This sopes recipe will teach you how to make the best Mexican sopes with step by step instructions, photos, tips and tricks!
This sopes recipe creates the best sopes bursting with corn flavor, crispy on the outside, soft on the inside and the perfect vehicle for all your favorite toppings! If you aren’t familiar with sopes, they are one of the post popular antojitos in Mexico, (which is a catch-all word for Mexican street food), which translates to “little cravings;” and you will crave these Mexican sopes! These handheld heroes are first smothered in refried beans then piled with any of your favorite shredded Mexican proteins, fresh shredded lettuce, punchy onions, bright tomatoes, creamy avocados, salty queso fresco and spicy salsa – does it get any better?! This sopes recipe tutorial includes step by step instructions on how to make the best sopes, different sopes protein options, how to prep ahead, how to store and how to freeze.

PIN THIS RECIPE TO SAVE FOR LATER
SOPES RECIPE
Welcome to sopes! Mexican sopes are always a good idea whether for lunch, dinner, snacks, appetizers, or to impress at your next fiesta. I love sopes because they are SO versatile, easy to make, and loaded with multiple flavors and textures all in one bite – crispy, crunchy, creamy, juicy, earthy, robust, spicy, cooling, fresh – ah, my happy place! This sopes recipe brings you all these flavors and textures in an easy weeknight meal that the whole will love!
WHY YOU’LL LOVE THIS SOPES RECIPE:
- DELICIOUS. Crispy, soft, and loaded with toppings.
- VERSATILE. The sopes can be topped with virtually any protein and are a fabulous way to use up leftovers. You can also skip the protein all together and go vegetarian with bean, cheese and veggies. As far as the toppings – there is no right or wrong! Line up whatever you have on hand and let everyone layer their sopes.
- INEXPENSIVE. Sopes are very inexpensive to make with just masa harina, water, salt and optional vegetable shortening yet so crave worthy I would spend big $$ on them.
- GREAT FOR A CROWD. Although we’re practicing social distancing right now, store this sopes recipe away for later because it’s great to serve a crowd whether that’s your own family (no one waiting to pass around the toppings to complete their sopes) or for potlucks, tailgating party, Cinco de Mayo, picnics, or swim parties. You can fry up the sopes ahead of time, reheat them in the oven, keep the meat warm in the crockpot, line up all the toppings, and let everyone adorn their own sopes.
- MAKE AHEAD. The sopes and meat can be made days ahead of time and then warmed when ready. You can also prep all of the toppings and store in airtight containers in the refrigerator. Now all you have to do is warm the meat and eat!
What Are Sopes?
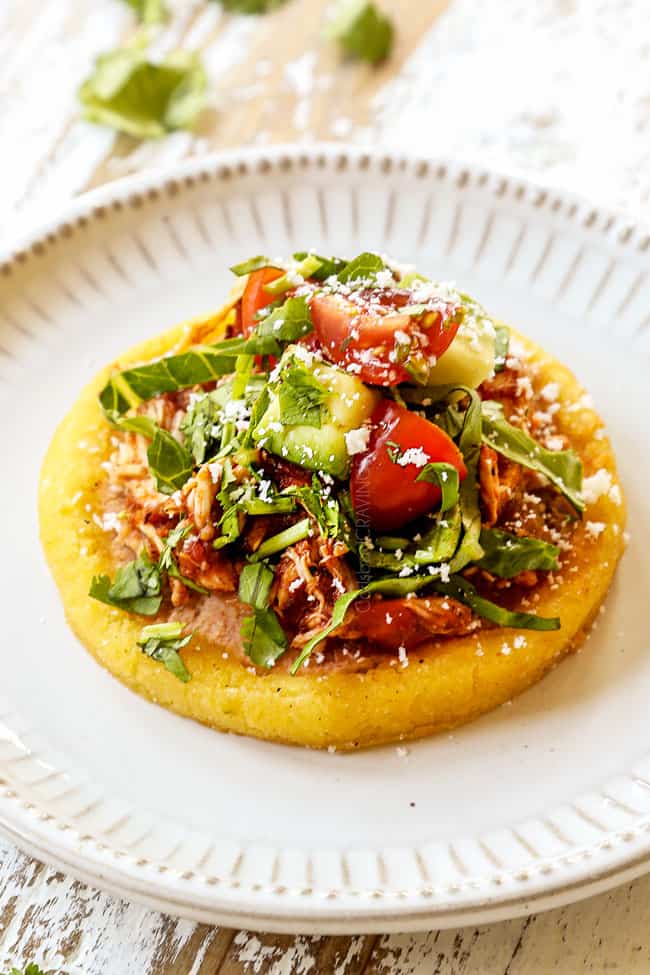
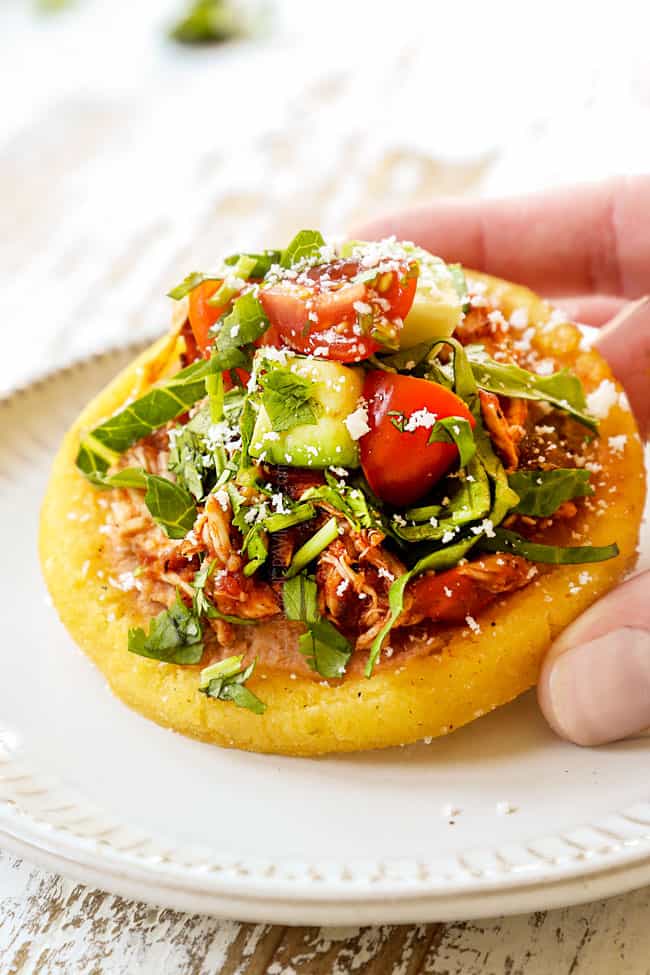
Sopes (pronounced: [ˈso.pes]), are small, savory, handheld corn cakes that are like a thicker version of a tortilla, about ⅓ to ½-inch thick, that are toasted and fried then topped with endless fillings. They are characterized by a rimmed edge to hold the fillings, much like a pizza or mini upside-down Frisbee, a strong corn flavor and a delightful crispy, fried exterior that remains slightly pliable giving way to a soft interior. They are so popular in Mexico, that you’ll find them everywhere from the grocery store to street carts – and soon you’ll taste why!
Sopes Recipe INGREDIENTS
The key to making sopes at home is to create a dough that is easy to shape, fry and fill. Fortunately, this can be accomplished with just a few ingredients. You will need water, masa harina, salt and optional lard/shortening/vegetable oil.
WHAT IS MASA HARINA? Can I use cornflour?
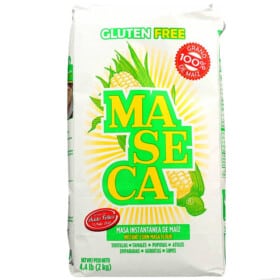
Masa harina is a type of naturally gluten-free flour, used to make sopes, tortillas, tamales and to thicken Mexican soups – but masa harina is not just corn flour or cornmeal – they are NOT 100% interchangeable. To make masa harina, corn is treated with an alkali solution which gives it a distinctive flavor as well as making it easier for the body to digest. It is then rinsed, dried and ground. Corn flour, on the other hand, is just plain ground corn.
Where Can I find masa harina?
Masa harina should be easy to find at your grocery store in the flour aisle or Latin aisle. Look for finely ground as opposed to coarse ground which is used in tamales. The most common type is white masa harina, which is made from dried white corn or you can also use yellow masa harina, which is made from dried yellow corn. The white is a bit sweeter, but both will work. You may or may not see “instant” on the label – both will work great.
Do I have to use lard/vegetable shortening/vegetable oil?
Sopes can be made with just masa harina, water and salt, or they can be made with the addition of melted lard, melted vegetable shortening or vegetable oil. I have tried making them both with and without the shortening, and the are way better with, in my opinion. The shortening helps bind the dough together so it’s easier to work with, doesn’t fall apart, doesn’t crack, is more pliable and of course, is more flavorful. In short, it adds the oomph.
DO SOPES HAVE GLUTEN?
Mexican sopes are 100% gluten free because masa harina is made from corn. To keep sopes gluten free, use gluten free toppings.
Can I make Vegan Sopes?
Yes! Use shortening or vegetable oil instead of lard, skip the protein and cheese and use vegan toppings.

What is on a sope?
Mexican sopes are traditionally filled with refried beans, shredded meat, queso fresco, lettuce, onions, salsa and sour cream. I’ve outlined these options below as well as additional topping ideas.
REFRIED BEANS
Refried beans are the glue that all the toppings stick to. Refried beans also add an irresistible creaminess that is heavenly with slightly crunchy sopes. You can use pinto or black refried beans or make our own. You can also mash up other beans such as white beans, cannellini beans, and even chickpeas with a fork, or better yet, add them to your blender along with some sour cream. If are opposed to using beans, then use a layer of mashed avocados mixed with lime juice and salt to secure the rest of the toppings.
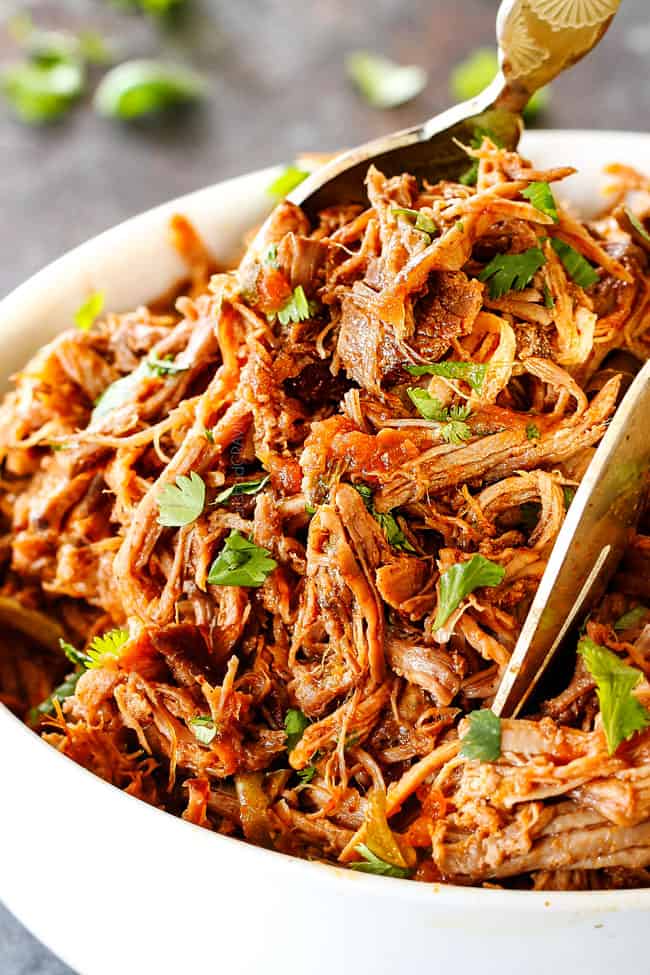
MEAT
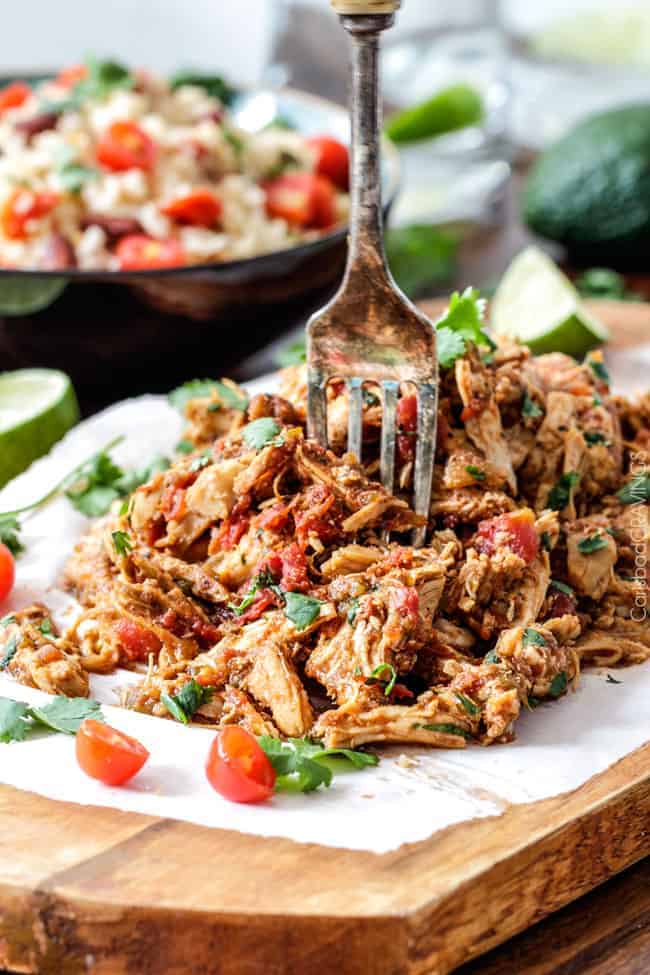
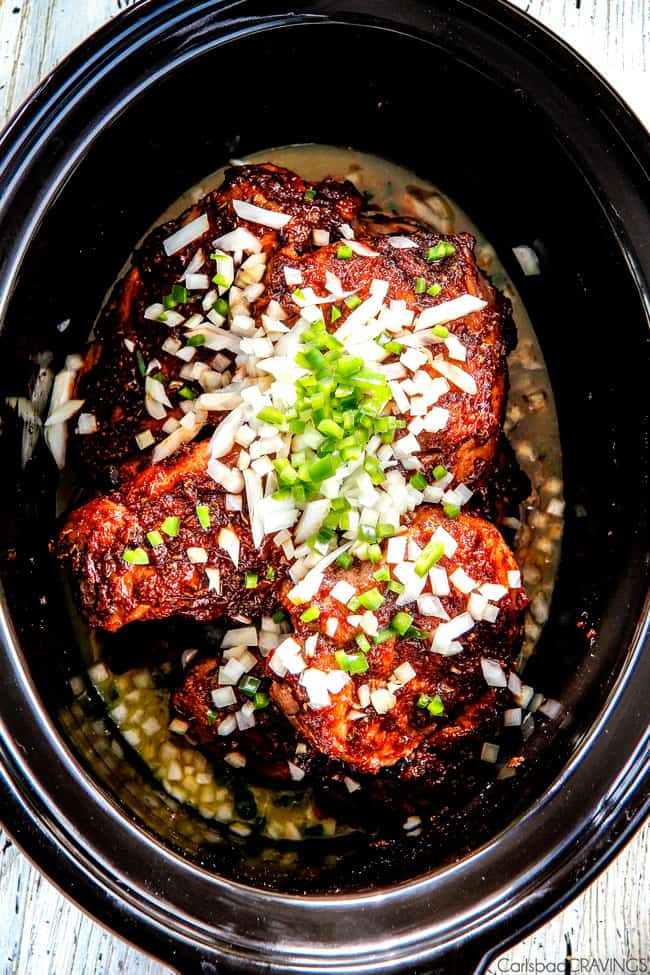
Shredded beef, pork or chicken is traditional for sopes but you can use any type of meat as long as it’s generously seasoned so it’s nice and flavorful to hold up against the thick sopes, beans and toppings. In these photos, I’ve used my 10-minute Mexican Shredded Chicken because it is super tasty – and literally takes 10 minutes! You can also use any of the following proteins:
CHICKEN
- Shredded Mexican Chicken (Crockpot): simmered with Mexican spices, salsa and green chilies for amazingly flavorful chicken that’s dripping with flavor and SO tender.
- Honey Lime Salsa Verde Chicken (Crockpot): tangy, flavorful with just the right amount of kick all balanced by a hint of honey.
- Quick Mexican Chicken: exploding with robust fiesta seasonings in a light sauce. This chicken only requires 10 minutes start to finish by utilizing Rotisserie chicken for a juicy, easy shortcut.
- Chicken Tinga: is another super quick and easy recipe made with shredded rotisserie chicken tossed in a saucy, smoky, spicy tomato chipotle sauce.
- Quick Ground Turkey (from my tacos): quick, easy, healthy and packed with flavor – you won’t even miss the beef with my secret ingredient!
- Chipotle Chicken: smoky, robust and spicy. It is made with a wet rub which concentrates the flavor so the chicken only requires 30 minutes of marinating. You may also marinate for up to 8 hours – whatever is more convenient for you! Make sure to chop the chicken finely so it doesn’t slide off of our sopes.
- Cilantro Lime Chicken: zesty, tangy and citrusy. It requires 2-10 hours of marinating so you’ll want to save this dreamy chicken if you are short on time BUT so worth the wait. Again, make sure to chop the chicken finely so it doesn’t slide off of our sopes.

BEEF
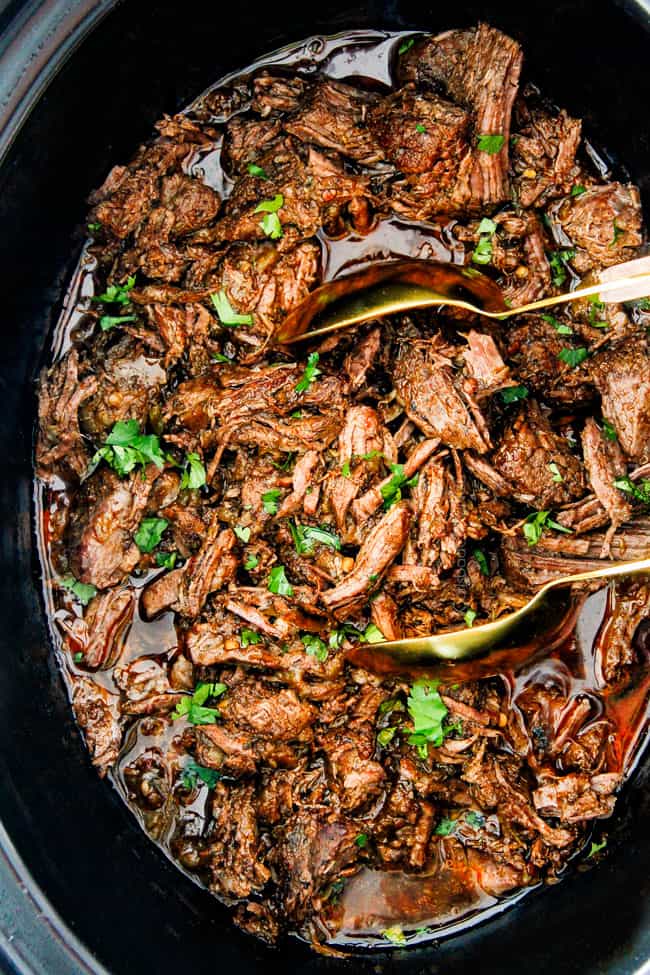
- Beef Barbacoa (Crockpot): crazy juicy beef slow cooked until melt-in-your-mouth tender infused with a tangy, chipotle sauce spiked with cumin, oregano and lime juice – one of my favorites of all time!
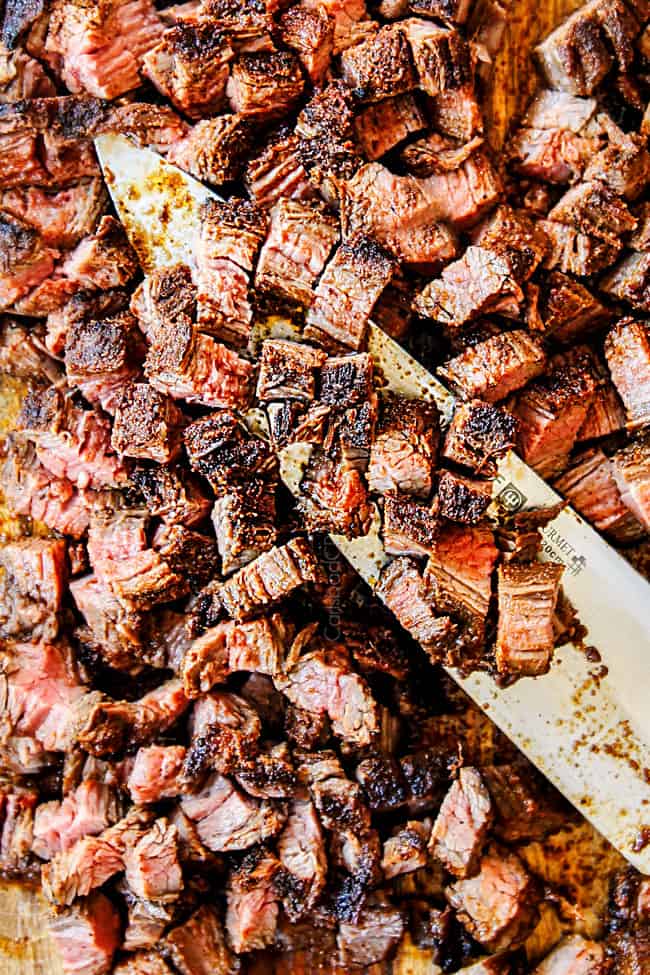
- Carne Asada: is the quintessential Mexican steak marinated in orange juice, lime juice, soy sauce and a splash of liquid smoke then spice rubbed with cumin, chili powder, smoked paprika, garlic and onion. It’s juicy, flavorful and crazy good. Chop it finely so it doesn’t slide off of our sopes.
PORK
- Carnitas (Crockpot): juicy pork smothered in a dynamic fiesta spice rub then slow cooked with orange juice and lime juice all finished in the oven to create glorious caramelized crispy burnt ends.
- Chipotle Ssweet Pulled Pork: inspired by Cafe Rio Pork made in the comfort of your own home is juicy, tender, saucy, sweet and spicy.
- Ancho pork (from my tacos): quick and easy 10 MINUTE recipe that’s exploding with flavor; chopped pork tenderloin is smothered in spices then cooked in skillet until golden then finished off with green chiles and lime juice.
VEGETARIAN/MEAT ALTERNATIVES:
For non-meat eaters, you can make vegetarian sopes! Sauté some tofu with taco seasonings or omit it altogether and add a chunky salsa (see toppings) or sautéed veggies such as sweet potatoes, zucchini, onions, peppers, mushrooms and/or corn.
CHEESE
Queso fresco is traditionally crumbled on top of sopes but you can also add Cotija cheese, shredded sharp cheddar, Monterrey Jack or Jack cheese on top of the beans or even stirred directly into the beans to melt.
HELPFUL TOOLS TO MAKE SOPES
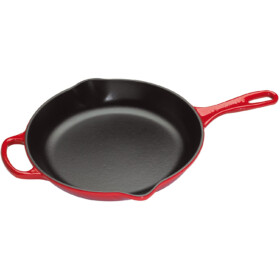
- Cast iron skillet: A quality cast iron skillet is a must in your cooking arsenal! It is perfect for frying tortillas for sopes or for searing and creating a deeply golden exterior on everything from roast, to pork to chicken and seamlessly transitions from the stove to the oven. I love my super high quality Staub and Le Creuset. They are a one-time pricey purchase that will last a lifetime. You can also go with a more economical, trusty skillet like this one which also works very well.
- Grease Splatter Screen: is SO helpful! It stops 99% of splashes which keeps you safe and your backsplash and counters free of grease. This multipurpose kitchen tool also doubles as a strainer, steamer, and a cooling rack and is rustproof and dishwasher safe with a lifetime guarantee.
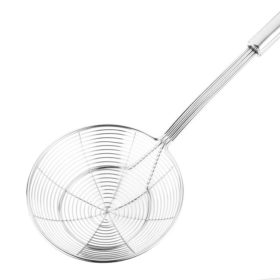
- Spider Strainer Ladle: is a must for frying! This is my favorite one as it is more solid and durable than the similar products and it has an extra-long handle to keep you safe.
HOW TO MAKE SOPES
Mexican sopes are traditionally made by flattening dough with a tortilla press and cooking them on an ungreased cast iron pan called a comal before frying. Today, however, I’m going to outline how you can create successful sopes with everyday kitchen tools. Read on for step by step photos, tips and tricks:
- Make the dough. In a large mixing bowl, whisk the masa harina and salt together. Stir in the water and melted lard (cooled to lukewarm) or vegetable oil. Knead by hand for about 3 minutes until the dough is smooth and pliable but not sticky. It should be the consistency of Play-Doh. After the dough is kneaded, form it into a ball and cover it with a damp dish towel and let rest for 5 minutes.
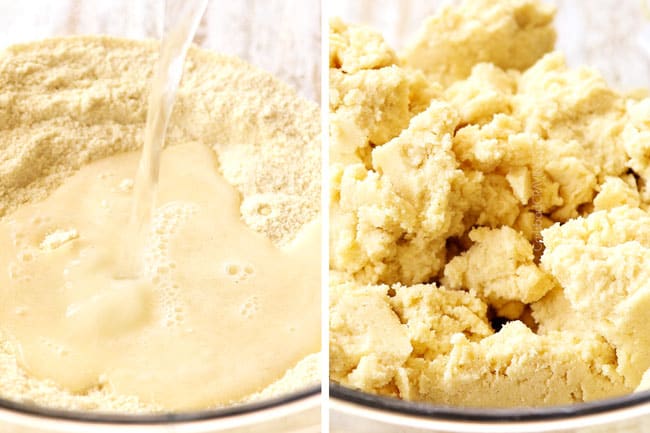
- Troubleshoot the dough. If the dough feels dry and crumbly or there’s cracking on the surface after you form it into a rough ball, add more water, little by little, kneading after each addition. The amount of water can vary depending on humidity levels. If you live in humid area, you may want to reduce the water to begin with.
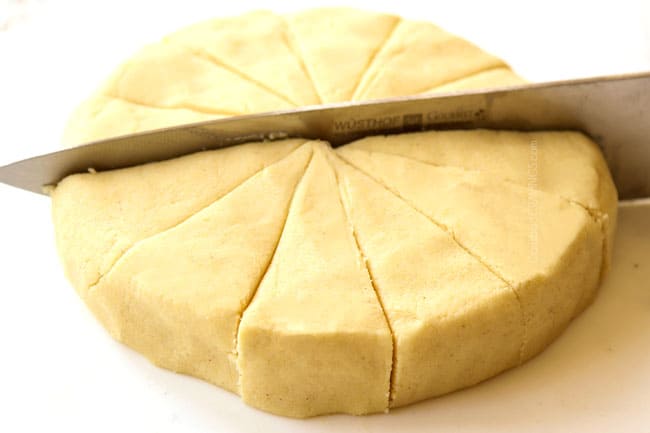
- Separate the dough. After 5 minutes, transfer the dough to cutting board and flatten into an even disc. Using a knife, cut the dough into 12 equal pieces (like cutting a pizza). Keep the dough covered with a damp dish towel at all times while not working with it.
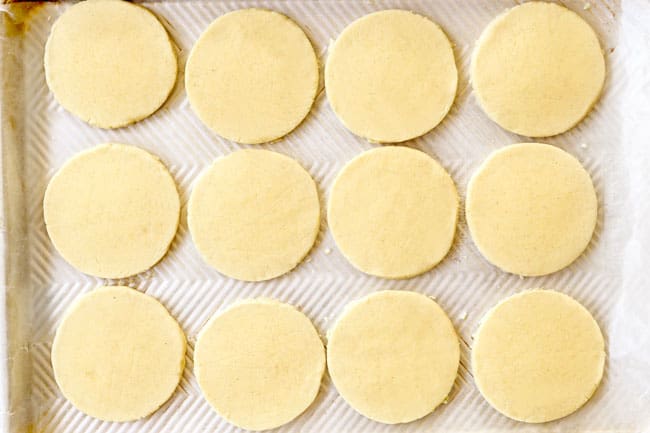
- Shape the dough. Line a baking sheet with parchment paper; set aside. Working with one piece of dough at a time, roll the dough into a ball, and place it in between two sheets of plastic wrap. Press down with a clear dish (I use a glass pie plate) to create a 3 ½ inch wide disk.
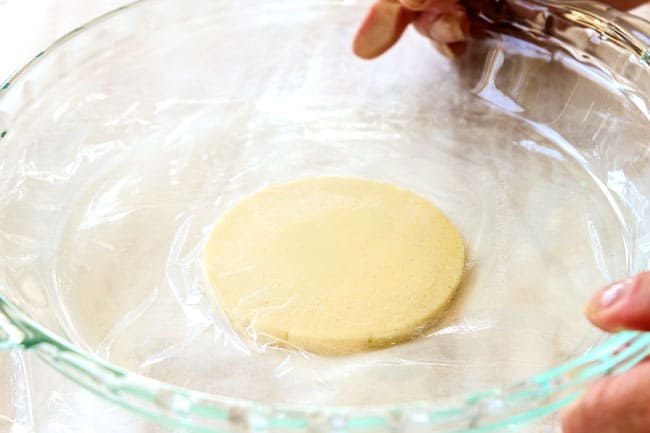
- Transfer sope to the prepared baking sheet, and cover with damp dish towel. Repeat with remaining dough. Alternatively, flatten sopes using a tortilla press.
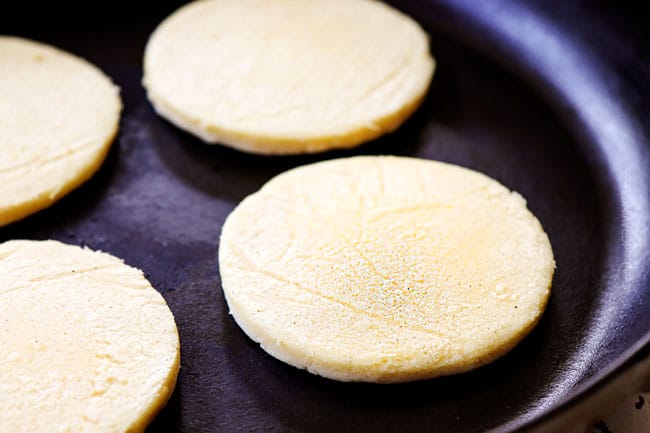
- Toast the sopes. Preheat a comal or well-seasoned cast-iron skillet to medium heat (350 degrees), about 2-3 minutes. If you don’t have a well-seasoned cast iron skillet, use a nonstick skillet. Once hot, carefully add 4 sopes in a single layer. Cook just until the bottoms feel dry and light golden spots appear, about 60 seconds. Flip and cook another 30 seconds. Don’t be tempted to cook any longer or the dough will be too tough to form the rimmed edges and will dry out and crack.
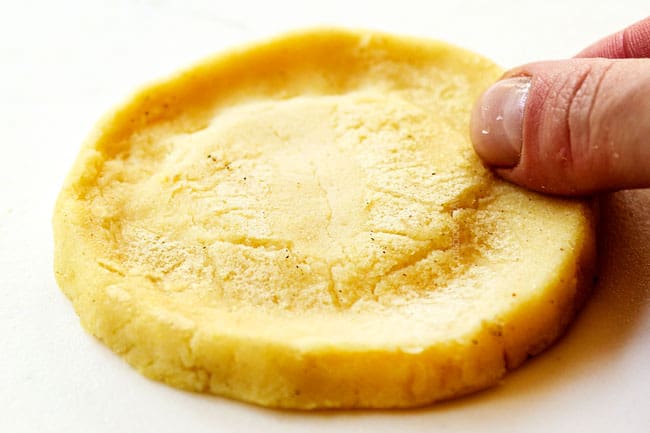
- Pinch the sopes. Transfer the sopes to a clean, flat surface and let them cool 45 seconds then proceed to quickly pinch the dough around the edges to create a ½-inch rim. You may want to use a clean kitchen towel or gloves to protect your fingers from the heat. Repeat with remaining sopes.
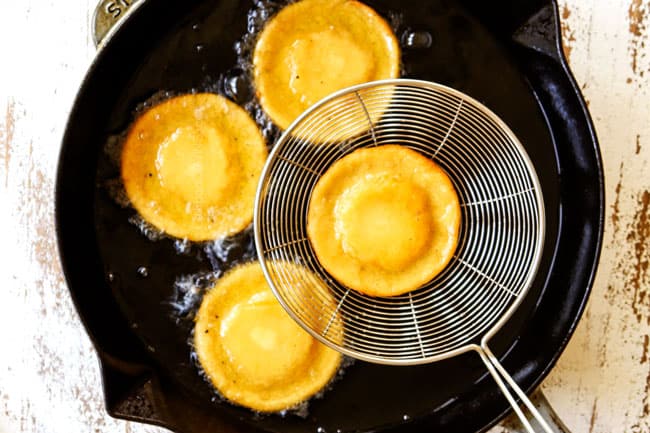
- Shallow-fry the sopes. Line a baking sheet with paper towels. Carefully add 2 cups vegetable oil to the now empty cast iron skillet and heat to 350 degrees F. Add 4-6 sopes, and fry until golden, about 1-2 minutes per side, adjusting heat as need to maintain temperature. Transfer sopes to prepared baking sheet and dab off excess oil with paper towels. Repeat with remaining sopes.
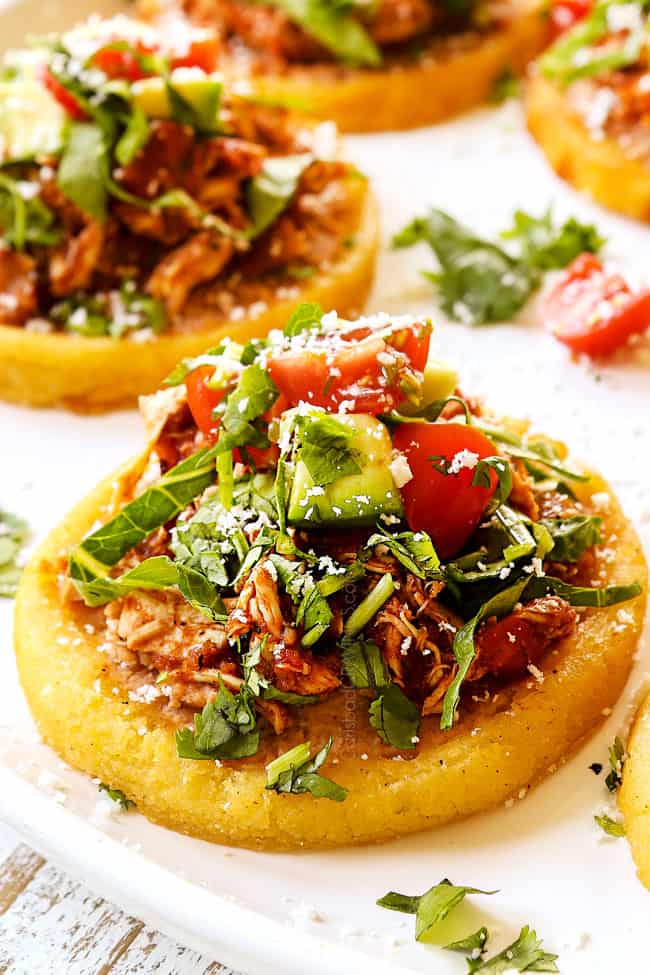
- Assemble the sopes. Spread a layer of refried beans on each sope. Top with meat, lettuce, onions, avocado, salsa, crema, cheese and any other desired toppings. Serve warm.

Do I have to toast and fry the sopes?
Toasting and frying the Mexican sopes might seem like unnecessary work, but each step serves a distinct purpose to create superior sopes. If you just fry the raw dough, your sopes will be excessively greasy with either a doughy or overly crisp texture. Instead, toasting, or par-cooking the dough first in a dry skillet creates a crispy outside and tender inside. Finishing them off in the fryer allows them to evenly finish cooking without become greasy and helps create a barrier from the moisture of the toppings so the sopes don’t becoming soggy.
Fun fact: When I was researching sopes recipes, I discovered all traditional recipes toasted and then fried the sopes and only a few non-traditional recipes just fried them. The recipes that only fried the sopes all had several comments on how much better the sopes were once the readers strayed from the original recipe and toasted and fried them. So, learn from their recipe testing and years of tradition and perform both steps for the best Mexican sopes!
Can I Bake Sopes recipe?
Yes, you can bake sopes – but should you? Baked sopes will taste quite differently than fried sopes AKA they will not taste as intended and will be denser without the coveted crispy exterior and soft interior. Still, if you want to bake them, bake at 450 degrees F on a well-greased rimmed baking sheet for 10-15 minutes, flipping once halfway through.
Do I Have to Make the rimmed edges?
Mexican sopes’ rimmed edges are a unique characteristic to sopes and help hold the toppings in place like a shallow dish; but the beautify of homemade sopes is you can make them however you want! If you omit the rimmed edges, just be prepared for a little messier eating experience.
Can I make sopes ahead of time?
Sopes are an ideal prep ahead dish. While sopes are very best fresh, you can still make the dough, protein and toppings ahead of time:
- Make sopes dough. The dough can be made up to 24 hours ahead of time, tightly wrapped in plastic wrap and stored in the refrigerator. You can also make the sopes 100% ahead of time and rewarm them in the oven.
- Make protein. Make the shredded beef, chicken, pork or other desired protein and refrigerate for up to three days. Gently warm in a skillet with a splash of water when ready to serve.
- Make beans. If making your own refried beans, this can be done up to 3 days ahead of time and stored in an airtight container in the refrigerator. Gently warm before serving.
- Toppings. The toppings can be chopped and stored in airtight containers in the refrigerator or small covered serving bowls. The guacamole and avocado crema (if using) will keep for up to a day without changing color very much – just make sure to press a piece of plastic wrap directly against the surface of the guac/crema to prevent oxidation.
SOPES RECIPE TIPS & TRICKS
- Prep protein toppings first. Mexican sopes are best served warm so make sure to cook your protein and prep all of your toppings before you begin making the sopes.
- Don’t let dough dry out. Keep the dough covered at all times with a clean, damp kitchen towel or paper towels. Also, keep a small bowl of water next to your working station to keep your hands moist when working with the dough.
- Use correct oil. Frying requires an oil with a high smoking point (around 450°F/232°C) and neutral flavor. If you select an oil with a low smoking point, not only will you have an incredible amount of smoke, but the oil will break down creating an unpleasant odor and unappetizing taste. Oils suitable for frying include: vegetable oil, peanut oil, soybean oil, safflower oil, canola oil, cottonseed oil, corn oil and sunflower oil.
- Use hot enough oil. If the oil doesn’t bubble immediately after you add the sopes, then oil is not hot enough. Also, if the sopes aren’t golden after a few minutes, then the oil isn’t hot enough. Use an instant read thermometer to take the guess work out of our frying (and everything else!).
- Use paper towels. Transfer fried sopes to a paper towel lined surface to drain. You don’t want them sitting in excess oil or they won’t be as crispy.
- Don’t stack. Don’t stack the sopes after frying or if they are at all warm or they will steam and you will lose that coveted crispiness. Line the sopes in a single layer with a little breathing room in between each one.
- Don’t pre-assemble. Only assemble the Mexican sopes once you are ready to serve for maximum crunchiness.
- Serve Chipotle style: Create a toppings bar like they do at Chipotle and let everyone top their own sopes for zero lag time.

How to eat Sopes
Mexican sopes are a finger food meant to be picked up and eaten like an open-faced sandwich or slice of pizza. You can, however, eat them with a fork and knife if you wish. To prevent sopes from becoming a messy ordeal: 1) use small bites, 2) always use refried beans or mashed avocados to help secure the toppings, 3) don’t pile the toppings too high.
Sopes Toppings
Half the fun – and success – of Mexican sopes are the toppings! It really makes them come alive with the explosion of tangy, creamy, crunchy all together. Toppings are also a fun way to let everyone customize their own sopes. Here are some topping ideas to choose from:
- Avocados: chopped avocados are the easiest avocado option and add a wonderful creaminess.
- Avocado Crema: is my addiction and my preference over chopped avocados or guacamole. Avocado crema is a marriage of avocados, sour cream and lime juice, is wonderfully silky, tangy and just takes minutes in your blender.
- Guacamole: use my homemade guacamole recipe (amazing!), your favorite recipe or even use store bought.
- Mexican Cream: it’s refreshing, bright, silky creaminess compliments and cuts through the rich beans and meat. You may also substitute with sour cream. Greek yogurt is also a creamy alternative if you are trying to save some calories.
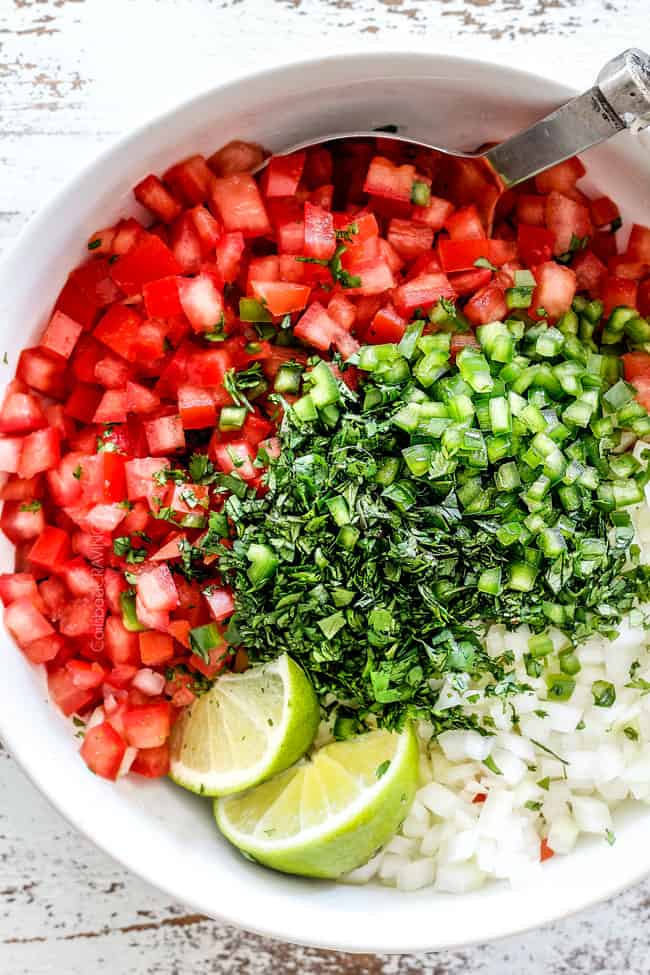
- Tomatoes: seeded, chopped Roma tomatoes or halved cherry tomatoes for a juicy, vibrant win or you can substitute with pico de gallo.
- Pico de gallo: is fresh tomato salsa that adds a vibrant, punchy freshness. You can use my homemade pico de gallo recipe or store bought. You can make the pico de gallo ahead of time and store it in an airtight container in the fridge. Bring to room temperature before serving.
- Cilantro: if you skip the pico de gallo, you can load on fresh cilantro and tomatoes instead for a fresh, zesty flair.
- Pickle red onions: I can’t believe I haven’t shared a recipe for this yet (coming soon!), but I love pickled red onions! They are bright, tangy, and punchy and a fantastic compliment to the creamy beans.
- Jalapenos: amp up the heat with fresh jalapenos or I love pickled jalapenos. They are especially great if you’re making a toppings bar so individuals can customize their spice level.
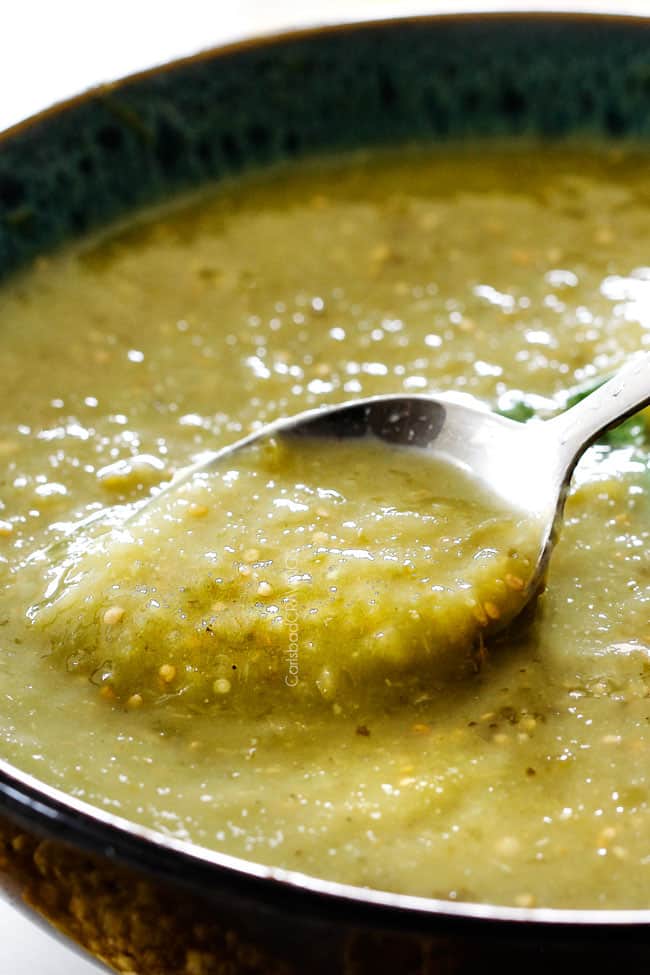
- Salsa: go with traditional restaurant style salsa, or chunky salsas with varying textures and flavors like my black bean corn salsa, avocado corn salsa, charred corn salsa, pineapple salsa, or mango salsa– all SO good!
- Hot Sauce: pass around the hot sauce for an easy, delicious way to customize heat.
WHAT TO SERVE WITH SOPES?
In Mexico, sopes are more commonly eaten as snacks or sides to other Mexican dishes, such as pozole, menudo, albondigas soup and caldo de pollo although they can be served as a main dish. To make transform sopes into a main dish, serve with sides such as:
- Rice: We love serving sopes with cilantro lime rice, Mexican rice, or avocado rice. You can also serve with quinoa, or low carb cauliflower rice.
- Salads: Mexican Salad, Mexican street corn salad, Southwest salad, corn salad, or Southwest orzo salad are always a win and a great way to stretch your sopes recipe if serving a crowd.
- Veggies: I HIGHLY encourage you to go with authentic elote (Mexican Grilled Street Corn) – you will not regret it! Other alternatives include grilled corn on the cob, baked asparagus, roasted broccoli, roasted potatoes, roasted cauliflower.
- Fruit: you can keep it simple and serve this sopes recipe with cantaloupe, or grapes or any of these fabulous options: pina colada fruit salad, fruit salad with honey lime vinaigrette, grape salad, winter fruit salad, or caramelized grilled pineapple.
- Carbs: corn casserole is a tasty, easy, creamy win or add some green chiles and or/ jalapenos to my sweet cornbread recipe and watch it disappear. Mexican Street Fries are also a favorite served with salsa ketchup.
- Dessert: tres leches cake or churros for the win!
How can I keep sopes warm?
Adjust the oven rack to the middle position and oven to 200 degrees F. After you fry the sopes, transfer them to paper towels, dab of excess oil, then transfer to a baking sheet (without paper towels). Place the baking sheet in the preheated oven to keep warm.
HOW TO STORE SOPES
Mexican sopes should not be assembled before storing, rather store all of the components separately.
- Sopes: store cooled sopes in an airtight container in the refrigerator for up to seven days.
- Chicken, Beef or Pork: store in an airtight container in the refrigerator for up to 5 days.
- Beans: store in an airtight container in the refrigerator for up to 7 days.
- Toppings: store in separate airtight containers or plastic bags for up to 3 days.
HOW TO REHEAT SOPES
You can reheat Mexican sopes in the microwave, stove, oven or air fryer:
- Microwave: you’ll lose some crispiness, but the microwave is handy for a quick reheat and eat. Microwave sopes on high for 20-30 seconds. You can even add the refried beans and protein and microwave all together.
- Stove: heat a cast iron skillet over low heat. Add sopes and heat for about one minute per side or until warm.
- Oven: transfer sopes to a baking sheet and bake at 400 degrees F for 5 minutes or until warmed through.
- Air fryer: air fry sopes at 400 degrees F for 3-5 minutes.
HOW TO FREEZE SOPES
- Let sopes cool completely.
- Line sopes in a single layer on a baking sheet so they aren’t touching.
- Transfer baking sheet to the freezer to flash freeze (this prevents them from sticking together when stored).
- Transfer sopes to a freezer bag and squeeze out excess air.
- Freeze for one month.
- Let defrost at room temperature before reheating.
WHAT TO DO WITH LEFTOVERS?
Leftover sopes can be reinvented in many ways! You can break them apart to form corn croutons and add to salads like my Mexican Salad, or Burrito Bowls. You can also grind them up and use as a thickener in Mexican soups such as Chicken Tortilla Soup, Verde Chicken Tortilla Soup, Chicken Enchilada Soup or Mexican Chicken Corn Chowder. You can also use them as dippers in Queso Blanco or Mexican Corn Dip– yum! You can also pile leftover sopes with unconventional fillings that you would normally serve with cornbread such as sloppy Joe meat or chili.
Sope FAQs
Sopes originated in central and southern Mexico but have spread across the country with countless variations and names such as picadita, pellizcadas, sopecitos, etc.
Mexican sopes are made with the same ingredients used to make tortillas, tamales, and gorditas: masa harina and water. Sometimes they also include lard, vegetable shortening or vegetable oil. These simple ingredients are inexpensive and pantry friendly which means anytime is a good time to make sopes!
To make Mexican sopes, masa harina and water are mixed together to form a dough. The dough is divided into balls then each portion is flattened into a circle. The sopes are then briefly toasted on an ungreased cast-iron pan called a comal, or a cast iron skillet. The edges are then pinched up to create a rimmed edge and, finally, the sopes are shallow-fried in hot oil.
Sope shells create the ideal vehicle for your favorite Mexican protein and toppings! Sopes are traditionally layered with refried beans, shredded meat (beef, pork, or chicken), followed by lettuce, onions, tomatoes, cheese (queso fresco) and salsa. Other popular toppings include Mexican crema, diced avocado or guacamole, pickled carrots, radish slices, or jalapeno slices.
Sopes and tostadas appear similar – they are both made with masa harina and water and both are fried discs. Sopes, however, boast their signature rimmed edges and tostadas are flat. The other main difference is the thickness which also affects the texture. Tostadas are thin and fry up shatteringly crispy. Sopes, are much thicker and fry up only subtly crispy and are still soft and pliable.
Sopes and gorditas are like brother and sister. They are both made of masa harina and water, shaped into balls, flattened into circles and toasted on a comal. Unlike sopes, however, gorditas contain a leavening agent, usually baking powder, so they puff up slightly when cooked. The puffier gorditas are then sliced to create a pocket, much like a pita, that is stuffed with filling. Sopes, on the other hand, don’t contain a leavening agent and are pinched around the permitter to create turned up edges then filled with toppings, much like a pizza.
Yes! This sopes recipe is easy to double. The trick when doubling this recipe is to make sure your dough doesn’t dry out at any stage, because each step will take a little longer. So, always keep the dough covered with a moist towel and keep your hands moist when working with the dough as well.
Want to try this Sopes RECIPE?
Pin it to your Mexican or Dinner Board to SAVE for later!
Find me on Pinterest for more great recipes! I am always pinning :)!
©Carlsbad Cravings by CarlsbadCravings.com


Mexican Sopes
Save This Recipe To Your Recipe Box
You can now create an account on our site and save your favorite recipes all in one place!
Ingredients
DOUGH
- 2 cups masa harina
- 1 teaspoon salt
- 1 1/3 cups water
- 2 tablespoons lard or vegetable shortening, melted or vegetable oil (Optional, may sub water. See notes)
- 2 cups vegetable oil for frying
TOPPINGS
- 1 cup refried beans warmed
- 1 1/2 cups shredded protein of choice see post for tons of options
- 1 1/2 cups finely shredded lettuce
- 1/4 cup diced white onion
- 1 avocado chopped
- 1/2 cup Homemade Salsa more or less to taste
- 1/2 cup Mexican cream may sub sour cream
- 1/2 cup crumbled queso fresco
OPTIONAL TOPPINGS:
- thinly sliced radishes
- Guacamole
- Avocado Crema
- salsa verde
- Chopped tomatoes
- pickled jalapenos
- pickled carrots
- hot sauce
Instructions
- Make the dough. In a large mixing bowl, whisk the masa harina and salt together. Stir in the water and melted lard (cooled to lukewarm) or vegetable oil. Knead by hand for about 3 minutes until the dough is smooth and pliable but not sticky. It should be the consistency of Play-Doh. After the dough is kneaded, form it into a ball and cover it with a damp dish towel and let rest for 5 minutes.
- Troubleshoot the dough. If the dough feels dry and crumbly or there’s cracking on the surface after you form it into a rough ball, add more water, little by little, kneading after each addition. The amount of water can vary depending on humidity levels. If you live in humid area, you may want to reduce the water to begin with.
- Separate the dough. After 5 minutes, transfer the dough to cutting board and flatten into an even disc. Using a knife, cut the dough into 12 equal pieces (like cutting a pizza). Keep the dough covered with a damp dish towel at all times while not working with it.
- Shape the dough. Line a baking sheet with parchment paper; set aside. Working with one piece of dough at a time, roll the dough into a ball, and place it in between two sheets of plastic wrap. Press down with a clear dish (I use a glass pie plate) to create a 3 ½ inch wide disk. Transfer sope to the prepared baking sheet, and cover with damp dish towel. Repeat with remaining dough. Alternatively, flatten sopes using a tortilla press.
- Cook the sopes. Preheat a comal or well-seasoned cast-iron skillet to medium heat (350 degrees), about 2-3 minutes. If you don’t have a well-seasoned cast iron skillet, use a nonstick skillet. Once hot, carefully add 4 sopes in a single layer. Cook just until the bottoms feel dry and light golden spots appear, about 60 seconds. Flip and cook another 30 seconds. Don’t be tempted to cook any longer or the dough will be too tough to form the rimmed edges and will dry out and crack.
- Pinch the sopes. Transfer the sopes to a clean, flat surface and let them cool 45 seconds then proceed to quickly pinch the dough around the edges to create a ½-inch rim. You may want to use a clean kitchen towel or gloves to protect your fingers from the heat. Repeat with remaining sopes.
- Shallow-fry the sopes. Line a baking sheet with paper towels. Carefully add 2 cups vegetable oil to the now empty cast iron skillet and heat to 350 degrees F. Add 4-6 sopes, and fry until golden, about 1-2 minutes per side, adjusting heat as need to maintain temperature. Transfer sopes to prepared baking sheet and dab off excess oil with paper towels. Repeat with remaining sopes.
- Assemble the sopes. Spread a layer of refried beans on each sope. Top with meat, lettuce, onions, avocado, salsa, crema, cheese and any other desired toppings. Serve warm.
Notes
Tips and Tricks
- Masa harina should be easy to find at your grocery store in the flour aisle or Latin aisle. Look for finely ground as opposed to coarse ground which is used in tamales. You may or may not see “instant” on the label – both will work great.
- Do I have to use lard/vegetable shortening/vegetable oil? Sopes can be made with just masa harina, water and salt, or they can be made with the addition of melted lard, melted vegetable shortening or vegetable oil. I have tried making them both with and without the shortening, and the are way better with, in my opinion. The shortening helps bind the dough together so it’s easier to work with, doesn’t fall apart, doesn’t crack, is more pliable and of course, is more flavorful. In short, it adds the oomph.
- Prep protein toppings first. Mexican sopes are best served warm so make sure to cook your protein and prep all of your toppings before you begin making the sopes.
- Don’t let dough dry out. Keep the dough covered at all times with a clean, damp kitchen towel or paper towels. Also, keep a small bowl of water next to your working station to keep your hands moist when working with the dough.
- Don’t stack the sopes after frying or if they are at all warm or they will steam and you will lose that coveted crispiness. Line the sopes in a single layer with a little breathing room in between each one.
- Don’t pre-assemble. Only assemble the Mexican sopes once you are ready to serve for maximum crunchiness.
- Serve Chipotle style: Create a toppings bar like they do at Chipotle and let everyone top their own sopes for zero lag time.
How to keep sopes warm
If you aren’t serving your sopes immediately, you can keep them warm in the oven. Adjust the oven rack to the middle position and oven to 200 degrees F. After you fry the sopes, transfer them to paper towels, dab of excess oil, then transfer to a baking sheet (without paper towels). Place the baking sheet in the preheated oven to keep warm.HOW TO STORE & Reheat
- Sopes: store cooled sopes in an airtight container in the refrigerator for up to seven days. Sopes should not be assembled before storing, rather store all of the components separately.
- Microwave: you’ll lose some crispiness, but the microwave is handy for a quick reheat and eat. Microwave sopes on high for 20-30 seconds. You can even add the refried beans and protein and microwave all together.
- Stove: heat a cast iron skillet over low heat. Add sopes and heat for about one minute per side or until warm.
- Oven: transfer sopes to a baking sheet and bake at 400 degrees F for 5 minutes or until warmed through.
- Air fryer: air fry sopes at 400 degrees F for 3-5 minutes.
HOW TO FREEZE SOPES
- Let sopes cool completely.
- Line sopes in a single layer on a baking sheet so they aren’t touching.
- Transfer baking sheet to the freezer to flash freeze (this prevents them from sticking together when stored).
- Transfer sopes to a freezer bag and squeeze out excess air.
- Freeze for one month.
- Let defrost at room temperature before reheating.
Want To Make This Recipe?

Did You Make This Recipe?
Tag @CarlsbadCravings and Use #CarlsbadCravngs
Leave a Review, I Always Love Hearing From You!
Carlsbad Cravings© Original


Layne says
Dang these look good! Can’t wait to make them!
Jen says
Thanks so much Layne, I hope you love them as much as us!
Diane Young Decker says
Thank you so much for posting this one. I used to live in Arizona and there was a small Mexican place that made sope and gorditas. OMG. So good. Haven’t had them in forty years. I’m having surgery for ovarian cancer next week, after several months of chemo, so won’t be able to make them myself for a while, but look forward to getting back on my feet so I can do this.
Jen says
You’re so welcome Diane! I’m sorry to hear about your battle with cancer. I pray your surgery goes well and that you have a speedy recovery. In the meantime, I think you should give this recipe to someone to make for you – you deserve it! Hugs!
Lupita says
Jen these sopes are the BEST I use to fry them without toasting them on comal before frying them and its a difference in taste and crispiness for sure. Thank you so very much for this recipe. I will be trying more of your recipes & by the way your dogs are precious there absolutely adorable:)
Jen says
Hi Lupita! Thank you for your sweet review! I am so happy to hear that they turned out delicious for you! I hope you have fun exploring my other recipes! Thank you for your kind words about my pups – we really adore them!