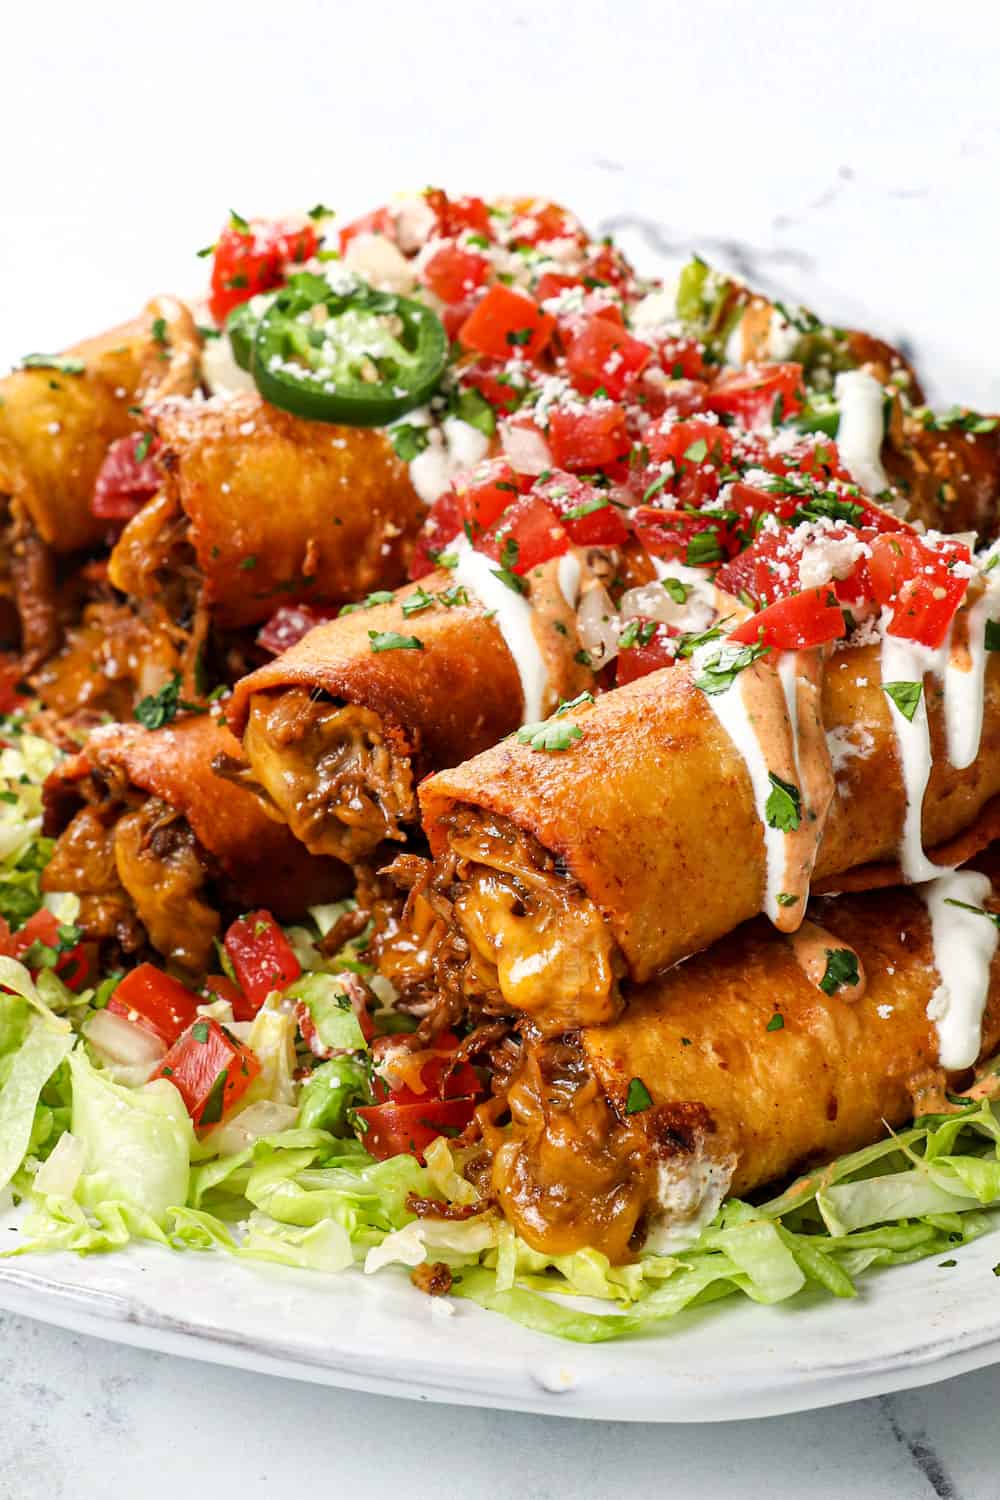
Crispy taquitos made in the air fryer, oven or skillet with chili braised beef!
This taquitos recipe is 1000X better than store-bought and will have everyone excited for dinner! Plus, the taquitos can be air fried, pan fried or baked in the oven and are make ahead and freezer friendly! Corn tortillas are stuffed with juicy, spoon tender shredded beef braised with a caravan of rich, earthy, fiesta seasonings, blanketed with cheese, rolled up and cooked to golden, crispy perfection. Finally, the beef taquitos are dunked in silky, smoky, zesty, spicy chipotle crema that will have everyone swooning! These homemade taquitos can also be made with any of your favorite proteins such as beef barbacoa, carnitas, crockpot Mexican chicken etc. Serve this taquito recipe with shredded lettuce, salsa and guacamole for an easy dinner, appetizer or snack!
If you love everything taquitos and flautas, don’t miss our chicken flautas, jalapeno popper taquitos, honey buffalo chicken taquitos, chipotle bbq pork taquitos!
PIN THIS RECIPE TO SAVE FOR LATER
WATCH HOW TO MAKE HOMEMADE TAQUITOS
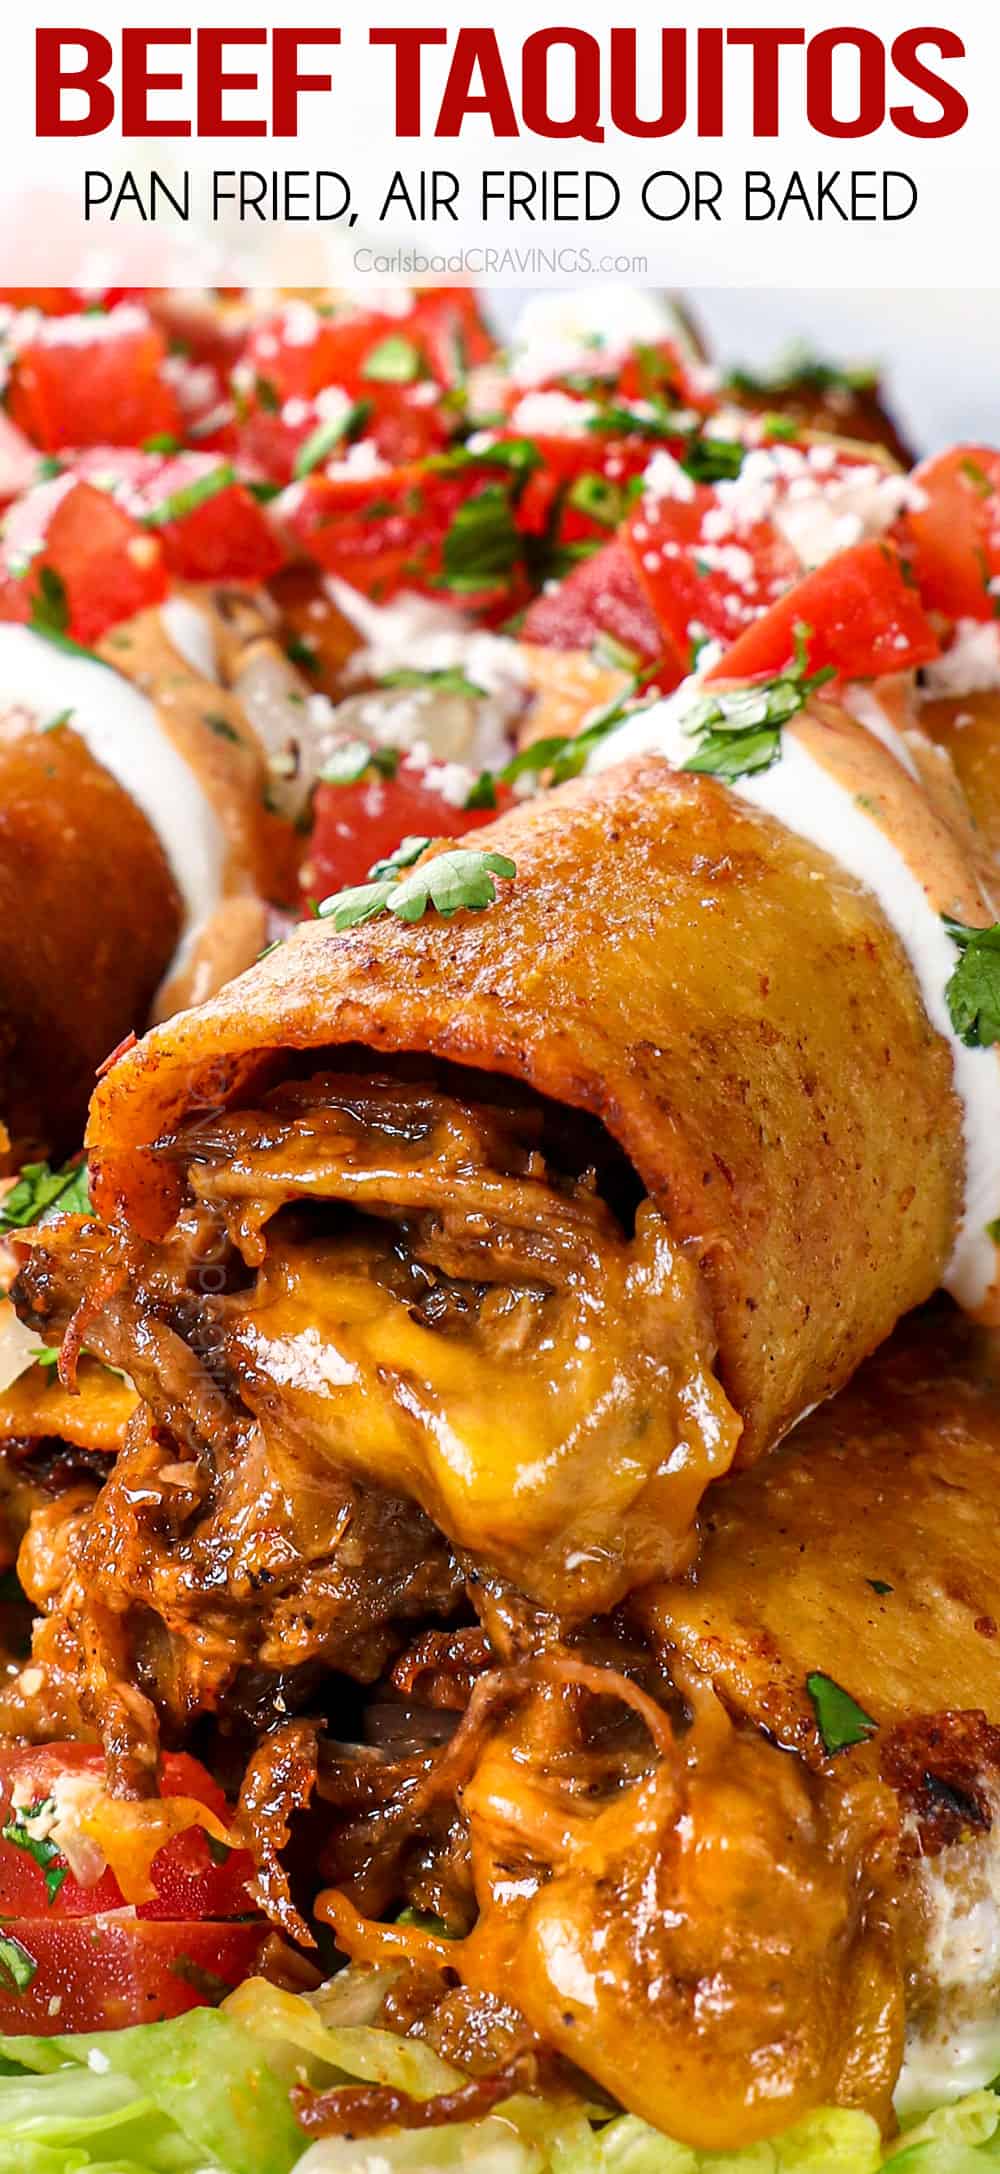

Why you’ll love this taquitos recipe
Everyone loves taquitos! These taquitos are an addicting lunch, dinner or party food from the juicy beef, to the layers of spices, to the bubbly cheese, to the golden, crispy tortillas, all dunked in contrasting silky, cooling sour cream, guacamole and chipotle crema. Just try and stop at two, three, four…
It’s all about the beef. Taquitos are only as good as the meat they are centered around! This Mexican shredded beef is rich and saucy, succulent and meltingly tender braised in a mélange of seasonings, chilies, salsa and liquid smoke to create an enticing complexity of flavor.
Once the beef is cooked, the taquitos take minutes to make. All you have to do is layer the tortillas with beef and cheese, roll and cook – that’s it!
This taquitos recipe can be cooked using any method. I’ve included methods for baking, air frying, and shallow pan frying the taquitos as well as cooking the beef in the oven, instant pot (in just over an hour!) crockpot or stovetop.
The taquitos can be stuffed with virtually any protein or you can skip the protein all together and go vegetarian with beans, cheese and veggies – the possibilities are endless! You can even swap the corn tortillas for flour tortillas – just don’t call them taquitos!
This taquito recipe is made with pantry friendly ingredients. Instead of making chili sauce from scratch with dried chili peppers and homemade chili sauce, this recipe utilizes pantry friendly, flavor packed shortcuts like chili powder, ground chipotle chili pepper and salsa to create pulled beef dripping with flavor.
The homemade taquitos are make-ahead and freezer friendly. The beef filling can be made days ahead of time or you can proceed to roll the taquitos, refrigerate then cook when ready. You will also love that this recipe is freezer friendly so all you have to do is heat and eat!
Taquitos are a fabulous make ahead crowd pleaser. Make the taquitos ahead of time and keep warm in the oven until time to serve – they will deliver all the flavor and addicting crunch without all the stress! Serve them up a at game night, family night, movie night, potlucks, parties, Cinco de Mayo, etc.

WHAT IS A Taquito?
Taquitos (literally “little tacos” or tacos dorados, meaning “golden tacos”) are made out of corn tortillas filled with seasoned shredded chicken or beef and cheese. The tortillas are rolled up tightly and either deep fried or fried in a small amount of oil on the stove (although I’ve included air fryer and baking instructions as well) until golden and crispy.
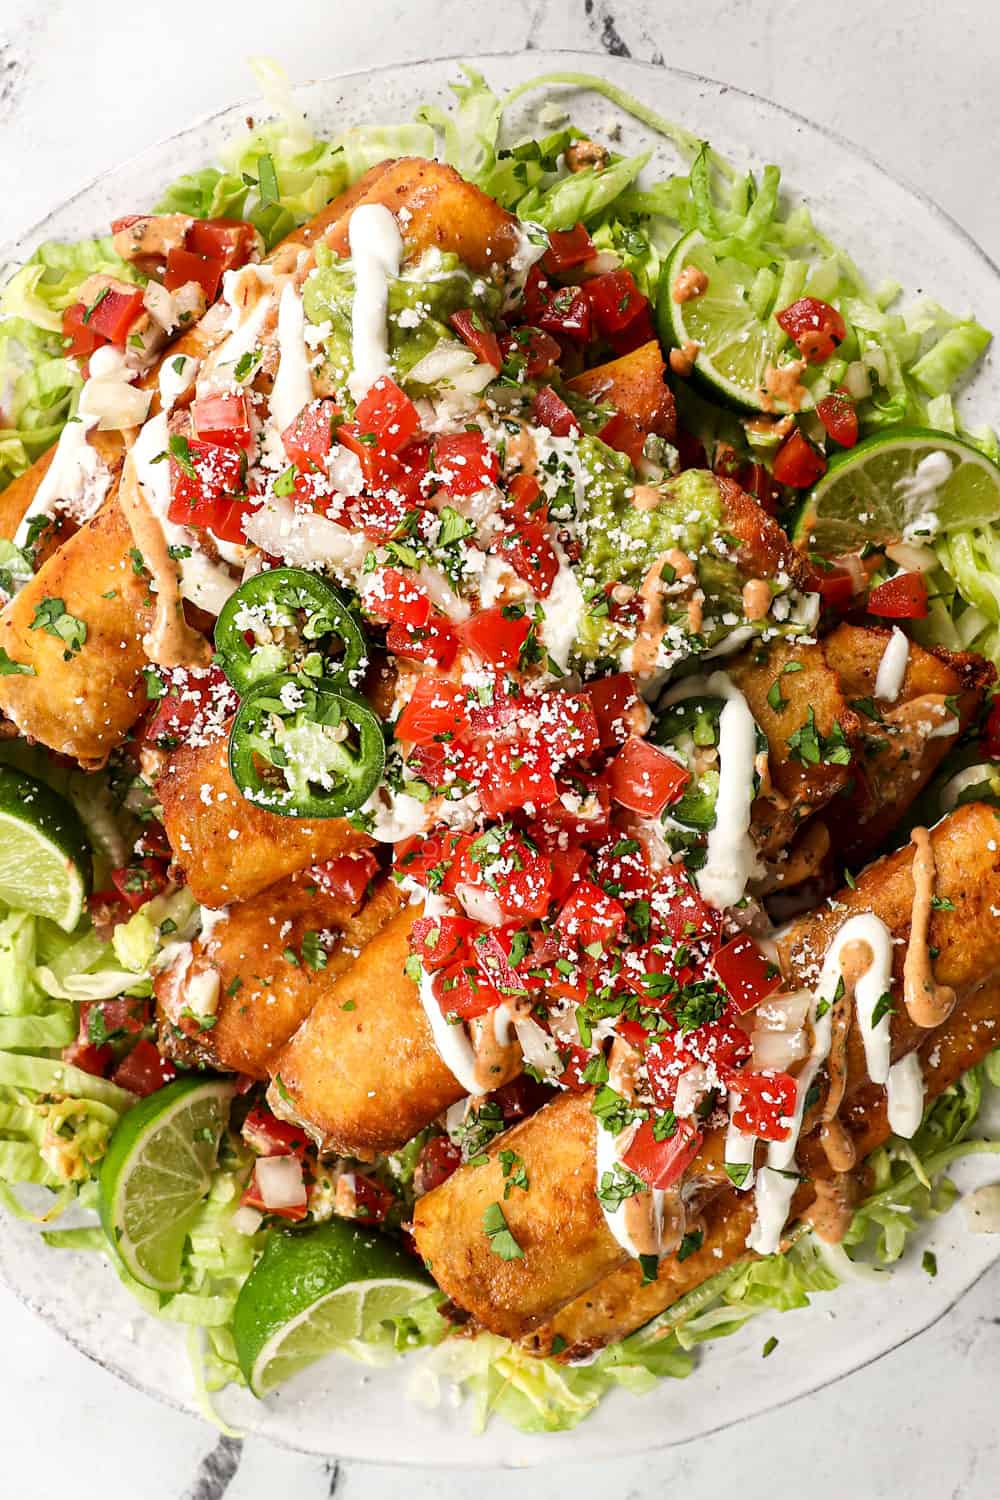
Also called rolled tacos, taquitos are an iconic Mexican street food, antojitos Mexicanos, that are meant to be served as a snack or appetizer, but increasingly are served as an entrée as well. They are commonly served with shredded iceberg lettuce, chopped or sliced tomatoes, guacamole, sour cream, salsa, queso fresco or cotija but you can serve them with anything your belly desires – like chipotle crema!.

flauta vs taquito
Chances are, you’ve been calling flautas taquitos your entire life! So let’s take a closer look at what sets them apart:
Tortillas: Taquitos are generally made with corn tortillas; flautas are made with flour tortillas.
Size: Taquitos are smaller because they are made with small 5-6 inch corn tortillas; flautas are larger because they are made with taco-size flour tortillas which are about 7-8 inches (or larger).
Course: Taquitos are often served as an appetizer because of their size; flautas are often served as the main dish but can also be served as an appetizer.
TAQUITO RECIPE INGREDIENTS
This homemade taquito recipe elevates pantry staples to new heights! Let’s take a closer look at what you’ll need to make this recipe (full recipe measurements in the recipe card at the bottom of the post):

What is the best BEEF for taquitos
Did you realize that the United States government has determined that taquitos must contain at least 15% meat? I’m not sure what the other 85% is?!
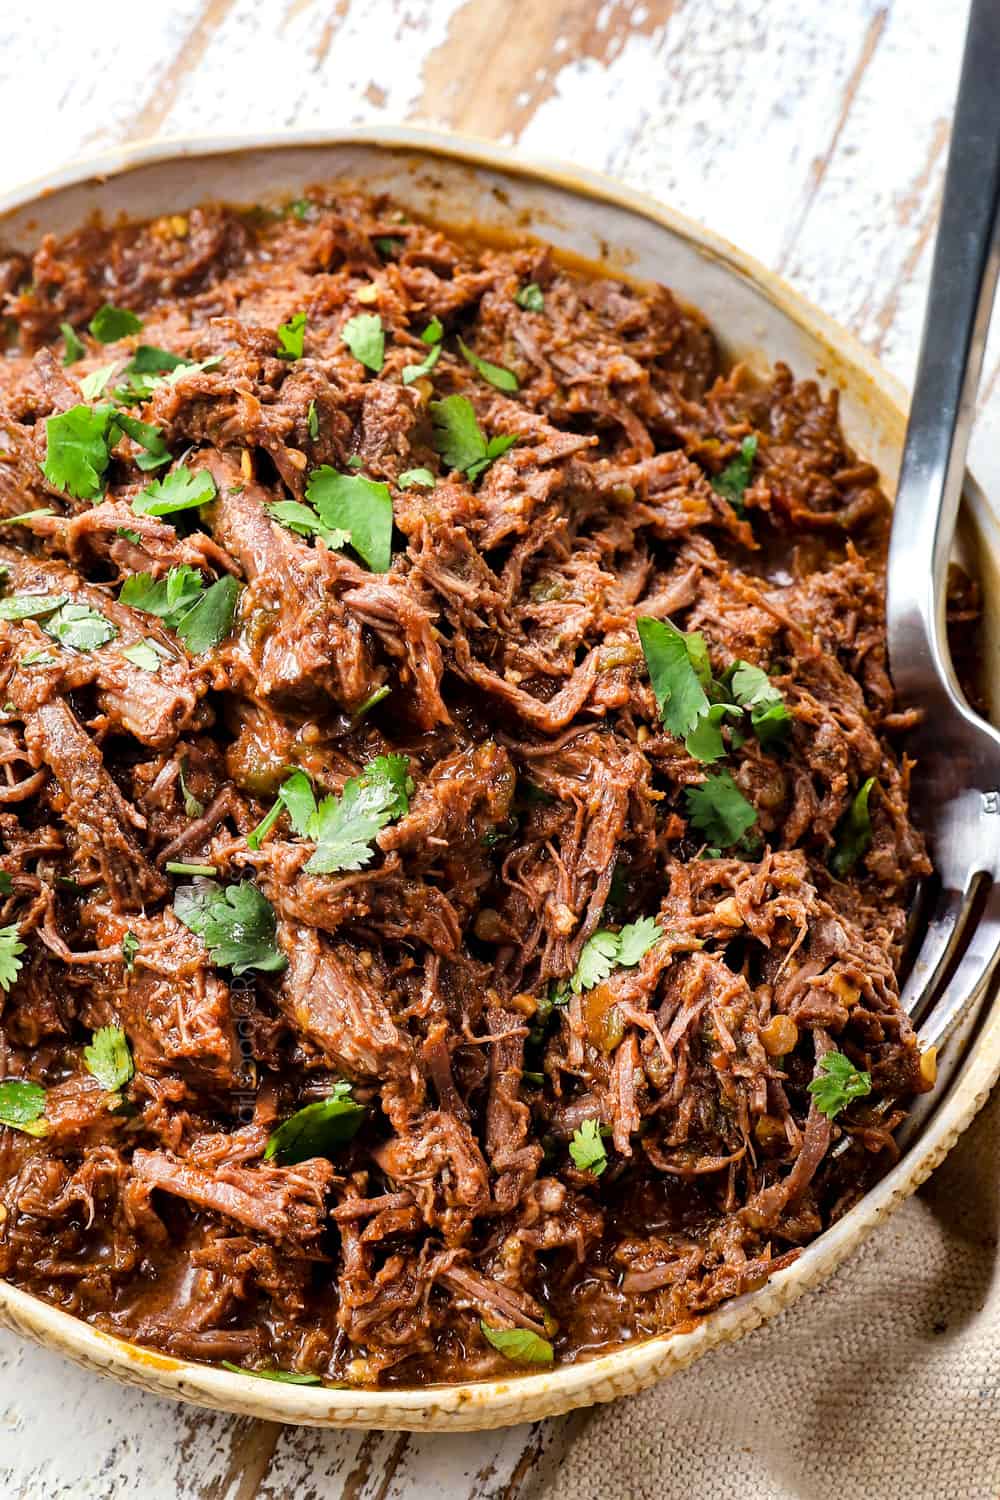
By making homemade taquitos, however, you don’t have to worry about any mystery meat. Instead, we are using my intensely juicy Mexican Shredded Beef – you are going to fall in love with its EASE and FLAVOR!
The best cut of meat for pulled beef taquitos is chuck roast, which also can be labeled as a shoulder roast, chuck eye roast, or arm chuck roast. It is considered the Mercedes of roasts thanks to its rich marbling which delivers succulent, beefy flavor and melt-in-your mouth texture. The marbling melts as it slow cooks, creating a self-basting effect that drips over the meat, keeping it extra juicy and infusing it with a coveted depth of succulent richness.

CAN I use another type of beef?
Different cuts: Many tough cuts of beef can be used for shredding instead of chuck roast as long as they are cooked long enough such as brisket, rump roast, round roast and even flank and skirt steak. Take care that whatever cut you choose has rich marbling (fat=flavor and tenderness) because these cuts are already leaner than chuck roast and therefore won’t be as juicy and flavorful.
Multiple cuts: Chuck roast can be combined with short ribs, beef oxtail or beef shank to equal 3 pounds.

WHAT ARE THE BEST TORTILLAS FOR TAQUITOS?
Corn tortillas are used to make taquitos. Flour tortillas are used to make flautas. Corn tortillas are more temperamental than flour, so there are a couple things to pay attention to in order to prevent your taquitos from falling apart:
1. Corn tortillas split easily when rolled unless you use quality tortillas. I recommend homemade corn tortillas or tortillas labeled as “homemade” or “freshly made.” La Tortilla Factory Corn Tortillas are fabulous for easy-to-roll tortillas that won’t easily split or tear. If you don’t have access to quality tortillas, please stick with flour tortillas or you will be incredibly frustrated.
2. Look for corn tortillas made of a corn/flour blend because they roll easier (La Tortilla Factory makes a great one).

BEEF TAQUITOS RECIPE VARIATIONS
Taquitos can be made differently every time! There is no limit to what you can stuff them with, just take care that the protein is well seasoned because it will lose potency when combined with the cheese and cocooned in the tortilla. You also want to make sure the filling isn’t dry; not wet, but not dry. Here are some ideas to play with:
CHEESE
I wouldn’t swap out the sharp cheddar as it adds tons of flavor, but you can swap the Monterrey Jack for:
- Pepper Jack: a derivative of Monterey Jack, flavored with sweet peppers, rosemary, garlic, habanero chilies and jalapeños – yum! Like Monterey Jack, it also melts well.
- Colby Jack: produced almost identically to Monterrey Jack but is seasoned with annatto (derived from seeds of the achiote tree) so its mild, slightly sweet and nutty.
- Oaxaca cheese: has a mellow, buttery flavor similar to Monterey but melts more easily with a mozzarella-like texture.
- Asadero: is Oaxaca’s cousin that isn’t quite as moist. It’s a mild, excellent melting cheese with a creamy-smooth, velvety texture.
PROTEIN
Taquitos are traditionally made with pulled beef or chicken, but don’t let that limit you! You can use any type of protein you like when it comes to this taquitos recipe. Here are some of my favorite Mexican proteins to try:
BEEF
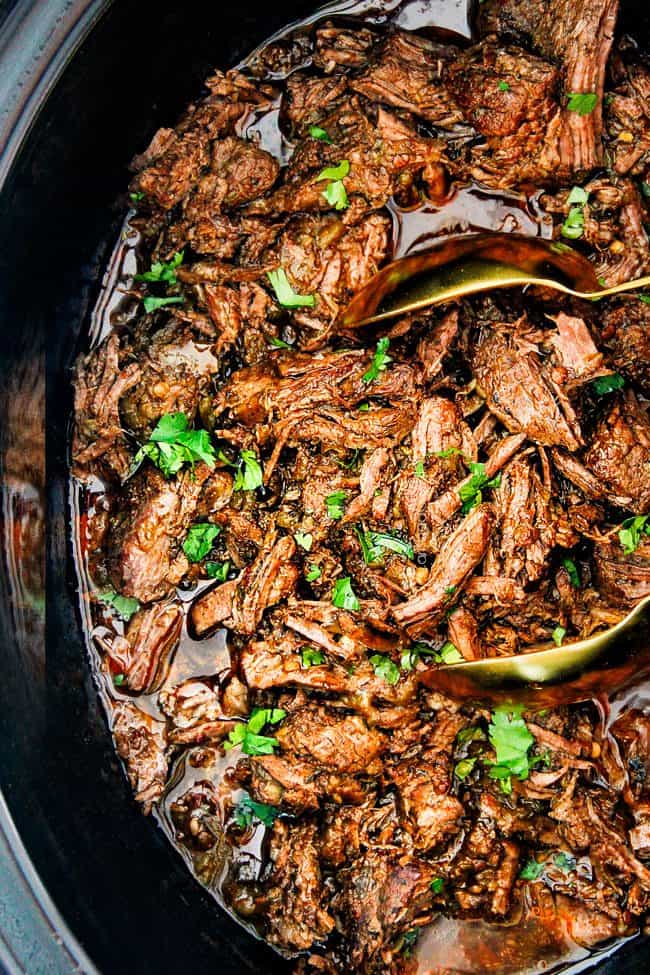
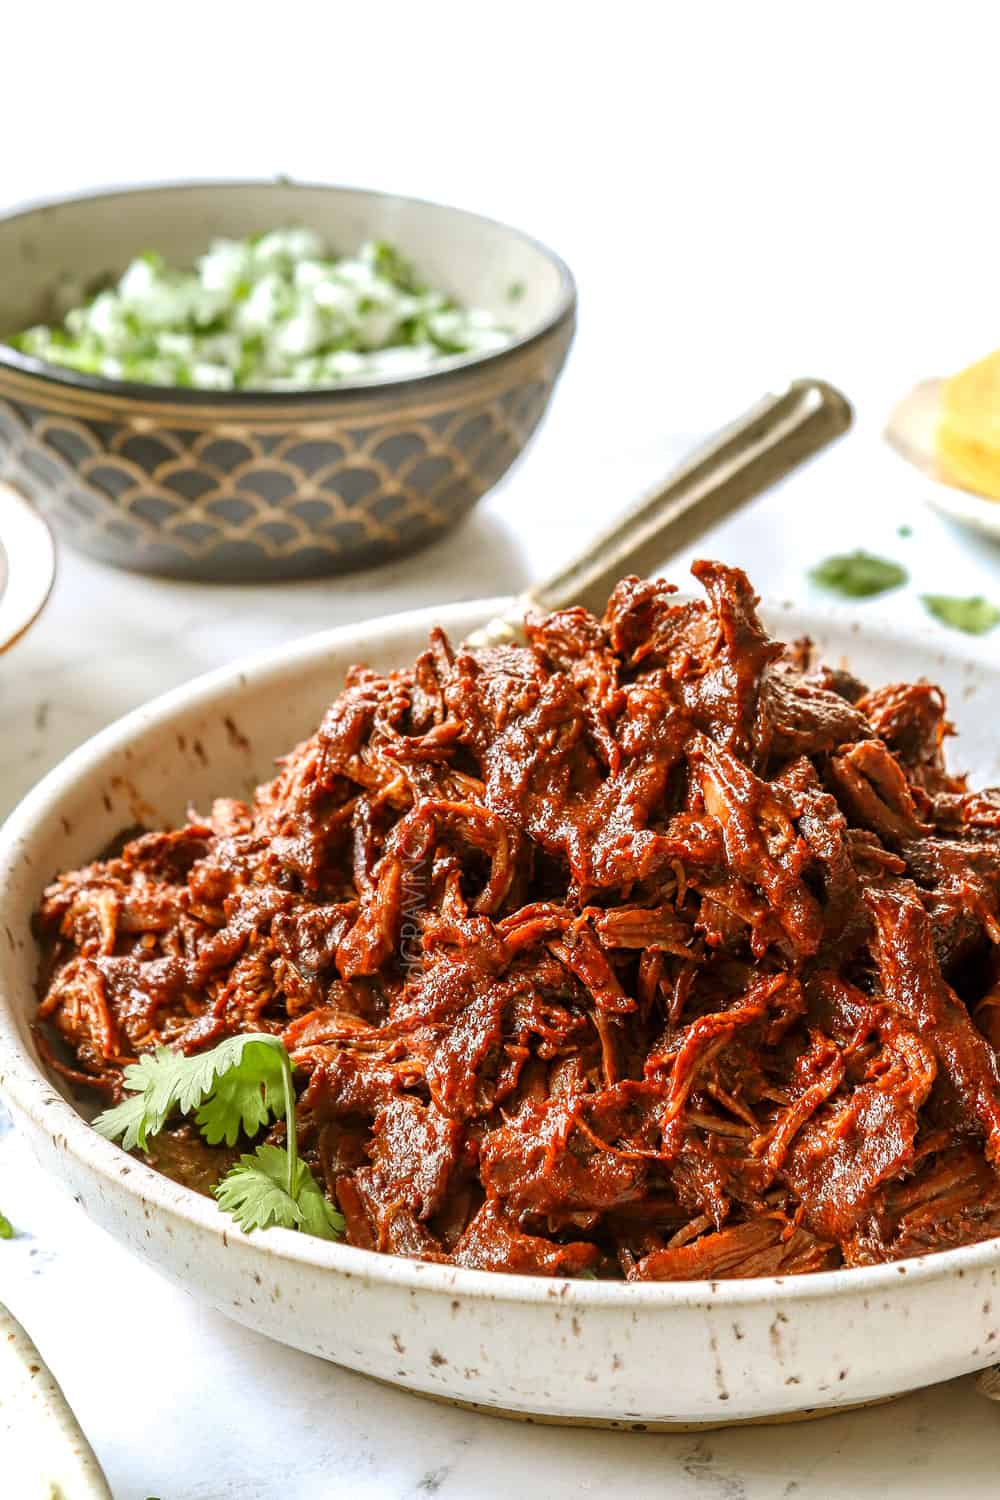
- Beef Barbacoa (Crockpot): Crazy juicy beef slow cooked until melt-in-your-mouth tender infused with a tangy, chipotle sauce. Barbacoa Beef is known for its intense flavor and perfect balance of chipotle peppers, cumin, oregano and lime juice.
- Beef Birria: This viral beef boasts an explosion of complex earthy, smoky, savory, slightly spicy, juicy, addictiveness in each and every saucy bite. The beef is stewed until fall apart juicy tender in a from scratch adobo sauce made from chilies, onions, garlic, tomatoes and toasted spices including peppercorns, cumin seeds, coriander seeds, cloves, bay leaves and cinnamon.
- Taco meat: It’s packed with flavor from browning the meat with sautéed onions, garlic and homemade taco seasoning, then combined with refried beans and salsa – the filling becomes hearty yet creamy all at the same time – pure savory comfort food at its most addicting.
CHICKEN
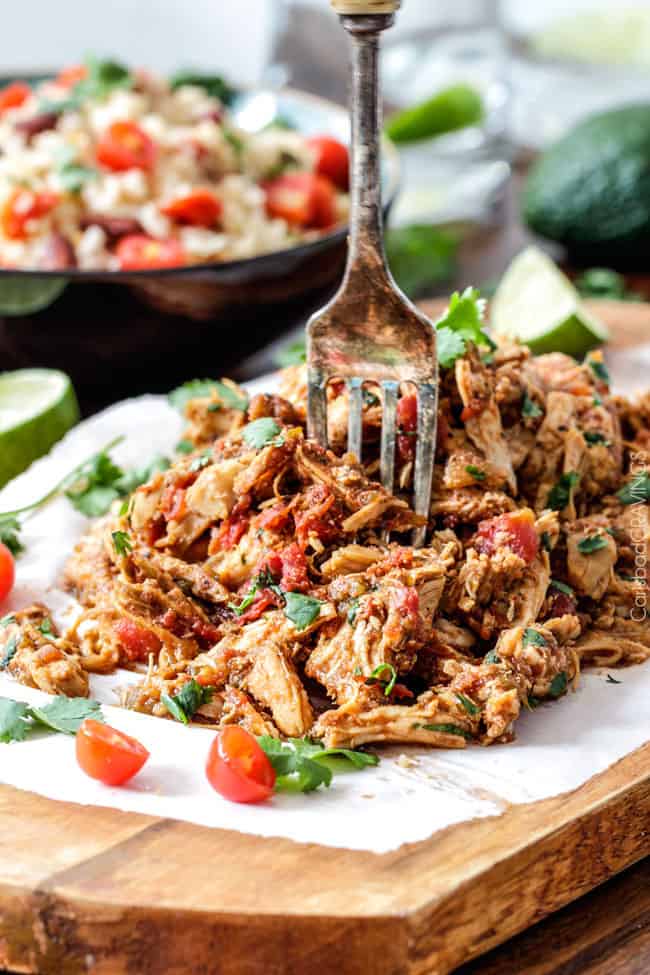
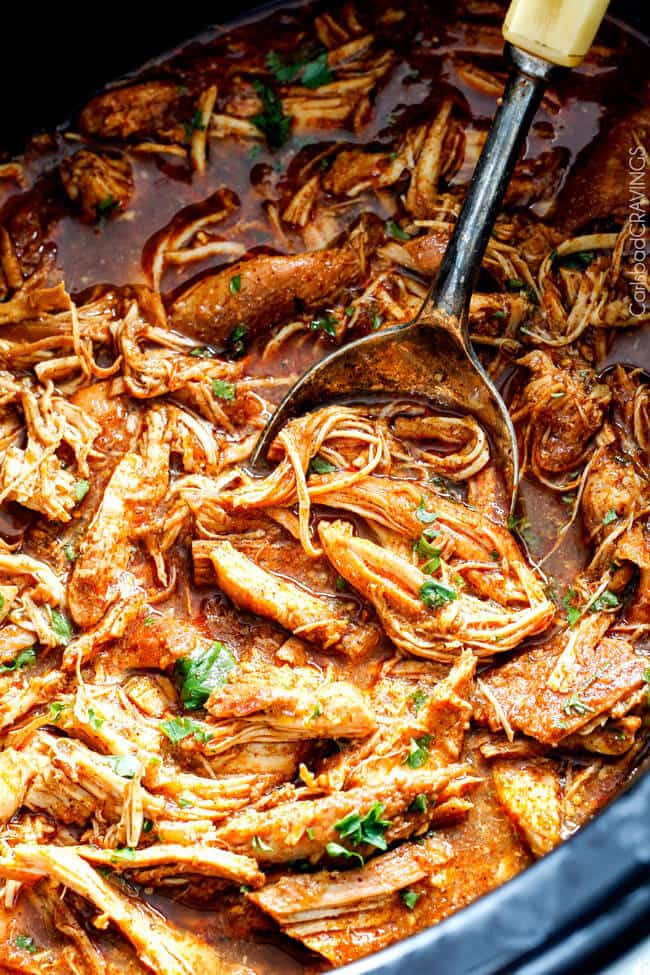
- Shredded Mexican Chicken (Crockpot): This is one of my most popular recipes! Chicken simmered with Mexican spices, salsa and green chilies for amazingly flavorful chicken that’s dripping with flavor and SO tender.
- Honey Lime Salsa Verde Chicken (Crockpot): This is another all-time reader’s favorite. It’s bright, tangy, zesty with just the right amount of kick all balanced by a hint of honey.
- Chicken Adobado: Use the chicken portion of my Chicken Birria Tacos. The chicken is braised with homemade adobo sauce made with dried chilies, onions, garlic, tomatoes and toasted spices for complex, rich flavor that is out of this world.
- Quick Mexican Chicken: This shortcut Mexican chicken is done in 10 minutes! It seasons rotisserie chicken with robust spices, fire roasted tomatoes, tomato paste and green chilies.
- Chicken Tinga: This option is also super quick and easy made with shredded rotisserie chicken tossed in a saucy, smoky, spicy tomato chipotle sauce.
- Quick Ground Turkey (from my tacos): It’s quick, easy, healthy and packed with flavor – you won’t even miss the beef with my secret ingredient!
PORK
- Carnitas (Crockpot): Juicy pork smothered in a dynamic fiesta spice rub then slow cooked with orange juice and lime juice all finished in the oven to create glorious caramelized crispy burnt ends.
- Chipotle Sweet Pulled Pork: A Café Rio Copycat that’s juicy, tender, melt-in-your-mouth with the perfect balance of saucy sweet heat.
- Salsa Verde Pork (Crockpot): This recipe is inspired by the aforementioned chicken but in a juicier pork version. It is tangy, flavorful with just the right amount of kick all balanced by a hint of honey.
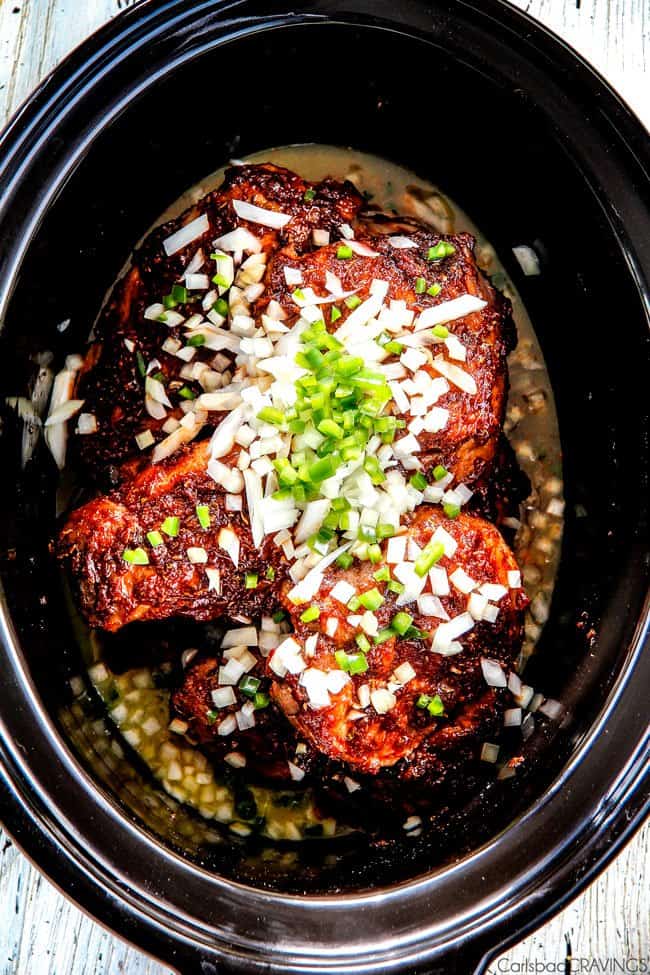
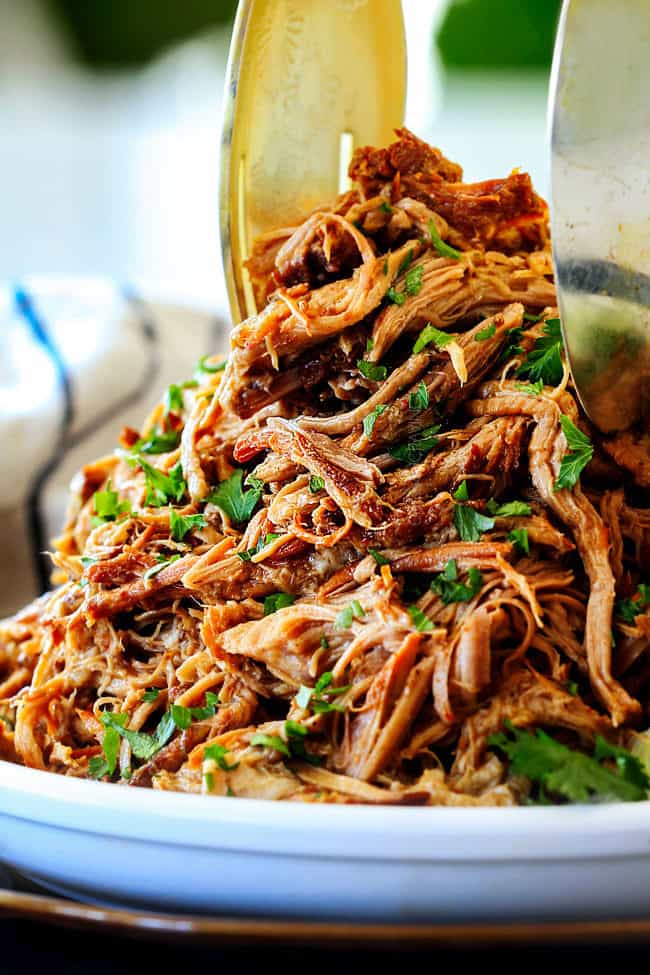
VEGETARIAN ALTERNATIVES:
- Tofu: Use extra firm tofu that is well drained; you will need 3 cups. To drain tofu, place it in a pie plate, top with a heavy plate and weigh down with 2 heavy cans (to release water). Set aside for 10 minutes then sauté with the taco seasonings while crumbling. You can add a little enchilada sauce or salsa for moisture.
- Veggies: Use 3 cups of any combo of your favorite veggies such as cooked sweet potatoes, black beans, zucchini and/or corn. Sauté them with taco seasonings. You can add a little enchilada sauce or salsa for moisture.
- Beans: Mix black beans or chickpeas with any of your favorite cooked veggies to equal 3 cups.

HOW TO MAKE BEEF AND CHEESE TAQUITOS
Making homemade taquitos can be divided into three steps:
1. Make taquito filling
2. Roll taquitos
3 Cook taquitos
Here’s a breakdown of each step with process photos or you can watch the “How to Make Taquitos” video in the recipe card.
HOW TO MAKE Taquito Filling
Please note the following instructions are for cooking the beef in the crockpot, but I’ve also includes instructions for how to cook the beef in the oven and Instant Pot in the notes of the recipe.
STEP 1: SEASON THE BEEF
- Whisk together seasonings: You’ll combine all of the seasonings except the oregano to create the spice rub. Instead, the oregano is added to the slow cooker or Dutch oven with the salsa because the delicate herb can burn over the high heat of searing.
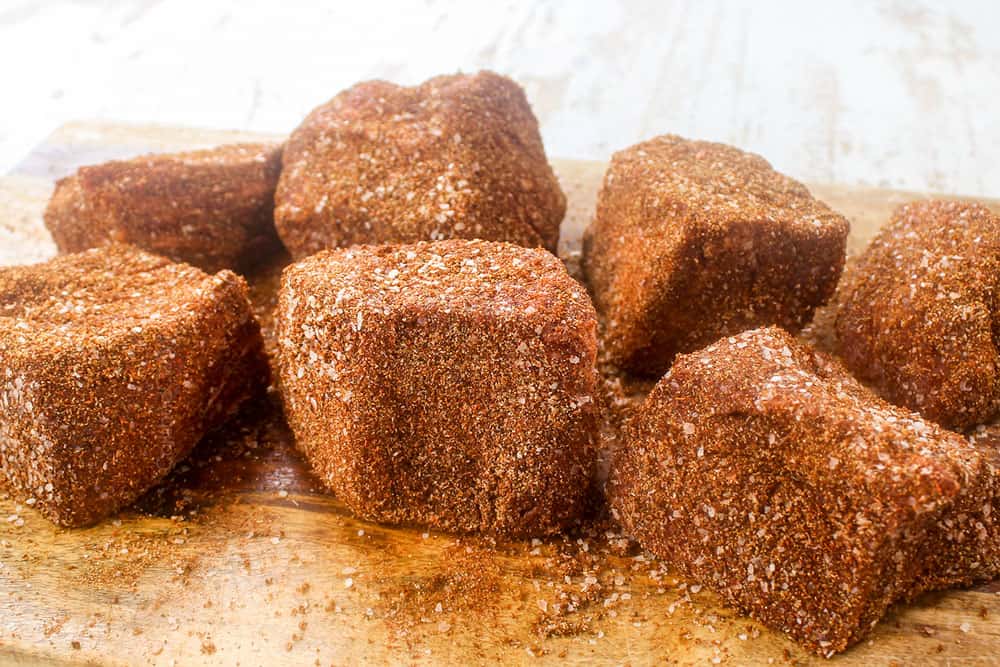
- Cut the beef into 7 or 8 pieces: You want the pieces about 3-inches thick. I cut the beef along the seams of fat. The smaller chunks of beef cook more quickly, and more importantly, they are more flavorful because 1) more sides of the beef will be seared resulting in the caramelizing Maillard reaction and 2) the chili salsa sauce will penetrate deeper into the beef as it cooks.
- Spice rub the beef: Pat the beef dry with paper towels to ensure the seasonings stick. Season all sides of the pieces with the spice rub. There is a lot of seasonings so be as liberal as you can. Save any leftover seasonings (including seasonings that fall off the beef) and add them to the pot with the beef broth.
STEP 2: SEAR THE BEEF
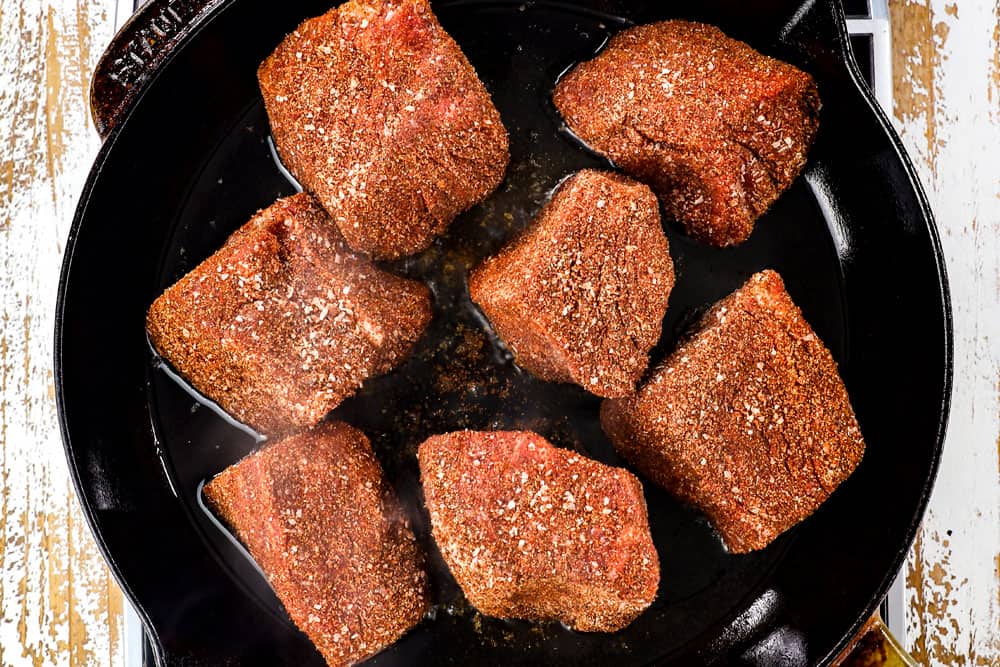
- Sear the beef in batches: Sear every piece of beef on all sides until deeply golden to develop flavor and to seal in the juices. You can use tongs or two forks to rotate your pieces. Transfer the seared roast to a 6-quart crockpot or large Dutch oven.
STEP 3: Combine INGREDIENTs
(Instructions for oven, stovetop and Instant Pot in the notes of the post.)
- Add ingredients: Add beef broth, beef bouillon, salsa, green chilies, tomato paste, lime juice, brown sugar liquid smoke and any leftover seasonings.
- Give them a stir. Stir the ingredients together on top of the beef but don’t worry too much about evenly combining, because they’ll become one with the sauce as the beef cooks and shrinks.
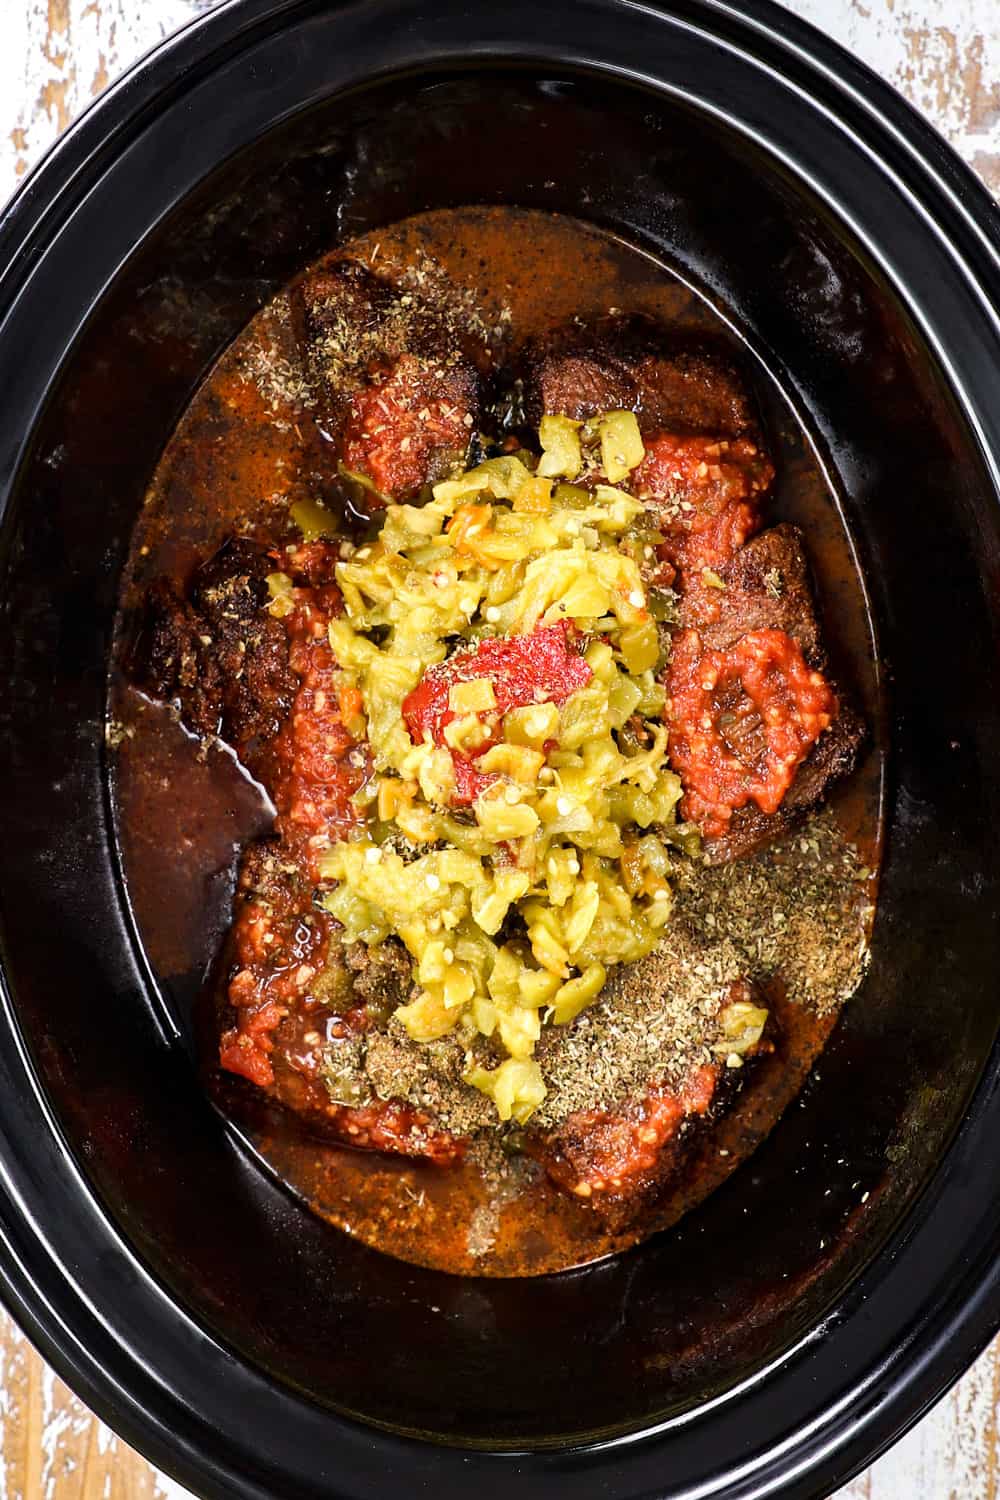
STEP 4: COOK BEEF
- Cover and cook: Cook on low for 8-10 hours or on high for 4-6 hours OR until roast is super tender and easily sheds with a fork. I suggest checking your beef on the earlier end of the cooking spectrum but don’t be alarmed if it takes another two hours.
- How do I know when the shredded beef is done? There are many factors when it comes to cooking times – the size and thickness of the beef, the shape/size of your crockpot and your actual slow cooker (they all cook differently!). If your beef is not tender, then cook on, it just needs more time – even 30 minutes can make the difference between okay beef and melt-in-your-mouth beef. Your beef is done when it falls apart with the tug of two forks.
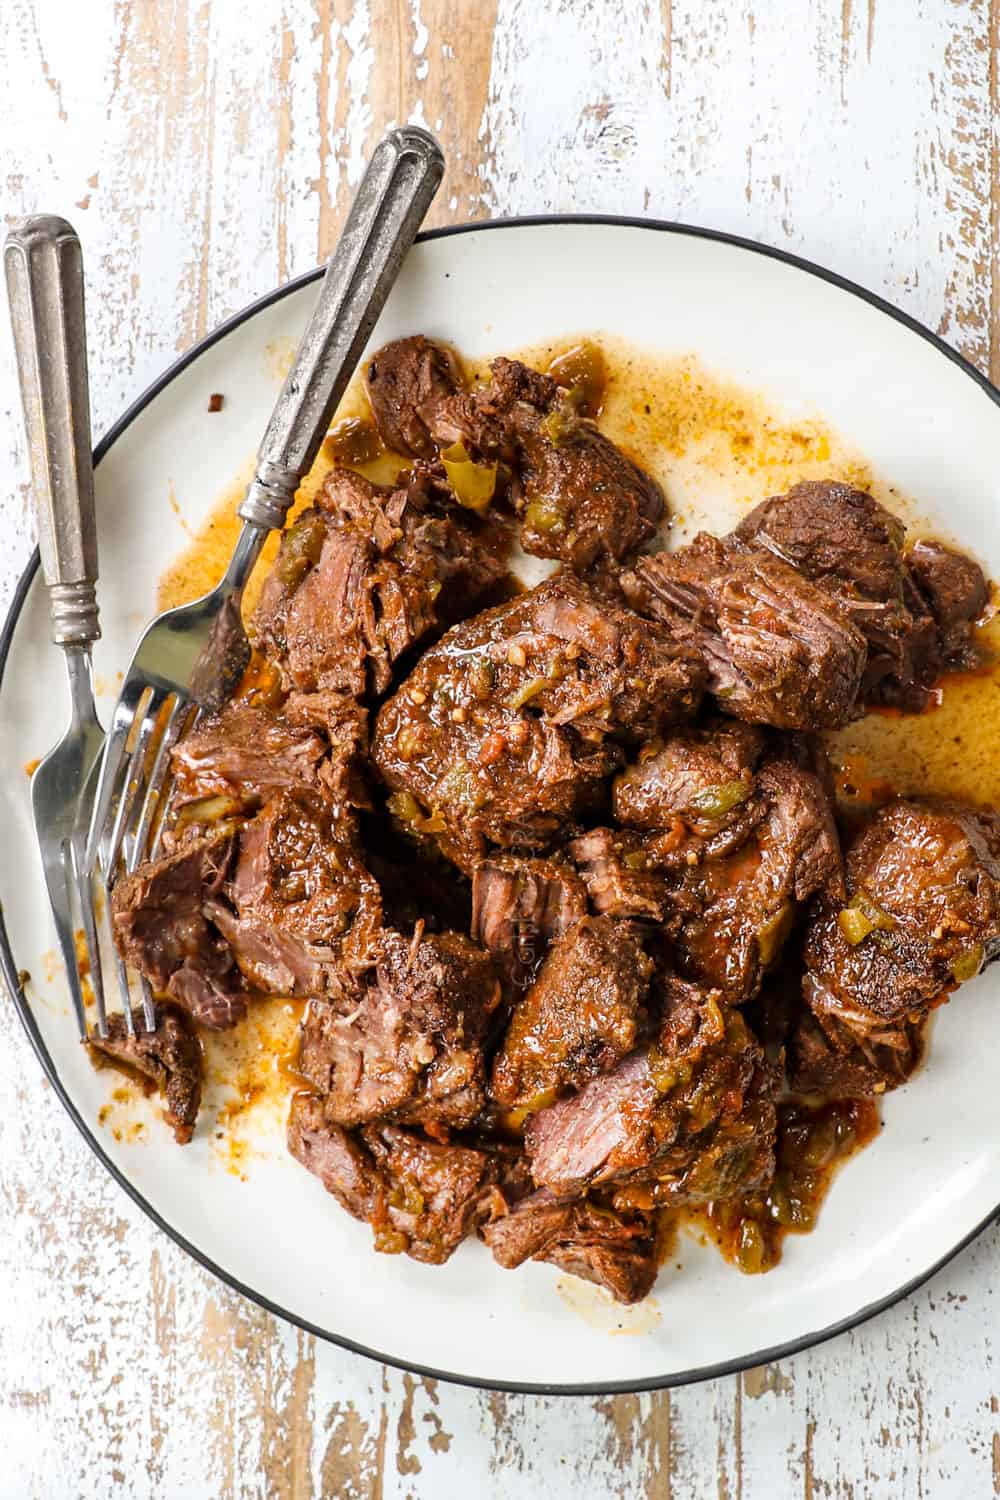
STEP 5: SHRED AND SOAK BEEF
- Shred beef: You may shred the beef directly in the slow cooker or I find it easier to transfer to a rimmed plate or bowl to remove excess fat.
- Soak beef: Add the shredded beef back to the slow cooker to cook on low for another 20 minutes. The beef is now thin enough to soak up even more flavor in every nook and cranny. This is when the magic really happens and your beef emerges buttery tender and exploding with flavor. This shredding and soaking trick will change your culinary life. I do it with EVERY shredded beef or chicken I cook.
HOW TO Roll TAQUITOS
Step 1: Warm tortillas
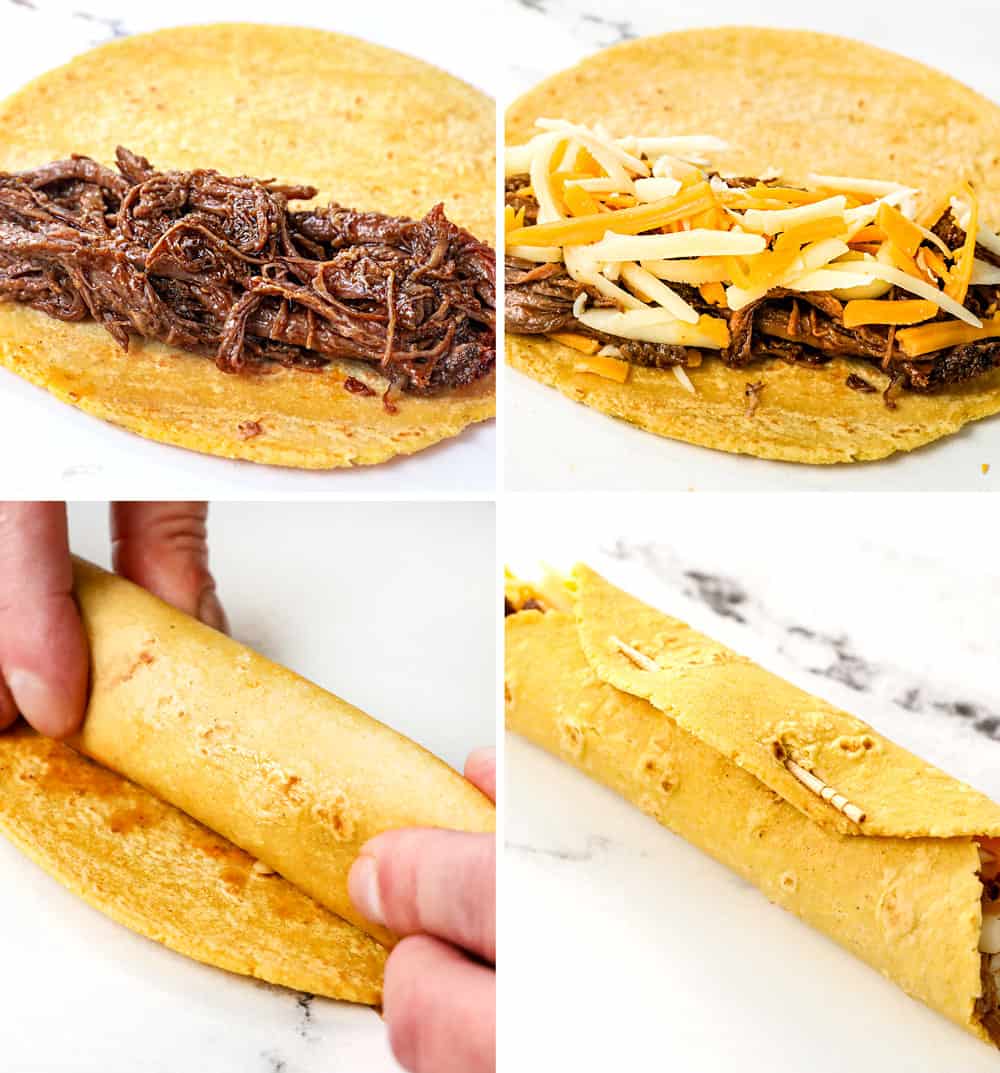
- Wrap a stack of 6 tortillas in a damp paper towel and heat them in the microwave for 30 seconds until warm and pliable. Repeat with a second batch once the tortillas are rolled.
Step 2: Assemble Taquitos
- Working with one tortilla at a time (keep other tortillas covered/warmed) spoon about 3 tablespoons beef onto the bottom third of each tortilla. Press the beef into a tight line and top with 2 tablespoons cheese.
- Tightly roll up tortillas and secure by threading a toothpick lengthwise along the seam.

HOW TO COOK HOMEMADE TAQUITOS
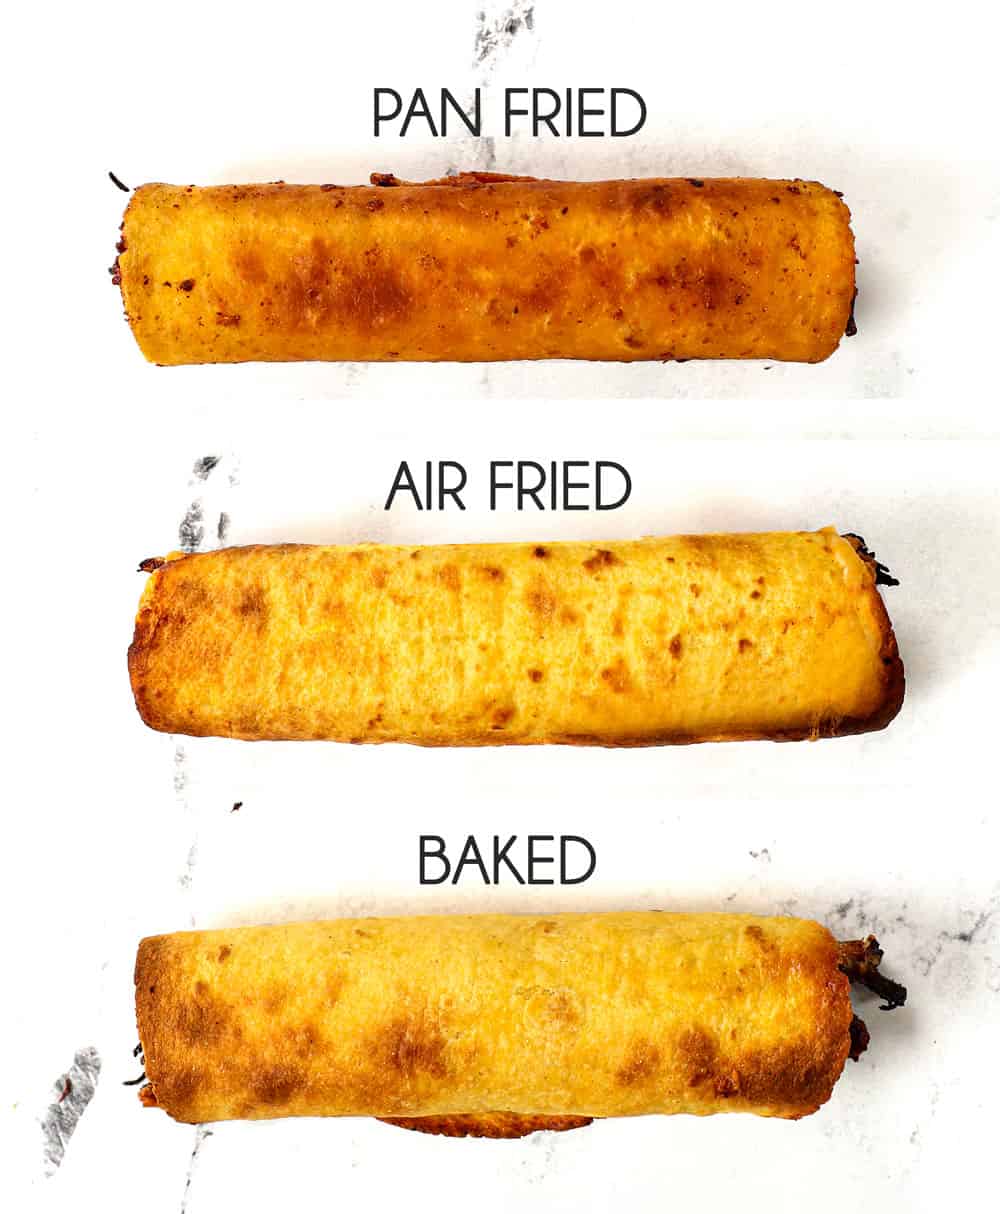
You have three options to cook your taquitos: shallow pan fry, bake or air fry, all with varying levels of crispiness (see the photo chart below).
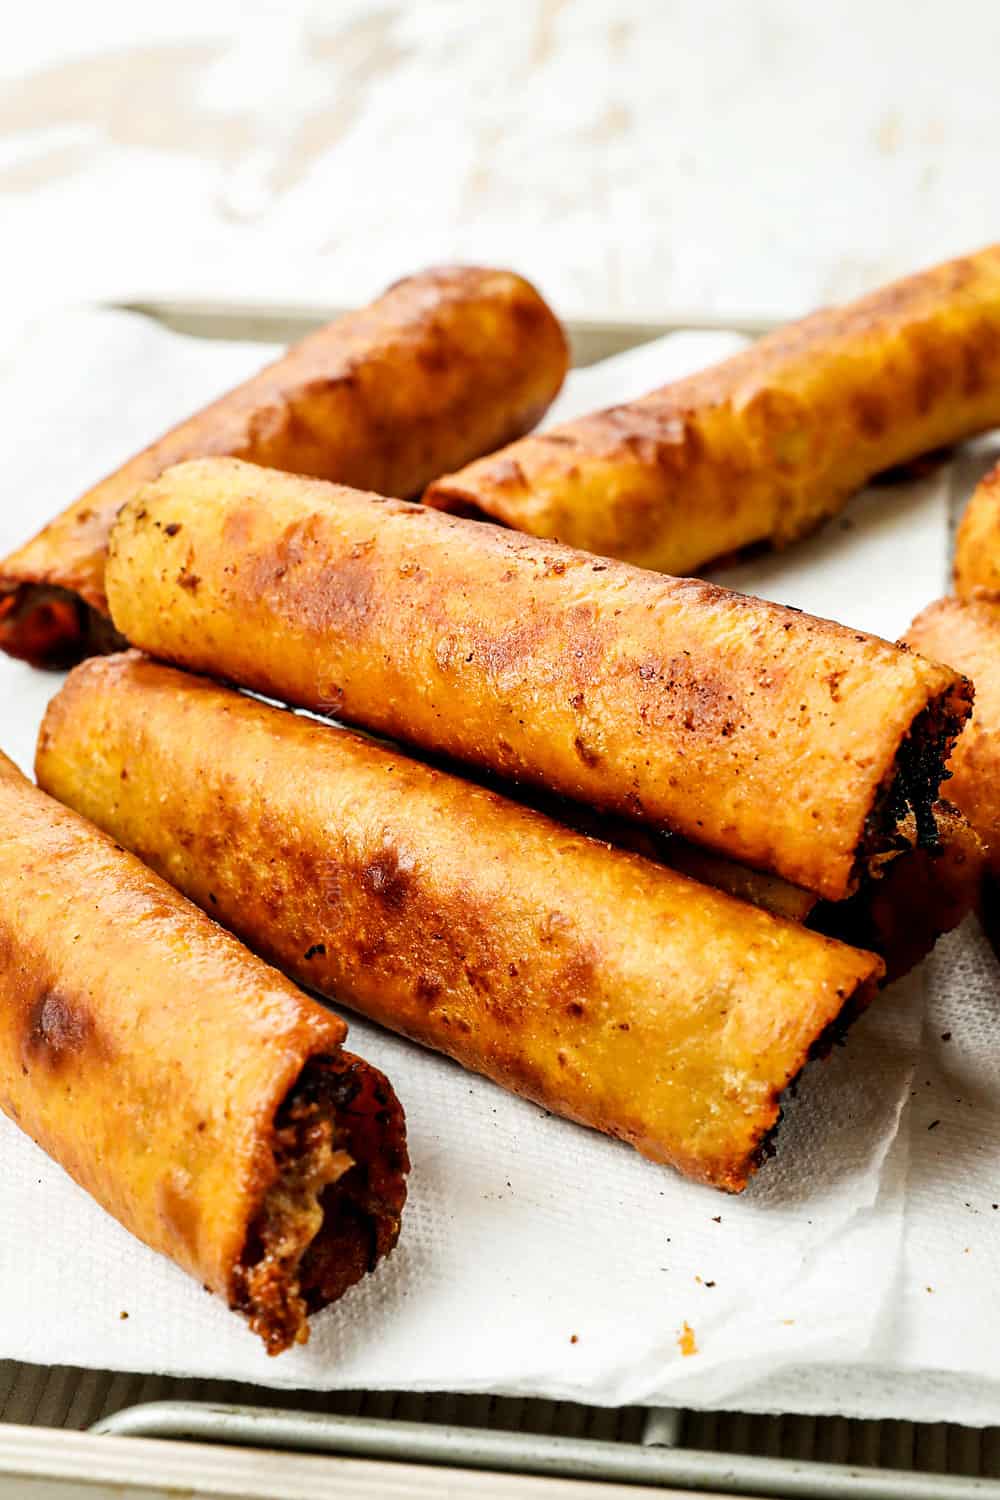
1. Pan frying is the ultimate indulgence for the BEST taquitos, AKA the most flavorful and by far the crispiest.
2. Air fryer taquitos surprisingly don’t get as crispy as I was expecting, but they are crispier than baking and a great option for reheating.
3. Baking is great for a large batch of hands-off cooking but they don’t as crispy as air frying or pan frying. They are still tasty though – so please don’t let that deter you, I just want to manage expectations.
how to pan fry taquitos (RECOMMENDED)
Heat ½-inch vegetable oil in a large nonstick skillet over medium-high heat to 350 degrees F. Once hot, add 4 taquitos seam side down in oil. Fry, turning as needed until golden brown on all sides, 3 to 4 minutes, adjusting burner as necessary to maintain oil temperature so they don’t fry too quickly.
Once the fried taquitos are cool enough to handle, carefully remove the toothpicks.
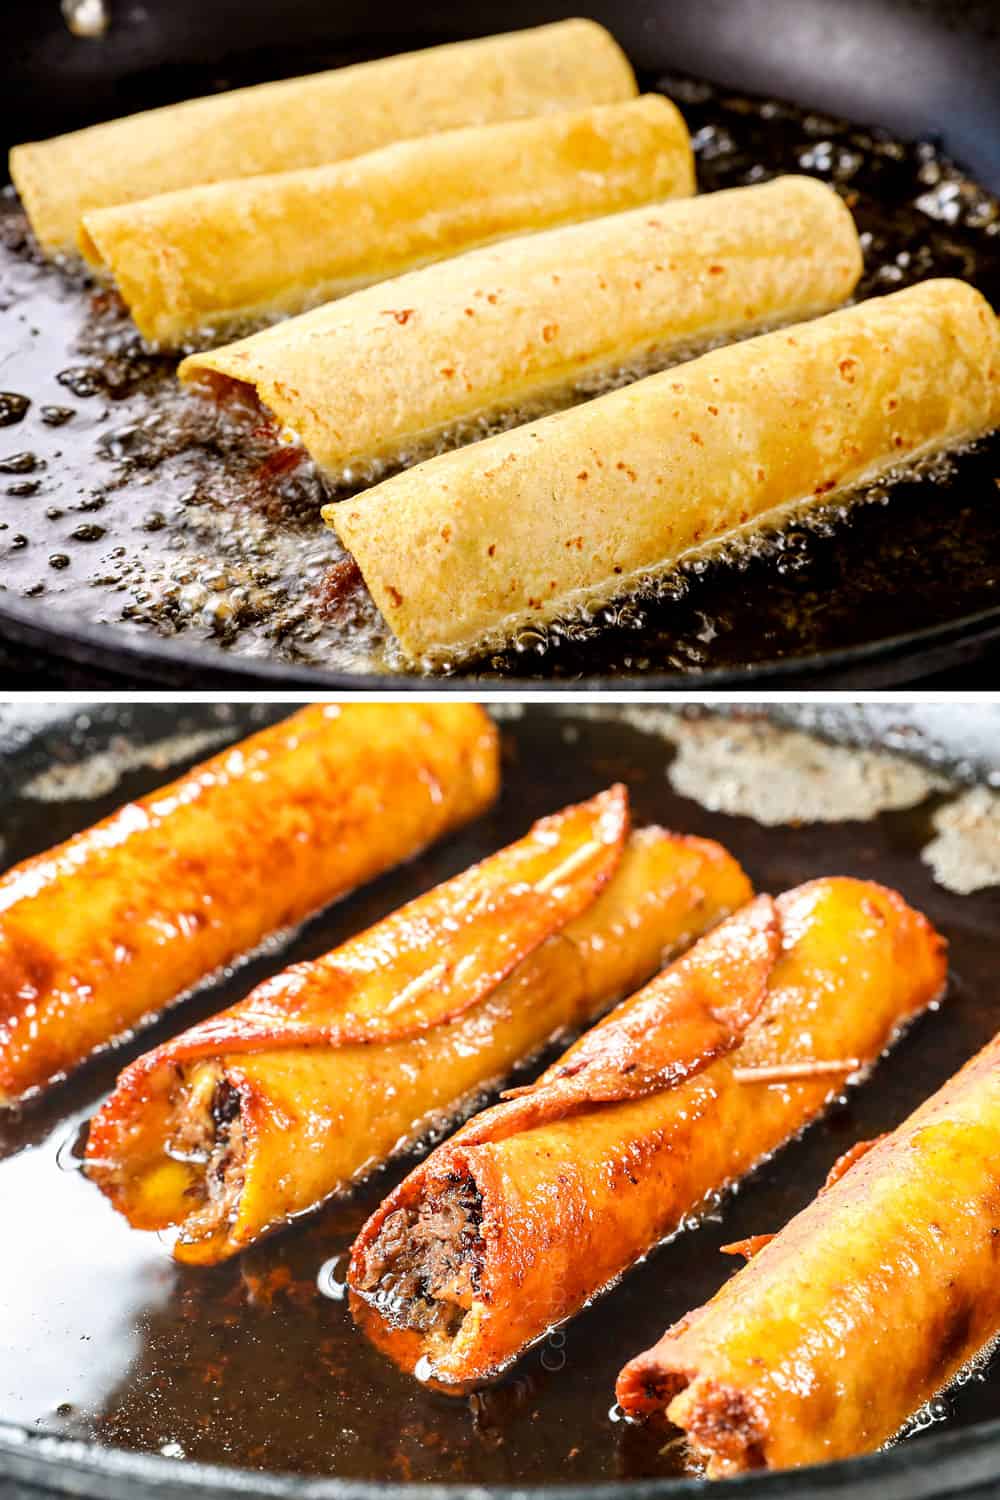
how to air fry taquitos
Preheat air fryer to 400 degrees F. Working in batches, brush taquitos all over with olive oil and place seam side down in the air fryer basket so they aren’t touching. Cook for 6-8 minutes or until they’re golden and crispy, turning halfway through the cooking time.
how to bake taquitos
Pre-heat oven to 425 degrees F. Place a baking rack in a baking pan and spray with nonstick cooking spray. Add taquitos in a single layer without touching then brush with olive oil. Bake for 15-20 minutes or until taquitos are golden (add an extra 5 minutes if taquitos have been refrigerated). Broil for extra crispiness. Remove the toothpicks, serve, and enjoy!

meal prep taquitos
These homemade taquitos are a great recipe to meal prep for a quick snack or dinner. The best way to make taquitos ahead of time is to assemble, cook, and freeze or you can assemble and store without cooking if you are using thick, quality tortillas, otherwise flimsy tortillas will become soggy.
You can also get a jump start on the taquitos prep:
Make filling. The beef can be seasoned, seared and stored in an airtight container or slow cooker with the braising ingredients for up to 2 days. Alternatively, the beef can be made, shredded and stored in the juices for up to 3 days. When ready to use, reheat in the crockpot or stove.
Prep toppings. The toppings such as lettuce, tomatoes, onions, etc. can be chopped and stored in airtight containers in the refrigerator or small covered serving bowls. The guacamole will keep for up to a day without changing color very much – just make sure to press a piece of plastic wrap directly against the surface to prevent oxidation/browning.
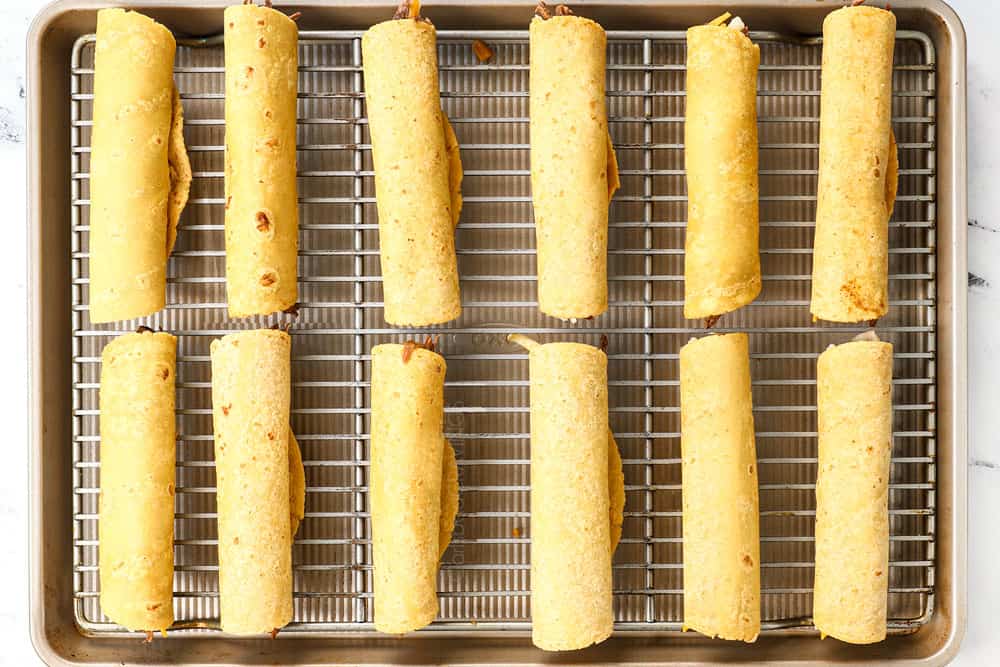

EXPERT TAQUITO RECIPE TIPS
Set yourself up for success with the right cut of beef. Choose a chuck roast that is fresh, bright in color and contains lots of marbling because marbling = flavor and tenderness. If you use a different cut of beef, I cannot guarantee it will be melt-in-your-mouth tender or as rich in flavor.
Cook the beef until very tender. If your beef isn’t crazy tender, then cook on! It just means the proteins needs more time to break down and tenderize. Even 30 more minutes can make the world of difference between “okay” and melt-in-your-mouth beef.
Use quality corn tortillas. If you don’t have access to quality, thick tortillas, please stick with flour tortillas or you will be incredibly frustrated because the corn tortillas will likely tear when rolling and cooking.
Warm tortillas in the microwave. If the tortillas are not warm and pliable, they will crack when rolling. Make sure to roll the taquitos one at a time so you can keep the warmed tortillas covered and warm until ready to use.
Use freshly shredded cheeses. Pre-packaged cheeses contain chemicals designed to prevent the strands from clumping in the packaging – these same chemicals inhibit their melting ability. Only freshly grated cheese will melt in the couple minutes it takes for the taquitos to crisp up.
Use two cheeses. Monterrey provides the ooey gooey factor and sharp cheddar adds the oomph of flavor.
Roll the tortillas tightly. You don’t want any gaps in the beef taquitos, otherwise oil will leak in between the beef and tortilla and cause it to tear.
Don’t overstuff the taquitos. It’s tempting to really pack in the meat, but this overwhelms the ratio of crispiness to meat and the taquitos are more likely to tear when rolling or cooking.
Adjust meat to cheese ratio. After cooking your first batch, you may want to sample a taquito and swap in more meat or cheese on the next batch depending on your family’s personal preference.
Use a toothpick to secure the taquitos closed before cooking. If you skip the toothpicks, your taquitos will fly open while cooking.
Serve Chipotle style: Create a toppings bar like they do at Chipotle and let everyone top their own taquitos for zero lag time.
Use a nonstick skillet to fry the taquitos. Typically, a cast iron skillet is used for frying, but we are not deep frying, we are shallow frying and only heating the oil to 350 degrees F. A nonstick skillet allows you to use less oil and still reap all the benefits of deep frying. You are welcome to use a cast iron skillet if you fill it with more than 1-inch deep of oil.
Use the correct oil for frying. Our goal of pan frying the taquitos is to create a deeply golden, crunchy exterior. To do this, you need an oil with a high smoking point and neutral flavor. If you select an oil with a low smoking point, not only will you have an incredible amount of smoke, but the oil will break down creating an unpleasant odor and unappetizing taste. Oils suitable for frying include: vegetable oil, peanut oil, soybean oil, safflower oil, canola oil, cottonseed oil, corn oil and sunflower oil.
Make sure you test the oil first, especially if frying without an instant read thermometer. To do this, tear off a bit of unused tortilla and add it to the oil. If it boils, your oil is ready but if it boils and turns dark within a minute or so, your oil is too hot. You will have to remove from the heat, wait a few minutes, return to heat and try again.
Adjust heat as needed so the taquitos cook up golden and crispy. If you find your taquitos are cooking too quickly and surpassing the golden brown before the cheese is melted, then lower the heat. You may need to start off at medium-high heat and lower to medium heat.
Don’t overcrowd the pan so the taquitos can cook evenly and so you have plenty of room to flip the taquitos over with tongs. This also helps you keep a close eye on them so they don’t overcook.
Drain taquitos on paper towels in a single layer without touching after they’re done frying. You don’t want them sitting in oil or touching or they will lose their extreme crunch.
To that end, resist the urge to stack the taquitos or they won’t be as crispy. I know I didn’t follow my own advice in the photos so I can speak from personal experience that stacked taquitos will steam and you will lose that coveted crispy exterior very quickly. It is best to serve the beef taquitos lined in a single layer with a little breathing room in between each one.
Keep the cooked taquitos warm as you fry them in batches by transferring them to the oven. Preheat the oven to 200 degrees F. Set a wire baking rack in a baking pan; set aside. Let taquitos drain briefly on paper towels, then transfer to the prepared baking pan and keep warm in oven while frying remaining taquitos.
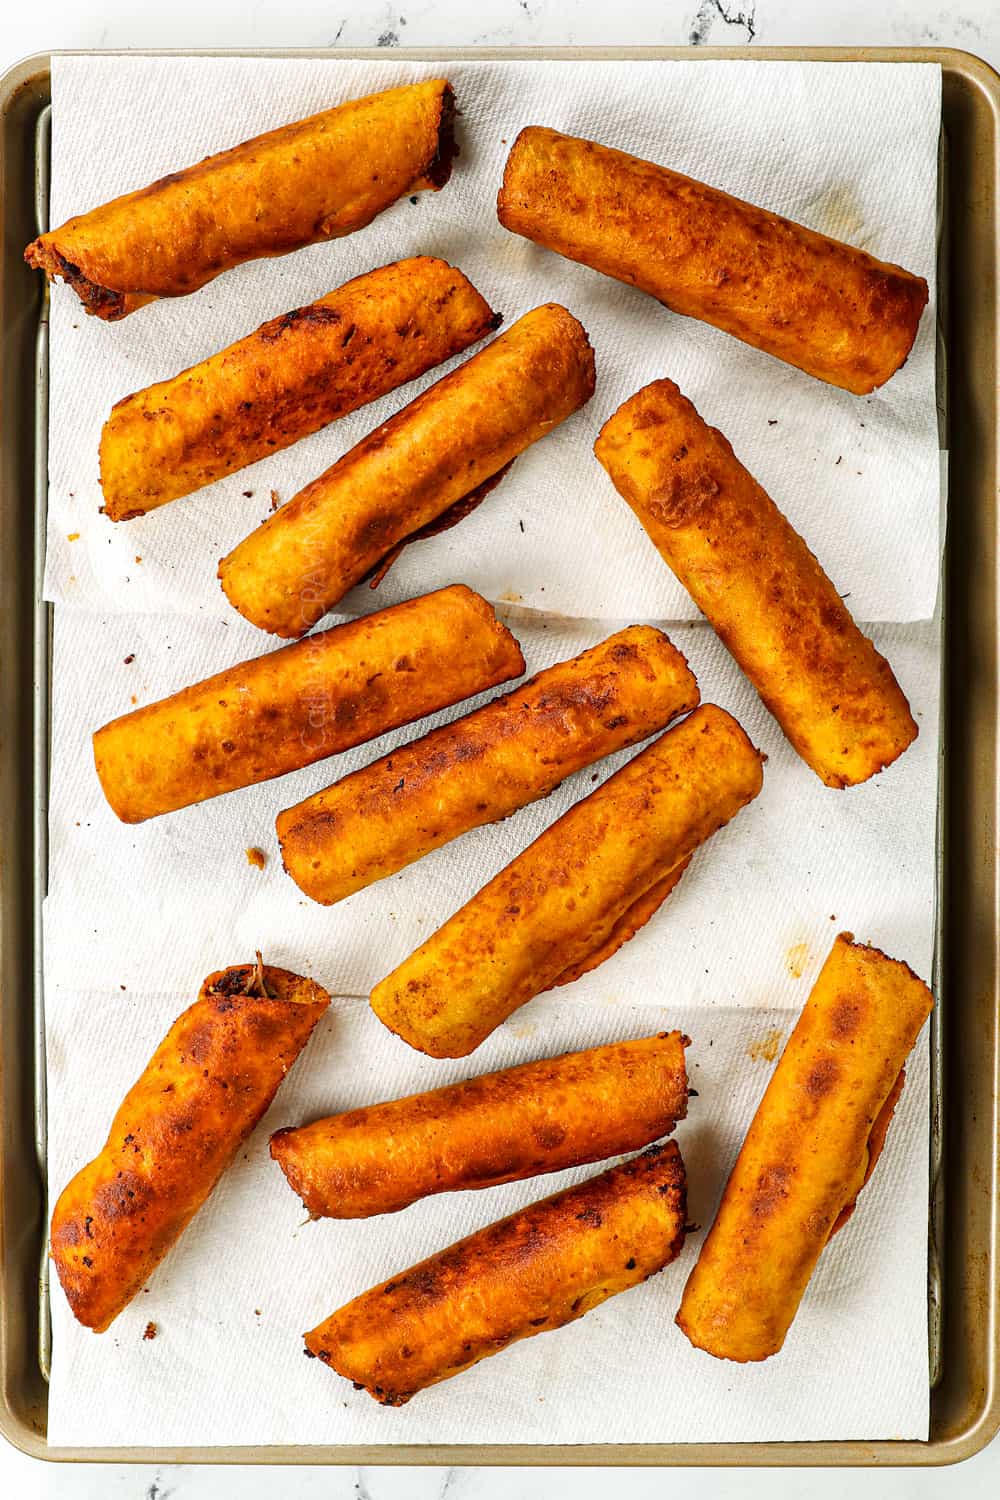
HOW TO SERVE HOMEMADE TAQUITOS
The most traditional taquito toppings include shredded iceberg lettuce, pico de gallo, guacamole, sour cream, salsa, queso fresco or cotija. The fun thing about homemade taquitos, however, is everyone gets to customize their toppings for their own perfect explosion of fresh, tangy, crunchy, and creamy. You can go as simple as just sour cream or my favorite to serve with taquitos is chipotle sauce. Here are some ideas to choose from:
- Chipotle Sauce: A drizzle of explosively flavorful, creamy, spicy, smoky, and zesty chipotle sauce will elevate your taquitos to next level! The sauce is made with chipotle peppers in adobo, cilantro, garlic, lime juice, ground cumin, smoked paprika, sour cream and mayonnaise (or sub-Greek yogurt).
- Sour cream, Greek yogurt or Mexican crema: These are all great options in addition to or if you skip the chipotle sauce. Their refreshing, bright, silky creaminess compliment and cut through the crunchy, cheesy richness. You can also spice up your sour cream with salsa verde, cayenne pepper, hot sauce or chipotle pepper.
- Guacamole: Lusciously creamy, tangy, salty and fresh. guacamole is a must with taquitos! You have three options when it comes to guacamole: 1) go simple by picking up store-bought in the deli section; 2) mash avocados with lime juice, garlic powder, onion powder, salt and pepper or 3) go all out with my favorite guacamole recipe made with avocados, lime juice, cilantro, jalapenos, red onions, and juicy tomatoes.
- Pico de gallo: This is fresh tomato salsa that adds a vibrant, punchy freshness. You can use my homemade pico de gallo recipe or store bought. You can make the salsa ahead of time and store it in an airtight container in the fridge. Bring to room temperature before serving.
- Cilantro: If you skip the pico de gallo, you can load on fresh cilantro and tomatoes instead for a fresh, zesty flair.
- Salsa: Go with traditional restaurant style salsa, or salsa verde or chunky salsas with varying textures and flavors like my black bean corn salsa, avocado corn salsa, charred corn salsa, pineapple salsa, or mango salsa– all SO good!
- Jalapenos: Fresh jalapenos or pickled jalapenos for their fabulous pickled tang are both great options. I particularly love these sweet and spicy pickled jalapeños from Trader Joes. They are similar to candied jalapenos but a little less sweet AKA perfection.
- Cotija cheese: Consider a layer of Cotija for a salty finish. Cotija is known as “Mexican Parmesan” because it is wonderfully salty, hard, and crumbly. It is traditionally found with the specialty cheeses and should be readily available. You may also use queso fresco.
- Hot Sauce: Pass around the hot sauce for an easy, delicious way to customize heat.

WHAT TO SERVE WITH BEEF TAQUITOS?
These beef taquitos make a tasty dinner with the help of a few sides. Here are some of our favorite sides to serve with taquitos:
Rice: a must-have-side in my book for almost every Mexican recipe. We love serving taquitos with cilantro lime rice, Mexican rice, or avocado rice. You can also serve with quinoa, or low carb cauliflower rice.
Salads: is always a win and a great way to stretch your taquitos recipe if you’re serving for dinner. This recipe pairs well with a big green salad, Mexican salad, southwest salad, esquites (Mexican street corn salad), corn salad, or southwest orzo salad. You also have my favorite Mexican pasta salad to choose from.
Veggies: I HIGHLY encourage you to go with authentic elote (Mexican Grilled Street Corn) – you will not regret it! Other alternatives include grilled corn on the cob, baked asparagus, roasted broccoli, roasted potatoes, roasted cauliflower.
Fruit: keep it simple and serve this taquito recipe with any of your favorite fruits such as cantaloupe, pineapple, or grapes or any of these fabulous options: pina colada fruit salad, fruit salad with honey lime vinaigrette, winter fruit salad, or caramelized grilled pineapple.
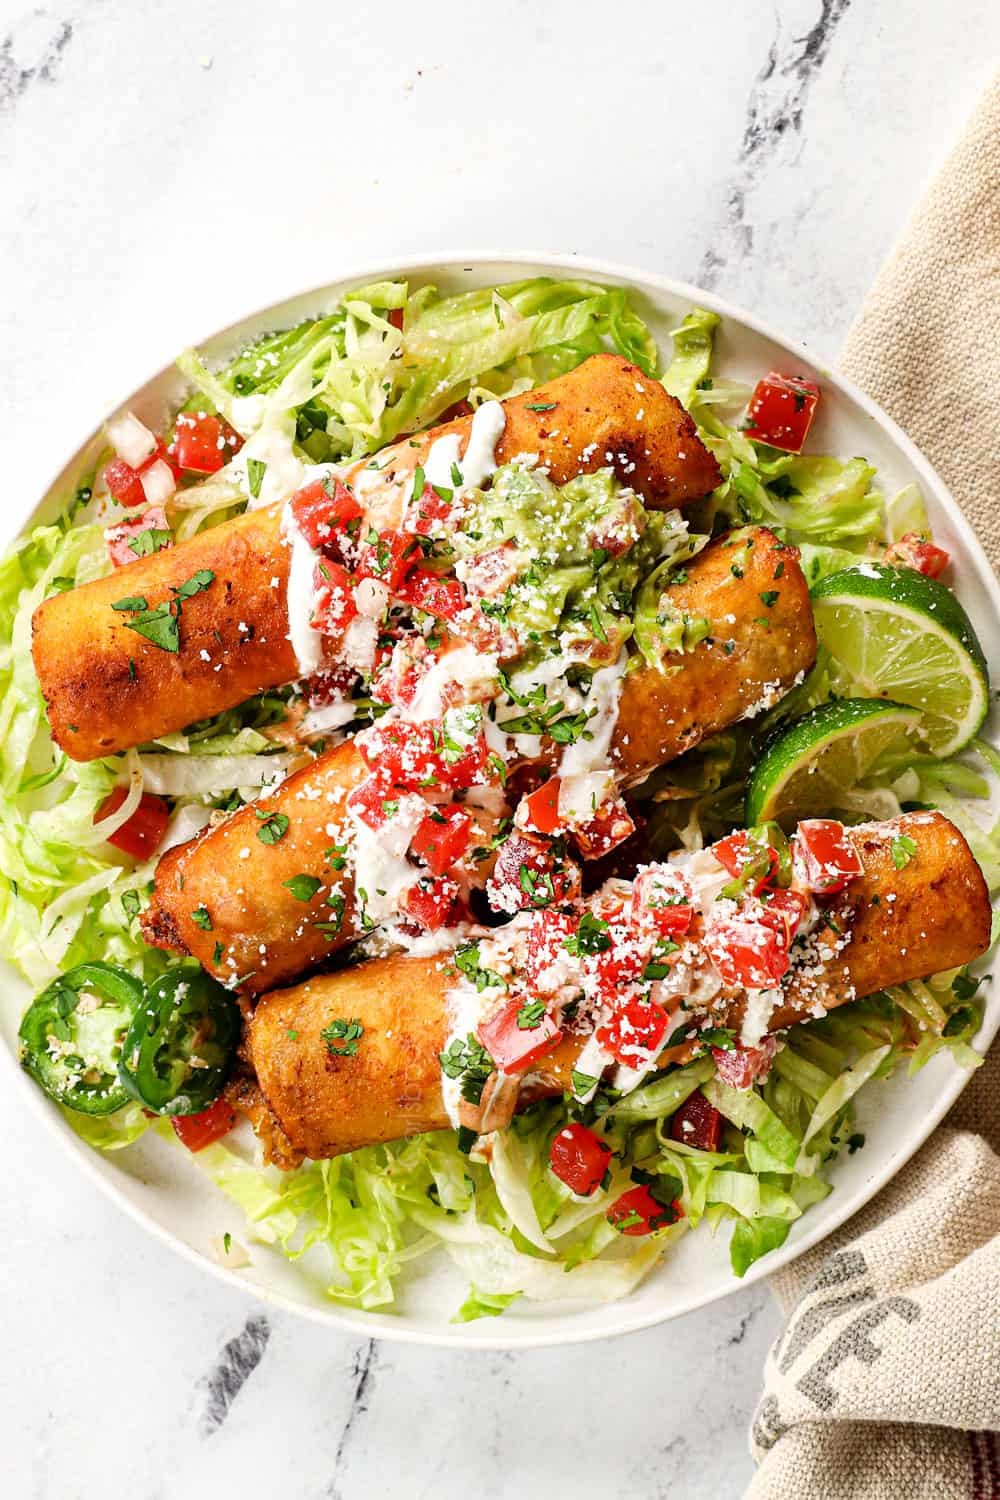

HOW TO STORE BEEF AND CHEESE TAQUITOS
Let taquitos cool completely before packaging to prevent them from becoming as soft. Transfer to a large sheet of foil or an airtight container and line them together with a little breathing room. If you need to stack them, stack them with parchment paper in between each layer to help prevent them from becoming as soggy. Wrap up or enclose completely.
Store taquitos in the refrigerator for up to 5 days or freeze for up to 3 months (instructions to follow).

HOW TO reheat TAQUITOS
You can reheat taquitos in the microwave, oven, stove or in the air fryer. The air fryer is my #1 preferred method for reheating anything crispy – or formerly crispy.
Air fryer: Place your taquitos in the air fryer basket and air fry at 400 degrees F for 4-6 minutes, flipping halfway through.
Stove: Heat a drizzle of oil in a large nonstick skillet over medium heat. Add the taquito(s) and cook until heated through, rotating as needed. Once the inside is warm, you can crank the heat to medium-high to quickly toast the outside.
Oven: Place taquitos on a baking rack placed over a baking pan. Bake in a preheated oven at 400 degrees F for 10-12 minutes or until warmed through.
Microwave: This is my least favorite method because the exterior doesn’t crisp up, but it’s convenient for hands off reheating. Transfer taquitos to ta microwave safe plate and microwave on high or 45 seconds then at 15-second intervals as needed.
HOW TO freeze TAQUITOS
Taquitos are a great make-ahead, have-on-hand snack or meal. To freeze, let taquitos cool completely in a single layer then line on a baking sheet so they aren’t touching. Flash freeze for 1-2 hours or until solid, then transfer to a large freezer bag and squeeze out any excess air. Alternatively, wrap each taquito individually in foil then place in a freezer bag. Freeze for up to 3 months.
HOW TO REHEAT FROZEN TAQUITOS
Air fryer: Spray the air fryer basket with cooking spray. Place desired number of frozen taquitos in the air fryer basket in a single layer so they aren’t touching. Air fry at 400 degrees F for approximately 10 minutes, flipping halfway through.
Oven: Place taquitos on a baking rack placed over a baking pan. Bake in a preheated oven at 425 degrees F for 15-20 minutes or until warmed through.
Microwave: Transfer desired number of frozen taquitos to a microwave safe plate and microwave on high or 2 minutes seconds then at 15-second intervals as needed. Microwaved taquitos will be extra soft. You can crisp them up in a skillet with a drizzle of oil.
TAQUITO RECIPE FAQS
The exact origin of taquitos is unclear but it is referred to as early as 1917 in Preliminary Glossary of New Mexico Spanish, with the word noted as a “Mexicanism” used in New Mexico. In 1929 it is defined as a “rolled-tortilla dish” in an American youth book, noted as a popular offering of railroad station vendors.
Still, the invention of taquitos, as they now exist, is often credited to Ralph Pesqueria, Jr., in my hometown of San Diego at his tortilla factory, which would later become the famous El Indio Mexican Restaurant in Old Town. Pesqueria shares that he used his grandmother’s recipe to make taquitos after workers from the Consolidated Aircraft Company factory across the street asked for a portable lunch item. Thanks to Pesqueria, we can all enjoy taquitos as portable handheld heroes!
WANT TO TRY THIS taquitos RECIPE?
PIN IT TO YOUR Mexican, Appetizer or dinner BOARD TO SAVE FOR LATER!
FIND ME ON PINTEREST FOR MORE GREAT RECIPES! I AM ALWAYS PINNING :)!
©Carlsbad Cravings by CarlsbadCravings.com
Beef Taquitos Recipe
Save This Recipe To Your Recipe Box
You can now create an account on our site and save your favorite recipes all in one place!
Ingredients
FOR THE TAQUITOS
- 3 cups Mexican shredded beef, (recipe to follow)
- 1 cup freshly shredded Monterrey Jack cheese
- 1 cup freshly shredded sharp cheddar cheese
- 16 quality corn tortillas (5-6 inches)
- vegetable oil or cooking spray for cooking
- toothpicks for securing taquitos
FOR THE BEEF
- 1 3-4 lb. boneless beef chuck roast, trimmed of excess fat, cut into 7-8 pieces
- 1 ½ tablespoons vegetable oil
SPICE RUB
- 1 TBS EACH chili powder, ground cumin, kosher salt (may sub 1 ½ tsps table salt)
- 1/2 TBS EACH garlic powder, onion powder, smoked paprika
- 1 tsp EACH pepper, ground coriander
- 1/2 – 1 ½ teaspoons chipotle chili pepper (only 1 ½ tsp if you LOVE heat)
BRAISING LIQUID
- 1 cup reduced sodium beef broth
- 1 cup mild salsa or salsa verde (medium if you like spicy)
- 1 4 oz. can mild diced green chilies (don't drain)
- 2 tablespoons tomato paste
- 2 tablespoons lime juice
- 2 tablespoons brown sugar
- 1-3 teaspoons liquid smoke (depending on how “smoky” you like it)
- 1 tablespoon granulated beef bouillon base, or cubes (crush cubes don't dissolve)
- 1 tablespoon dried oregano
For serving (pick your favs!)
- 1 recipe chipotle sauce (HIGHLY recommend!)
- shredded iceberg lettuce
- 1 recipe pico de gallo or storebought
- 1 recipe guacamole or storebought
- sour cream, Greek yogurt or Mexican crema
Instructions
prep THE BEEF
- Whisk together all of the spice rub ingredients in a small bowl; set aside.
- Pat beef pieces dry with paper towels then liberally season with the spice rub, gently pressing to adhere. Save any excess spices to add to the pot later.
- Heat 1 ½ tablespoons vegetable oil in a large cast iron skillet (or large Dutch oven for oven/stovetop method) over medium-high heat. Once very hot, add cubed beef and sear on all sides.
Cook the beef (SEE NOTES FOR MORE COOKING OPTIONS)
- Transfer beef to a 6 quart (or larger) slow cooker along with all remaining ingredients, including any leftover spices. Stir to combine. Cover and cook on HIGH for 3 ½ – 4 ½ hours or on LOW for 6-8 hours, OR until the beef shreds easily with two forks. If it's not shreding easily, it just needs more time to cook.
- Remove the beef to a rimmed plate or large bowl (do NOT discard juices in slow cooker), and shred with two forks, discarding any excess fat.
- Add the shredded beef back to slow cooker and toss with slow cooker juices. Cook on low for 20 minutes for beef to absorb juices. Taste and season with chipotle powder/cayenne pepper, lime juice or brown sugar to taste.
- Remove beef with a pair of tongs to a serving bowl or strain in colander so the taquitos don’t get soggy. I like to save the liquid to cook my rice in (just add liquid plus water needed for rice).
TO MAKE THE TAQUITOS
- Wrap a stack of 6 tortillas in damp paper towels and heat in the microwave for 30 seconds or until warm and pliable. Repeat with a second batch only once the first batch is filled and rolled.
- Working with one tortilla at a time (keep other tortillas covered/warmed) spoon about 3 tablespoons beef onto the bottom third of each tortilla. Press the beef into a tight line and top with 2 tablespoons cheese. Tightly roll up tortillas and secure by threading a toothpick lengthwise along the seam (see photo in post or watch video below).
TO PAN FRY (RECOMMENDED)
- Optional to keep taquitos warm: Preheat oven to 200 degrees F. Set a wire baking rack in a baking pan; set aside.
- Heat ½-inch vegetable oil in a large nonstick skillet over medium-high heat to 350 degrees F. If you don't have an instant read thermometer, the oil can also be tested by placing a small piece of tortilla into the hot oil. If it sizzles immediately, the oil is ready, if it turns dark immediately, it is too hot.
- Once hot, add 4 taquitos seam side down. Fry, turning as needed until golden brown on all sides, 3 to 4 minutes, adjusting burner as necessary to maintain oil temperature so they don’t fry too quickly.
- Let taquitos drain briefly on paper towels, then transfer to the prepared baking pan and keep warm in oven while frying remaining taquitos.
- Remove the toothpicks before serving with desired toppings.
TO AIR FRY
- Preheat air fryer to 400 degrees F. Working in batches, lightly brush taquitos all over with olive oil or spray with cooking spray. Place seam side down in the air fryer basket so they aren’t touching. Cook for 6-8 minutes or until they’re golden and crispy, turning halfway through the cooking time. Remove the toothpicks before serving with desired toppings.
TO BAKE (the least crispy)
- Pre-heat oven to 425 degrees F. Place a baking rack in a baking pan and spray with nonstick cooking spray. Add taquitos in a single layer without touching then brush with olive oil.
- Bake for 15-20 minutes or until taquitos are golden (add an extra 5 minutes if taquitos have been refrigerated). Broil for extra crispiness.
- Remove the toothpicks before serving with desired toppings.
Video
Notes
beef STOVETOP METHOD
- Follow the recipe through step 3.
- Stir in all of the remaining ingredients including any leftover spices. Add an additional ½ cup beef broth for a total of 1 ½ cups.
- Gently simmer, covered, for 2 ½ to 3 ½ hours, until the beef is fall apart tender. I recommend checking to see if the beef is fork tender at 2 ½ hours, and if not, continue to cook an additional 30-60 minutes – or as long as it takes! Keep an eye on the beef and add additional broth if needed because more liquid will evaporate on the stove.
- Remove the roast to a rimmed plate or large bowl and shred with two forks, discarding any excess fat.
- Return the beef to the pot and let rest for 20 minutes to soak up additional juices.
beef OVEN METHOD
- Preheat oven to 300 degrees F. Follow the recipe through step 3.
- Stir in all of the remaining ingredients including any leftover spices. Add an additional ½ cup beef broth for a total of 1 ½ cups.
- Bring to simmer, cover, and transfer to the oven. Cook, covered, for 3 to 3 ½ hours, until the beef is fall apart tender. Keep an eye on the beef and add additional broth if needed.
- Remove the roast to a rimmed plate or large bowl and shred with two forks, discarding any excess fat.
- Return the beef to the pot at room temperature and let rest for 20 minutes to soak up additional juices.
beef PRESSURE COOKER AND INSTANT POT
- Sear the beef then add the rest of the ingredients to the Instant Pot, including any leftover spices. Cover and set the lid to “Sealing.”
- Pressure cook on “Manual” for 50 minutes, followed by a quick release.
Expert Tips and Tricks
- Corn tortillas: Corn tortillas split easily when rolled unless you use quality tortillas. I recommend using tortillas labeled as “homemade” or “freshly made” or tortillas made of a corn/flour blend. La Tortilla Factory Corn Tortillas are fabulous for easy-to-roll tortillas that won’t easily split or tear.
- Flour tortillas: If you don’t have access to quality tortillas, please stick with flour tortillas or you will be incredibly frustrated, these are called You will need to increase the filling because flour tortillas are larger.
- Protein options: You can use any meat to make the taquitos such as Beef Barbacoa, Beef Birria, Taco meat, Shredded Mexican Chicken, Honey Lime Salsa Verde Chicken, Quick Mexican Chicken, Carnitas, or Chipotle Sweet Pulled Pork.
- Cooking options: Pan frying is the ultimate indulgence for the BEST taquitos, AKA the most flavorful and by far the crispiest. Air fryer taquitos surprisingly don’t get as crispy as I was expecting, but they are crispier than baking and a great option for reheating. Baking is great for a large batch of hands-off cooking but they don’t as crispy as air frying or pan frying. They are still tasty though – so please don’t let that deter you, I just want to manage expectations.
- Don’t stack the taquitos or they won’t be as crispy. Stacked taquitos will steam and you will lose that coveted crispy exterior very quickly. It is best to serve the beef taquitos lined in a single layer with a little breathing room in between each one
- Prep ahead: The beef can be seasoned, seared and stored in an airtight container or slow cooker with the braising ingredients for up to 2 days. Alternatively, the beef can be made, shredded and stored in the juices for up to 3 days. When ready to use, reheat in the crockpot or stove. The toppings can also be prepped and stored in airtight containers in the refrigerator.
How to Store and Reheat
- To store: Let taquitos cool completely before packaging to prevent them from becoming as soft. Transfer to a large sheet of foil or an airtight container and line them together with a little breathing room. If you need to stack them, stack them with parchment paper in between each layer to help prevent them from becoming as soggy. Wrap up or enclose completely. Store taquitos in the refrigerator for up to 5 days or freeze for up to 3 months (instructions to follow).
- To reheat in the air fryer: The air fryer is my #1 preferred method for reheating anything crispy – or formerly crispy. Place your taquitos in the air fryer basket and air fry at 400 degrees F for 4-6 minutes, flipping halfway through.
- To reheat on the stove: Heat a drizzle of oil in a large nonstick skillet over medium heat. Add the taquito(s) and cook until heated through, rotating as needed. Once the inside is warm, you can crank the heat to medium-high to quickly toast the outside.
- To reheat in the oven: Place taquitos on a baking rack placed over a baking pan. Bake in a preheated oven at 400 degrees F for 10-12 minutes or until warmed through.
- To reheat in the microwave: This is my least favorite method because the exterior doesn’t crisp up, but it’s convenient for hands off reheating. Transfer taquitos to ta microwave safe plate and microwave on high or 45 seconds then at 15-second intervals as needed.
To Freeze and Reheat from Frozen
- To freeze: Let taquitos cool completely in a single layer then line on a baking sheet so they aren’t touching. Flash freeze for 1-2 hours or until solid, then transfer to a large freezer bag and squeeze out any excess air. Alternatively, wrap each taquito individually in foil then place in a freezer bag. Freeze for up to 3 months.
- To reheat in the air fryer: Spray the air fryer basket with cooking spray. Place desired number of frozen taquitos in the air fryer basket in a single layer so they aren’t touching. Air fry at 400 degrees F for approximately 10 minutes, flipping halfway through.
- To reheat in the oven: Place taquitos on a baking rack placed over a baking pan. Bake in a preheated oven at 425 degrees F for 15-20 minutes or until warmed through.
- To reheat in the microwave: Transfer desired number of frozen taquitos to a microwave safe plate and microwave on high or 2 minutes seconds then at 15-second intervals as needed. Microwaved taquitos will be extra soft. You can crisp them up in a skillet with a drizzle of oil.

Did You Make This Recipe?
Tag @CarlsbadCravings and Use #CarlsbadCravngs
Leave a Review, I Always Love Hearing From You!



Erinn says
Wow!!! When this recipe came across my email, I just knew this was going to be on my meal list for the up coming week. And this recipe, once again did not disappoint. Cheers from the whole family. A few steps involved but I read through the whole recipe and your post so I could get a good feel for all the steps involved. Then prepared as much as I could before hand. Worth the evert. The only problem I had was that my corn tortilla shells kept wanting to tear….why is that do you think?
Jen says
Thanks so much Erinn, I love hearing these were a huge hit! As far as the corn tortillas tearing it could be either: 1) type of corn tortilla – needs to be quality thicker, soft tortillas like La Tortilla Factory, preferable even part corn, part wheat, 2) the tortillas weren’t warm enough. If you can’t locate quality corn tortillas then I would stick with flour. Hope that helps!
Brandy Huston says
Made these using some homemade tortillas and they were great! I just wanted to say thanks for providing so many options at each step! It was really helpful to have all the possible methods identified!
Jen says
You’re so welcome Brandy, I’m so pleased they were a hit! And bravo for making homemade tortillas!
Karen Misty Thornton says
my husband and I have recently gone meatless. However, these look soo good! How can i get the same consistency and look with mushrooms or jackfruit with this recipe?
Jen says
Hi Karen, my apologies as I have not experimented with meatless taquitos. Good luck!