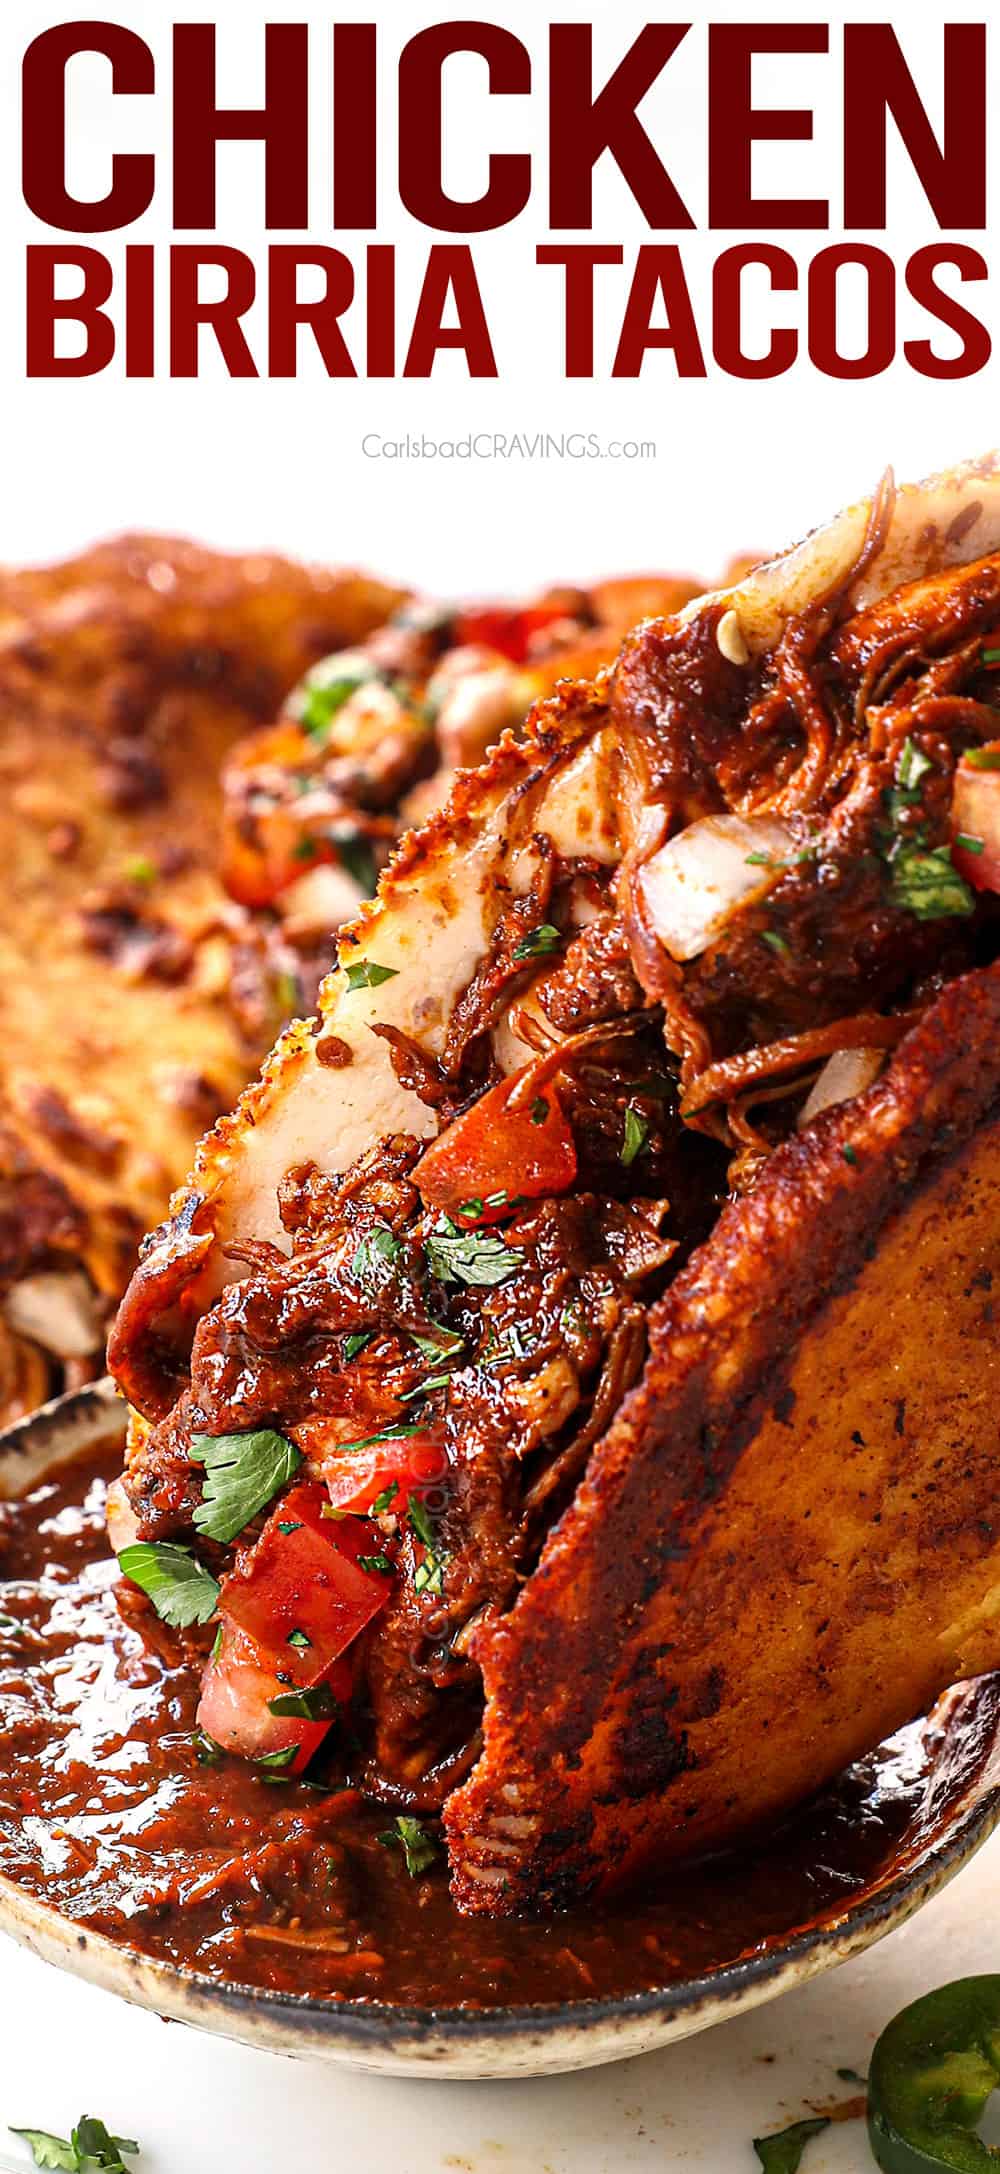
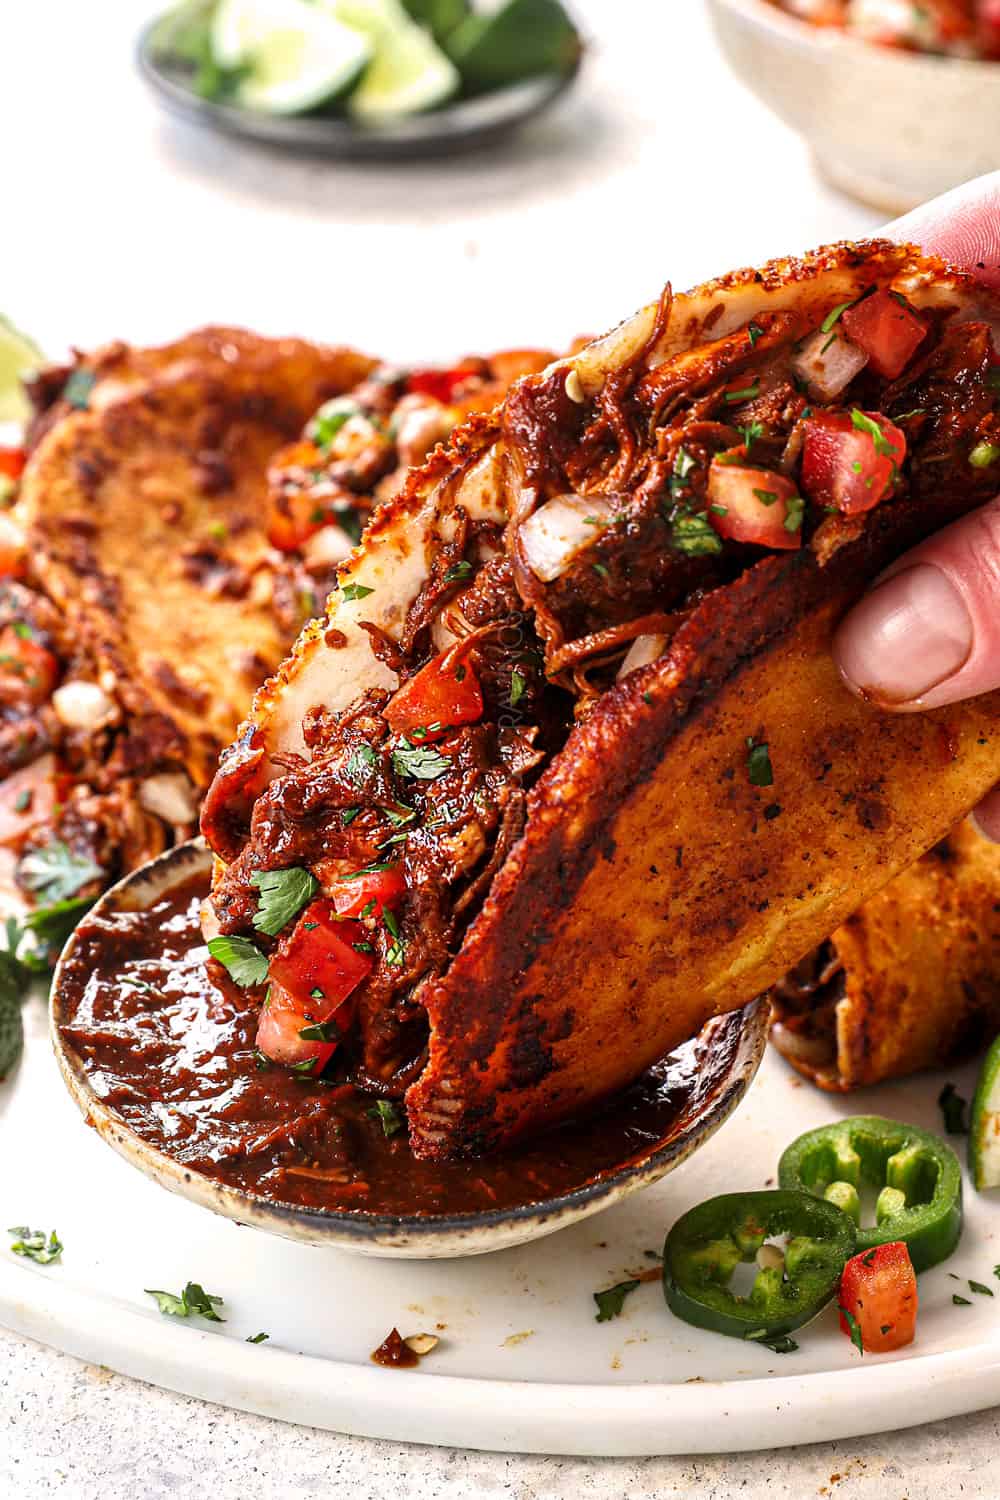
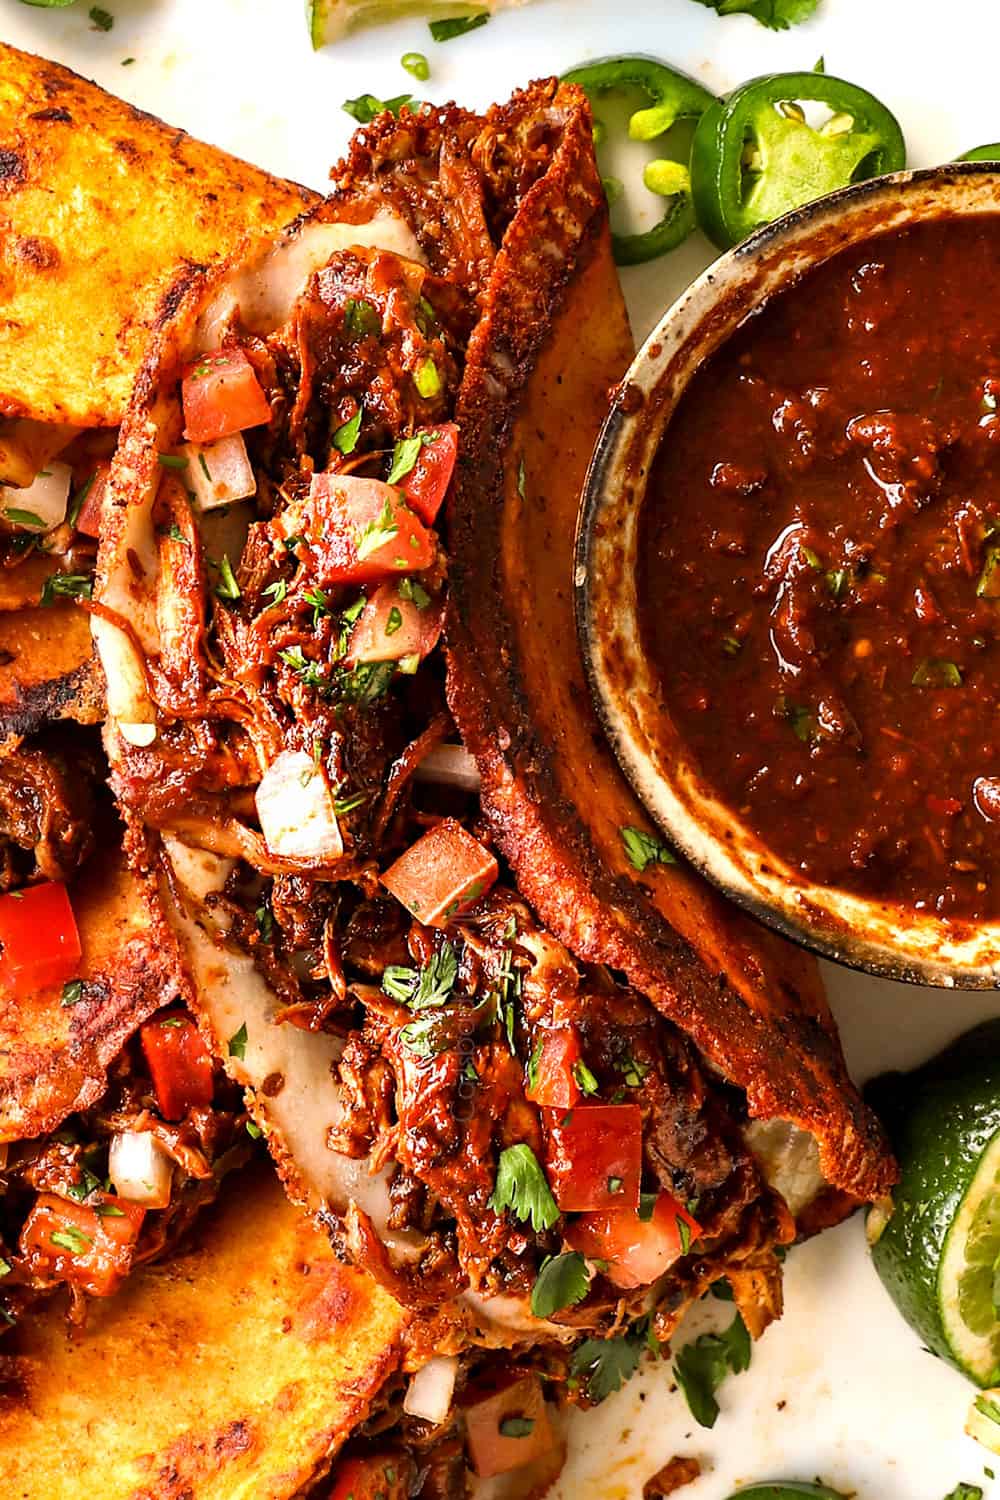
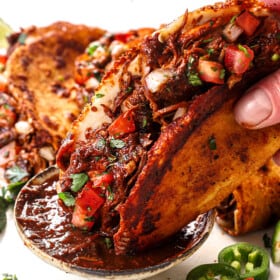
Chicken Birria Tacos with step-by-step photos and how to video! AKA crispy, pan-fried tacos piled with shredded chicken and oozing cheese dunked in a rich, flavorful consomé.
These Chicken Birria Tacos are an explosion of earthy, smoky, juicy, cheesy, crispy addictiveness in each and every saucy bite PLUS they’re quicker to make than their beefy cousin! The tacos are made with juicy shredded chicken braised in a bold, aromatic adobo chili sauce, stuffed into broth-battered corn tortillas along with ooey gooey Oaxaca cheese, pan-fried until crispy then dunked in the deeply crimson Birria consume for a saucy, rich finish. With one bite you’ll understand exactly why Birria Tacos are the hottest food trend that is here to stay. Serve the chicken tacos with pico de gallo or simply onion, cilantro and a squeeze of fresh lime juice.
This is a lengthy guide full of history, tips of tricks. You can use the “jump to recipe” button at the top to skip directly to the recipe card if you wish.
PIN THIS RECIPE TO SAVE FOR LATER
HOW TO MAKE chicken birria tacos VIDEo

Why you’ll love chicken birria tacos recipe
It’s as addicting as your favorite restaurant! Until recently, Birria Tacos were enjoyed only at the most authentic Mexican restaurants, but thanks to their explosion on social media, they are the possibly the most famous tacos in the world. This recipe using real-deal dried chilies for authentic, crispy, pan-fried chicken tacos with oozing cheese dunked in deep crimson consomé – AT HOME!
It’s quicker to make than Beef Birria Tacos. This chicken taco recipe is based off of my Beef Birria Taco recipe. I conducted extensive research to create that truly intoxicating recipe and I am pleased to say it is just as crazy delicious with chicken! The ingredient list is a little lengthy but I’ve streamline the process as much as possible. Plus, the chicken only takes 30 minutes to cook instead of 3 hours like the beef!
It’s the chicken: braised in a mélange of chiles and spices, the chicken adobado is rich, succulent, fall apart tender, with an enticing complexity of flavor. You will want to use it in more than just this recipe!
It’s the cheese: take it or leave it, but take it. Cheese melting into the juicy chicken and spilling out the sides of the golden tortilla to create Quesa Birria.
It’s the tortillas: dipped in the adobo sauce for superior flavor then pan fried for crispy fried caramelization. Addictingly crispy fried taco shells are a culinary-changer.
It’s the consomé (Birria broth in Spanish vs consommé in French): deeply crimson, made of chilies and fragrant spices. The sauce is complex, lightly smoky, rich, perky with acidity and deeply satisfying.
It’s the dunk: the bath of rich consomé is the cherry on top, for juicy, cheesy saucy, crispy, out of this world bite, after bite….

What is birria?
Birria is a Mexican dish traditionally made from either goat or lamb but beef and chicken are quickly becoming popular favorites. The meat is stewed until fall apart juicy tender in a rich adobo sauce made from chilies, onions, garlic, tomatoes and toasted spices including peppercorns, cumin seeds, coriander seeds, cloves, bay leaves and cinnamon. The resulting meat is deeply complex with fragrant, savory, slightly spicy notes.
Birria is commonly served at celebrations such as holidays and weddings solely as a meat stew but can also be served inside tacos or quesadillas, burritos and nachos and most recently, restaurants are making Birria wontons, Birria grilled cheese, Birria egg rolls and Birria ramen, as well!

What are chicken birria tacos?
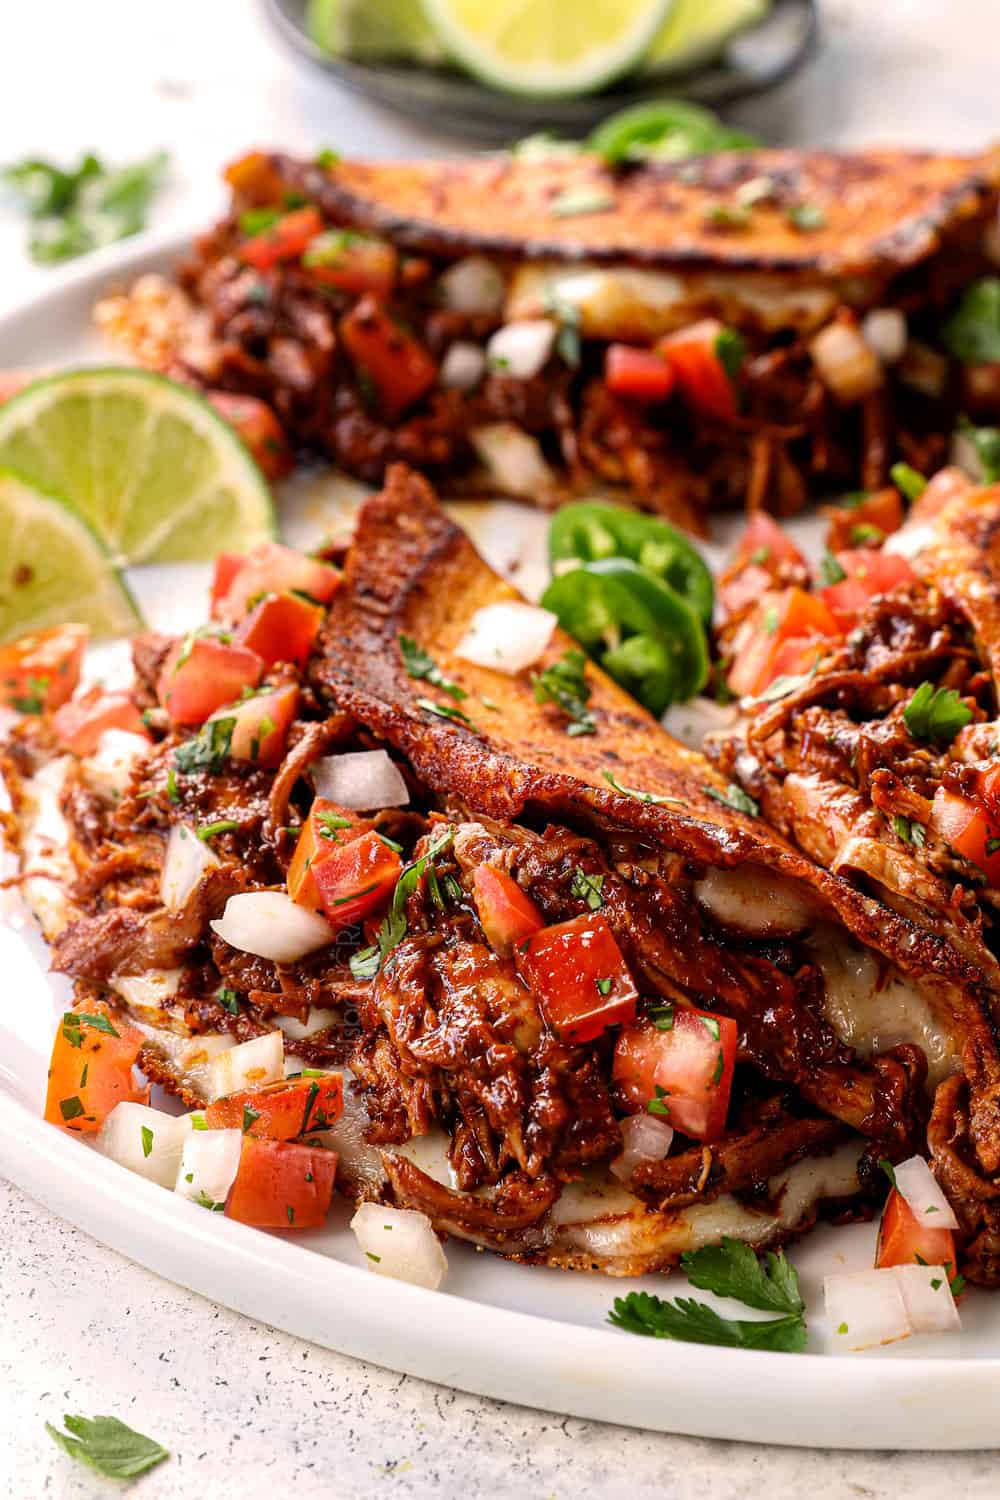
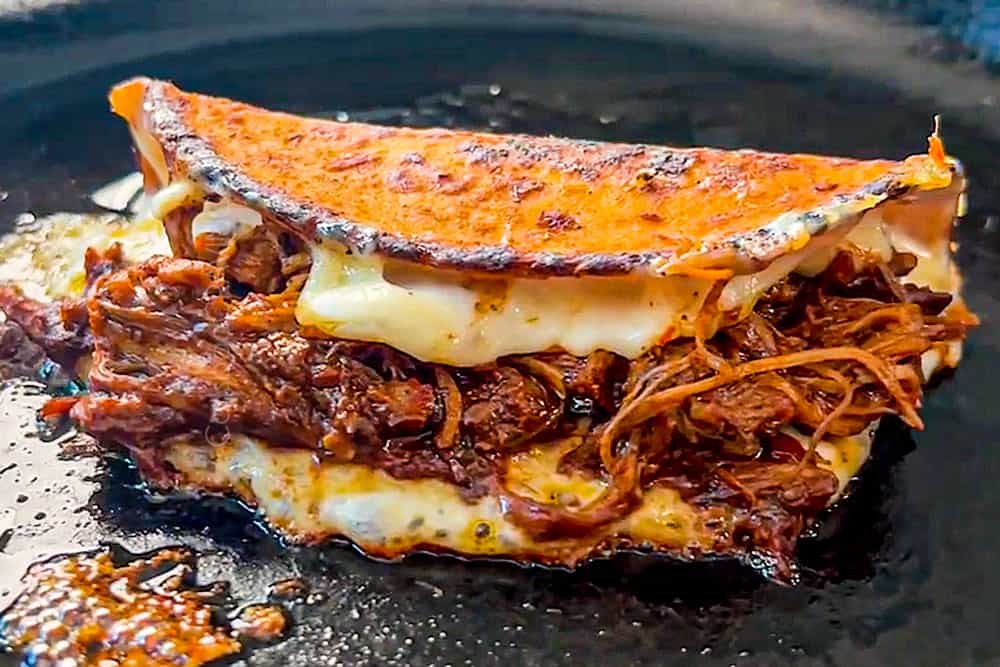
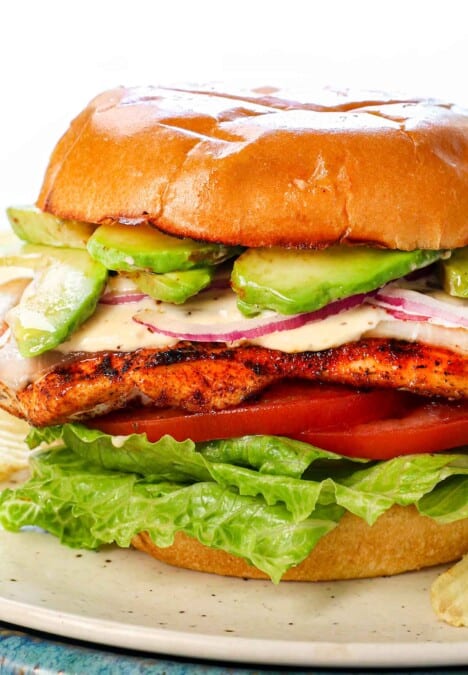
Chicken Birria Tacos are made of fall apart tender chicken braised in adobo sauce that cling to some of the chili sauce as its shredded so it’s rich, saucy and dizzyingly flavorful. The shredded chicken is stuffed inside a corn tortilla that’s been dipped in a thin layer of the braising chili sauce, then pan fried in a sizzling hot skillet to crispy gloriousness. Once the tortilla is golden, it’s folded over to form a crunchy taco. A layer of Oaxaca cheese is often added to create Chicken Quesabirria, because ooey gooey melty cheese makes everything better!
The Chicken Birria tacos are topped with chopped onions and cilantro and served with a side of the leftover rich and flavorful consomé broth for dipping, much like a French dip sandwich or grilled cheese and tomato soup,

Chicken Birria Tacos Recipe Ingredients
The ingredients list for this Birria Chicken Tacos recipe is broken down into four parts: 1) the chicken, 2) the spices for the adobo sauce, 3) the remaining ingredients for the adobo sauce and 4) the tacos. The ingredients list may look long at first glance, but that’s just because it’s packed with flavorful spices!
The Chicken :
The chicken is first seared to lock in its juices and add flavor then mixed into the adobo sauce and finished in the oven, .
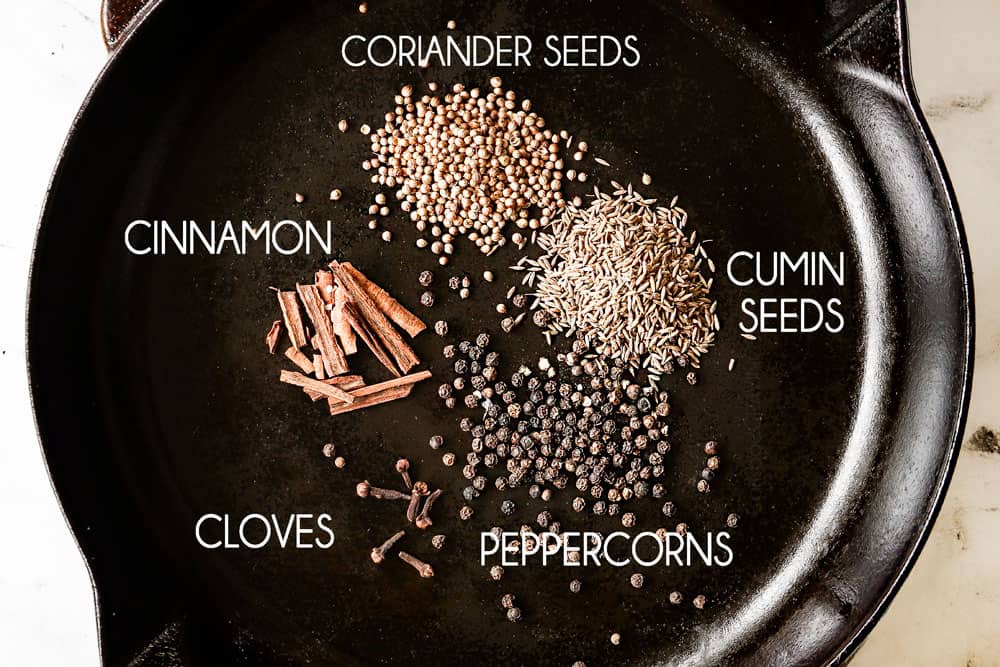
The Whole Spices
The whole spices are toasted to unlock their flavor, then stewed with the chilies and blended into the smoky adobo sauce. I have included dried and granulated substitutions in the recipe, but go whole if you can because their toasted aroma adds a complex depth to the adobo sauce. Many of these seasonings can be picked up at the grocery store, but you may need to order some online. I’ve linked the seasonings below to Amazon for easy purchasing if need be:
The Sauce
In addition to the whole spices, the adobo sauce is made with whole ground chilies, onions, garlic, tomatoes and apple cider vinegar for its signature tanginess. I’ve provided more information on the dried chiles further down this post, but here’s an overview of these ingredients:
What Kinds of Chiles Are in Adobo Sauce?
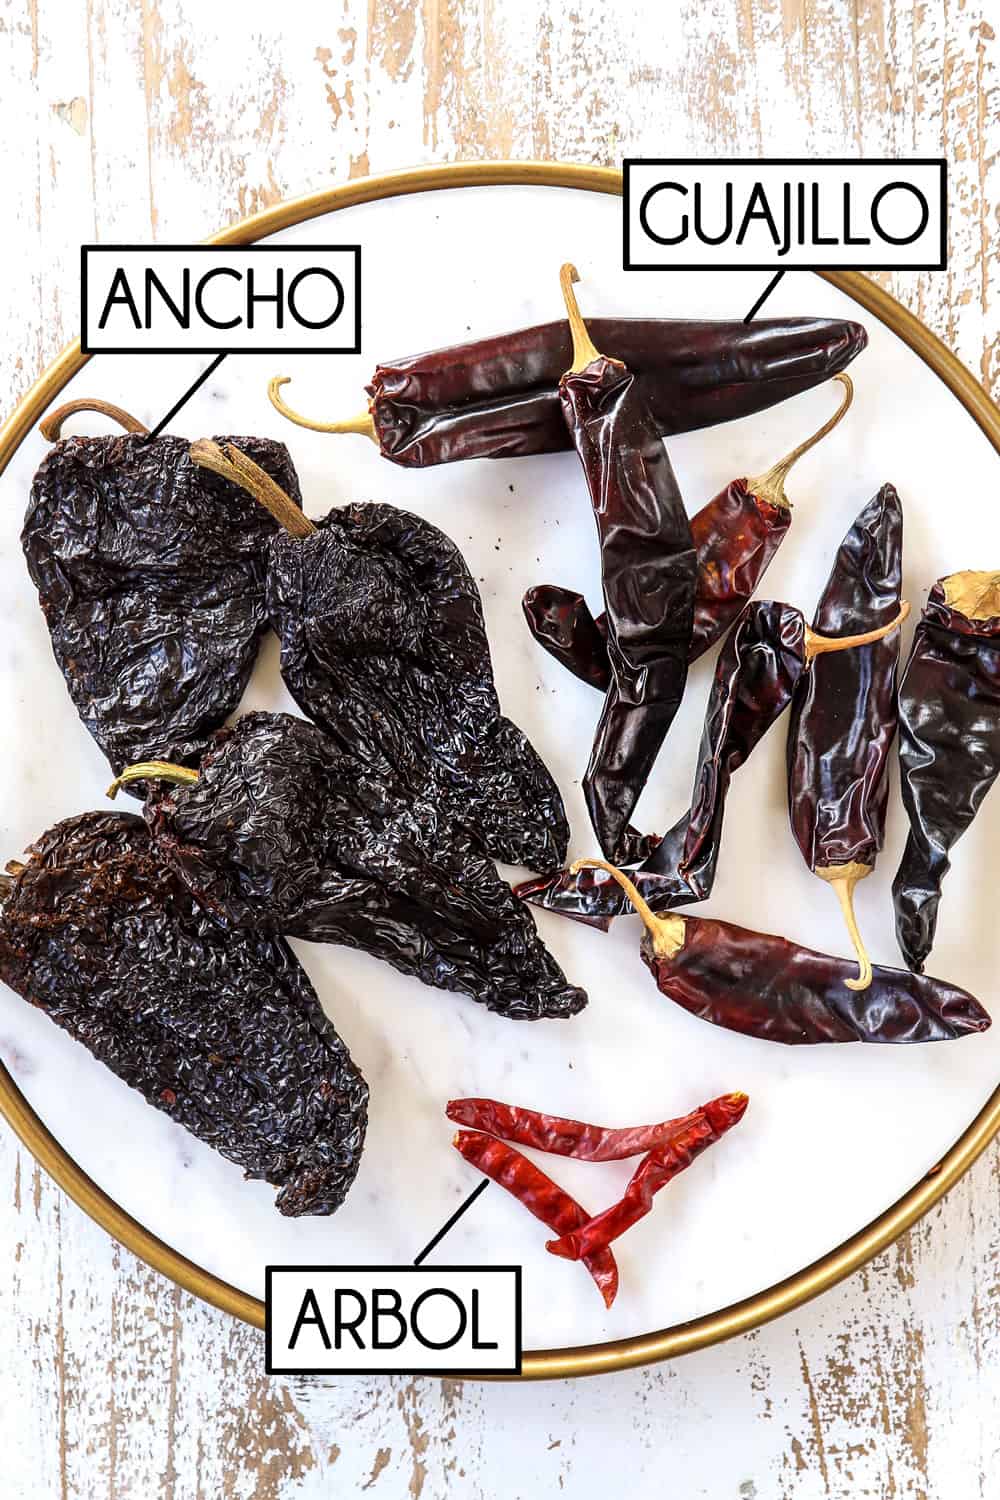
Adobe sauce is made with Mexican dried chili peppers — namely guajillo peppers, ancho peppers, and chiles de arbol. Here’s what to know:
Guajillo chiles: These chilies are considered mild-medium in terms of heat, with a heat rating of 2,500 to 5,000 on the Scoville Heat Scale (SHU), compared with jalapeño peppers — which can reach 8,000 SHU — and habaneros, which can reach 350,000 SHU! Guajillo chiles are known as mirasols or “sun gazers,” because the peppers grow upright, tipped toward the sun. The ripened chilies are dried and smoked until they reach a deep garnet and boast a sweet berry-toned heat (think cranberries) and mild smokiness.
Ancho chiles: These are dried poblano chiles with sweet, earthy, rich flavor. They are considered some of the mildest chili peppers, measuring between 1,000 – 2,000 Scoville Heat Units (SHU). Both the guajillo chiles and the ancho chiles will add wonderfully complex flavor to your recipe but will not make the adobo sauce spicy, simply flavorful.
Arbol chiles: These chilies are also known as bird’s beak chili and rat’s tail chili. They are very spicy and should not be used plain but as an enhancer to either guajillo chiles or ancho chiles. Arbol chiles have a heat rating between 15,000 – 30,000 SHU. I recommend one arbol chili to bring a little heat to the adobo sauce. It won’t make it super spicy, but rather add a medium kick for a more rounded flavor. If you know you love spicy, then you can add two.
FOR THE Chicken QUESA BIRRIA TACOS

how to make chicken birria tacos at a glance
Here’s a quick breakdown of the steps, with a detailed outline in the following section:
1. Toast the spices
2. Sear the chicken
3. Stew the chili peppers, tomatoes and spices
4. Blend the stewed chilies to make the adobo sauce
5. Cook the chicken in the sauce then shred
6. Dip tortillas in the sauce
7. Pan fry the tortillas and stuff with chicken and cheese
8. Dip in the consume and eat!

HOW TO MAKE chicken birria tacos
Making Chicken Birria Tacos takes about a third less time than making Beef Birria Tacos because the chicken only takes about 30 minutes to cook. So, while there are a few steps, you will LOVE the end result! Here’s a breakdown of this recipe with step by step photos (full recipe measurements in the recipe card at the end of the post):
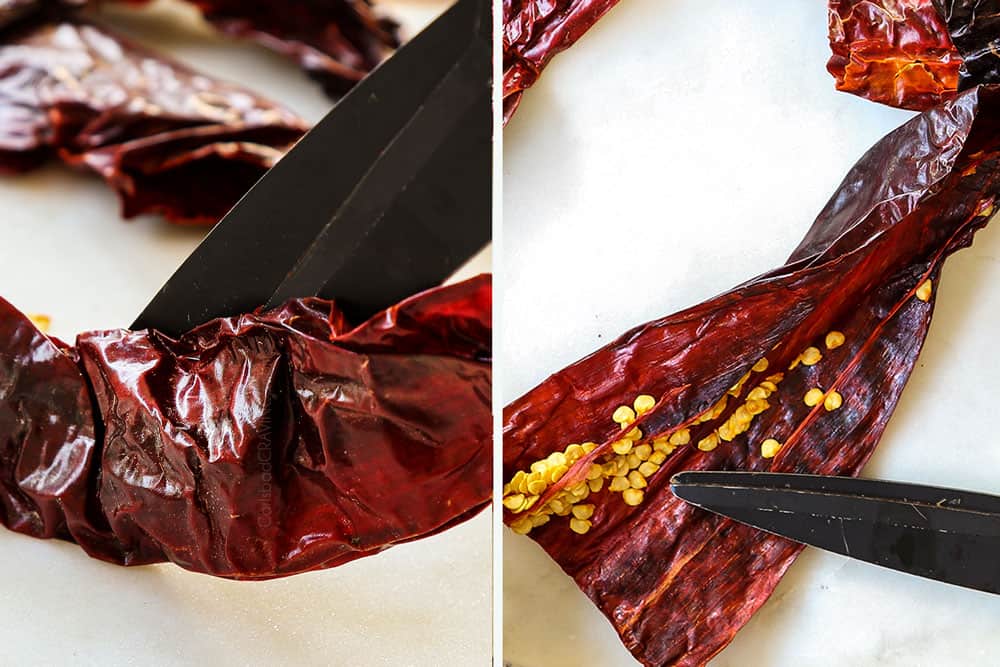
Step 1: Remove the Seeds from the Chiles
- The seeds need to be removed from the chilies before using because the seeds contain most of the heat – if you leave them in, your mouth will be on fire and the adobo sauce will be inedible.
- The easiest way to remove the seeds is to cut the tops off of the chilies with kitchen shears. Next, cut the chilies along one edge and open them like a book to expose the seeds inside.
- Scrape out all of the seeds.
- Next, toast the chilies in a dry skillet for just a few minutes. Set aside until ready to use.
Step 2: Toast the Whole Spices
- Dry toast the whole spices over medium heat until super fragrant. You can do this any time before making the recipe. Set aside until ready to use.
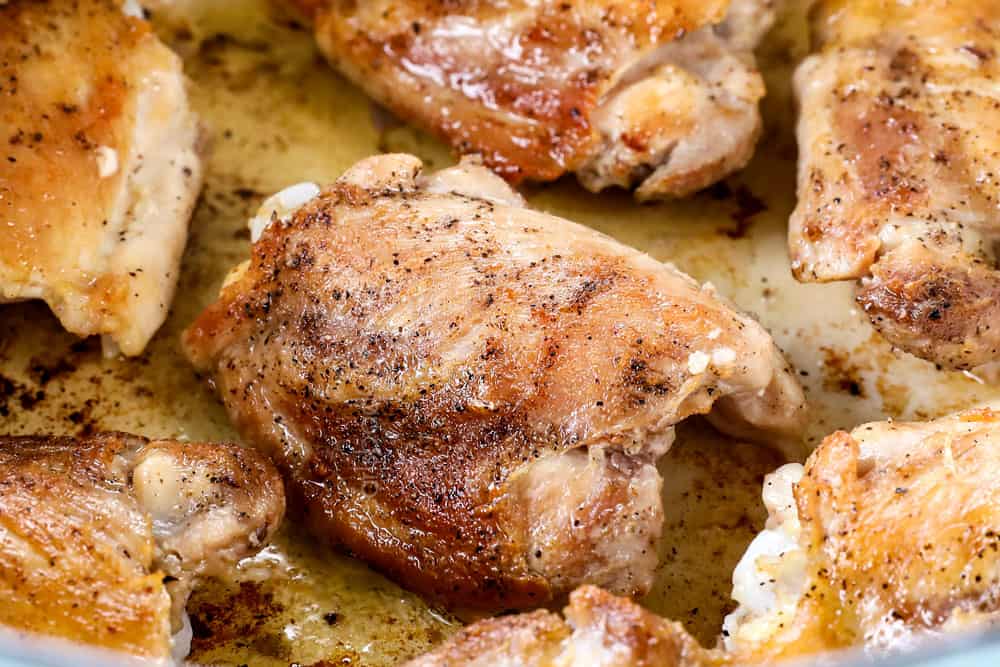
Step 3: sear the chicken
- Season both sides of the chicken with salt and black pepper.
- Sear the chicken in batches in sizzling hot oil over medium-high heat. I recommend using the same pot you’re going to make the adobo sauce in to capitalize on all those browned flavor bits that will be stuck to the bottom of the pan!
- Remove the chicken from the pan but leave the drippings.
Step 4: Sauté the Aromatics
- Now it’s time to scrape up those brown bits! Heat some oil in the chicken drippings. Add the onions and sauté until softened. Add the garlic and sauté for 1 minute.

Step 4: Stew the Chilies
- Add the toasted spices, deseeded chilies, tomatoes, apple cider vinegar, dried oregano, smoked paprika, dried thyme and bay leaves. Add 3 cups of chicken broth. Bring to a simmer for 10-15 minutes, until the peppers are very soft, stirring occasionally.
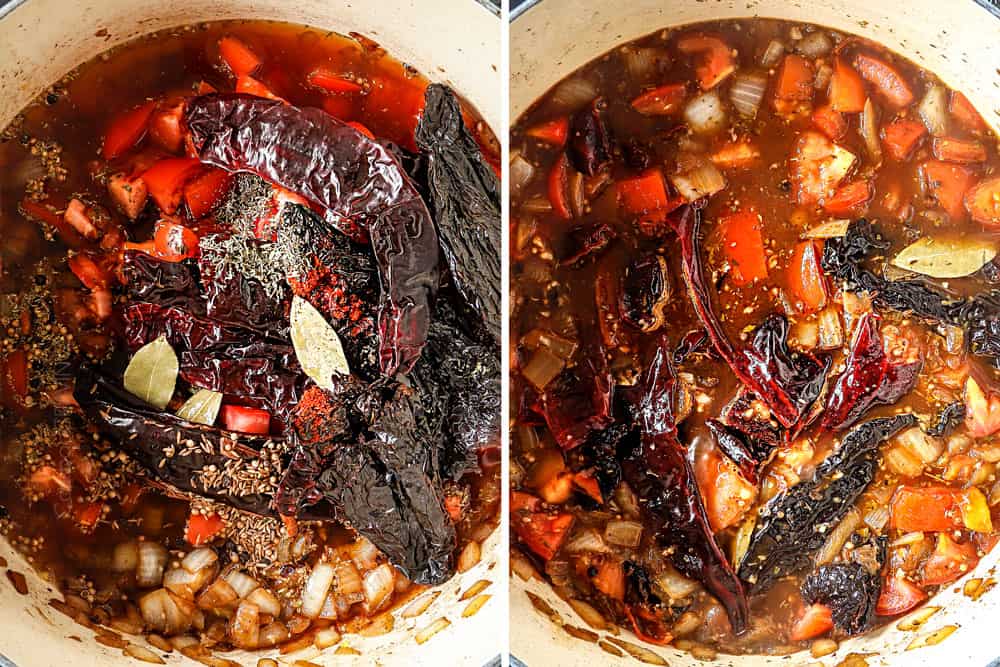
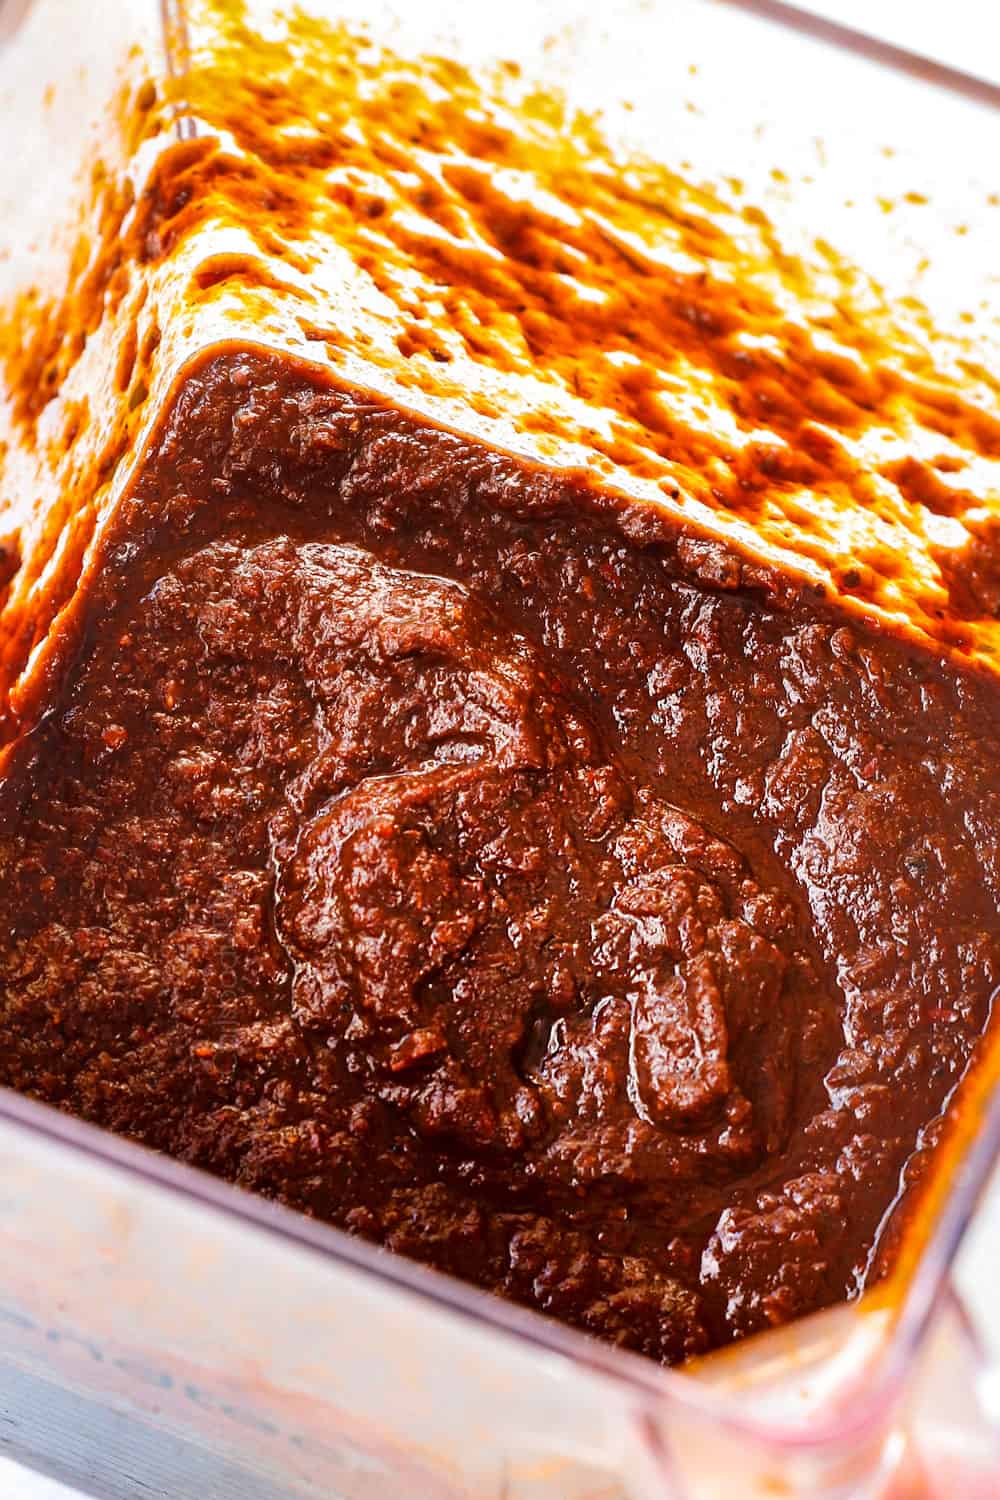
Step 5: Blend the sauce
- Transfer the mixture to a high-powered blender and puree until smooth.
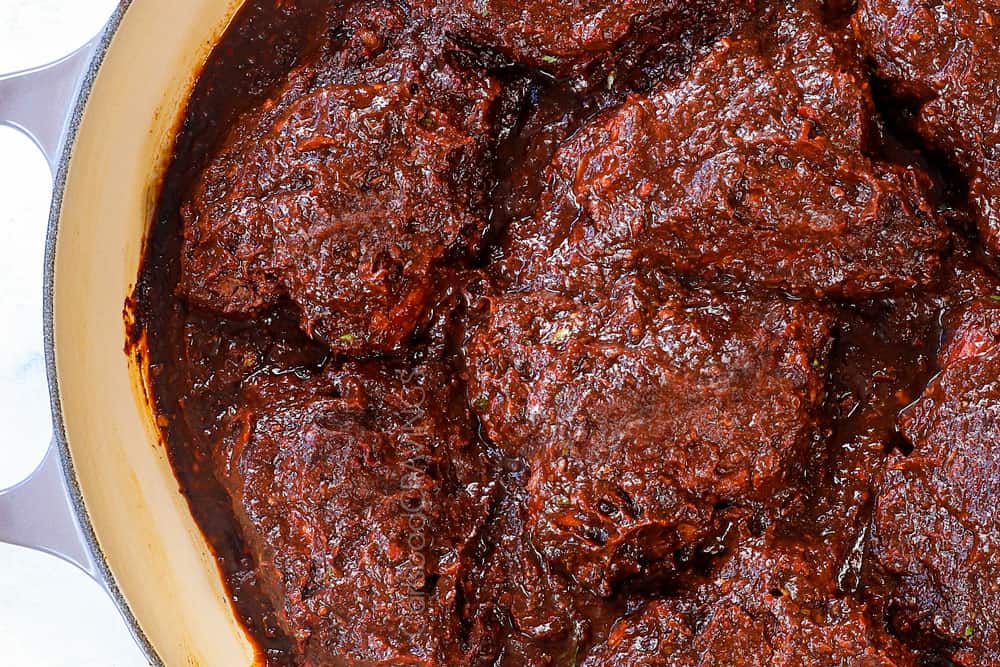
Step 6: braise the chicken
- Add the chicken back to the Dutch oven (I use my braiser) followed by the adobo sauce.
- Cover, bring to a simmer, then transfer to the oven to bake for about 30 minutes.
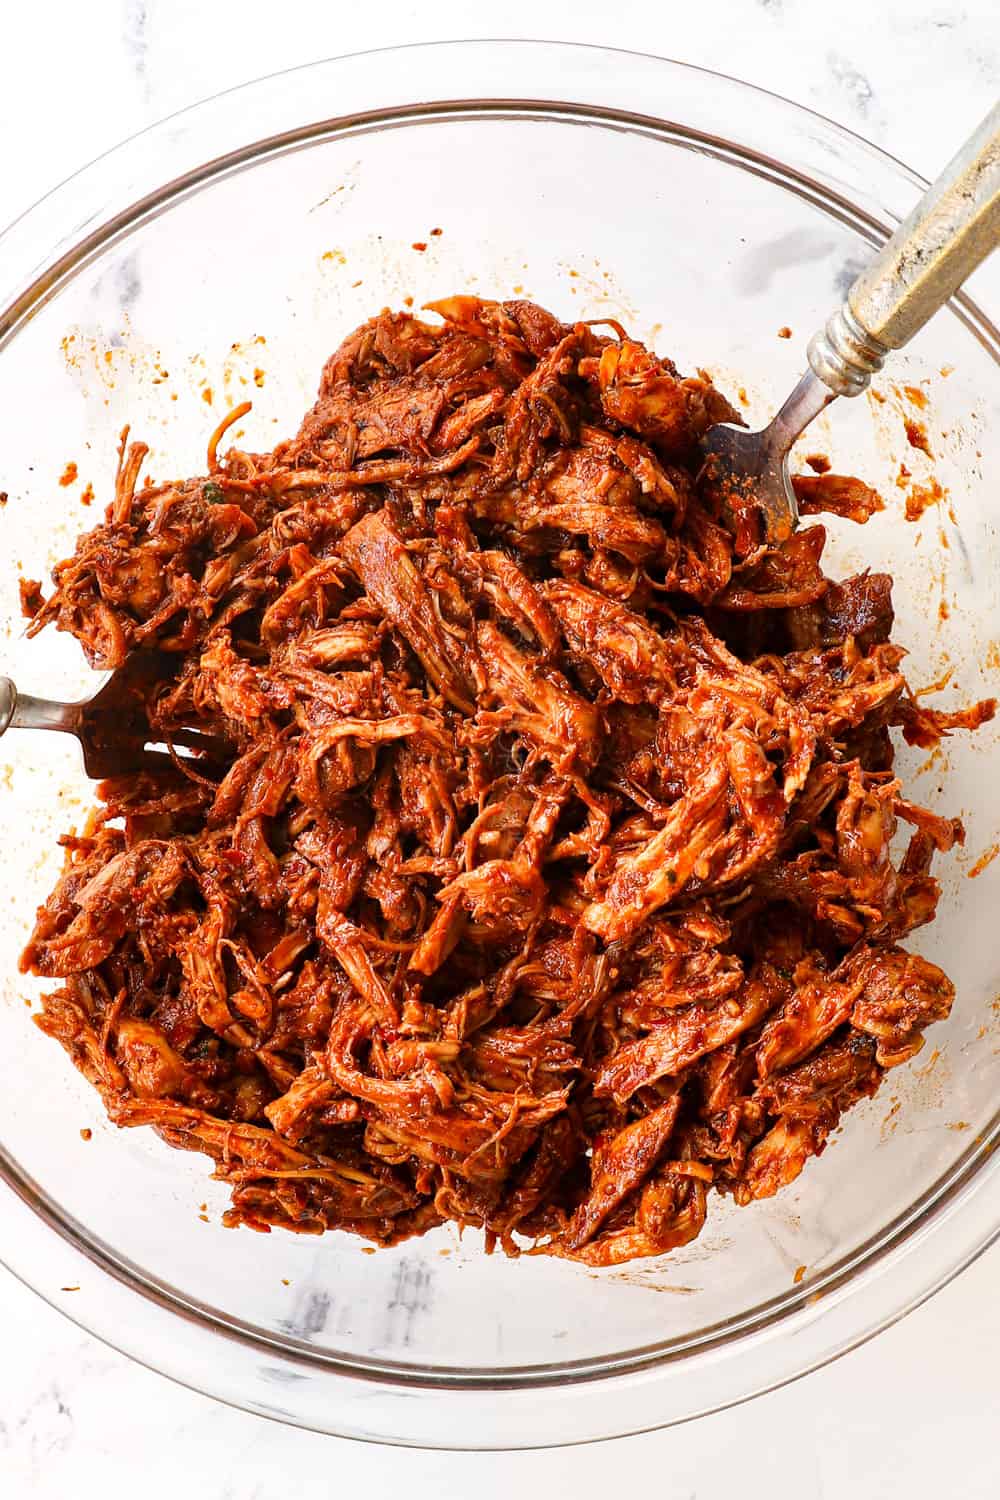
- Remove the chicken from the bones and shred.
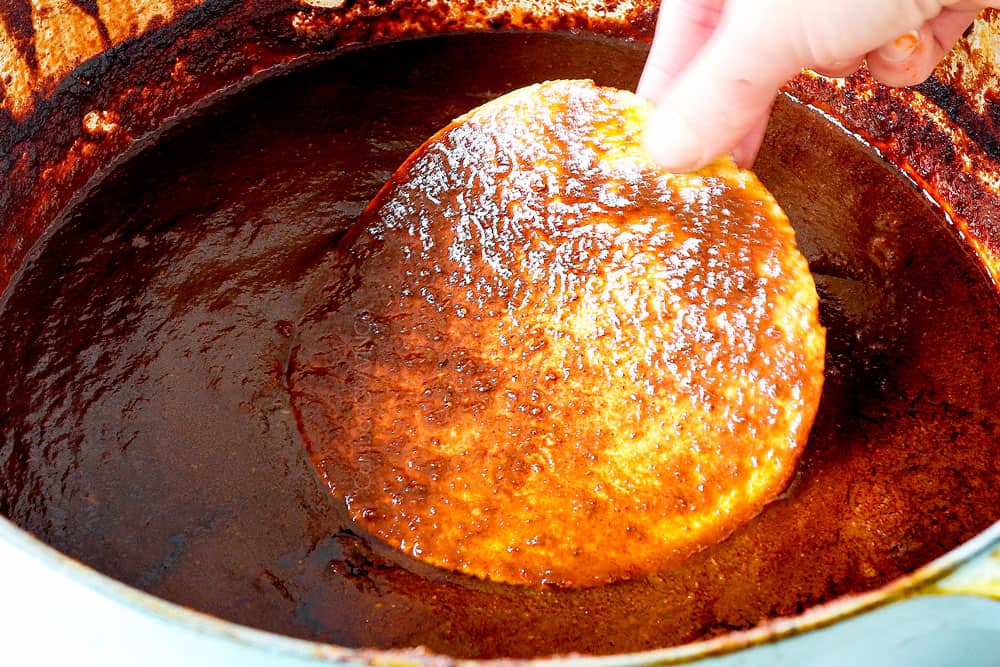
Step 7: make the tacos
- Cook the tortilla. Heat some vegetable oil in a cast iron skillet or nonstick skillet over medium heat. Working with one tortilla at a time, dip it into the top of the broth and add it to the skillet. Press the tortilla down with a spatula because it will start to bubble and pull away as it cooks. Cook for 1-2 minutes until the bottom is golden.
- Make it cheesy. Flip the tortilla over and immediately add cheese. Cover, and cook until the cheese is mostly melted. If you aren’t using cheese, then don’t cover the taco.
- Add meat. Uncover and top half of the cheese with shredded chicken.
- Fold. Cook until the bottom of the tortilla is lightly charred then fold the tortilla over in half to form a taco.
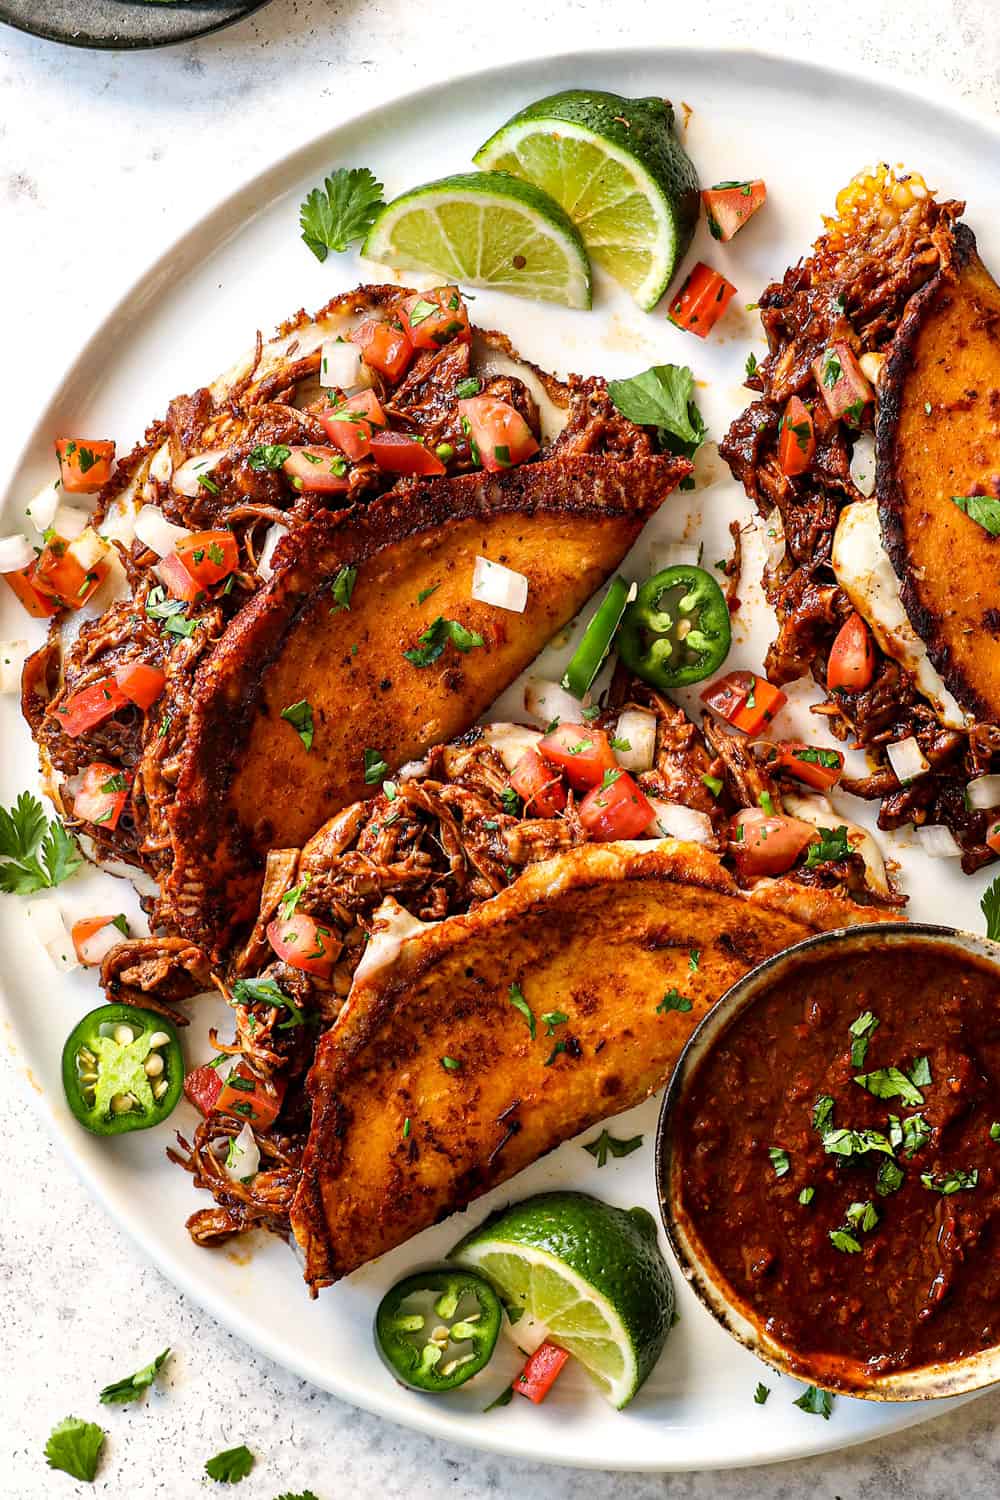
Step 8: SERVING chicken BIRRIA TACOS:
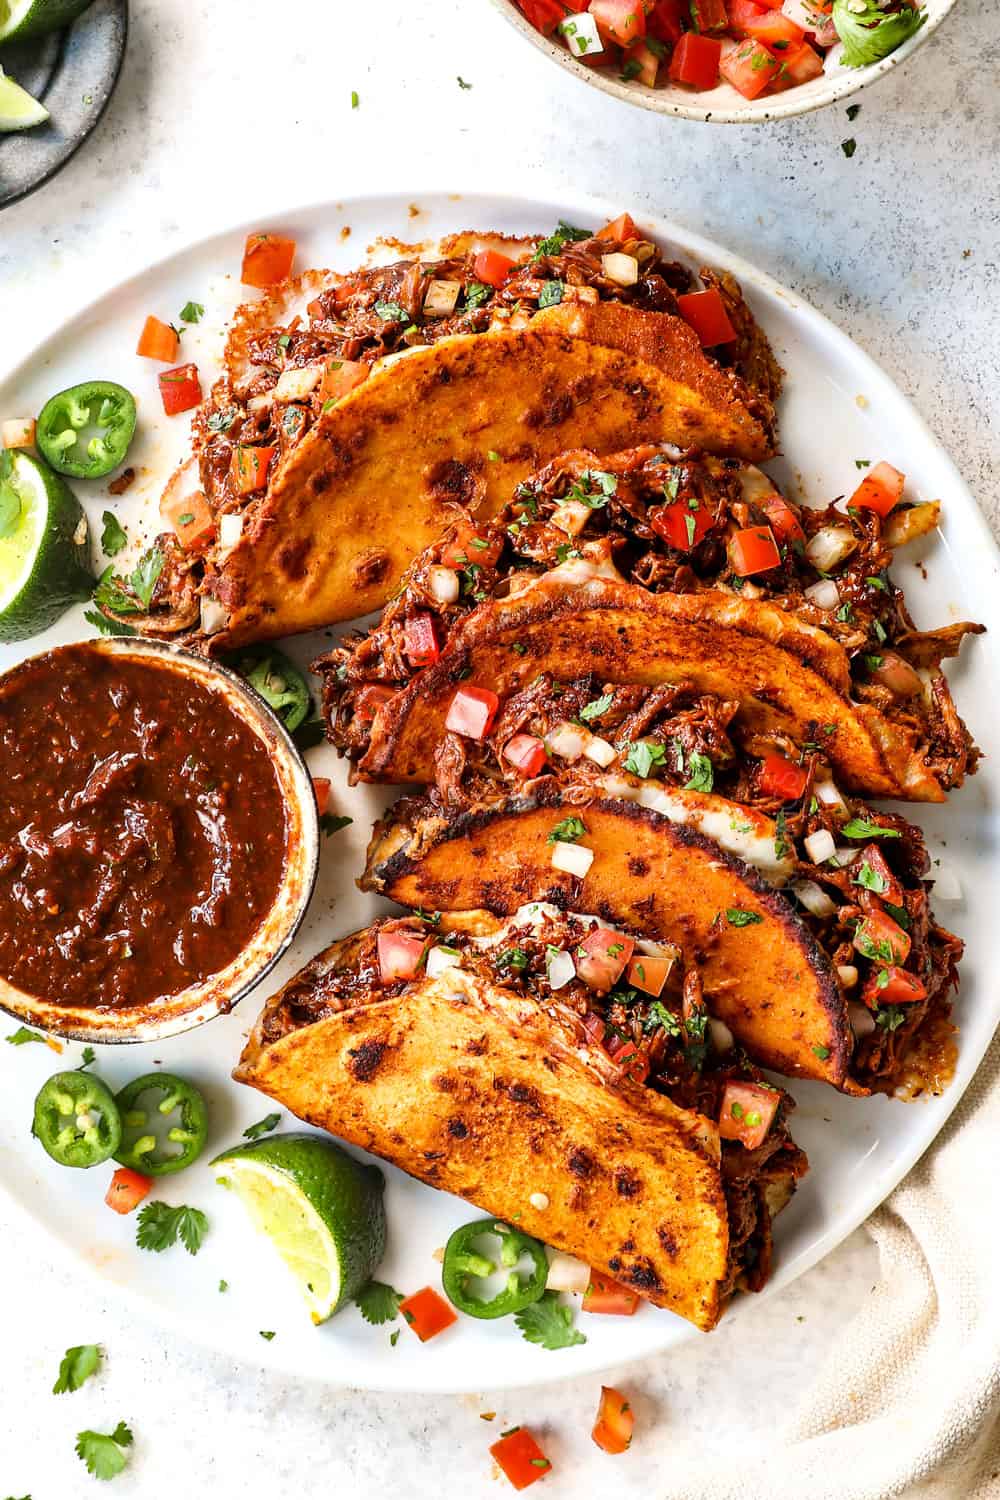
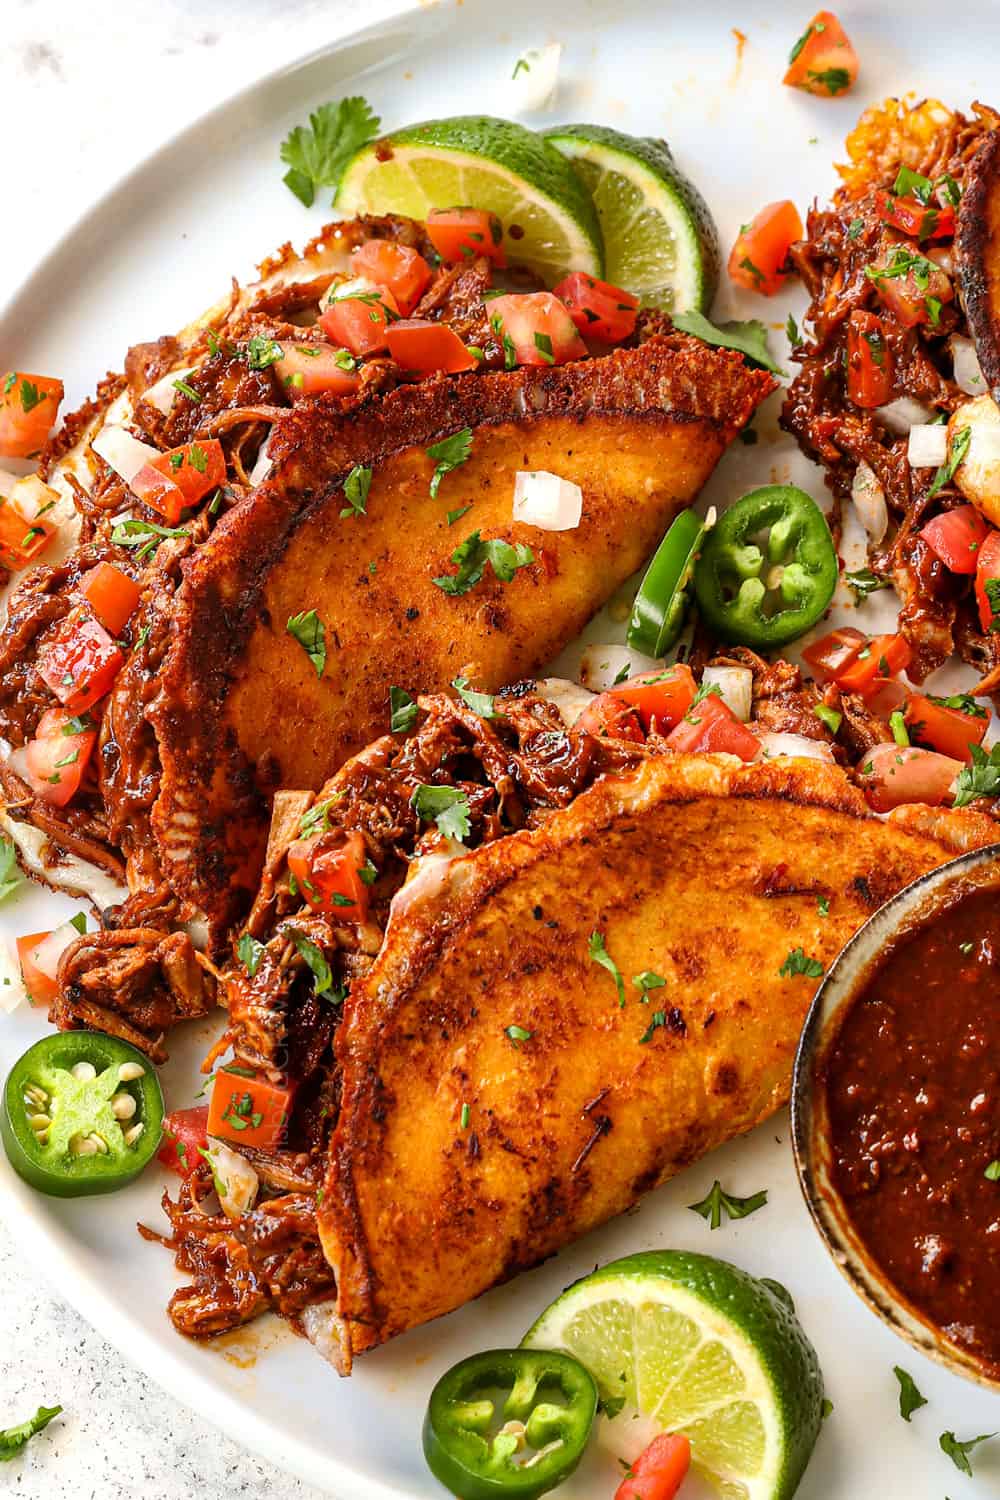
- Serve the tacos on a plate with a side of the consume (remaining sauce) and top the tacos with desired onions/cilantro or pico de gallo and dunk into the dipping sauce. And drool.

meal prep
You can prepare the entire recipe in advance, or just parts of it. This will not only save you time but will make the Chicken Birria Tacos more flavorful!
–Spices: can be toasted and stored in an airtight container for up to 1 year!
–Sauce: can be made and stored in the refrigerator up to 3 days or frozen for up to 3 months.
–Chicken: can be seasoned, seared and stored in an airtight container for up to 2 days. You can proceed to bake the chicken and shred or simply add it to the chili sauce and bake the next day.
–Cheese: string/shred the cheese and store in an airtight container in the refrigerator until ready to use.
–Toppings: chop the onions and cilantro and store in the refrigerator for up to two days. Add the lime juice before serving.

Can I make the chicken in the instant pot?
You bet! Add the seared chicken and adobo sauce back to the Instant Pot, and give the mixture a quick stir. Cook on high pressure for 13-15 minutes then let release naturally for 5 minutes.

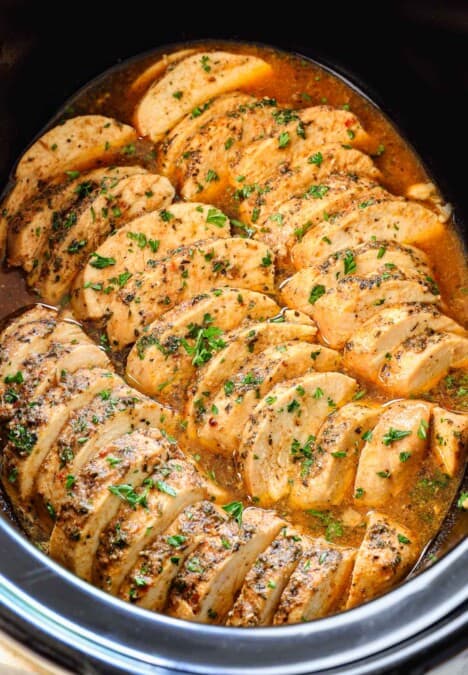
Can I make the chicken in the crockpot?
Yes! Lightly spray the slow cooker insert with cooking spray. Add the seared chicken and adobo sauce to the crockpot, and give it a stir to evenly coat the chicken. Cook on high for 2-4 hours or on low for 6-7 hours or until chicken is tender enough to shred.
Can I make the chicken on the stove?
Yes! Follow the recipe through adding the chicken and adobo sauce to the pot. Cover and gently simmer for 45 minutes to 1 hour, until the chicken is fall-apart tender. Keep an eye on the adobo sauce and add additional broth if needed because more liquid will evaporate on the stove.

Tips for making chicken birria tacos
•Make ahead. I recommend making part of the recipe a day ahead of time, either the adobo sauce or the up to shredded the chicken. This allows you to take a break from the kitchen so you don’t have to complete the entire recipe all in one day. Additionally, it allows the flavors to deepen further as the chicken rests overnight. I’ve included detailed make ahead instructions a few sections below.
•Don’t touch your eyes! When you are prepping the chili peppers, don’t touch your face, especially your eyes. You may even want to wear gloves if you have sensitive skin. When you cut into a chili pepper, capsaicin (a chemical irritant) can transfer to your skin causing a burning sensation, although it doesn’t actually damage the skin. Wash your hands immediately after prepping the chilies.
•Sear for flavor and moisture. Sear ALL sides of each piece of chicken until deeply golden! Make sure to sear the chicken in batches if your pot isn’t large enough so it will sear and not just steam. When searing the chicken, turn down the heat as needed – you want deeply golden bits but not any black bits.
•You may or may not need to strain the chili sauce. If you have a high-powered blender like a Blendtec or Vitamix, it should process the adobo sauce until completely smooth. If you don’t have a high-powered blender, then strain the adobo sauce through a fine mesh strainer into a bowl, using a rubber spatula to push the mixture through. The solids left behind are the spices so don’t toss them! You can wrap them in a cheese cloth or mash them and add them to the broth.
•Use quality tortillas. Quality tortillas are necessary so the tortillas don’t tear. If you can’t find homemade or freshly made tortillas, consider making them yourself. Just pick up some corn flour and follow my easy recipe. Homemade corn tortillas also freeze well so you can make them up to months ahead of time.
•Warm up your tortillas. If you use thick, quality tortillas like La Tortilla Factory, this step isn’t necessary, but if not, you’ll want to warm up the tortillas to make them pliable so they fold easily without tearing. To do this, wrap them up in damp paper towels and microwave for 30 seconds.
•Extra cheese is delicious. Don’t worry about overfilling the chicken tacos with cheese. It will toast on the skillet and become all sorts of caramelized yum.
•Keep prepared tacos warm in the oven until serving. This Chicken Birria Taco recipe makes about 12 tacos, and unless you eat as you cook, the first tacos in the batch will end up cold. To remedy this, I recommend storing the prepared tacos on a baking sheet in the oven in a single layer at 250 degrees F until all of the tacos are completed.
•Don’t stack the tacos. If you stack the tacos, they will steam and loose all crunchiness.
•Don’t skip the toppings. The chicken tacos need plenty of chopped cilantro and lime to cut through the richness with their bright freshness. Additionally, even if you don’t think you love raw onions, they compliment the chicken adobado beautifully.

Chicken Birria Taco variations
- Add or omit cheese. Chicken Quesa Birria Tacos are of course decadently fabulous but you may omit the cheese if you’d like.
- Use a different cheese. Oaxaca is the traditional cheese of choice but you can use other melting cheeses as well such mozzarella, Chihuahua, asadero, or Monterrey Jack cheese.
- Make softer tacos. Make the tacos as crispy or as soft as you’d like depending on how long you pan fry the tortillas.
- Baked crispy tacos. Spray a baking sheet with cooking spray. Preheat oven to 425 degrees F. Add a layer of cheese to the the tortilla and top it with shredded chicken. Fold the tortillas over in half and lightly press so they stay folded. Bake at 425 degrees for 8 minutes, flip the tacos over and bake an additional 5-8 minutes, or until the cheese is melted and the tacos are crispy.
- Make soft tacos. Make street-style chicken tacos by adding the chicken adobado to a charred or toasted corn tortilla and pile it with your favorite toppings.
- Spice them up. Serve the tacos with sliced or chopped jalapenos or hot sauce.
- Add Sour cream or Mexican Crema. Its refreshing, bright, silky creaminess compliments and cuts through the crunchy, cheesy richness.
- Top with pico de gallo. Add tomatoes to your chopped onions and cilantro to make pico de gallo for vibrant, punchy freshness. You can use my homemade pico de gallo recipe or store bought. You can make the salsa ahead of time and store it in an airtight container in the fridge. Bring to room temperature before serving.
- Top with salsa. Top the chicken tacos with traditional restaurant style salsa, or chunky salsas with varying textures and flavors like my black bean corn salsa, avocado corn salsa, charred corn salsa, pineapple salsa, or mango salsa– all SO good!
- Add extra toppings. Go as simple or as extravagant as you’d like. More topping ideas include: guacamole, sliced avocados, avocado crema, shredded lettuce, Cotija, pickled red onions, pickled jalapenos etc.

what to serve with chicken tacos
Tacos, rice, and beans are a match made in heaven! You can also serve these Chicken Birria Tacos alongside any number of roasted veggies, fruits, and more. Here are some side dish ideas to get your started:
•Rice: cilantro lime rice, Mexican rice, or avocado rice. You can also serve with quinoa, or low carb cauliflower rice.
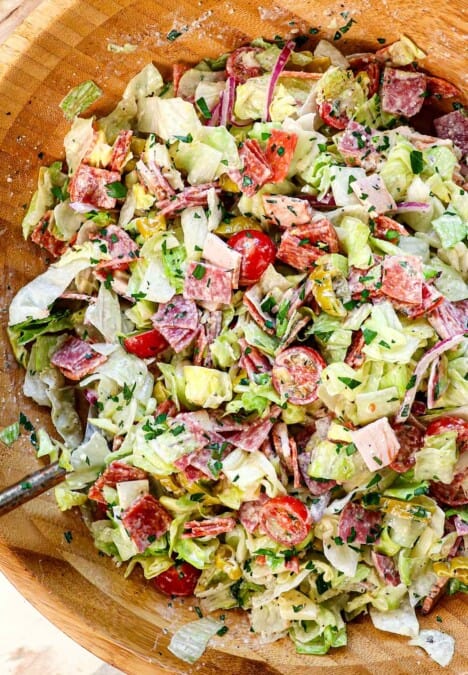
•Salads: Mexican pasta salad, Mexican Salad, Mexican street corn salad, Southwest salad, corn salad, or Southwest orzo salad.
•Veggies: elote (Mexican Grilled Street Corn), baked asparagus, roasted broccoli, roasted potatoes, roasted cauliflower.
•Fruit: pina colada fruit salad, fruit salad with honey lime vinaigrette, grape salad, winter fruit salad, or caramelized grilled pineapple.
•Dessert: Tres leches cake for the win!

Storing Chicken Birria
These tacos are best when served fresh. They won’t be as crispy when reheated unless you use an air fryer, but they will still be tasty.
Storage: store tacos in a single layer (with parchment paper in between layers if stacked) in an airtight container in the refrigerator for up to 5 days.
To freeze: wrap each taco individually in foil then add to a freezer bag or flash freeze the tacos by placing on a baking sheet without touching and freezing until solid. Transfer the solid tacos to a freezer bag

HOW TO REHEAT
Air fryer: This is my #1 preferred method for reheating anything crispy – or formerly crispy. It restores the tacos to their former crispy glory as if they were freshly made – seriously amazing! Place your tacos in the air fryer basket and air fry at 400 degrees F for 4-6 minutes, flipping halfway through.
Stove: Heat a large nonstick skillet to low then add the taco(s). Cook until heated through, rotating as needed. Once the inside is warm, you can crank the heat to medium-high to quickly toast the outside.
Oven: Place tacos on a wire rack placed over a baking pan. Bake in a preheated oven at 400 degrees F for 10-12 minutes or until warmed through.
Microwave: This is my least favorite method because the exterior doesn’t crisp up, but it’s convenient for hands off reheating. Transfer tacos to a microwave safe plate and microwave on high or 45 seconds then at 15-second intervals as needed.
faqs
Birria comes from the term “birrioso” the adjective of birria, meaning “low class” or “worth nothing,” possibly referring to the fact that birria was enjoyed by the working class in the early 1600s. Today, the term birria is synonymous with a deeply flavorful stew braised in chili sauce or “a meal of exquisite flavor, tradition, and culture,” anything but worthless.
Others claim the name comes from “berrear” which is the Spanish onomatopoeia for a goat’s bleating, named for the fact the stew was originally made of goat.
If you’ve never purchased or cooked with dried chilies before, don’t be intimidated! Dried chilies can be found at any Mexican market as well as many grocery stores (and many super Walmart’s depending on your location) in either the Mexican aisle or produce section. Many produce stores such as Sprouts and Whole Foods also carry packages of dried chilies. If you can’t find them or simply want a one-click option, then you can purchase them on Amazon here: ancho chiles, guajillo chili, arbol chiles.
Each package of chili peppers contains quite a few and they last for at least a year, so don’t worry about them going to waste. You can also use them in this Birria recipe, Chile Colorado, or my Pozole Rojo recipe.
origins of birria tacos
Birria Tacos aren’t just a new, random, Tiktok craze but are the best of something old (birria) and something new (dipping in consomé). While Birria Tacos are a somewhat new invention, we can trace the origins of back to 16th century Jalisco, Mexico. During this time, goats became the main meat source as a way to deal with and capitalize on the abundant, pesky goat population stemming from animals brought by the Spanish colonizers. The goat was stewed with local chilies and spices like oregano, thyme and cloves in a clay pot or in the ground for hours to tenderize the lean meat and to mellow out the gaminess.
Over time, the dish evolved and spread to other parts of the Mexico, including Aguascalientes, Michoacán, Durango, Zacatecas, Colima, Tijuana, Oaxaca and beyond. Most notably, Birria Taco stands seemed to flourish in Tijuana, Mexico in the early 2000s. Many of these stands swapped the goat meat for beef because it was more accessible and less gamy, which helped popularize the dish with tourists.
As far as dipping the taco in the consomé? We can thank food truck owner Teddy Vasquez for publicizing the dip. He may or may not have been the first to actually dunk Birria Tacos in the consomé, but he was definitely the first one to create viral videos.
In 2015, Teddy Vasquez was persuaded by a friend to learn the art of Birria in Tijuana, Mexico. After an entire year of immersing himself in everything Birria, he returned to Los Angeles and opened the taco stand, Teddy’s Red Tacos. After nine months, he saved enough money to open a food truck and ramped up his marketing. He began posting videos on Instagram showing Birria Tacos being dunked in the consomé.
Soon, other taqueros in Los Angeles and across the country started adding Birria Tacos to their menus. It wasn’t long before people from coast to coast, from all walks of life, began lining up around blocks for bites of Birria. And then came Quesabirria Tacos. They exploded onto Tiktok and Instagram with cheese spilling out the sides of the crispy shells making them the latest must-have craze. The Great Birria Boom” had arrived.
Today, thanks to Teddy Vasquez, Tiktok and Instagram, Birria Tacos are a household name, as they should be. They can be found on nearly every Mexican restaurant menu and even made right in your own home. Follow this Chicken Birria Tacos recipe and you’ll taste why the Birria Boom is here to stay!

WANT TO TRY THIS chicken birria taco RECIPE?
PIN IT TO YOUR chicken, Mexican or dinner BOARD TO SAVE FOR LATER!
FIND ME ON PINTEREST FOR MORE GREAT RECIPES! I AM ALWAYS PINNING :)!
©Carlsbad Cravings by CarlsbadCravings.com

Chicken Birria
Save This Recipe To Your Recipe Box
You can now create an account on our site and save your favorite recipes all in one place!
Ingredients
SPICES FOR ADOBO SAUCE
- 1 tablespoon black peppercorns (may sub 1 teaspoon ground pepper)
- 1 tablespoon cumin seeds (may sub 1 tsp ground)
- 1 tablespoon coriander seeds (may sub 1 tsp ground)
- 6 whole cloves (may sub ¼ teaspoon ground)
- 1/2 cinnamon stick smashed/broken up (sub ¼ teaspoon ground)
ADOBO SAUCE/CONSOMÉ
- 1 yellow onion, chopped
- 8 cloves garlic, minced
- 6 dried guajillo chiles, stems and seeds removed
- 4 dried ancho chiles, stems and seeds removed
- 1 chili de arbol, stem and seeds removed
- 4 vine-ripe tomatoes, roughly chopped (or Roma tomatoes)
- 2 tablespoons apple cider vinegar
- 1 tablespoon dried oregano
- 1 tsp EACH smoked paprika, dried thyme
- 1/2 teaspoon salt
- 4 bay leaves
- 3 cups reduced sodium chicken broth
TACOS
- 12-14 corn tortillas (like La Tortilla Factory)
- 12 ounces Oaxacan cheese or mozzarella separated into strings
- 1 recipe pico de gallo OR the following:
- ½ white onion chopped
- ¼ cup cilantro minced
- 1-2 tablespoons lime juice
- pinch of salt
Instructions
Toast Whole Spices and Chilies
- Dry toast the whole spices for the adobo sauce (if using) in a large Dutch oven or braiser over medium heat until evenly toasted, stirring occassionally. They're done once they smell super fragrant. Transfer to a bowl or plate.
- Add the peppers and dry roast for a couple minutes per side; remove to a plate.
SEAR THE CHICKEN
- Preheat the oven to 350 degrees F.
- Season both sides of the chicken with 1 teaspoon salt and ½ teaspoon pepper.
- Heat 2 tablespoons oil in the now empty pot over medium-high heat. Add the chicken in an even layer and sear both sides until deeply browned (work in batches if needed); remove to a plate but leaving the drippings.
MAKE THE SAUCE
- Add a drizzle of oil to the drippings if needed/seems dry; heat over medium-high heat. Add the onions and sauté until softened. Add the garlic and sauté for 1 minute.
- Add the toasted spices to the pot followed by the deseeded chilies, and all the remaining Adobo Sauce ingredients (through broth). Bring to a simmer for 10-15 minutes, until the peppers are very soft, stirring occasionally.
- Transfer the mixture to a high powered blender and purée until smooth, leaving a corner of the lid open and covered with a paper towel so steam can escape and it doesn’t explode. (NOTE: If you don’t have a high-powered blender, then strain the chili sauce through a fine mesh strainer into a bowl, using rubber spatula to push the mixture through. The solids left behind are the spices so don’t toss them! You can wrap them in a cheese cloth or mash them and add them back to the sauce.)
BRAISE AND SHRED THE CHICKEN
- Add the chicken back to the pot followed by the chili sauce, turn to coat the chicken. Cover, bring to a simmer, then transfer to the preheated oven. Cook for 20-30 minutes or until chicken shreds easily and registers 175 degrees F on an instant read thermometer (165 degrees F if using chicken breasts). You can prep the toppings (below) while the chicken cooks).
- Using tongs, transfer the chicken to a bowl; keep the sauce coating the chicken but leave most if it behind in the pot for dipping. Once cool enough to thandle, remove the bones and shred the chicken.
ASSEMBLE THE TACOS
- In a medium bowl, make the pico de gallo if using, or mix together onion, cilantro, lime and salt to taste; set aside.
- Heat 1 tablespoon vegetable oil in a cast iron skillet or nonstick skillet over medium heat. Working with one tortilla at a time, lightly dip it in the top of the sauce and add it to the skillet. Press the tortilla down with a spatula because it will start to bubble and pull away as it cooks. Cook for 1-2 minutes until the bottom is golden.
- Flip the tortilla over and immediately cover the entire surface with shredded cheese. Cover, and cook until the cheese is mostly melted. Uncover and top half of the cheese with shredded chicken. Cook until the bottom is lightly charred then fold the tortilla over in half to form a taco.
- Transfer to a plate and serve with the pico de gallo or cilantro/onion mixture and a bowl of the consomé liquid (remaining sauce) as a dipping sauce. Dig in!
Video
Notes
- Dried Chilies:Dried chilies can be found at any Mexican market as well as many grocery stores (and many super Walmart’s depending on your location) in either the Mexican aisle or produce section. Many produce stores such as Sprouts and Whole Foods also carry packages of dried chilies. If you can’t find them or simply want a one-click option, then you can purchase them on Amazon here: ancho chiles, guajillo chili, arbol chiles.
- Chicken: I highly recommend bone-in chicken thighs for the juiciest, richest tasting option, however, boneless chicken thighs are a close second. You may substitute with chicken breasts, but adjust the cooking time as needed and don’t overcook as they dry out easily.
- Tortillas: Homemade corn tortillas, or packages that say, “freshly made,” “organic” or “made in small batches” are best so the tortillas don’t crack or tear. I love La Tortilla Factory Corn Tortillas which you can find on Amazon here. If using less quality corn tortillas, wrap them in damp paper towels and microwave for 30 seconds to warm before using.
- Oaxaca cheese: should be easy to find at your grocery store or at least Sprouts or Whole Foods. If you are unfamiliar with Oaxaca cheese, it comes in a round package that is actually a log of cheese spiraled into a circle. You will want to peel the cheese into strips, much like string cheese, so it melts quickly. If you are unable to find Oaxaca, use freshly grated mozzarella, it tastes surprisingly similar.
- To keep prepared tacos warm in the oven until serving: place tacos on a baking sheet in a single layer at 250 degrees F in the oven until all of the tacos are completed. Don’t stack the tacos at any time or they will steak and become soggy.
Shredded Chicken Cooking Options
- Instant Pot Chicken Adobado: Add the seared chicken and adobo sauce back to the Instant Pot, and give the mixture a quick stir. Cook on high pressure for 13-15 minutes then let release naturally for 5 minutes.
- Crockpot Chicken Adobado: Lightly spray the slow cooker insert with cooking spray. Add the seared chicken and adobo sauce to the crockpot, and give it a stir to evenly coat the chicken. Cook on high for 2-4 hours or on low for 6-7 hours or until chicken is tender enough to shred.
- Stovetop Chicken Adobado: Cover and gently simmer for 45 minutes to 1 hour, until the chicken is fall-apart tender. Keep an eye on the adobo sauce and add additional broth if needed because more liquid will evaporate on the stove.
Prep Ahead
- Spices: can be toasted and stored in an airtight container for up to 1 year!
- Sauce: can be made and stored in the refrigerator up to 3 days or frozen for up to 3 months.
- Chicken: can be seasoned, seared and stored in an airtight container for up to 2 days. You can proceed to bake the chicken and shred or simply add it to the chili sauce and bake the next day.
- Cheese: string/shred the cheese and store in an airtight container in the refrigerator until ready to use.
- Toppings: chop the onions and cilantro and store in the refrigerator for up to two days. Add the lime juice before serving.
Storage
Chicken Birria Tacos are best when served fresh. They won’t be as crispy when reheated unless you use an air fryer, but they will still be tasty.- Storage: store tacos in a single layer (with parchment paper in between layers if stacked) in an airtight container in the refrigerator for up to 5 days.
- To freeze: wrap each taco individually in foil then add to a freezer bag or flash freeze the tacos by placing on a baking sheet without touching and freezing until solid. Transfer the solid tacos to a freezer bag
To Reheat
- Air fryer: This is my #1 preferred method for reheating anything crispy – or formerly crispy. It restores the Chicken Birria Tacos to their former crispy glory as if they were freshly made – seriously amazing! Place your tacos in the air fryer basket and air fry at 400 degrees F for 4-6 minutes, flipping halfway through.
- Stove: Heat a large nonstick skillet to low then add the taco(s). Cook until heated through, rotating as needed. Once the inside is warm, you can crank the heat to medium-high to quickly toast the outside.
- Oven: Place tacos on a wire rack placed over a baking pan. Bake in a preheated oven at 400 degrees F for 10-12 minutes or until warmed through.
- Microwave: This is my least favorite method because the exterior doesn’t crisp up, but it’s convenient for hands off reheating. Transfer tacos to a microwave safe plate and microwave on high or 45 seconds then at 15-second intervals as needed.
Want To Make This Recipe?

Did You Make This Recipe?
Tag @CarlsbadCravings and Use #CarlsbadCravngs
Leave a Review, I Always Love Hearing From You!


Ekta says
OMGGGG I have been waiting for this recipe from you, even requested this some time ago. Thanks so much, will be making this soon. I am sure it will be delicious.
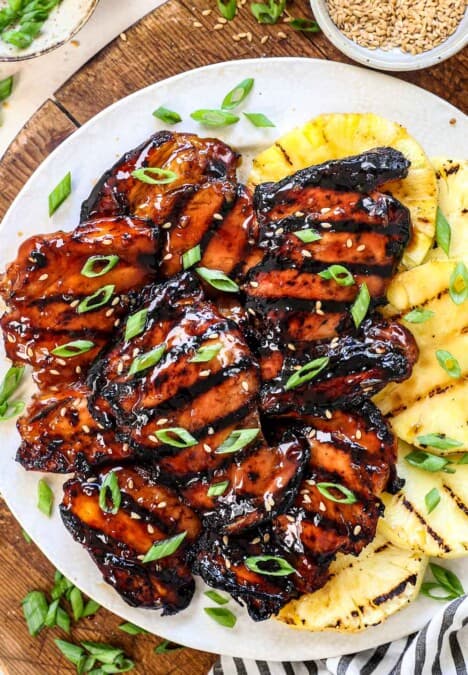
Just got done with a dinner party, made Cajun chicken, Cajun shrimp & rice, grape salad among other things, all your recipes, got rave reviews as always 🙂
Jen says
I hope you love it as much as us! I love hearing you made all of my recipes for a dinner party – I’m so flattered! What a delicious night!
Sherri says
My tacos didn’t get crispy. I’m not sure why. The recipe was delicious regardless but I’d like to figure out how to make the taco shells crispy on the pan fry. Any thoughts as to why this would happen?
Jen says
Hi Sherri, most likely the pan was not hot enough. I would maybe add additional oil and crank up the heat, that way you are virtually frying the tacos and there is no way they can’t crisp up! Also, take care not to saturate the tortilla in the sauce.
Lisa Kelly says
I’m so excited to try this recipe. I would prefer to use chicken breast, are you able to give an idea of how long to cook breast for?
Jen says
Hi Lisa, depending on the size of chicken breasts, they should take roughly the same amount of time. Enjoy!
Meghan says
This was FANTASTIC! So much flavor! And I thought this recipe was going to be incredibly challenging, it wasn’t! It was just a few steps I had never done before. SO GOOD!
Jen says
Thank you so much Meghan! I love that you tackled this recipe and it was easier than you thought – bravo!
Katie says
It’s nice to know that i took the time to review and you haven’t bothered to show it.What was wrong with my review? Because i said for my taste there just wasn’t enough flavour from the adabo so I added more chillies and everything else was positive ? I won’t bother next time,how rude.
Jen says
Hi Katie, I have over 350 pending reviews and simply haven’t gotten to your yet, my apologies.
Vicki says
Best check your rudeness level Katie ……Jen has soooooo many recipes, and all of them have comments. Your turn will come up!
Eva says
Hi! I’m making these for my family tonight. I excluded the hotter pepper and added chicken tomato bouillon. I also added a saxon with coriandor and annoto since i didnt have corriander. It’s quite pleasant, with only a hint of heat. The chicken is pressurizing in the instant pot now with the blended consumme. I Can’t wait to share with family.
Jen says
Thanks Eva! I hope everyone loved it!
Alex Raets says
Omg delicious thanks so much
As for the rude chic guess we should b calling her Karen
Jen says
You’re so welcome! I’m pleased you enjoyed it!
Shar says
I suggest if using chicken breasts to boil them or pre-cook in a crackpot. I tried the searing first and my breasts somehow ended up tough. Next time, I will cook them completely separately and then shred, then dip it in the adobo. My adobo had a punch of heat, a little bit too much. I ended up adding a good helping of brown sugar. I will have to play around with the recipe. Thanks, I enjoyed trying something new!
Jen says
Thanks for taking the time to comment! I’m glad to hear it was a good experience!