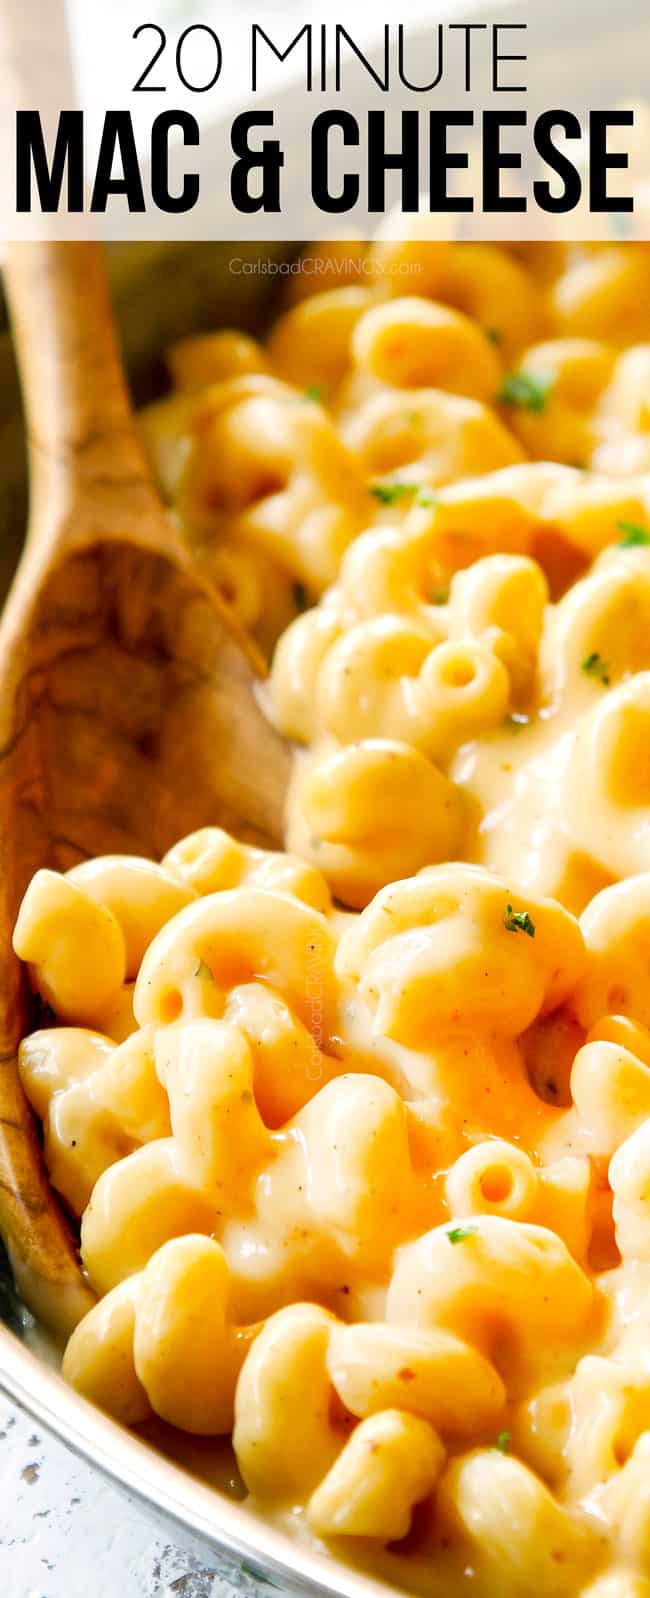
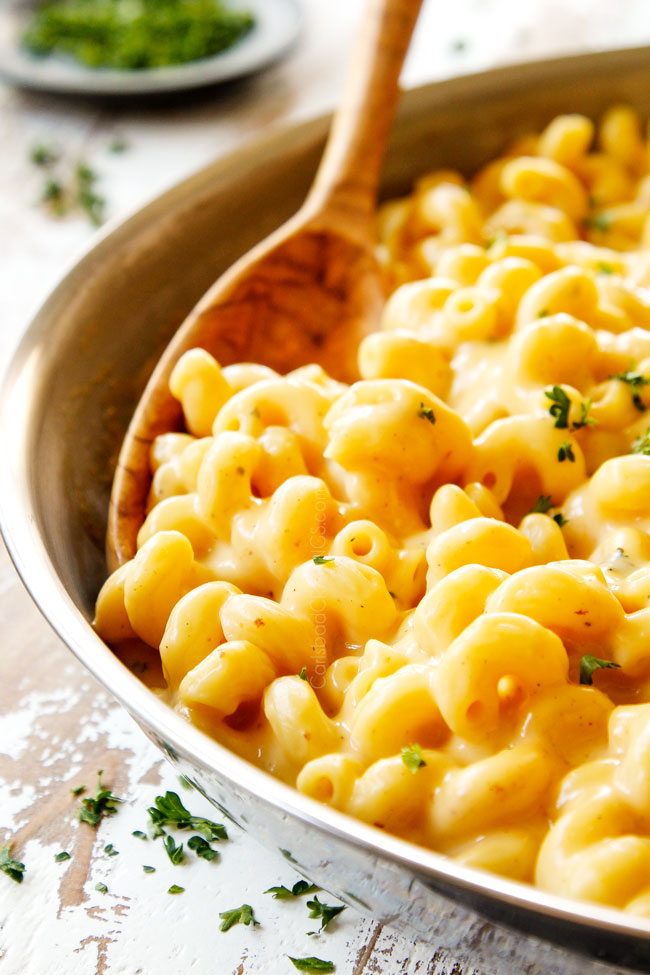
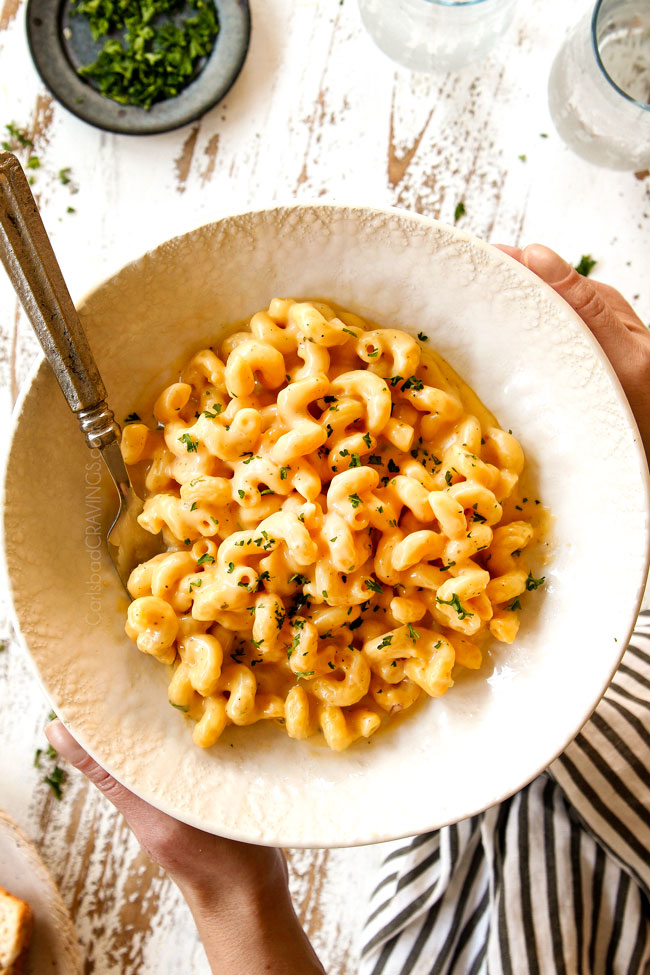
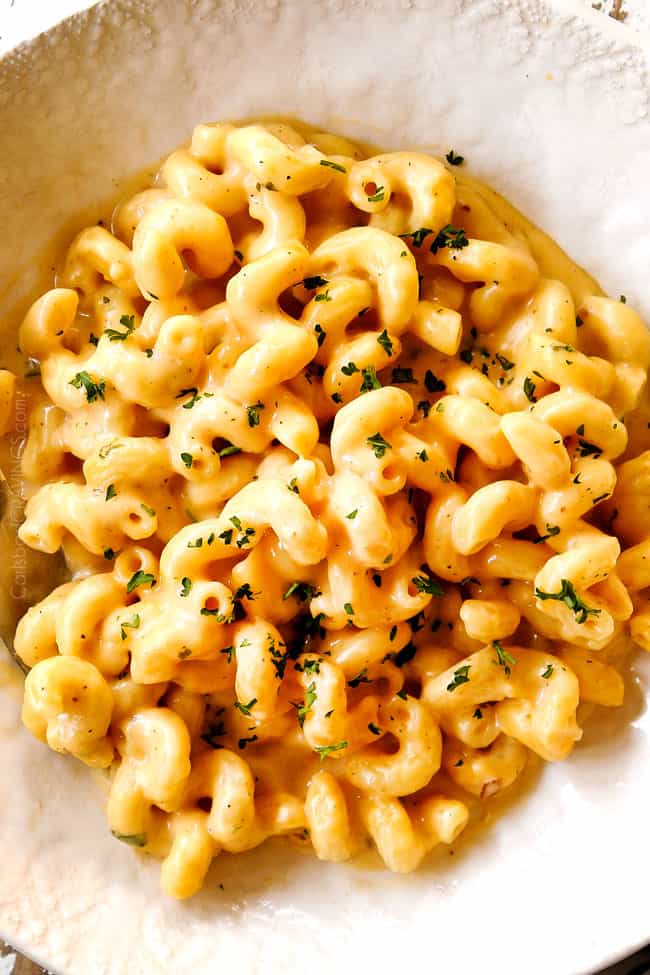
MEGA CREAMY HOMEMADE MAC AND CHEESE ON YOUR TABLE IN 20 MINUTES!
This Stovetop Mac and Cheese is the ultimate creamy addictive comfort food your whole family will CRAVE! It’s rich, luxuriously creamy, cheesy, seasoned to perfection and lick-the-plate scrumptious! This homemade Mac and Cheese recipe boasts three different cheeses for restaurant worthy results but is also easy to customize with what you have on hand (how-to included). You can also add chicken, bacon, sausage, veggies, etc. This easy Mac and Cheese recipe is also make-ahead friendly and freezer friendly. Best of all, in this post, I’ve put together a Mac and Cheese masterclass that includes the best pasta shapes, the best cheeses, the best add-ins, and the best tips and tricks for the SILKIEST Mac and Cheese ever – no grainy, gritty or dry pasta here! So, prepare your taste buds for a cheesy, comforting, home run! Your search for the best Mac and Cheese recipe stops here!
How to Mac and Cheese Video
PIN THIS RECIPE TO SAVE FOR LATER
This is the Best Creamy Mac and Cheese
Mac and Cheese is one of the most beloved comfort foods of all time. Mac and Cheese always sounds divine, is a favorite from children to grandparents alike, goes with practically everything, is a barbecue and potluck must but equally in demand at Thanksgiving and Christmas and is as versatile as they come.
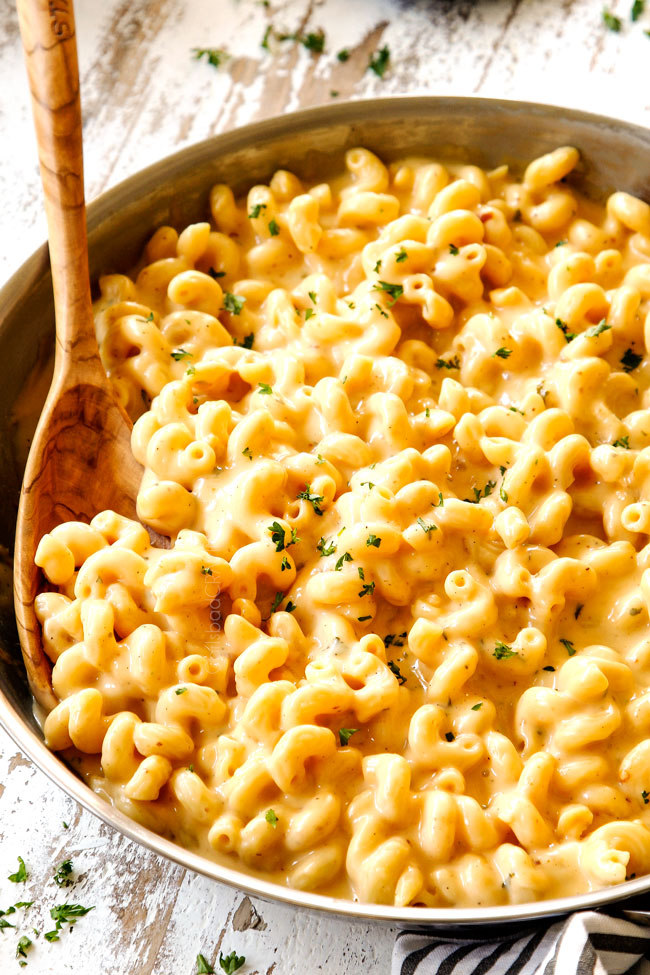
Sadly, too many homemade Mac and Cheese recipes are disappointingly bland, dry, grainy or gritty – not this Mac and Cheese recipe! The pasta is enveloped in a rich, silky, cheese sauce that’s made from scratch without any processed cheeses but still takes just minutes to make! It joins my other favorite pasta recipes: Classic Lasagna, Chicken Alfredo, Bolognese, One Pot Chili Mac, Cheesy Taco Pasta Bake and my Million Dollar Baked Penne as comfort food at its most scrumptious BUT it takes a fraction of the time to whip up!
What You’ll Love About This Creamy Mac and Cheese Recipe
There are SO many homemade Mac and Cheese recipes out there, but I’ve done all the research, all of the testing and all of the trial and error to bring you the very BEST Mac and Cheese recipe. Here’s why you’ll love it:
Silky sauce
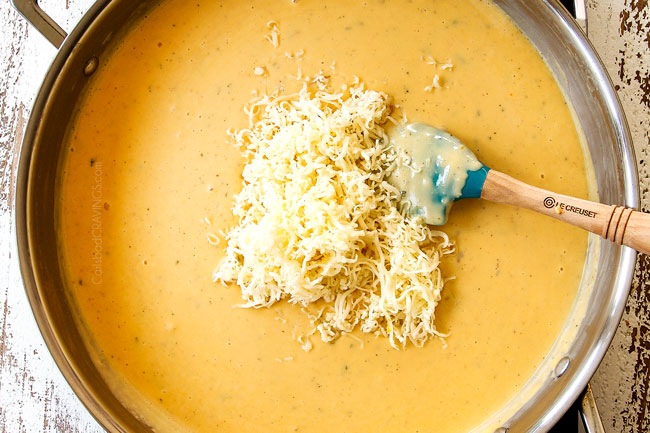
First, this Mac and Cheese boasts multiple cheeses for maximum flavor and superior melting ability. It uses evaporated milk to stabilize all the cheesiness and create incredible silkiness that doesn’t separate, curdle or become grainy. I’ve also included tons of tips and tricks to create the smoothest sauce every time.
Flavor
The Stovetop Mac and Cheese is then seasoned to perfection with hand-picked seasonings for the most flavorful sauce that ever-swaddled noodles. The three cheeses – sharp cheddar, Gouda and Gruyere further amplify the cheesy flavorful seduction.
Pantry Friendly
In addition to how quick and speedy this Stovetop Mac and Cheese is – it’s also very pantry friendly. You just need pasta, your cheeses (I’ve provided many different options, and cheeses last a long time), flour, evaporated milk and seasonings – that’s it!
Versatile
From here, you can make the homemade Mac and Cheese as written or use it as a springboard for all sorts of variations – you can add broccoli, spinach or peas, sausage, chicken or turkey sausage – there are so many possibilities you can choose your own Mac and Cheese adventure every time!
Make Ahead
You will also love that this Stovetop Mac and Cheese reheats like a champ. Unlike baked versions, reheating it on the stove allows you to gently reheat and add additional liquid as needed to achieve the same silky consistency as when it was first made.
Mac and Cheese Recipe Stovetop Ingredients
This Mac and Cheese recipe requires mostly pantry friendly ingredients. You will need:
FOR THE PASTA
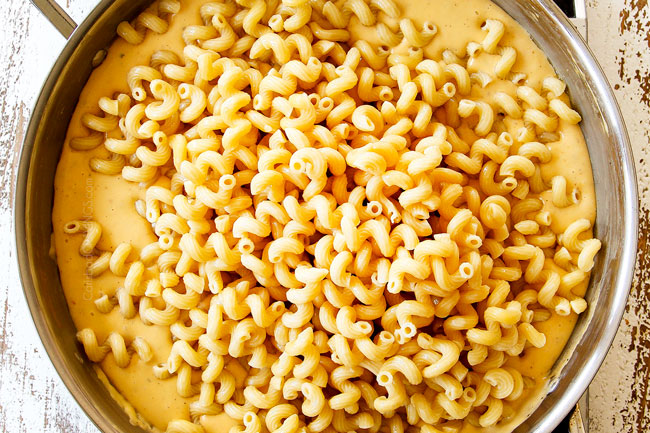
- Recommended pasta: My favorite pasta shape for baked Mac and Cheese is cellentani. It is also known as cavatappi, amori, spirali, or tortiglione and should be sold at most grocery stores. It is type of spiral, hollow, macaroni with scored ridges. Both the hollowness and the ridges area ideal to capture creamy sauce – and I just love the texture of the shape. It is sturdy enough for the rich sauce and doesn’t become easily overwhelmed or soggy.
- Different pasta shapes: That being said, feel free to use other pastas but look for shapes with plenty of texture such as grooves or ridges so the sauce has something to cling to and doesn’t slip right off. Some good options are radiatori (another fav), medium shells, rotini, rigatoni, penne, fusilli, etc.
- Pastas to avoid: Avoid pastas with smooth surfaces such as ziti, spaghetti or fettucine. You also want to go with medium size pastas instead of long pastas.
- Pastas types: You can use classic pasta, whole-wheat pasta, gluten free pasta.
FOR THE SAUCE
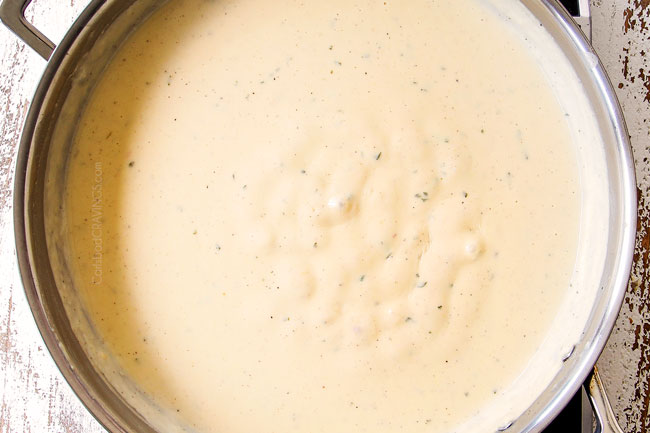
Like all classic Mac and Cheese recipes, this recipe beings with a bechamel sauce. Bechamel is made from butter, flour and milk. The starch in the flour stabilizes the melting cheeses which prevents it from breaking or turning stringy or gritty. You will need:
- Butter: use unsalted butter so we can control the level of salt. Do NOT substitute any of the butter with oil or your sauce can become grainy.
- All-purpose flour: thickens the sauce and stabilizes the cheese. You may substitute with gluten free flour.
- Evaporated milk: adds creaminess without the fat of heavy cream. Evaporated milk is canned, stabilized homogenized cow’s milk from which 60 percent of the water has been removed. This mean it is thicker than just milk and more stable than heavy cream and less likely to curdle or separate.
- Dijon mustard: might sound odd, but I promise it is not a pronounced flavor but simply boosts the other flavors and highlights the cheddar.
- Chicken bouillon: please do not skip! It is a secret ingredient that adds tons of flavor. It is essentially dehydrated vegetables, meat stock, a small portion of fat, salt, and seasonings AKA it is salt with flavor! You can use chicken bouillon, bouillon powder or better than bouillon – all in equal amounts. If you are using bouillon cubes, just mash them up a bit before you add them to the sauce – don’t dissolve in water first. You will need 3 cubes.
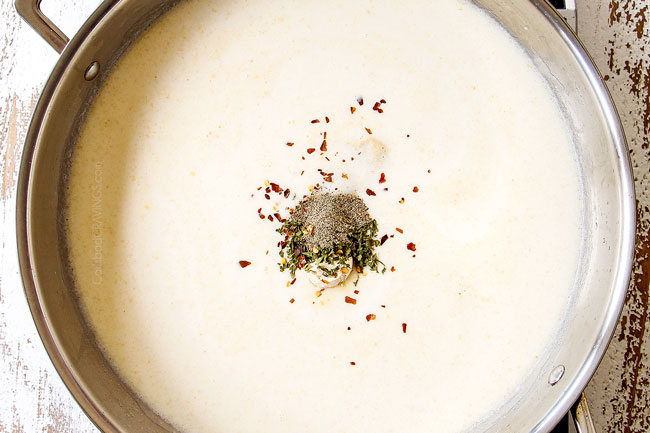
- Seasonings: onion powder, garlic powder, dried parsley, salt, pepper and red pepper flakes infuse the velvety sauce with complex flavor while still allowing the cheese flavors to shine.
FOR THE CHEESE
I’ve used my favorite combination of cheeses but you are welcome to mix and match (details in next section).
- Sharp cheddar: is the quintessential cheese for Mac and Cheese. It boasts sharp richness and provides the signature flavor.
- Gouda: MAKES this Stovetop Mac and Cheese! It tastes similar to cheddar but is more mild and smokey so it underscores the cheddar in all the right ways. Equally important, Gouda melts 1000X better than cheddar so it allows you to enhance the flavor while melting gorgeously.
- Gruyere: is the consummate melting cheese and one of my favorite cheeses to use! It’s sweet, slightly salty, creamy, nutty and boasts enough flavor to cut through the richness of the sauce and melts seamlessly for additional luxurious creaminess. Gruyere is a Swiss cheese and can be found with the specialty cheese (usually by the deli) in your grocery store.
Best cheeses for mac and cheese
When you think about “adult” Mac and Cheese, restaurant Mac and Cheese or the best Mac and Cheese you’ve ever had, they all have one thing in common – they use more than one type of cheese. Cheeses come in a wide variety of flavors and melting abilities – swapping some of the cheddar for a mix of cheeses elevates your homemade Mac and Cheese beyond bland and boring. It creates an aromatically complexity and lusciously smooth cheesiness (as cheddar is prone to be grainy) that any restaurant would be proud to serve.
START WITH CHEDDAR
The one cheese you will almost always find in Mac and Cheese recipes is sharp cheddar. It is flavorful, inexpensive, easy to find, and melts easily. Sharp cheddar should be the building block of your Mac and Cheese recipe.
If you don’t want to make an extra trip to the grocery store or spend extra $$ on cheeses, then you can use all cheddar BUT you run the risk of grainy Mac and Cheese as it is not the smoothest melting cheese. If you use all cheddar, use high-quality cheddar and follow my Tips and Tricks, and you should be fine.
Now that we have a base of flavorful cheddar, you can add one or two different cheeses to enhance the flavor. Start with a base of cheddar then add a stronger, full-flavored cheese (such as Gruyere) and a more mild, silky cheese (such as Gouda, Fontina, Muenster, etc.). Here are some tasty cheeses to try:
ADD FULL FLAVORED CHEESE:
- White Cheddar: use white cheddar with sharp cheddar for a depth of flavor. It also pairs beautifully with Gruyere.
- Havarti: is strong, flavorful and somewhat sharp. It is strong like Swiss but more buttery and can range from somewhat sweet to very sweet, and slightly acidic.
- Gruyere: is deliciously nutty and its saltiness helps cut through the luxurious creaminess. It is a fabulous alternative to Parmesan in sauces because it melts beautifully despite being a hard cheese.
- Asiago: is salty and nutty like Parmesan but creamier. Fresh Asiago can range from mild flavored to much sharper the longer it is aged.
- Pepper Jack: kicks up the flavor without being overwhelmingly spicy.
- Brie: is earthy, nutty, fruity, creamy and buttery. It melts like a dream for extra fancy, decadent Mac and Cheese – just make sure to remove the rind!
ADD MILD MELTING CHEESE:
- Gouda: boasts a mild smokey flavor due to the “cold smoked” process and is also nutty, tangy and melts easily. It will add a depth of flavored sophistication without overwhelming the Mac and Cheese.
- Muenster: is buttery, mild and is one of the best melters out there. It should be paired with a stronger, more flavorful cheese.
- Fontina: The semi soft, creamy texture makes for a decadent Mac and Cheese. The buttery flavor complements other cheeses for a flavor explosion.
- Cream Cheese: melts beautifully with a mild, slightly tangy flavor. Just make sure you soften your cream cheese to the point of almost melting, about 20-25 seconds in the microwave before adding.
- Colby cheese: is similar to cheddar but is more mild in flavor with sweet, nutty notes. It is also softer and moister than cheddar.
CHEESES TO USE AS SUPPLEMENTS
These cheeses will not completely melt and therefore should be used as supplement cheeses for flavor and not for melting.
- Parmesan: you can certainly add Parmesan to Mac and Cheese but it should not be a building block cheese, as it won’t contribute much to create a silky sauce. Instead, go for silkier Gruyere.
- Gorgonzola: is a fun addition (not substitute) for a nice zing.
- Chevré: is a fancy way of saying goat cheese and adds a delightful tanginess.
- Feta: is dry and crumbly and will not melt leaving clumps in an otherwise smooth sauce. Feta is best used as a topping to add salty, tangy, buttery flavor.
CHEESES TO AVOID
You can still use the following cheeses but I suggest using more flavorful cheeses that also melt well to achieve exponentially delicious results.
- Monterrey Jack: melts well but doesn’t contribute much flavor.
- Mozzarella: also melts exceptionally well but doesn’t add much flavor compared to other cheeses and can become overly stringy.
CHEESES TO NEVER USE
Anything pre-shredded! Always stay away from bagged, pre-shredded cheeses as they contain anti-clumping chemicals designed to prevent them from clumping in the bag – these same chemicals prevent the cheese strands from melting and will leave you with gritty, lumpy, sad Mac and Cheese.
Helpful Equipment
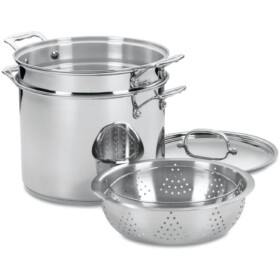
- Pasta Pot and Strainer: I LOVE this pasta pot with a removable strainer and use it every time I make pasta! The set allows you to simply lift out the strainer when the pasta is done cooking. The stainless steel also does not discolor, react with food or alter flavors.
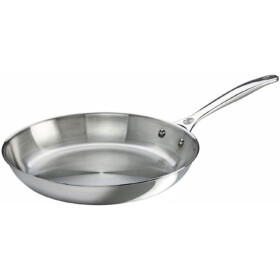
- Saucepan: is virtually indestructible, distributes heat evenly, won’t leech into food and large enough for tossing pastas. Stainless steel is particularly useful when cooking with acidic ingredients like tomatoes or vinegars because the metal won’t react with the acidity. I love both my 10 and 12-inch Le Creuset Stainless Steel Pans with a limited lifetime warranty but this more economical pan also has excellent reviews.
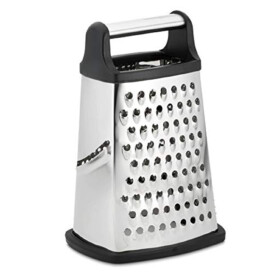
- Cheese grater: I use this kitchen tool constantly because FRESHLY grated cheese as opposed to bagged shredded cheese is always the way to go! Using freshly grated cheese also saves money, tastes better, and MELTS better.
How to Make Stovetop Mac and Cheese
Now let’s get to the main event! Making homemade Mac and Cheese is super simple. Boil your pasta while you make the easy, creamy, cheesy, flavorful from-scratch sauce in minutes.
Here’s how to make Mac and Cheese:
- Cook pasta. Begin by cooking your pasta just until al dente according to package directions. Al dente means the pasta will still have a little bite.
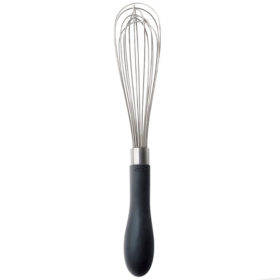
- Make roux. Melt 4 tablespoons butter in a large skillet over medium-low heat, then whisk in flour. Cook, while stirring for 3-5 minutes until golden and very smooth.
- Add milk and seasonings. Turn heat to low then gradually whisk in evaporated milk until no lumps remain followed by Dijon, bouillon and all remaining spices/seasonings.
- Simmer to thicken. Bring to a simmer, whisking constantly, just until thickened (but not overly thick).
- Add cheeses. Remove from heat and whisk in sharp cheese a little at a time until melted, followed by Gruyere a little at a time until melted, followed by Gouda a little at a time until completely melted. If cheese isn’t completely melted, return to LOW and whisk constantly until completely melted.
- Add pasta. Add pasta and toss until evenly coated.
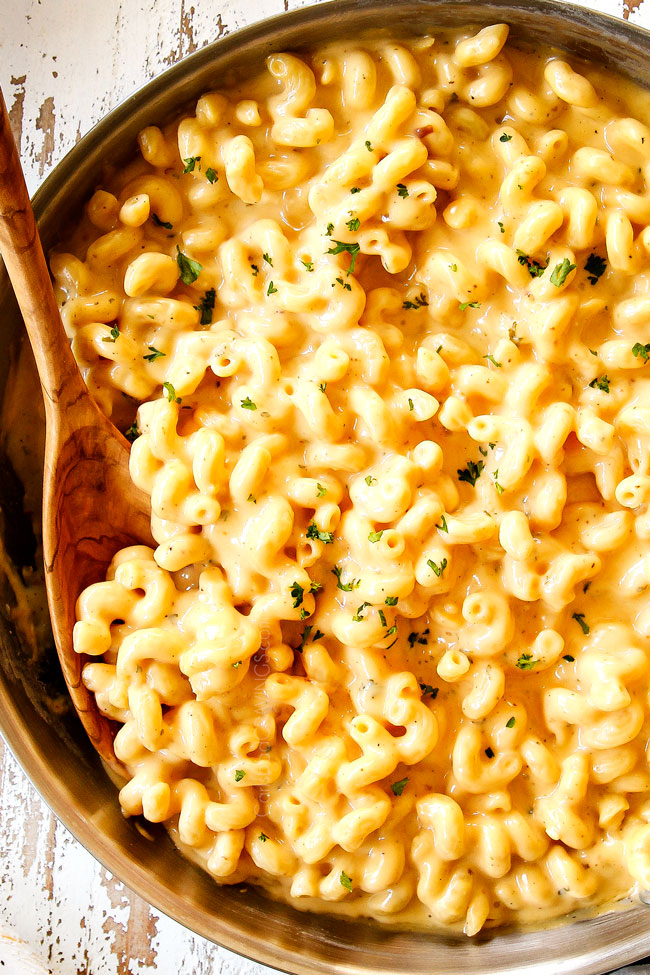
- Garnish. Sprinkle with fresh parsley if desired then dig in!
How to Add the Crispiest Panko Topping
You can use the above method for lazy day panko, but for the CRUNCHIEST panko topping, I recommend toasting it in a skillet first – seriously culinary changing.
TO MAKE PANKO TOPPING:
- 3/4 cup panko breadcrumbs
- 2 tablespoon butter
- 1 tablespoon extra virgin olive oil
Directions: Melt butter in olive oil over medium heat in a medium skillet. Add panko and stir to coat. Continue cooking until crumbs become golden brown. Evenly sprinkle over Stovetop Mac and Cheese.
CAN I MAKE MAC & CHEESE AHEAD OF TIME?
You can completely make your Mac and Cheese recipe ahead of time and gently warm (instructions below) or prepare the pasta and sauce in advance and keep them separate. If you know you are reheating, take extra care that your pasta is al dente – testing the pasta a couple minutes before the package directions specify.
As a caveat, this Mac and Cheese isn’t quite as good when made ahead and will lose some of its creaminess but you can add additional liquid to help restore it to its former glory.
TO PREP AHEAD:
MAKE SAUCE:
- You can make the sauce up to 3 days in advance.
- Refrigerate it in an airtight container.
- Gently heat in a large skillet before using, adding additional milk as needed to thin to desired consistency.
MAKE PASTA:
- You can cook the pasta al dente up to 5 days ahead of time.
- Rinse pasta with cool water.
- Toss with a drizzle of oil to prevent it from sticking together.
- Transfer to an airtight container or freezer bag and squeeze out excess air.
- Store in the refrigerator until ready to use.
COMBINE:
When ready to serve, add the pasta to the warmed sauce and warm through, adding additional milk as needed to reach desired consistency.
TO MAKE AHEAD:
- Let Mac and Cheese cool to room temperature.
- Transfer to an airtight container and refrigerate.
- When ready to serve, transfer to a skillet and heat gently, stirring often until heated through. You may need to add a splash of milk to thin the sauce as it will have thickened in the refrigerator.
Creamy Mac and Cheese Recipe Tips
These easy tricks for making Mac and Cheese will instantly elevate your dish. I also have a separate section on how to prevent grainy sauce.
- Use quality cheese. Cheese is the star of this recipe and with so few ingredients- it needs to be top notch! Quality cheeses will melt better and produce silkier sauces. NEVER use pre-bagged cheeses for sauces or your destined for grainy/gritty sauce failure.
- Use multiple cheeses. The BEST Mac and Cheese recipes use a mix of cheeses: cheddar plus one fully-flavored cheese and one melty cheese. This creates a complex flavor profile and luscious creaminess. I highly suggest my favorite combo of sharp cheddar, Gruyere and Gouda – SO flavorful and SO luxuriously creamy.
- Cook pasta in salted the water. You should always salt your pasta water – it is the one chance you have for the flavor to penetrate the pasta and enhance the subtle pasta flavor – you can taste the difference. Use 1 tablespoon salt for 6 quarts of water.
- Don’t overcook pasta! I recommend testing your pasta about 2 or 3 minutes before the box recommends – pasta should be al dente– meaning it should still be a little firm in the center/ have a “bite” to it.
- Stop pasta from cooking. Strain and rinse your pasta with cold water to prevent it from continuing to cook.
- Prevent pasta from clumping. If you’re not adding the cooked pasta to the sauce right away, toss it with a little olive oil. This will prevent it from sticking together.
- Cook flour for three minutes. Three minutes can seem like a long time but don’t cut it short – you want to make sure to cook out the raw flour taste and for it to become super smooth so your sauce doesn’t become grainy.
- Thin sauce if needed. If the sauce appears too thick after you add the cheese, simply stir in a little milk until it reaches desired consistency.
How to prevent grainy cheese
- Don’t use all cheddar. Cheddar has a tendency to become grainy if used on its own. It is best to combine with a good melting cheese such as Gouda, Fontina, Muenster or even cream cheese.
- Don’t use reduced fat cheeses. If your cheddar or other cheeses are reduced fat, then they will melt into a grainy mess.
- Shred the cheese yourself. Nothing will ruin your homemade Mac and Cheese faster than using pre-shredded cheeses. As previously discussed, pre-shredded cheeses are coated with chemicals that will prevent the cheese from melting beautifully.
- Don’t use oil. Mac and Cheese requires the high fat content of high-quality butter – more fat is the key to success. Don’t use ANY kind of oil or you’re setting yourself up for disaster.
- Use enough butter. You need at least an equal amount of butter (or slightly more) as flour to create a roux. If you don’t have enough butter, then the roux won’t become smooth and will remain gritty.
- Don’t use wheat flour. Use all-purpose flour and not whole wheat/whole grain flour. All-purpose flour is more finely ground and integrates more smoothly into the roux.
- Cook the roux REALLY WELL. This is where a lot of people go wrong. The roux should be cooked for a full three minutes – or longer- until it becomes nice and smooth and then cook longer still.
- Don’t burn roux. On the opposite end of the spectrum, don’t burn the roux. Burning the roux will cause the sauce to be grainy. If the roux is browning too quickly before it is smooth, then reduce the heat. If it does happen to burn then throw it out, wipe the pan clean and start over.
- Don’t use low-fat milk. The higher the fat content, the smoother your cheese will melt/incorporate. It’s best to use evaporated milk but you can also get by with whole milk – even 2% milk can result in grainy/gritty Mac and Cheese.
- Use warm milk. Warm evaporated milk in the microwave before adding to the roux. Adding cold milk to the hot roux can cause grittiness as the cold shocks the melted butter.
- Stir constantly. Whisk the milk/roux constantly while pouring in the milk so less lumps have time to form. Whisking over low heat also slows the formation of lumps.
- Remove lumps before increasing heat. Whisk constantly until the lumps are gone before increasing the heat. If you increase the heat while lumps remain, they are much harder to dissolve.
- Remove from heat. If the béchamel is too hot when you add the cheese, then the emulsifiers and coagulants will break down and the proteins in the cheeses will clump resulting in grainy sauce. So, make sure your bechamel is cool enough by removing the pan from the heat completely before adding the cheeses.
- Use warm temperature cheese. Leave your cheese out for an hour or so if you think of it. Warm cheese melts much easier than cold cheese.
- Add the cheese slowly. Add your cheeses in multiple batches – a handful at a time, stirring until completely melted, before adding some more.
- Stir, stir, stir. Stir until the cheese is completely melted. If your cheese isn’t melting, then your sauce may not be warm enough. Return the pan to LOW but don’t let the sauce simmer then continue to stir until completely melted.
Recipe Variations
This Mac and Cheese is delicious in its classic cheesiness or you can use the recipe as a base to customize it. Here are a few ideas:
- Add chicken. Stir in rotisserie chicken or chopped cooked chicken at the end of cooking. You can even season your chicken with different seasonings such as Cajun seasoning to mix things up.
- Add bacon. Use thick cut bacon so it doesn’t get lost in the cheesiness. Cook and crumble bacon in the skillet then use the remaining drippings to cook the roux in. Stir half of the bacon into the cooked Mac and Cheese and sprinkle the rest on top.
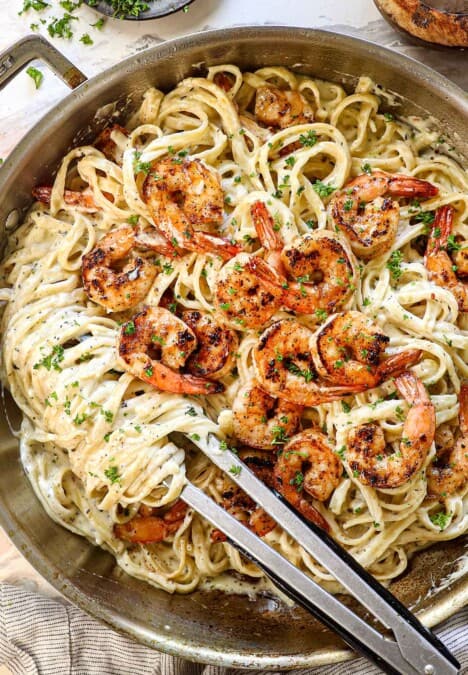
- Add seafood. Add roasted or sautéed shrimp or salmon after you’ve stirred in the pasta. You can follow my recipe for butter garlic shrimp or salmon pasta for easy add-ins.
- Add other protein. Stir in any leftover cooked protein or cooked ground beef, ground turkey, ground Italian sausage, or sliced sausage.
- Swap cheeses. You can swap the Gruyere and Gouda for Asiago, Fontina, Muenster, etc.
- Add veggies. This homemade Mac and Cheese provides a fabulous enveloping canvas for veggies. Stir in roasted or sautéed broccoli, petite peas, bell peppers, asparagus, zucchini, mushrooms, spinach, etc.
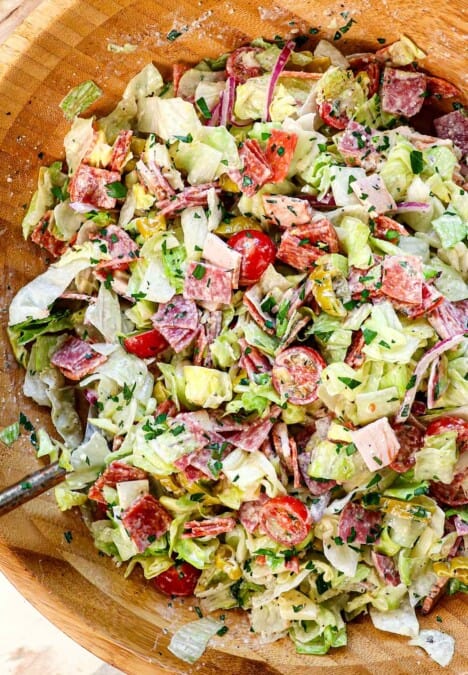
- Add tomatoes: Roast cherry tomatoes tossed in olive oil, salt and pepper at 400 degrees F for 10-12 minutes then stir into the Mac and Cheese after the pasta. The tomatoes are especially delicious with Italian sausage or andouille chicken sausage with spinach. You can also add drained fire-roasted tomatoes.
- Sun-dried tomatoes: purchase the sun-dried tomatoes in a jar packed in oil, not water. They are usually located near the olives or pickles at your grocery store. Rinse, pat dry and chop. Add to the roux the last minute or so of cooking.
- Artichokes: are tender, slightly sweet and nutty and divine paired with sun-dried tomatoes. Purchase artichoke hearts in water NOT marinated. The marinated ones often have an acrid taste. Chop and add to the simmering sauce.
- Toppings: feel free to top your Stovetop Mac and Cheese with toppings such as Ritz crackers or Panko. For Ritz, mix 1 cup of crushed Ritz crackers with 3-4 tablespoons of melted butter. For panko, mix 3 tablespoons melted butter 3/4 cup panko; place in the oven to broil just until golden.
- Make gluten-free. To make gluten free Mac and Cheese, use your favorite gluten free pasta and gluten free flour.
CAN I BAKE MAC & CHEESE?
Baked Mac and Cheese is also fabulous, but requires extra saucy pasta in order for the pasta not to dry out when baked. This translates into more liquid and more cheese – you can’t just add the Stovetop Mac and Cheese to a 9×13 and bake. If you would like to make Baked Mac and Cheese, follow my Million Dollar Mac and Cheese recipe instead. You can follow the recipe for the Baked Mac and Cheese with or without the sour cream and provolone layer.
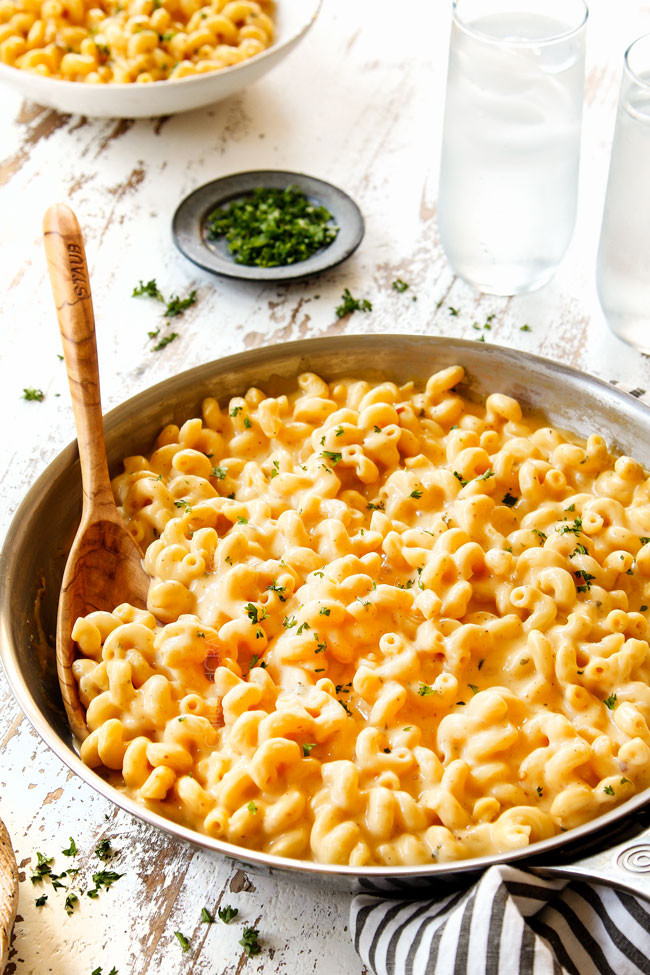
Serving suggestions
We love this homemade Mac and Cheese recipe with a big salad and Garlic Parmesan Butter Breadsticks. It is also delicious with any of the following:
- Salad: This creamy, cheesy Mac and Cheese pairs beautifully with a fresh, crunchy salad. Some of our favorites are Wedge Salad with Blue Cheese Ranch, Cucumber Tomato Salad, Strawberry Salad with Balsamic Vinaigrette, Green Bean Salad. and Strawberry Avocado Broccoli Salad.
- Vegetables: You can skip the salad, and instead opt for cooked veggies – but we like both! Roasted Parmesan Broccoli, Roasted Parmesan Asparagus, Glazed Carrots and Sautéed Brussels Sprouts with Garlic, Lemon, Butter or Roasted Brussels Sprouts are all superb.
- Bread: Mopping up Mac and Cheese with soft bread is a must! We love Soft and Fluffy Dinner Rolls and Garlic Parmesan Butter Breadsticks for this purpose – and the purpose of stuffing our face.
- Fruit: Bright, fresh fruit is a must either in the form of fresh grapes, melon, etc. or in fruit salad form. We love Fruit Salad with Honey Lime Vinaigrette, Winter Fruit Salad with Honey Lime Poppy Seed Vinaigrette and Berry Salad in Honey Mascarpone.
Storing and Reheating Homemade Creamy Mac and Cheese
- Storage: Store in an airtight container in the refrigerator for up to 5 days.
- Microwave: Microwave small portions for one minute, stir, then continue to heat at 30 second intervals until warmed through.
- Stove: For larger portions, reheat pasta gently on the stove. You may need to add a splash of milk to thin the sauce as it will have thickened in the refrigerator.
HOW TO FREEZE Stovetop MAC AND CHEESE:
So, how well does Mac and Cheese freeze? It freezes fairly well because the base is a roux and the recipe uses evaporated milk instead of milk or heavy cream. That being said, the cheese can become a little grainy, but still delicious. So, expect delicious – just not fresh of-the-stove perfection. To freeze:
- Let Mac and Cheese cool to room temperature.
- Transfer Mac and Cheese to a freezer safe container.
- Label and freeze for up to 3 months.
- Allow to thaw completely in the refrigerator, up to 48 hours.
- Reheat per instructions.
LOOKING FOR MORE ITALIAN RECIPES?
- Lasagna Soup
- Spaghetti Bolognese
- Italian Vegetable Soup
- Zuppa Toscana
- Minestrone Soup
- Easy Baked Risotto
- Marinara Sauce
- Manicotti
- Fettuccine Alfredo
- Cheesy Chicken Bacon Ranch Pasta
- Sun Dried Tomato Pasta
- Skillet Cheesy Meaty Penne
- Skinny Fettuccine Alfredo
- Parmesan Meatballs and Orzo
- Italian Meatballs
Want to try this Mac and Cheese RECIPE?
Pin it to your Dinner or Pasta or 30 Minute Meals Board to SAVE for later!
Find me on Pinterest for more great recipes! I am always pinning :)!
©Carlsbad Cravings by CarlsbadCravings.com

Mac and Cheese Recipe (Stovetop)
Save This Recipe To Your Recipe Box
You can now create an account on our site and save your favorite recipes all in one place!
Ingredients
- 1 pound cellentani or radiatori (may sub rotini, fusilli or macaroni)
- 4 tablespoons unsalted butter
- 3 tablespoons all-purpose flour
- 2 12 oz. cans evaporated milk warmed
- 1 tablespoon Dijon mustard
- 1/2 tablespoon chicken bouillon or better than bouillon
- 1 tsp EACH onion powder, garlic powder, dried parsley
- 1/2 tsp EACH salt, pepper
- 1/4-1/2 teaspoon red pepper flakes optional
- 1 cup (4 oz.) freshly shredded sharp cheddar cheese room temperature
- 1 cup (4 oz.) freshly shredded Gruyere cheese room temperature
- 1 cup (4 oz.) freshly shredded Gouda cheese room temperature
Instructions
- Cook pasta in salted water just until al dente according to package directions – don’t overcook! Reserve 1 cup of pasta water, strain pasta and rinse with cold water.
- Melt 4 tablespoons butter in a large skillet over medium-low heat. Once melted, whisk in flour and cook, stirring constantly for 3-5 minutes. Turn heat to low then gradually whisk in evaporated milk until no lumps remain followed by Dijon, bouillon and all remaining spices/seasonings.
- Bring to a simmer, whisking constantly, just until thickened (but not overly thick).
- Remove from heat and whisk in sharp cheese a little at a time until melted, followed by Gruyere a little at a time until melted, followed by Gouda a little at a time until completely melted (whisking constantly). If cheese isn't completely melted, return to LOW and whisk constantly until completely melted.
- Add pasta and toss until evenly coated. Stir in a little pasta water if needed to reach desired consistency. Dig in!
Video
Notes
Tips & Tricks and how to prevent Grainy Sauce
- Use quality cheese & shred yourself. Cheese is the star of this recipe and with so few ingredients- it needs to be top notch! Quality cheeses will melt better and produce silkier sauces. NEVER use pre-bagged cheeses for sauces or your destined for grainy/gritty sauce failure.
- Use multiple cheeses. The BEST Mac and Cheese recipes use a mix of cheeses: cheddar plus one fully-flavored cheese and one melty cheese. This creates a complex flavor profile and luscious creaminess. I highly suggest my favorite combo of sharp cheddar, Gruyere and Gouda – SO flavorful and SO luxuriously creamy. Don’t use all cheddar as cheddar has a tendency to become grainy if used on its own. See Post for alternative cheese choices.
- Don’t use reduced fat cheeses. If your cheddar or other cheeses are reduced fat, then they will melt into a grainy mess.
- Don’t use oil. Mac and Cheese requires the high fat content of high-quality butter – more fat is the key to success. Don’t use ANY kind of oil or you’re setting yourself up for disaster.
- Cook the roux REALLY WELL. This is where a lot of people go wrong. The roux should be cooked for a full three minutes – or longer- until it becomes nice and smooth and then cook longer still.
- Don’t burn roux. On the opposite end of the spectrum, don’t burn the roux. Burning the roux will cause the sauce to be grainy. If the roux is browning too quickly before it is smooth, then reduce the heat. If it does happen to burn then throw it out, wipe the pan clean and start over.
- Don’t use low-fat milk. The higher the fat content, the smoother your cheese will melt/incorporate. It’s best to use evaporated milk but you can also get by with whole milk – even 2% milk can result in grainy/gritty Mac and Cheese.
- Use warm milk. Warm evaporated milk in the microwave before adding to the roux. Adding cold milk to the hot roux can cause grittiness as the cold shocks the melted butter.
- Stir constantly. Whisk the milk/roux constantly while pouring in the milk so less lumps have time to form. Whisking over low heat also slows the formation of lumps.
- Remove lumps before increasing heat. Whisk constantly until the lumps are gone before increasing the heat. If you increase the heat while lumps remain, they are much harder to dissolve.
- Remove from heat. If the béchamel is too hot when you add the cheese, then the emulsifiers and coagulants will break down and the proteins in the cheeses will clump resulting in grainy sauce. So, make sure your bechamel is cool enough by removing the pan from the heat completely before adding the cheeses.
- Use warm temperature cheese. Leave your cheese out for an hour or so if you think of it. Warm cheese melts much easier than cold cheese.
- Add the cheese slowly. Add your cheeses in multiple batches – a handful at a time, stirring until completely melted, before adding some more.
- Stir, stir, stir. Stir until the cheese is completely melted. If your cheese isn’t melting, then your sauce may not be warm enough. Return the pan to LOW but don’t let the sauce simmer then continue to stir until completely melted.
- Cook pasta in salted the water. You should always salt your pasta water – it is the one chance you have for the flavor to penetrate the pasta and enhance the subtle pasta flavor – you can taste the difference. Use 1 tablespoon salt for 6 quarts of water.
- Don’t overcook pasta! I recommend testing your pasta about 2 or 3 minutes before the box recommends – pasta should be al dente– meaning it should still be a little firm in the center/ have a “bite” to it.
HOW TO REHEAT
- Storage: Store in an airtight container in the refrigerator for up to 5 days.
- Microwave: Microwave small portions for one minute, stir, then continue to heat at 30 second intervals until warmed through.
- Stove: For larger portions, reheat pasta gently on the stove. You may need to add a splash of milk to thin the sauce as it will have thickened in the refrigerator.
HOW TO FREEZE
This Mac and Cheese freezes fairly well because the base is a roux and the recipe uses evaporated milk instead of milk or heavy cream. That being said, the cheese can become a little grainy, but still delicious. So, expect delicious – just not fresh of-the-stove perfection. To freeze:- Let Mac and Cheese cool to room temperature.
- Transfer Mac and Cheese to a freezer safe container.
- Label and freeze for up to 3 months.
- Allow to thaw completely in the refrigerator, up to 48 hours.
- Reheat per instructions.
Want To Make This Recipe?

Did You Make This Recipe?
Tag @CarlsbadCravings and Use #CarlsbadCravngs
Leave a Review, I Always Love Hearing From You!
Carlsbad Cravings© Original


Kristine says
Can’t wait to try this! Your million dollar mac is my go to recipe, everyone loves it!
Jen says
Thank you Kristine! I hope this stovetop Mac and Cheese becomes a new favorite as well!
Kristine says
It’s amazing! Couldn’t find gruyere, so used Swiss instead. So good!
Jen says
Yesss! Thank you Kristine!
Carol R says
This sounds Delicious! I love how detailed all your recipes are. The Tips are so helpful. Thank you for sharing this one.
Jen says
You’re so welcome Nancy! I’m so pleased you find the tips helpful! I hope you love this Mac and Cheese!
Maxine R Parrotta says
I made this scrumptious dish today and everyone loved it. Good comfort food on this cold Rochester day.
Jen, I really appreciate all the background information and tips you provide on the ingredients and techniques used,,,,,,makes it so interesting.
During these long days at home,,,,I have turned to cooking to occupy my time. Every day I check to see what new recipes you have for us. Thank you so much!
Jen says
Thanks so much Maxine, I’m so pleased this Mac and Cheese was a winner with the entire fam! I also so appreciate your thoughtful words and that you find my tips/tricks helpful! I hope you find many new family favorite recipes during this crazy time!
Carol F. says
That was delicious!!! Thank you for all the tips. I think I will be doing more homemade mac and cheese in the future because of the success I had using your recipe and tips.
Jen says
That’s awesome Carol, thank you for taking the time to make my day! I’m so happy this Mac and Cheese was a repeat winner!
Lori says
Tried this and used cheddar gruyere and cream cheese. Delish!
Jen says
I’m so happy you loved it Lori, thank you!
Marie-José says
Made this recipe tonight and everyone loved it!! It was so good! Thank you!
Jen says
You’re so welcome, I’m so pleased it was a hit!
Kate says
AMAZING recipe. Great instructions, great results – everyone absolutely loves it when I make it.
I’ve played around with the cheeses being used and haven’t settled on a favorite combo, but they’ve all tasted great.
I’ve made this as written several times, but eventually settled on my own variation when I make it:
-Tinkyada Brown Rice GF pasta (best glutenfree pasta ever!)
-Bob’s Red Mill 1-to-1 GF Baking Flour
-Yellow mustard, instead of dijon
-Aleppo pepper, instead of red chili flakes
-Nutritional yeast instead of bouillon
-Add smoked paprika (Watkins brand).
Also I’ve used condensed milk and regular whole milk and both work great.
Thanks for the lovely recipe, so happy to share this with my family ❤
Jen says
Thanks Kate, I’m so pleased this mac and cheese is a family favorite! Thanks for sharing your adaptations!
Mandi says
Hello, do you think if I made this and then put it in a crockpot on warm that it would be ok for a few hours?
Jen says
Yes, I think that should work fine just make sure to cook the pasta al dente and be prepared to stir in a little extra milk when ready to serve. Good luck!
Kit says
Did I misunderstand something? The ingredient list for the cheeses: 1 cup (4 oz.). Is it 1 cup (8 oz) or 1/2 cup (4 oz)? Should I use 1 cup or 1/2 cup of cheeses? Looking forward to trying this tonight!
Jen says
Hi Kit, shredded cheese weighs less in ounces than block cheese so you will need 1 cup of shredded cheese which is indeed 4 ounces. Enjoy!
Jamie says
Can you make and stick in a crockpot on warm to keep warm until serving?
Jen says
Yes, that should work great. Make sure to grease the crockpot and be prepared to stir in a little extra milk if needed to keep it extra creamy.
I'manee says
This was a hit for our memorial weekend! I added some panko bread crumbs to the top and Stu k in in the oven for 20 minutes, and added some Parmesan which paired really well with the flavors of this recipe. I love that I can add a little spin without taking away from your recipe! Everything you create can be so versatile which is why you’re my go to recipe creator and food blogger! I’m
Jen says
I’m so pleased this was a hit I’manee! I love that you’re comfortable adding your own spin – your additions of panko and Parmesan sound absolutely wonderful!
Alyse says
My family loves Mac and Cheese. Is there a gluten free pasta that you recommend?
Jen says
I haven’t personally tried them, but Banza and Zenb have great reviews. Good luck!
Jen says
Thanks for the ultimate compliment of making it again for Christmas dinner! I’m so pleased everyone loved it!
Ruth Worley-Rizk says
I use this recipe on special occasions like Christmas, birthdays, New Years using Colby, sharp cheddar, and Asiago (I like strong cheese but have found company do not) I do not add the onion and garlic powder because I prefer the taste of the cheese. The recipe is fantastic and always works.
Today my daughter and I wanted mac and cheese. So with what I had, I used the recipe. I used cheddar, mozzarella (yes I have read not to use this) and 3/4 cup of dill havarti. I had no canned milk, no Dijon and used 2%, and a lTBL extra of butter. I used garlic better than bullion because my daughter is vegetarian. Gues what? It worked beautifully. I did have to add a little corn starch at the end of sauce to thicken. Very tasty, I still prefer chicken better than bullion as the garlic is a bit dominating. I just wanted to say this recipe is the best and very adaptable.
Jen says
Thank you so much, Ruth, I’m happy to hear your changes were a success! 🙂 I love that you use this recipe for special occasions!
Ruth Worley-Rizk says
Still the best Mac and cheese recipe. This time I used provolone, sharp, and Colby. This recipe is almost foolproof. I still refrain from onion and garlic powder as I dont find them necessary. That said,, I finally get the dijon, something I loathe under normal circumstances. Everything else about this recipe is perfect and I can see onion and garlic, I just find them overpowering flavors and I want to taste the cheese.
Jen says
Hi Ruth! That’s a huge compliment for you to say this is the best Mac and cheese recipe that you’ve tried. Thank you so much for your sweet review! I’m thrilled that you love this dish!