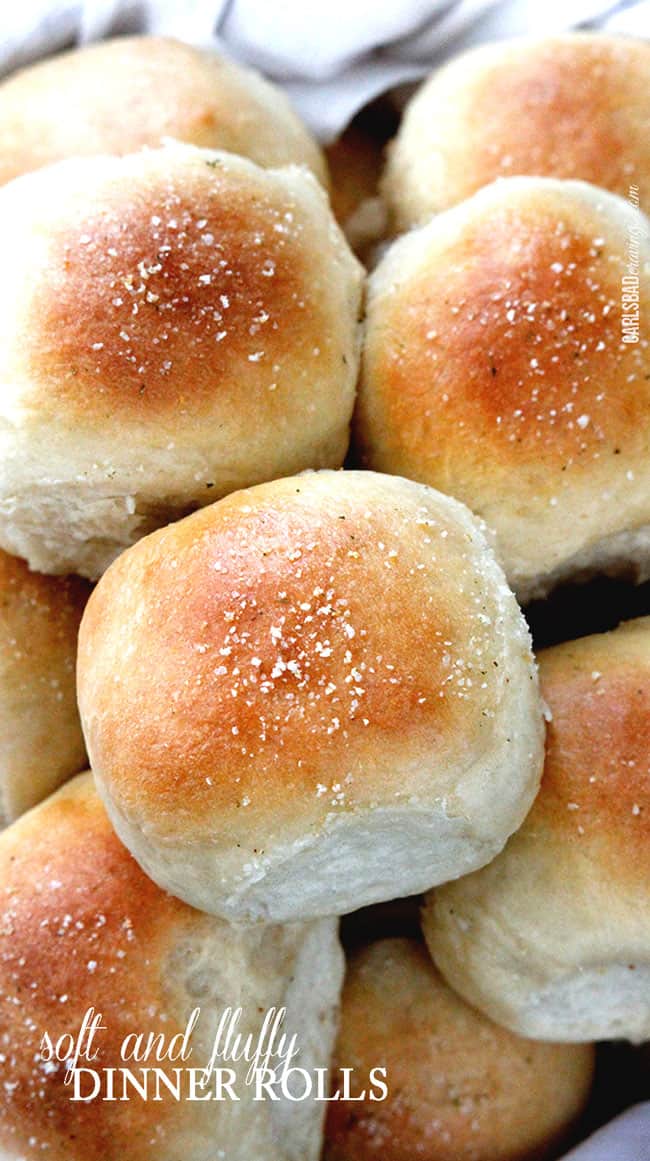
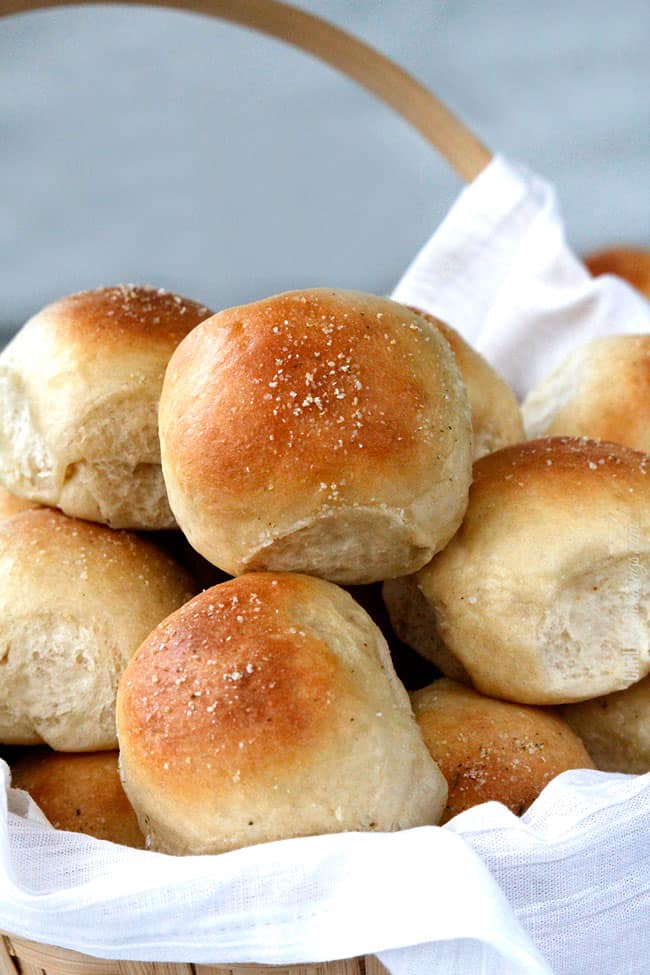
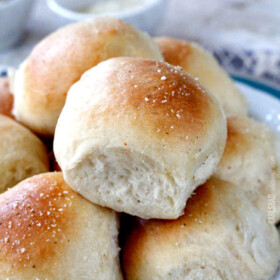
The BEST Dinner Rolls with zero hand kneading!
These Dinner Rolls are soft and fluffy, double brushed with butter and topped with garlic salt for the best Dinner Roll recipe ever! These Homemade Dinner Rolls will be the only rolls you will ever want to make. or eat. Out of everything I could be making for Thanksgiving, I am making these perfect, tantalizing pillows of deliciousness. And soon you’ll taste why! I’ve included how to make ahead, how to freeze and how to customize your homemade dinner rolls!

Why you’ll love THIS Dinner Roll Recipe
I will never make another dinner roll recipe again – these dinner rolls are PERFECT! When I made these buttery balls of bliss last week, I knew Patrick was going to be excited. As soon as the door opened and he was met with their buttery homemade dinner roll aroma, I heard an enthusiastic, “Yes!” as he hurried up the stairs and dove right in. “You have to make these for Thanksgiving!” he exclaimed.
He has since conjured up plans to open a food truck with a menu solely based on these dinner rolls because they make “everything taste amazing!” I love the enthusiasm.
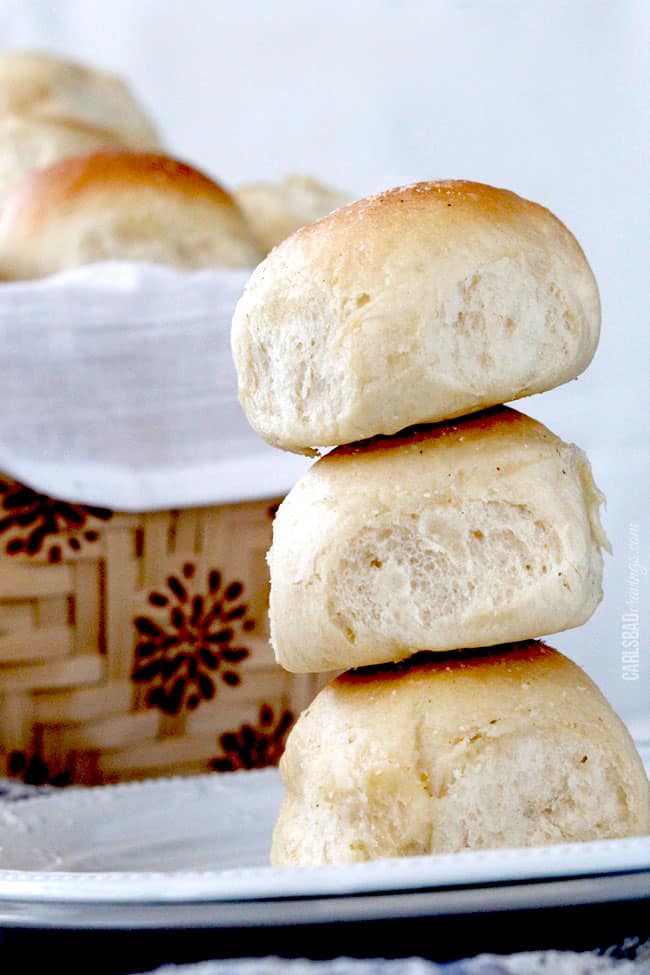
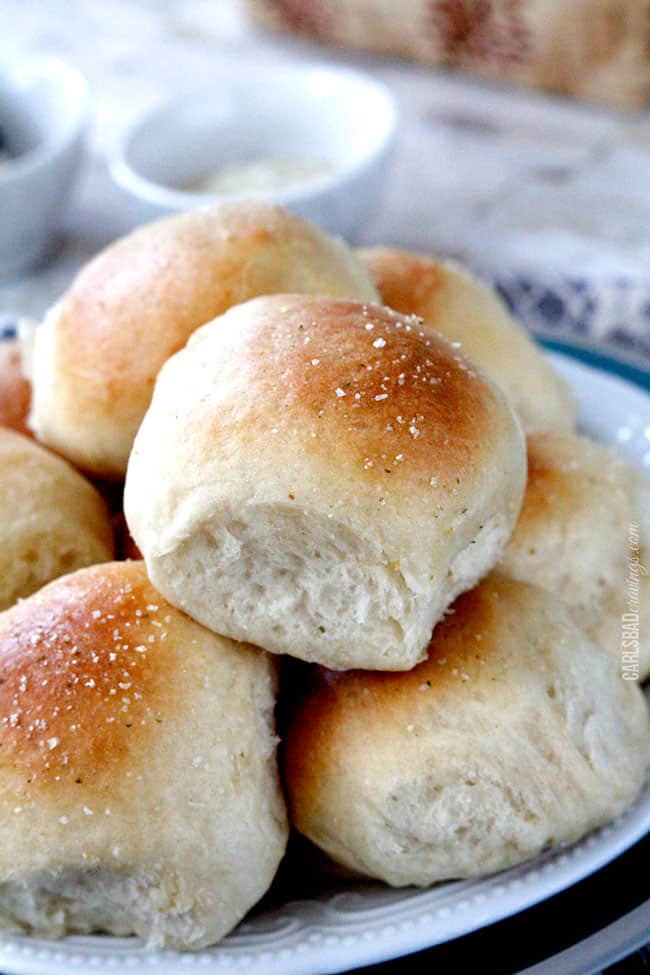
But Patrick is right. YOU have to make this dinner roll recipe for Thanksgiving, or any time you crave amazing rolls. These dinner rolls are super uber soft and fluffy, smothered in butter before baked then smothered in butter again after they bake because, after all, you are taking the time to make homemade dinner rolls – they better be buttery! Just as they better be melt in your mouth delicious. Done and done.
The last extra “something special” that pushes this already perfect Dinner Roll Recipe into a whole new realm of unspeakable deliciousness (as in you can’t speak because your mouth is stuffed with roll after roll after roll), they are gifted with a sprinkling of garlic salt. It enhances all that’s right in the world these dinner rolls.
I hope this Dinner Roll Recipe joins you this Thanksgiving and for many Thanksgivings to come and that their freshly baked bread aroma fills your soul with reminiscent foodie and family memories and present Thanksgiving!

Why these are the BEST HOMEMADE DINNER ROLLS!

Dinner Roll Recipe Ingredients
Let’s take a closer look at what you need to make this recipe (measurements in the printable recipe card at the bottom of the post):

HOW TO MAKE DINNER ROLLS
Let’s take a closer look at how to make this recipe with step-by-step photos (full recipe in the printable recipe card at the bottom of the post):
In summary you will:
- Proof yeast.
- Make dough.
- Knead the dough.
- Cover the dough and let it rise.
- Shape dough into rolls.
- Let the rolls rise.
- Bake.
- Brush with butter.
- EAT!
Making Homemade Dinner Rolls really is that simple, it just takes some time in between some of the steps while you wait for the dough to rise. Here is a more detailed explanation with tips and tricks how to make the Best Homemade Dinner Rolls!
MELT BUTTER:
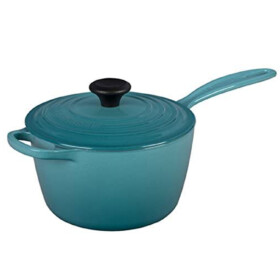
This dinner roll recipe starts by melting butter and sugar with milk in a saucepan. A lot of recipes call for combing melted butter with eggs before mixing with dry ingredients, but if you do this, the melted butter will immediately solidify. This method easily solves that dilemma and provides the even distribution of butter and sugar. Equally important, scalding the milk breaks down the proteins in the milk which helps the dough.
1. PROOF YEAST:
Making Homemade Dinner Rolls really is that simple, it just takes some time in between some of the steps while you wait for the dough to rise. Here is a more detailed explanation with tips and tricks how to make the Best Homemade Dinner Rolls!
There is no reason to be scared of working with yeast because you can actually SEE if it is working or PROVE that it’s working before you make the dinner rolls – thus the name PROOFING the yeast.
- What temperature should my water be to proof yeast? The warm water is what activates the yeast, so be diligent about checking for the right temperature. You need to be somewhere between 100-110F. I warm mine in the microwave in a glass-measuring cup and then use a thermometer to check the temperature.
- How do I prove active dry yeast? To proof your yeast, dissolve yeast in warm water in the bowl of your mixer and wait for 5-10 minutes. If it foams, you are ready to start baking, if it doesn’t, this means a) the water was too hot and killed the yeast, b) the water was too cold so the yeast didn’t activate or c) the yeast is too old. Refrigerated active dry yeast only has a shelf life of about 6 months.
- What if I don’t have a stand mixer, can I still make dinner rolls from scratch? No worries, you can knead it by hand – just be prepared to wash your hands! Start out by stirring with a spoon until you cannot do it anymore. Then its time to get in there and get dirty. Continue to knead until all the flour is incorporated and/or the dough is soft to the touch and only slightly sticky. It’s a bit of a workout, but it’s worth it!
2. MAKE DOUGH:
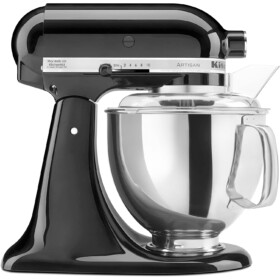
The dough hook is the best attachment to make dough for dinner rolls. I always spray my dough hook with nonstick cooking spray. This allows the the dough to come together without leaving half of it behind on the hook! If you don’t have a mixer, you can start to mix with a wooden spoon.To make dough, add milk mixture, eggs, salt and 5 cups flour to the mixer and mix until combined. Gradually mix in 2 more cups of flour until dough starts to pull away from the sides of the bowl. By adding the flour in two batches, it mixes more evenly.
3. KNEAD DOUGH:
Once you see the flour pulling away from the sides of the bowl, continue to knead on medium-low speed (dial 4) for approximately 5 minutes (or by hand for 10) until dough is smooth.
- What should finished dough feel like? The dough should be sticky but not so sticky that it clings to your fingers – just barely sticks.
- What if my dough is sticky? If your dough is too wet and is not pulling away from the bowl, add 1 more tablespoon of flour at a time until dough barely sticks to your fingers. Take care not to add too much additional flour or else your dinner rolls will be dry and dense.
- What if I don’t have a stand mixer, can I still make dinner rolls from scratch? No worries, you can knead it by hand – just be prepared to wash your hands! Start out by stirring with a spoon until you cannot do it anymore. Then its time to get in there and get dirty. Continue to knead until all the flour is incorporated and/or the dough is soft to the touch and only slightly sticky. It’s a bit of a workout, but it’s worth it!
4. LET DOUGH RISE:
Shape the dough into a ball and place back into your mixing bowl that has been coated lightly with olive oil or nonstick cooking spray. Cover tightly with plastic wrap that has been sprayed with nonstick cooking spray and allow to rise at room temperature until doubled in size, about 1 ½ -2 hours.
The dough will rise more quickly in a warm environment, so keep it in a draft free location. See my section below on faster rise techniques.
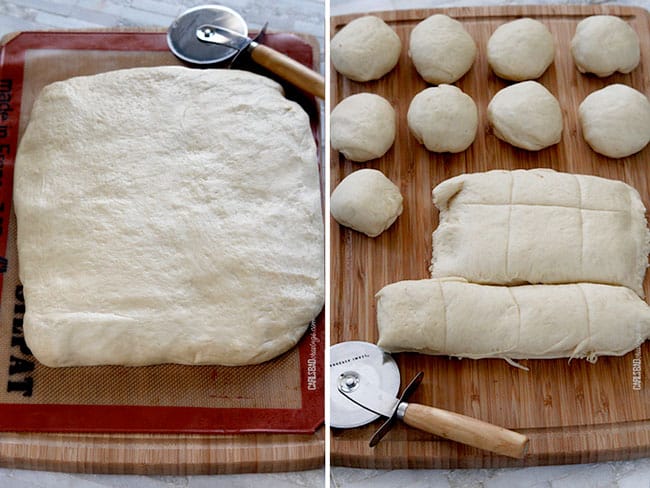
5. SHAPE DOUGH:
Making the dinner rolls the same size ensures an even baking time. I am good at eyeballing it, but to ensure accuracy, we are going to pat the dough into a rectangle of uniform thickness, then cut into squares. This method is also much quicker, easier and accurate method than eyeballing it.
The overall dimensions of your large rectangle don’t matter, you just want it to be an even thickness so the rolls are roughly the same size. Cut the rectangle into 28 roughly even pieces by cutting the rectangle into 4 strips along the short end and 7 strips along the long end to create a total of 28 dough squares. You can use a kitchen scale to weigh them if you want to be even more accurate, but I don’t think that is necessary.
To form the balls, take a corner of the square and stretch it to the bottom, then pinch and seal it. Repeat with all 4 corners. Make sure the rolls are smooth on top and sealed on the bottom. You can roll them on the counter top or between both hands but then you run the risk of overworking the dough, so I just use my hands.
What if my hands keep sticking to the dough? If the dough is too sticky to work with at any point, you can spray your hands with nonstick spray. I highly suggest this instead of dusting them with flour, because you don’t want to add more flour to the dough than is necessary.
6. SECOND RISE:
Place balls about 1 inch apart on a baking sheet lined with a nonstick mat or parchment paper. Cover with a towel and let rise until doubled, 45-60 minutes.
Yeast dough requires time to develop its flavor and gluten. You can rush many things in life, but you cannot rush bread. You can help it along, but do not be tempted to bake your rolls until you get the necessary rise -that is, if you want the softest, fluffiest dinner rolls!
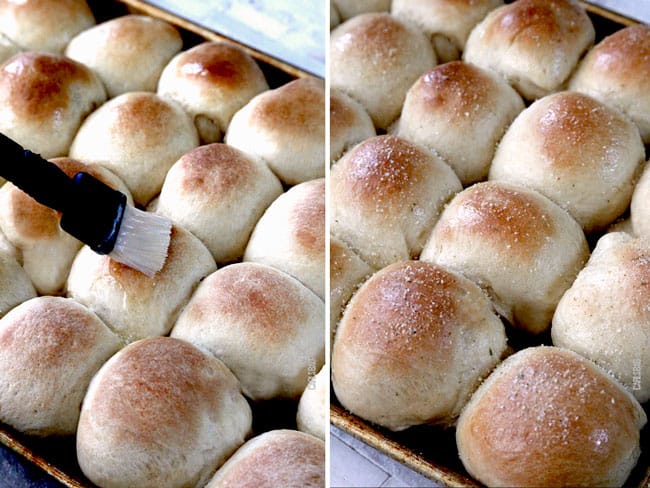
7. BUTTER TOPS:
Don’t forget to brush the tops of the dinner rolls with butter! This is what gives the top of the rolls that irresistible golden sheen, infuses them with flavor, tenderness and promotes even bowing.
8. BAKE:
Bake dinner rolls for 15-20 minutes or until golden. Always check a center roll for doneness. Take care not over bake your rolls or they won’t be as tender.
- What if my rolls are getting too dark? Check the rolls right at 15 minutes, if they are darkening beyond what you prefer, place a piece of foil over the top.
- What if my rolls don’t turn golden? When bread or rolls do not brown as much as expected, it is because the dough has been slightly over-proofed. The yeast cells eat up all the sugars and then there isn’t much left to caramelize during the bake. I suggest shortening up your second rise time by about 10 minutes.

9. FLAVOR!
Brush your hot, fresh-out-of-the-oven homemade dinner rolls with remaining butter and sprinkle with garlic salt.

CAN I MAKE THESE DINNER ROLLS AHEAD OF TIME?
YES! In fact, dinner rolls are a flexible and accommodating kind of recipe. Multiple points along the process you can stop, put the rolls on pause, and pick them up again when you want to:
• After First Rise: You can let the dough have its 1st rise in the refrigerator overnight. Cover the dough tightly and place in the refrigerator for up to 18 hours. Remove from the refrigerator and allow the dough to fully rise for 2 more hours. This comes in handy when you want the dough to rise slowly or you won’t be home once the dough rises as it is not good to let dough rise for too long.
• After Shaping: You can also pause dough making after forming the balls. Cover the shaped rolls tightly and refrigerate for up to 48 hours. At least 3 hours before you need them, remove the rolls from the refrigerator, keep covered, and allow to rise on the counter for about 1-2 hours before baking. This not only finishes proofing the yeast, but takes the chill off so the yeast is active when the rolls enter the oven.
HOW DO I MAKE DOUGH RISE FASTER?
I know how hard it can be to wait for your buttery Dinner Rolls to be ready, so to help expedite the rising process, there are a few things you can do. besides living in Texas in July, to help create a warm and humid environment:
• Microwave: Fill a glass with 1 cup of water, use something small so the glass and the dough can fit in the microwave together. Heat water on high for 2 minutes. Carefully move the glass to the side and place the dough while still in the mixing bowl inside microwave and close the door. It does not not need to be a microwave safe bowl – we will not use the microwave with dough inside. Now you have a warm, moist cozy spot for the dough to rise.
• Oven: Preheat oven to its lowest temperature for 2 minutes then turn off the oven. Either boil or microwave 2 cups of water. Place hot water in the oven. Next, place dough in the bowl in the oven. Close oven door and let rise. You can prepare the oven before making the dough so the oven is warm, moist and ready when the dough is prepared.
• Near oven: You can open the preheated or warming oven and place dough near it. You will need to rotate the dough if using this method so the dough rises evenly.
• Counter top: Boil some water and put it in a bowl or measuring dish next to the dough that’s rising. Cover the dough AND the vessel containing the boiling water with a damp towel and let the rising begin!
HOW TO FREEZE HOMEMADE DINNER ROLLS
• Shaped, unbaked individual rolls: you can add individual rolls to plastic bag(s), seal and freeze or freeze 4,6, 8 rolls in one bag separated by parchment paper. Freeze for up to two months. This comes in handy when you don’t need the whole batch at once.
• Shaped, unbaked rolls: after you have assembled the rolls in the baking pan, cover tightly with two layers of plastic wrap and freeze. You can either leave them in the baking pan or remove the slab of rolls to a freezer bag to free up freezer space once frozen. Freeze for up to two months.
• How to Reheat Frozen Rolls: remove rolls from freezer and from the freezer wrapping to prevent excess condensation. Let rolls thaw and rise for about 4-6 hours then continue to brush with butter, garlic salt and bake per recipe instructions.
• Baked Dinner Rolls: You can also freeze completely baked dinner rolls as well. Thaw the dinner rolls on the counter, then reheat in foil at 300 degrees F for 15-20 minutes or until completely warmed thorough.

FLAVOR VARIATIONS FOR HOMEMADE DINNER ROLLS
Homemade Rolls FAQs
To keep dinner rolls warm for your guests or loved ones:
Heat dry beans by wrapping them in a kitchen towel and microwaving until warm. Alternatively you can heat balls of foil in the oven while cooking the rolls and add those to the bottom of the basket.
Place heated beans in the bottom of a napkin lined basket and add the warm dinner rolls.
Wrap the rolls with sides of the napkin that line the basket or top with another clean kitchen towel.
Yes! These Dinner Rolls taste so yummy with frosting; I would strongly recommend not sprinkling with garlic ;-). You can also use it for pretzels or bread sticks.
This recipe is pretty straightforward, but one thing to look out for is over kneading your dough. It is better for our dough to be under-kneaded than over kneaded.Over kneaded dough causes the dough to warm up too quickly and therefore ferment too quickly, or even over ferment, which will produce dinner rolls lacking in flavor. It also over develops the gluten which will produce tough dinner rolls with a tough exterior and dense, dry interior.
You don’t won’t to let your dough sit out after the dinner rolls have doubled in size. At this point, you will want to refrigerate the rolls because if you let the dough rise too much it will cause over-fermentation and a super yeasty flavor.
Once you have the perfect dinner roll dough, the shapes are endless! You can deviate from the round ball and turn this dough into twisted rolls, cloverleaf, or any other fun shapes.
I could eat leftover room temperature dinner rolls all day long, but they are so much better warmed! To reheat dinner rolls:
OVEN: Wrap dinner rolls in foil and place them on a baking sheet. Bake at 350 degrees F until warmed through, about 10 to 15 minutes. (The foil is necessary so they don’t dry out.)
MICROWAVE: Wrap dinner rolls in moistened paper towels and place on a microwave-safe plate. Warm on low power for 10-20 seconds. Check to see if warm. Repeat if necessary.
WANT TO TRY THIS RECIPE?
PIN IT to your recipe BOARD TO SAVE FOR LATER!
FIND ME ON PINTEREST FOR MORE GREAT RECIPES! I AM ALWAYS PINNING :)!
©Carlsbad Cravings by CarlsbadCravings.com

Best Dinner Rolls Recipe (Soft & Fluffy)
Save This Recipe To Your Recipe Box
You can now create an account on our site and save your favorite recipes all in one place!
Ingredients
- 1 1/2 cups milk
- ½ cup (1 stick) salted butter, cut into pieces
- 1/2 cup sugar
- 1 package active dry yeast (2 ¼ teaspoons)
- 1/2 cup warm water
- 3 large eggs, lightly beaten
- 1 1/2 teaspoons salt
- 7 cups all-purpose flour
- 3 tablespoons butter, melted
- Garlic salt
Instructions
- Add milk to a small saucepan and bring to a simmer. Remove from heat and stir in ½ cup butter and sugar until melted. Place in the refrigerator to cool.
- Meanwhile, in the bowl of your standard mixer, dissolve yeast in warm water and let sit 5-10 minutes or until foamy. (If it doesn’t foam, start again)
- Fix mixer with dough hook and generously spray hook with nonstick cooking spray.
- Add milk mixture, eggs, salt and 5 cups flour to the mixer and mix until combined. With the mixer running on low, gradually mix in 2 more cups of flour until dough starts to pull away from the sides of the bowl. Once dough has pulled away from the bowl, knead on medium-low speed (dial 4) for approximately 5 minutes (or by hand for 10) until dough is smooth and barely sticks to your fingers.*
- Shape the dough into a ball and place back into your mixing bowl that has been coated lightly with olive oil or nonstick cooking spray. Cover tightly with plastic wrap that has been sprayed with nonstick cooking spray and allow to rise at room temperature until doubled in size, about 1 ½ -2 hours.
- After dough has doubled, remove to a floured surface (or nonstick mat) and punch down then lightly shape into rectangle of uniform thickness (overall dimensions don’t matter) using your hands. Cut the rectangle into 28 roughly even pieces then shape into balls by folding the corners under. Place balls about 1 inch apart on a baking sheet lined with a nonstick mat or parchment paper. Cover with a towel and let rise until doubled, 45-60 minutes.
- Preheat oven 350 degrees F. Brush rolls with approximately 1 ½ tablespoons melted butter. Bake for 15- 20 minutes or until golden. Remove from oven and brush with remaining butter and sprinkle with garlic salt.
- ENJOY!
Notes
MAKE AHEAD
- After First Rise: You can let the dough have its 1st rise in the refrigerator overnight. Cover the dough tightly and place in the refrigerator for up to 18 hours. Remove from the refrigerator and allow the dough to fully rise for 2 more hours. This comes in handy when you want the dough to rise slowly or you won’t be home once the dough rises as it is not good to let dough rise for too long at room temperature.
- After Shaping: You can also pause dough making after forming the balls. Cover the shaped rolls tightly and refrigerate for up to 48 hours. At least 3 hours before you need them, remove the rolls from the refrigerator, keep covered, and allow to rise on the counter for about 1-2 hours before baking. This not only finishes proofing the yeast, but takes the chill off so the yeast is active when the rolls enter the oven.
HOW TO FREEZE
- Shaped, unbaked rolls: after you have assembled the rolls in the baking pan, cover tightly with two layers of plastic wrap and freeze. You can either leave them in the baking pan or remove the slab of rolls to a freezer bag to free up freezer space once frozen. Freeze for up to two months.
- How to Reheat Frozen Rolls: remove rolls from freezer and from the freezer wrapping to prevent excess condensation. Let rolls thaw and rise for about 4-6 hours then continue to brush with butter, garlic salt and bake per recipe instructions.
- Baked Dinner Rolls: You can also freeze completely baked dinner rolls as well. Thaw the dinner rolls on the counter, then reheat in foil at 300 degrees F for 15-20 minutes or until completely warmed thorough.
FLAVOR VARIATIONS
- Cheddar Dinner Rolls – add 1 cup shredded cheddar cheese. Other cheese varieties work like pepper Jack or Gruyere, but avoid super soft cheeses as they will make the dough too doughy. Along with cheese, you can also add chives, green onions, jalapenos, etc.
- Garlic Parmesan Dinner Rolls: add ½ cup freshly grated Parmesan and 1 teaspoon garlic powder to the dough before kneading. You can also add in additional Italian herbs like rosemary, basil and parsley.
- Garlic & Herb Dinner Rolls – add 1 teaspoon garlic powder and 2 teaspoons of each of three of your favorite dried Italian herbs to dough before kneading.
- Rosemary Sun-Dried Tomato Dinner Rolls – add 2 Tablespoons fresh or 2 teaspoons dried chopped rosemary and ½ cup rinsed, dried and chopped sun-fried tomatoes to dough before kneading. You could also add Parmesan and/or olives as well.
- Honey Butter Dinner Rolls- I recommend bread flour for the added gluten if making honey butter rolls. Add ⅓ cup honey and omit the ½ cup sugar and garlic competently from the recipe. When baked, add 2 tablespoons honey to melted butter and brush on tops of rolls.
Want To Make This Recipe?

Did You Make This Recipe?
Tag @CarlsbadCravings and Use #CarlsbadCravngs
Leave a Review, I Always Love Hearing From You!
Adapted from Food Network


Katie says
I made some dinner rolls to test yesterday and brushing them with butter caused them to kind of shrivel up by the end of the day, and today they are kind of stale. I need to make these the day before Thanksgiving and travel 6 hours with them. Would you suggest holding off on brushing with butter until we reheat them? Would that help keep them fresh? Thanks!
Jen says
Hi Katie, I’m honestly perplexed it did that, but yes, you can certainly brush the butter on the warmed rolls the next day and they will taste just as good. Happy Thanksgiving!
Ann says
I would love to try these for Thanksgiving. One member of the family is very allergic to dairy. I usually just get a stick plant butter and a “milk” substitute for most recipes. Do you know if an alternative milk and plant butter would work. Hopefully someone else has tried non-dairy substitutes. Thanks, love your recipes.
Jen says
Hi Ann! I am so glad that you have been loving the recipes! I haven’t tried dairy substitutes, but you can experiment!
Brenda says
I am not a baker at all, I can cook but baking is not my specialty. These were definitely easy to make, recipe was easy to follow , was nervous but they turned out delicious, just one of 3 dishes I made from this site for Easter!
Jen says
I’m so glad these turned out for you! Thanks for making these recipes part of your Easter celebration!
Karla says
I made these rolls and while I love the flavor, mine turned out kind of heavy and dense and a little too yeasty. My dough was very sticky in spite of adding nearly an extra cup of flour. What did I do wrong?
Jen says
Hello Karla! I’m sorry to hear that! Perhaps a longer kneading time in order to allow the gluten to transform.
Emily says
These are the best dinner rolls EVER! PERFECT taste, PERFECT texture. I am just dipping my toes in the water when it comes to making things home made, and this recipe was very easy to follow. Thank you so much for sharing!
Jen says
Hi Emily! I am thrilled that you loved making and eating these rolls! Welcome to cooking and I hope you find many more recipes that are PERFECT for you! Thank you for sharing your sweet comment!