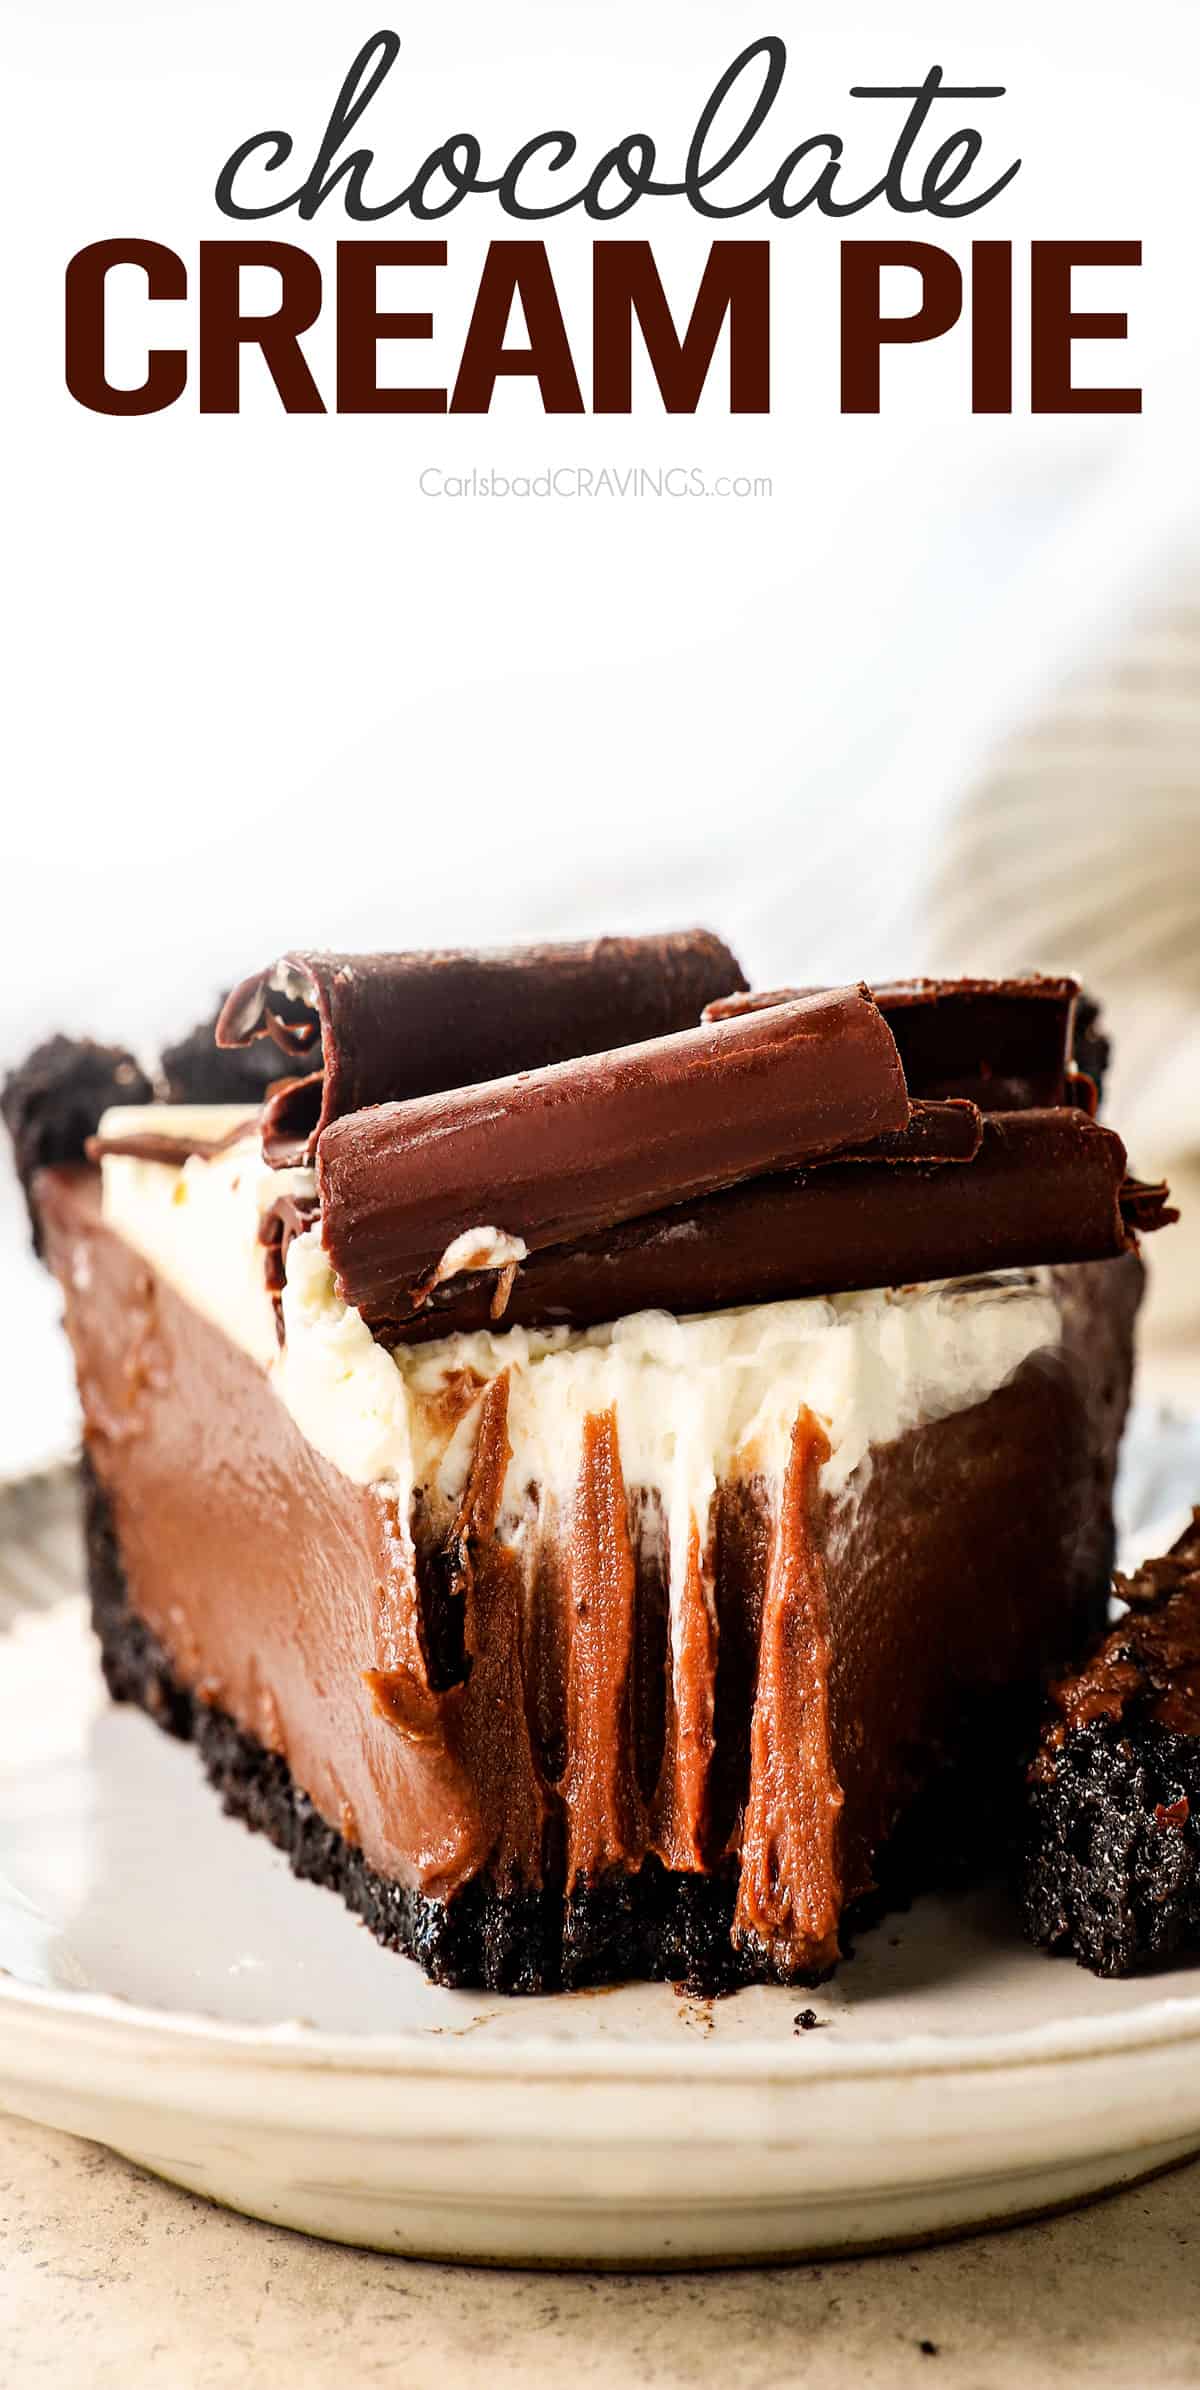
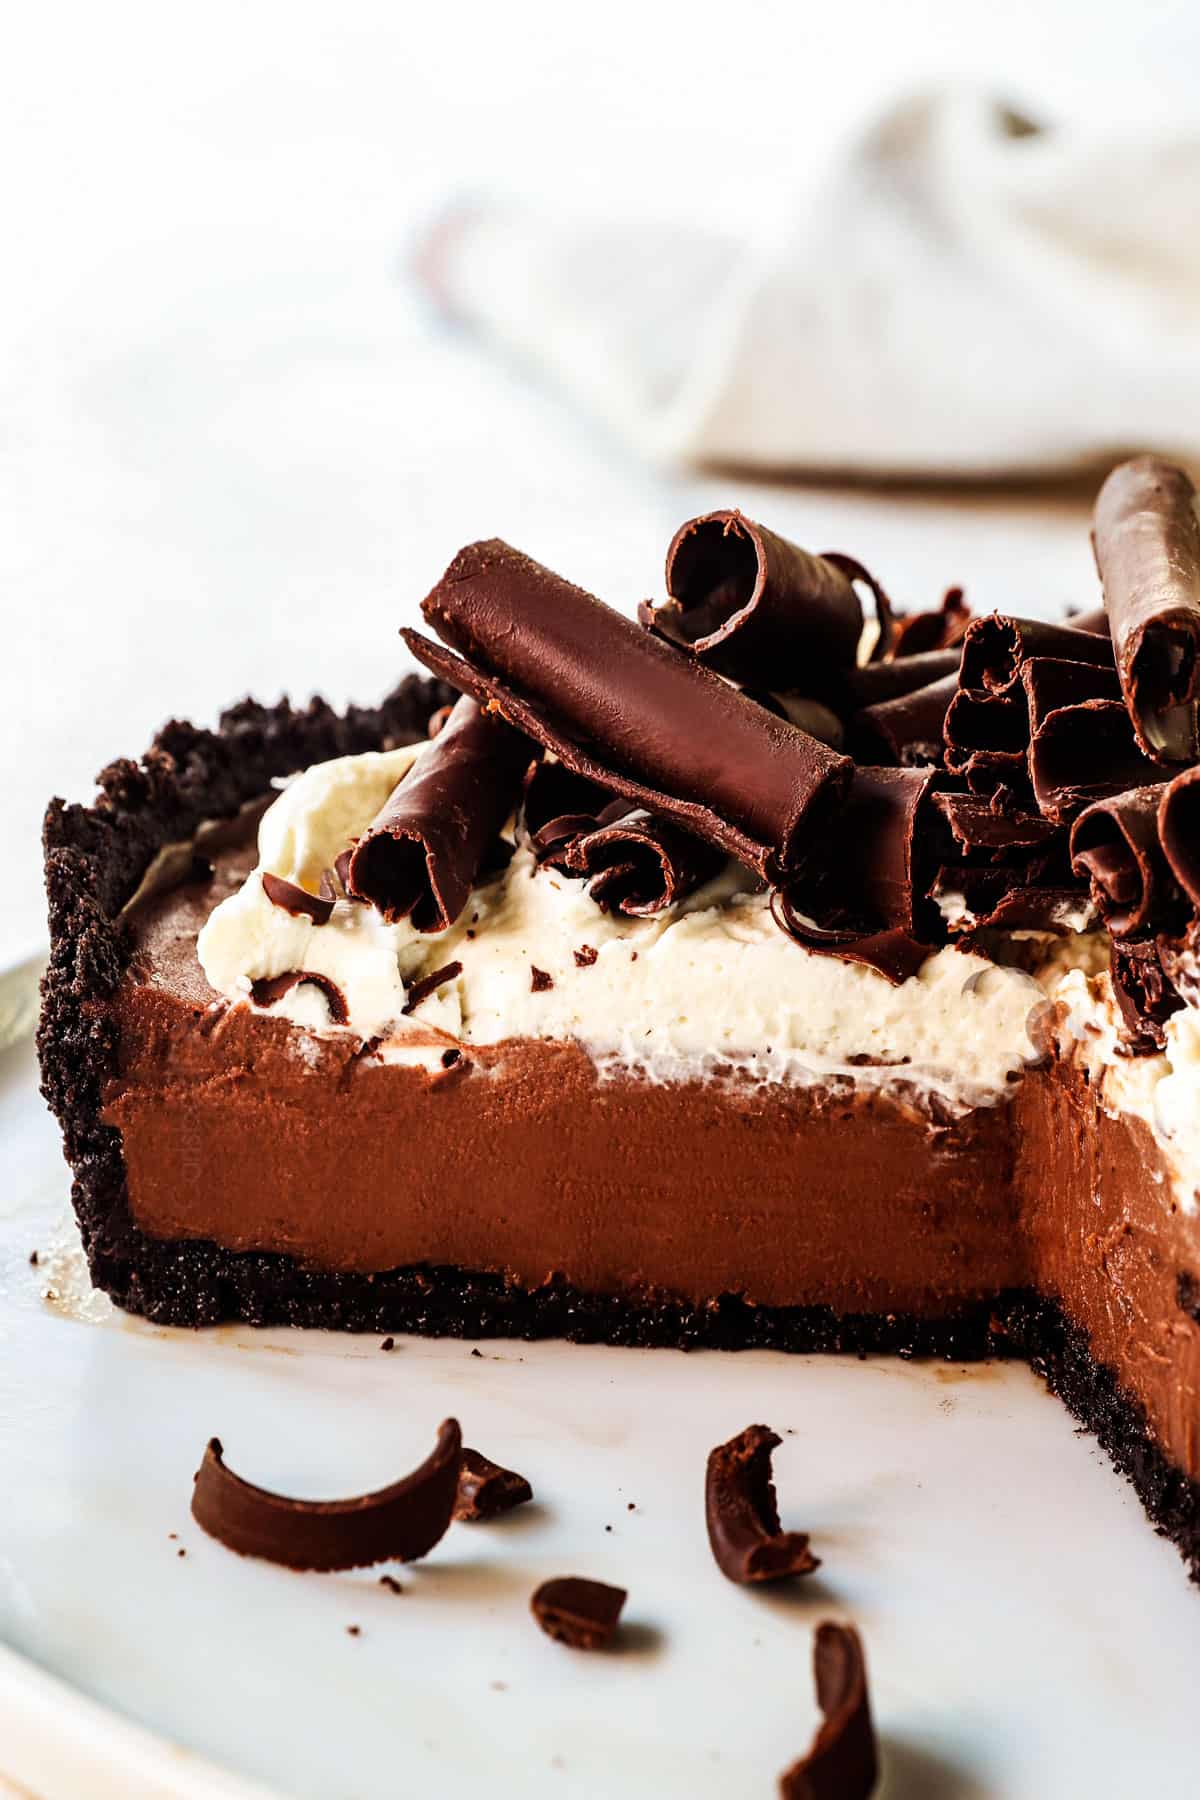
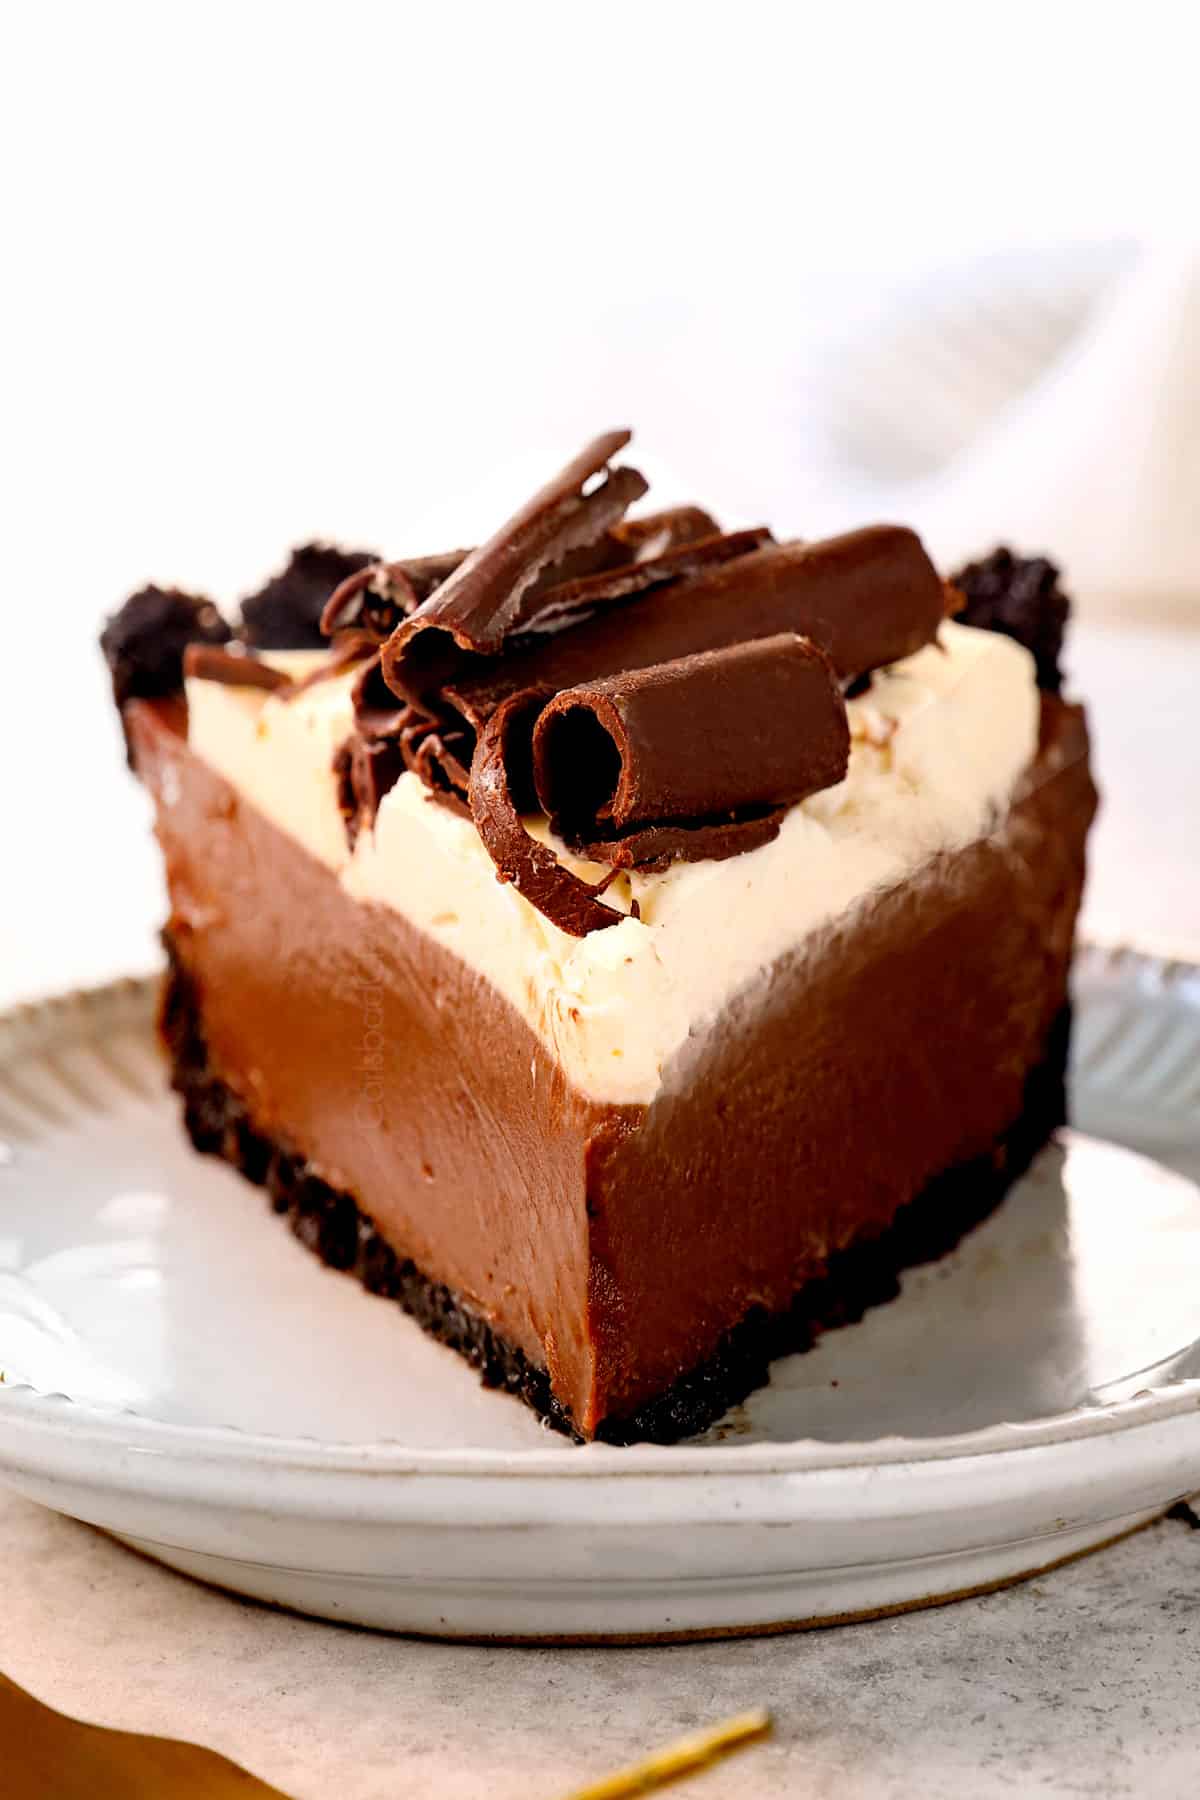
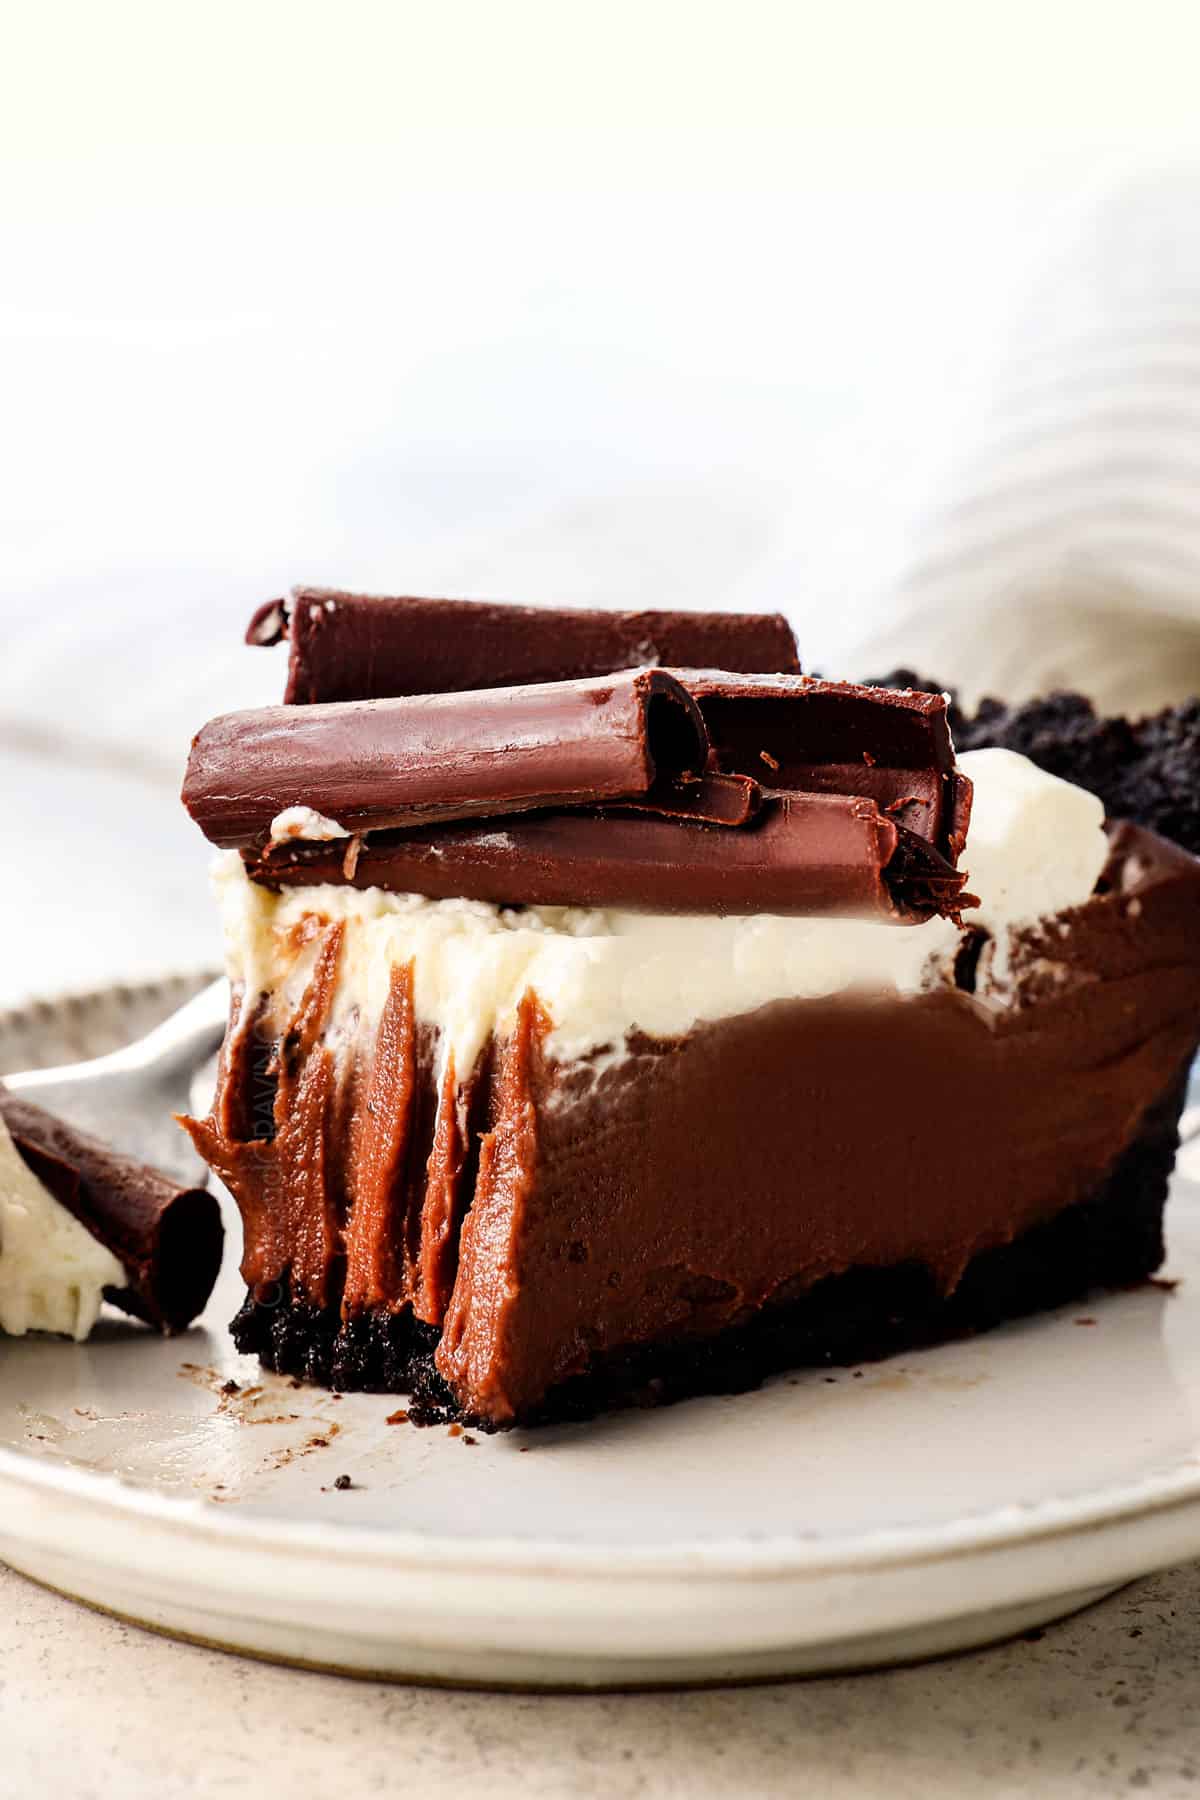
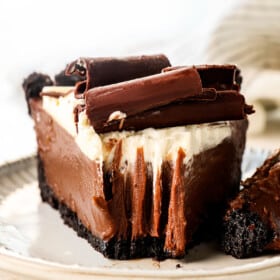
Chocolate Cream Pie is rich, silky, cool, creamy and destined to be the highlight of any dinner or celebration!
This Chocolate Cream Pie is a dizzyingly delicious dessert that will have heads turning – the ultimate rich and creamy dessert for chocolate lovers! A buttery Oreo crust is filled with silky, supremely chocolaty custard filling, topped with billowy homemade whipped cream then showered with showstopping chocolate shavings. This Chocolate Cream Pie recipe can be made 100% ahead of time, including the whipped cream (thanks to my stabilized whipped cream technique) for a stress-free dessert win. This recipe requires a few steps but is easy to follow with a detailed step-by-step video, photos, tips and tricks for one of the most stunning desserts of your life!
If you love pie as much as us, don’t miss some of our favorites like Dutch Apple Pie, Pecan Pie, Strawberry Pie, Mini Chocolate Peanut Butter Pies, Butterfinger Pie, Mini Caramel Apple Pies, Pear Pie, Mud Pie, Million Dollar Cookie Pie and S’mores Pie.
Chocolate Cream Pie Recipe Video

WHY this Recipe for Chocolate Cream Pie works
Deeply chocolaty. The chocolate filling is perfectly sweet, perfectly chocolaty with much deeper, richer complexities thanks to the combination of semi-sweet and unsweetened chocolate, as opposed to using semi-sweet and bittersweet which lacks a depth of flavor. Unsweetened chocolate, however, does not undergo the refining process known as conching, so it retains an unparalleled depth of flavor which is rounded out with sugar.
Oreo crust! Forget the homemade pie crust, a crispy, buttery, salty-sweet Oreo crust is the ideal complement to the creamy filling.
Thick, rich and holds together. Unlike many chocolate pudding pies which can run all over the pan once you remove the first slice, this recipe boasts a chocolate custard filling which holds together beautifully.
100% make ahead friendly thanks to the stabilized whipped cream. This means you can make chocolate pie days ahead of time because the whipped cream will hold its shape and won’t deflate or weep ever. So go ahead, serve it STRESS FREE for Thanksgiving or Christmas!
Chocolate Cream Pie Ingredients
This Chocolate Cream Pie is made with an Oreo crust, chocolate custard filling, and stabilized whipped cream — all homemade! It’s rich, decadent, and so easy to prepare with my tips and tricks. Here’s what you’ll need to make the chocolate pie recipe (full measurements in the printable recipe card at the bottom of the post):
FOR THE OREO CRUST:
For the chocolate filling:
FOR THE STABILIZED WHIPPED CREAM:

What Pan Should I USe?
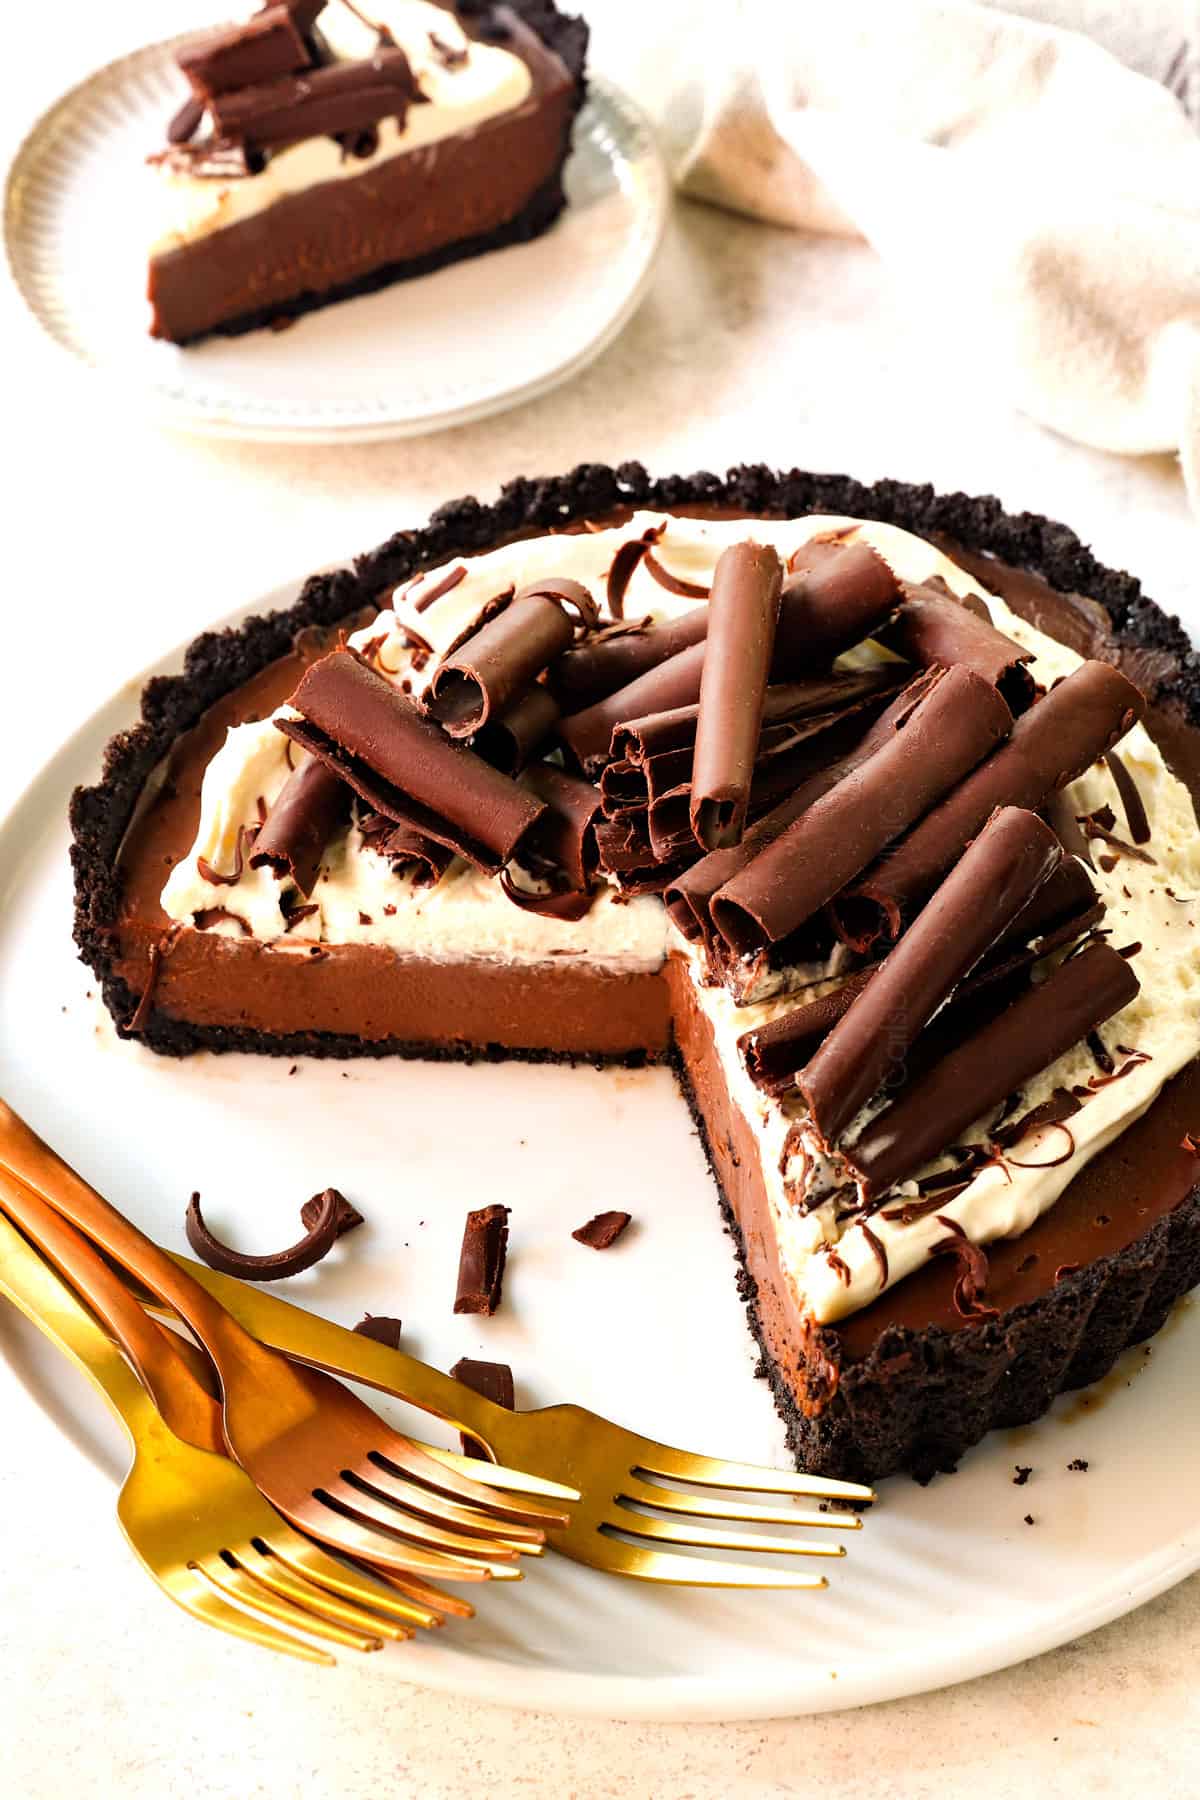
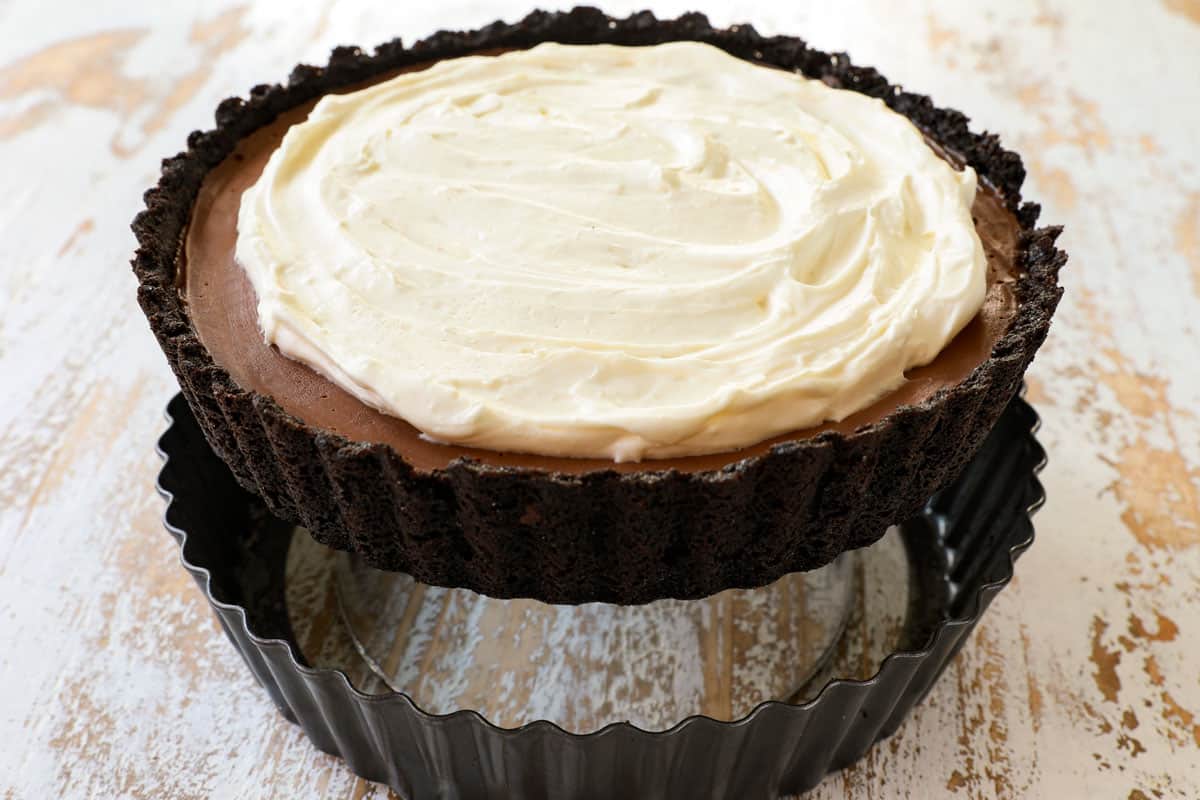
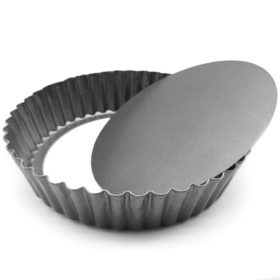
To make Chocolate Cream Pie, you are welcome to use a standard 9-inch deep-dish pie plate, or I highly recommend a 9-inch quiche pan with a removable bottom as seen in these photos. Now that I’ve made pies in this pan, I will never go back!
The removable bottom is a game changer. When you’re ready to serve, you place the pie on an inverted bowl and the sides drop away from the pan. This feature is amazing because it:
–allows you to easily transfer the entire pie to a plate or cake stand for beautiful presentation.
–shows off the beautiful sides of the pie
–allows you to slice the pie cleanly without ruining two slices before you can finally get a whole piece out
–allows you to remove the slices from the pan without losing any crust
How to Make Chocolate Cream Pie
Homemade Chocolate Cream Pie is easy to prepare, but you have to pay attention to the technique. The key is to never stop whisking the egg yolks while tempering and to not overcook. Please don’t be intimidated, you’ll be head over heels over the end result! Let’s take a closer look at how to make this indulgent dessert. I also recommend watching the How To Make Video in the printable recipe card with full measurements at the bottom of the post:
Step 1: Make the Oreo Cookie Crust
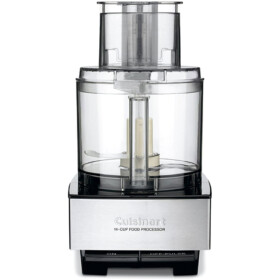
- Process Oreos into crumbs: Make the crumbs by either pulsing the Oreos in your food processor or crushing in a sealable bag with a rolling pin/side of a can. You want very finely ground crumbs because they stick together better.
- Combine crumbs and butter: If you use your food processor, simply add the butter directly to the processor and process until the crumbs are moistened. If you don’t have a food processor, add the crumbs and butter to a bowl and stir until the crumbs are evenly moistened.
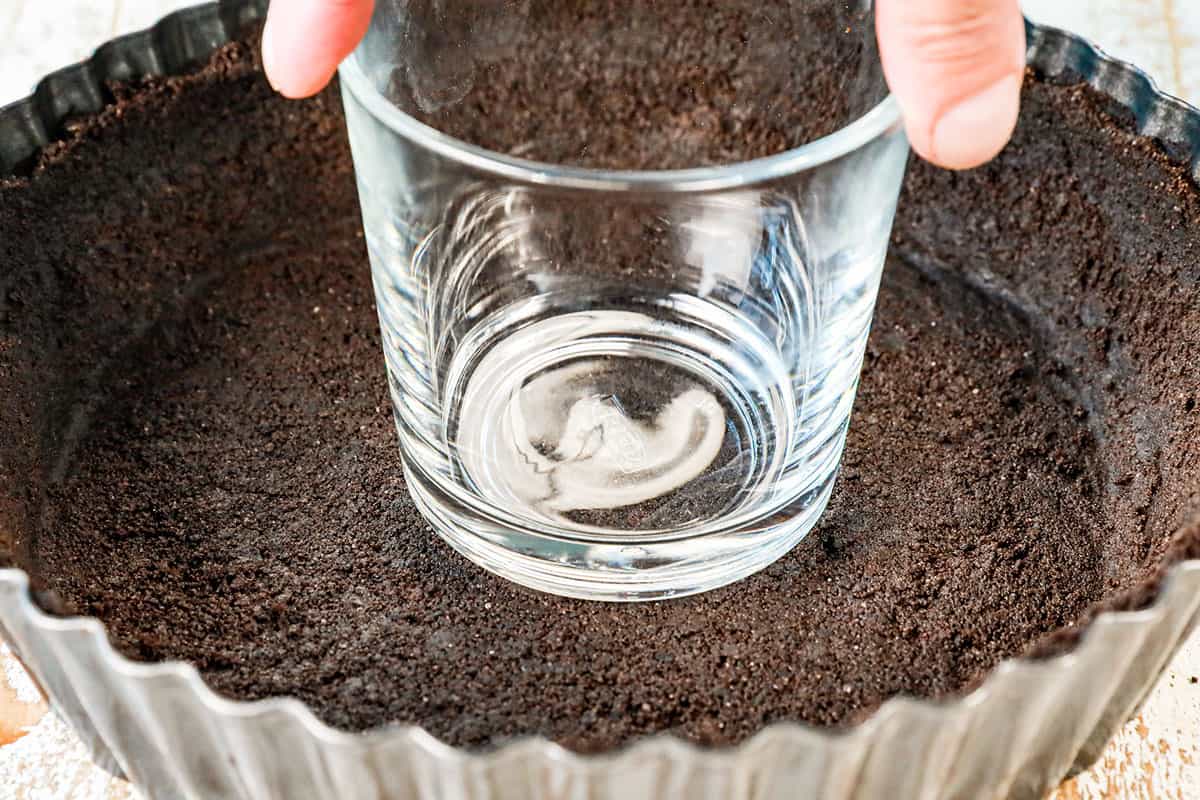
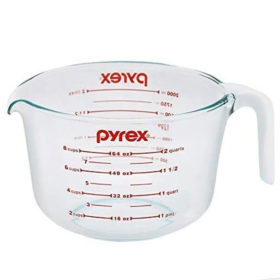
- Make the crust: Transfer the moistened crumbs to your pan and press firmly on the sides and then use the bottom of a glass to help create a compact, even bottom. This helps the crust stay intact and not crumble when sliced.
- Bake the crust: Bake the crust for 10 minutes then allow it to cool while you make the chocolate custard filling. Baking the crust before adding the filling allows it to seal together and cooling the crust before adding the filling prevents it from becoming soggy.
Step 2: Make the Chocolate Filling
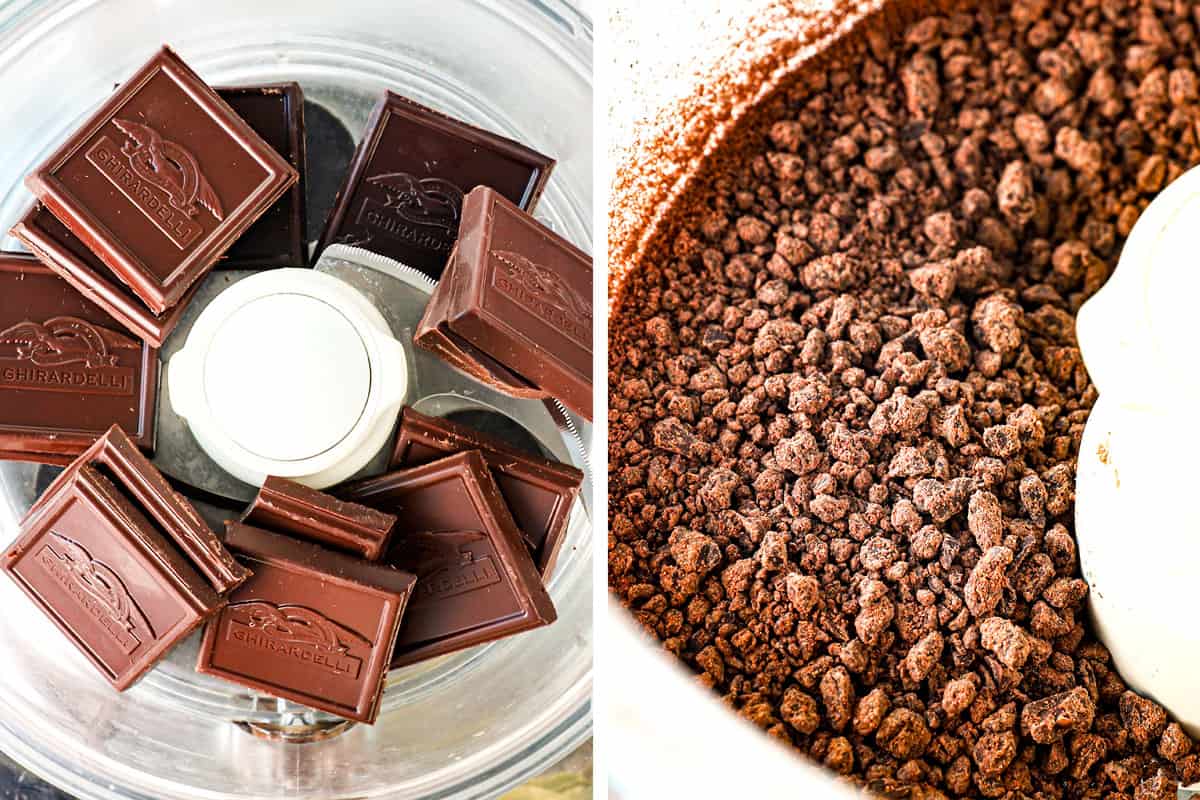
- Process the chocolate: Before you process the Oreos, I suggest adding the chocolate and processing it into small pieces. This not only saves you time and elbow grease, but helps the chocolate melt seamlessly later in the recipe.
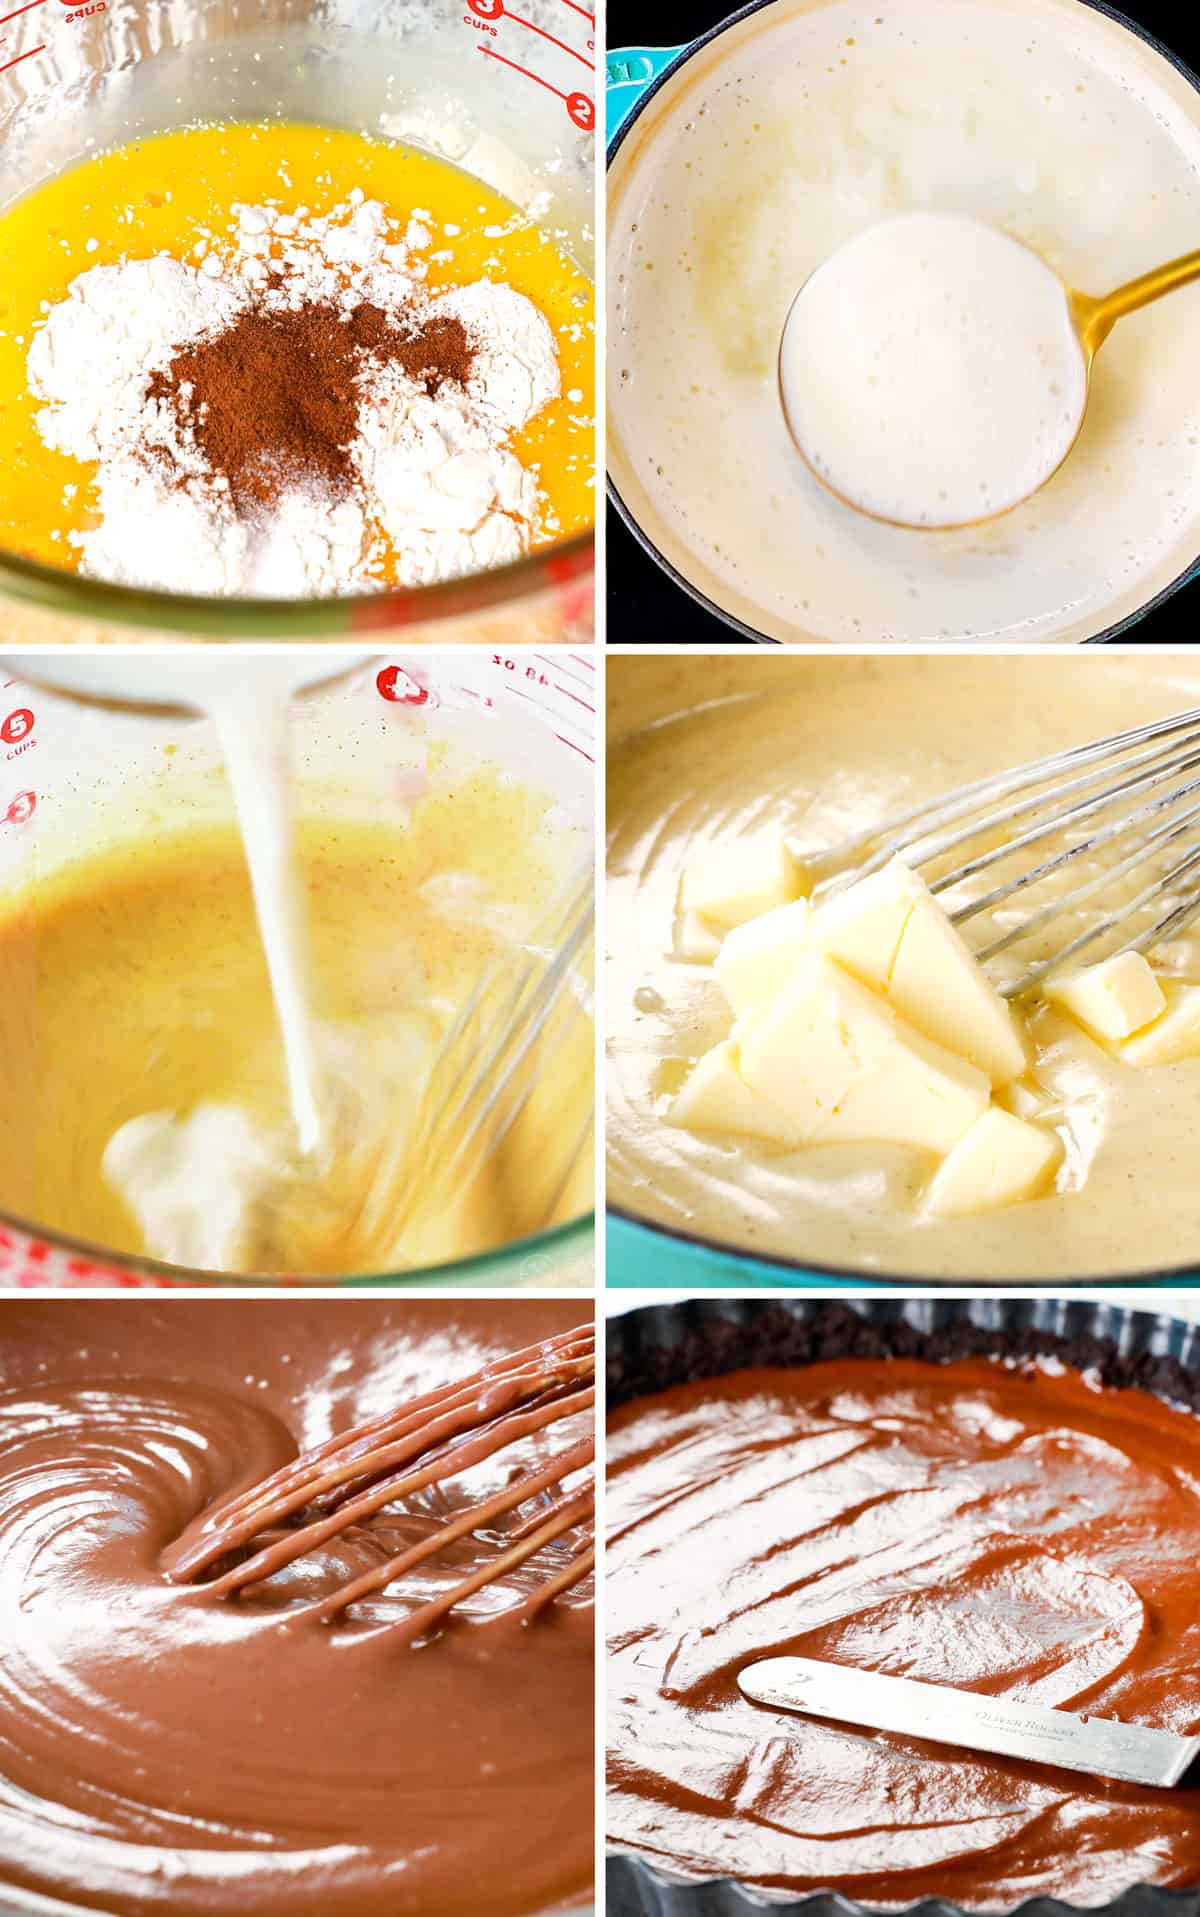
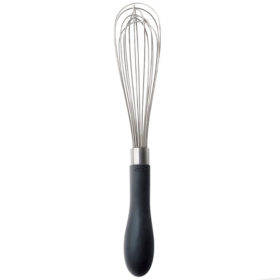
- Whisk egg yolks: Add the egg yolks, cornstarch, cinnamon and salt to a large liquid measuring cup or medium mixing bowl and whisk until completely combined. The mixture may seem thick because of the cornstarch, which is normal.
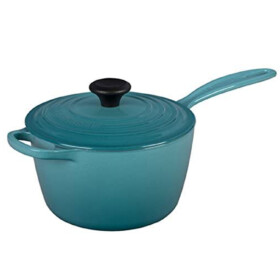
- Dissolve sugar: Add the sugar and half and half to a medium saucepan and bring to a simmer, stirring often. The goal here is to dissolve the sugar completely before adding the egg yolk mixture.
- Temper the eggs: This step is key to the success of your entire Chocolate Cream Pie recipe, but don’t worry, it’s easy! You can’t just add the egg yolks to the simmering half and half all at once, or they will scramble. Instead, we will temper the egg yolks, which simply means, slowly raising the temperature of the egg yolks by whisking in a little warmed half and half into the whisked egg yolks a little at a time. It is best to go slow and gradually whisk in a little and then a little more and then a little more. This recipe specifies slowly streaming in ½ cup ladle a couple times, but you can just eyeball it. It is fine it it’s more. The key here is to NEVER STOP WHISKING!
- Thicken the mixture: Gradually whisk the tempered egg yolk mixture back into the saucepan until combined with the rest of the half and half (again, never stop whisking during this process). Bring to a simmer, whisking constantly (especially around the edges) until the mixture thickens and a few bubbles burst on the surface, about 1 minute. Remove from the heat and whisk in the vanilla.
- Whisk in butter and chocolate: The order here is important. First, whisk in the butter until melted. This helps cool the mixture down a bit before adding the chocolate, otherwise, the fats in the chocolate can separate. When adding the chocolate, it’s helpful to add it in batches, so it melts more smoothly.
- Transfer to the crust: Pour the filling into the cooled pie crust and smooth into an even layer. If your crust is too warm then wait and add it to a bowl instead, then the crust when ready.
Step 3: Chill the Pie
- Refrigerate: Press a piece of plastic wrap directly on the surface of the filling. Refrigerate until filling is cold and set, about 3 hours, but best if overnight. You can add the stabilized whipped cream any point after 3 hours and continue to refrigerate until ready to serve. If using regular whipped cream, then pipe it on just before serving.
Step 4: Make the Stabilized Whipped Cream
- Make the gelatin: Add the unflavored gelatin to a microwave-safe bowl, then pour the water over top. Let stand for 5 minutes and then microwave for 20 seconds. Stir to combine.
- Whip the heavy cream: Add the heavy cream, powdered sugar, and vanilla extract to a large mixing bowl. Whip just until soft peaks form. You can use a handheld or stand mixer to do this.
- Add the gelatin: Turn the mixer to low and slowly pour in the gelatin mixture. Mix until combined, then increase the speed to medium and continue mixing until stiff peaks form.
Step 4: Assemble the Pie
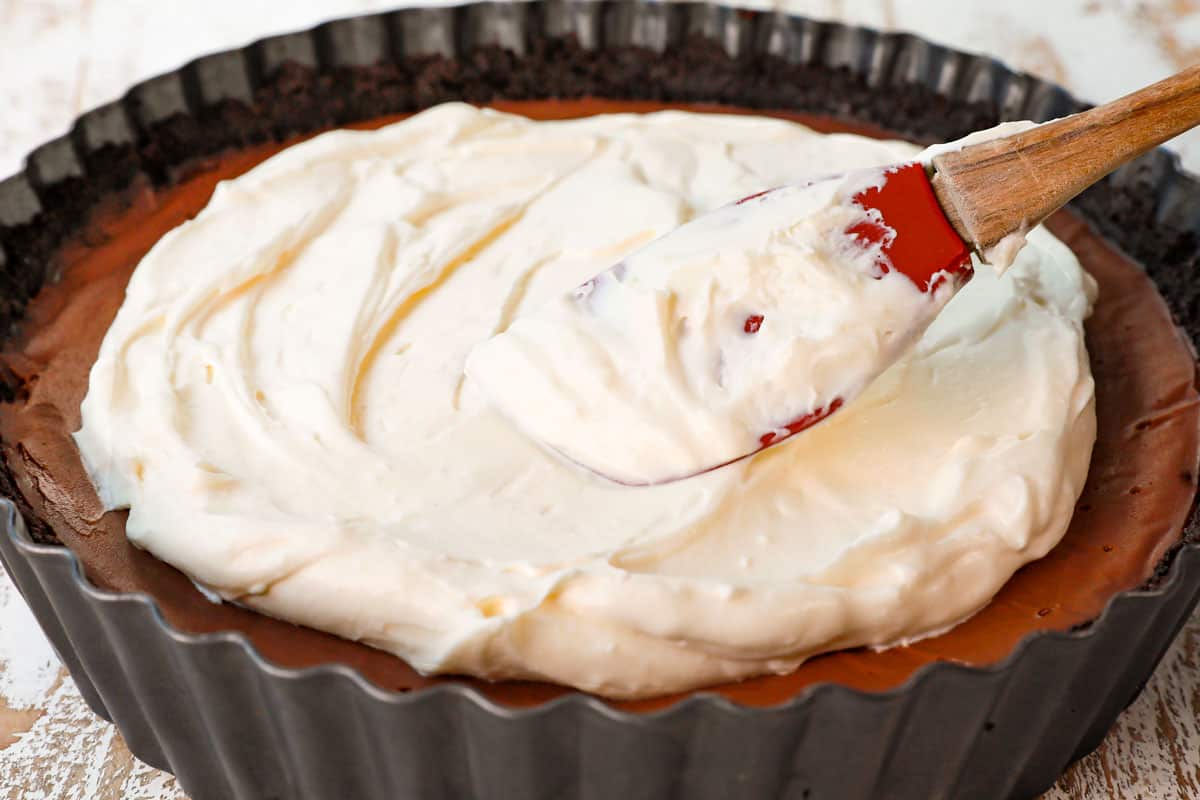
- Add heavy cream: Spread or pipe the stabilized whipped cream on top of the filling.
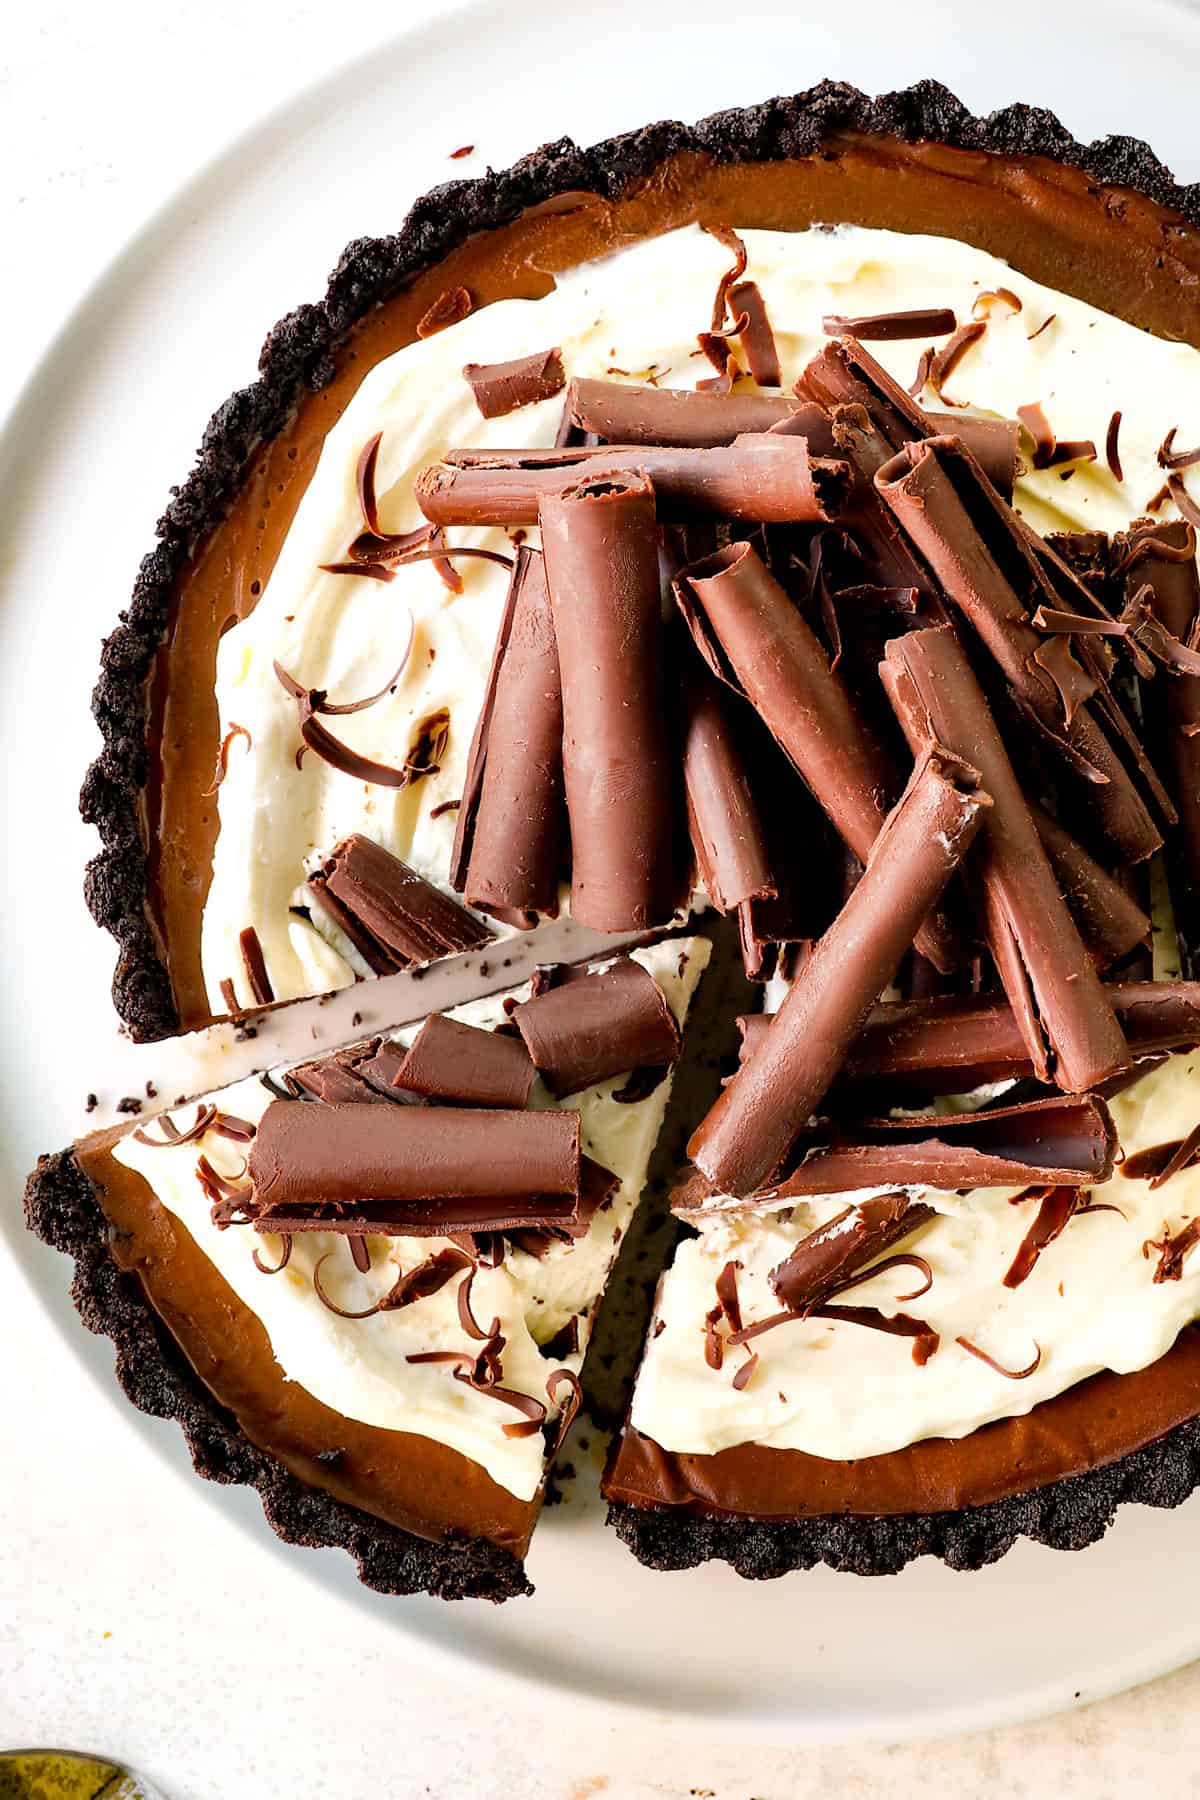
- Garnish: Top the pie with chocolate shavings or chocolate curls, if desired.

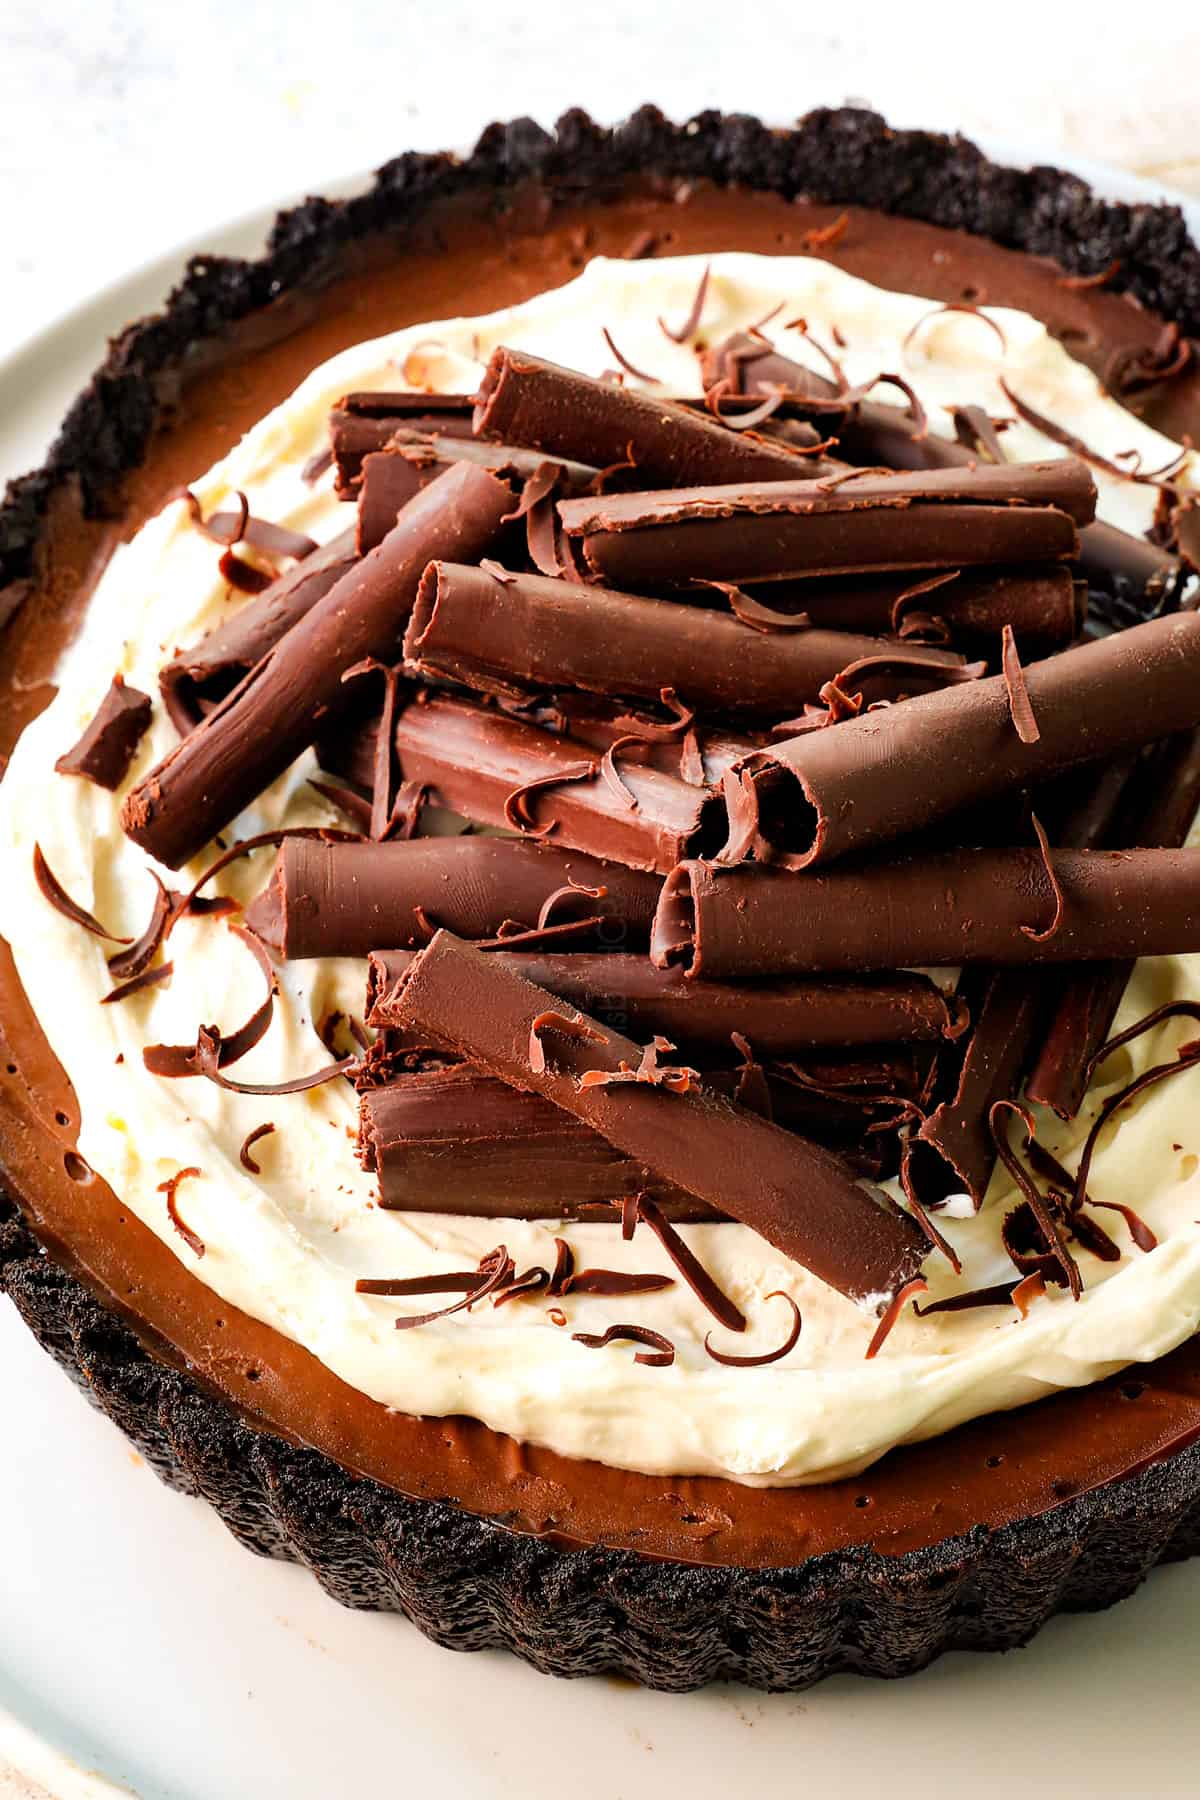
To Make the Chocolate Curls
You are welcome to decorate your Chocolate Cream Pie however you like. Some ideas include chocolate shavings (shave semi-sweet chocolate directly from the squares using a carrot peeler), mini chocolate chips, crushed candy, etc. but I love the “wow” factor that chocolate curls add – and they’re so easy to make!
- Select chocolate. You can use 6 ounces semi-sweet baking chocolate (like what you used for the pie filling) or 1 cup quality chocolate chips. If using chocolate chips, only use brands Ghirardelli or Guittard. Most other chocolate brands contain less cocoa butter and will not melt well. When selecting chocolate, check the label for cocoa butter; the higher the percentage of cocoa butter, the better the chocolate chips. This translates into the tangible qualities of richer flavor, aroma, and better melting ability.
- Use shortening. Melt the chocolate with 1 tablespoon shortening. The shortening breaks up and softens the chocolate just a bit so it doesn’t shatter as easily while curling, but the chocolate stays firm after the curls are made.
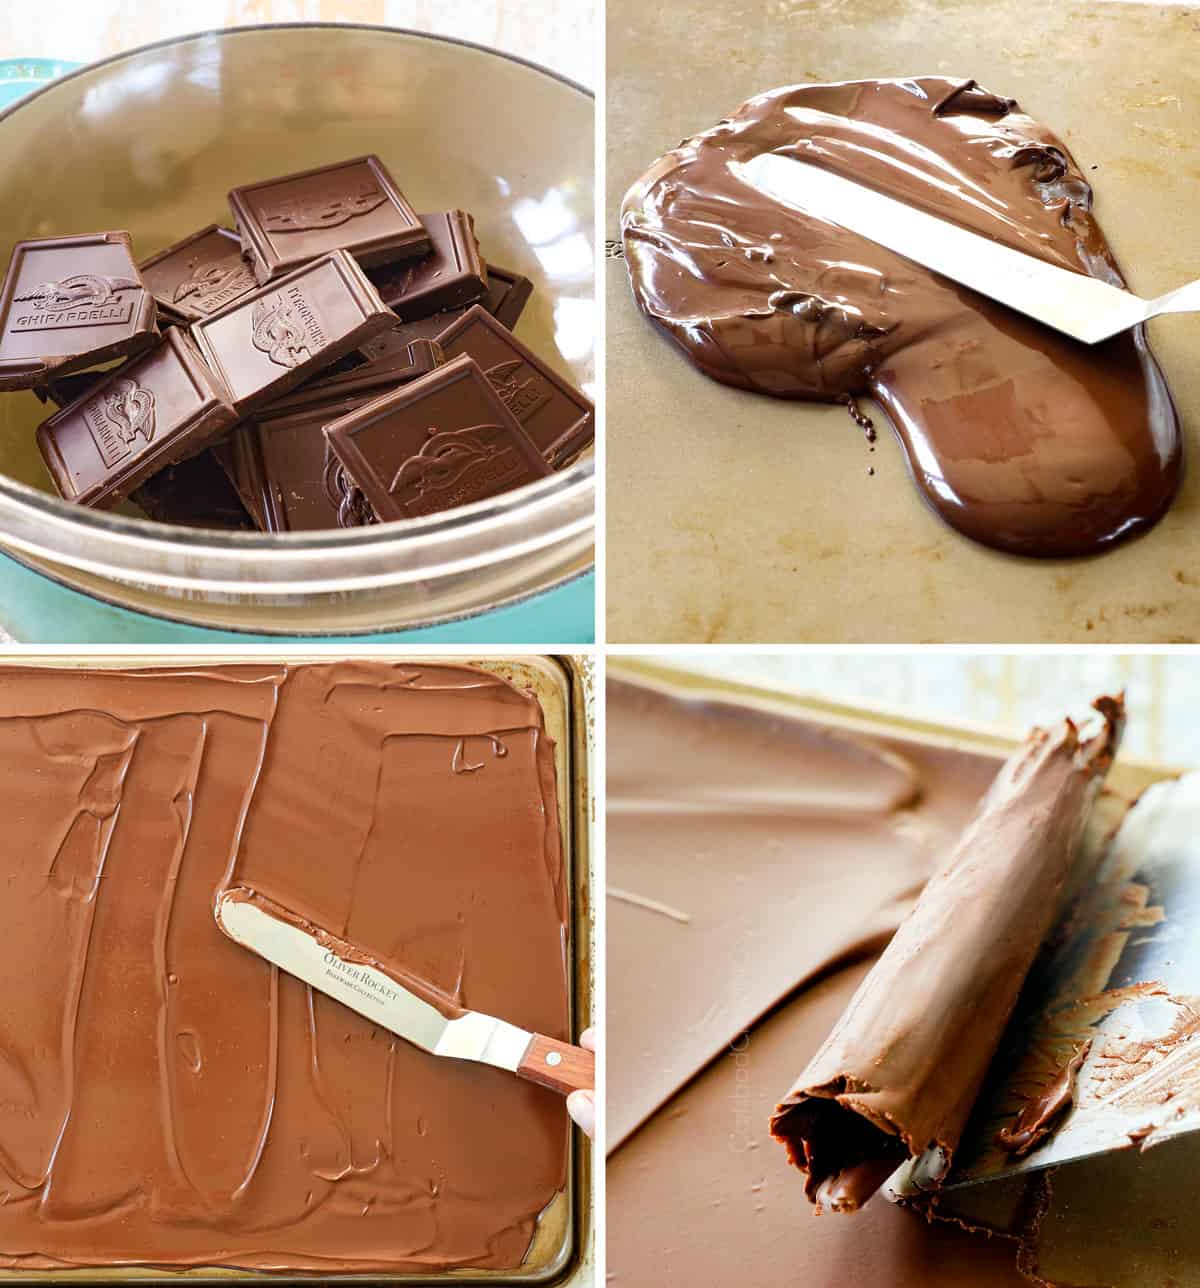
- Melt chocolate: To melt, make makeshift double boiler by bringing an inch or two of water (depending on how low your bowl reaches) to a gentle simmer. Place a heat proof bowl with the chocolate and shortening over top. You want it to fit snugly without touching the water. Stir the chocolate constantly until melted and silky smooth.
- Pour over a flat surface. Pour the melted chocolate onto the clean back of a half baking sheet and smooth it into an even, thin layer that covers the entire back of the sheet. I recommend an offset spatula.
- Allow the chocolate to set. Place the chocolate baking sheet in the refrigerator for 10 minutes or until set, then remove the pan and allow it to sit at room temperature for 1-2 minutes.
- Test the chocolate. It will take a little testing to see if your chocolate is ready to make curls, but you’ll know the second it is right. Press a metal spatula or scraper firmly against the pan and scrape the chocolate up as you push the scraper forward. If the chocolate curls beautifully over itself in one piece, it’s perfect. If it’s flaky and shattering, it’s too cold and needs to sit at room temperature for a couple minutes to become more pliable. If the chocolate seems soft and pulls up from the pan but isn’t curling, it’s too warm; return it to the fridge for 2-3 minutes to allow it to set up more.
- Make the curls. Working in rows, press a metal spatula or scraper firmly against the pan and scrape the chocolate up as you push the scraper forward. After a curl, stop and cut the chocolate and continue again in the row – you don’t want one long curl or it will break when you try and separate it! Depending on how quickly you move, you may find you need to pop the chocolate sheet in the refrigerator towards the end to firm up a bit, then continue again.
- Adjusting the size of your curls: The larger the metal spatula you use, the larger your curls will be. Likewise, smaller metal spatulas result in smaller curls.
- Store. If not topping your dessert with curls right away, transfer them to the freezer to harden. Once hard, transfer to a zip-top bag and refrigerate until you need them.

Make this Chocolate Cream Pie Recipe ahead of time
You have a few options when it comes to making the Chocolate Cream Pie in advance:
-Crust: can be baked and cooled up to 2 days in advance before filling. Wrap tightly and store at room temperature. The baked crust can also be frozen for up to 3 months.
-Filling: can be turned into the crust and covered with plastic wrap pressed directly against its surface, then refrigerated for 24 hours before topping.
-Chocolate Curls: transfer the curls to the freezer to harden. Once hard, transfer to a zip-top bag and refrigerate until you need them.
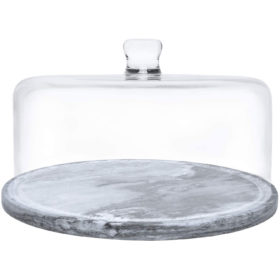
-Entire recipe: thanks to the stabilized whipped cream, you can prepare the entire recipe up to 3 days before you plan on serving it. Be sure to cover the pie to prevent it from drying out, but be careful not to squish the stabilized whipped cream topping. I like to use a cake caddy for this.

Chocolate Cream Pie Recipe Tips

How to get the perfect pie filling
There are four important elements to a thick pie filling 1) using enough egg yolks, 2) using cornstarch, 3) using unsweetened chocolate and 4) cooking the filling long enough so the mixture coagulates (that happens at 160 degrees).
–The egg yolks provide the silky richness and coagulate as the proteins change from a liquid to a semisolid or solid.
–The cornstarch thickens and helps the filling set while also stabilizing the filling by making the eggs more resistant to overcooking and curdling.
–The unsweetened chocolate works as a natural thickener because it is full of starchy cocoa solids (more than bittersweet or semi-sweet).
Now the trick is using these ingredients in perfect proportions – which is what this Chocolate Cream Pie recipe has done for a an indulgently creamy, smooth, rich chocolate pie filling that holds together perfectly.

Variations of The Best Chocolate Cream Pie
Can I make this recipe gluten free?
Yes! Use use gluten free Oreos for the crust – the rest of the ingredients are gluten free!

How to Store Chocolate Cream Pie With Oreo Crust
Cover any leftovers with plastic wrap or use a cake caddy or other airtight container. The pie must be refrigerated and will last up to 3-4 days.
Can you Freeze Chocolate Cream PIe
You may freeze Chocolate Cream Pie, but it’s not the best dessert to freeze. The filling will likely become grainy.
The Best Chocolate Cream Pie Recipe FAQs
The combination of semi-sweet chocolate and unsweetened chocolate provides the perfect, rich, chocolaty, not-too-sweet custard filling. You may play around with the semi-sweet chocolate, but you must maintain 2 ounces of unsweetened chocolate. Unsweetened chocolate adds structure because it boasts more cocoa solids which are rich in starches, a natural thickener.
No, it is CRUCIAL to use quality baking chocolate for this recipe or your filling will be grainy. Set yourself up for success by using QUALITY baking chocolate such as Ghirardelli brand.
Baking chocolate is cooled, hardened chocolate liquor with a high percentage of cocoa butter because it’s intended to be baked with and therefore melts beautifully when making the filling, whereas, chocolate chips contain less cocoa butter and will not melt seamlessly and can leave you with stubborn chocolate pieces (i.e. they’re not suitable for melting).
Keep those leftover egg whites! Leftover egg whites can be stored in a sealed container and refrigerated for up to 4 days OR they can be frozen for several months. (Use an ice cube tray if you want to keep them in individual, easy-to-measure portions.) Use them for omelets, soufflé, angel food cake, pavlova, royal icing or candied nuts.
No, do not substitute either the heavy cream or half and half in this recipe. You need the higher fat content in both products to make a creamy chocolate filling and whip the stabilized whipped cream to stiff peaks. Using whole milk, non-dairy milk, or another lower fat alternative will result in runny pie filling and the whipped cream won’t hold its shape.
Stabilized whipped cream is simply heavy cream that has been whipped with gelatin in order to give it structure. I am a huge fan because it allows you to prepare any dessert 100% ahead of time. It holds its shape long after the last bite is gone without weeping or melting.
Stabilized whipped cream is made by dissolving unflavored gelatin in water then whipping it into the heavy cream until stiff peaks form – that’s it! It doesn’t alter the flavor one bit. If you want to make traditional whipped cream, skip the gelatin and water. You must wait until serving to add the whipped cream, otherwise, it can deflate and melt.
Yes, but prepare yourself for a different tasting pie! I recommend using regular Oreos to make the crust to embrace all of the rich chocolate deliciousness! You may, however, use gluten-free Oreos if you need to keep this dessert gluten-free.
Yes, this pie would be delicious with a traditional Pie Crust (be sure to blind bake it first), Pecan Graham Cracker Crust or traditional Graham Cracker Crust, however, Oreos are still my favorite! If you use Graham crackers, you’ll use 12 whole sheets, 6 tablespoons butter and ¼ cup granulated sugar.
If your chocolate pie is runny, it’s likely the filling wasn’t cooked long enough to coagulate. Bring the filling to a simmer until a few bubbles burst on the surface and it reaches about 160 degrees. Take care, however, because you also don’t want to overcook the filling which will make it very dense, and can even make it start to weep and separate.
A chocolate pie can not set up if it doesn’t have enough cornstarch, egg yolks, or the filling wasn’t cooked to 160 degrees. Use this trusted recipe and you won’t have any problems!

WANT TO TRY THIS Chocolate Cream Pie RECIPE?
PIN IT to your dessert, holiday, chocolate or pie recipe BOARD TO SAVE FOR LATER!
FIND ME ON PINTEREST FOR MORE GREAT RECIPES! I AM ALWAYS PINNING :)!
©Carlsbad Cravings by CarlsbadCravings.com


Chocolate Cream Pie With Oreo Crust
Save This Recipe To Your Recipe Box
You can now create an account on our site and save your favorite recipes all in one place!
Ingredients
Oreo crust:
- 24 Oreo cookies (with filling)
- 5 tablespoons salted butter
Chocolate Custard filling:
- 6 tablespoons salted butter, chopped into pieces (chop BEFORE you begin)
- 6 ounces QUALITY semi-sweet chocolate (I recommend Ghirardelli's)
- 2 ounces QUALITY unsweetened chocolate (I recommend Ghirardelli's)
- 6 large egg yolks, room temperature
- 2 tablespoons cornstarch
- 1/2 teaspoon cinnamon (optional)
- 1/4 teaspoon salt
- 2 1/2 cups half and half
- 1/2 cup granulated sugar
- 1 1/2 teaspoons vanilla extract
Stabilized Whipped Cream:
- 1 teaspoon unflavored gelatin
- 1 1/2 tablespoons water
- 1 cup cold heavy cream
- 3 tablespoons powdered sugar
- 1 teaspoon vanilla extract
Instructions
Prep
- Preheat oven to 350 degrees F.
- Chop the butter for the custard into pieces; set aside.
- Add the chocolate for the custard to a food processor and process until ground. Remove and wipe the processor clean. (Alterntively, chop by hand.)
For the crust: (Can be made 1-2 days in advance)
- Add Oreos to the now empty food processor and process until finely ground. Add butter and pulse to combine. (Or crush with a rolling pin then mix with butter in a bowl).
- Pour the crumbs into a 9-inch pie plate that is at least 1 ½ inches deep. (I use a quiche pan with a removable bottom.) Press the crumbs up the sides, then press the remaining crumbs onto the bottom; use the bottom of a measuring cup or glass to firmly press the crumbs into the bottom. If using a deep pan, you only need to press the crumbs 1 1/2-inches up the sides.
- Bake at 350 degrees F for 10 minutes. Transfer to a wire rack and cool completely before filling.
For the chocolate custard filling:
- Add egg yolks, cornstarch, cinnamon and salt to a large liquid measuring cup or mixing bowl and whisk until thoroughly combined, about 30 seconds; set aside.
- Add sugar and half and half to a medium saucepan. Bring to a simmer over medium-high heat, stirring often.
- Ladle out about ½ cup of the hot liquid (eyeball it) and very slowly whisk it into the egg yolk mixture to temper the eggs, WHISKING CONSTANLY. Repeat a few times. Never stop whisking, even while ladling.
- Gradually whisk the tempered egg yolk mixture back into the saucepan until combined (never stop whisking during this process). Bring to a simmer, whisking constantly (especially around the edges) until the mixture thickens and a few bubbles burst on the surface, about 1 minute.
- Remove from the heat and immediatley whisk in the vanilla, followed by the chopped butter until melted. Whisk in the ground chocolate a little at a time until completely melted and smooth.
- Pour the filling into the cooled pie crust and smooth into an even layer.
- Press a piece of plastic wrap directly on the surface of the filling. Refrigerate until filling is cold and set, about 3 hours, but best if overnight. You can add the Stabilized Whipped Cream anytime after the 3 hours and serve or return the pie to the fridge until ready to serve, up to 3 days.
Stabilized Whipped Cream
- Add unflavored gelatin to a microwave safe bowl then pour the cold water over top; let stand for 5 minutes. Microwave for 20 seconds. Stir the mixture, then set aside while you immediately begin to beat the heavy cream.
- Add heavy cream, powdered sugar, and vanilla extract to a large mixing bowl. Whip using an electric hand mixer just until soft peaks form (the peaks flop over when the beaters are lifted.)
- Turn the mixer to low and slowly pour in the gelatin mixture. Mix until combined then increase speed to medium and continue mixing until stiff peaks form (peaks stand straight up when the beaters are lifted).
Assemble
- Spread the whipped cream evenly over top the pie. Garnish with chocolate shavings or chocolate curls. (See post for detailed chocolate curls tutorial).
- Serve immediately or cover with a cake caddy or tent with foil and keep chilled until ready to serve, up to 3 days.
- To cut clean slices: Fill a large glass with hot water. Dip the knife in the hot water before each cut, then wipe clean with a paper towel after each cut, then repeat. You can also run the knife under hot water in between cuts.
Video
Notes
Tips and Tricks
- Use quality chocolate: Now is not the time to skimp on quality chocolate or you can ruin your Chocolate Cream Pie even if you do everything right. Use quality baking chocolate that is FRESH. I recommend Ghirardelli brand chocolate. Less quality or old chocolate will also leave you with a grainy filling.
- Can I use different chocolate?: The combination of semi-sweet chocolate and unsweetened chocolate provides the perfect, rich, chocolaty, not-too-sweet custard filling. You may play around with the semi-sweet chocolate, but you MUST maintain 2 ounces of unsweetened chocolate. Unsweetened chocolate adds structure because it boasts more cocoa solids which are rich in starches, a natural thickener.
- Can I use chocolate chips? No, it is CRUCIAL to use quality baking chocolate for this recipe or your filling will be grainy. Baking chocolate is cooled, hardened chocolate liquor with a high percentage of cocoa butter because it’s intended to be baked with and therefore melts beautifully when making the filling.
- Do I have to use stabilized whipped cream? Stabilized whipped cream is simply heavy cream that has been whipped with gelatin in order to give it structure. I am a huge fan because it allows you to prepare any dessert 100% ahead of time. It holds its shape long after the last bite is gone without weeping or melting. If you want to make traditional whipped cream, skip the gelatin and water. You must wait until serving to add the whipped cream, otherwise, it can deflate and melt.
- Vegetarian gelatin substitute: Use 1 teaspoon agar-agar instead of gelatin.
- My favorite pie pan: I highly recommend a 9-inch quiche pan with a removable bottom as seen in these photos. The removable bottom shows off the beautiful sides of the pie and allows you to slice the pie cleanly without ruining any crust or other pie slices!
- Storage: Store covered, in the refrigerator, for up to 4 days. I don’t recommend freezing.
Make Ahead
You can prepare the entire recipe ahead of time or in stages:- Entire recipe: Thanks to the stabilized whipped cream, the pie can be made and refrigerated up to 3 days in advance. Be sure to cover the pie to prevent it from drying out with tented foil or a cake caddy.
- Crust: can be baked and cooled up to 2 days in advance before filling. Cool, then wrap tightly and store at room temperature. The baked crust can also be frozen for up to 3 months.
- Filling: can be turned into the crust and covered with plastic wrap pressed directly against its surface, then refrigerated for 24 hours before topping with cream.
- Chocolate Curls: transfer the curls to the freezer to harden, then to a zip-top bag and refrigerate until you need them.
Want To Make This Recipe?

Did You Make This Recipe?
Tag @CarlsbadCravings and Use #CarlsbadCravngs
Leave a Review, I Always Love Hearing From You!


Lauren says
How deep was the quiche pan yused for the chocolate cream pie?
Jen says
Mine was 2 inches. I pressed the crust about 1 1/2 – 1 3/4 inches up the sides.
Kim says
This was delicious! And I won our annual Pi day pie contest at work! Thank you for the wonderful recipe.
Jen says
Yay, Kim, I am so happy to hear that! Thank you for making my recipes and taking the time to comment!
T says
Help!!! I cannot find Giradehlli baking chocolate as linked. Are any other brands suitable? I did find Lindt 100% Cacao pure dark? And ‘Bakers’ brand semi sweet chocolate? Help, I don’t want to spend the time and ruin it with poor quality chocolate.
Jen says
I think those other brands will work great! Those are both quality chocolate. I hope you love the pie!
Scott says
The absolute best Chocolate Cream Pie I’ve ever made. Huge hit during the holidays.
Jen says
I’m so pleased that it is a winner! Happy holidays to you and yours!
Sherie Dracup says
Jen, you are a genius. This pie was so amazing. I had company and they were amazed. Will be making for our annual Christmas dinner. I have such good luck with your recipes. Just the best. Also, your pups are adorable. Merry Christmas!!
Jen says
Hi Sherie! Thank you so much for your sweet review! I am so glad that it was a hit and that it will be a repeat for another special occasion! I love hearing that you have success with my recipes 🙂 Merry Christmas to you as well! I do love my little puppies! They bring us a lot of joy!
Anastasia says
Hi can I use dairy free half and half or any other dairy free substitute (coconut/ oat)?I’ve made this as is but would to make a dairy free version for some friends
Jen says
I’m so pleased you enjoyed it Anastasia! I haven’t tried a dairy free version, so I asked ChatGTP and this is what it said:
Yes, you can make a dairy-free version, but I would make a few substitutions for the best results.
For the half-and-half, I recommend using a full-fat, unsweetened oat cream or dairy-free barista-style creamer rather than coconut milk. Oat-based products have a more neutral flavor and will let the chocolate shine. If you don’t mind a subtle coconut flavor, full-fat canned coconut milk is your best bet for richness and a creamy custard texture.
For the topping, you can either:
Use a dairy-free whipping cream such as Country Crock Plant Cream or Silk Heavy Whipping Cream Alternative and prepare it as directed, or
Skip the stabilized whipped cream and top with coconut whipped cream just before serving.
The biggest flavor difference will come from the milk substitute. For the closest match to the original pie, I’d choose oat cream or a dairy-free half-and-half alternative over coconut milk. The pie will still be rich, silky, and intensely chocolatey.
Lee Ann says
Jen, just had to let you know that I have made this chocolate cream pie for my husband’s birthday 3 years in a row.He (we) absolutely love it! I must admit, I was a little intimidated to give it a go, but I followed your detailed instructions exactly with tremendous success! Thank you so much for sharing this deliciously decadent recipe! It is now a birthday tradition in our home!
Jen says
Wow Lee Ann! That makes my day to hear your glowing review of this recipe! I’m so thrilled that it has become a birthday tradition in your family! Thank you so much for taking the time to comment on this recipe and my detailed instructions! 🙂
Blair Huntington says
Good effort overall! The examples were practical and clear.
Jen says
Thanks Blair!