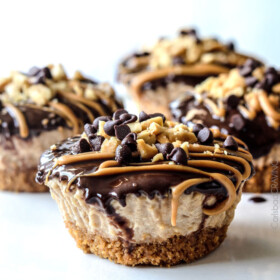
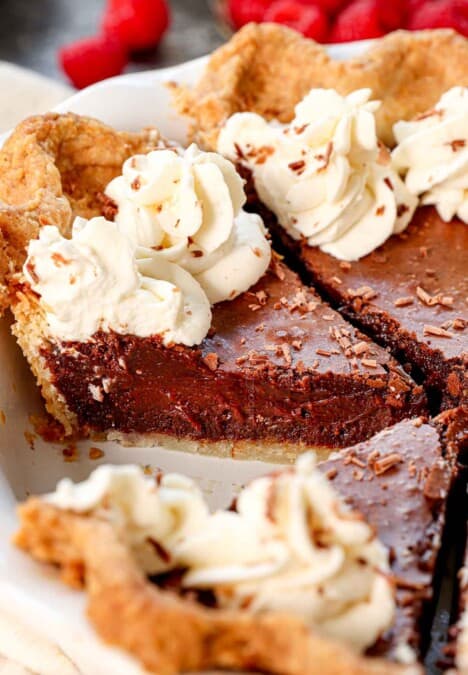
Chocolate Peanut Butter Pie made even more drool worthy with perfect proportions in individual mini pie form!
These Chocolate Peanut Butter Pies are an easy, make ahead, almost no bake rich, decadently DELICIOUS dessert with a toffee graham cracker crust, creamy peanut butter filling, and silky chocolate ganache topping sure to satisfy all your peanut butter, chocolate cravings. They are make ahead and freeze so they are the ideal stress free entertaining or special occasion dessert!
WATCH: Mini Chocolate Peanut Butter Dessert

Chocolate Peanut Butter Pie
Patrick and I were lazying around one night with nothing on TV, nothing on Netflix. He was manning the controls when he stopped at Pioneer Woman. “Let’s watch this!” he said. Honestly, I think he was more excited about it than I was. but as Ree began making her Chocolate Peanut Butter Pie, I got excited, very excited. And then I was so excited, I had to make my very own version of Chocolate Peanut Butter Pie ASAP, and these little beauties were born.
Why You’ll Love this Easy Chocolate Peanut Butter Pie
These adorably delicious mini Chocolate Peanut Butter Pies are “the best” in my book because:
- They are mini Chocolate Peanut Butter Pies which means you get the perfect ratio of crust to filling.
- Mini means they are easy to transport, serve and eat – not to mention they are so cute!
- They boast a buttery graham cracker crust that’s not just graham crackers and butter but toffee bits for a Toffee Graham Cracker Crust. Perfection.
- This Chocolate Peanut Butter Pie recipe is almost no bake. You bake the mini crusts for about five minutes and that’s it for the oven! Baking helps the crust bind together so it doesn’t crumble all over when you bite into the mini pies because you don’t want to miss a crumb of this crust.
- The Toffee Graham Cracker crusts are delish but not overpowering – the perfect compliment to the peanut butter filling.

Chocolate Peanut Butter Pie Ingredients
- graham crackers: you will need 5 whole sheets
- butter: please use unsalted butter so we can control the salt
- brown sugar: may sub granulated if that’s all you have
- toffee bits: I use Heath Bits‘O Brickle Toffee bits located in the baking section by the chocolate chips. You can omit them if you can’t find them but they add a wonderfully sweet taste to both the pie and crust.
- heavy cream: you cannot substitute milk or it will not whip up fluffy
- cream cheese: use room temperature cream cheese so it is easy to mix
- smooth peanut butter: I recommend spoonable peanut butter such as Jif or Skippy as opposed to natural peanut butter that can taste gritty.
- confectioners’ sugar: please don’t substitute granulated or brown sugar
- vanilla extract: quality exact for the best flavor!
- chocolate: use semi-sweet QUALITY chocolate bars such as Bakers or better yet, Ghirardelli if you can get your hands on them. You may substitute chocolate chips but ONLY use Guittard or Ghirardelli. Other chocolate brands have too many additives and will not melt nicely.

How to Make Chocolate Peanut Butter Pie
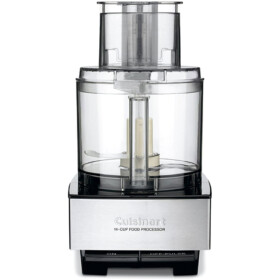
- Make graham cracker toffee crust: Add Graham crackers, butter, brown sugar and toffee to a to a food processor and blend to a fine crumble. If you don’t have a food processor you can use a rolling pin to crumble the graham crackers and toffee bits and then combine everything in a large bowl.
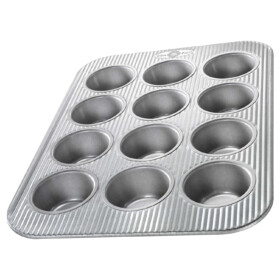
- Line muffin tins. Divide crust mixture between the 12 liners (about a heaping tablespoon each) and press into the bottom of the liners. Bake for 5-7 minutes or until lightly golden. Set aside.
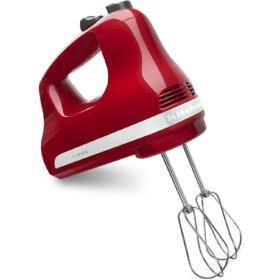
- Whip heavy cream: We start the filling by whipping heavy cream in a large bowl with a hand mixer until stiff peaks form and then set aside. This is what will give our pies the lightness to cut through the rich peanut butter.

- Beat filling ingredients together. The filling is a whipped combination of heavy cream, cream cheese, sugar, toffee bits (you don’t taste the “crunch” – they just add a little something-something-something) and a splash of vanilla. Before you fold in your heavy cream into the peanut butter/cream cheese mixture, it will be very thick so don’t be alarmed.
- Fold heavy cream into filling. Once this peanut butter/sugar mixture is thick and creamy, you fold in your freshly whipped heavy cream to create a fluffy, silky, creamy peanut butter filling..mmmmmmmm…..(you are going to want to lick the bowl clean and you can! because it doesn’t have eggs…not that that usually stops me…)

- Assemble chocolate peanut butter pies: Spoon your whipped splendor of Peanut Butter Pie Filling over the Toffee Graham Cracker Crust (they will fill to the top) and freeze for at least one hour to harden. You are welcome to freeze for days – just whenever you are ready for the next step.

- Make chocolate ganache. Once your peanut butter pies are firm, make Chocolate Ganache by heating heavy cream in a microwave safe bowl for about 90 seconds. Add chopped chocolate, let sit one minute then vigorously whisk until smooth. Let cool to barely warm, stirring occasionally (it will thicken as it cools.).
- Top Chocolate Peanut Butter Pies with ganache. Spoon the Chocolate Ganache over the peanut butter cups and spread with the back of the spoon.

DO I HAVE TO USE MUFFIN WRAPPERS?
It is also optional if you garnish with or without the wrappers. I like to keep the wrappers on for the ganache so it doesn’t spill over the sides and then remove the wrappers, place pies on a baking sheet and proceed to garnish, then freeze. There really isn’t a right or wrong though, just as long as you freeze the Chocolate Peanut Butter Pies after you garnish.
Can I make Chocolate Peanut Butter Pies Ahead of time?
Absolutely! You can make your mini Chocolate Peanut Butter Pies completely ahead of time and store them in a freezer for up to 7 days. If serving company, however, I recommend only preparing part of the recipe ahead of time because the peanuts will soften slightly when frozen.
I recommend making the recipe up through Step 4 (putting the peanut butter filling in each cup) and freezing for several hours or for up to 7 days. When you’re ready to put this dessert on your menu, start at Step 5, making the chocolate ganache, and follow through to the end of the recipe.
CAN I GARNISH PIES RIGHT BEFORE SERVING?
I don’t recommend garnishing the Chocolate Peanut Butter Pies right before serving because the pies will soften too much – they need to be served straight from the freezer. Instead, garnish pies after you have spooned your ganache over the pies and the chocolate has set (it should set in about 5 minutes at room temperature) and then place in the freezer.

HOW TO SERVE CHOCOLATE PEANUT BUTTER PIE
Once ready to devour, serve Chocolate Peanut Butter Pies immediately as they tend to soften quickly. But don’t worry, they will get consumed even quicker because these mini pies are lusciously rich, and peanut butter creamy creamy crowned with silky chocolate are too much to resist.
So please make these Mini Chocolate Peanut Butter Pies as soon as possible because they are every chocolate lover, peanut butter lovers dream. Go, Be a dream maker.

Peanut Butter Chocolate Pie storage
A day in our house! If you have leftover Chocolate Peanut Butter Pies, cover and store them in an airtight container for up to 7 days in the freezer.
DO I NEED TO THAW MY MINI PIES?
No, please don’t! The Chocolate Peanut Butter Pies will soften quickly on their own and will not taste “frozen.” They can go straight from the freezer to your dessert plate. They are best if allowed to sit for about 10 minutes and then consumed.
CAN I REFRIGERATE MY MINI PIES?
No, Chocolate Peanut Butter Pies need to kept in the freezer until ready to serve. They do soften quickly, so if you need to transport them, then place them back in the freezer again to firm up before servings.

Looking for more Pie Recipes?
- Almost No Bake Ultimate Mud Pie
- Almost No Bake Blueberry Cheesecake Pie
- Easy Mini Key Lime Cheesecake Pies
- Best Ever Pecan Pie
- Nutella S’mores Pie
- Banana Coconut Pie
- Million Dollar Cookie Pie
- Mini Strawberry Pies
- Mini Caramel Apple Pies

Easy Chocolate Peanut Butter Pie Recipe
Save This Recipe To Your Recipe Box
You can now create an account on our site and save your favorite recipes all in one place!
Ingredients
Graham Cracker Toffee Crust
- 5 whole graham cracker sheets
- 3 tablespoons unsalted butter, melted
- 1 tablespoon brown sugar
- 2 tablespoons toffee bits (I use Heath Bits ‘O Brickle Toffee bits)
Peanut Butter Pie Filling
- 1 cup heavy cream
- 6 oz. cream cheese, room temperature
- 1 cup smooth peanut butter
- 1 cup confectioners’ sugar
- 1/2 cup toffee bits (I use Heath Bits ‘O Brickle Toffee its)
- 2 teaspoons vanilla extract
- 1/4 teaspoon salt
Chocolate Ganache
- 4 oz. quality semisweet chocolate, chopped
- 1/2 cup heavy cream
Garnish
- 1/4 cup chopped salted peanuts
- 1 1/2 tablespoons smooth peanut butter
- mini chocolate chips (optional)
- chopped peanut butter cups (optional)
Instructions
- Preheat oven to 350F. Line a 12 count regular size muffin tin with muffin/cupcake liners.
- Add Graham Cracker Crust ingredients to food processor and blend to a fine crumble. Divide Crust mixture between the 12 liners (about a heaping tablespoon each) and press into the bottom of the liners. Bake for 5-7 minutes or until lightly golden. Set aside.
- Add heavy cream to a large mixing bowl and beat with handheld electric mixer on high until firm peaks form. Set aside.
- To a separate mixing bowl (or remove heavy cream), using the same beaters, beat peanut butter and cream cheese until smooth. Add the confectioners' sugar, toffee bits, vanilla, and salt and beat until smooth (it will be thick). Gently fold the whipped heavy cream into the peanut butter-cream cheese mixture with a spatula until completely blended.
- Spoon Peanut Butter Pie Filling into muffin tins (they will fill to the top). Freeze for at least one hour.
- Meanwhile, prepare Chocolate Ganache by microwaving heavy cream for approximately 90 seconds until hot but not boiling. Add chocolate and let sit one minute then whisk vigorously until smooth. Let cool to barely warm, stirring occasionally (it will thicken as it cools.). Spoon the Chocolate Ganache over the peanut butter cups and spread with the back of the spoon (its okay if some spreads over the edges).
- To garnish, melt peanut butter and drizzle over mini pies (I add my peanut butter to a ziploc bag and snip the corner), sprinkle with salted peanuts and mini chocolate chips. Freeze for at least 4 hours up to 7 days. (See Notes)
- When ready to serve, serve IMMEDIATELY after removing from the freezer as the mini pies soften quickly. You can either serve with the or without the cupcake liners.
Video
Notes
Want To Make This Recipe?

Did You Make This Recipe?
Tag @CarlsbadCravings and Use #CarlsbadCravngs
Leave a Review, I Always Love Hearing From You!
Carlsbad Cravings


Wya says
Have you ever made this ahead of time and frozen it?
Jen says
Yes I have! I recommend making the recipe up through Step 4 (putting the peanut butter filling in each cup) and freezing for several hours or for up to 7 days. When you’re ready to put this dessert on your menu, start at Step 5, making the chocolate ganache, and follow through to the end of the recipe. Hope this helps!
Lesley L Lassen says
I am allergic to peanuts, do you think I can sub almond butter?
Jen says
Hi Leslie! I have never tried baking with almond butter but I’ve heard they’re interchangeable as far as flavor goes. As long as it’s the same consistency as smooth peanut butter I don’t see why you couldn’t substitute it. Let me know if you end up trying it! I hope it turns out wonderful for you if you do!
Mike Rodriguez says
Hello. I want to make sure I didn’t miss something. They are called “mini” but the recipe calls for regular muffin pan. Will the time in oven be the same if I use a 24 count mini muffin pan?
Jen says
Hi Mike! Thank you for your interest in this recipe! I can see how that could be confusing. It’s mini since it’s not in a regular pie pan but you can use a 24 count pan, just reduce the amount of crust and baking time. Hope you love it!