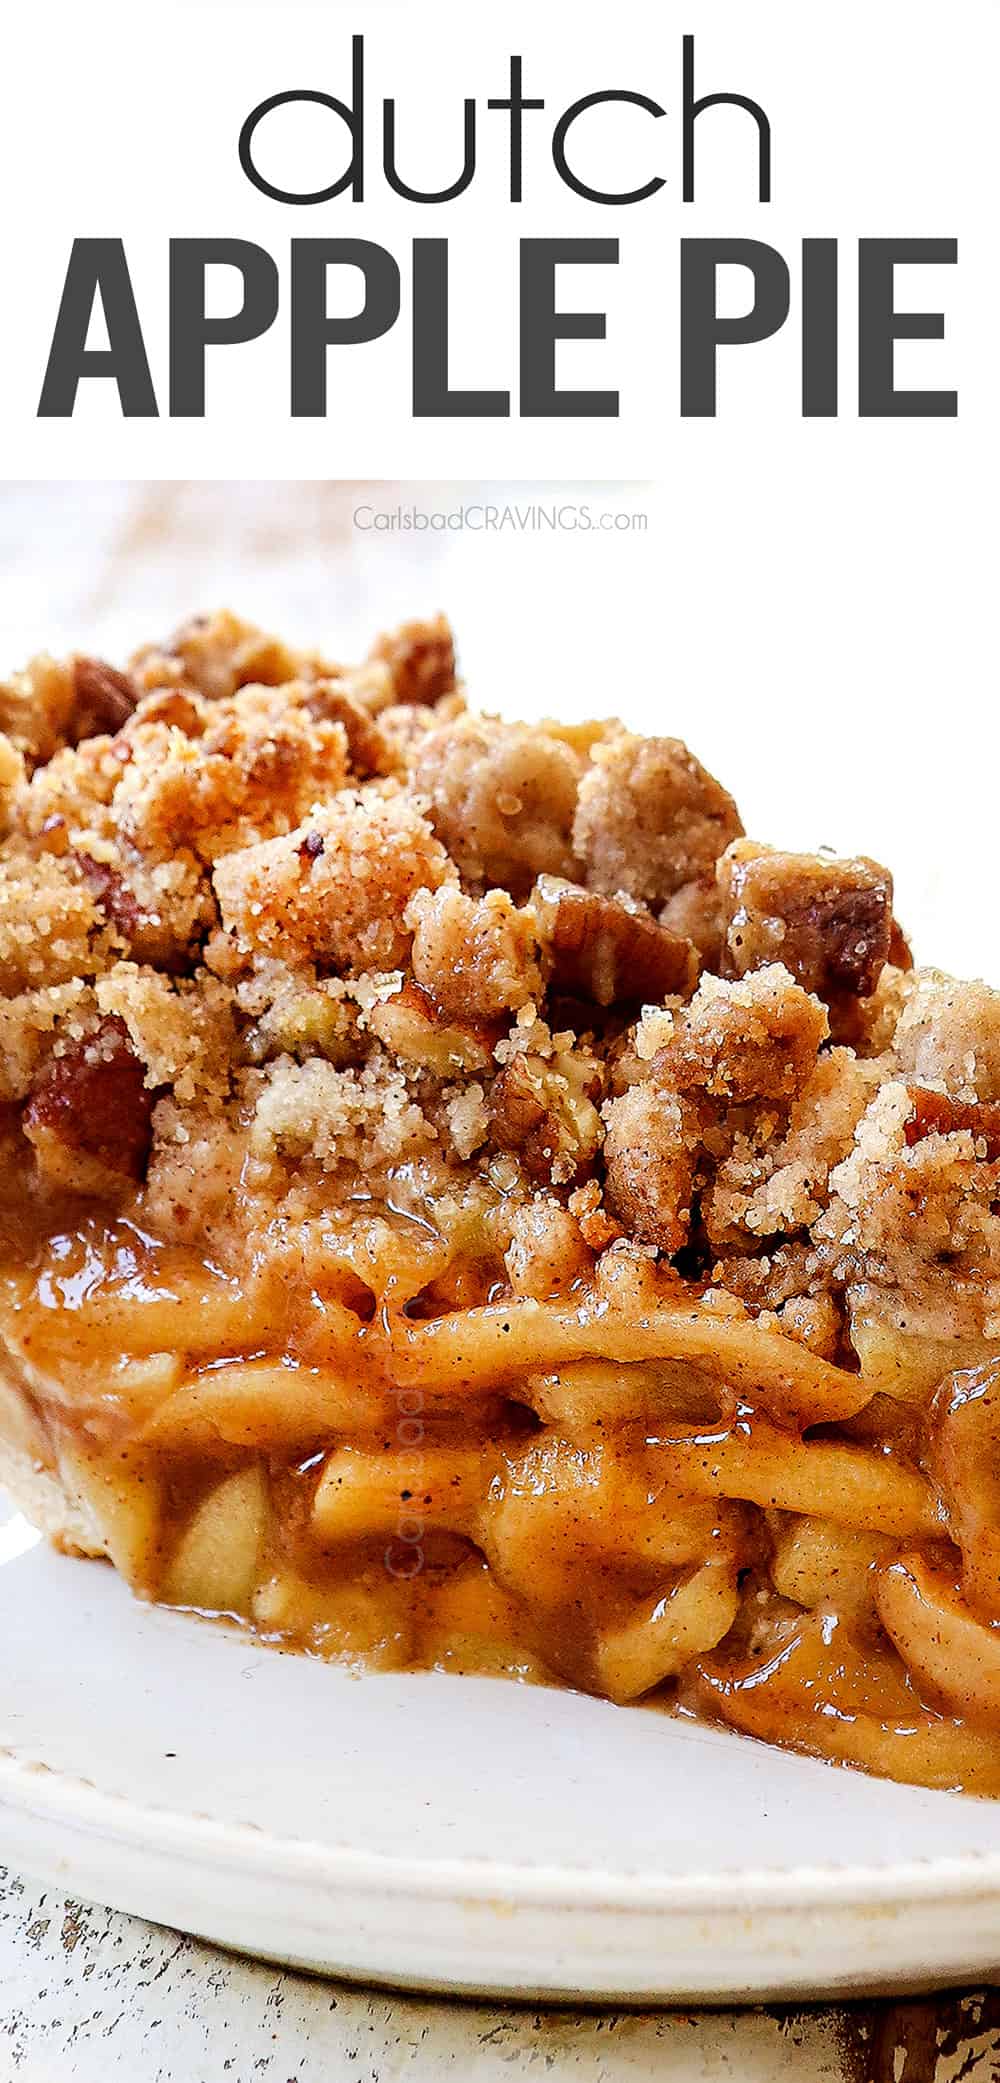
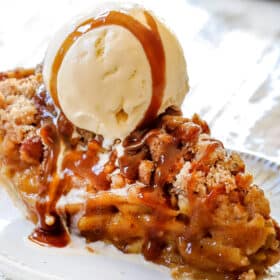
This Dutch apple Pie is crunchy, buttery, full of brown sugar and perfectly tender cinnamon apples and is way easier than a double crust! AKA the best apple pie you will sink your teeth into!
This Dutch Apple Pie recipe is one of my all-time favorite pies! It’s loaded with tender, brown sugar apples in buttery, flaky homemade pie crust topped with sweet, crunchy streusel topping. It avoids the common pitfalls of many apple pie recipes that are bland, mushy or watery. Instead, my foolproof recipe creates the best homemade apple pie of your life with the ideal texture and sweet cinnamon apple flavor. This Dutch Apple Pie recipe can be made 100% ahead of time and reheated or the components can be made ahead and combined when ready to bake. In this post, I’ll teach you how to make the best apple pie from scratch with step-by-step photos and video tutorial or you can use the “jump to recipe button” at the top of the post to skip directly to the recipe.
The fall screams apple dessert recipes! Don’t miss apple dump cake, apple oatmeal cookies, mini apple pies, apple dumplings, apple crisp, apple cheesecake bars and of course this Dutch apple pie recipe.
PIN THIS RECIPE TO SAVE FOR LATER
How to make Dutch Apple Pie Video
BEST Dutch Apple Pie
Everyone needs the best Dutch Apple Pie recipe in their baking/Thanksgiving repertoire and this is it! This recipe is:
- cradled in a buttery, flaky crust
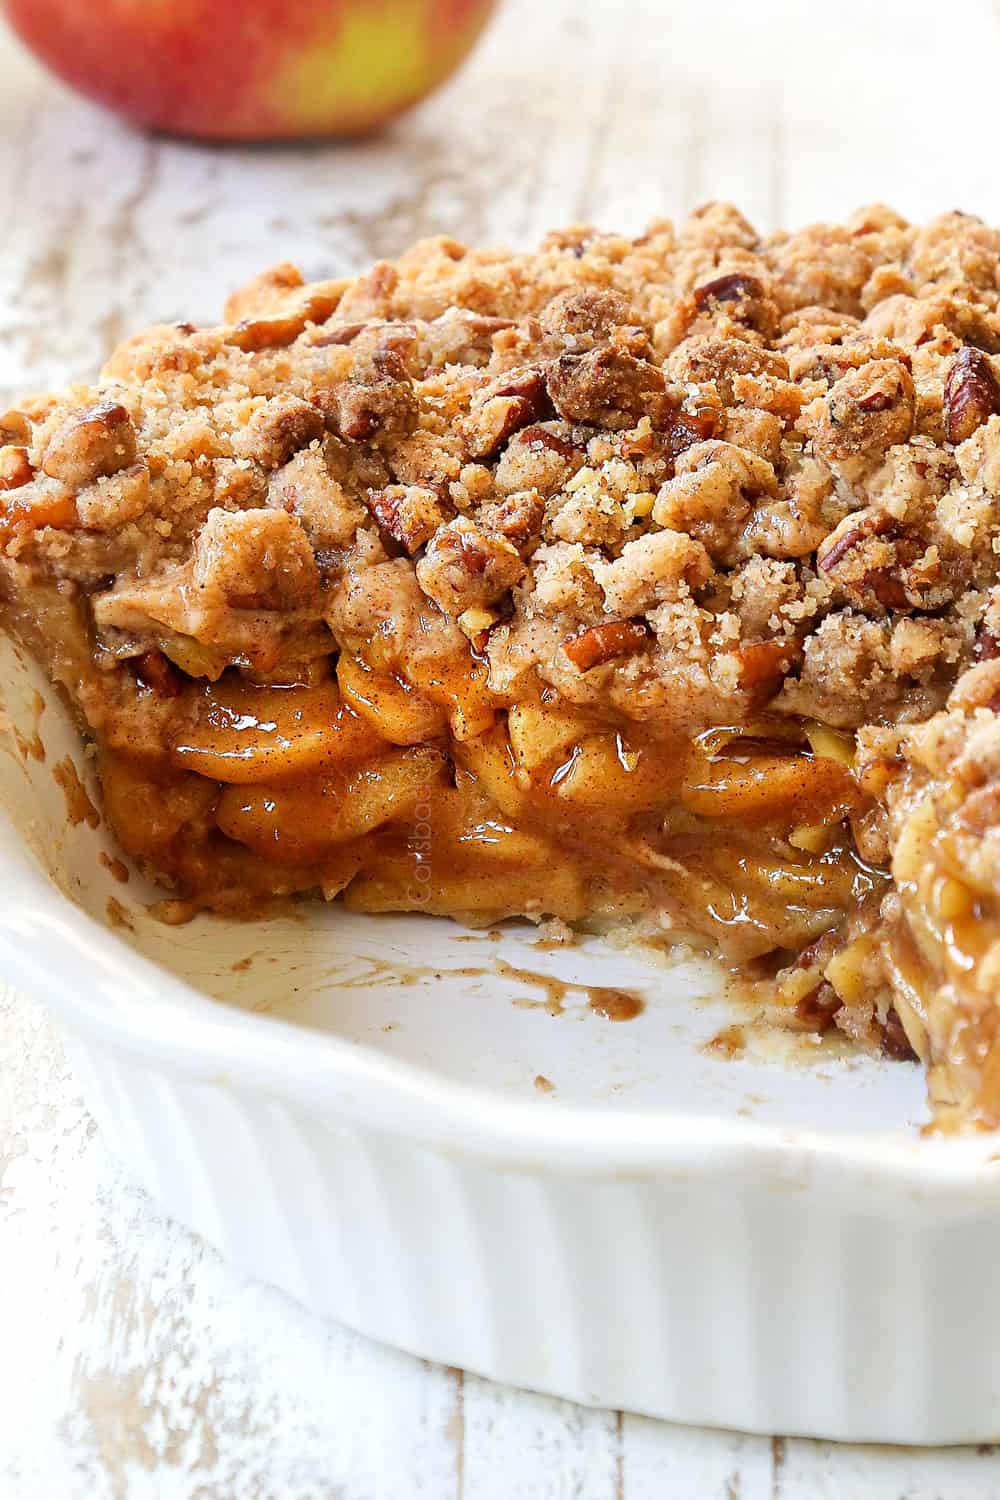
- loaded with rich, juicy, tender apples enveloped in a caramel-like sauce
- laced with cinnamon, ginger, nutmeg, and cloves
- never watery thanks to my foolproof technique
- boasts double the apples for double the pleasure
- topped with a brown-sugary, buttery, crunchy pecan crumble
- easier than classic apple pie with a simple crust on the bottom – no need to make a lattice top and the accompanying fear of shrinking apples and a crust gap!
What’s the difference between apple pies?
Dutch Apple Pie, also known as Apple Crumble Pie or Apple Streusel Pie, boasts a flaky, butter or shortening crust on the bottom, a cinnamon apple filling and a sweet crumble or streusel topping made with butter/shortening, flour and sugar that bake into a sweet, crunchy blanket. The textures of flaky, upon tender upon crunchy are heavenly. Dutch Apple Pie differs from classic apple pie which is covered in a lattice top or second pasty topping. Dutch Apple Pie is also easier to make!
Creating the best apple pie recipe
There is a reason you haven’t seen an apple pie recipe on this site before. I was waiting for perfection. And it finally arrived. After test after test after test, I can honestly say this is the best Dutch Apple Pie recipe I’ve come across.
In my journey towards the best Apple Crumble Pie, I’ve experienced everything that can go wrong: runny filling, mushy apples, undercooked apples, too tart of a filling, too sweet of a filling, burnt topping, soggy crust, etc. I’ve experienced these problems even when trying supposedly successful online recipes. Any one of these problems results in a disappointing apple pie, a frustrating outcome when you’re ready to bring dessert to a special occasion like Thanksgiving.
With this apple pie recipe, you can feel confident your apple pie will be a success with perfectly tender apples enveloped in a caramel like sauce that is never runny, the right balance of sweet and tart and a golden, crunchy topping.
how to make dutch Apple Pie foolproof
I’ve tackled each of the possible pitfalls of homemade apple pie head on and created these tips/techniques for success:
Cook your apple pie filling
After several runny apple pie fillings, I turned to The Book on Pie by Erin Jeanne McDowell and Cook’s Illustrated for answers. These experts both suggest cooking the apple pie filling first. I can attest this method is a total game changer and will deliver the perfect apple pie filling every single time. I know it sounds like a hassle, but the process takes just an extra 20 minutes on the stove plus cooling. Plus, you didn’t decide to make apple pie because you needed a quick dessert, did you?
Why cook the filling? Quite simply, raw apples are unpredictable. You usually end up with some crunchy apples and/or some soggy apples. Raw apples are also incredibly juicy, but the real problem is, you never know just how juicy because apples are living things. This means the same amount of thickener (cornstarch/flour) that worked to thicken the filling one time might not work the next time and you’ll end up with a lot of extra liquid pooling in the pie plate the second you remove the first slice. That’s embarrassing. All that extra moisture also makes for diluted flavor.
How does it work? Cooking the apple filling on the stove solves all of these problems. You get to cook the apples to your exact ideal tenderness on the stove because they will not continue to cook in the oven.
Cooks Illustrated explains that as you cook the apples slowly, the pectin in the apples is converted to a heat-stable form which prevents the apples from continuing to cook in the oven – so no, they will not become mushy when baked!
Whatever tenderness the apple pie filling reaches on the stove is how it will remain in the fully cooked pie. This means YOU 100% control the texture of the apples! Like more tender apples? Cook longer. Like firmer apples? Cook shorter. Magic!
As you cook the apples, the juices are released and cooked down, the sugars melt with the juices and thicken with the flour to a rich, caramel-like sauce, a stage that often is never reached when the apple pie filling is baked on the stove. Lastly, you get to use extra apples because they are cooked down before you add them to the pie for stacks and stack of thinly sliced perfectly tender apples in every bite. Win, win, win!
Use a LOT of apples
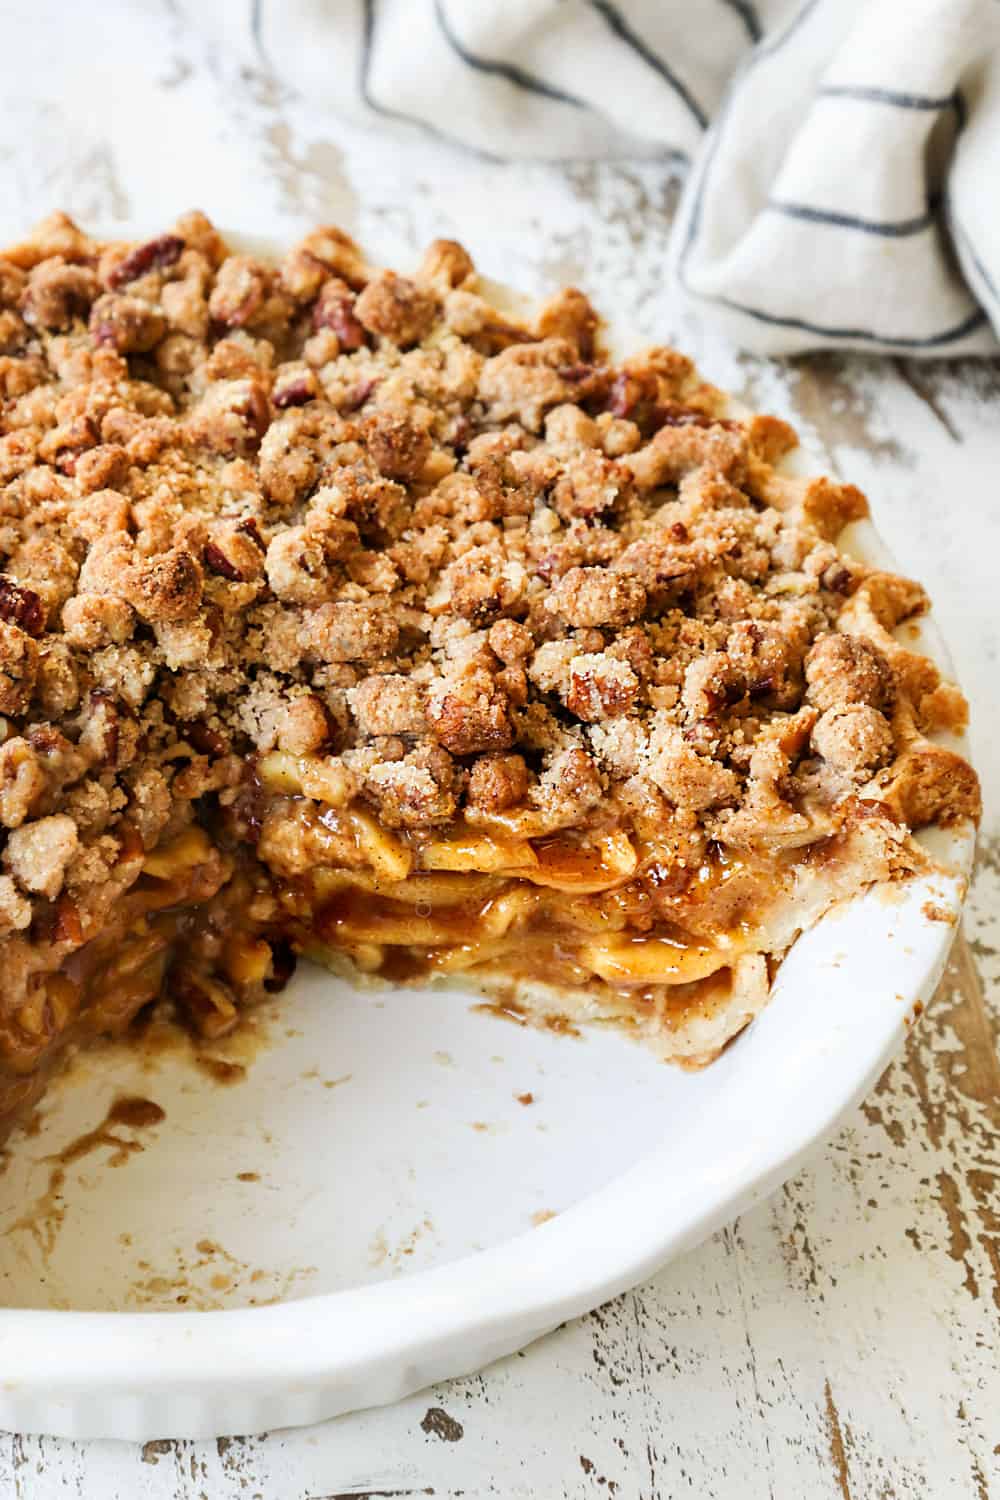
By cooking the apple pie filling before baking the pie, the apples cook down/shrink before baking the pie instead of while baking the pie. This allows you to use over 1 ½ times the amount apples as traditional recipes. Most apple pie recipes call for 3 pounds of apples but this recipe calls for 5 pounds. This allows you to create a mountain of apples which doesn’t shrink when the pie bakes and fall in the middle. More apples also means more flavor and more texture. More layers of tender, juicy browns sugar apples in every bite.
Use the right mix of apples
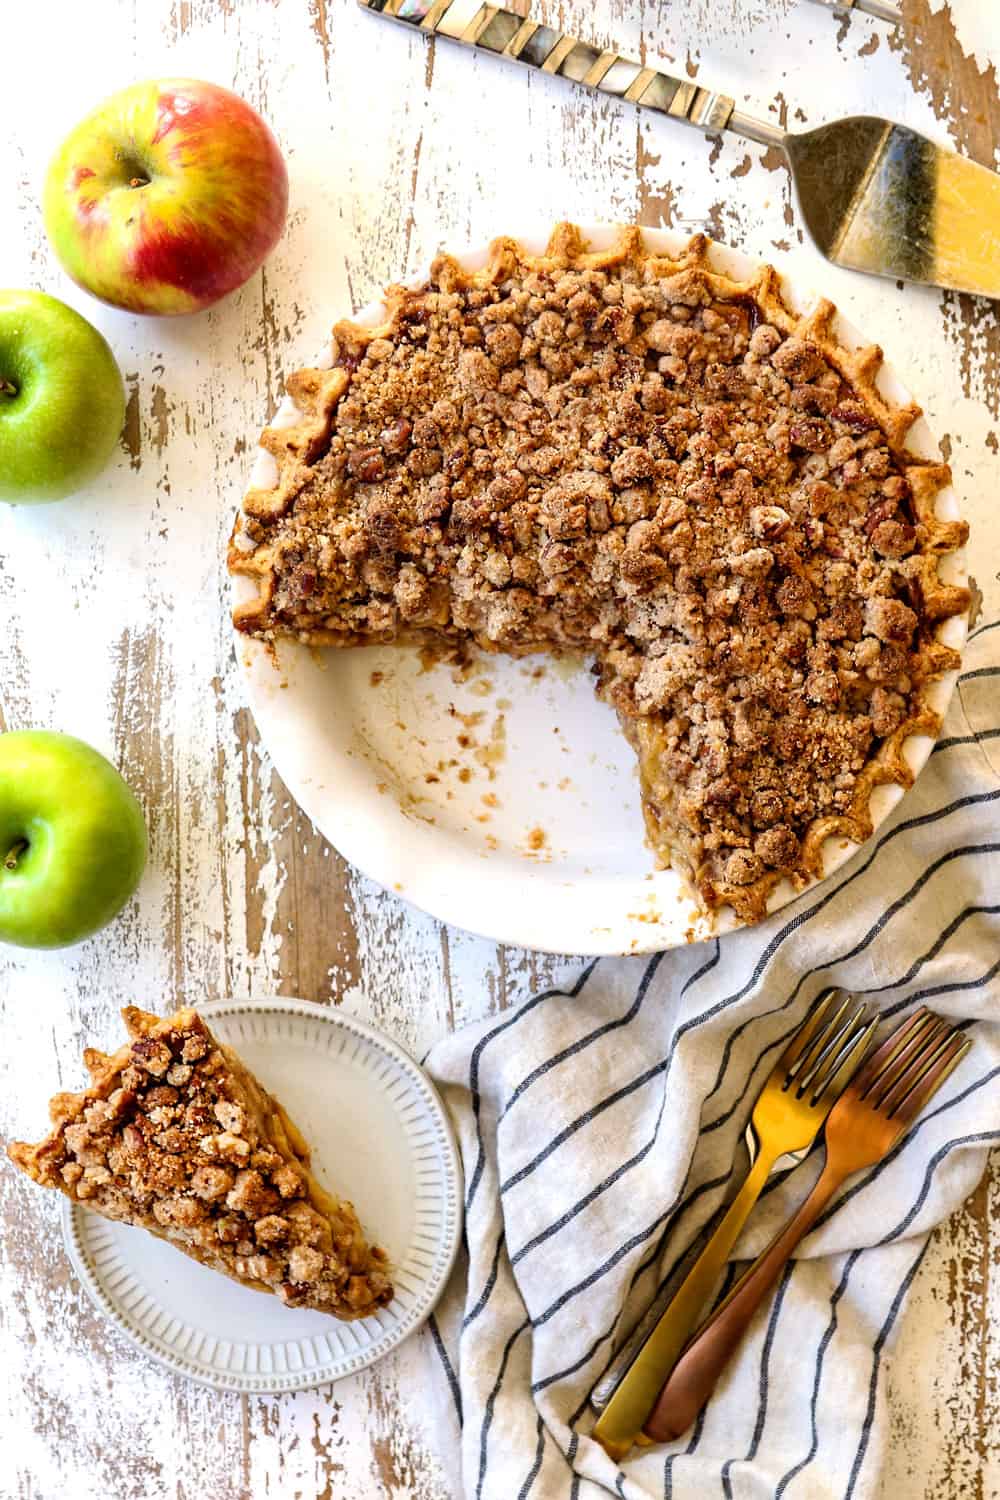
And on that note: be sure to use the right apples. You want a mix of tart apples and sweet-tart apples for a perfectly balanced apple pie that is not too sweet or too tart. I used Granny Smith (very tart) and Honey Crisp (sweet-tart). Slicing all these apples thinly creates even more layers of texture and more surface area for the caramel-y mixture to cling to.
Make the filling flavorful
The filling should be so tantalizing you want to shovel it into your mouth without crust or the streusel. To accomplish, this, use two types of sugar: brown sugar for its molasses notes and granulated sugar for its pure sweetness. Season the filling with plenty of ground cinnamon, ground ginger, ground nutmeg, allspice and a hint of salt. Lastly, a couple tablespoons of lemon juice breaks through the sweetness and amplifies the flavor of the apples. The mixture will envelop the increasingly juicy, tender apples as they to create a sweet, creamy caramel-y sauce.
Make your apple pie with a homemade flaky pie crust
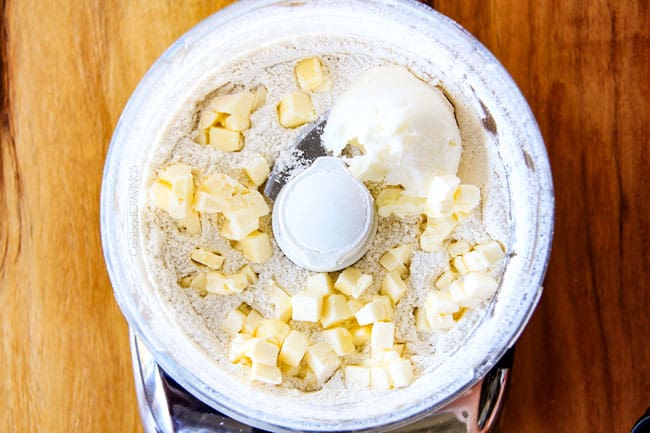
The crust is one of three important elements in this Dutch Apple Pie recipe, so it is important that it’s delicious! My homemade crust is made with both butter and shortening to create the best flavor and texture: mega buttery, mega tender, mega flaky deliciousness. I use it in all of my pie recipes. The crust can also be made ahead of time and stashed in the refrigerator or freezer.
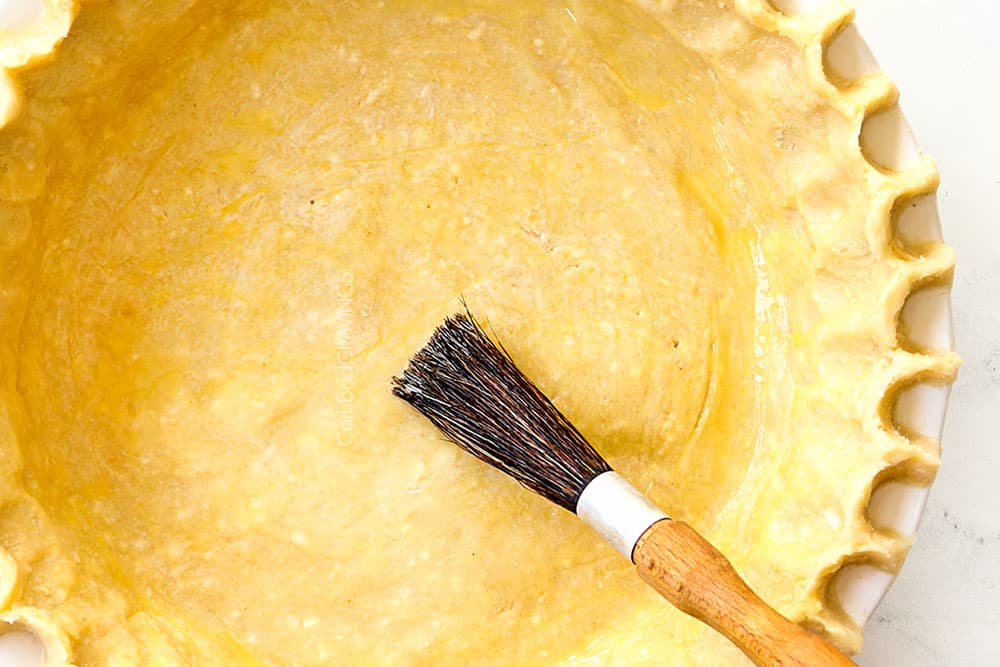
Use an egg wash
You will also love that that the wonderfully flaky, buttery pie crust doesn’t require you to pre-bake it like some recipes. Instead, brushing it with a simple egg wash before adding the filling insulates the crust against moisture and helps promote a perfectly golden, flaky crust.
Use melted butter in the streusel
In most Dutch Apple Pie recipes, cold butter is cut into sugar and flour to create a dry, powder topping that can wash away when baked. For a crispier topping, this recipe boasts a streusel topping with melted butter incorporated directly into the flour, sugar and nuts to bind all the ingredients together so it bakes as a separate entity that melts into a crunchy blanket when baked. Bonus, this method is super quick and easy!
Start baking the apple pie at high heat.
Beginning baking the apple pie at 425 then decreasing the temperature serves three purposes. 1) the hike in temperature results in a spectacularly crunchy topping, 2) it helps brown the crust on the bottom and 3) helps thicken the filling so it can begin bubbling/thickening before the crust burns.
Bake the pie on the lowest rack
Apple Crumble Pie should be baked on the bottom rack so it’s closer to the heat source. This will ensure that bottom crust gets nice and golden brown even without pre-baking. You’ll want to preheat the oven with a baking sheet on the lowest rack so it’s nice and hot to receive the pie, much like a pizza stone with homemade pizza crust. The worst mistake you can make with pie crust is baking it in the middle which makes for an under-baked, soggy, doughy mess.
Apple Pie Filling Ingredients
- Apples: this recipe uses 5 pounds of apples, which is about 11 large apples. It sounds like a ton of apples but the apples shrink when cooked on the stove so they will easily fit in a regular pie plate (1 ½ inches deep). Always use two varieties of apples for the best flavor, I suggest Granny Smith and Honeycrisp for this recipe.
- Brown sugar: use light brown sugar so the molasses flavor isn’t too strong. The sugars will melt with the juices of the apples to create a caramel-like sauce, no butter/liquid required!
- Granulated sugar: adds pure sweetness.
- Flour: apples release a lot of moisture so we need flour to help thicken the filling back up.
- Lemon juice: the slight acidity helps balance the sweetness and amplifies the apples’ flavor. The lemon juice also keeps leftovers (should you be so lucky) more appealing.
- Vanilla extract: adds an extra oomph of flavor. Use quality extract for the best flavor.
- Spices: cinnamon, nutmeg, ginger, allspice and salt enhance the flavors and balances out the sweetness.
What are the best apples for apple Pie?
Apple pie can be made with any baking apple, meaning apples that become tender and not mushy when baked: Granny Smith apples, Cortland’s, Pink Cripps, Honeycrisps and Jonagold’s, for example. But for THIS Dutch Apple Pie, you will want to use a combination of a tart apple variety like Granny Smiths and a sweet-tart apple like Honeycrisps. I tried making this recipe with all Granny Smith apples like I do in my Apple Crisp and Apple Dump Cake, but because there are SO many apples, the pie was way too tart. By using a sweet/tart combination, you will create a pie with plenty of apple flavor that is not too sweet or too tart.
You may substitute the Granny Smith apples or Honeycrisps with apples of similar sweetness/tartness. Still, always try and use at least 2 varieties of apples for the best flavor. Here are some varieties of apples that hold up well in baked desserts and pie:
- Granny Smith: packed with juicy tartness, these are your never-fail baking apple that always bake up flavorful and tender.
- Honeycrisp: my favorite to pair with Granny Smiths because they boast a sweet-tart balance and a light berry flavor and always holds firm after baking. They best substitute for Honeycrisps in this recipe are Jonagolds, Braeburn or Pink Lady.
- Pink Lady: have a concentrated sweet-tart flavor and will hold its shape when baked. They are the best alternative to Honeycrips due to their intense flavor.
- Jonagold: is a cross between Golden Delicious and the Jonathan. They are tart with a honeyed sweetness, and hold up exceptionally well in the oven.
- Braeburn: sweet and tart without an almost spicy sugared honey taste and hold up well in pie and other baked desserts.
- Mutsu: also known as Crispin, is a less tart version of Golden Delicious with a sweet honeyed flavor abut keeps its structure when baking. It is sweeter than the aforementioned apples so keep that in mind if making substitutions.
What are the worst apples for apple pie?
While many apples will work in apple pie, some will NOT. Avoid these: McIntosh, Gala, Fuji or Red Delicious. These apples are a little too soft or just too bland after the long baking time. Golden delicious also can break down too much with the long baking time.
SHOULD I PEEL THE APPLES?
Yes, please do! If you don’t peel your apples first, you’re left with an unpleasant tough texture as the skin doesn’t break down enough when baked.
Apple Pie Crumble Ingredients
- flour: helps bind the topping ingredients together and gives it a crumbly texture. I use all-purpose flour but any flour will work great, including gluten free flour.
- pecans: help make the topping extra crunchy! Don’t chop the pecans too small or else they can burn. If you aren’t a fan, then simply omit them.
- brown sugar: adds sweetness and a hint of molasses. It also adds moisture to the topping. Use light brown sugar for best results so the molasses flavor isn’t overpowering.
- granulated sugar: adds sweetness and helps the topping crisp up.
- butter: helps bind the ingredients together and gives it the crumbly texture. Cube your butter then chill it so it’s nice and cold. Use unsalted butter so we can control the salt. If you only have salted butter, reduce the salt in the topping to ⅛ teaspoon.
- salt: enhances the flavor.
- cinnamon: because even the topping needs to be seasoned.
- turbinado sugar: adds flavor and crunch. Turbinado sugar comes from the first pressing of sugar cane and is coarser, darker, and more well-rounded in flavor than granulated or brown sugar, making it the perfect finishing touch to sprinkle over the topping. If you don’t have turbinado, sugar, then substitute with granulated sugar.
Dutch Apple Pie Crust
I highly recommend my favorite homemade pie crust. This truly is a no fail, buttery, flaky pie crust recipe. The ingredients list is minimal – just flour, sugar, salt, shortening, butter, and ice water.
There are different schools of thought when it comes to butter pie crust recipes or Crisco pie crust recipes. Although butter crusts are delicious, they are not as flaky as those made with shortening. Shortening pie crusts, on the other hand, have wonderful texture but lack in flavor. BUT when you use BOTH butter and shortening you have both flavor and texture – AKA the best pie crust!
Can I use Store-Bought Pie Crust?
For the very best apple pie, I highly recommend a homemade crust – store-bought pie crusts don’t even come close. But if you need to use a store-bought crust then I recommend a frozen crust, just make sure it is 1 ½-inches deep. Follow the instructions on the packaging in regards to thawing/baking.
WHAT PIE PAN IS BEST?
You will need one standard 9-inch pie pan for this Dutch Apple Pie recipe. The raw apples will seem like they could never possible fit into such a small space, but the cook down considerably and will all fit into the pan perfectly.
How to make Homemade Dutch Apple Pie
Let’s dive into how to make Dutch Apple Pie. Each of the components (crust, filling, topping) can be made ahead of time and stored separately. Here’s how to make it (full measurements in the recipe card at the bottom of the post):
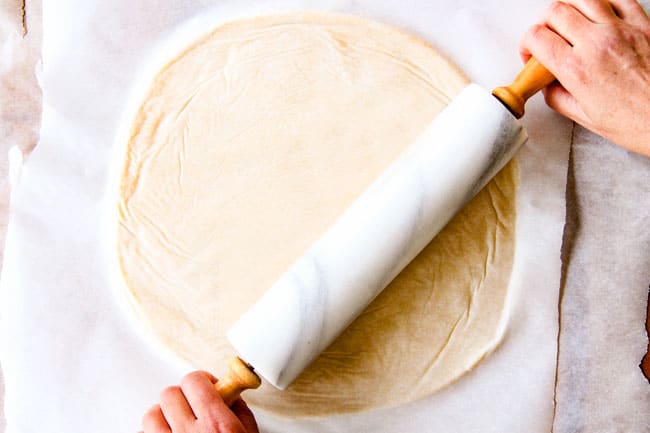
- Step 1: Make the pie crust. Use my favorite homemade pie crust. I suggest making the crust the night before so it’s all ready to roll out and fill the next morning. The crust post is full of tips and tricks for fool proof pie crust even if you’ve never made it before – so don’t be intimidated! You’ll want to place the crust in the freezer while you prep the topping and apples so the fat is extra cold when it goes into the oven which makes for a flakier crust.

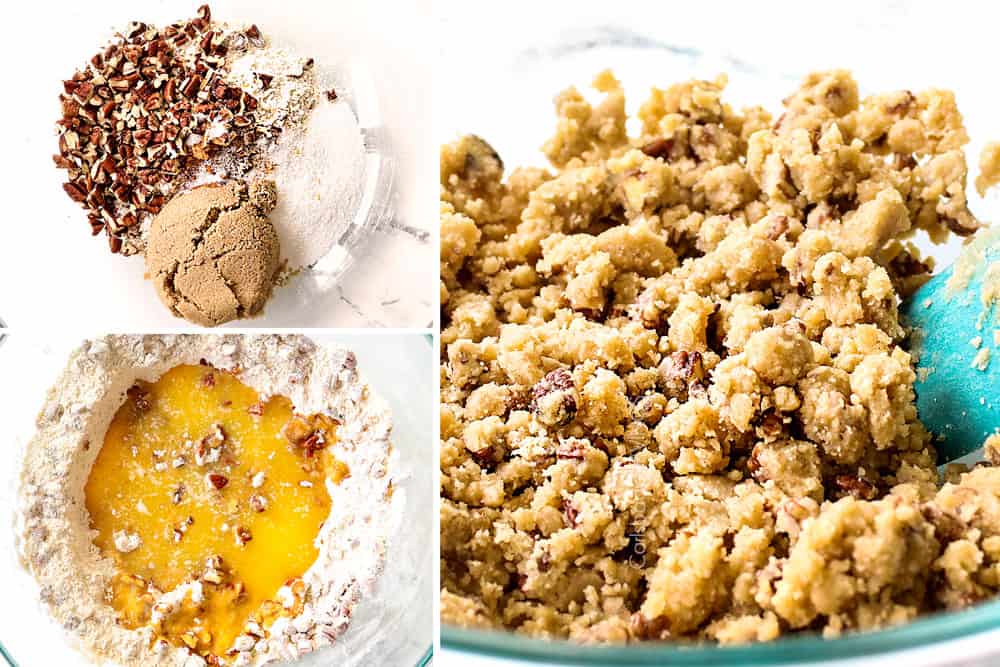
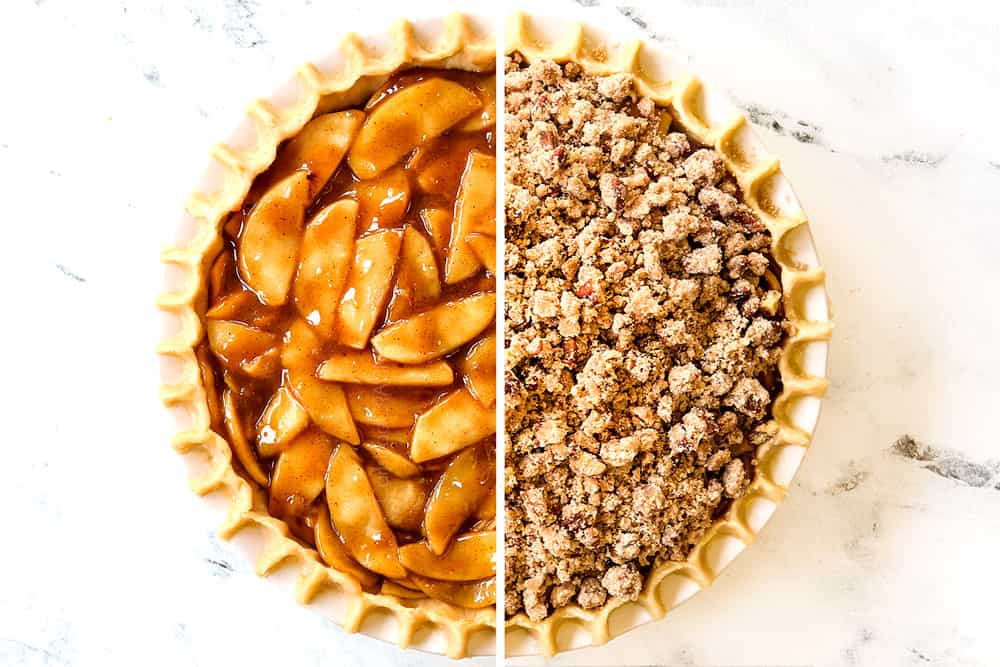
- Step 2: Make the crumble topping. It is important that the topping be very cold before it is added to the pie, so make it before you make the apple filling. A cold topping = a crunchy topping. To make, whisk together the flour, pecans, sugars, cinnamon and salt in a large bowl and stir until evenly combined. Pour in the melted butter and stir with a spatula to combine then use your hands to combine until the mixture resembles crumbly wet sand. Cover and transfer to the refrigerator while you prep the filling.
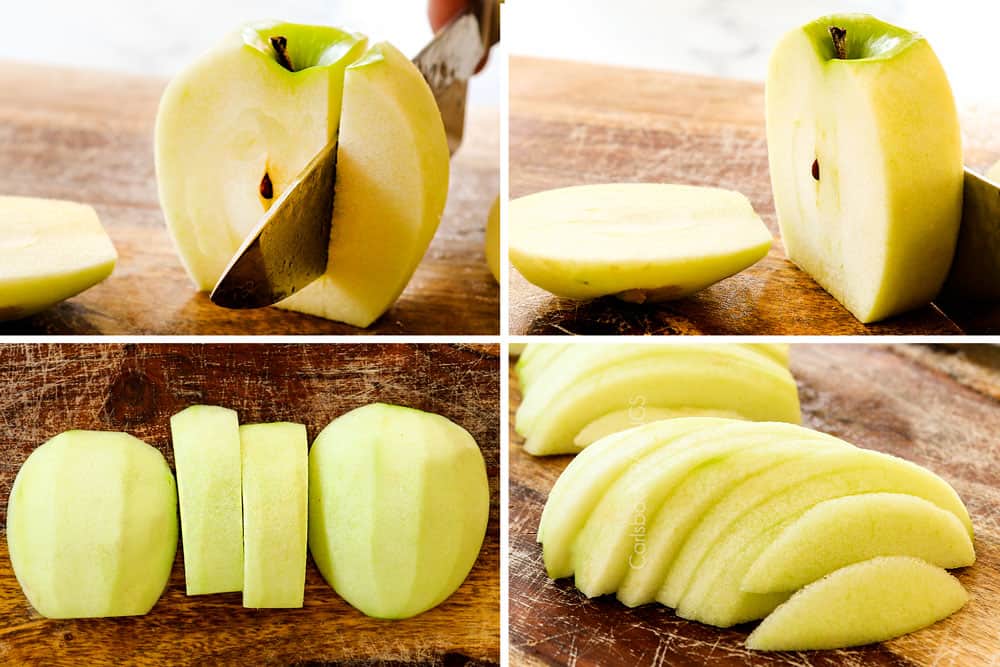
- Step 3: Slice the apples. Have you been slicing apples the easy or hard way for apple pie/crisp/crumble? The best way I’ve found is to first peel the apples, then make 4 slices around the core to remove it. Lay your 4 remaining apple segments, cut side down, on a cutting board and slice into 1/8-inch slices. Transfer the apples to a large Dutch oven as you go to keep the workspace clean. You are welcome to slice the apples thicker for a chunkier apple pie although I find the texture of thin slices more appealing. If you go with thicker slices, you’ll need to pre-cook the filling longer.
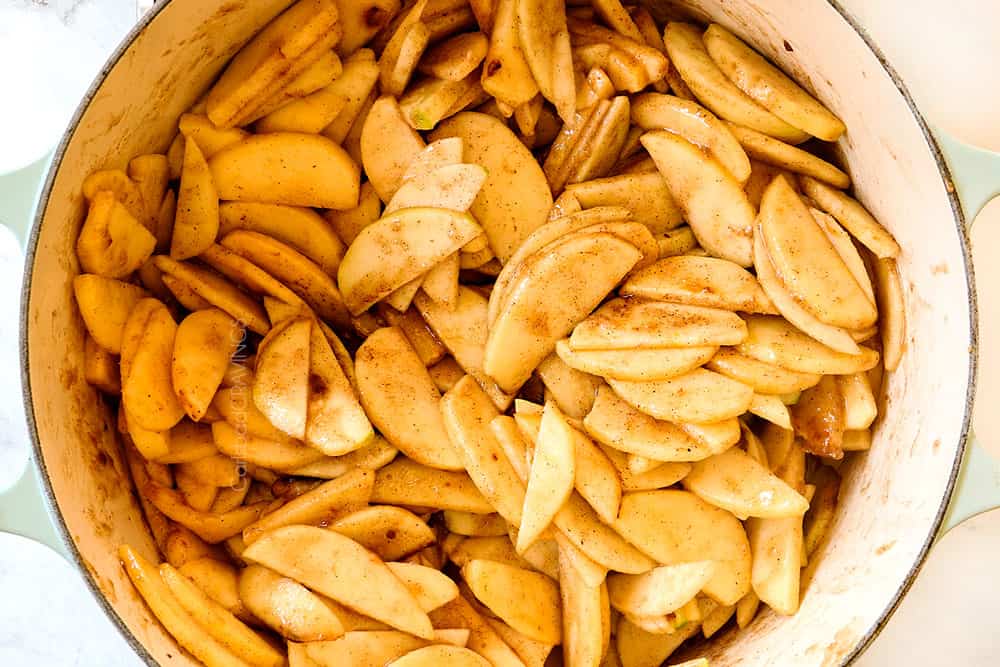
- Step 4: Combine the apple pie filling ingredients. Now that we have what seems like a ton of apples, it’s time for the magical process of cooking them down to fit into the pie pan while simultaneously creating the thick, caramel like coating. Add the sugars, flour, salt, and spices and 1 tablespoon lemon juice to the apples and gently stir until until the apples are evenly coated. The mixture will seem dry at first, but in no time at all, the juices will begin to release from the apples, mingling with the sugars to create a sweet, glorious sauce.
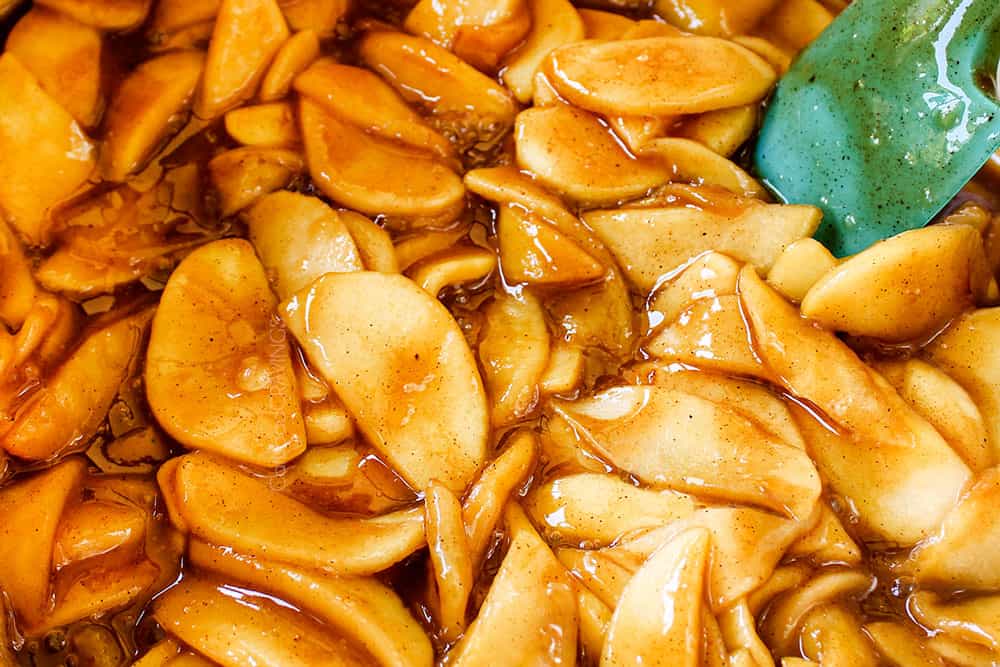
- Step 5: Cook the apple pie filling. Cover, and cook the filling for 15-20 minutes, stirring every couple of minutes and replacing the lid. Be pretty vigilant about stirring the apples so the sugars don’t burn on the bottom. You’ll want to replace the lid each time because the steam helps to evenly cook the apples. The apples are done when they reach YOUR desired apple pie tenderness – they will not become more tender in the oven (refer to the science at the beginning of post). The apples should be fork tender but still hold their shape. Continue to cook longer for softer apples, or less time if you like them firmer. Once tender, stir in the remaining lemon juice and the vanilla.
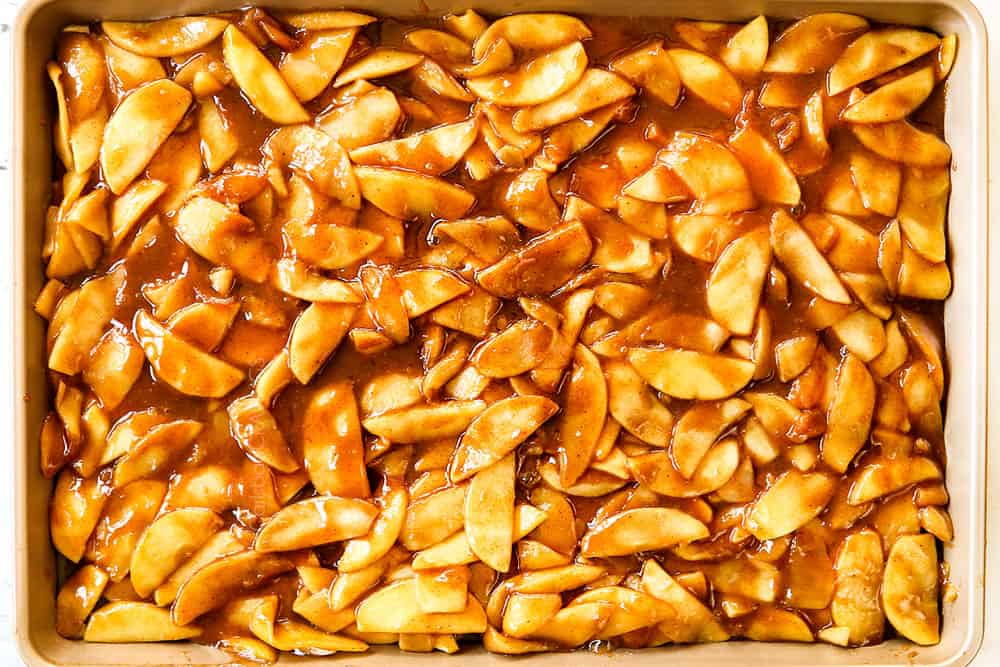
- Step 6: Cool the apples. Once the apples have reached your desired tenderness, transfer them and all of their tantalizing caramel juices to a rimmed baking sheet and spread into an even layer. Pop the pan in the fridge or freezer to cool completely to room temperature, about 30 minutes. You may also leave the apples on the counter to cool if you don’t mind the couple hour cooling time. While your apples are cooling, place a baking sheet in the center rack of your oven and preheat the oven to 425 degrees F so it can get nice and hot.
- Step 7: Assemble: Once the apples have cooled completely, transfer them and all of the sauce to the chilled pie shell, rearranging and layering the apples horizontally as needed so they are compact. Evenly sprinkle the topping over the apples followed by 1 tablespoon turbinado sugar. Place the whole pie in the fridge or freezer for 30-45 minutes, for an extra flaky crust.
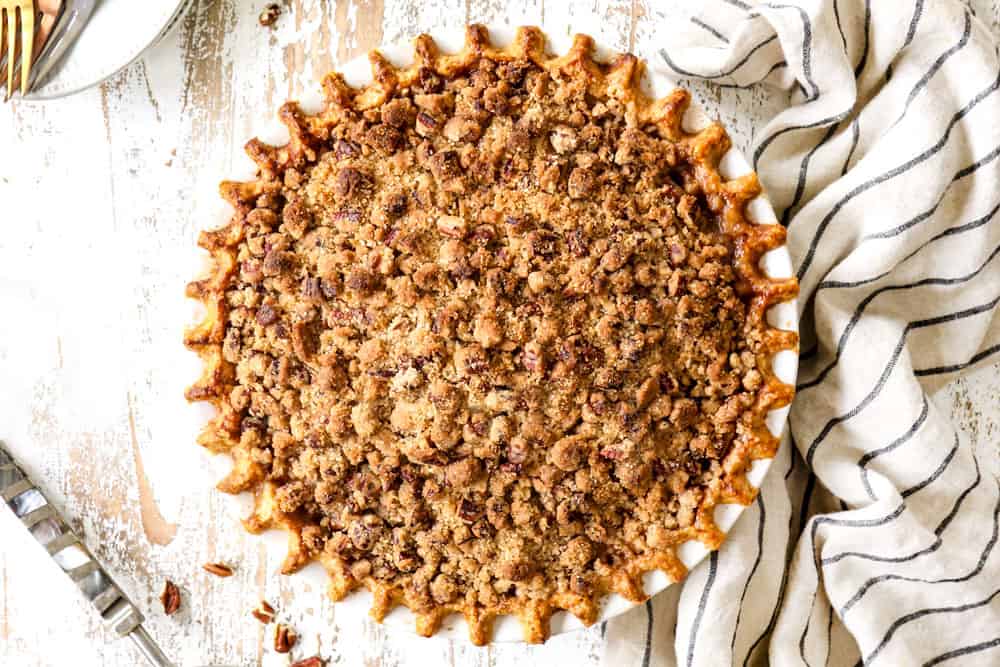
- Step 8: Bake the apple pie. Place the pie on the hot rimmed baking sheet. Bake at 425˚F for 25 minutes. Reduce the heat to 375˚F and continue baking another 35-45 minutes or until the filling is bubbling around the edges (you should be able to hear it bubble). Cover the crust and top with foil if they are browning too quickly. I cover the crust halfway through cooking.
- Step 9: Cool the pie. This is probably the most difficult part of the whole pie! You will want to cool the pie for at least 4 hours so the juices that become runny when cooking can cool and thicken and not run all over the place when you slice into the pie. You can place the pie in the freezer to speed up this process.
CAN YOU MAKE APPLE pie AHEAD OF TIME?
Yes, apple pie is great to make one day ahead of time. Let it cool completely, then tent with foil and store at room temperature. Rewarm by tenting the pie with foil and placing the pie into a cold oven. Turn the oven to 375 degrees, and when the preheat bell dings, leave the pie in for another 10-15 minutes.
Make-Ahead Tips:
You can either make the pie completely ahead of time or pre-make portions of the pie. Here’s how:
- Pie Crust: the dough can be made 2 days ahead of time and refrigerated until ready to use. You can also go one step further and mold it in the pie pan, brush with egg wash, cover, and refrigerate for up to 2 days. You can freeze the pie dough or the formed pie crust, covered tightly for up to 3 months. Thaw in the refrigerator overnight.
- Apple Pie Filling: can be made/cooked two days ahead of time, covered tightly and refrigerated for one day.
- Crumble Topping: can be made two days ahead of time, covered tightly and refrigerated until ready to use.
- Finished Pie: the pie can be baked, cooled, covered and stored at room temperature one day before serving. Reheat in the oven before serving.
Tips for making Dutch Apple Crumb Pie
Follow these tips for the best homemade apple pie!
- Allow plenty of time to make the pie. Apple pie is best if the different elements have time to be chilled: the crust, apple filling, topping, and assembled pie and the baked pie. I suggest making the apple pie a day ahead and warming when ready to serve.
- Make topping first and refrigerate. If you wonder why your toppings haven’t gotten as crispy as you like them on previous desserts, it’s likely your topping was not chilled. For the crispiest topping, the butter should be very cold before going into the oven so always make your topping FIRST and refrigerate.
- Use a variety of the correct apples. Use a blend of baking apples for flavor and structure. As detailed, Granny Smith apples and Honeycrips are my favorite for apple pie.
- Kitchen gadgets. Peeling and slicing the apples take the majority of prep time in this recipe but if you have an apple peeler and corer and/or food processor (with attachment) for slicing the apples, your prep time can be cut in half.
- Slice apples uniformly. Slice your apples into 1/8-inch thick, slices. Uniform thinly sliced apples ensure you beautifully tender apples throughout without some crunchy ones mixed in.
- Use real butter. If you want the BEST Dutch Apple Pie, use real butter in the crust and topping, margarine won’t have the same flavor or effect.
- Don’t skip the egg wash. The egg wash helps create a beautiful golden crust, but more importantly, helps prevent a soggy crust on the bottom.
- Don’t skip chilling the pie crust. Pie dough does the best if chilled at all stages: after making, after pressing into the pie shell, after the egg wash and after adding the filling. This allows the fat to firm up, otherwise the water in the butter is released and interacts with the gluten in the four, resulting in a soggy crust.
- Bake the pie on the lowest rack. This helps to evenly brown the bottom crust to become golden and crisp because it’s closer to the heat source, while also keeping the top crust farther away from the main heating elements, which helps it to brown more gradually and evenly thought-out baking.
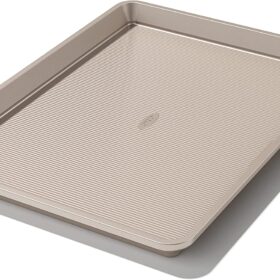
- Bake the apple pie on a hot baking sheet. The baking sheet is insurance in case any of the filling does overflow. This also makes it easy to transfer the pie to and from the oven. You will want to preheat the baking sheet in the oven so it’s super-hot when you place the pie on it to help crisp up the crust, much like a pizza stone.
- If your crust is browning too quickly, place a pie crust shield on top of the pie edges to prevent them from browning too quickly.
- Prevent burnt topping. If the topping starts to brown too quickly, then lay a piece of foil over the top and bake on.
- Watch for a bubbling filling. It’s important to bake the pie until you see syrup bubbling up all around the edges of the pan. This is a sign the filling has thickened in the middle. If your pie is runny after baking when you slice it, it most likely did not reach this stage, which is crucial to properly thickening the filling.
- Let the apple pie cool before serving. This will give the sauce a chance to thicken a little more as it cools. If you try and slice into a warm apple pie, it may be runny and completely fall apart, even if you have done everything right. I opt to cool the pie completely, then refresh it when I want to serve it warm. You can put it in the freezer to speed up the cooling process if you’d like.
Apple Dutch Pie Recipe variations
My favorite apple pie is this Dutch Apple Pie recipe – but that doesn’t mean you can’t mix it up! Here are some recipe variation ideas:
- Omit nuts. The pecans add a nice crunch to the topping so I highly recommend them, but they can be omitted if you must.
- Swap nuts. Use chopped walnuts or almonds instead.
- Add raisins. Stir ½ cup raisins into the filling.
- Add cranberries. Cranberries and apples are heavenly together! Try replacing 1 ½ cups sliced apples with 1 ½ cups fresh cranberries. Don’t use frozen cranberries because they will release too much moisture.
- Add quick-cooking oats to the crumble. Use ¾ cup flour, ¾ pecans and ¾ cup oats. Make sure you use quick cooking oats otherwise the topping will be too chewy. If you only have old fashioned oats, you can create quick-cooking oats by pulsing them a few times in your food processor.
- Make gluten-free apple pie. Swap the flour in this recipe with gluten free 1 to 1 baking flour.
How to serve Dutch Apple Crumb Pie
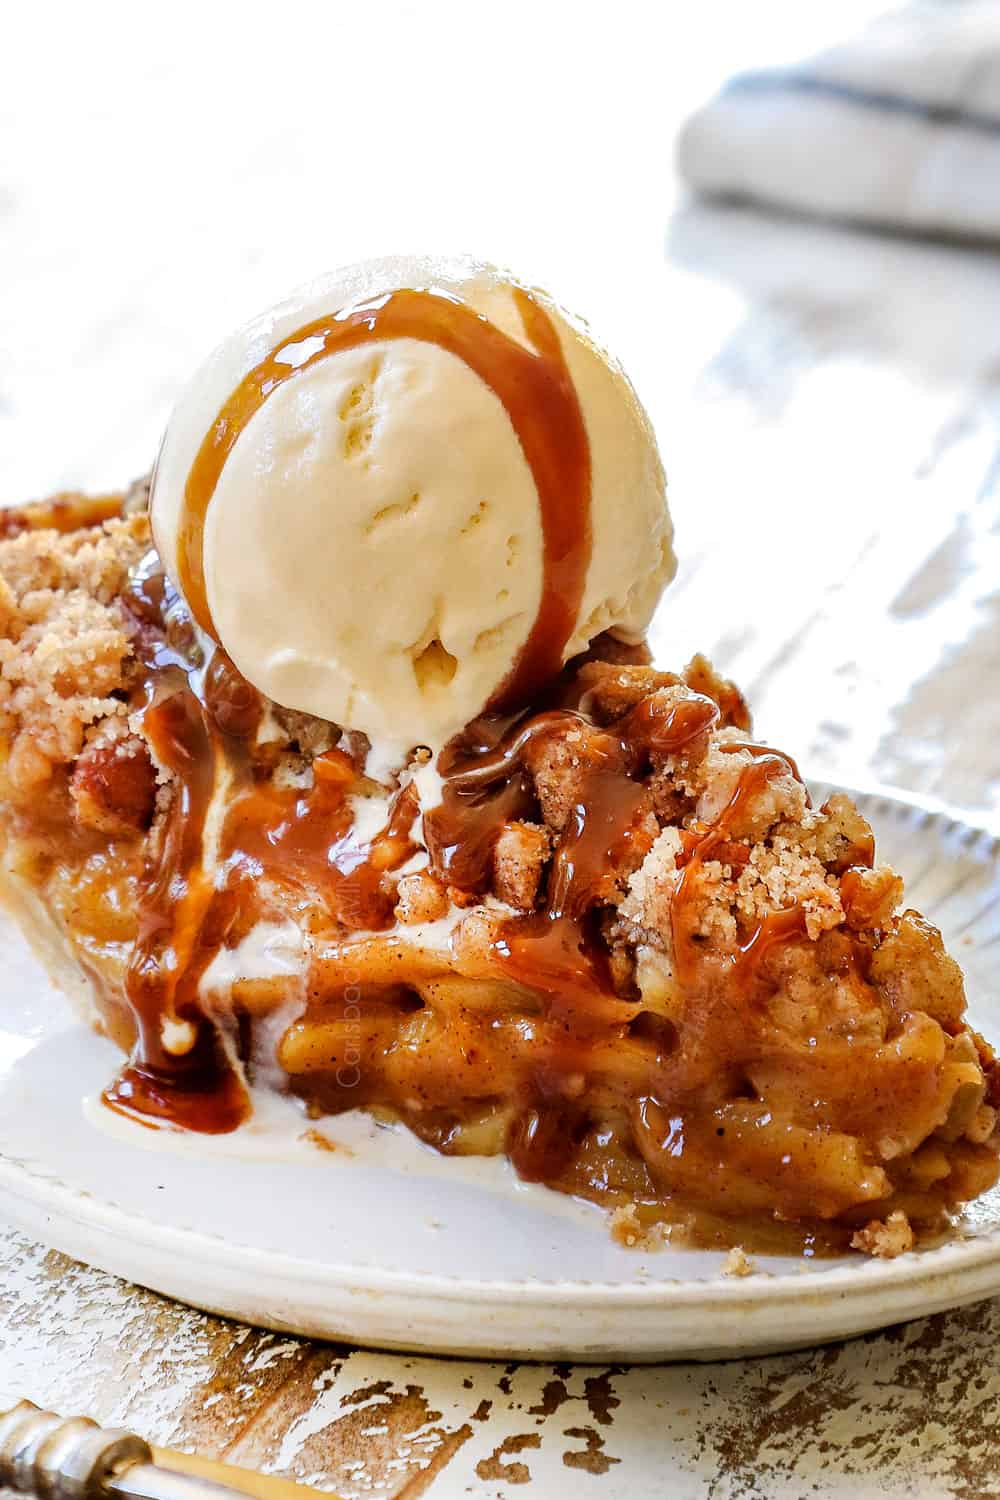
Dutch Apple Pie is best served warm and becomes exponentially more delicious with a big, cold scoop of vanilla ice cream. The cold, silky smooth ice cream mingled with the warm, sweet, crunchy cinnamon topping is heavenly! You can also add a drizzle of caramel sauce, but it honestly doesn’t even need it!
How long is apple pie good for?
Apple pie will keep at room temperature for up to 1 day. Let cool completely, then tightly cover. For longer storage, cover with aluminum foil and refrigerate for up to 5 days; reheat before serving (see below).
How to reheat apple pie
Apple pie should be cooled in order for the filling to set. In order to refresh the pie, tent it with foil and place it into a cold oven. Turn the oven to 375 degrees, and when the preheat bell dings, leave the pie in for another 10-15 minutes.
Can you freeze Apple Pie filling?
Yes, the apple pie filling can be cooked per recipe instructions, cooled and transferred to a freezer size Ziploc bag. Squeeze out excess air to prevent freezer burn and freeze for up to 3 months. Thaw overnight in the refrigerator before adding to the pie.
How to freeze an entire Apple Pie
Baked and cooled pie freezes well for up to 3 months. Place the pie in the freezer for 1-2 hours to flash freeze, then wrap it a couple times in plastic wrap followed by foil. Freeze for up to 3 months. Thaw overnight in the refrigerator and allow to come to room temperature before serving or reheating.
Fun History About Dutch Apple Pie
Apple pie may be a symbol of America, but the dessert didn’t actually come from America, and neither did the apples! When early colonists settled Jamestown, the only apples they discovered were crab apples, which were often too sour and bitter to eat, even after cooking. Apples had to be imported from Europe and, only then, could the evolution of apple pie continue.
The first authentic Dutch Apple Pie dates back to a cookbook from 1514 (source) in Brussels, Denmark. The pie was made with a standard pie crust, filled with cooked, peeled apples, sugar, lots of spices including cardamom, ginger, cinnamon, nutmeg, cloves, and mace and baked in a Dutch oven pan. The top crust was then removed, the filling was pressed through a sieve, then stirred with cream and returned to the oven. This technique may sound odd today, but apple pie had to start somewhere!
From 1820 to 1900, over 340,000 immigrants from Holland settled in the United States, bringing their beloved Dutch Apple Pie recipes with them. During this same time, John Chapman, otherwise known as Johnny Appleseed, introduced various species of apple trees from Europe to large parts of Pennsylvania, Ohio, Indiana, Illinois and West Virginia. By the 1800s, American farmers were growing a mind-boggling 14,000 varieties of apples fit for apple pie!
With the surplus of apples, Dutch Americans continued the tradition of making apple pie and it evolved into what we know and love today. In a 1924 advertisement, the Gettysburg Times promotes “New Lestz Suits that are as American as apple pie.” And we have the Dutch and Johnny Appleseed to thank for it!

Looking for more pie recipes?
- Pecan Pie
- Mini Caramel Apple Pies
- Pear Pie
- Mud Pie
- Butterfinger Pie
- Million Dollar Cookie Pie
- S’mores Pie
- Banana Coconut Cream Pie
WANT TO TRY THIS dutch appel pie RECIPE?
PIN IT TO YOUR dessert OR holiday BOARD TO SAVE FOR LATER!
FIND ME ON PINTEREST FOR MORE GREAT RECIPES! I AM ALWAYS PINNING :)!
©Carlsbad Cravings by CarlsbadCravings.com


Dutch Apple Crumb Pie
Save This Recipe To Your Recipe Box
You can now create an account on our site and save your favorite recipes all in one place!
Ingredients
FILLING
- 3 1/2 pounds Honeycrisp apples
- 1 1/2 pounds Granny Smith apples
- 2/3 cup packed light brown sugar
- 1/2 cup granulated sugar
- 6 tablespoons all-purpose flour
- 2 tablespoons lemon juice, divided
- 1 1/2 teaspoons ground cinnamon
- 1/2 tsp EACH ground ginger, ground nutmeg, allspice
- 1/8 teaspoon salt
- 1 teaspoon vanilla extract
PIE CRUST
- 1 recipe homemade pie crust
TOPPING
- 1 cup all-purpose flour
- 3/4 cup chopped pecans (optional)
- 1/4 cup packed light brown sugar
- 1/4 cup granulated sugar
- 1 teaspoon ground cinnamon
- 1/4 teaspoon salt
- 6 tablespoons unsalted butter, melted
- 1 tablespoon turbinado sugar for dusting (may sub granulated sugar)
Instructions
- Pie crust: Prepare pie crust through step 4 (adding the egg wash) under “Roll Dough.” Place the crust in the freezer while you prep the topping and apples. (CLICK HERE for recipe.) SEE NOTE/WARNING IF USING GLASS PAN.
- Topping: Whisk together the flour, pecans, sugars, cinnamon and salt in a large bowl until evenly combined. Pour in the melted butter and stir with a spatula to combine then use your hands to combine until the mixture resembles crumbly wet sand. Cover and transfer to the refrigerator while you prepare the filling.
- Slice the apples: Peel the apples, then make 4 slices around the core to remove it. Lay your 4 remaining apple segments, cut side down, on a cutting board and slice into 1/8-inch slices. Transfer the apples to a large Dutch oven as you go to keep the workspace clean.
- Apple pie filling: Add the sugars, flour, 1 tablespoon lemon juice, and spices to the sliced apples and set over medium heat. Gently stir until evenly coated. Cover, and cook for 15-20 minutes, stirring every couple minutes and replacing the lid. The apples are done when they reach YOUR exact desired apple pie tenderness – they will not become more tender in the oven. They should be fork tender but still hold their shape. (No, they will not become mushy when baked, see the science behind it in the post.)
- Once tender, stir in remaining 1 tablespoon lemon juice and the vanilla.
- Transfer the apples and their caramel juices to a rimmed baking sheet ( I cover the pan with a silicone mat for easy cleanup) and spread into an even layer. Pop the pan in the fridge or freezer to cool completely to room temperature, about 30 minutes. You may also leave the apples on the counter to cool if you don’t mind the couple hour cooling time.
- Assemble: Once the apples have cooled completely, transfer them and all of the sauce to the chilled pie shell, rearranging and layering the apples horizontally as needed so they are compact. Evenly sprinkle the topping over the apples, breaking up any large clumps with your fingers, followed by 1 tablespoon turbinado sugar. Place the whole pie in the fridge for 30 minutes, for a really flaky crust (See Note/Warning if using glass pie pan.)
- Preheat oven: Immediately after transferring the pie to the fridge, place a baking sheet on the bottom rack of your oven and preheat the oven to 425 degrees F so the baking sheet can get nice and hot.
- Bake: Transfer the chilled pie to the rimmed baking sheet. Bake at 425 degrees F for 25 minutes. Reduce the heat to 375 degrees F and continue to bake an additional 35-45 minutes or until the filling is bubbling around the edges (if you don’t wait for it to bubble, your filling will be runny). Cover the edges with a pie shield or the top with foil if they are browning too quickly. I cover the crust halfway through cooking.
- Cool: Transfer the pie to a cooling rack and let it rest for 4 hours to cool to room temperature so the filling can set. You can pop the pie in the fridge/freezer to speed up the cooling process.
- Reheat: After the pie has cooled you can reheat/refresh it in the oven. Tent the pie with foil and place into a cold oven. Turn the oven to 375 degrees F, and when the preheat bell dings, leave the pie in for another 10-15 minutes.
Video
Notes
- GLASS PIE AN WARNING: I suggest a ceramic pie dish or HIGH QUALITY glass made from borosilicate glass and not soda-lime glass which seems more prone to thermal shock and shattering (newer Pyrex is not to be trusted). To be safe, I suggest blind baking the pie crust (see pie crust post for instructions) after a short refrigeration.
- Pre Cooking Apples: delivers a foolproof filling that is never runny, mushy or crunchy. Cooks Illustrated explains that as you cook the apples slowly, the pectin in the apples is converted to a heat-stable form which prevents the apples from continuing to cook in the oven – so no, the apples will NOT become mushy when baked!
- Cooling the Apple Pie: this will give the sauce a chance to thicken a little more as it cools. If you try and slice into a warm apple pie, it may be runny and completely fall apart, even if you have done everything right. I opt to cool the pie completely, then refresh it when I want to serve it warm.
Make-Ahead Tips:
You can either make the pie completely ahead of time or pre-make portions of the pie. Here’s how:- Pie Crust: the dough can be made 2 days ahead of time and refrigerated until ready to use. You can also go one step further and mold it in the pie pan, brush with egg wash, cover, and refrigerate for up to 2 days. You can freeze the pie dough or the formed pie crust, covered tightly for up to 3 months. Thaw in the refrigerator overnight.
- Apple Pie Filling: can be made/cooked two days ahead of time, covered tightly and refrigerated for one day.
- Crumble Topping: can be made two days ahead of time, covered tightly and refrigerated until ready to use.
- Finished Pie: the pie can be baked, cooled, covered and stored at room temperature one day before serving. Reheat in the oven per recipe instructions before serving.
Storage
Apple pie will keep at room temperature for up to 1 day. Let cool completely, then tightly cover. For longer storage, cover with aluminum foil and refrigerate for up to 5 days; reheat before serving (see below).How to freeze
- Apple filling: the apple pie filling can be cooked per recipe instructions, cooled and transferred to a freezer size Ziploc bag. Squeeze out excess air to prevent freezer burn and freeze for up to 3 months. Thaw overnight in the refrigerator before adding to the pie.
- The whole pie: baked and cooled pie freezes well for up to 3 months. Place the pie in the freezer for 1-2 hours to flash freeze, then wrap it a couple times in plastic wrap followed by foil. Freeze for up to 3 months. Thaw overnight in the refrigerator and allow to come to room temperature before serving or reheating.
Want To Make This Recipe?

Did You Make This Recipe?
Tag @CarlsbadCravings and Use #CarlsbadCravngs
Leave a Review, I Always Love Hearing From You!


Olivia says
If you put a cold glass pie pan onto a hot baking sheet, won’t that risk shattering the glass?
Jen says
Great question! I suggest a ceramic pie dish or HIGH QUALITY glass made from borosilicate glass. Older Pyrex should be trustworthy but new Pyrex is made of soda-lime glass which seems more prone to thermal shock and shattering. To be safe, I suggest blind baking the pie crust (see pie crust post for instructions) and then you can just add the filling and bake without refrigerating.
Lisa says
Made this for Thanksgiving and although a lot of waiting to chill dough, well worth it. Flaky crust, great flavor and set up perfect. Finally found the perfect apple pie, was absolutely amazing! Thank you for this amazing recipe!
Jen says
Thanks so much for taking the time to review this apple pie recipe Lisa. I’m thrilled it was worth the effort and the “perfect pie!” Doesn’t get better than that! Happy Holidays!
Gina P says
If I double the recipe, would it work well for a slab-style dessert? If so, would you recommend a jelly-roll p[an size (10×15) or a half-sheet pan size (13×18)? Thank you! Love your recipes!
Jen says
Hi Gina, yes I think it should work great as as slab style dessert. The area of a 9-inch pie pan is 63 inches so I would double the recipe to fit better in the smaller size pan (10×15) whose area is 150 inches. Good luck!
Fern says
Made this Dutch Apple Pie for our family October fest yesterday. Wow!! It’s been a long time since I made my own pie, and even longer since I’ve made my own pie crust. One-by-one as each person took a bite of pie, their eyes grew wide, and they exclaimed how good it was. Thank you for giving us this pie recipe! But want to thank you even more for teaching an old dog, new tricks! How could I get this old and keep coring and slicing apples the hard way! And how come I never thought of rolling pie crust between parchment paper rather than on a floured surface and getting flour all over the kitchen! Since you made it so much easier, I just might make my own pies more often — don’t have to dread coring and slicing apples and cleaning flour off every inch of my kitchen!! Thank you soooo much Jen — for the recipe and the education!! Love, love your blog!
Jen says
Thank you for taking the time to comment and make my day Fern! I am so honored you were able to learn a few new techniques that will make your cooking easier – that means everything to me!
Kristin says
I would like to make this for thanksgiving but my family likes the traditional lattice top. In order to make the lattice top would I double your homemade crust recipe? Also, would this affect the cooking time? TIA!
Jen says
Hi Kristin, my homemade pie crust recipe makes 2 pie crusts, so you are good to go! I would lightly brush the top of the lattice with with the egg wash and sprinkle with coarse sugar, if you have it, before baking. You will probably need to cover the lattice top about 20 minutes or so into baking, so just make sure to pay attention to that. Other than that, you’re all set!
Stephanie says
PERFCT apple pie recipe, best I’ve ever tasted and easy to make. We loved this for our Thanksgiving pie. Only issue I had was keeping my 2 teen kids with forks in hand, away from diving into the caramel coated apples as they were cooling because they tasted SOOO good. .
Jen says
That means a lot coming from you, thank you so much Stephanie! Happy Thanksgiving!!!
Cheryl says
Pie was delicious! I was surprised that the apples didn’t get mushy. Thank you for your inspiration and sharing such fantastic recipes!
Jen says
Thanks Cheryl, so pleased you loved it!
T says
Can you make this into an apple crumble instead? No crust on bottom.
Jen says
Absolutely!
Joni says
My 2nd attempt ever, with Dutch Apple pie, and this recipe far exceeds the first one I made. We love what the pecans add and bring to the amazing flavors. The spices are so spot on. As we were enjoying our first piece(s), my husband and I both agreed this would be absolutely mind blowing with some crumbled, crispy fried bacon added in to the topping. (Bring that next time!) Delicious as is!!
Jen says
YAY! I’m so pleased this recipe was a hit! I’m drooling over the crispy bacon idea – brilliant!
A Leming says
My pie is in the oven now and it smells yummy! What size pie plate did you use? I cheated and bought a deep dish crust. I had almost enough filling and crumbles for a second pie. I told hubby the leftover filling and crumbles will be atop pancakes for breakfast in the very near future. He was as excited about that as much as the pie! I can’t wait to cut into it…just wanted to state that this is a LOT of apples for even a deep dish crust.
Jen says
I’m so glad you made this recipe, I hope you love it! My pie actually just went into the oven as well! I use a standard pie dish and not a deep dish. The key is to layer the apples horizontally so they compact nicely. Happy Thanksgiving!
LaNae says
I want to use my home canned apple pie filling. DO I have to cook the home canned apple pie filling or can I. just put it in the crust.
Jen says
You can just put it in the crust. Enjoy!
Heather says
Absolutely perfect recipe. I got many compliments on this pie. It was the highlight of Thanksgiving. I made the dough and filling 1 day ahead and refrigerated overnight. Used a little less sugar for the very last sprinkle. I have aphoto of it I would like to post. I baked in a glass dish all I have.
Jen says
I’m so thrilled that it was the star of your feast! Thanks for sharing, happy holidays!
Arlene says
If anyone invites me to share their homemade Dutch Apple Pie, I will know that I am a special guest. This may be the hardest anything I’ve ever made. It’s in the oven for the 425° baking now, and I’m exhausted!
Jen says
I hope it is delicious and worth the effort!
Amy says
Amazing pie! I have been on the search for a recipe for Apple pie that does not get mushy and found it in this pie. The science is what got me in and the taste/texture will have keep making it. Thank you for an awesome pie that I will be proud to share.
Jen says
Wow Amy! Thank you for such a warm review! I’m so happy that this recipe is a keeper and that you love it enough to share it with others!
Joy says
I am not much of a baker, I am wondering if I weigh the apples before I cut them up or after? Hope that makes sense. Thanks.
Jen says
Joy, weigh the apples before you cut them. Enjoy!