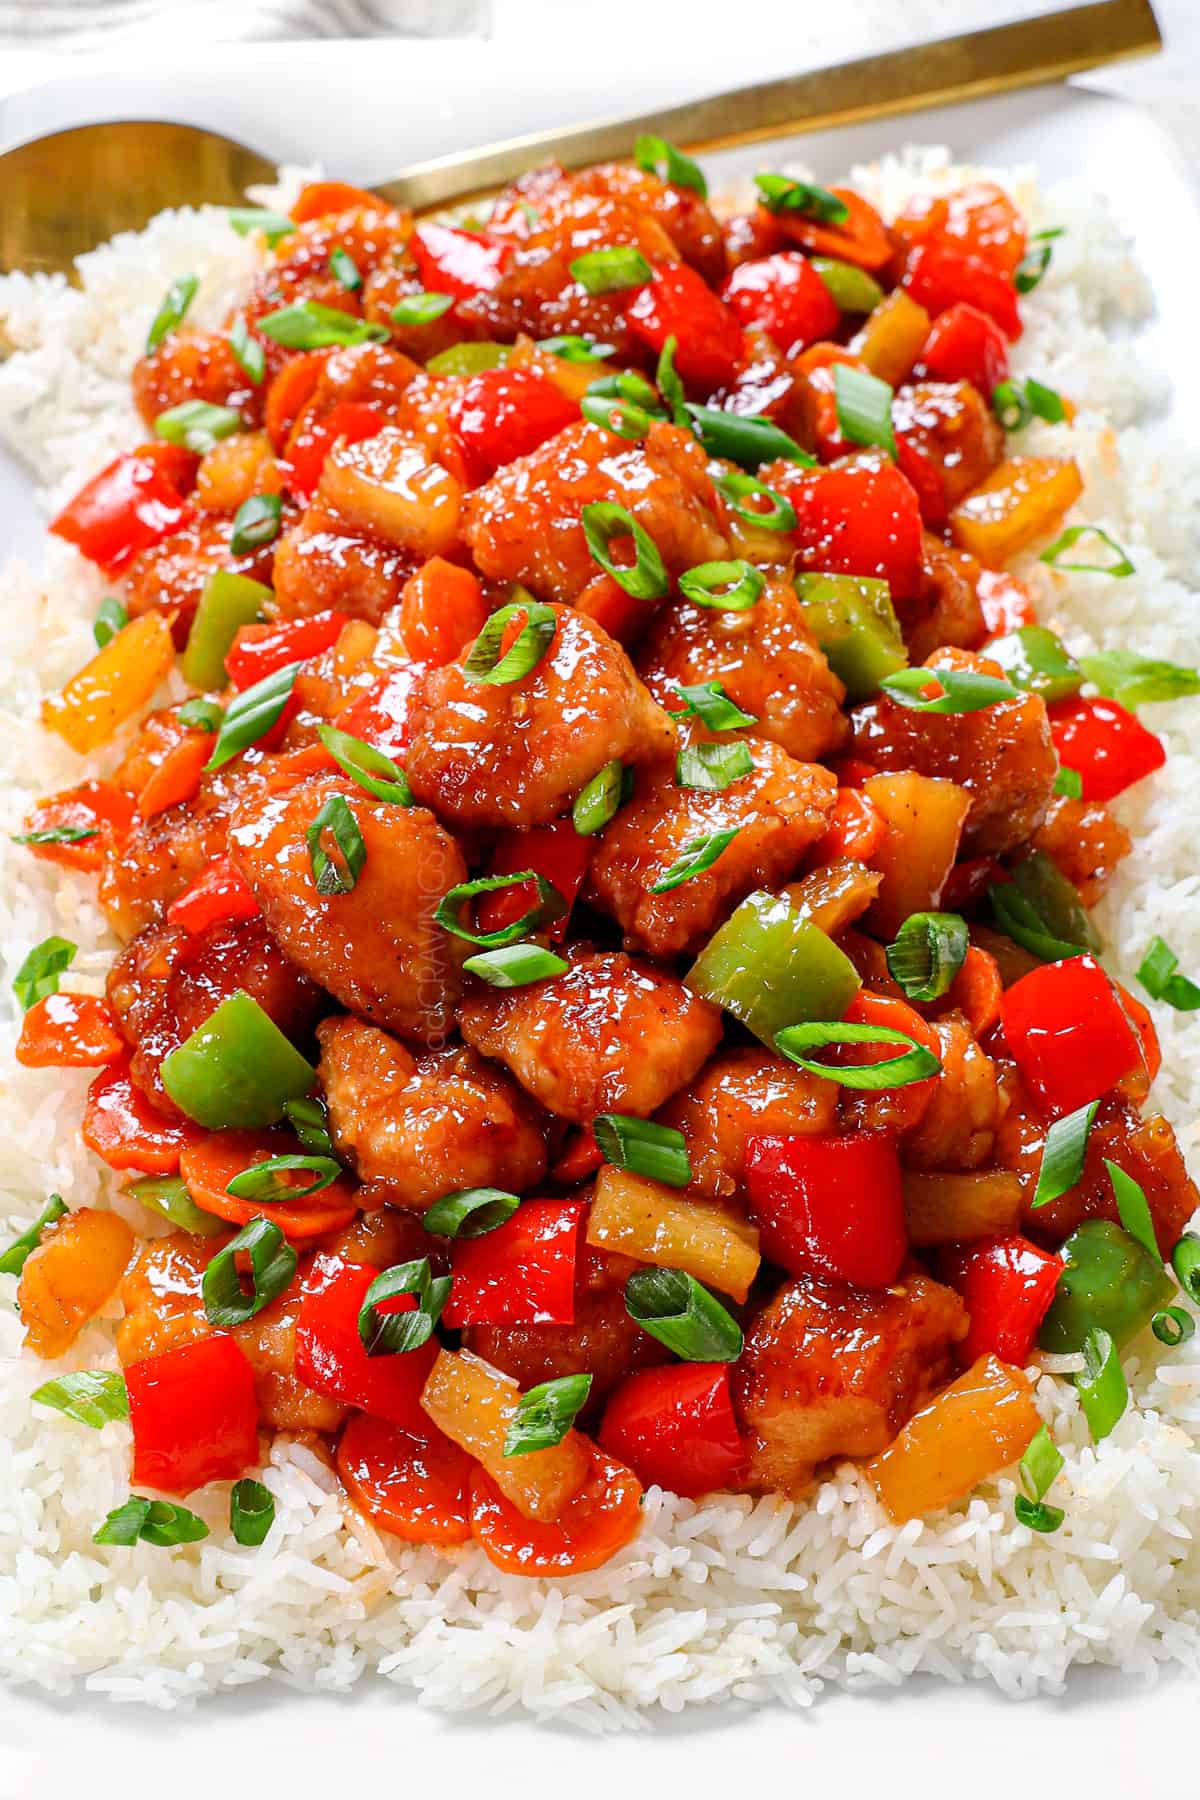
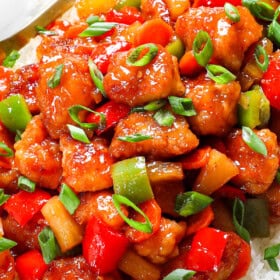
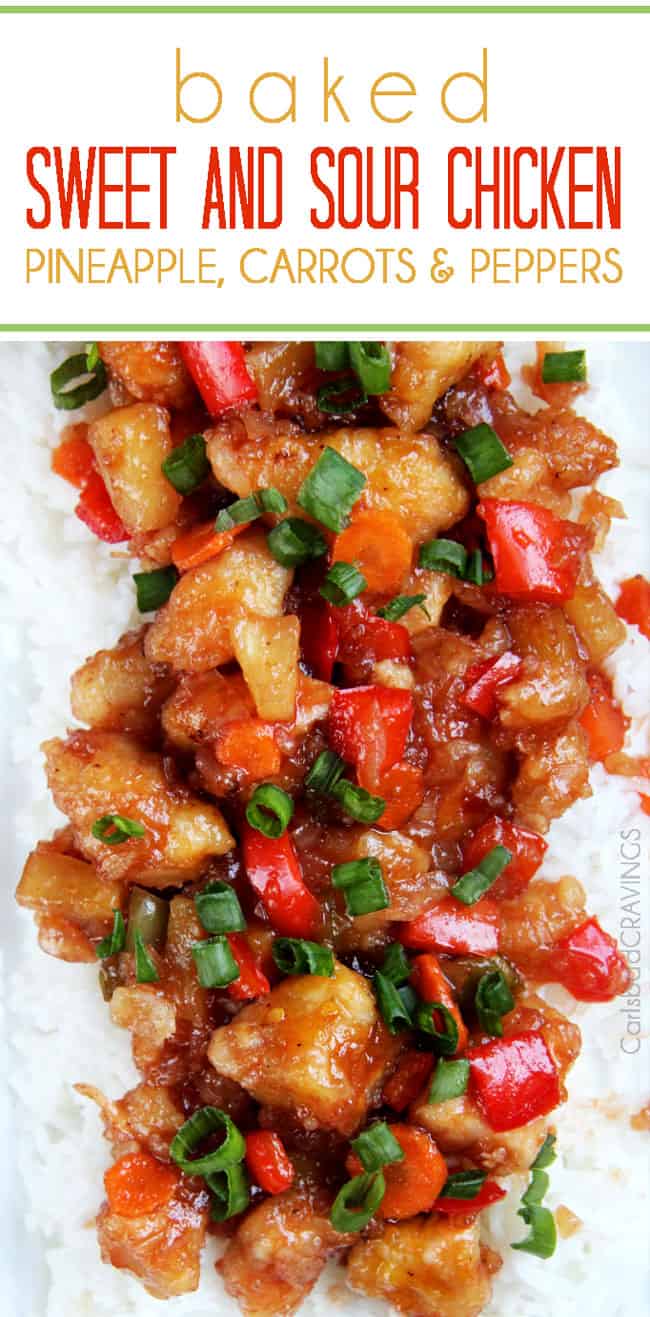
Prepare to make the BEST Sweet and Sour Chicken you’ve ever tasted! This baked version of a classic favorite has become a hit among readers, with rave reviews calling it “restaurant quality,” “better than takeout,” and “the most flavorful homemade sweet and sour chicken.” Best of all, it’s healthier than takeout baked with pineapple, carrots, and bell peppers for a satisfying meal-in-one without needing to stir-fry extra veggies!
(Originally Published 11-15-2018, Photos updated 9/16/24)
Watch How to Make Sweet and Sour Chicken
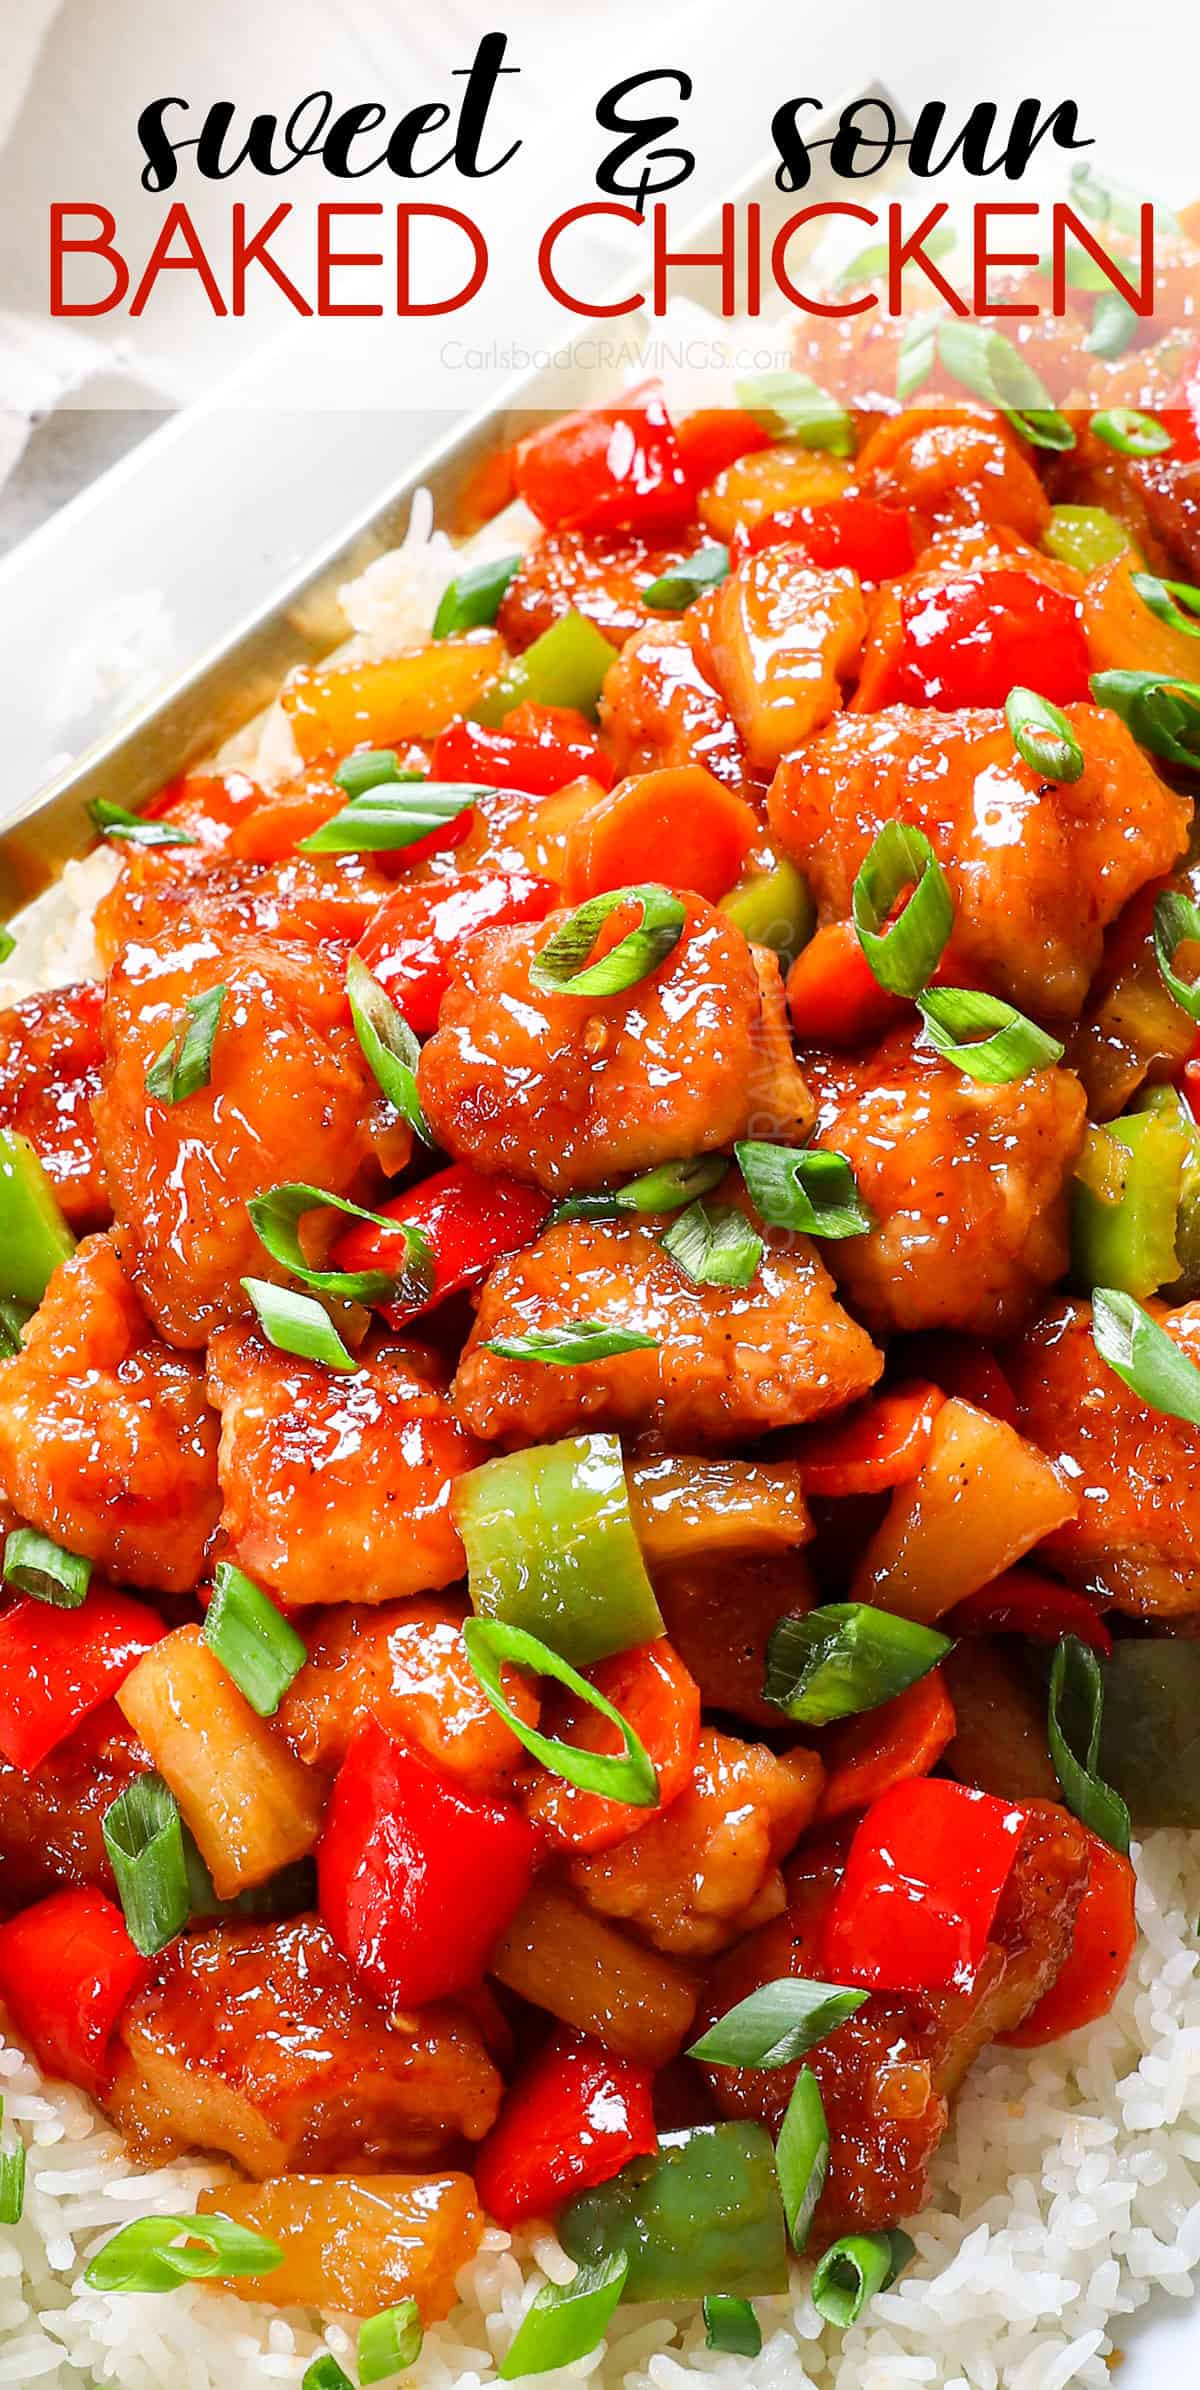

Baked Sweet and Sour Chicken Recipe
How I fell in Love with Sweet and Sour Chicken
I was first introduced to a variation of this Sweet and Sour Chicken recipe from my older (and only) sister, Kimberly, who is an incredible cook!
Kimberly is the same sister who donated her kidney to me in October 2013, (You can read more about her in my Easter Soul Food).
Kim is responsible for my current well-being and almost single-handedly responsible for my love of cooking—and for this Sweet and Sour Chicken recipe.
I always liked to cook, but when she gifted me a recipe binder for Christmas at the beginning of my marriage, comprised of all her tried and true recipes, it lit a fire. After I cooked every recipe in the binder (and because they were all her favorites, they were all delicious and turned out great!), I wanted to cook more! So I started cooking new recipes almost every night of the week, and pretty soon, I started creating my own recipes almost every single night of the week.
Her Baked Sweet and Sour Chicken recipe has always been one of my favorites in her binder. I have played with it over the years, increasing the sauce, simmering the sauce, and adding spices, pineapple, carrots, and bell peppers, so it has become a baked sweet and sour meal all in one baking dish!

Ingredients in Baked Sweet and Sour Chicken
Let’s take a closer look at what you’ll need to make this recipe (measurements in the printable recipe card at the bottom of the post):
For the Chicken Breading:
For the homemade sweet and sour sauce:
For the VEGETABLES:

How to Make Sweet and Sour Chicken
Let’s take a closer look at how to make Sweet and Sour Chicken with step-by-step photos (full recipe in the printable recipe card at the bottom of the post):

Can I prep this Recipe for Sweet and Sour Chicken in advance?
Yes! You can prepare this recipe in stages but only completely assemble it once ready to bake. Here’s how:
-Sweet and Sour Sauce: Store it in an airtight container in the refrigerator after simmering.
-Chicken: Brown the breaded chicken and store, covered, in a 9×13 baking dish.
-Veggies: Chop the vegetables and store them in the fridge for up to 2 days.
When you’re ready to bake, combine the ingredients. Be prepared to add 15 minutes to the baking time.

Tips for making Sweet and Sour Chicken with Pineapple

can I reduce the sugar?
As written, the sauce is a perfect balance of sweet and sour. If you want to reduce the sugar, you must proportionately reduce the red wine vinegar and ketchup because the sugar balances the tanginess. You will be left with more sour sauce if you reduce the sugar without reducing the other ingredients. You CAN, however, substitute some of the sugar with honey.


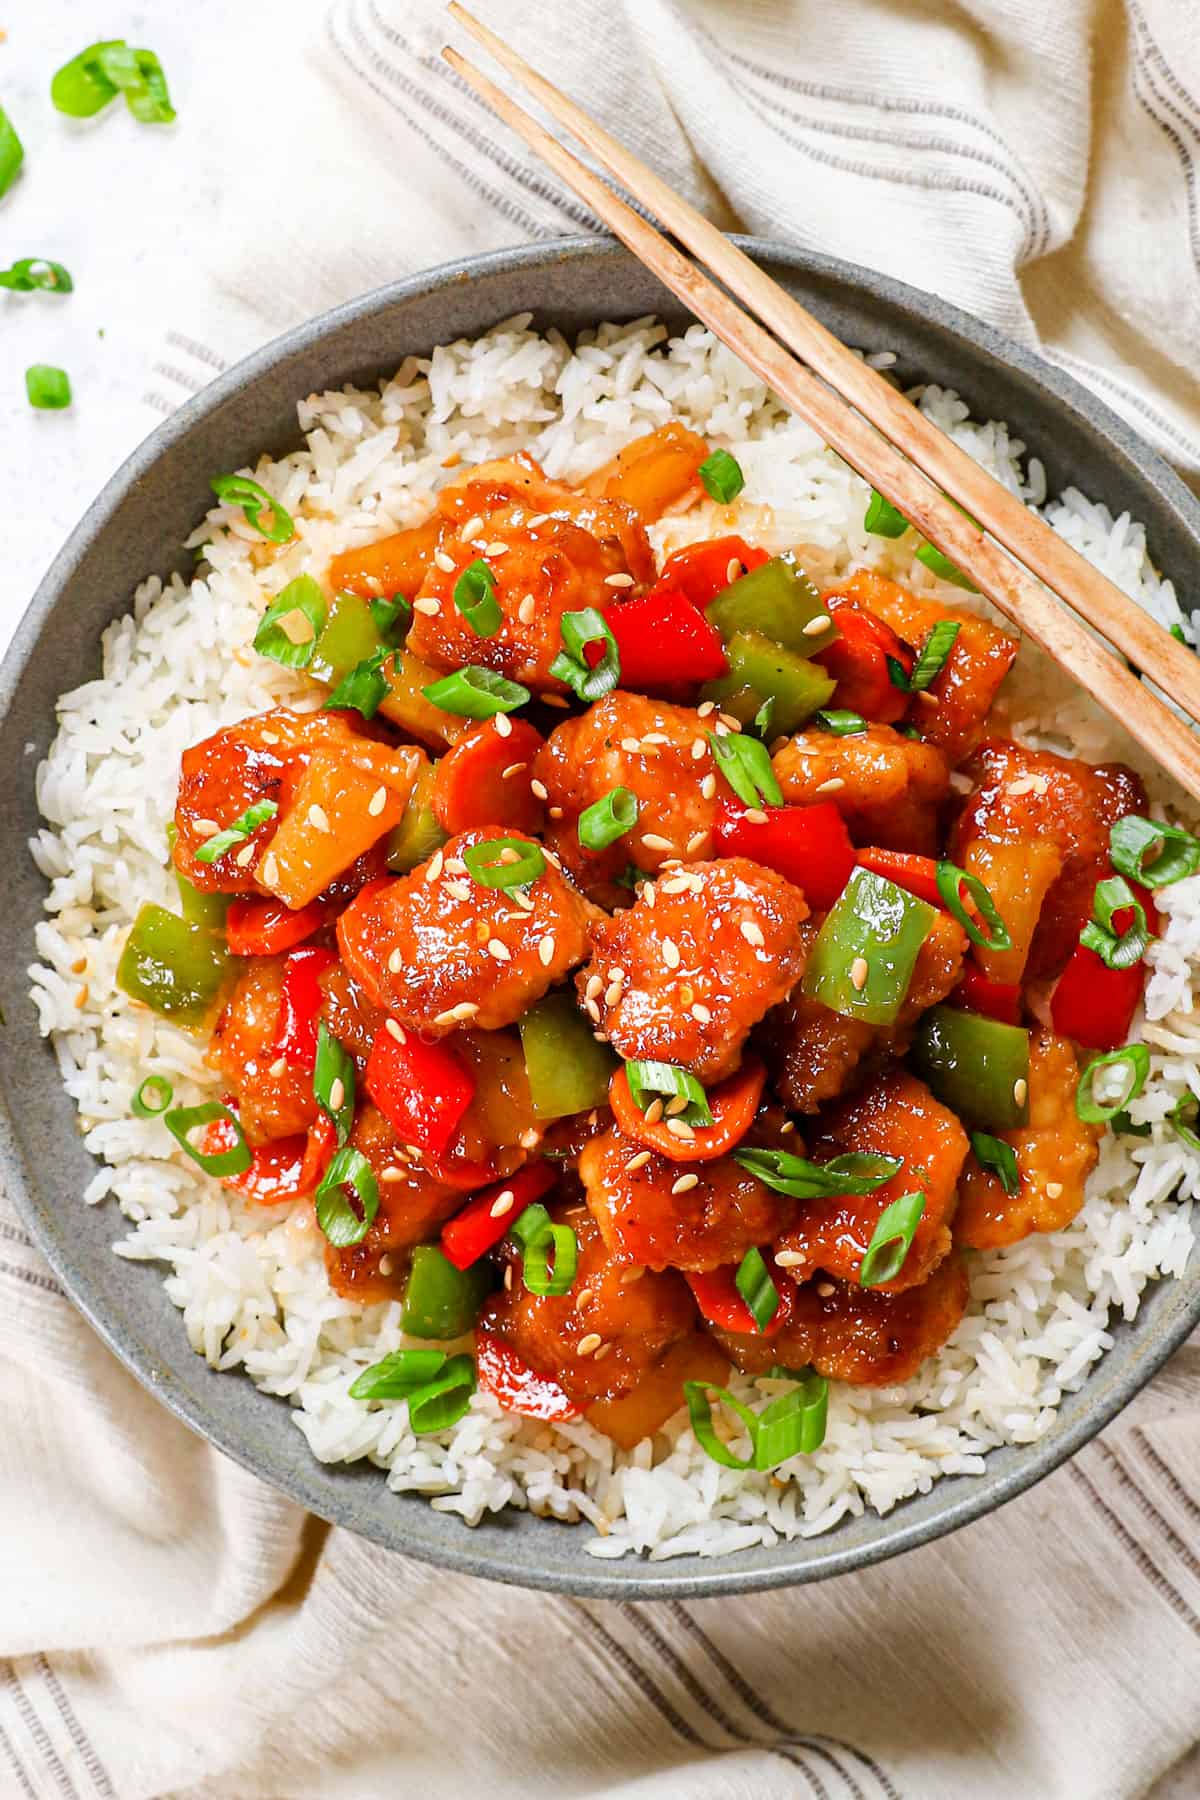
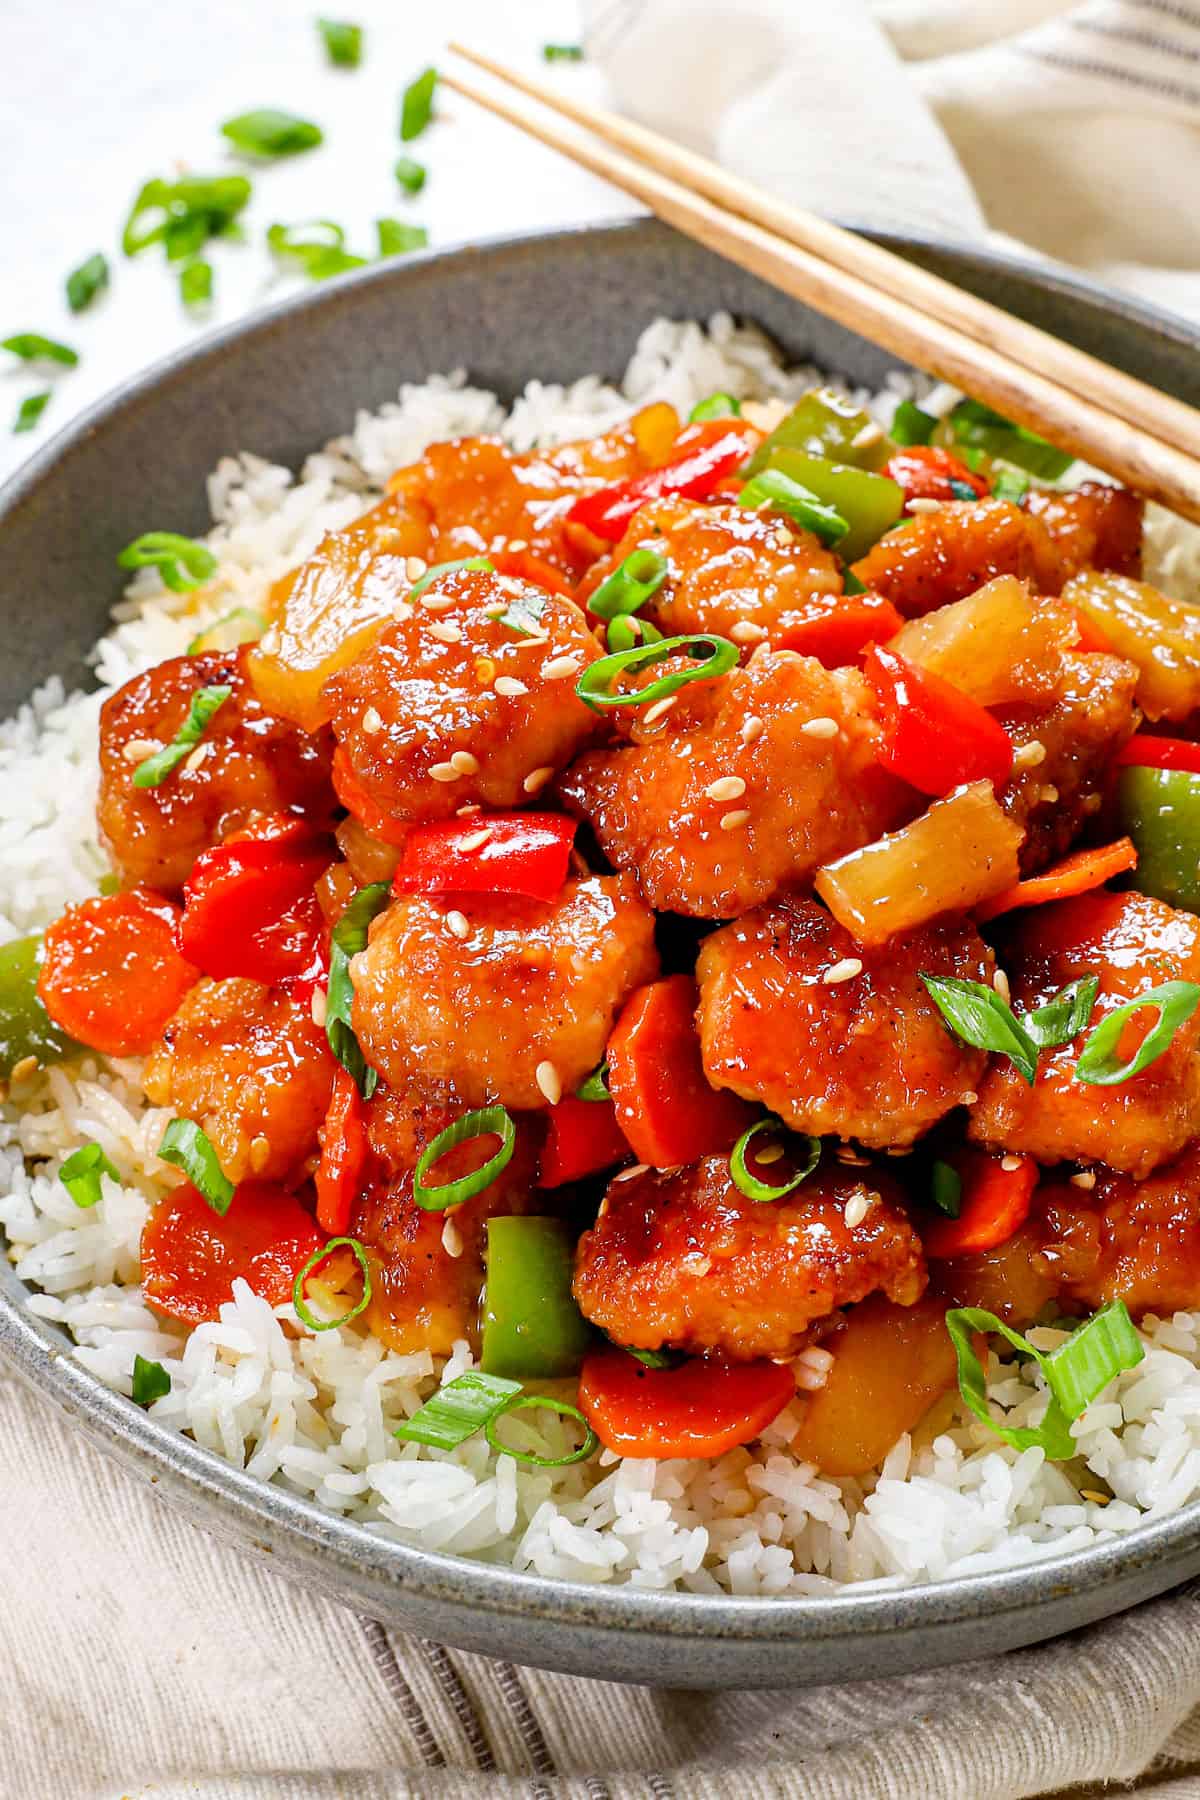
What can I serve with sweet and sour chicken?

HOW TO STORE Sweet and Sour Chicken
This Chinese Sweet and Sour Chicken recipe is best served fresh because it is at peak sauciness, and the chicken is the juiciest. However, leftovers can be stored in an airtight container in the refrigerator for up to 5 days.

How to Reheat Baked Sweet and Sour Chicken
-How to reheat on the stove: To reheat, heat a drizzle of vegetable, canola, or peanut oil over medium heat. Once hot, add the chicken, stirring occasionally until warmed through.
-Reheating in microwave: Microwaving leftovers is not advised because the chicken can become rubbery, so be careful not to overcook the chicken.
Can I Freeze Sweet and Sour Chicken?
If you are making Sweet and Sour Chicken specifically to freeze, then I recommend freezing the chicken and sauce separately and omitting the bell peppers so the chicken and peppers don’t become soggy.
TO FREEZE CHICKEN WITHOUT SAUCE:
- Space the browned chicken apart on a baking sheet then flash freeze for 1-2 hours or until the chicken is solid. This prevents the chicken from clumping together.
- Add the chicken to a freezer-size bag, squeeze out excess air, and label.
- Add the sweet and sour sauce to a separate airtight container.
- When ready to use, defrost chicken and sauce in the refrigerator overnight.
TO FREEZE CHICKEN IN SWEET AND SOUR SAUCE:
If freezing leftovers, I recommend removing the bell peppers before freezing because they will become mushy when thawed.
- Let the dish cool completely.
- Transfer to a large freezer bag or divide it into smaller bags. Alternatively, transfer to an airtight container(s). Press air from the freezer bag, seal, and label.
- Freeze for up to 3 months.
- When ready to eat, defrost in the refrigerator overnight.
Sweet and Sour Chicken FAQs
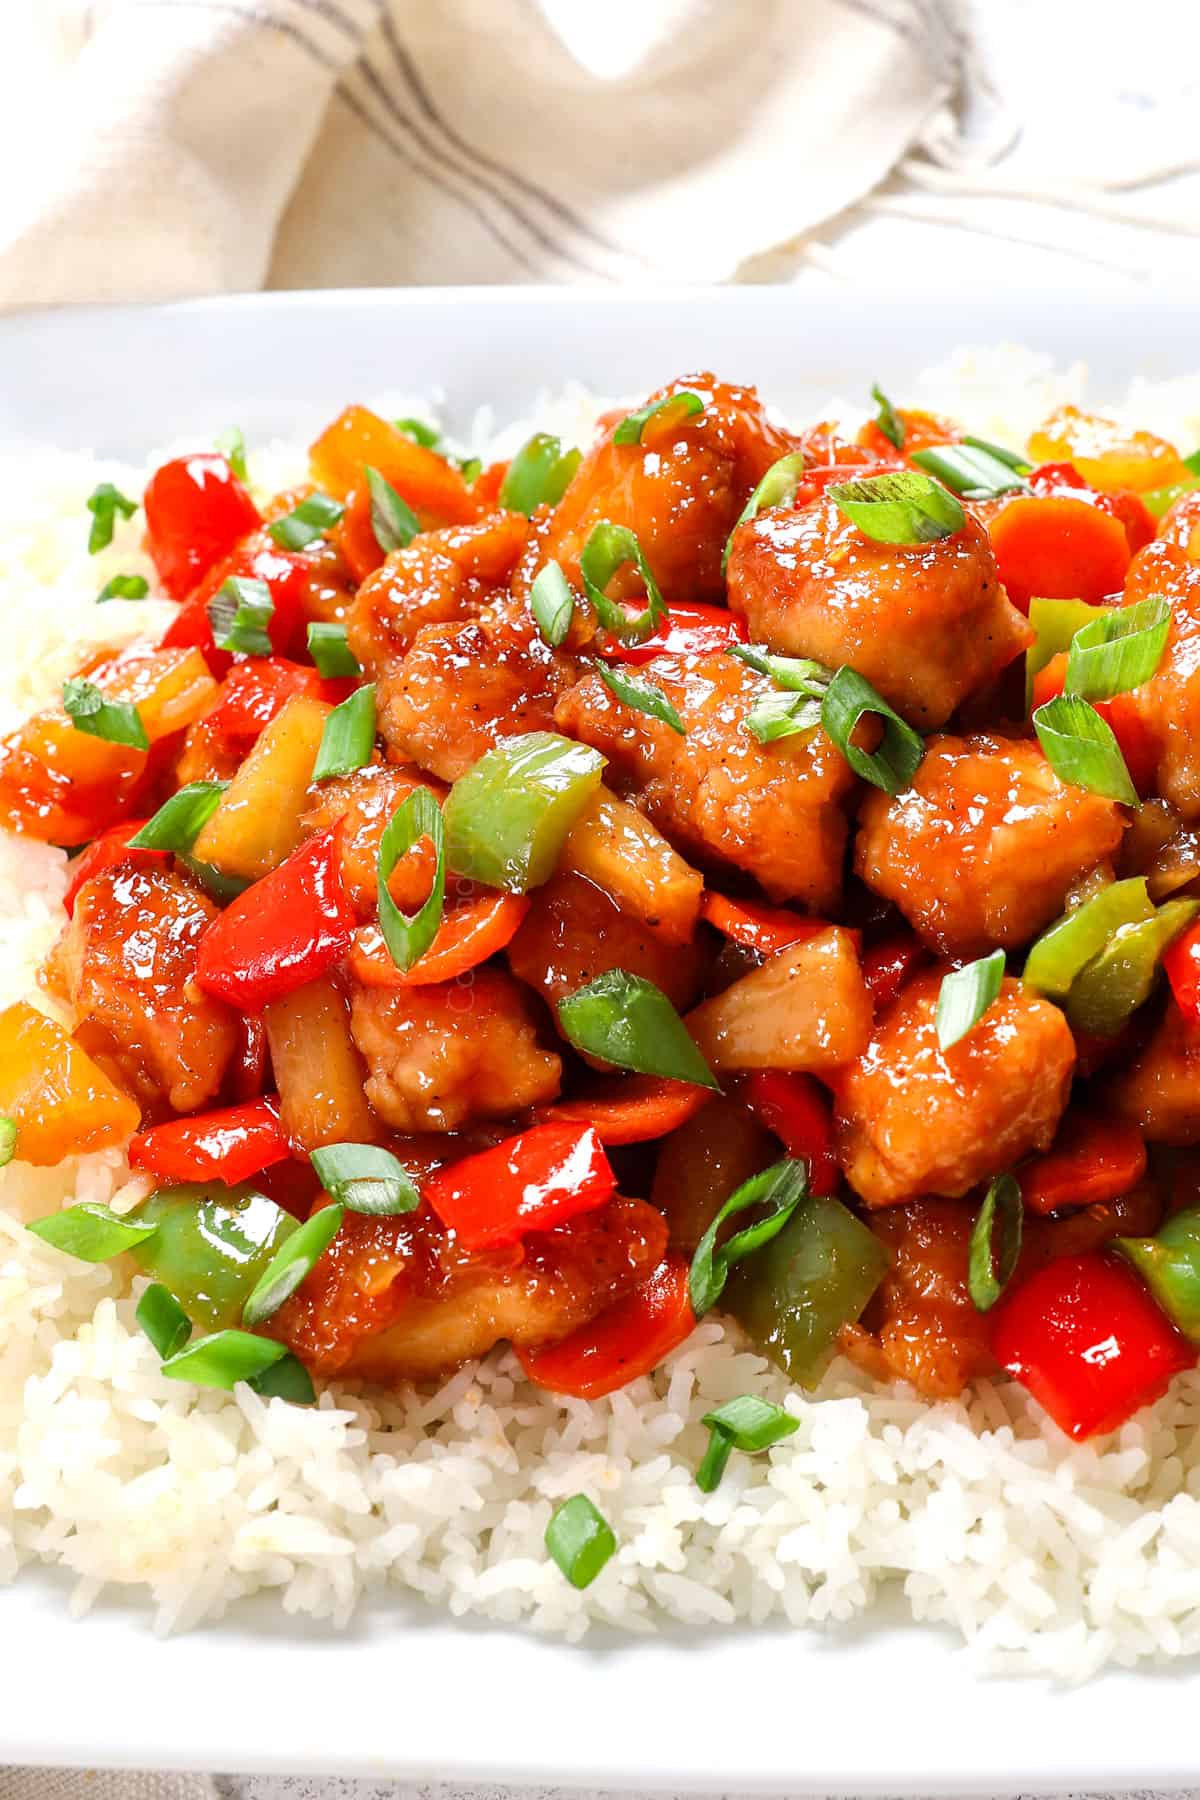
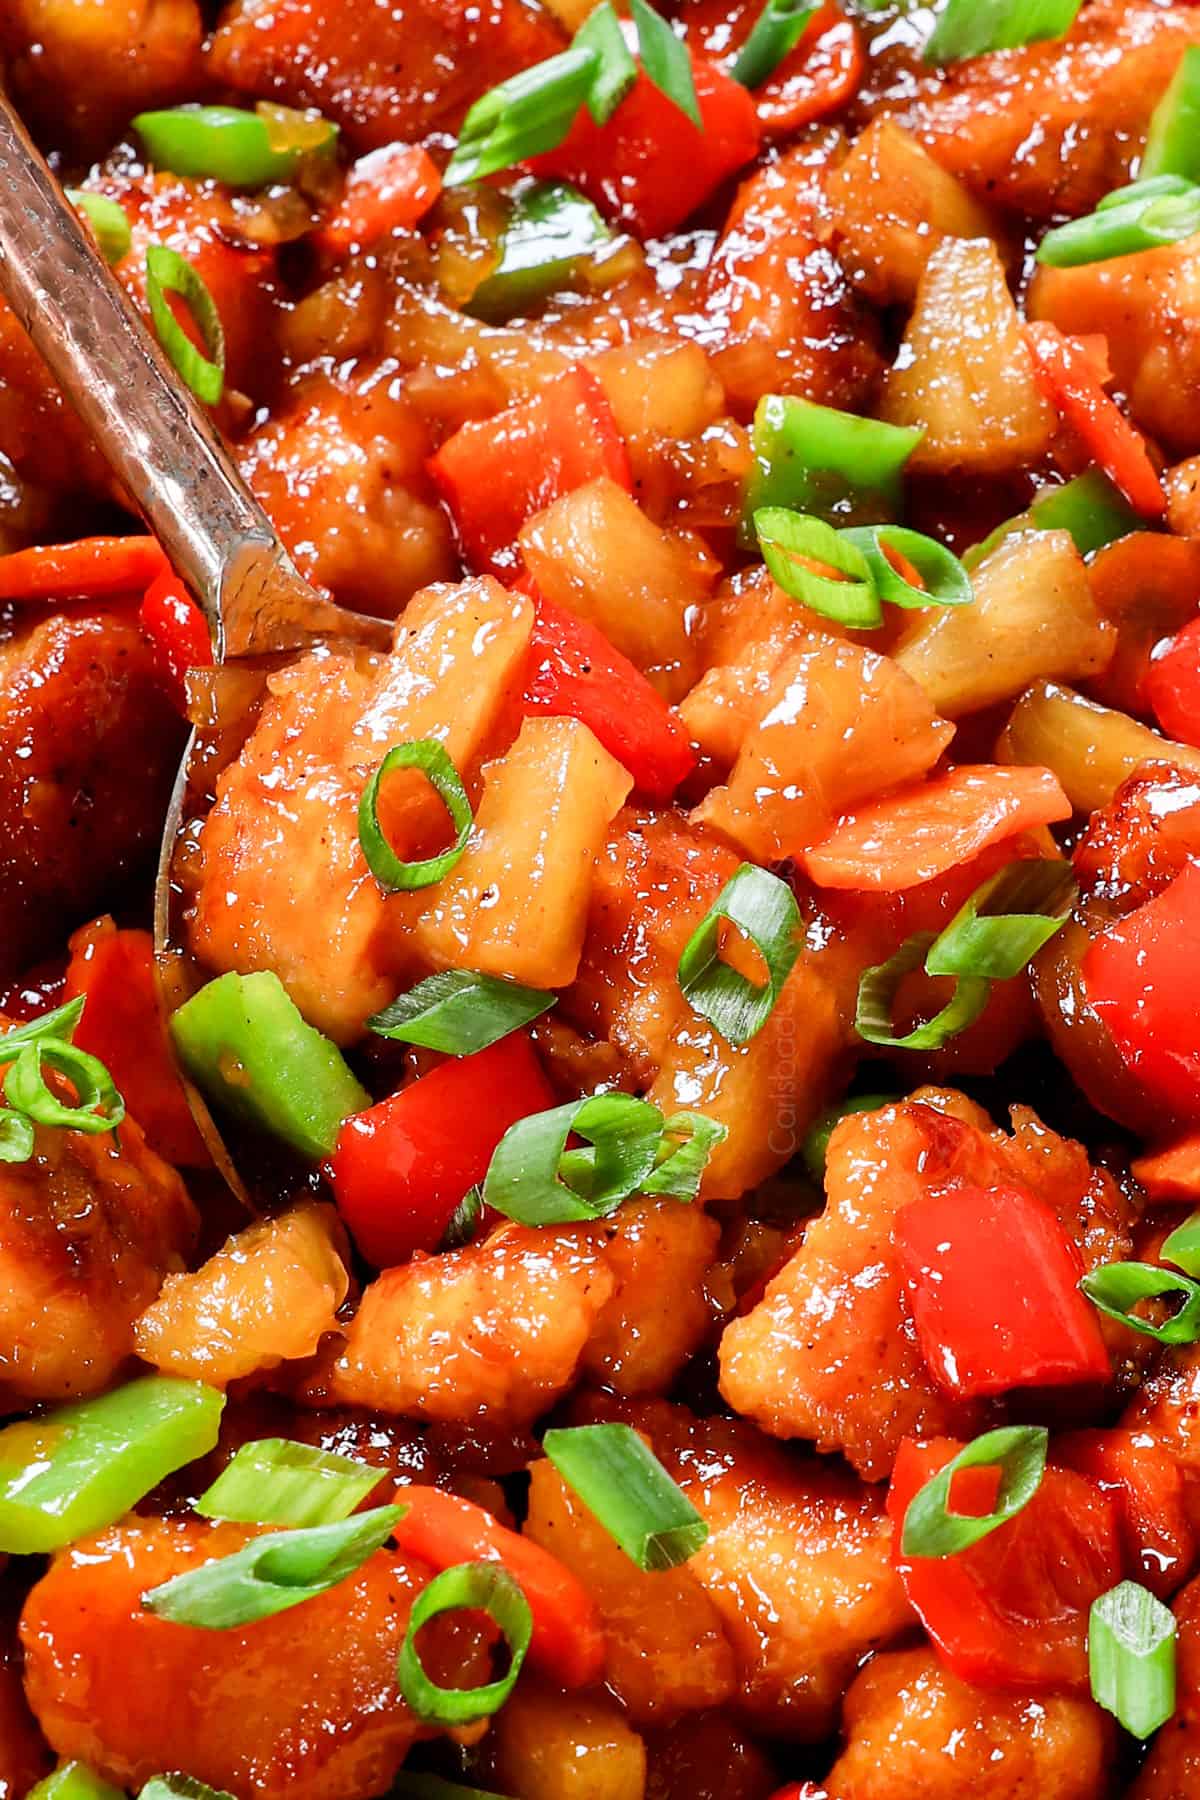
Sweet and Sour Chicken is a popular Chinese-American dish featuring bite-sized pieces of chicken that are typically breaded and either fried or baked, then tossed in a flavorful, sweet, and tangy sauce. The sauce is made from a combination of sugar, vinegar, ketchup, and soy sauce, creating a perfect balance of sweetness and acidity. Vegetables like bell peppers, onions, carrots, and pineapple are often added for color, texture, and extra flavor. It’s commonly served over rice, making it a comforting and delicious meal that blends savory, sweet, and sour elements.
Sweet and Sour Chicken has a balanced, tangy, and sweet flavor profile. The sauce combines the sweetness of sugar and pineapple with the tanginess of vinegar and ketchup, creating a zesty, mouthwatering taste. The chicken, often breaded and baked or fried, is crispy on the outside and tender inside, absorbing the sauce beautifully. Added vegetables like bell peppers and carrots contribute crunch and a mild earthy flavor, while the pineapple provides bursts of juicy sweetness. Altogether, it’s a flavorful mix of sweet, tangy, and savory elements that makes each bite deliciously satisfying.
Sweet and Sour Chicken as commonly known in the West is not directly from China, but it is inspired by Chinese cuisine. The dish is a popular adaptation of traditional Chinese sweet and sour flavors, which have been used in Chinese cooking for centuries, particularly in dishes from regions like Guangdong (Cantonese cuisine). However, the deep-fried, breaded version with a thick, tangy sauce that includes ketchup and sugar is a creation of Chinese-American and Chinese-British cuisine, developed to appeal to Western tastes. It is a fusion dish that blends authentic Chinese ingredients with Western influences.
Yes, you can use chicken thighs instead of chicken breasts for sweet and sour chicken. Chicken thighs are juicier and more flavorful, making them an excellent substitute. Make sure to cut them into large enough bite-sized pieces.
Sweet and sour chicken can be made gluten-free by using gluten-free flour for the breading and gluten-free soy sauce in the sauce. Be sure to check all ingredients for gluten to ensure the dish remains safe for those with gluten sensitivities.
Bell peppers (red and green), carrots, and onions are the best vegetables to pair with sweet and sour chicken. Feel free to include other vegetables like broccoli (steamed first), mushrooms, etc.
To reduce the sweetness in sweet and sour chicken, reduce the amount of sugar in the sauce. You can also add more vinegar or soy sauce to balance the flavors and make the dish more tangy or savory.
The best oil for baking sweet and sour chicken is a neutral, high-heat oil like canola oil or vegetable oil. These oils will help the chicken crisp up without adding any strong flavors.
Yes, you can use frozen vegetables in sweet and sour chicken. Be sure to thaw and drain them well before adding to the dish to prevent excess water from diluting the sauce.

More Easy Chinese Recipes:
If you love Chinese fakeout takeout, be sure to check out my:
Honey Lemon Chicken
Beef and Broccoli
Mongolian Chicken
Mongolian Beef
Cashew Chicken
Kung Pao Shrimp
Pineapple Ginger Chicken
Coconut Cashew Chicken
WANT TO TRY THIS sweet and sour chicken RECIPE?
Pin it to your recipe BOARD TO SAVE FOR LATER!
FIND ME ON PINTEREST FOR MORE GREAT RECIPES! I AM ALWAYS PINNING :)!
©Carlsbad Cravings by CarlsbadCravings.com


Baked Sweet and Sour Chicken with Pineapple
Save This Recipe To Your Recipe Box
You can now create an account on our site and save your favorite recipes all in one place!
Ingredients
Chicken Breading
- 3-4 chicken breasts (1 ½ pounds), chopped in bite-size pieces)**
- 3 eggs
- 1/2 cup flour
- 1 1/3 cups cornstarch
- 1/2 tsp EACH garlic powder, salt
- 1/4 tsp EACH pepper, ground ginger, onion powder
Sweet and Sour Sauce
- 1 1/2 cups granulated sugar (may sub half honey)
- 1 cup red wine vinegar
- 1/2 cup pineapple juice (from 20 oz. can pineapple tidbits listed below)
- 1/3 cup ketchup
- 2 tablespoons reduced-sodium soy sauce
- 1 small yellow onion, diced
- 4 garlic cloves, minced
- 1 teaspoon salt
- 1/2 tsp EACH red pepper flakes, ground ginger
Vegetables/Pineapple
- 1 20 oz. can pineapple tidbits in juice
- 1 green bell pepper, 1-inch chop
- 1 red bell pepper, 1-inch chop
- 1 cup carrots sliced as THINLY as possible (2-3 carrots)
Instructions
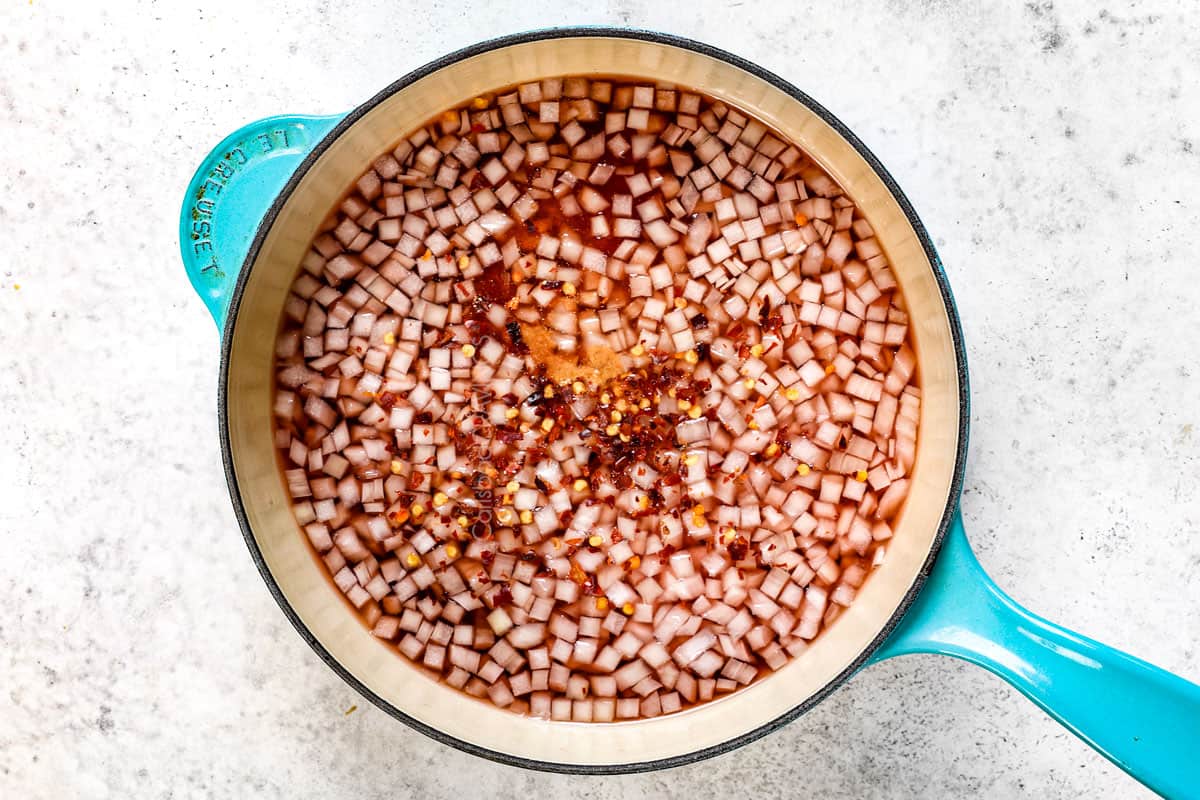
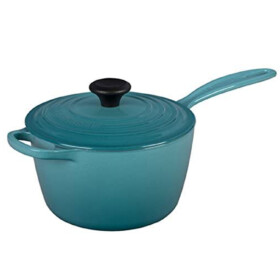
- Sweet and Sour Sauce: Add the "Sweet and Sour Sauce" ingredients to a medium/large saucepan. Bring to a boil, then reduce to a gentle simmer while you prepare the chicken and chop the vegetables, stirring occasionally (turn off if it takes longer than 20 minutes). Note: The sauce will not thicken; simmering is to soften the onions and blend flavors.
- Prep: Preheat the oven to 350°F and lightly grease a 9×13 baking dish with non-stick cooking spray.
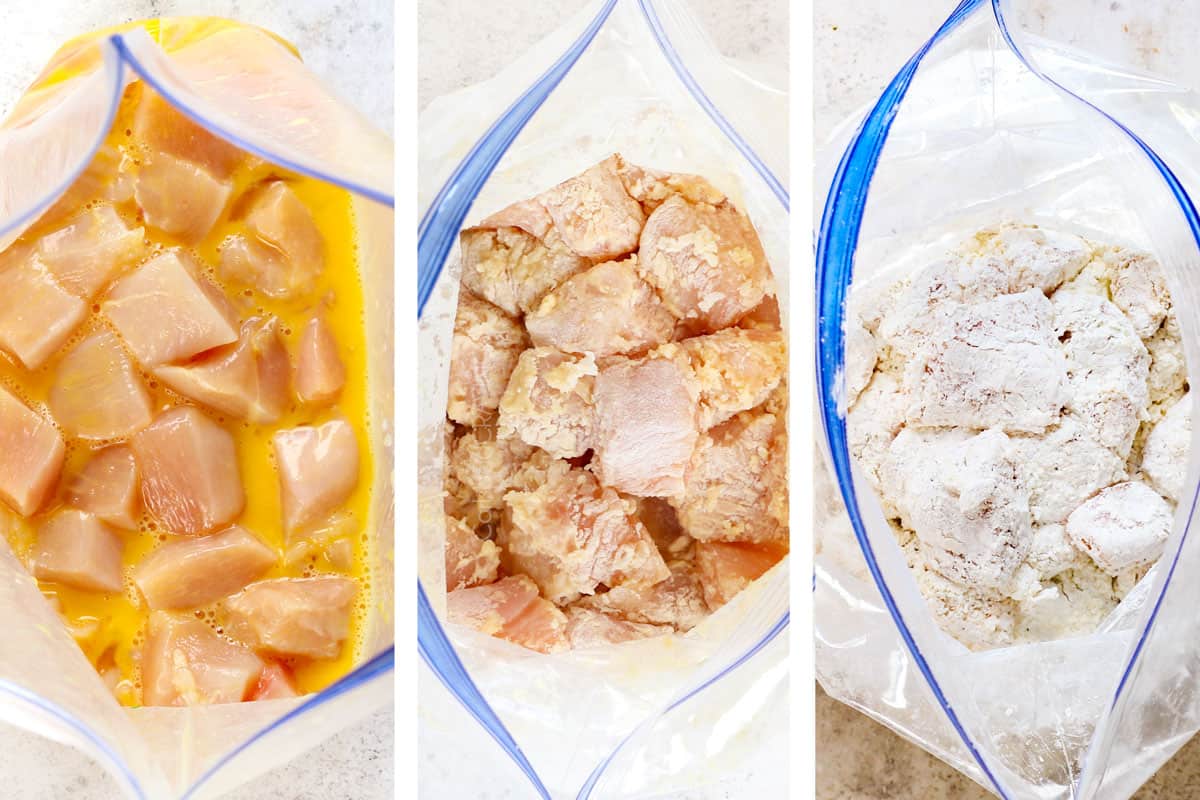
- Breading Stations: Whisk the eggs together in a large bowl or freezer bag, set aside. Add ½ cup flour to a large freezer bag; set aside next to the eggs. Whisk the cornstarch and breading spices in a separate freezer bag, then set aside next to the flour.
- Bread Chicken: Add the chicken to the eggs and coat, then remove, allowing excess to drip off (I plop the chicken on paper towels). Add the chicken to the freezer bag with the flour, toss until evenly coated, and discard any extra flour. Add the chicken to the spiced cornstarch bag and shake until evenly coated. Transfer the chicken to a colander to shake off excess coating.
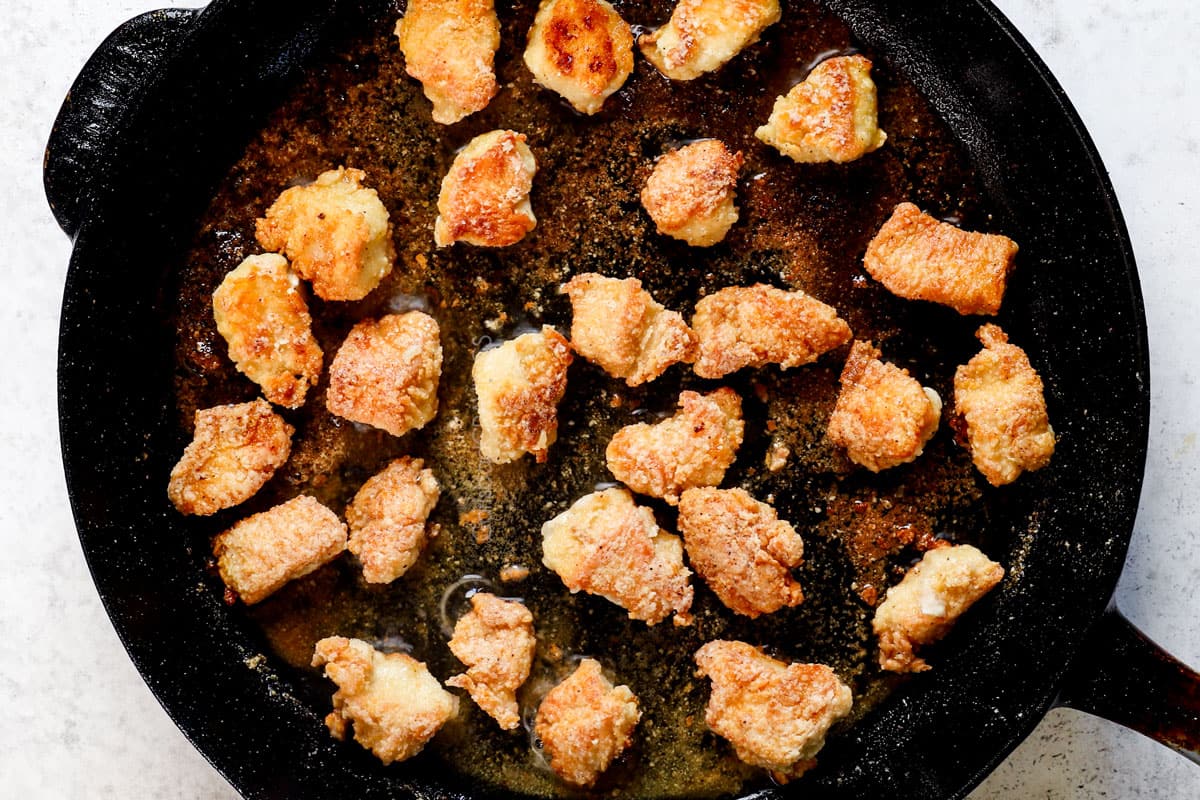
- Brown Chicken: Over high heat, heat enough neutral, high-smoke-point oil (vegetable, peanut, canola, avocado, etc.) to generously cover the bottom of a large cast iron skillet until hot and rippling. Working in batches (changing the oil in between), add the chicken and cook for 1-2 minutes per side until browned but not cooked through. Transfer the chicken to the prepared 9×13 baking dish.
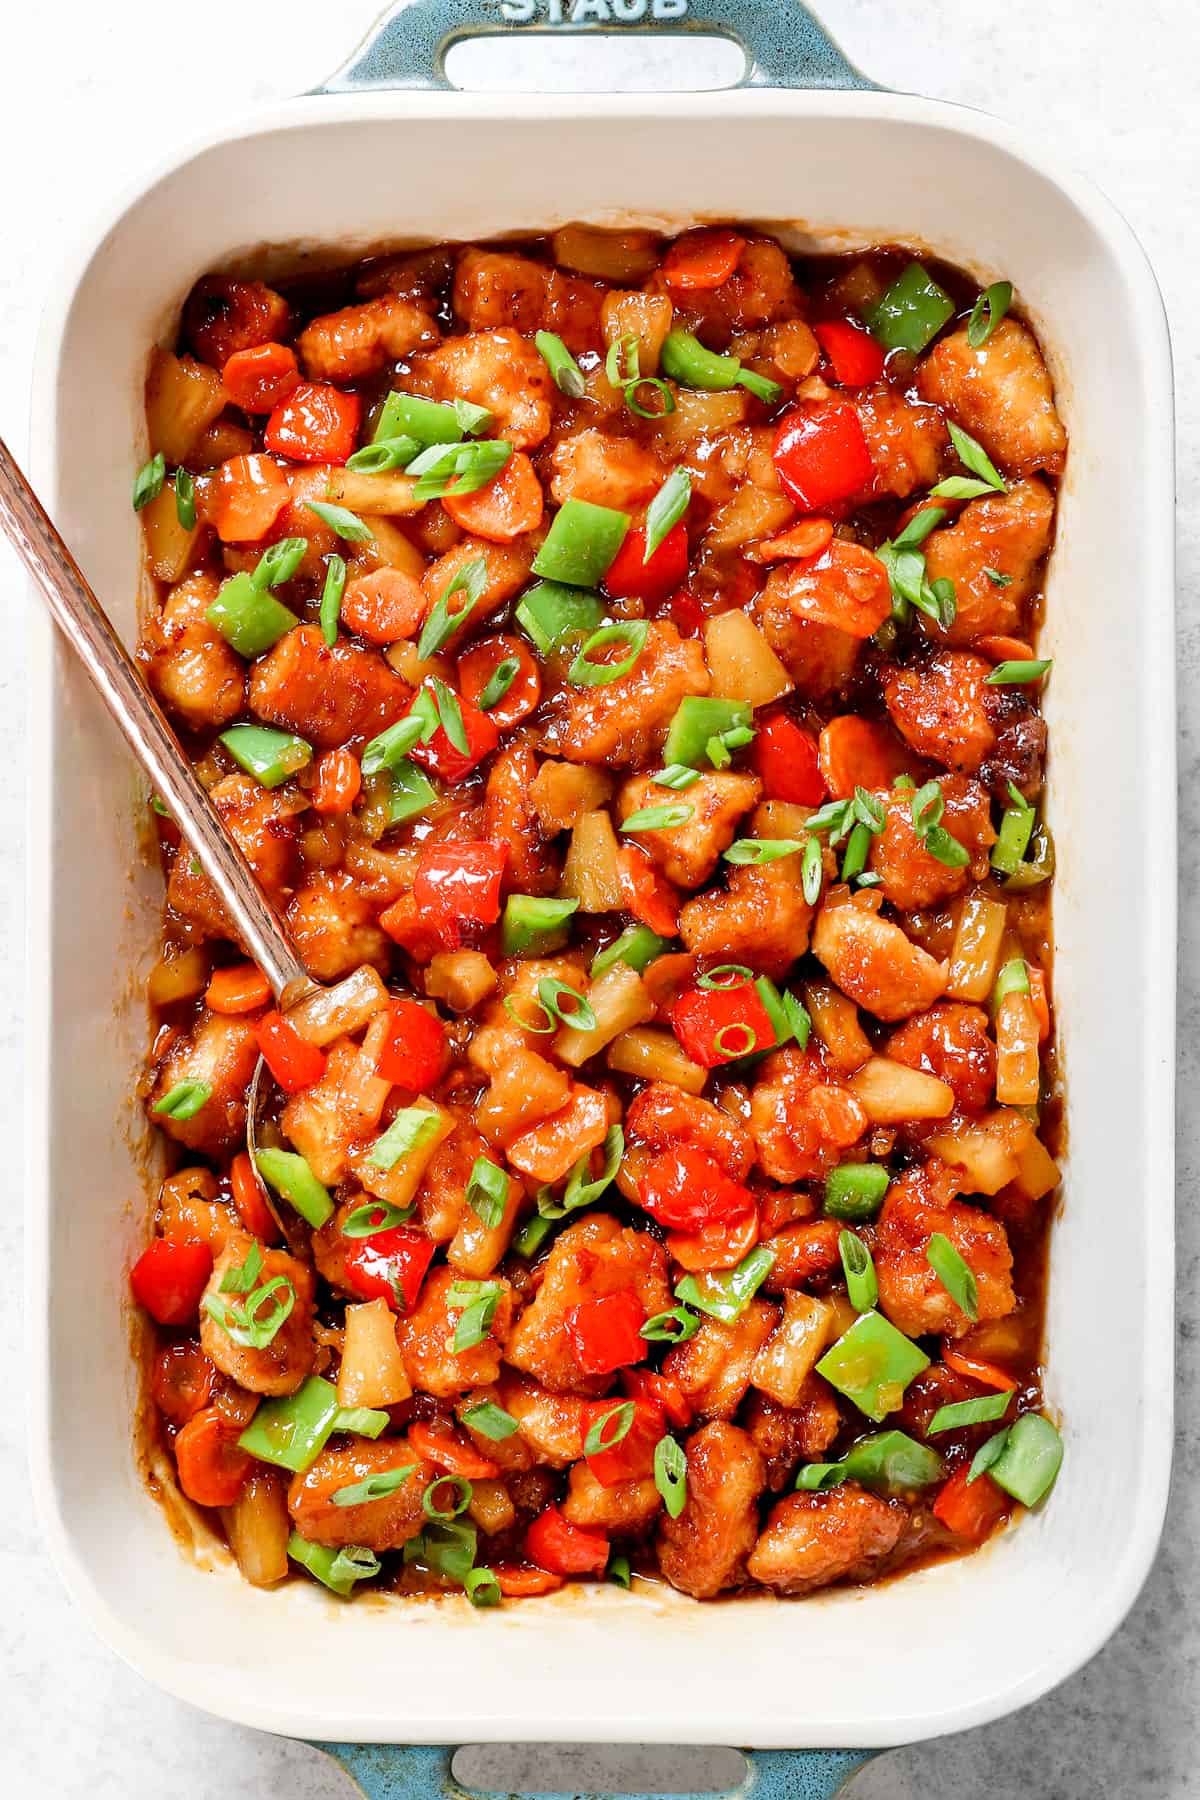
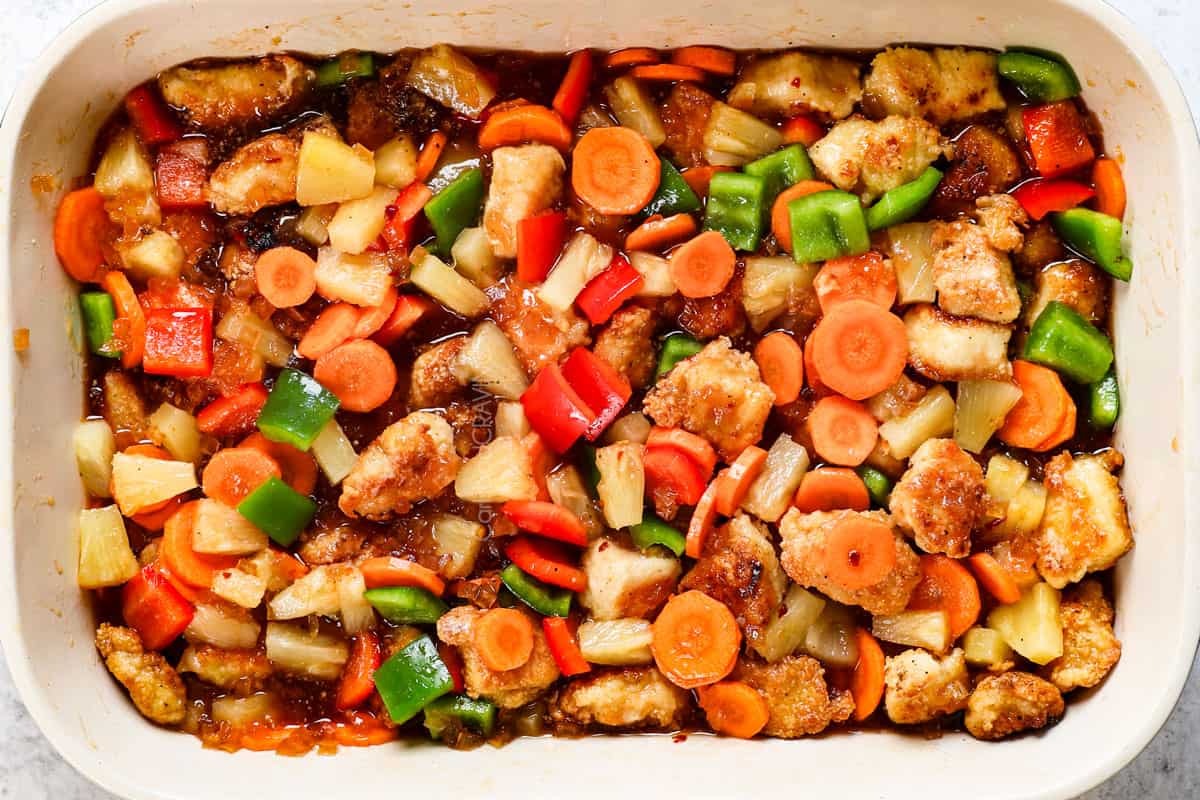
- Assemble: Add the carrots, pineapple, peppers and sweet and sour sauce. Stir until sauce/chicken/vegetables are evenly combined.
- Bake: Bake at 350°F, uncovered, for 45-50 minutes, or until the sauce thickens, stirring occasionally. Serve over rice. Enjoy!
Video
Notes
- *If your chicken breasts are extra thick (like the Costco variety), I recommend tenderizing/flattening with a meat mallet or the side of a large can beforehand.
- Can I reduce the sugar? As written, the sauce is a perfect balance of sweet and sour. If you want to reduce the sugar, you must proportionately reduce the red wine vinegar and ketchup because the sugar balances the tanginess. You will be left with more sour sauce if you reduce the sugar without reducing the other ingredients. You CAN, however, substitute some of the sugar with honey.
Prep Ahead
- Sweet and Sour Sauce: Store it in an airtight container in the refrigerator after simmering.
- Chicken: Brown the breaded chicken and store, covered, in a 9×13 baking dish.
- Veggies: Chop the vegetables and store them in the fridge for up to 2 days.
- Bake: When you’re ready to bake, combine the ingredients. Be prepared to add 15 minutes to the baking time.
Want To Make This Recipe?

Did You Make This Recipe?
Tag @CarlsbadCravings and Use #CarlsbadCravngs
Leave a Review, I Always Love Hearing From You!
Carlsbad Cravings Original inspired by Kim’s Sweet and Sour Chicken


Barbara says
I have some canned pineapple juice and a fresh pineapple. How much juice would I need and how much chopped fresh pineapple? Thank you.
Jen says
Hi Barbara, I’m sorry but I’ve never made it with fresh pineapple/juice before.
Jan says
This truly is the best sweet and sour chicken I’ve ever tasted. It’s full of great flavor and beautiful color. Thanks for posting such a delicious recipe!
Jen says
You’re so welcome Jan! I’m so happy it’s a favorite!
Alexandra says
When do you add the pineapple tidbits?
Jen says
Hi Alexandra – it is added in step 6, enjoy!
Caitie says
You’re recipe instructs to cook for 50 minutes. That seems excessive. Is that a typo?
Jen says
Nope, the chicken breading protects the chicken from drying out and time allows for the breading to really soak up the sauce. Enjoy!
Anna says
Hi! What is the best way to cook this after taking out of the freezer? Do I put it all back in the oven with the freshly chopped veg and sauce?
Jen says
Hi Anna, if you have already baked the chicken, then just make the sauce on the stove and add the chicken and warm through. If you haven’t already baked the chicken, then yes, just add the sauce and bake according to the recipe. I hope that helps!
Heather says
Fantastic recipe, my family loved it will definitely be making again. Thanks for sharing.
Jen says
You’re so welcome Heather, I’m so pleased it will be on repeat!
Lynn says
This was super yummy! Soooo flavourful. Way better than take out, too. Thanks for another wonderful recipe. I’m going to reheat the leftovers in my convection oven to crisp it up!
Jen says
Thanks so much Lynn, I love hearing this was better than takeout!
Kristen says
Hi could I cook the chicken in my air fryer? Thanks!
Jen says
The chicken bakes in the sauce in this particular recipe so you would want to use this recipe instead in which they cook separately: https://carlsbadcravings.com/sweet-and-sour-chicken/
Susan says
This is my husband’s fav Chinese take out dish. We are watching calories now and I will make this for him this weekend. I will think of, and honor your most generous and loving sister as I put it together.
Jen says
Thank you so much Susan! I hope you and your husband enjoyed the recipe!
Susan says
Made this last night and my husband, who always orders sweet and sour from take out, declared it to be the best he has ever had! Next time, however, I would put all my floured chicken bits in a colander and shake off the excess to a bowl. The second change would be to fry the chicken in two batches, changing the oil between each batch. I also might use 1/2 cup red wine vinegar and 1/2 cup rice wine vinegar to reduce the vinegar pungency just a bit. If you don’t like the bite of heat, consider cutting the red chili flakes in half. The chicken was perfectly cooked, not at all dry. The coating was amazing, not the cloying batter you get in some take out places. I love this dish! Make LOTS of rice for leftovers the next day.
Jen says
Thank you so much, Susan, I am so happy you and your husband loved this recipe and that the changes worked for you! I hope you are having a wonderful week and find more recipes to enjoy!
Sharon says
The title of this recipe says “BAKED”. Step 2 says to turn on the oven to 350F. Then everything is done on the stovetop. What am I missing here?
Jen says
Hi Sharon, the Sweet and Sour Chicken is baked altogether once compiled for unbelievable flavor that seeps into the chicken while the sauce thickens and veggies cook. I guarantee you’ll love it!
Kirsten says
Hi Jen,
Could not wait to try this recipe! Tonight was the night. My husband loves sweet and sour chicken from our local asian cafe. It is hard to beat their dishes! But you did it! He is in love with this recipe as it is tangy and sweet and simply delicious! Thanks for another dinner hit!
Jen says
Wow! I’m so thrilled that it did not disappoint!
Briana says
I agree that this is by far the best sweet and sour chicken I’ve ever had in my life! It is a bit time consuming but worth every minute. The chicken came out so tender and the sauce was delicious and so full of flavor! I did have an issue with my sauce not thickening, but I was able to easily fix this by mixing a cornstarch slurry into the final product.
Jen says
I’m so glad the effort paid off! Good thinking with the cornstarch!
Heather Burger says
Made this for dinner after receiving your cookbook. It was so good. The sauce didn’t thicken for us but I just add a slurry to the pan and gave it a good stir. Viola! The best sweet and sour chicken we’ve had in a long time. My son I. Law said that I’ve ruined going out for Chinese!
Thanks for sharing your love l of food and awesome recipes! We’ll be working our way through all the recipes in your book.
Jen says
Hi Heather, I’m thrilled to hear that everyone loved this so much! Thank you for sharing! This sauce isn’t intended to be thick, though I’m glad you could adjust to your preference.
Katie says
I can’t have chicken and I LOVE sweet and sour, could this be made with shrimp or pork?
Jen says
Yes! You can still bake pork tenderloin but for shrimp I would use this stovetop version as a template instead: https://carlsbadcravings.com/sweet-and-sour-chicken/
Karen says
This was a delicious treat to make for Chinese New Year. Everything was tasty from the amazing sauce, the perfect chicken pieces and not mushy veges. I only wish the prep time was more accurate as the chicken process took almost 25 minutes. Thanks for a yummy recipe!
Jen says
Hi Karen! Thank you for your feedback! I am so glad that it turned out delicious for you!
Brandi says
Thanks for the great recipe! Will definitely make this again.
Jen says
Thanks so much Brandi! So glad that you loved it!