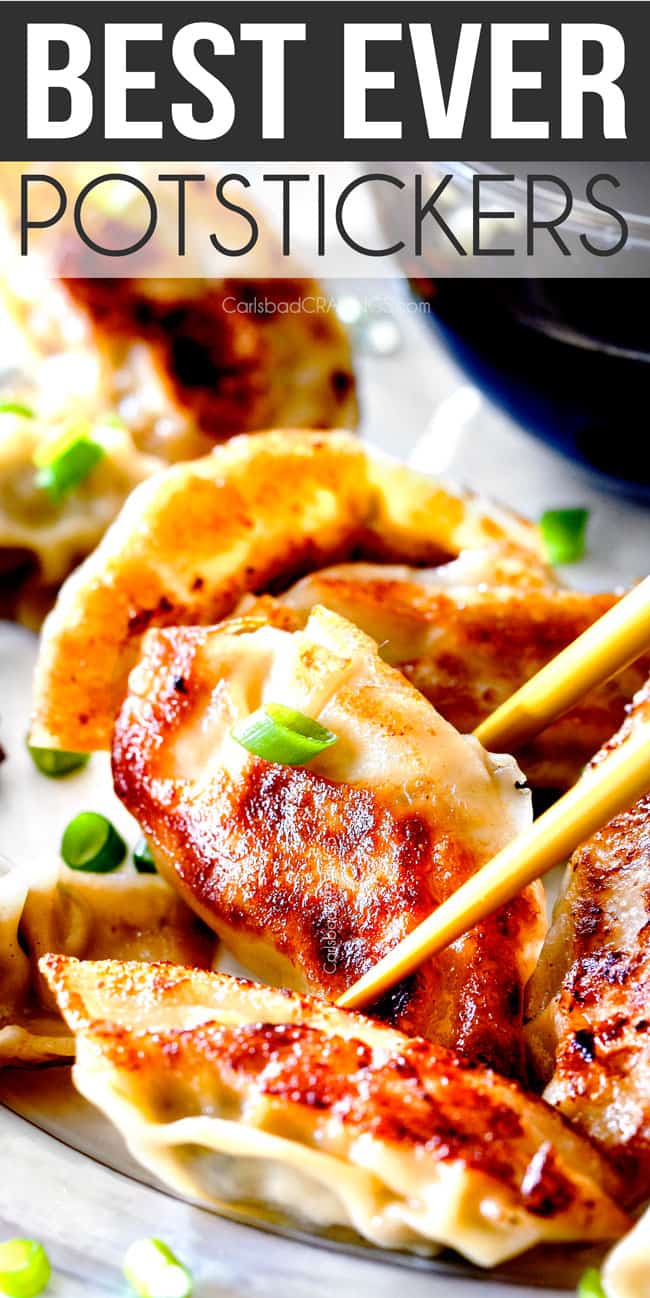
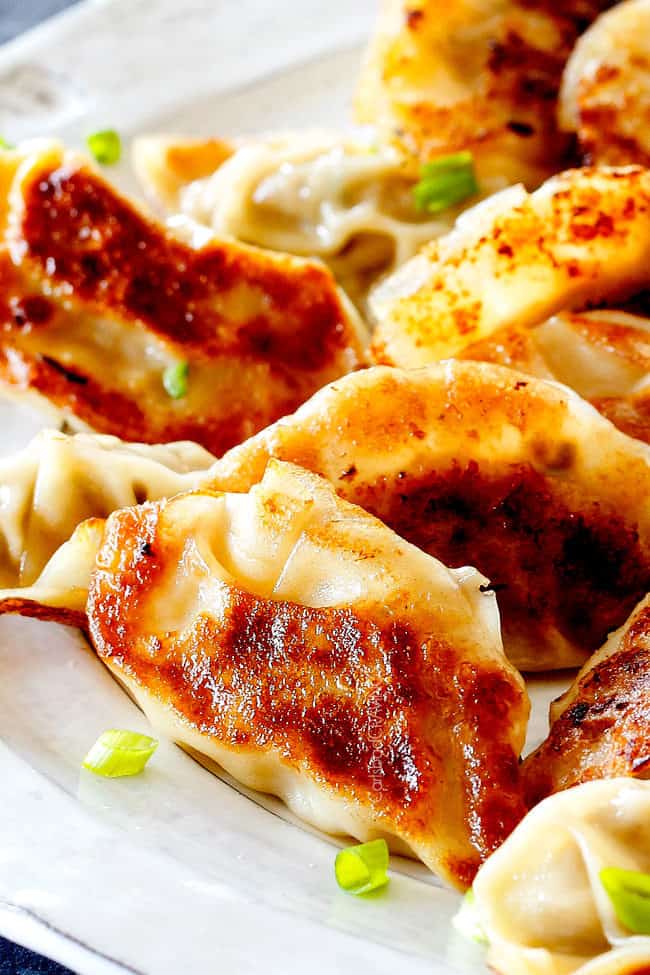
Homemade Potstickers are easier than you might think and taste better than your favorite restaurant!
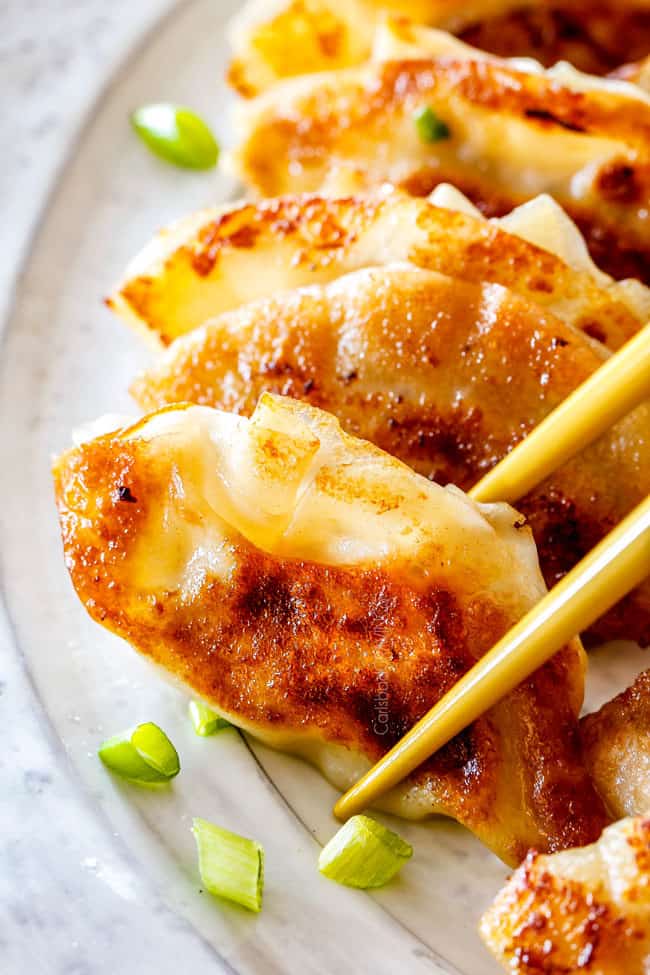
These Potstickers are stuffed with flavorful, juicy pork, cabbage, shiitake mushrooms, ginger and garlic. They are steamed then pan fried to create an irresistible contrast between the top tender wrapper, golden crispy underside and rich, juicy filling. You can swap out the pork for your favorite protein and you can crimp the potstickers to seal instead of pleating. I also use a never-seen-before food processor technique for the filling so you have practically NO chopping and your filling comes together in minutes. These potstickers freeze beautifully for fabulous instant lunches or dinners whenever you need a dumpling fix.
Watch How to Make Potstickers
These Potstickers are one of my favorite appetizers to come out of my kitchen. They are perfect for upcoming New Year’s (or any occasion), because you can assemble them and refrigerate or freeze beforehand.
Homemade potstickers do require some time and effort but they are SO worth it! I kid you not that my husband and I ate all but 5 of the potstickers in one sitting! Even while I was photographing, Patrick was swiping whatever pot sticker I would point to that wasn’t in the shot to gobble it down because they are just SO good.
With just one bite you’ll wonder why you’ve waited so long to make homemade potstickers. Well, I can tell you why, you didn’t have THIS potsticker recipe post! In this post, I will show you:
- What Potstickers are
- Why they are called Potstickers
- What Potstickers are made of
- Filling variations for Potstickers
- About Potsticker wrappers
- Step by step photos of how to make Potsticker filling
- Step by step photos of how to pleat Potstickers
- Step by step photos of how to cook Potstickers
- How to prevent your Potstickers from sticking or tearing
- Tricks for perfect Potstickers
- How to make a dipping sauce for Potstickers
- How to make Potstickers ahead of time
- How to reheat Potstickers
- How to freeze Potstickers
It’s a lot of info, so just cruise on down to the recipe if you wish and if you need some photo help, then cruise back up. Happy homemade Potstickers!
What are Potstickers?
If you have been to a Chinese restaurant, you have probably seen potstickers on the menu, and hopefully, have had the pleasure of trying them. If not, you’re probably wondering what are potstickers?! Potstickers are “steam-fried” dumplings made with round wrappers and stuffed with juicy fillings, traditionally pork and cabbage.
They are medium-sized dumplings, usually eaten in two to three bites served with a soy and rice vinegar dipping sauce. They have fairly thick, often homemade, round wrappers that crisp up beautifully on the outside while remaining soft and juicy inside.
Potstickers are traditionally pleated to seal in the filling but don’t let that intimidate you out of making potstsickers! Fancy pleats aren’t necessary, you can simply fold them in half and crimp the edges instead.
Potstickers are distinguished from other Asian dumplings by their cooking method. First, potstickers are lightly browned in oil, then water is added to the pan, which is then covered to steam until the filling is cooked, then uncovered to let dumplings pan fry until the bottoms crisp up. This steam-fry method preserves the potstsickers juiciness. And that’s potstickers in a nutshell! Or should a dumpling?
Why is it called a Potsticker?
Charming legend has it that during Song Dynasty (960 – 1280 A.D.), dumplings were boiled in a wok (guo). One day, a chef forgot about his boiling dumplings and when he remembered, the water had boiled away and he was left with (tie) dumplings stuck to his pan.
He pried the dumplings from the wok and served them with their crispy bottoms. The patrons loved the contrasts of the juicy, rich filling and the crispy bottom. Thus, the potsticker was born and given the name guotie in Chinese which literally means “wok stick” or “stuck to the wok”and has been translated into English as potsticker.
Ingredients for Pork Potstickers
Potstickers can be stuffed with all sorts of fillings, but traditionally they include some sort of minced meat and vegetables such as cabbage, mushrooms, onions, ginger, and garlic. I adapted the filling for these Potstickers from my Wonton Soup recipe, because I already knew they were spectacular. My Potsticker filling is quite traditional with ground pork and veggies but is SO flavorful with the addition of soy sauce, rice wine vinegar , rice wine, sesame oil and Asian chili sauce AND by steaming in chicken broth instead of water.
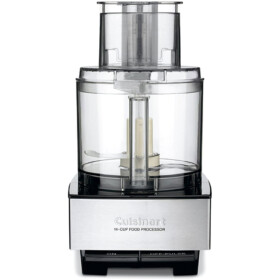
I am going to show you how to make the quickest, EASIEST potsticker filling by using your food processor – no laborious chopping. So although the ingredient list is somewhat lengthy, it is as easy as dump and pulse while the food processor does all the work for you.
This Potstickers recipe is made with:
- ground pork: for the juiciest potstickers, don’t use lean ground pork. You can ask your butcher to grind pork belly or pork shoulder. That being said, you can purchase lean ground pork and add 1 tablespoon vegetable oil for the juiciest filling.
- Napa cabbage: is best for authentic flavor and because it is not as crunchy as green cabbage but you may substitute green cabbage in a pinch or even coleslaw.
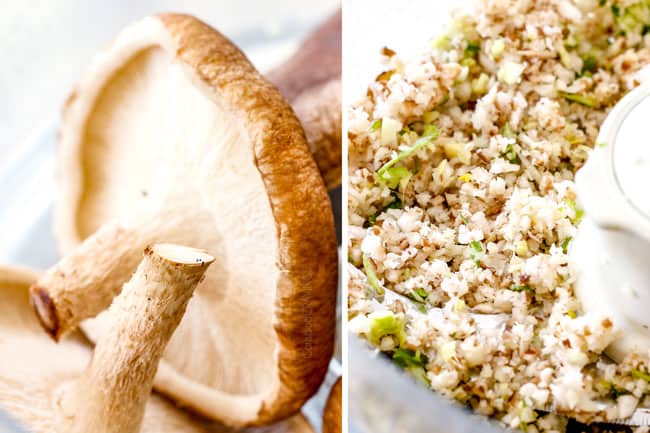
- shiitake mushrooms: do NOT rinse mushrooms or else they will suck up water and make our Potsticker filling wet and your Potstickers soggy. Instead, brush off any dirt with a damp paper towel if needed. Shiitakae mushrooms offer a fabulous earthy, umami flavor but you may substitute another mushroom or omit if needed.
- green onions: I don’t recommend substituting for white/yellow onions or shallots because they will not soften like green onions in the potstickers and therefore will be too strong.
- ginger: you will need 1” peeled ginger – you don’t need to mince because the food processor will do all the work.
- garlic cloves: just peel the garlic and the food processor will do all the work.
- egg yolk: we just want the egg yok to add moisture and bind the filling together – DON’T use the entire egg or the mixture will be too wet.
- soy sauce: use light soy sauce so your filling won’t be too salty.
- rice wine vinegar: use unseasoned rice vinegar.
- rice wine: Rice wine is NOT rice vinegar- DO NOT switch them out. Rice wine adds a sweetness and depth of flavor while rice vinegar, on the other hand, will add an acidic flavor. If you don’t keep rice wine on hand you can substitute pale dry sherry or omit it.
- sesame oil: toasted sesame oil is best but you can use regular if that’s what you have on hand.
- Asian chili sauce: this will not make the potstickers spicy, just flavorful because it is such a small amount.
- chicken broth: I use chicken broth instead of water to steam the Potstickers and it makes a HUGE difference! The chicken broth is absorbed by the dumplings so even the wrappers are flavorful!
What are potstickers wrapped in?
Potstickers are wrapped in round Asian dumpling wrappers sometimes labeled dumpling skins, potsticker or gyoza wrappers. They are thin sheets of dough made with wheat flour and water.
If your grocery store carries them, they will be located in the refrigerated section. If you don’t see them, make sure you ask someone before you give up. If your grocery store doesn’t carry them, then you can find them at an Asian market or use wonton wrappers (info on that below).
How to Make Potstickers
Step 1: Make Potsticker Filling:
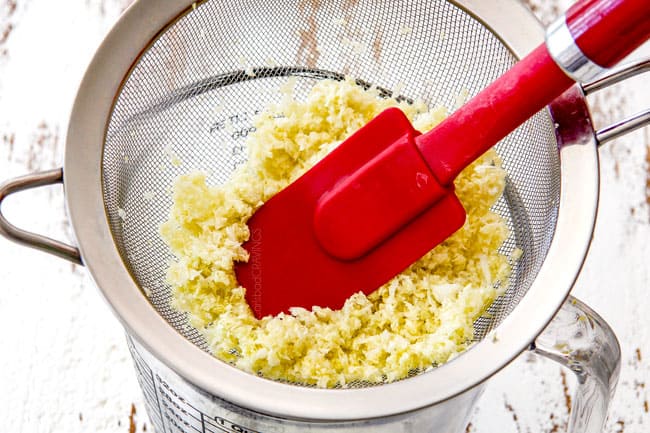
- Add cabbage to food processor and process until fine.

- This next step is CRUCIAL or else you will end up with soggy, tearing potstickers because cabbage releases a lot of water when it cooks: Add diced cabbage to a fine mesh sieve and toss with ½ teaspoon salt. The salt will draw out the excess moisture. Place salted cabbage over a bowl and let sit for 20-30 minutes then press cabbage down with a rubber spatula quite a few times to squeeze out excess moisture. Set aside.
- Add mushrooms, green onions, ginger and garlic to food processor (you don’t need to clean it out) and pulse until finely chopped.
- Add mixture to one side of a large bowl. To the other side of the bowl add egg yolk and whisk. Add cabbage, ground pork and all remaining filling ingredients.
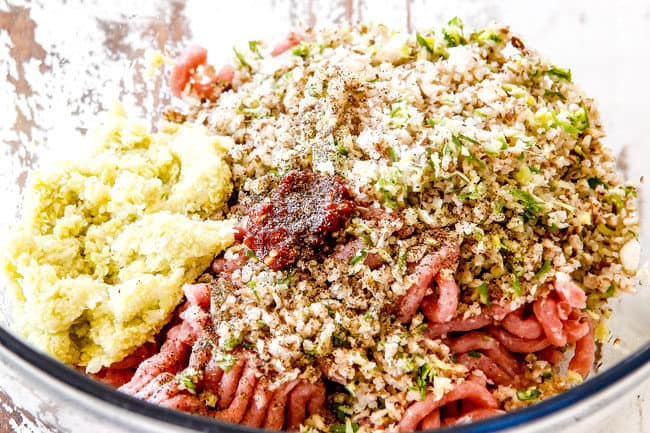
- Mix with your hands until thoroughly combined. Cover with plastic and either freeze for 15 minutes or refrigerate at least 30 minutes (or up to 24 hours) to chill mixture. This makes the filling easier to work with and less wet so the potstickers don’t get soggy.

Step 2: Assemble Potstickers
- Line a baking tray with parchment paper and prepare some damp paper towels or a damp cloth (to cover pot stickers and keep them moist). Keep all wrappers covered in plastic wrap when you are not using them. Fill a small bowl with water.
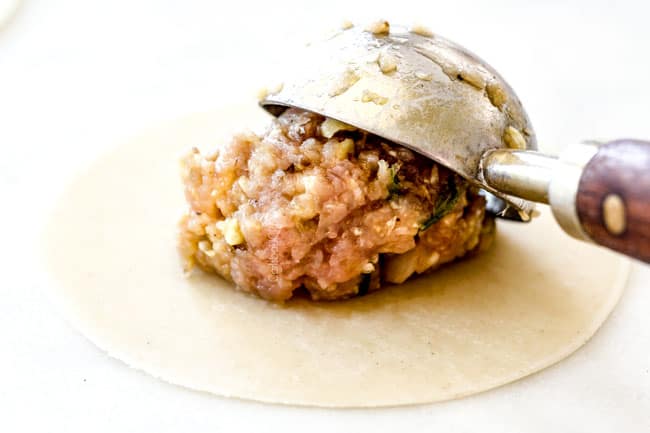
- Working with 2-4 wrappers at a time (depending on how fast you are), add 1 tablespoon filling to the middle of each wrapper.
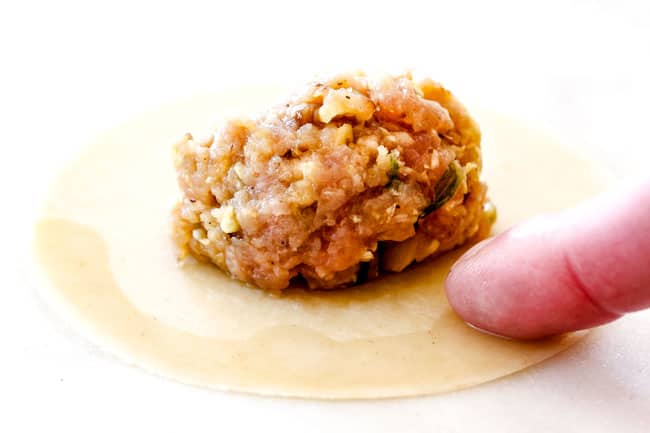
- Dip your finger in water and run it around the edge of HALF the wrapper.
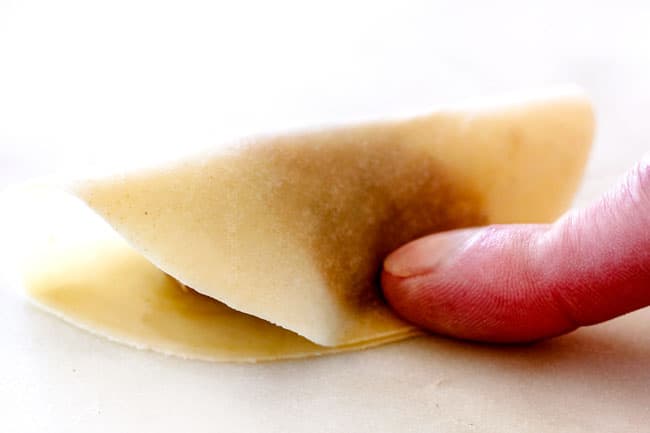
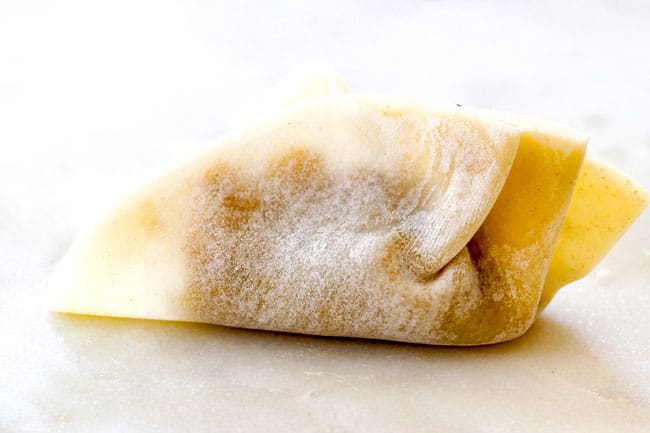
- Fold wrapper over in half to create a half-moon shape.
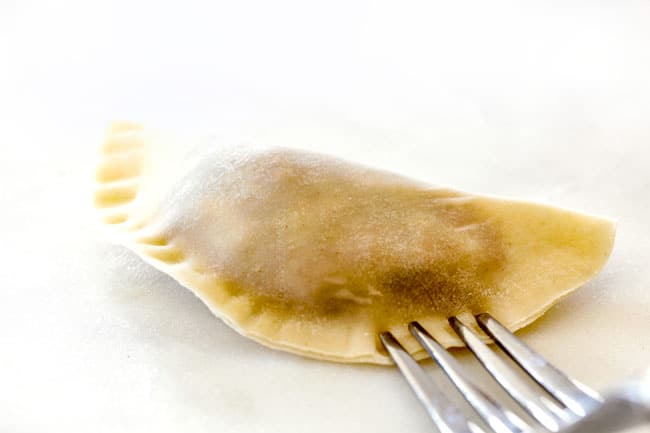
- At this point you can either crimp edges with a fork OR pleat (pleating instructions below).
- To crimp: seal the two edges of the potsticker so the filling is completely enclosed. Press about 1/4″ of fork tongs all around the edges to enforce the seal.
- Place filled wrappers on prepared baking tray and cover with damp paper towels/cloth. Repeat with remaining wrappers.
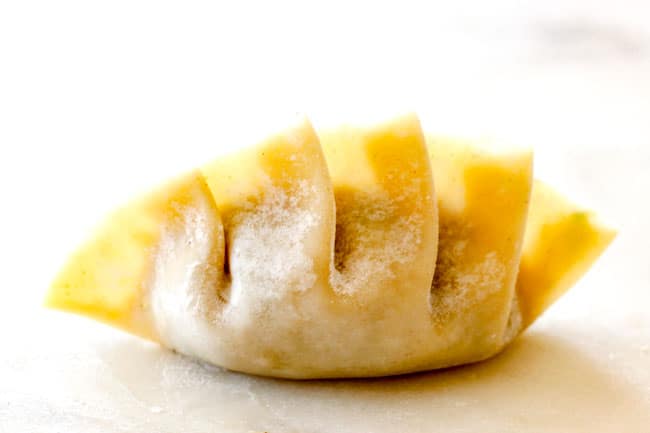
How to Pleat a Potsticker
Fancy pleats are not necessary for potstickers, but they are actually super easy to make. Once you do 1-2, you will have the hang of it and whip them out in a flash.
- To create pleats, keep the back, moistened wrapper flat, and work with the front moistened wrapper. In other words, you are pleating just ONE side of the wrapper.
- Start with one side and work across to the other side.
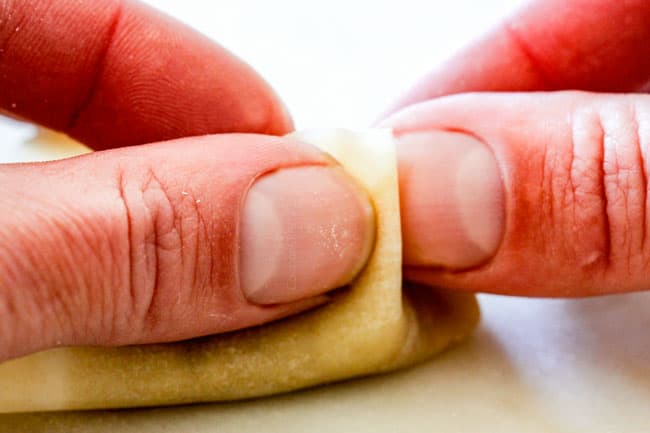
- Create one pleat with the front ummoistened wrapper by taking a small portion of dough, making a little fold and tucking a small part behind.
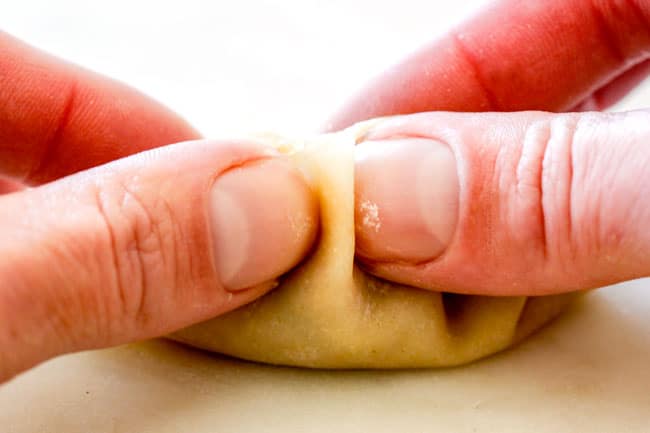
- Firmly press completed pleat into back of wrapper to seal edges.
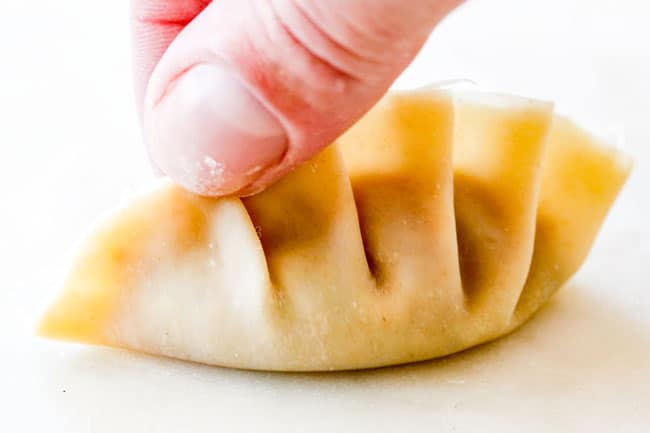
- Repeat for 4 pleats.
How to Make Potstickers crispy
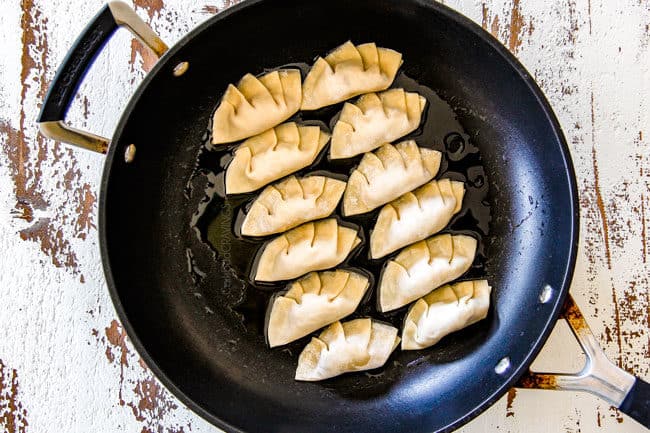
- Heat 1 tablespoon oil in a large NONSTICK skillet (that has a lid) over medium high heat.
- Add about 12 dumplings to the skillet flat side down, enough that will comfortably fit. Cook without touching until the underside is lightly golden (approx. 2 minutes – watch closely so they don’t burn! Adjust heat if needed).
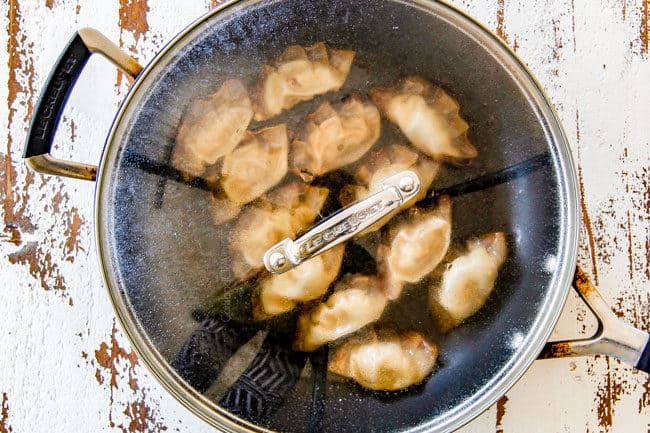
- Stand back and use one hand holding the lid as a shield, as you pour ⅓ cup chicken broth around the dumplings then quickly place the lid on. You can even remove skillet from heat for 30 seconds if this will make you more comfortable against splattering.
- Turn heat to LOW and cook until chicken broth has completely evaporated.
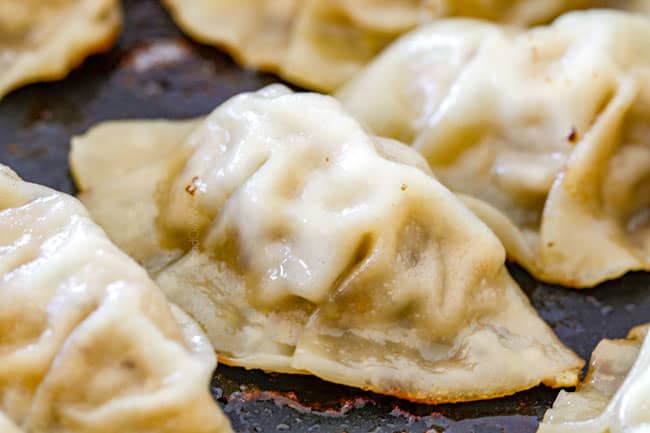
- Remove lid, increase heat to medium and cook 1-2 additional minutes to crisp up bottoms. Transfer potstickers to a paper towel lined plate or baking tray. Repeat until all potstickers are cooked.
How to make Homemade Potstickers ahead of time
- Assemble the potstickers according to directions up to refrigerating.
- Place uncooked dumplings in a single layer in an airtight container so they are not touching then layer with parchment paper then another single layer of dumplings. If you don’t have an airtight container then place potstickers on a parchment lined plate or baking tray so they are not touching then wrap the plate/tray tightly with plastic wrap.
- Refrigerated airtight dumplings for up to 2 days.
- When ready to cook, cook dumplings according to directions.
Potsticker Recipe tips for success
For the perfect potstickers, follow all of the steps above so the potstickers don’t tear. In addition:
- Don’t overfill potstickers: depending on the size of your dumpling and your folding method, you may fit less filling – that is perfectly fine – you want to generously fill your potsticker but not to the point it can’t close completely. Use less filling if you are having a problem easily sealing your potsticker.
- Don’t overcrowd your pan – the dumplings will expand as they cook and you don’t want them to expand into each other and stick. You also want to give them space so the full surface of the bottom of the potsticker is touching the pan so it can crisp up.
- Check for golden bottoms: Don’t be afraid to peak underneath your dumplings to see if they need a little more time, are properly golden or are cooking too quickly. Adjust cooking time or temperature accordingly.
- Check a few dumplings: Sometimes your pan can cook unevenly, so check a few dumplings for doneness.
- Check for doneness: After the chicken broth is evaporated, you can check a dumpling to ensure the pork is cooked through. If not, add a few more tablespoons broth, cover, and cook on. The amount of chicken broth can vary depending on the thickness of the wrapper.
- Don’t rush the crisping: While the dumpling will brown in the first step, they will only get crispy when all the chicken broth is evaporated. If the bottoms aren’t browning to your liking, then drizzle in a little more vegetable oil and shake th pan back and forth to evenly distribute the oil.
How to keep Homemade Potstickers from sticking
It is ESSENTIAL that you use a nonstick skillet. If you don’t use a nonstick skillet then your potstickers will stick to the pan and tear when you try to remove them. A quality nonstick skillet will eliminate sad, unfortunate torn potstickers.
How do I keep potstickers from Tearing?
- Cover wrappers: Keep the dumpling wrappers covered in their packaging when not using or else they will dry out and tear easily.
- Remove liquid from filling: Salt cabbage and push out as much liquid from the cabbage as possible. Excess liquid will cause the wrappers to get moist and tear easily.
- Remove air: As you are folding and pleating your potstickers, push out any excess air otherwise they can tear as they cook.
- Tight pleats: The pleats should be pinched tight without any holes or else the potstickers with suck up to much moisture when steaming and tear.
- Cover potstickers: Assembled potstickers should be placed on parchment paper and covered with a clean damp towel to keep them moist and fry drying out.
- Nonstick Skillet: Potstickers will stick to your skillet and tear when you try and move them unless you use a nonstick skillet.
Potsticker Recipe Variations
You can swap out the ground pork for your favorite protein but I recommend keeping the other filling ingredients the same for the ideal texture and filling to moisture ratio.
Also keep in mind, the fattier the protein, the juicier the filling. You may add 1-2 tablespoons vegetable oil to the below options, or just know they won’t be quite as juicy, but still plenty flavorful.
- Chicken Pot Stickers: replace the ground pork with ground chicken.
- Turkey Pot Stickers: replace the ground pork with ground turkey.
- Shrimp Pot Stickers: replace the ground pork with finely chopped raw shrimp. If using shrimp that has been frozen then thawed, do NOT freeze uncooked potstickers – you should not refreeze raw seafood.
Can I use Wonton Wrappers for Potstickers?
You can substitute round dumpling wrappers with wonton wrappers and cut them into an approximate 3.5” rounds using a cookie cutter or place an object measuring 3.5” on wrappers and cut around with a pizza cutter.
If you are cutting the wonton wrappers, cut multiple at a time so it goes more quickly. When cutting, immediately place cut wrappers back in a sealed bag or cover with a damp cloth/paper towel and only remove wrappers as needed so the rest stay covered in the package otherwise they will dry out.
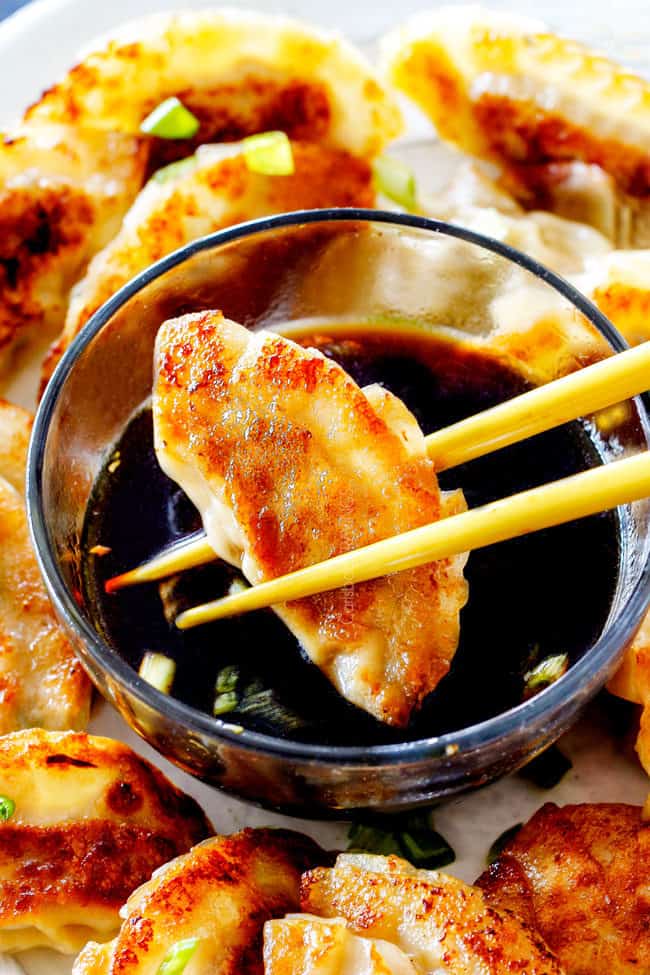
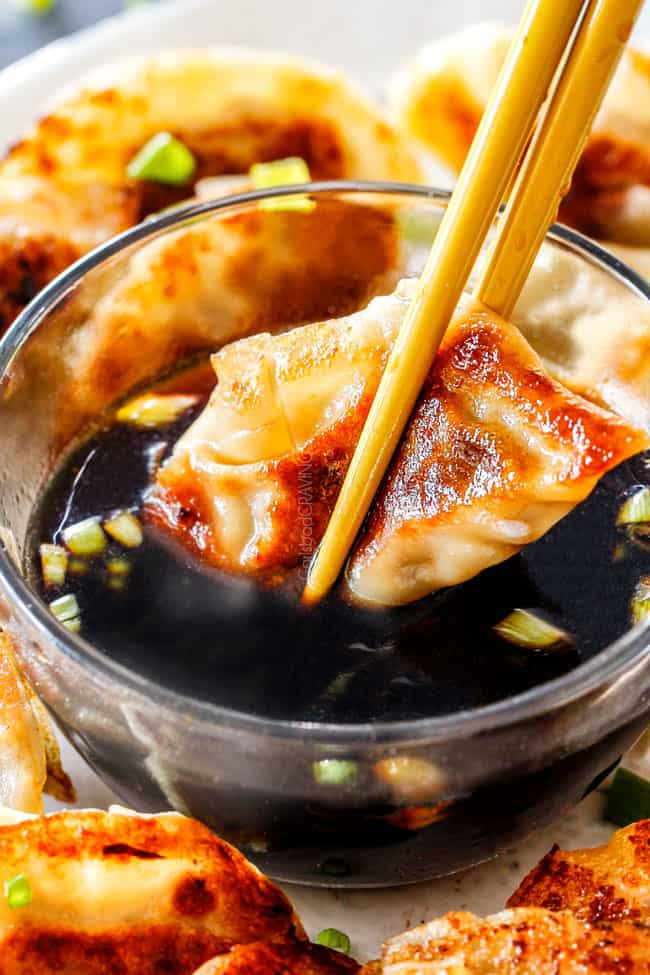
How to serve Pork Potstickers
You can serve Potstickers with Asian Chili Sauce, soy sauce, sweet and sour sauce, or my favorite and most traditional sauce is:
- 3 tablespoons low sodium soy sauce
- 1 ½ tablespoons rice vinegar
- 1 ½ tablespoons rice wine
- Chili paste to taste (optional)
Whisk all the ingredients together in a small bowl then dunk away!
What to pair with this Potsticker Recipe
These potstickers are so fabulous you can serve them as an appetizer or as a meal. They make a great appetizer alongside Sweet and Sour Chicken Egg Rolls, Shrimp Spring Roll, Chinese Chicken Lettuce Wraps, Chinese Chicken Wings or Pineapple Cream Cheese Wontons.
I more often devour potstickers as a meal so I can make them more often. You can keep it simple and serve with steamed rice and any steamed veggies or get a little more fancy and serve with Asian Salmon, Chinese Chicken Salad, and/or Sesame Chicken.
How to store leftover Potstickers
How to reheat Pork Potstickers
You can simply microwave your potstickers but you will lose the crispy bottom. If you want your reheated potstickers to taste the same as when you made them, then microwave to reheat then pan fry in some hot oil to re-crisp the bottoms.
Can you Freeze Potstickers?
- Assemble the potstickers according to directions up to refrigerating.
- Place uncooked dumplings on a parchment lined baking tray so they are not touching.
- Wrap the tray tightly with plastic wrap, and freeze for 1 month OR after freezing for 1-2 hours (until potstickers are solid), transfer potstickers to a freezer bag to save space.
- Freeze for up to 3 months.
How to make Potstickers from frozen
- When ready to cook, do NOT THAW before cooking. Take care when you add the potstickers to the pan because ice crystals may cause the oil to splatter.
- Cook dumplings according to recipe directions except add 2 extra tablespoons of chicken broth.
- After the chicken broth evaporates, check a dumpling for doneness, if it not cooked through add another tablespoon or of chicken broth to the pan and cook an additional minute then check again.
Looking for more Asian recipes?
- Sesame Chicken
- General Tso’s Chicken
- Beef Bulgogi
- Cashew Chicken
- Sweet and Sour Chicken
- Mongolian Beef
- Kung Pao Shrimp
Want to try this Potsticker RECIPE?
Pin it to your ASIAN, APPETIZER or DINNER Board to SAVE for later!
Find me on Pinterest for more great recipes! I am always pinning :)!
©Carlsbad Cravings by CarlsbadCravings.com

Pork Potstickers
Save This Recipe To Your Recipe Box
You can now create an account on our site and save your favorite recipes all in one place!
Ingredients
- 35-40 ROUND Asian dumpling wrappers (about 3 1/2″ diameter) (sometimes labeled wonton, gyoza or potsticker wrappers)
- 1 cup low sodium chicken broth divided
- Vegetable oil
Filling
- 1/2 head Napa cabbage (5 oz.)
- 1/2 teaspoon salt
- 3.5 oz. pkg. shiitake mushrooms do NOT rinse mushrooms – wipe with paper towels
- 4 green onions
- 1″ peeled ginger
- 2 garlic cloves peeled
- 1 large egg yolk
- 12 oz. ground pork preferably not lean
- 1 tablespoon reduced sodium soy sauce
- 1 teaspoon rice wine vinegar
- 1 teaspoon rice wine
- 2 teaspoons toasted sesame oil
- 1 teaspoon Asian chili sauce
- 1/4 teaspoon pepper
Dipping Sauce (optional)
- 3 tablespoons low sodium soy sauce
- 1 1/2 tablespoons rice vinegar
- 1 1/2 tablespoons rice wine
- Chili paste to taste optional
Instructions
Filling
- Add cabbage to food processor and process until fine. Add diced cabbage to a fine mesh sieve and toss with ½ teaspoon salt. Place over a bowl and let sit for 20-30 minutes then press cabbage down with a rubber spatula quite a few times to squeeze out any excess moisture. Set aside. (You can do part of this step in advance and leave the cabbage in the sieve in the refrigerator for as long as you like.)
- Add mushrooms, green onions, ginger, and garlic to a food processor (you don’t need to clean it out) and pulse until finely chopped. Add mixture to one side of a large bowl. To the other side of the bowl add egg yolk and whisk. Add cabbage, ground pork and all remaining filling ingredients and mix with your hands until thoroughly combined. Cover with plastic and either freeze for 15 minutes or refrigerate at least 30 minutes (or up to 24 hours) to chill mixture.
Dumplings
- Line a baking tray with parchment paper and prepare some damp paper towels or a damp cloth (to cover assembled pot stickers and keep them from drying out). Keep all wrappers covered in plastic wrap when you are not using them. Fill a small bowl with water.
- Working with 2-4 wrappers at a time (depending on how fast you are), add 1 tablespoon filling to the middle of each wrapper. Dip your finger in water and run it around the edge of HALF the wrapper. At this point you can either 1) Fold wrapper over in half to create a half-moon shape, pinch the edges firmly together to seal and crimp with a fork OR 2) create 4 pleats (instructions below).
- To create pleats: keep the back, moistened wrapper flat, and work with the front moistened wrapper (you are pleating just ONE side of the wrapper). Start with one side and work across to the other side. First, create one pleat with the front ummoistened wrapper by taking a small portion of dough, making a little fold and tucking it back. Firmly press completed pleat into back of wrapper to seal edges. Repeat for 4 pleats. *SEE PHOTOS IN POST*
- Place filled wrappers on prepared baking tray and cover with damp paper towels/cloth. Repeat with remaining wrappers.
Cook
- Place paper towels on a baking tray to place cooked potstickers. Heat 1 tablespoon oil in a large NONSTICK skillet (that has a lid) over medium high heat.
- Add about 12 dumplings to skillet flat side down, enough that will comfortably fit. Cook without touching until the underside is lightly golden, approx. 2 minutes. Watch closely so they don’t burn! – check the bottom of a potsticker occasionally and adjust heat if needed.
- Turn heat to LOW. Stand back and use one hand holding the lid as a shield, as you pour ⅓ cup chicken broth around the dumplings then quickly place the lid on. You can even remove skillet from heat for 30 seconds if this will make you more comfortable against splattering.
- Cook until chicken broth has completely evaporated. Remove lid, increase heat to medium and cook 1-2 additional minutes to crisp up bottoms. Transfer potstickers to a paper towel lined baking tray. Repeat until all potstickers are cooked. Best served warm with Dipping Sauce.
Dipping Sauce
- Whisk together Dipping Sauce ingredients. Add chili sauce to taste if desired.
Video
Notes
Wrappers
- If your grocery store carries them, they will be located in the refrigerated section. If you don’t see them, make sure you ask someone before you give up. If your grocery store doesn’t carry them, then you can find them at an Asian market or use wonton wrappers (info on that below).
- You can substitute round dumpling wrappers with wonton wrappers and cut them into an approximate 3.5” rounds using a cookie cutter or place an object measuring 3.5” on wrappers and cut around with a pizza cutter.
- If you are cutting the wonton wrappers, cut multiple at a time so it goes more quickly. When cutting, immediately place cut wrappers back in a sealed bag or cover with a damp cloth/paper towel and only remove wrappers as needed so the rest stay covered in the package otherwise they will dry out.
- You can also leave the wonton wrappers square and then fold in half to create a triangle. You may need to adjust the amount of filling and broth used as wonton wrappers are thinner.
How to Prevent Potstickers from Tearing
- Cover wrappers: Keep the dumpling wrappers covered in their packaging when not using or else they will dry out and tear easily.
- Remove liquid from filling: Salt cabbage and push out as much liquid from the cabbage as possible. Excess liquid will cause the wrappers to get moist and tear easily.
- Remove air: As you are folding and pleating your potstickers, push out any excess air otherwise they can tear as they cook.
- Tight pleats: The pleats should be pinched tight without any holes or else the potstickers with suck up to much moisture when steaming and tear.
- Cover potstickers: Assembled potstickers should be placed on parchment paper and covered with a clean damp towel to keep them moist and fry drying out.
- Nonstick Skillet: Potstickers will stick to your skillet and tear when you try and move them unless you use a nonstick skillet.
Tips for Perfect Potstickers
- Don’t wash mushrooms: do NOT rinse mushrooms or else they will suck up water and make the Potsticker filling wet and your Potstickers soggy. Instead, brush off any dirt with a damp paper towel if needed.
- Don’t overfill potstickers: depending on the size of your dumpling and your folding method, you may fit less filling – that is perfectly fine – you want to generously fill your potsticker but not to the point it can’t close filling. Use less filling if you are having a problem easily sealing your potsticker.
- Don’t overcrowd your pan – the dumplings will expand as they cook and you don’t want them to expand into each other and stick. You also want to give them space so the full surface of the bottom of the potsticker is touching the pan so it can crisp up.
- Check for golden bottoms: Don’t be afraid to peak underneath your dumplings to see if they need a little more time, are properly golden or are cooking too quickly. Adjust cooking time or temperature accordingly.
- Check a few dumplings: Sometimes your pan can cook unevenly, so check a few dumplings for doneness.
- Check for doneness: After the chicken broth is evaporated, you can check a dumpling to ensure the pork is cooked through. If not, add a few more tablespoons broth, cover, and cook on. The amount of chicken broth can vary depending on the thickness of the wrapper.
- Don’t rush the crisping: While the dumpling will brown in the first step, they will only get crispy when all the chicken broth is evaporated. If the bottoms aren’t browning to your liking, then drizzle in a little more vegetable oil and shake th pan back and forth to evenly distribute the oil.
How to Freeze Potstickers
- Assemble the potstickers according to directions up to refrigerating.
- Place uncooked dumplings on a parchment lined baking tray so they are not touching.
- Wrap the tray tightly with plastic wrap, and freeze for 1 month OR after freezing for 1-2 hours (until potstickers are solid), transfer potstickers to a freezer bag to save space.
- Freeze for up to 3 months.
- When ready to cook, do NOT THAW before cooking. Take care when you add the potstickers to the pan because ice crystals may cause the oil to splatter.
- Cook dumplings according to recipe directions except add 2 extra tablespoons of chicken broth.
- After the chicken broth evaporates, check a dumpling for doneness, if it not cooked through add another tablespoon or of chicken broth to the pan and cook an additional minute then check again.
Want To Make This Recipe?

Did You Make This Recipe?
Tag @CarlsbadCravings and Use #CarlsbadCravngs
Leave a Review, I Always Love Hearing From You!
©Carlsbad Cravings Original
A version of my Potsticker recipe first appeared on Real Housemoms where I am a contributor


Anna says
Made these for New Years Eve and they were delicious and so fun to make!! Thanks for the step by step instructions! My husband loves gyoza and he said they were amazing! I already want to make another batch!!
Jen says
Thank you for taking the time to comment Anna! I’m so pleased these were such a hit and fun to make! Happy 2019!
Dave says
I made these for New Year’s Eve as well. I have a friend who can be kind of selective when it comes to quality of food (he worked for decades in restaurants). He absolutely loved these. Of the 40 that I made, he probably ate 20 of them. My son loved them as well. The process for the cabbage was a perfect step, especially salting to remove the excess moisture.
I’m going to make a double batch and freeze them. But, my son is disappointed i’m not cooking them today!
Jen says
Thank you so much for your awesome comment Dave! I am thrilled both your fine palate friend and son loved them! That is awesome you are going to make and freeze them as well – happy eating!
Blair says
Did you use dried shitake mushrooms? I’m having a hard time finding fresh.
Jen says
I used fresh, but you can substitute them with cremini mushrooms. If you using dried: Cover the mushrooms in boiling water. Cover with plastic wrap to stop heat escaping. Soak for 20 minutes. The mushrooms should almost double in size so make sure to use the correct amount for the recipe. Drain. Strain the liquid and make sure they are very dry.
Pam says
These were very flavorful, however chopping everything up by hand makes a much better filling texture. It just doesnt take that long. So much better than take out potstickers!
Jen says
I’m so happy you enjoyed them, thanks Pam!
Meagan says
I would like to make these for a potluck office party. Would they do well in a crockpot after they’ve been cooked. I’m trying to figure out how to transport and keep warm. Thanks!
Jen says
Hi Meagan, unfortunately these potstickers are best served fresh as the wrappers are quite delicate and will tear and/or get mushy if placed in a crockpot.
Paula says
So, I tried this recipe and when ever I’m trying a new recipe, I always do it to spec and then modify it after. This recipe was spot on! The only thing I didn’t do from the original recipe was use the mushrooms . I didn’t have any on hand and didn’t think it was worth it to leave the house during the outbreak. It honestly made no difference at all! The step by step instructions were great and the end result was perfection. I will advise you not to walk away while the wontons are cooking, as they brown pretty quickly. If you like the Asian flavor profile, you will love this recipe! Make it…..you won’ t regret it!
Jen says
Thank you so much for your awesome comment Paula! I’m thrilled you loved these potstickers so much!
Monica says
I made these yesterday and they were delicious!! I’ll definitely be making them again with chicken next time. One question though, is there a reason that both sides of the potsticker aren’t browned? I drained my cabbage like you said, but next time I will do that well in advance and be sure to squish out as much liquid as I can before mixing it in with the other filling ingredients, because even after draining the liquid, the filling was still fairly wet with all of the other liquid ingredients. I might try freezing the filing next time too, instead of just refrigerating it . It made a lot, so I cooked some and froze some. Thanks for such a great recipe!
Jen says
Thanks Monica, I’m so happy they will be on repeat! Browning one side of the potstickers is the traditional way but you can certainly brown both if you wish!
Sydney says
Are there nutrition facts available?
Jen says
You can calculate info at https://www.myfitnesspal.com/recipe/calculator
Valerie says
A cheater tip for shaping the potstickers! I use a small plastic hinged empanada maker from the dollar store. Gyoza wrappers (or wonton wrappers cut into circles) fit perfectly and my potstickers turn out with a nice pleated edge. It really speeds up the process, though I would like to teach myself the traditional folding technique. I’ve tried to watch YouTube videos, but the fingers of the demonstrator also seem to be in the way during the most crucial moments of the fold. {grin}
Jen says
Thanks for such a great tip Valerie, I love that idea! I don’t have a video for potstickers, so I’m not sure which one you are seeing!
Anna says
Would it be possible to switch the pork for beef if needed? Or would that throw off the recipe?
Jen says
Yes, you can use ground beef!
Linda Marie says
My son lived in Japan for a number of years. He craved pot stickers but the Asian store bought are expensive. Found this recipe and he absolutely loved it! Directions are fantastic, follow exactly and enjoy! Thank you for sharing this recipe !!
Jen says
What a compliment!! I’m so pleased he enjoyed them! Thank you so much for the kind review❤️
Sara says
Happy New Year! We made these last night at my New Year’s Eve party. It was an Asian theme. They were awesome. One of the girls made the prettiest pleats. I did use button mushrooms and added some white pepper. They tasted great the next day too. Thanks!
Jen says
YUM! What a great idea for a party! Love it! So glad they turned out so awesome for you!
Betty says
Hi there! Do you think I could cook from frozen in the oven? Just put a little oil on bottom of large pan & maybe some water, cover and cook? Thanks for delicious recipe!
Jen says
Hi there! I haven’t tested baking them from frozen, so I can’t say for sure how they’d turn out. My concern is that the texture might not be quite the same and you may miss out on that classic crispy bottom and tender-steamed top that makes potstickers so good. Your idea could work in theory, but the oven doesn’t replicate that quick steam-then-sear method very well. If you’re looking for the best results, I’d still recommend cooking them on the stovetop as directed. That said, if you do try the oven method, I’d love to hear how it goes!