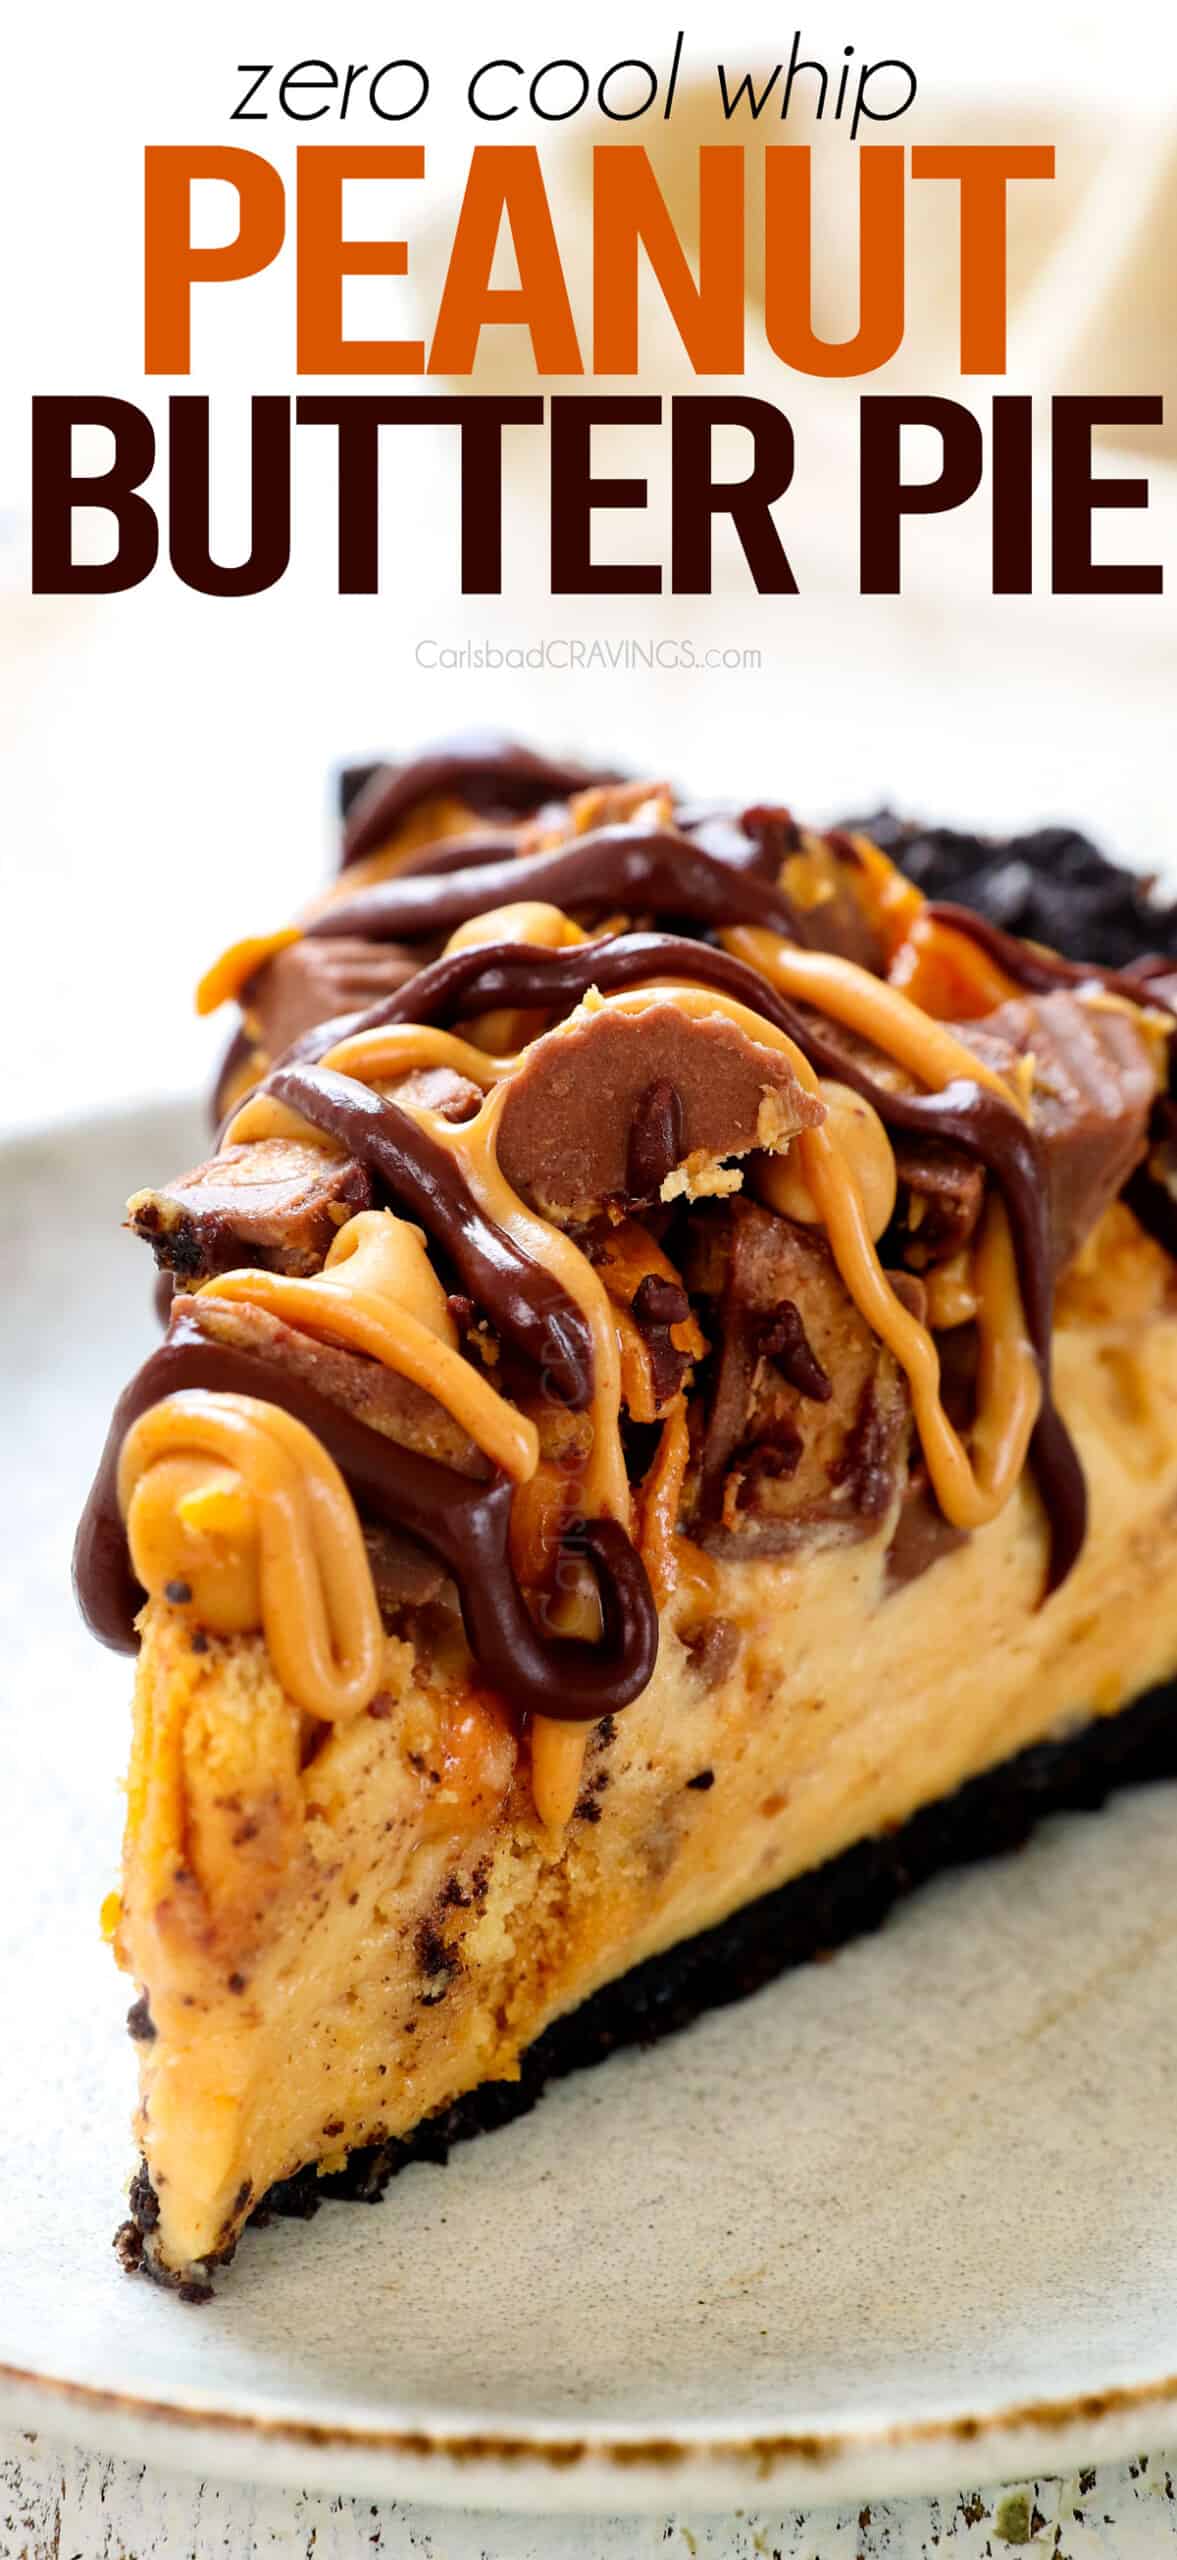
This Peanut Butter Pie is the ultimate dessert for peanut butter lovers, based on my mini peanut butter pies that have garnered TONS of rave reviews and have been shared hundreds of thousands of times on social media! With a recipe honed to perfection, it’s elevated with toffee bits, homemade whipped cream (no Cool Whip), and a skilled balance between airy lightness and rich decadence, with just the right touch of sweetness. Follow along for your step-by-step guide, how-to-make video, and expert tips for achieving peanut butter pie perfection!
Watch How to Make Peanut Butter Pie

Why You’ll Love This Easy Peanut Butter Pie Recipe
This recipe is the culmination of many experiments to bring you the very best! Here’s why you’ll love it:

What is Peanut Butter Pie?
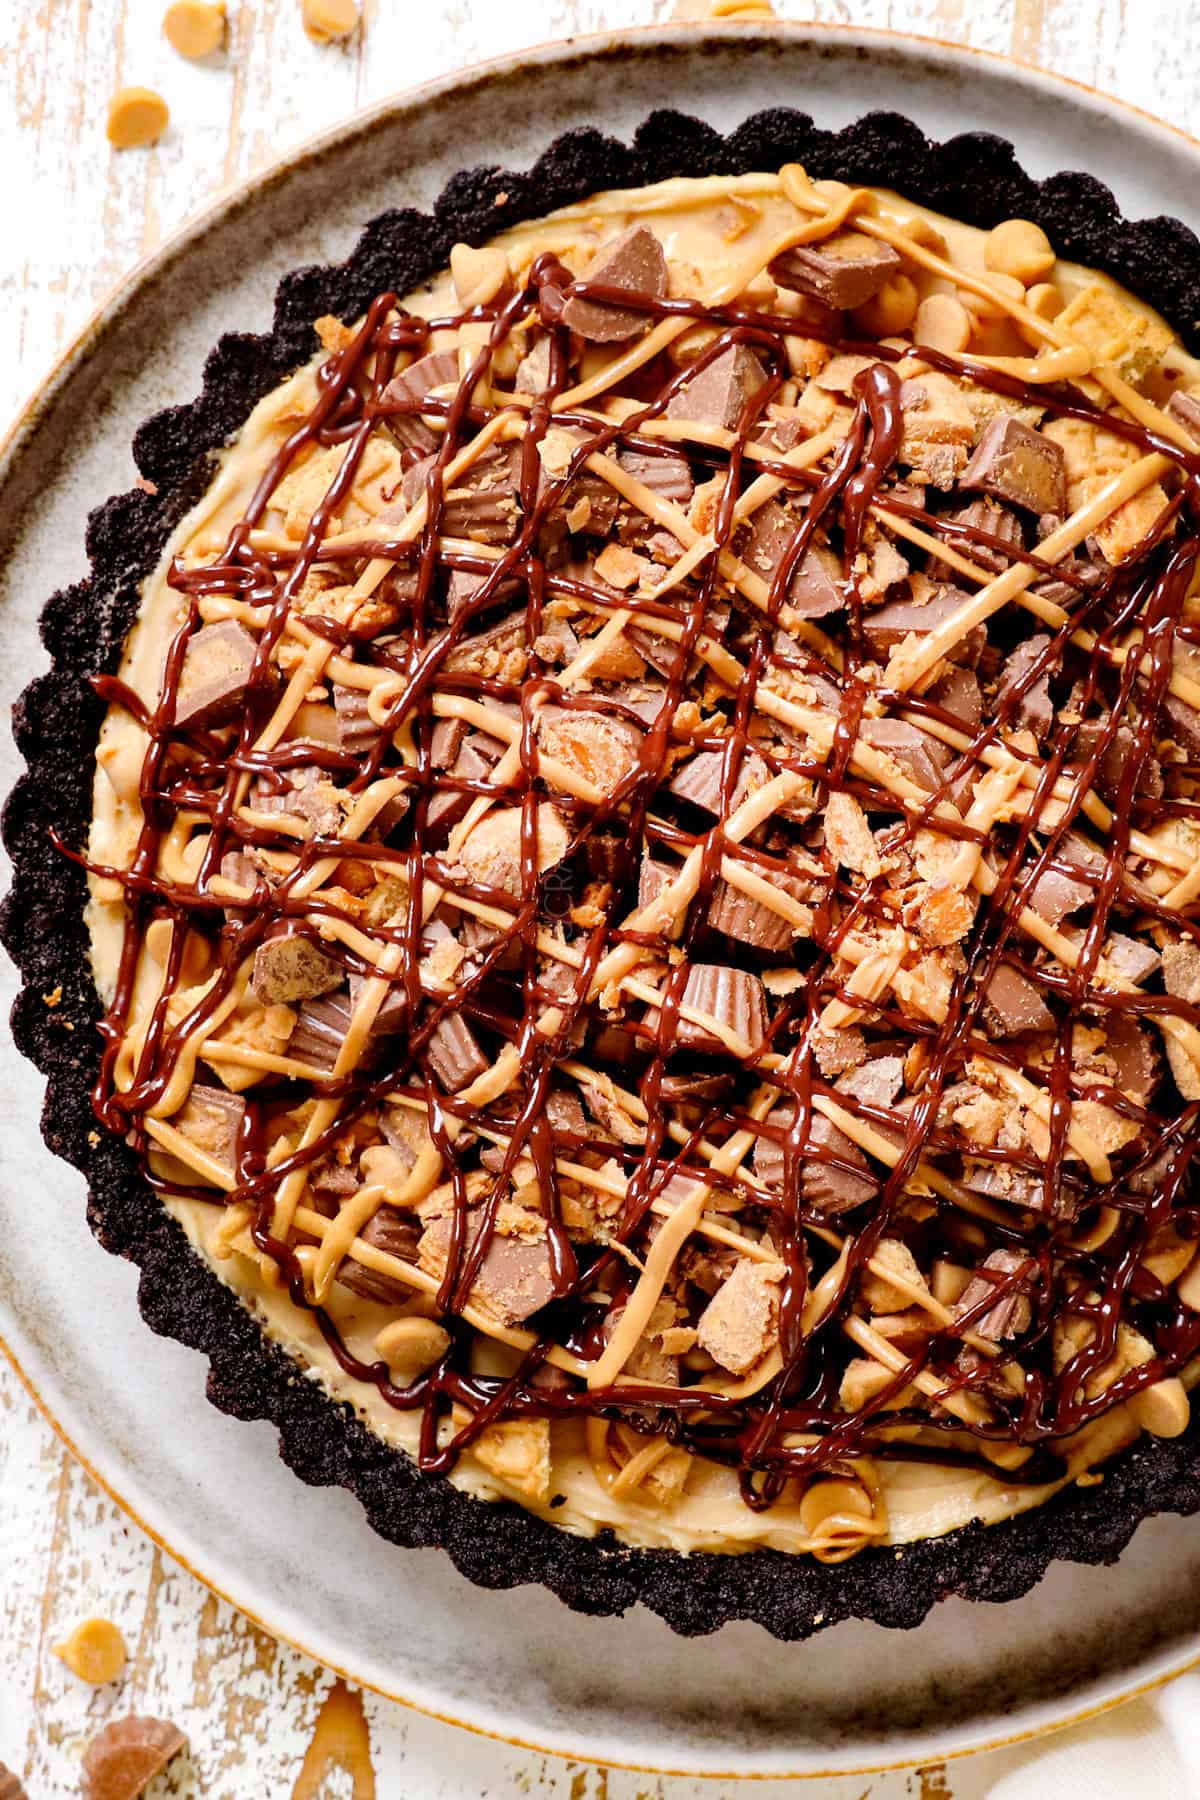
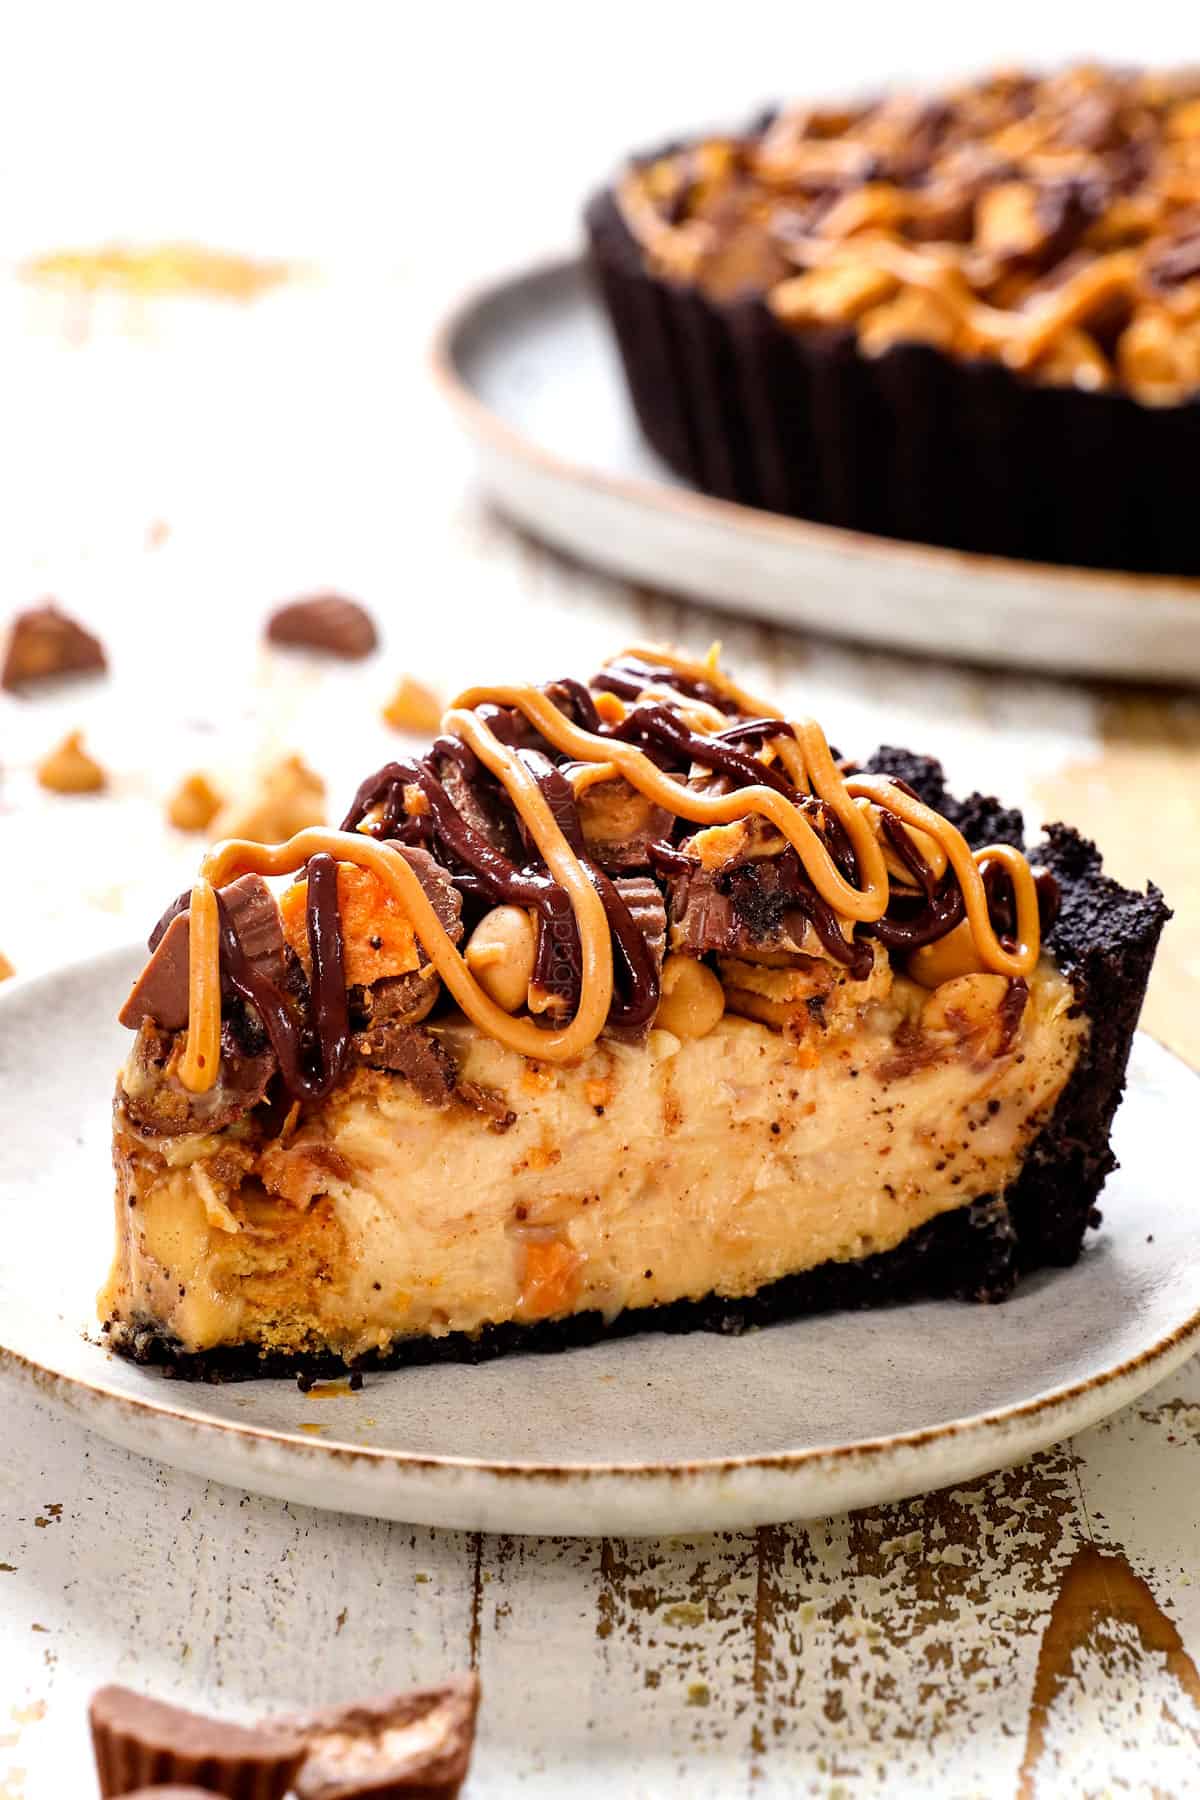
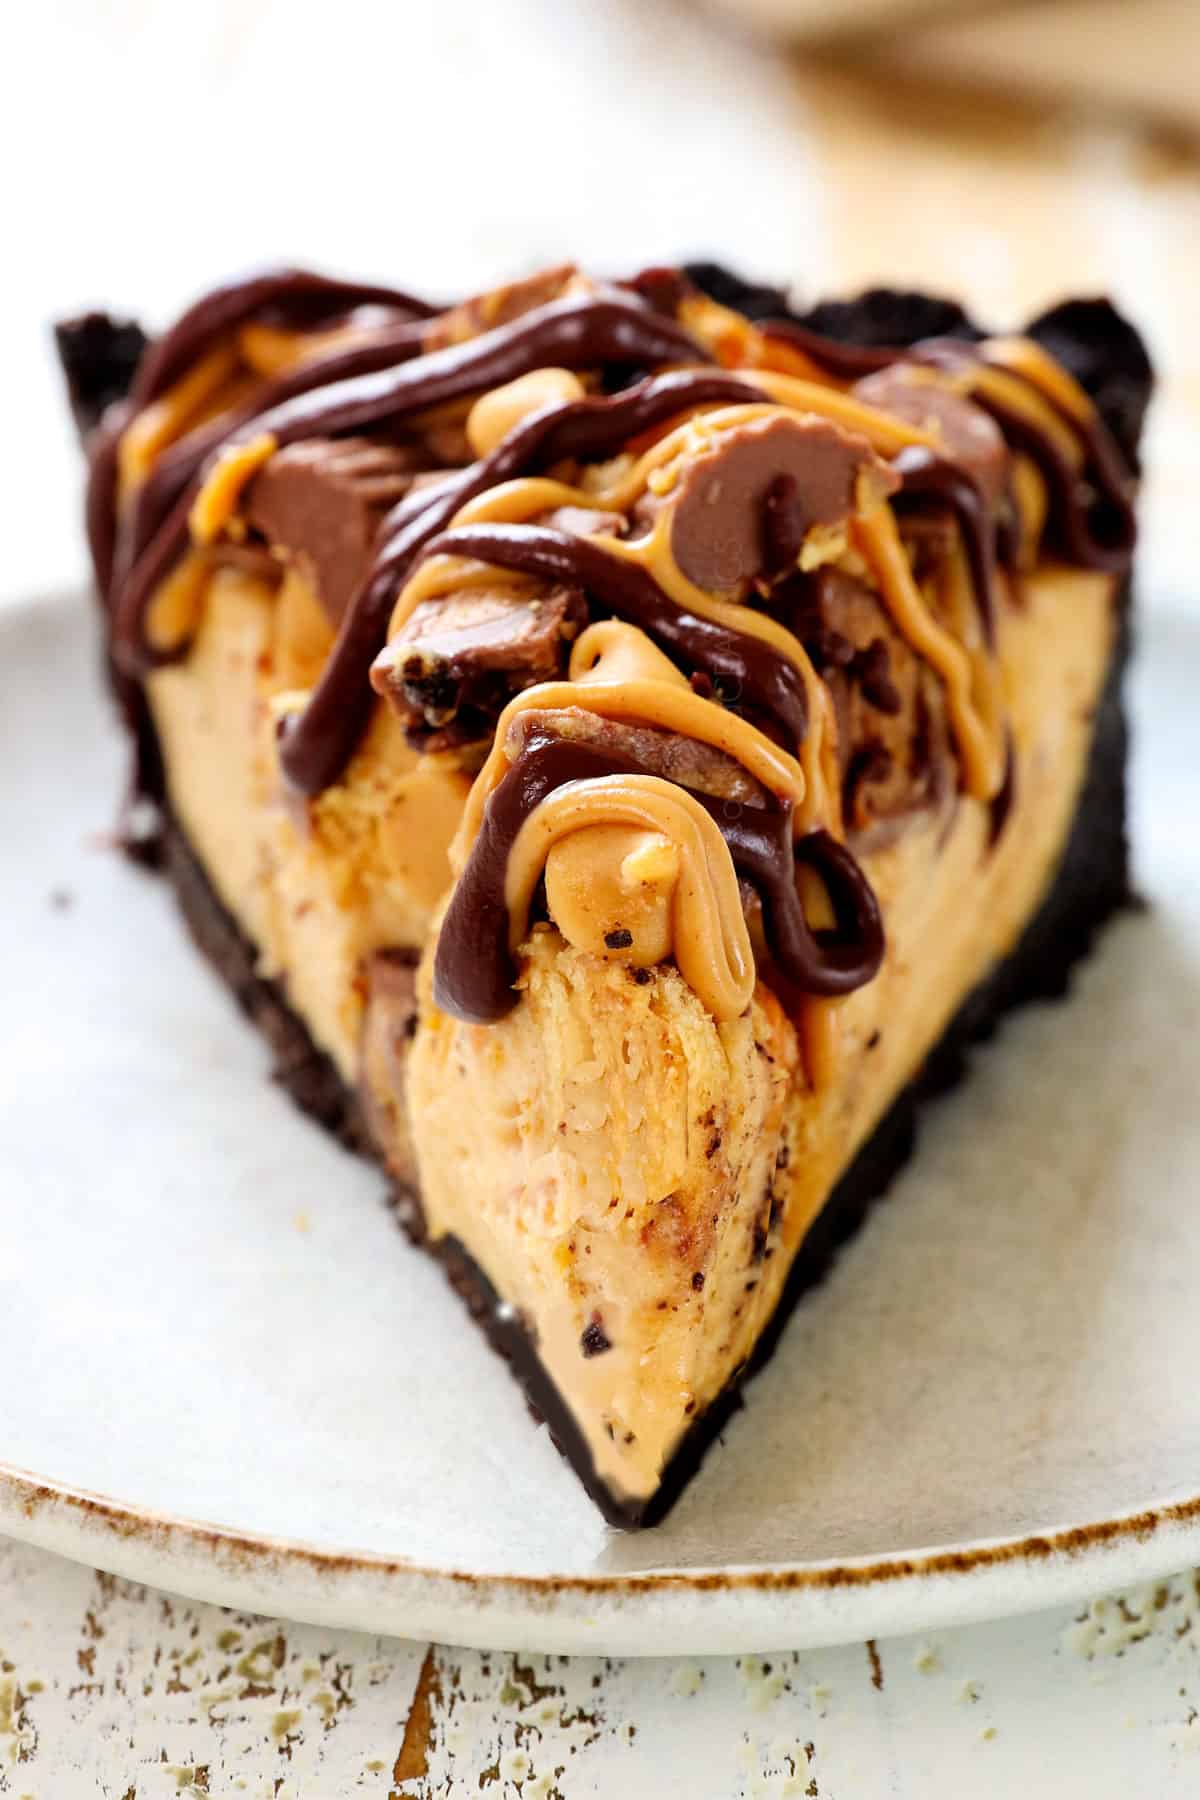
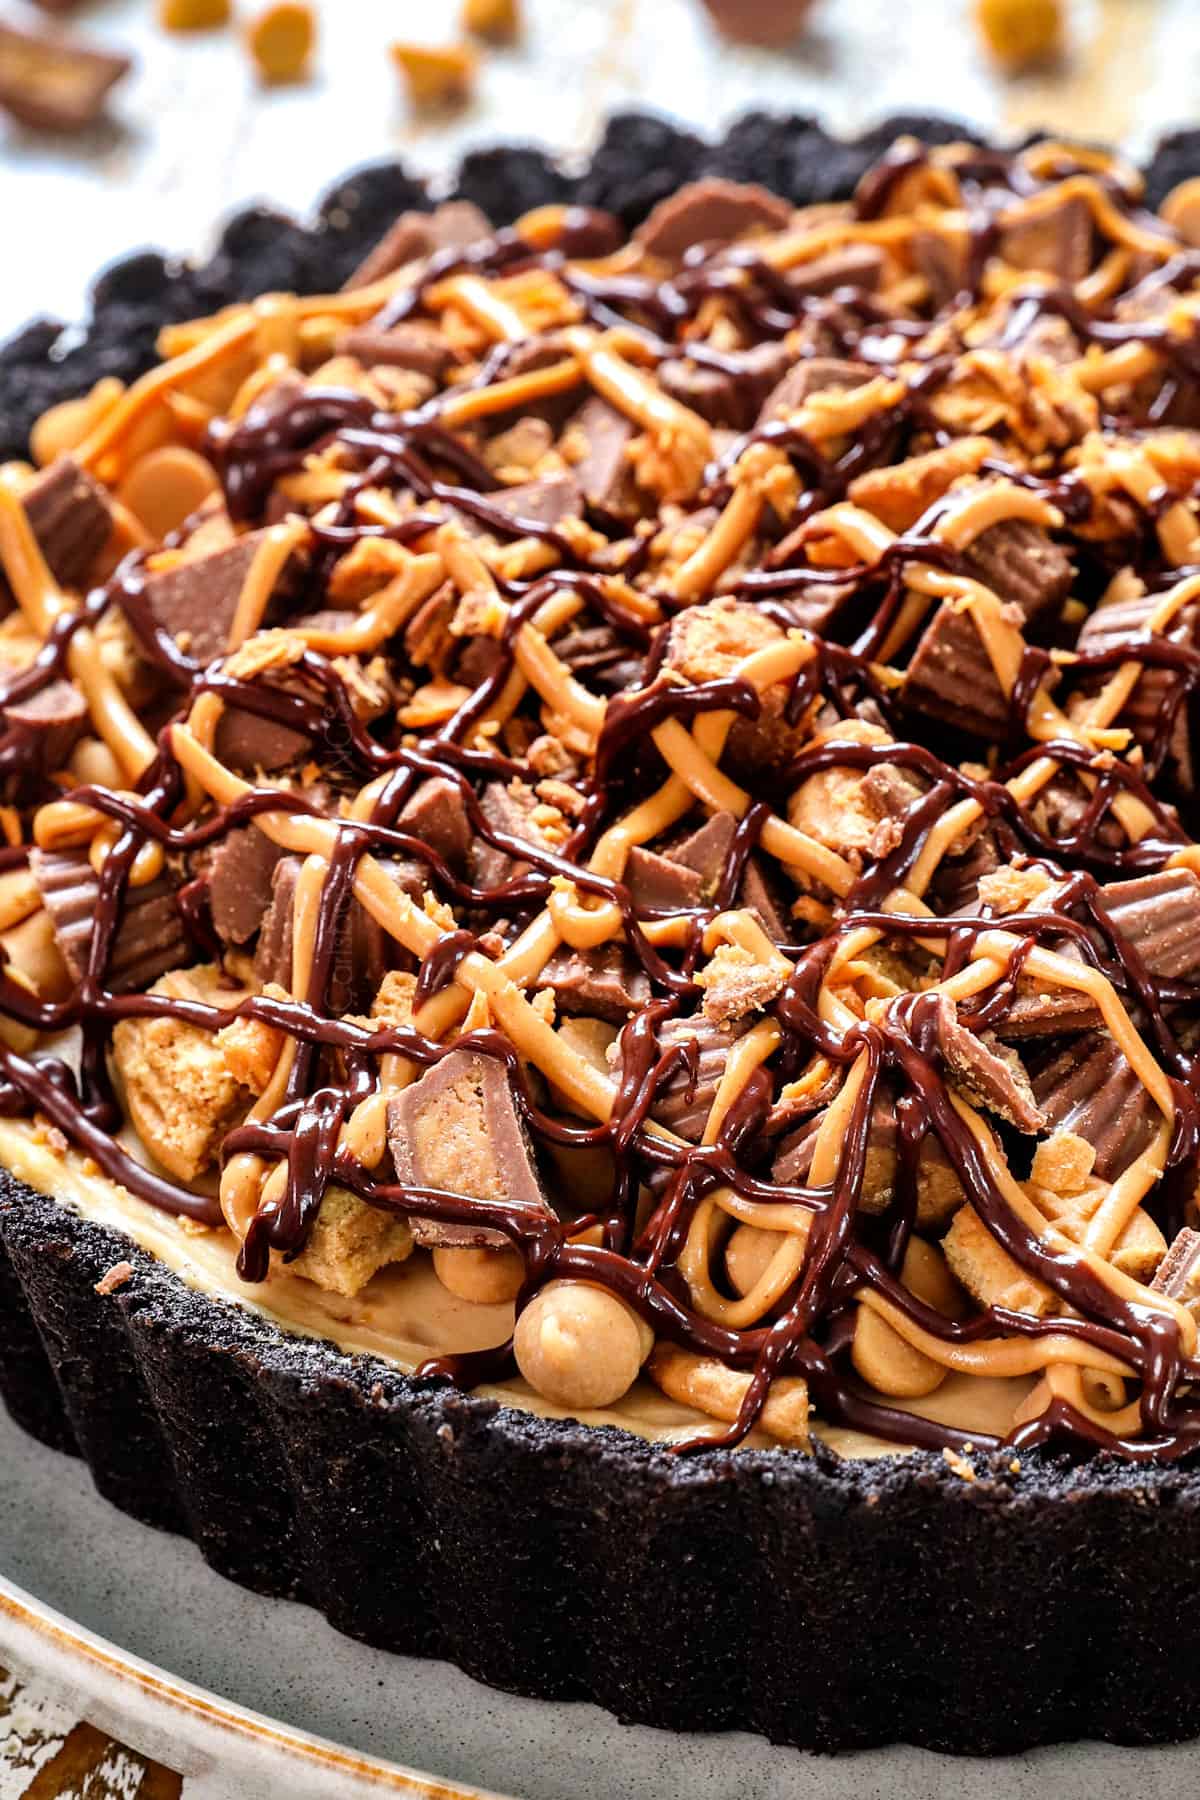
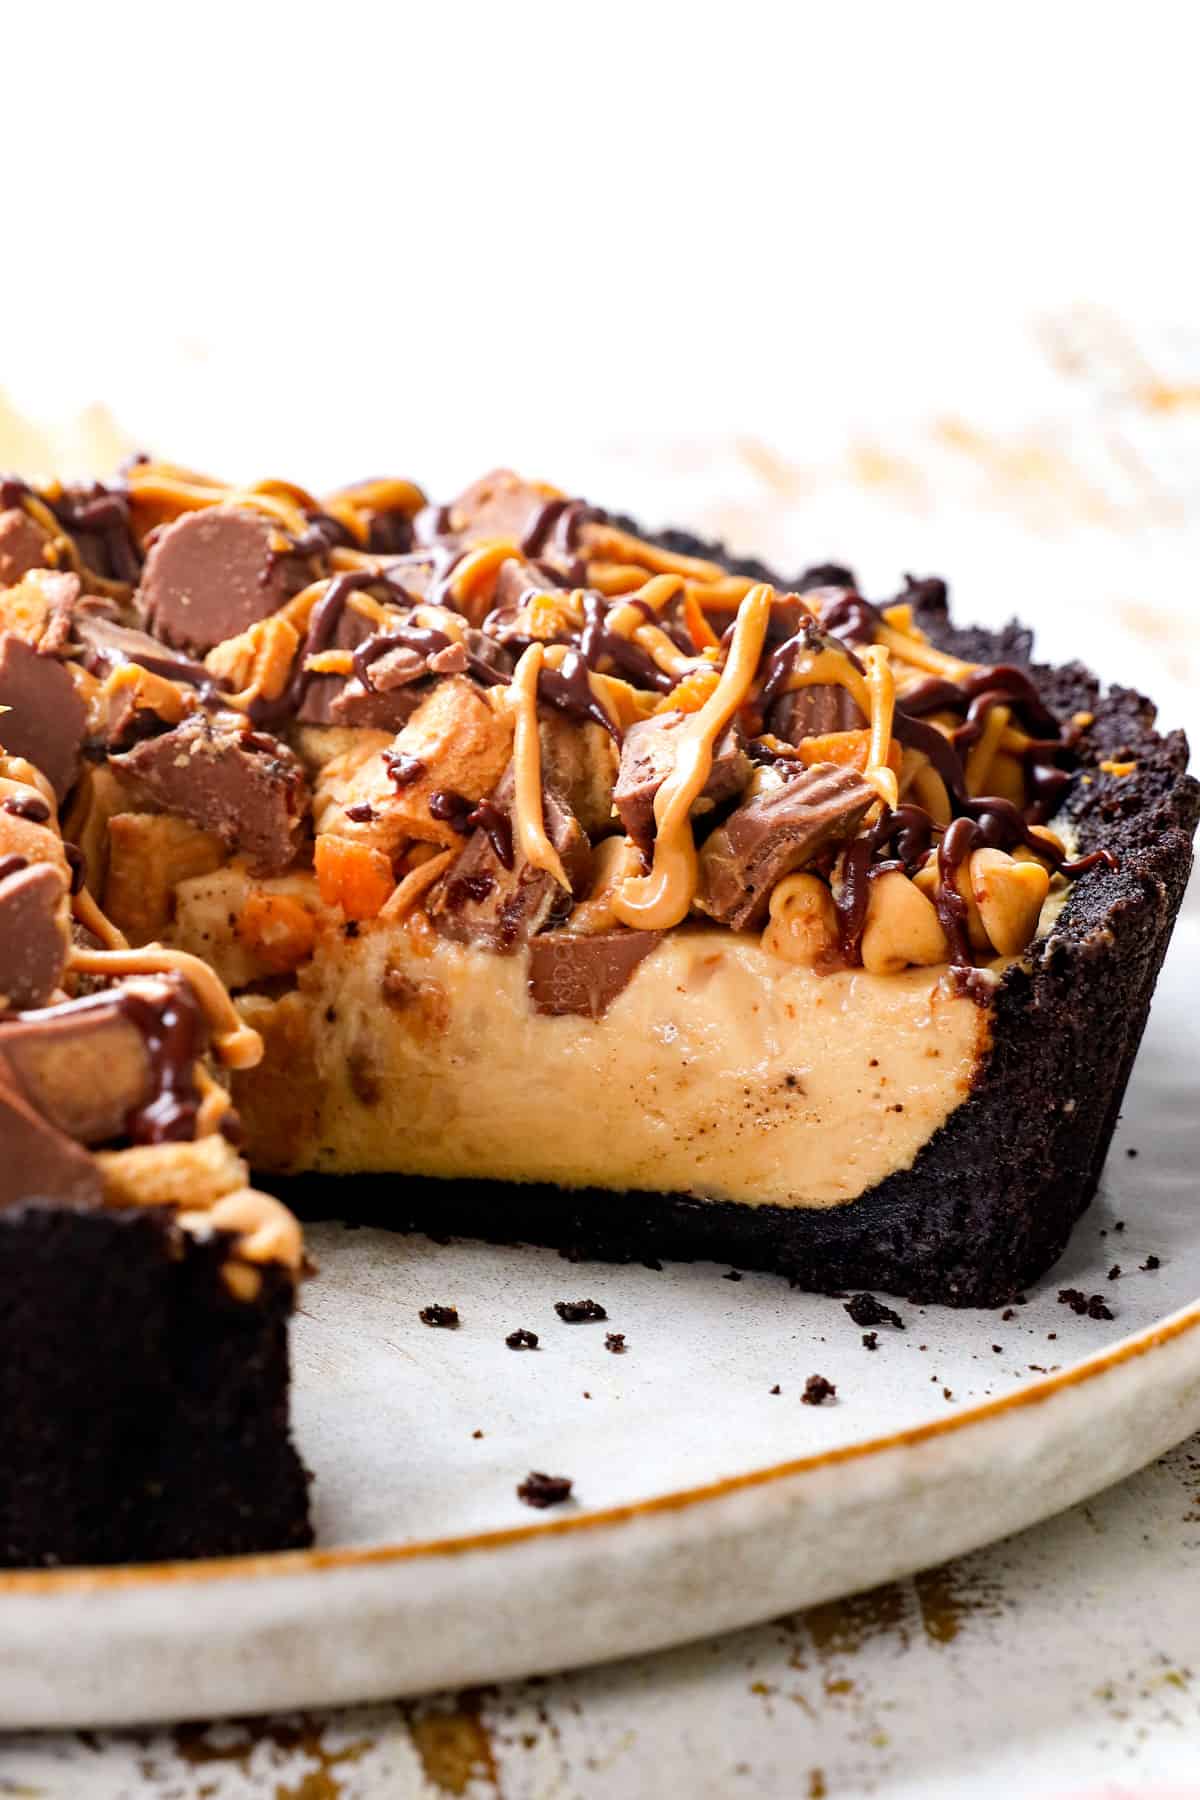
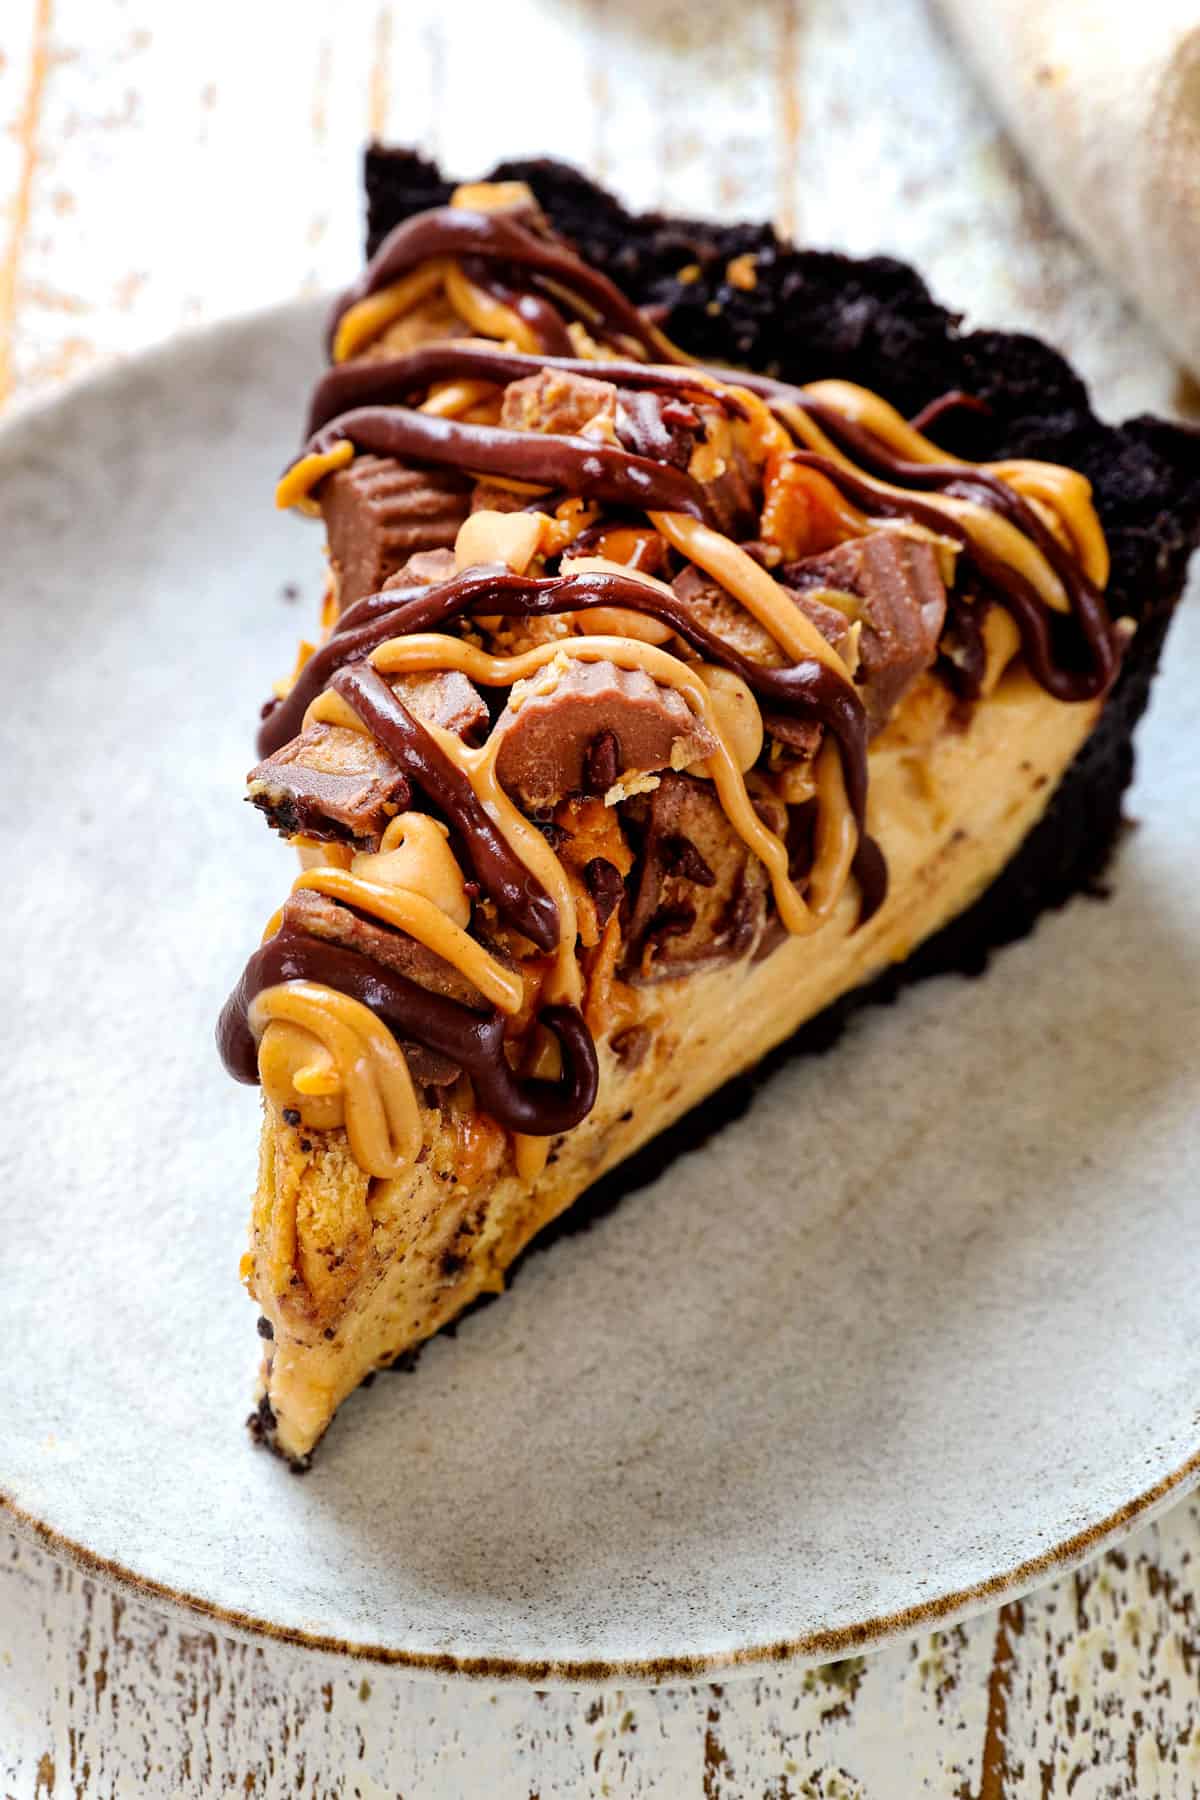
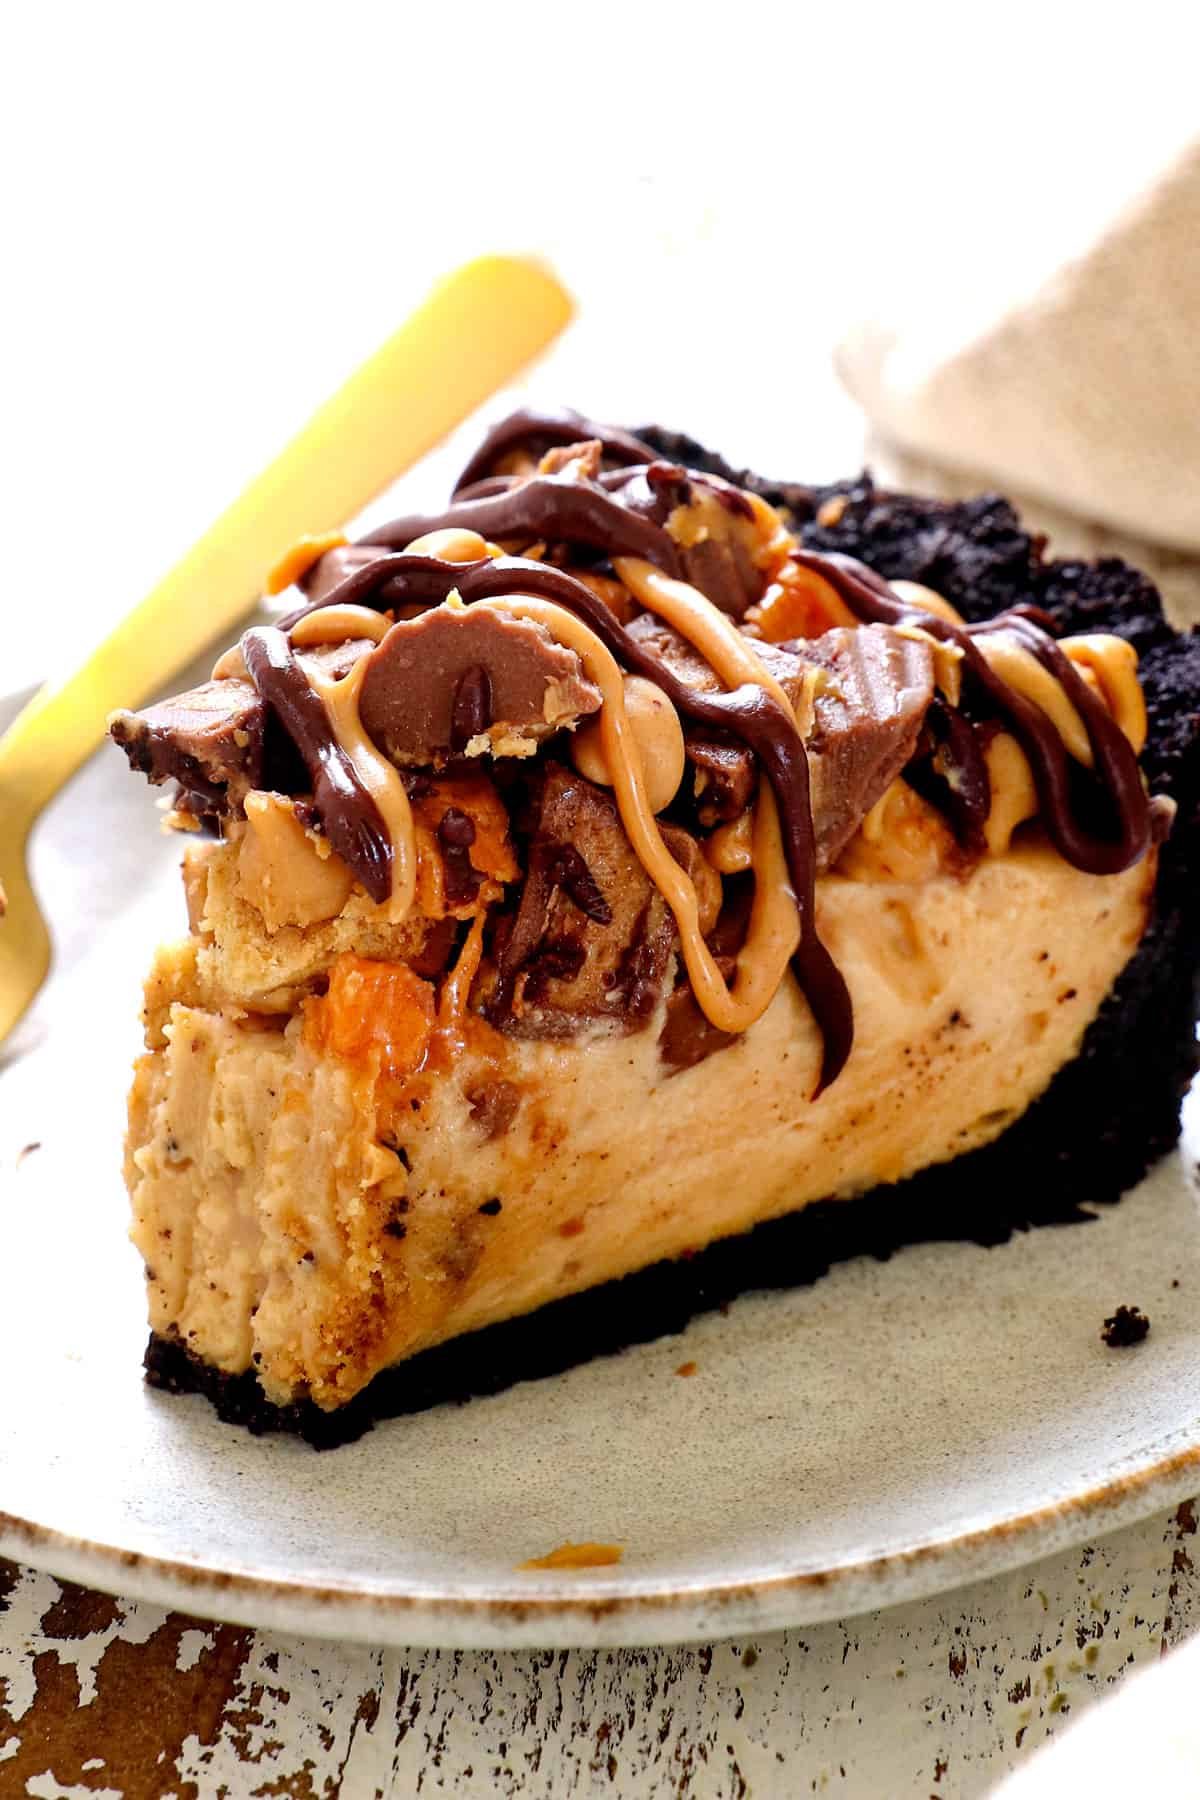
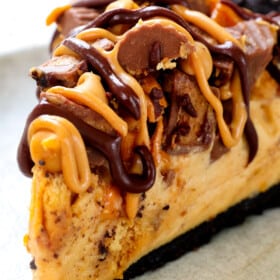
Peanut Butter Pie is a delightful dessert made with a rich and creamy filling primarily consisting of peanut butter, cream cheese, sugar, and homemade whipped cream. This mixture is poured into a buttery, crunchy, chocolaty Oreo crust, chilled until set, then garnished with peanut butter drizzle, chocolate drizzle and your favorite peanut butter candies like Nutter Butters, Mini Reese’s Pieces and peanut butter chips. It’s an indulgent favorite that celebrates peanut butter in a delectable pie form!

Best Peanut Butter Pie Ingredients
The ingredients for this almost no bake peanut butter pie can be divided into three parts: 1) the crust, 2) the filling, and 3) the topping. Let’s take a closer look at what you’ll need for each (full recipe with measurements in the printable recipe card at the bottom of the post):
Peanut Butter Pie Oreo Crust:
For the Peanut Butter Pie filling:
Peanut Butter Pie Topping:

no bake peanut butter pie variations
Variations
Additions

No Bake Peanut Butter Pie
For a 100% no bake peanut butter pie, use a store-bought Oreo crust or chocolate Graham cracker crust made with 14 sheets of Graham crackers and 7 tablespoons butter.

How to Make Easy Peanut Butter Pie
This peanut butter pie recipe is comprised of four main parts:
1. crust
2. stabilized whipped cream
3. peanut butter filling
4. the topping
Each element is quick and easy to make so please don’t be overwhelmed. Let’s take a closer look with step-by-step photos or watch the video in the recipe card (full instructions with measurements in the recipe card at the bottom of the post):
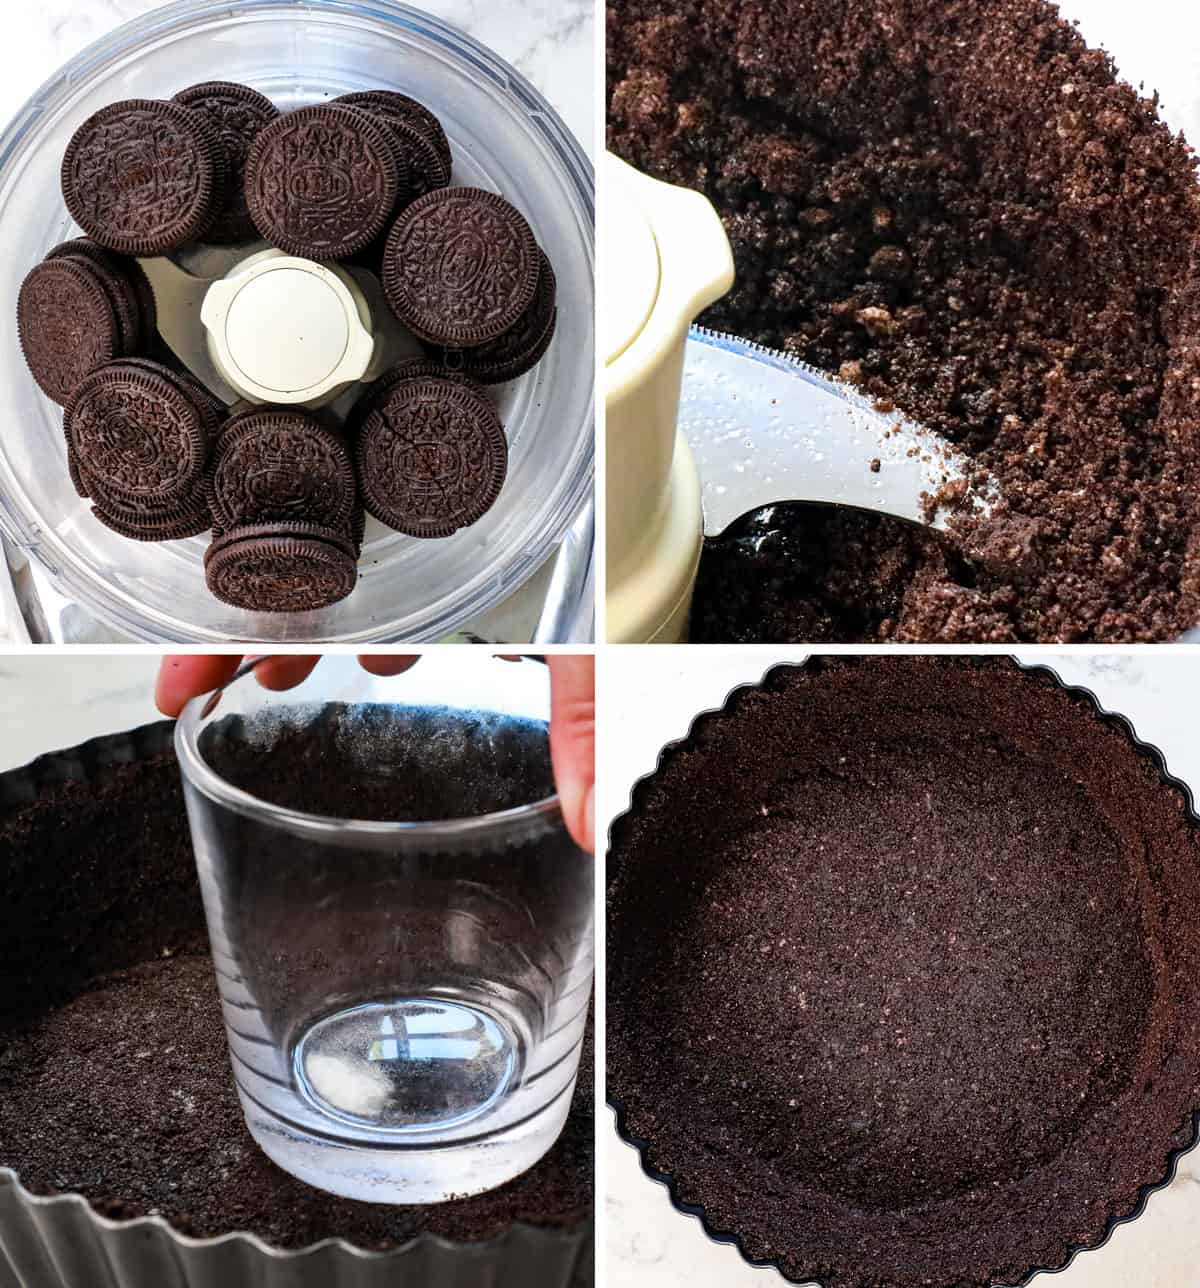
Step 1: How to Make Oreo Crust
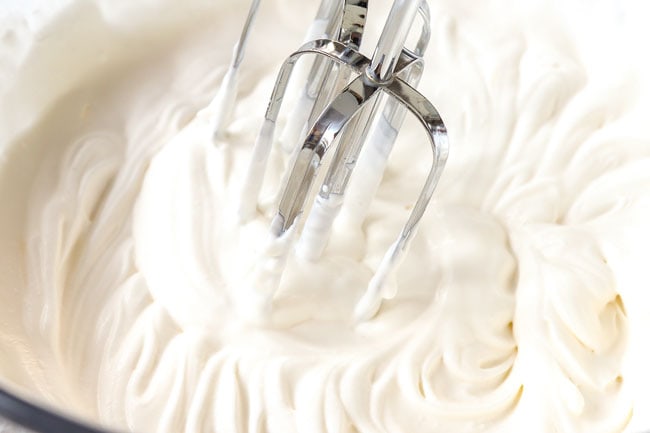
Step 3: How to MaKe stabilized Whipped Cream
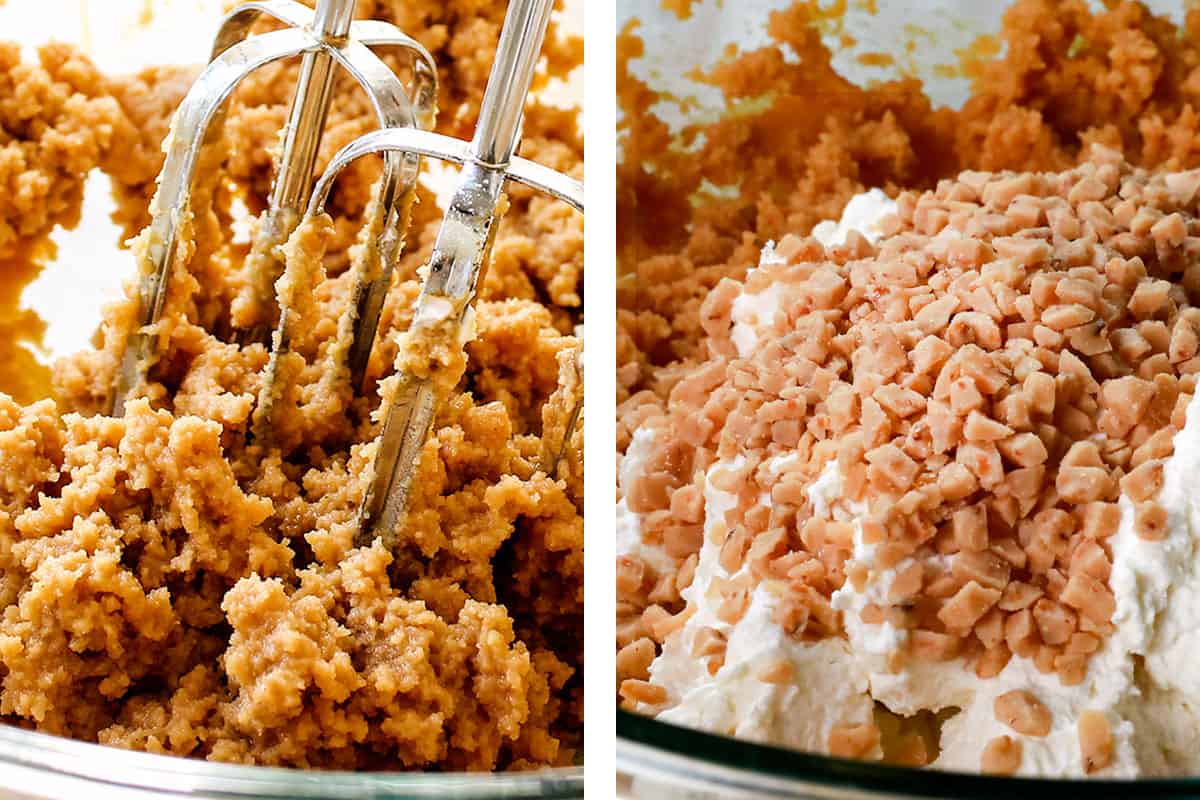
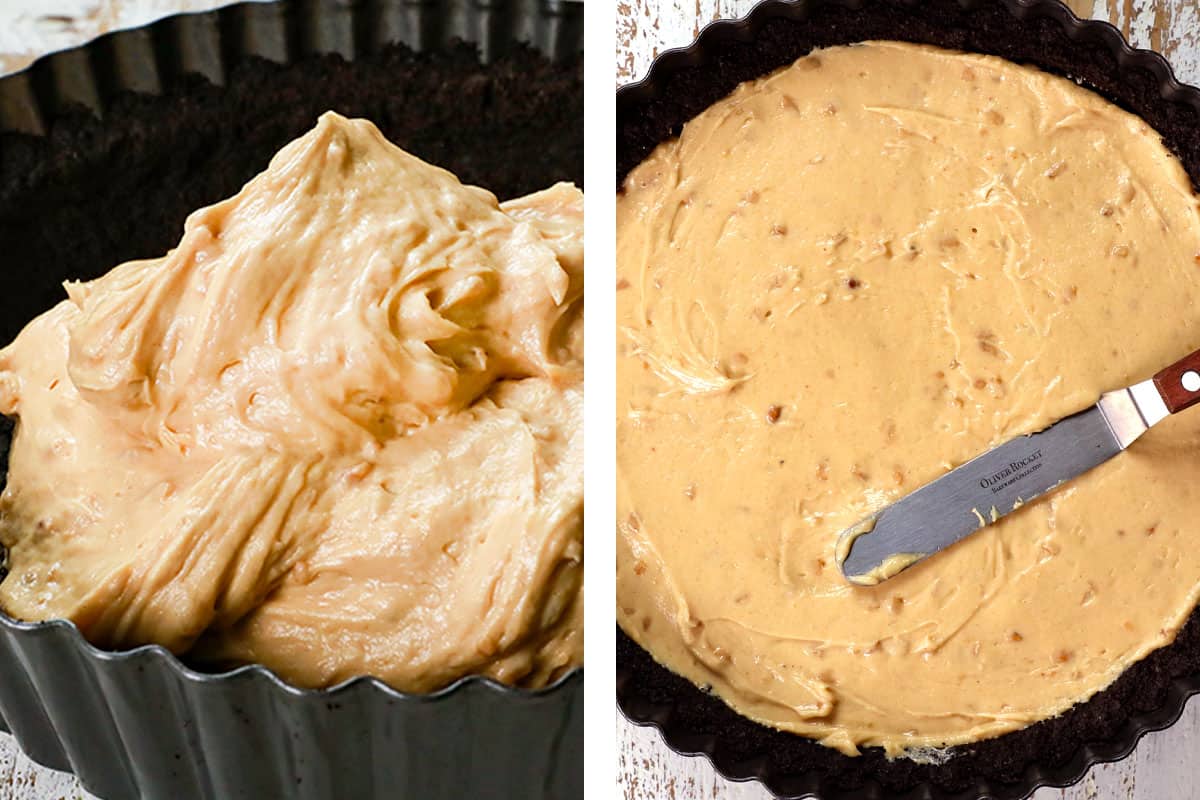
Step 2: How to make peanut butter pie filling
Step 4: Chill
Step 5: Add Topping

Whipped Peanut Butter Pie Tips
Follow these tips for the best peanut butter pie recipe every time:
Ingredient Tips
REcipe Making Tips

How to Serve Best Peanut Butter Pie
How to Store Peanut Butter Pie Recipe

How to refrigerate Peanut Butter Pie
Cover and store the easy peanut butter pie in the refrigerator for up to 4 days or freeze for up to 2 months.
How to freeze peanut butter pie
Wrap the pie in two layer of plastic wrap, followed by foil. Store for up to 2 months. Let the pie sit at room temperature for 20 minutes or so before serving to soften up a bit.

WANT TO TRY THIS Peanut Butter Pie RECIPE?
PIN IT to your recipe BOARD TO SAVE FOR LATER!
FIND ME ON PINTEREST FOR MORE GREAT RECIPES! I AM ALWAYS PINNING :)!
©Carlsbad Cravings by CarlsbadCravings.com
Recipe for Peanut Butter Pie
Save This Recipe To Your Recipe Box
You can now create an account on our site and save your favorite recipes all in one place!
Ingredients
CRUST
- 24 Oreos with filling
- 5 tablespoons unsalted butter, melted
FILLING
- 1 teaspoon unflavored gelatin (see notes)
- 1 1/2 tablespoons water
- 1 cup heavy cream
- 1 teaspoon vanilla extract
- 8 ounces block cream cheese (very soft)
- 1 cup powdered sugar
- 3/4 cup creamy conventional peanut butter (like Skippy or Jif)
- 1/2 cup toffee bits (like Heath’s Bits of Brickle)
Topping
- peanut butter for drizzling (slightly warmed for easy drizzling)
- chocolate sauce for drizzling (see Notes for DIY)
- favorite PB candy: more toffee bits, Nutter Butters, Mini Reese's Pieces, Butterfingers, PB Chips, etc. (pick your favs!)
Instructions
CRUST
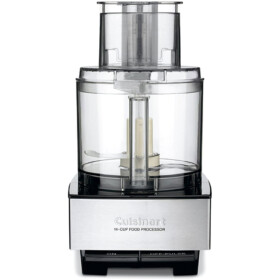
- Preheat oven to 350 degrees F. Add Oreos (including cream filling) to a food processor and process until finely ground. Add butter and pulse to combine. (Or crush with a rolling pin then mix with butter in a bowl).
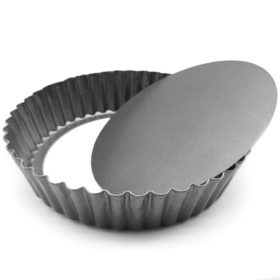
- Pour the crumbs into a 9-inch pie plate or I use this quiche pan with a removable bottom for perfect slices. Press the crumbs up the sides, then onto the bottom; use the bottom of glass to firmly press the crumbs into the bottom. If using a deep pan (like the quiche pan), only press the crumbs 1 1/2-inches up the sides.
- Bake at 350 degrees F for 10 minutes. Transfer to a wire rack and cool completely before filling.
STABILIZED WHIPPED CREAM
- Add the unflavored gelatin to a microwave safe bowl then pour the cold water over top; let stand for 5 minutes. Microwave for 10 seconds. Stir the mixture, then set aside. Immediately proceed with the next step.
- Add 1 cup heavy cream and vanilla extract to a large mixing bowl. Whip using an electric hand mixer until soft peaks form (the whipped cream folds over when you lift the beaters out of the bowl).
- Turn the mixer to low and slowly pour in the gelatin mixture. Mix until well combined then increase the speed to medium and continue mixing until stiff peaks form (the whipped cream stands straight up and doesn’t fold over when you lift the beaters out of the bowl); set aside.
FILLING
- In a separate large mixing bowl, using the same beaters (no need to clean), beat the cream cheese, powdered sugar and peanut butter on medium-low until combined. Increase speed to medium-high and beat until light and fluffy, at least 2 minutes.
- Add the whipped cream and toffee bits and fold until evenly combined.
- Pour the mixture into the cooled pie crust and smooth the top.
CHILL
- Cover with plastic wrap pressed against the surface of the pie. Chill the pie in the refrigerator for at least 5 hours before topping or freeze for at least 2 hours.
Toppings
- Add toppings (chopped/crushed candy and drizzles) to the peanut butter pie at any point after it's set; i.e.; add after five hours and return to the refrigerator, or add and serve immediately. If the pie has been frozen, let it sit at room temperature for 20 minutes or so after adding the toppings to soften up a bit before serving (slice while still firm), or return to the fridge.
SLICE
- Use a hot knife to slice the pie for the cleanest slices. You can either run the knife under hot water or fill a large glass with hot water, then dip the knife in the hot water before each cut. Wipe the knife clean with a paper towel after each cut, then repeat. I like the pie best after the slices have a chance to soften for 5-10 minutes.
Video
Notes
- 4 ounces semi-sweet baking chocolate (may sub ½ cup quality chocolate chips like Ghirardelli or Guittard)
- 2 tablespoons corn syrup
- 1 tablespoon vegetable oil
- Add the ingredients to microwavable safe bowl. Microwave uncovered on Medium (50%) for 1 to 2 minutes, whisking halfway through, or until chocolate can be whisked smooth. Add to a small bag, snip the corner and drizzle.
- Do I have to add corn syrup? C
Tips and Tricks
- Use conventional peanut butter: Peanut butter that isn’t homogenized can sometimes cause texture and emulsion issues like your filling separating due to their high ratio of oil. Additionally, I find that some natural peanut butters have a coarse texture that isn’t ideal for achieving that mousse-like pie filling.
- Why gelatin? Whipping the cream with unflavored gelatin then folding it in with the other beaten ingredients gives this pie a light, creamy, texture with structure without any Cool Whip. The gelatin ensures your pie doesn’t become soft and weepy straight out of the refrigerator. Unflavored gelatin is a common baking ingredient and can be found next to the packages of Jell-O and pudding at your grocery store.
- Gluten free peanut butter pie: Use gluten free Oreos or substitute with gluten free chocolate cookies or sandwich cookies, or even gluten free graham crackers. If your substitution does not contain a filling, add 2 tablespoons extra butter to the crust. Only use gluten free candy for the topping. Butterfingers are gluten free and all of Reese’s products are listed as gluten-free on the Hershey’s website, except seasonal-shaped Reese’s.
- Vegetarian peanut butter pie: Use 1 teaspoon agar-agar instead of gelatin.
HOW TO SERVE AND STORE
- If traveling: Freeze the pie for at least an hour and let it soften for 20-30 minutes (more or less as needed) at room temperature before serving (slice while still firm).
- How to store: Tent with foil or use a cake caddy. Store in the refrigerator for up to 4 days or freeze for up to 2 months.
- To freeze: Wrap the pie in two layer of plastic wrap, followed by foil. Store for up to 2 months. Let the pie sit at room temperature for 20 minutes or so before serving to soften up a bit.
Want To Make This Recipe?

Did You Make This Recipe?
Tag @CarlsbadCravings and Use #CarlsbadCravngs
Leave a Review, I Always Love Hearing From You!


Paula says
Looks so yummy! Any recipe alterations if my pie dish is 10-11”?
Jen says
Thanks Paula! This is a very forgiving recipe because the filling isn’t baked, so I think a larger pie dish will work just fine. The filling will spread out and be less deep, so your crust won’t have to be as tall.
Becky says
For gluten free, what can I use in place of cake flour? Also, if my cooking spray doesn’t contain four, can I just sprinkle some g/f 1 to 1 in the pan?
Thanks in advance!
Jen says
Hi Becky, which recipe are you referring to? This peanut butter pie doesn’t contain flour. Thanks!