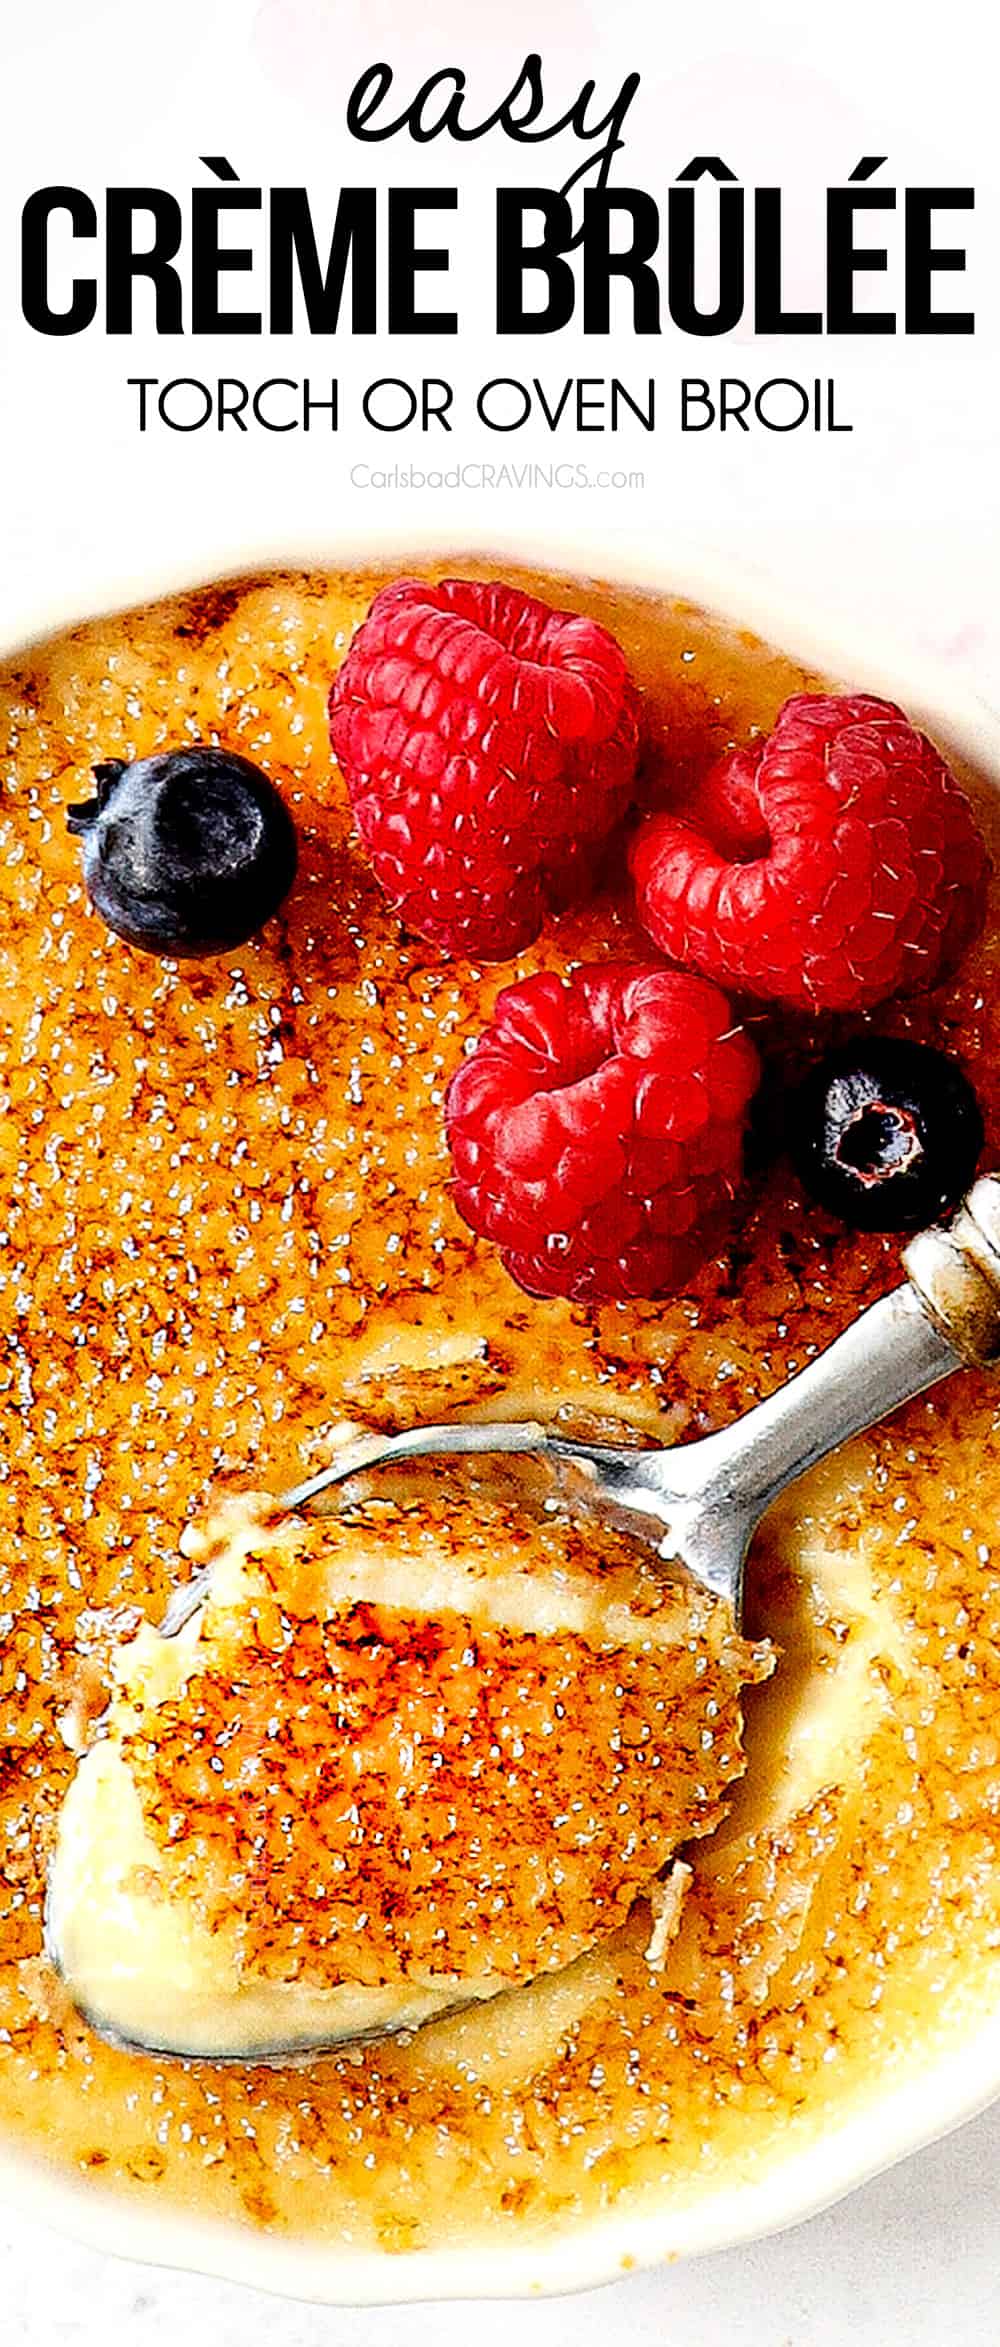
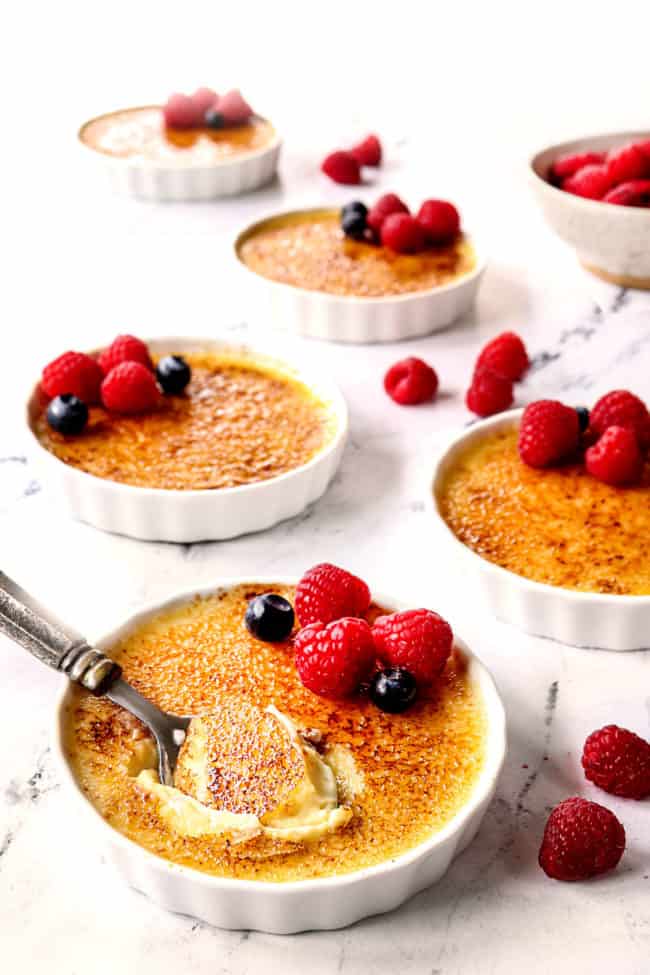
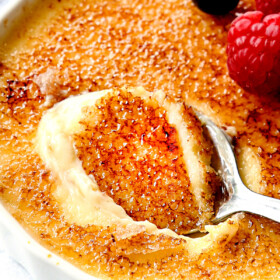
This Crème brûlée is restaurant delicious and one of the easiest dessert to make at home with only 5 ingredients!
This crème brûlée recipe is shockingly easy to make at home – but it can be our little secret. Crème brûlée radiates elegance, indulgence and luxury, characterized by the crisp caramelized sugar shell giving way to the lusciously creamy custard. All you need are egg yolks, heavy cream, vanilla, salt and sugar to make this recipe. And don’t worry, you do NOT need a crème brûlée torch – I’ll show you how to make the solid caramelized sugar topping in your oven! This foolproof crème brûlée recipe includes step-by-step photos and tips for success so you can make the best crème brûlée recipe of your life. You will also love that this crème brûlée recipe is make ahead friendly!
If you enjoy this crème brûlée recipe, don’t miss these other decadent favorites: Crème Brule French Toast, Chocolate Éclair Cake, Chocolate Mousse Cake, Chocolate Lava Cake and Red Velvet Cheesecake.
Watch How to Make Crème Brûlée
PIN THIS RECIPE TO SAVE FOR LATER

Crème Brûlée Recipe
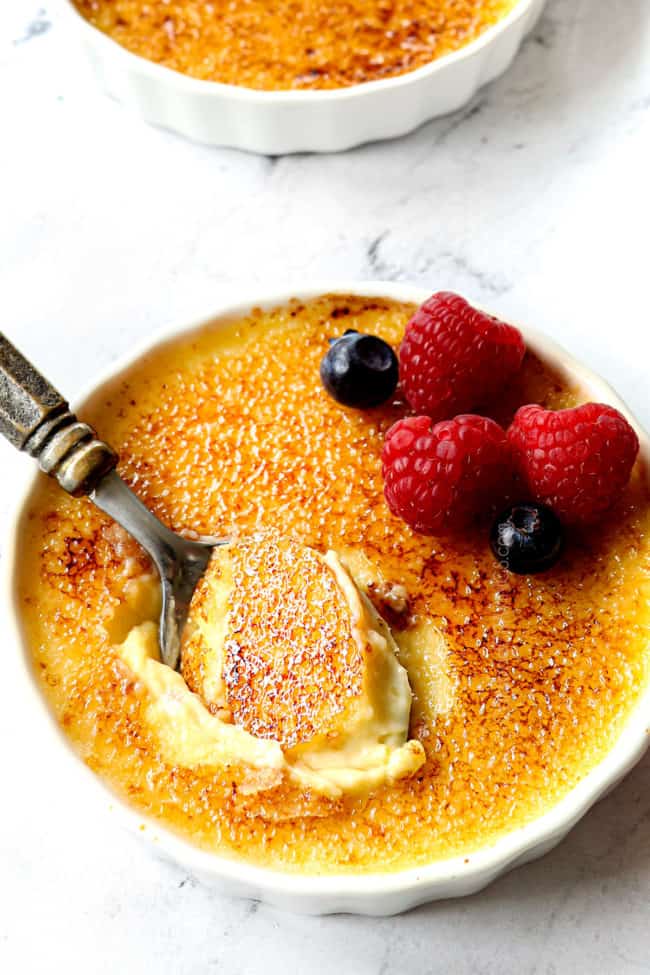
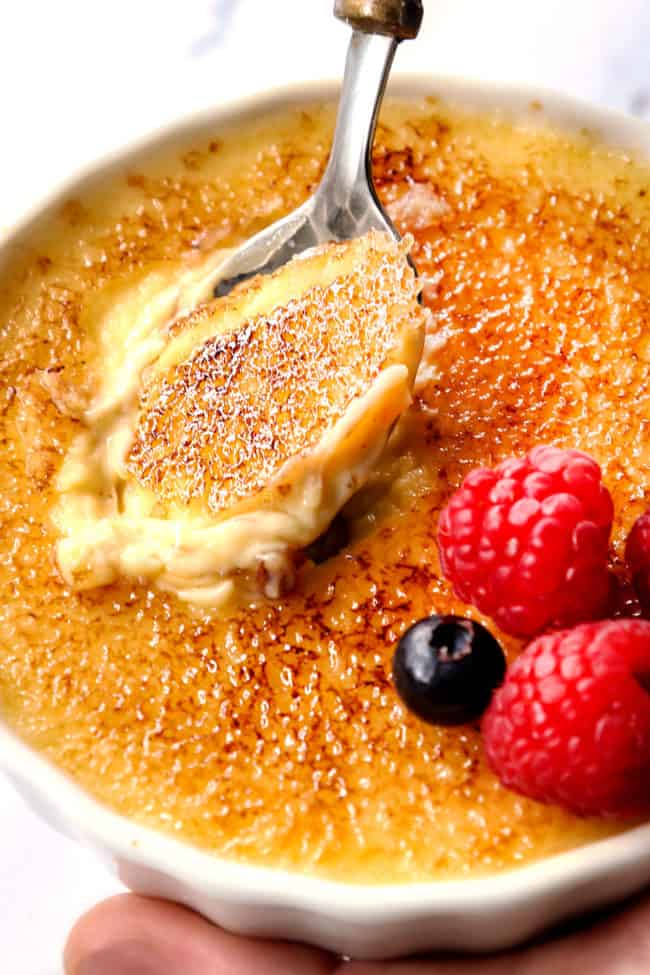
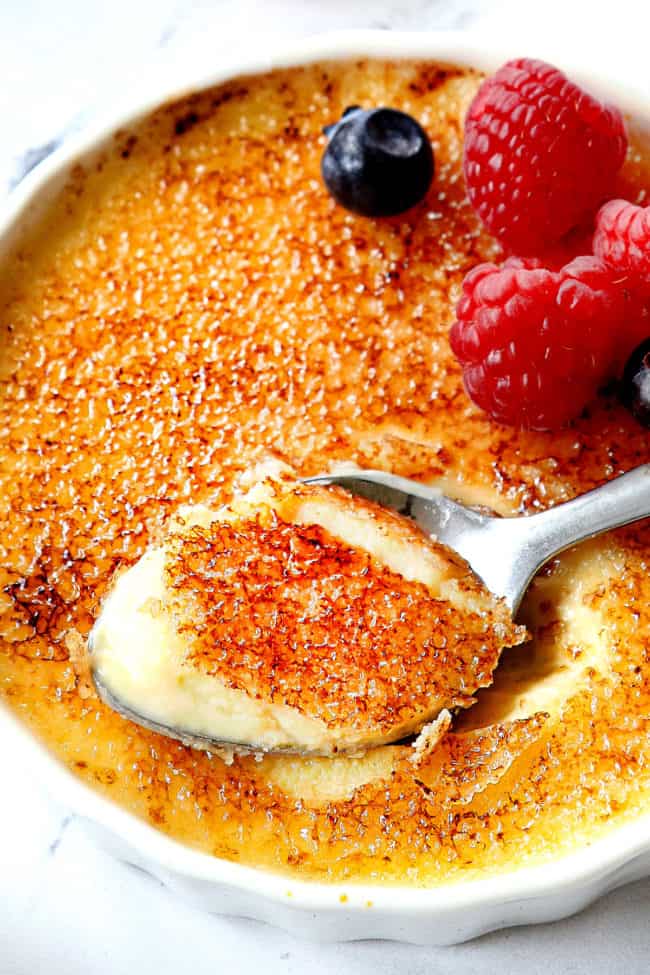
Crème brûlée is one of my favorite desserts of all time! I wanted to bring you this sensational crème brûlée recipe in plenty of time for Valentine’s Day, because it is swoon worthy. The textural difference between the brittle crystalized sugar crust that cracks when you gently tap it with a spoon to reveal the creamiest, velvety smooth, rich, custardy layer is sublime. Top the crème brûlée with fresh berries and you have the most decadent, show stopping dessert.
So, if you love crème brûlée and are looking for the best, easy, most foolproof crème brûlée recipe – this is it! It’s every bit as fabulous as any restaurant version I’ve tried, at a fraction of the price for 6! This classic French dessert may look fancy and intimidating, but I promise it’s easier to make than you think! After I made it once, I had it memorized and whipped it out in minutes the next day so I could experiment with the boiler brûlée (as opposed to torch) method. Here’s what you should know:

WHAT IS CREME BRÛLÉE?
Pretty much the creamiest dessert on the planet! Crème brûlée is an easy dessert served in individual ramekins with a rich custard base made out of eggs, sugar, heavy cream and vanilla. The topping is made out of a thin layer of granulated sugar which is caramelized with a torch to create textually contrasting hard candy-like shell.
There are two methods for making the custard. In the “hot” custard method, egg yolks are whisked with sugar over a double broiler then heavy cream and vanilla are added. In this recipe, we are using the easier “cold” custard method in which the egg yolks and sugar are whisked together off heat and then warmed cream is gently whisked in. It really is one of the easiest desserts you can make!
WHAT DOES CREME BRÛLÉE MEAN?
Crème brûlée means “burnt cream” in French and is also known as Trinity Cream. Burnt cream is a nod to torching the top of the custard so the custard takes on the appearance of “burnt cream,” although it is actually the sugar that is caramelized and not the custard.
WHAT DOES CREME BRÛLÉE TASTE LIKE?
Crème brûlée is not just any custard! The base of crème brûlée is lusciously creamy which contrasts beautifully with the hardened caramelized sugar topping. The flavor of crème brûlée is something in between vanilla and caramel, with a hint of butterscotch – basically all your favorite flavors wrapped up in one decadent dessert!
Where does creme brûlée come from?
Crème brûlée is the quintessential French dessert, although England and Spain also claim to be the true country of origin. But as they say, the proof is in the pudding, or in this case the custard, because the earliest known recipe for crème brûlée appears in French chef François Massialot’s cookbook in 1691. The name “burnt cream” was used in the 1702 English translation of his recipe.
In Massialot’s recipe and other early versions of crème brûlée, a prepared disk of caramelized sugar was placed directly onto the custard instead of caramelizing the sugar directly on the dessert. The actual burning of the sugar on the top of the custard is said to be invented at Trinity College in Cambridge, England in 1879 when a student branded the school crest into a topping of sugar, thus earing the other popular names of creme brûlée: “Cambridge Cream” and “Trinity Cream.”
Crème brûlée kept a low profile in America until the 1980s until one of New York’s swankiest restaurants, Le Cirque, introduced it to their menu. It then became the darling of the restaurant boom and swept across the nation, being featured on every restaurant menu until it gained mainstream popularity nationwide. Today, crème brûlée is a household name. There is crème brûlée French toast (so good!), crème brûlée flavored ice cream, donuts, cupcakes, and even coffee creamer. But in my opinion, the original crème brûlée in custard form cannot be beat.

Creme Brûlée Ingredients
Let’s take a closer look at what you need to make this recipe (measurements in the printable recipe card at the bottom of the post):
This dessert intimidates many people — but it shouldn’t! You can see from the ingredients list below that this recipe calls for just a handful of ingredients, with heavy cream being the only “special” ingredient.
Here’s what you’ll need to make the best crème brûlée recipe from scratch:

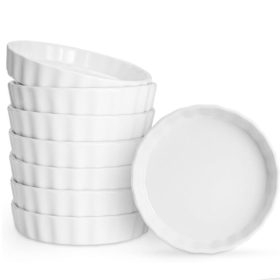
Creme Brûlée Ramekin Recommendations
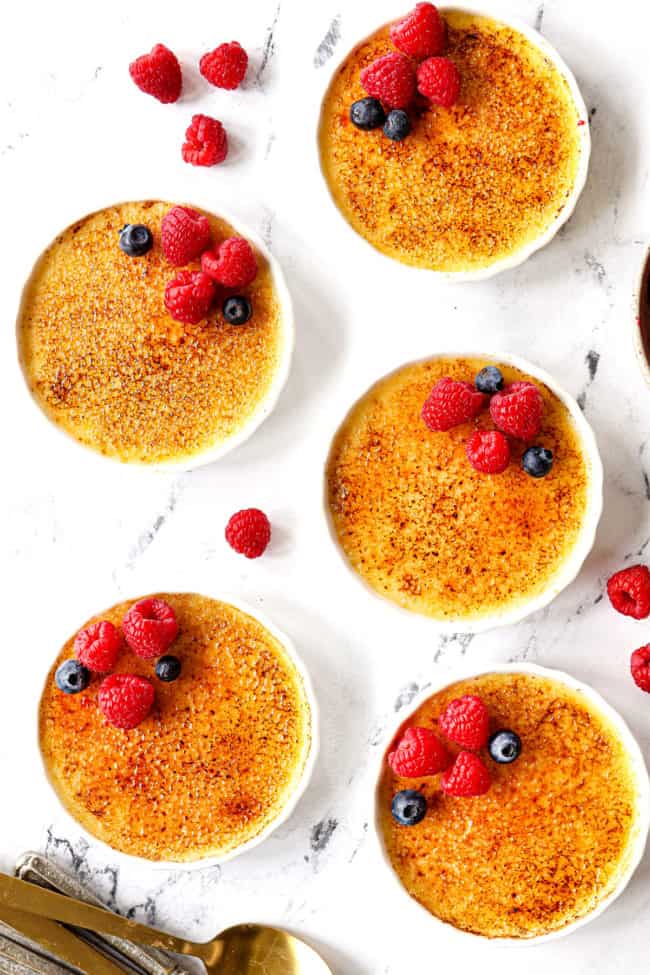
Restaurant-style creme brûlée is served in wide, shallow ramekins which promotes maximum surface area for the brittle sugar crust – YUM.
My favorite size ramekins to use are 5-ounce ramekins (shown in this recipe). I find the ratio of topping to custard the most satisfying. The wide surface means more caramelized sugar without the custard being too thin. I suggest these 5 ounce ramekins if you are purchasing them anyway. They are an investment, but less expensive than purchasing multiple crème brûlée orders at a restaurant and you can use them again and again!
Can I use a different size?
The good news is, you can pretty much use any ramekin size you have. If you have 4-ounce ramekins, use those, if you have 6-ounce ramekins, use those! You will need enough ramekins to hold 30 ounces of liquid.

How to Make Crème Brûlée
Let’s take a closer look at how to make this recipe with step-by-step photos (full recipe in the printable recipe card at the bottom of the post):
Making crème brûlée from scratch is incredibly easy, but you do need to follow the recipe closely to achieve perfect results. Here’s an overview of how to make crème brûlée:
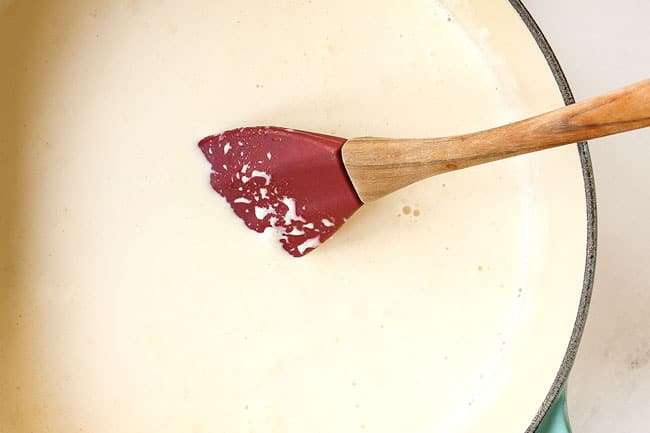
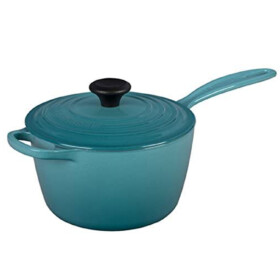
Step 1: Warm the Heavy Cream
- Combine the heavy cream and salt in a saucepan. Place it over medium heat and bring the cream just to a simmer. Once simmering, remove from the heat and whisk in the vanilla.
- Tip: Let the heavy cream cool for 10 minutes. This helps prevent the egg mixture from curling. While the cream is cooling, you can beat the eggs and sugar and line the ramekins in a roasting pan.
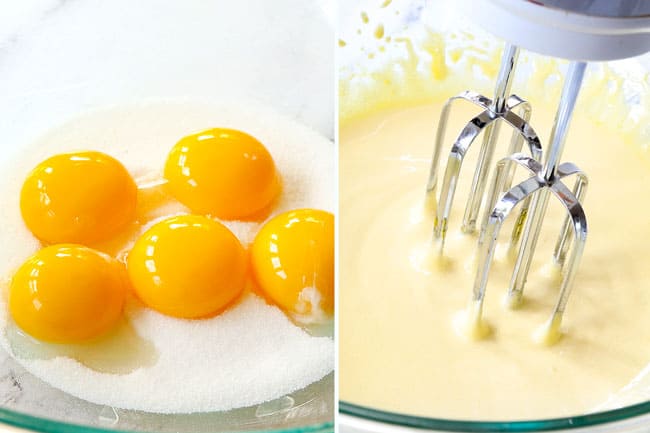
Step 2: Beat eggs and sugar
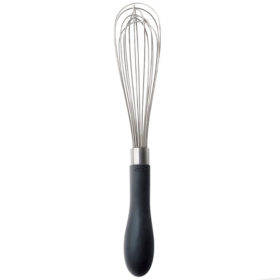
- Add the egg yolks and ½ cup granulated sugar to a mixing bowl. Beat on medium speed for 2 minutes. If you don’t have an electric mixer, you can whisk by hand – it will just take a little more elbow grease.
- Tip: Keep those leftover egg whites. Leftover egg whites can be stored in a sealed container and refrigerated for up to 4 days OR they can be frozen for several months. (Use an ice cube tray if you want to keep them in individual, easy-to-measure portions.) Use them for omelets, soufflé, angel food cake, pavlova, royal icing or candied nuts.
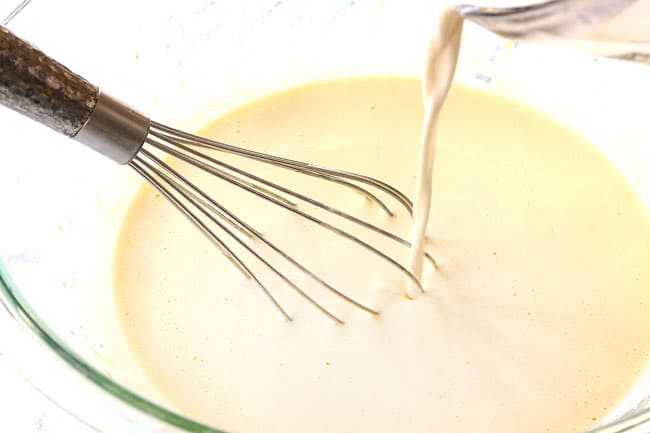
Step 3: Temper the Egg Yolks
- This step is key to the success of your entire crème brûlée recipe, but don’t worry, it’s easy! You can’t just add the warmed heavy cream to the egg yolk and sugar mixture all at once or the eggs will scramble. Instead, we will temper the egg yolks, which simply means, slowly raising the temperature of the egg yolks by whisking in a little warmed cream at a time. It is best to go slow and gradually whisk in a little cream and then a little more and then a little more before adding the rest- but always keep that whisk moving!
- Tip: For smooth crème brûlée, skim the foam off. After whisking the cream and eggs together, your custard will be foamy on top. Skim off the foam otherwise the bubbles will rise to the top of the crème brûlée once baked and create a bumpy texture.
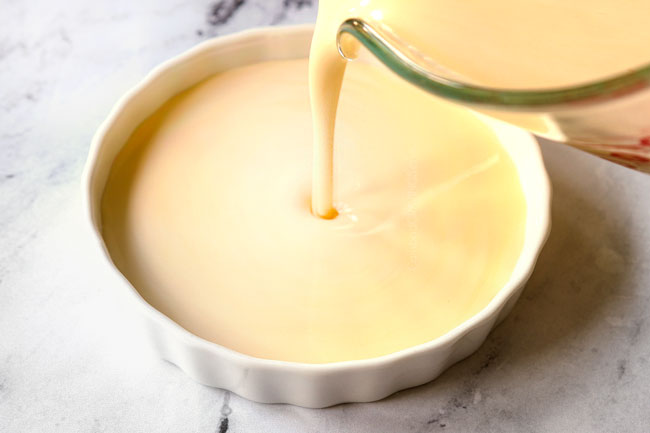
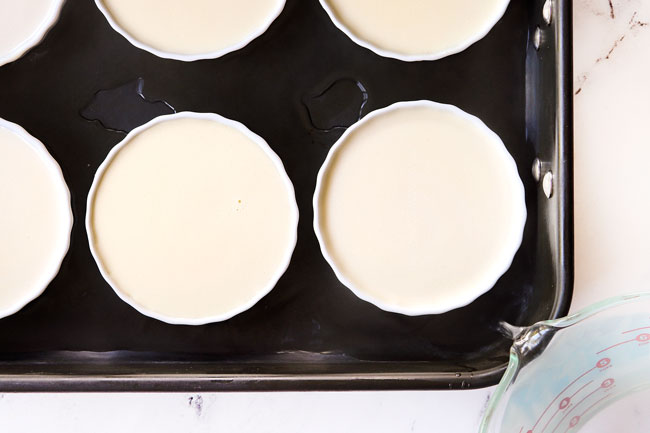
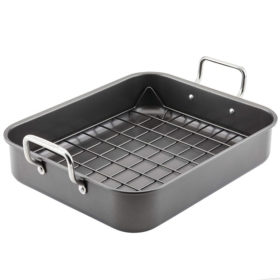
Step 4: Prepare the Crème Brûlée for Baking
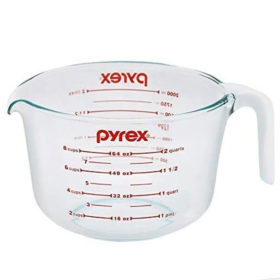
- Transfer the custard to a liquid measuring cup (or pitcher) so it’s easy to pour. Divide the custard between 6-8 ramekins (depending on size).
- Place the ramekins into a roasting pan with high sides. Carefully pour boiling water or just-off-the-boil water into the pan around the custard until it reaches about ¾ up the sides of the ramekins.
How to carefully add the hot water bath
You don’t want any water splashing onto your custards from the water bath so here are 4 tips:
- Place the pan with the custards in the oven and then fill it with water
- Use a pitcher or liquid measuring cup
- Rest the spout on the corner of the roasting pan
- Add the water very slowly
Why use a water bath for crème brûlée?
A hot water bath is used to cook custards in the oven to create a humid environment which helps the custards cook evenly and prevents curdling or cracking. The proteins in the eggs are very heat sensitive and need to be cooked with gentle heat to keeps the eggs soft and smooth. A water bath insulates custards from the direct heat of the oven because the water can’t exceed 212°F, unlike the air in a 350°F oven.
Step 5: Bake the Crème Brûlée
The depth of the ramekins will determine how long it takes for the custards to bake. Shallow 5- and 6-ounce ramekins that are less than 1 inch deep will take about 25 or 30 minutes. Deeper, narrower ramekins, about 2 inches deep, will require 40-50 minutes.
4 Ways to tell when the custard is done baking:
- Temperature: No matter what size of ramekin you use, you can ensure the custard is the perfect temperatures if you use an instant read thermometer which should register 170 degrees F.
- Consistency: If you don’t have a thermometer, just pay attention to the “jiggle.” You want the top of the custard to be set so it’s not liquidly, but you still want it to wobble when moved from side to side. The custard will continue to firm up as it cools which will remove the jiggle. If the sides jiggle while the center sloshes a bit, it’s not ready.
- Touch: When you lightly touch the center of a custard (without breaking through the surface), it should spring back just a bit, leaving your finger mostly clean.
- Appearance: The custard should have an even, color across the surface without any wet spots. The entire surface should look glossy.
Signs that you’ve over-baked your custards:
- If the custards don’t jiggle or barely jiggle, they are over-baked. They will still be delicious, but they will be less creamy and denser, and taste slightly eggy. Overbaked custards should be eaten soon after they’re chilled because they will continue to firm up in the oven.
- If the custards have actually begun to rise in the middle, then the eggs are cooked and they cannot be salvaged.
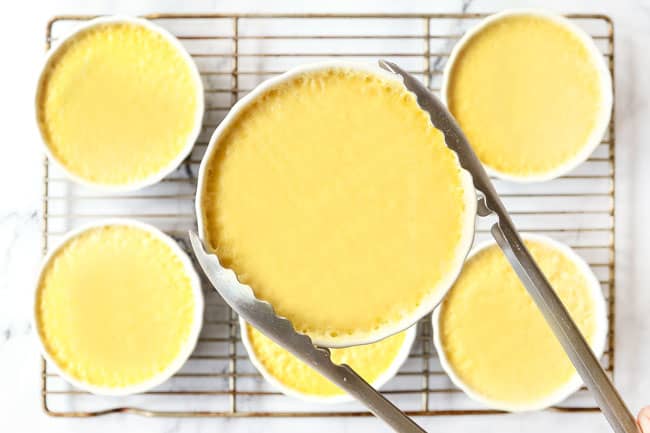
Step 6: Let the Crème Brûlée Cool
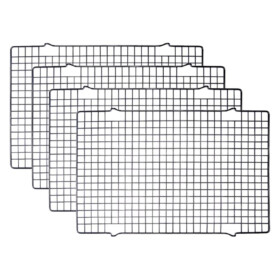
Remove the ramekins from the oven and carefully remove them from the water bath. Let the crème brûlée cool on a wire rack at room temperature for 1 hour. Then, pop the ramekins into the fridge for at least 4 hours but best if overnight.
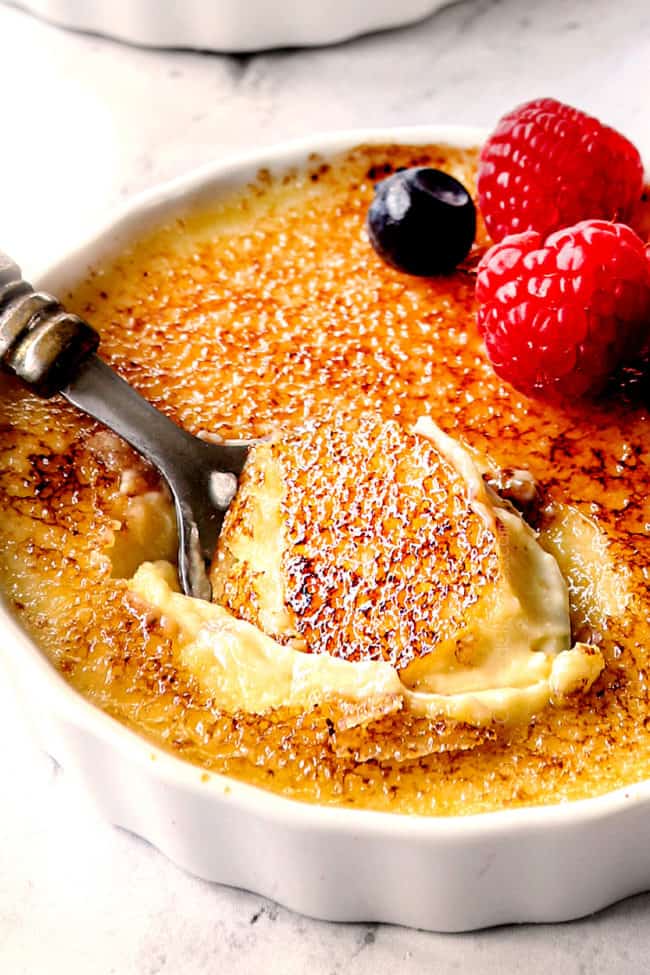
Step 7: Brûlée the Tops
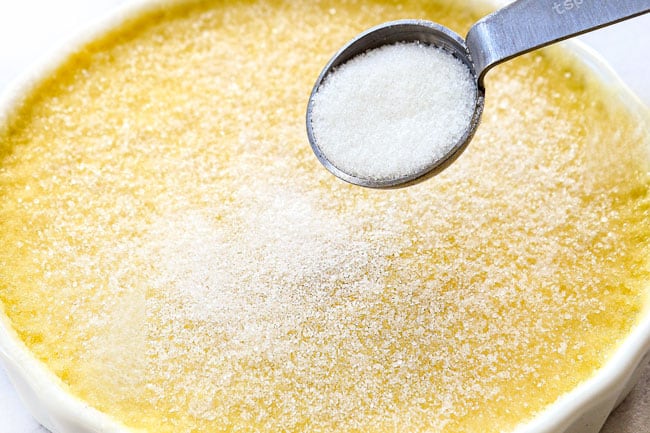
Now comes the fun part: caramelizing the tops of the custard! This step is super simple, but elevates the recipe from custard to crème brûlée! It involves sprinkling the surface of each custard with granulated sugar and using a torch to first melt the sugar then caramelize the sugar into a solid blanket of YUM.

Tips for the Perfect Caramelized Topping:
- Cover custard completely with sugar: You want to cover the top of each custard completely with a thin layer of sugar, because any exposed custard will curdle when you torch it. The amount of sugar will depend on the width of your ramekins. Narrow, deep ramekins will require closer to 1 teaspoon of sugar whereas wider, shallow ramekins will require closer to 2 teaspoons of sugar.
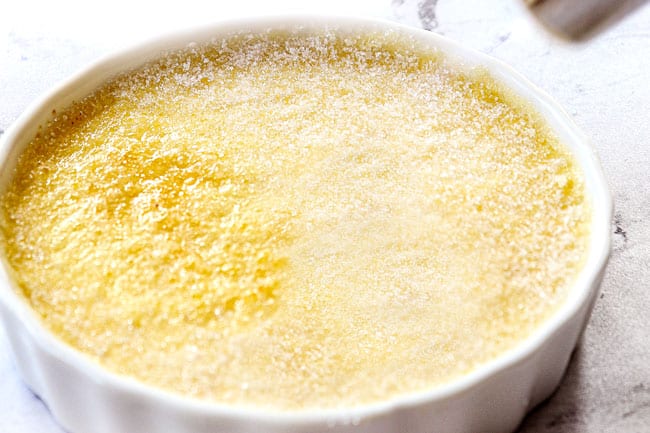
- Evenly distribute sugar. The key to the perfect topping is to create a thin, even layer of sugar. To accomplish this, swirl the sugar all around the ramekin so it reaches edges then shake the ramekins from side to side to evenly distribute the sugar. ‘
How to Make Crème Brûlée with a Torch
Hold the creme brulee torch torch about 4 to 5 inches from the sugar, and maintain a constant, slow, side to side motion. You should see the sugar melt first. If there is a patch of raw sugar, continue to torch it from side to side until it melts.
Next, it’s time for the sugar to caramelize. This process should be gradual, using a medium strength flame (you can dial the flame up or down) to create the most uniform caramelized topping. A stronger flame will require less time but is guaranteed to result in burnt speckles or entire burnt patches. Instead, patience, with a medium flame, is the name of the game for the most gorgeous golden curst.
One last hint is to stop torching just before the desired degree of doneness is reached because the sugar will continue to cook for a few seconds after the flame has been removed. If you remove the flame and still want deeper caramelization, then just go back over the surface again.
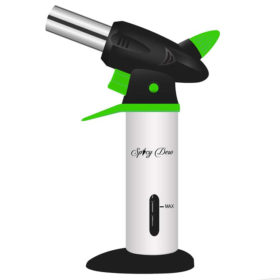
Creme Brûlée Torch Recommendation
The sugar topping needs direct high heat in order to caramelize into a solid layer. I highly recommend a professional kitchen torch (I use this one) for this purpose because you can control the heat source, which means you deliver perfectly uniform, golden sugar shells every time, plus it’s awesome for my s’mores molten lava pies, and s’mores Nutella pie! A kitchen torch is an investment but it pays for itself if you make the crème brûlée more than once this year!
How to make creme brûlée without a torch
Let’s take a closer look at how to make this recipe with step-by-step photos (full recipe in the printable recipe card at the bottom of the post):
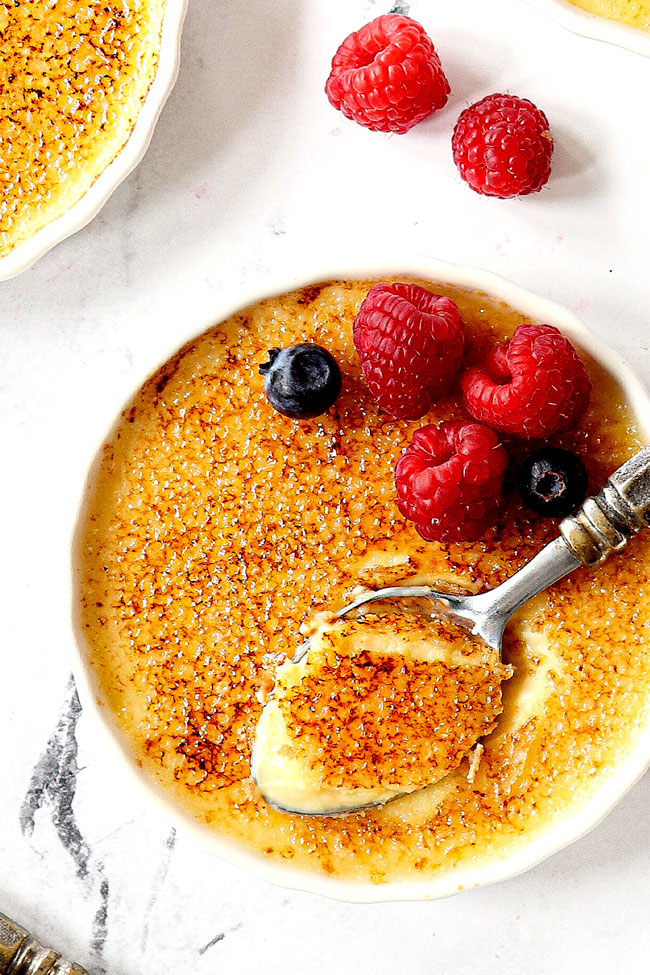
No kitchen torch? No problem! Many people shy away from making crème brûlée because they don’t have a kitchen torch. While I highly recommend a kitchen torch for the most even caramelization, you can also get by using your oven broiler, your crème brûlée will just look a little more rustic with spatters and clusters of dark sugar and maybe slightly blackened round the edges – but you will still be rewarded with that coveted hard candy shell!
To brûlée in your oven, arrange a rack in the oven in the highest position. I suggest only broiling half of your creme brulee at a time so you can rotate the ramekins more easily.
Place the ramekins on a baking sheet and place on the top rack and then turn on the broiler. You don’t want to preheat the broiler because we want to gradually melt the sugar on the top before it gets caramelized. By placing the creme brulee in a cold oven, they also don’t get too warm throughout and caramelize more evenly. It is much easier to burn the creme brulee if you place them beneath a preheated broiler.
Because the broiler is not preheated, the creme brulee will take closer to 5-10 minutes (mine took 7 minutes, not pictured). You’ll want to rotate the ramekins frequently with tongs so that they broil evenly. Watch the crème brûlée very closely towards the end because the tops can go from caramelized to burnt in a matter of seconds. Remove them from the oven when the tops are golden brown and bubbling. If you remove them from the oven and find you want more caramelization, just pop them back in.
Creme Brulee Recipe tips

MAKE AHEAD TIPS FOR CRÈME BRÛLÉE
Crème brûlée is a fabulous make ahead dessert because it can be prepared almost entirely ahead of time, or you can prepare it in stages. Here are options for making ahead:
•Uncooked custard: can be covered and stored in the refrigerator for 3 days before baking. You can either store it in one container or go one step further and divide it between ramekins (make sure to cover all of the ramekins with plastic wrap as well).
•Baked custards WITHOUT brûléed sugar topping: can be covered and stored in the refrigerator for up to 4 days.
•Crème brûlée (baked custards WITH brûléed sugar topping): If prefer more lukewarm crème brûlée, then let custards sit for 30 minutes at room temperature before serving. Alternatively, if you prefer chilled crème brûlée, store the them in the refrigerator for up to 30 minutes before serving. Do not refrigerate any longer after brûléeing the tops or you risk the sugar absorbing moisture and the brittle top softening. Unfortunately, it doesn’t work well to torch the top again to try crisping it back up.

How to Serve Crème Brûlée
This easy crème brûlée recipe is perfect as is, but you can also garnish it with berries, whipped cream, and more. Here are a few serving suggestions for crème brûlée:
Is creme brûlée served cold?
I personally find frigid crème brûlée not nearly as appetizing and am always disappointed when it is served this way. This had me wondering why sometimes crème brûlée at a restaurant is some-what chilled and sometimes it is chilled throughout? So, is creme brûlée served hot or cold?
The temperature of the creme brûlée depends on if it is being served immediately after the top has been caramelized (some-what chilled) or if has been stuck back in the refrigerator after it’s been brûléed (chilled throughout).
The best crème brûlée will be freshly torched and only somewhat chilled. This caramelizing process warms the top of the custard, while leaving the center slightly cool. I, however, prefer to take the chill off even more by letting the custard sit for 15 minutes or so at room temperature before torching.
Crème brûlée can also be served cold if that is your personal preference. To serve cold crème brûlée, place it back in the refrigerator for up to 30 minutes after torching. For the hardest, crunchiest topping, however, crème brûlée is best served right after torching.

Easy Creme Brûlée Storage
How Long Does Crème Brûlée Last?
The baked custard will last up to three days in the fridge. Once torched, it’s best enjoyed right away as the topping becomes less crisp over time, but it may be refrigerated for 30 minutes without losing the crunchy topping.
Can I Freeze Crème Brûlée?
No, I do not recommend freezing crème brûlée. Custard does not freeze well, it has a tendency to split and the topping will become soft when thawed.
Creme Brulee Recipe FAQs
This is SO easy to fix. A little burnt is passable and even pleasurable to some, but if your top is scorched, then you can fix it by scraping off the top layer, adding the top sugar layer again and repeating the brûlée process.
Creme brûlée is a type of custard, but has some distinct characteristics that set it apart from other custard desserts. What makes creme brûlée unique is the process of caramelizing the sugar topping just before serving, creating a brittle, caramelized crust on top of the smooth custard. This combination of a creamy custard base with a crisp, caramelized sugar topping is what defines creme brûlée and makes it a beloved dessert. Traditional custard, on the other hand, doesn’t have this sugary crust and is usually served in a more pudding-like form.

WANT TO TRY THIS RECIPE?
PIN IT to your recipe BOARD TO SAVE FOR LATER!
FIND ME ON PINTEREST FOR MORE GREAT RECIPES! I AM ALWAYS PINNING :)!
©Carlsbad Cravings by CarlsbadCravings.com


Easy Creme Brulee Recipe
Save This Recipe To Your Recipe Box
You can now create an account on our site and save your favorite recipes all in one place!
Ingredients
Custard
- 2 1/2 cups heavy whipping cream
- 1/4 teaspoon salt
- 5 large egg yolks at room temperature
- 1/2 cup granulated sugar
- 1 1/2 teaspoons pure vanilla extract
ADD LATER FOR TOPPING:
- 1/4 cup granulated sugar
Instructions
CUSTARD
- Preheat the oven to 325 degrees F.
- Add the heavy cream and salt to a medium saucepan and heat over medium heat just until simmering. As soon as it begins to simmer (don’t let it boil!), remove from heat and stir in the vanilla extract. Set aside to cool for 10 minutes.
- Meanwhile, bring about 5 cups of water to a boil on the stovetop to use later in the water bath (I use a large saucepan so it boils more quickly). Place either (8) 4-ounce ramekins, (6) 5-ounce ramekins (my fav), or (5) 6-ounce ramekins in a roasting pan or two smaller baking pans; set aside.
- Add the egg yolks and ½ cup granulated sugar to a mixing bowl. Beat on medium speed for 2 minutes.
- Using a hand whisk and whisking constantly, slowly drizzle ¼ cup (eyeball it) warmed heavy cream into the egg mixture; whisk until completely incorporated. Repeat with another ¼ cup warmed cream. Once combined, slowly whisk in the remaining warmed cream until combined, whisking constantly.
- Pour the custard into a large liquid measuring cup (or pitcher)— this makes filling the ramekins much easier. Evenly divide the custard between the ramekins. Transfer boiling water to a separate (or cleaned) liquid measuring cup or pitcher.
- Transfer the roasting pan with custard to the middle oven rack then immediately pour the hot water into the pan around the custard until it reaches about ¾ up the sides of the ramekins. (Place the spout on the corner of the roasting pan and pour slowly so water doesn’t splatter onto the custard.)
- Bake at 325 degrees F for 25-45 minutes or until the center registers 170 degrees F on an instant read thermometer. The custard should be barely set, not liquid, but still jiggly all over. The baking time will depend on the depth of the ramekins; shallow 1-inch ramekins (5-6 ounces) will take closer to 25 minutes, deep 2-inch ramekins (4 ounces) will take closer to 45 minutes).
- Remove the custards using tongs to a cooling rack and let cool to room temperature, 1-2 hours. Cover custards with plastic wrap and refrigerate for 4 hours up to 3 days before adding the sugar topping.
SUGAR TOPPING PREP
- For lukewarm crème brûlée (my preference) that is being TORCHED, remove the custard from the refrigerator 20 minutes prior to caramelizing the sugar on top OR wait 20 minutes after caramelizing to serve. Do not remove custard from the fridge earlier if oven broiling (the oven will sufficiently heat the custard up).
- Dab the tops of the custards with paper towels to remove any condensation. Create the sugar crust by sprinkling 1-2 teaspoons over the tops of each custard. Use less sugar for narrow ramekins and 2 teaspoons for wide ramekins. Swirl the sugar then shake the ramekin from side to side until the sugar is evenly distributed.
TO TORCH BRULEE
- Hold the torch about 4 to 5 inches from the sugar, and use a medium power flame. Maintain a constant, slow, side to side motion until the sugar melts and then becomes golden. Serve crème brûlée immediately for best results (crunchiest topping) or store in the refrigerator for up to 30 minutes before serving.
TO OVEN BRULEE
- I suggest only broiling half of the custards at once so they are easier to rotate for more even caramelization. Arrange a rack in the oven in the highest position. Place the ramekins on a baking sheet then place on the rack and turn on the broiler (DO NOT PRE-HEAT BROILER).
- Broil for 5 to 10 minutes, rotating the ramekins frequently with tongs so that they broil evenly. Watch closely towards the end so they don’t burn. Remove from the oven when the tops are golden brown and bubbling. Serve crème brûlée immediately for best results (crunchiest topping) or store in the refrigerator for up to 30 minutes before serving.
Video
Notes
Tips for Success
- Ramekins: I personally prefer 5-ounce ramekins (shown in this recipe). I find the ratio of topping to custard the most satisfying. The wide surface area means more caramelized sugar without the custard being too thin. I suggest these 5 ounce ramekins if you are purchasing them anyway. They are an investment, but less expensive than purchasing multiple crème brûlée orders at a restaurant and you can use them again and again! That being said, if you already have 4 ounce or 6 ounce ramekins, those will also work! You will need enough ramekins to hold 30 ounces of liquid.
- Crème Brulee Torch: I highly recommend a professional kitchen torch (I use this one) because you can control the heat source, which means you deliver perfectly uniform, golden sugar shells every time, plus it’s awesome for my s’mores molten lava pies, and s’mores Nutella pie! A kitchen torch is an investment but it pays for itself if you make the crème brûlée more than once this year! If you don’t have one, don’t worry, you can still oven broil, your crème brûlée will just look a little more rustic with spatters and clusters of dark sugar – but you will still be rewarded with that coveted hard candy shell!
- Don’t forget the butane: If you invest in a kitchen torch, then it will also need butane which you can order online or pick up at Home Depot. I don’t want you to be excited to unwrap and use your shiny new toy only to find it doesn’t have fuel!
- How to bring eggs to room temperature: Room temperature eggs combine easier with the sugar for a creamier filling. To quickly bring eggs to room temperature, fill a large bowl with warm water (not hot) and carefully add eggs. Let sit for 10-15 minutes.
- Keep those leftover egg whites: Leftover egg whites can be stored in a sealed container and refrigerated for up to 4 days OR they can be frozen for several months. (Use an ice cube tray if you want to keep them in individual, easy-to-measure portions.) Use them for omelets, soufflé, angel food cake, pavlova, royal icing or candied nuts.
- For smooth crème brûlée, skim the foam of: This doesn’t affect the flavor, just appearance, so it’s not crucial. After whisking the cream and eggs together, your custard will be foamy on top. Skim off the foam or these bubbles will rise to the top of the crème brûlée once baked and create a bumpy texture.
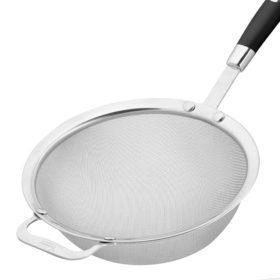
- Strain custard if needed: If you slowly whisk in the cream to the eggs, you shouldn’t need to strain the custard. If you notice that your custard isn’t luxuriously smooth after adding all of the cream, however, then you will want to strain it. To do this, simply place a fine mesh sieve over a liquid measuring cup or pitcher – whatever you are going to use to pour the custard into the ramekins.
- Cover custard completely with sugar: You want to cover the top of each custard completely with a thin layer of sugar, because any exposed custard will curdle when you torch it.
- Remove torch before desired doneness: Take care to stop torching just before the desired degree of doneness is reached because the sugar will continue to cook for a few seconds after the flame has been removed. If you remove the flame and still want deeper caramelization, then just go back over the surface again.
- What if I burn my sugar topping? This is SO easy to fix. A little burnt is passable and even pleasurable to some, but if your top is scorched, then you can fix it by scraping off the top layer, adding the top sugar layer again and repeating the brûlée process.
MAKE AHEAD TIPS
Crème brûlée is a fabulous make ahead dessert because it can be prepared almost entirely ahead of time, or you can prepare it in stages. Here are options for making ahead:- Uncooked custard: can be covered and stored in the refrigerator for 3 days before baking. You can either store it in one container or go one step further and divide it between ramekins (make sure to cover all of the ramekins with plastic wrap as well).
- Baked custards WITHOUT brûléed sugar topping: can be covered and stored in the refrigerator for up to 4 days.
- Crème brûlée (baked custards WITH brûléed sugar topping): If prefer more lukewarm crème brûlée, then let custards sit for 30 minutes at room temperature before serving. Alternatively, if you prefer chilled crème brûlée, store the them in the refrigerator for up to 30 minutes before serving. Do not refrigerate any longer after brûléeing the tops or you risk the sugar absorbing moisture and the brittle top softening. Unfortunately, it doesn’t work well to torch the top again to try crisping it back up.
Storage
The baked custard will last up to three days in the fridge. Once torched, the crème brûlée is best enjoyed right away as the topping becomes less crisp over time, but it may be refrigerated for 30 minutes without losing the crunchy topping.Want To Make This Recipe?

Did You Make This Recipe?
Tag @CarlsbadCravings and Use #CarlsbadCravngs
Leave a Review, I Always Love Hearing From You!
Carlsbad Cravings© Original


Lesli Schei says
My daughters love creme brûlée but I have always been too scared to make it… until now! We made this for our family Valentines Day dinner and it was perfect! So easy to make, and silky smooth inside with that crunchy sugar top. Thanks for yet another amazing recipe!
Jen says
YAY! Thanks so much for the awesome review Lesli, I’m so pleased these were accessible and turned out perfect!
Becca Skaggs says
Made this for the 2nd time last night…everyone I’ve made it for say it’s the BEST creme brulee they’ve ever had and i have to agree. So rich and creamy with simple ingredients and easy to follow instructions. Thank you!!
Jen says
Thanks for the awesome review Becca! I’m thrilled this crème brûlée recipe is a repeat favorite! One of these days you’re going to have to make them just for yourself 😉 xo
Cheryl Ellenburg says
Hi jennifer,
I just found your web site and can’t wait to start using your fabulous recipes. In fact, I plan to make your Creme Brulee for Christmas. I’ll let you know the results. I do have 1 question. I have had Creme Brulee with a flaming liquor?. Do you think this takes away from the taste of the original dessert? Also, what type of alcohol is used? Thanks so much.
Jen says
Welcome to my site Cheryl! This is the advice I found: https://cooking.stackexchange.com/questions/7345/can-i-make-cr%C3%A8me-br%C3%BBl%C3%A9e-using-a-flamb%C3%A9 It doesn’t sound like it is easily done!
Katie Vallier says
My custard isn’t setting….not sure if it can be saved! I did one in a small jelly jar size mason jar and then 4 in glass ramekins. The jelly jar actually set but the 4 others are not….
Jen says
Hi Katie, if your smaller one set it sounds like the other containers just need more time?
Patricia Sitongia says
I would like to know if I could double this recipe to make for more people. I have made it once and turned out perfect! Or do you think I would heave to make 2 separate recipes? This was a big hit for my family!
Jen says
I’m so pleased it was a hit! You should be able to double the recipe without any problem.
Michelle E says
I made this for the New Year 2022 and it was exceptionally delicious! Not too sweet and was just the perfect sweetness once brûléed! It hasn’t even been a week and I’m already back in the kitchen to make another batch and I have a quick question… I can’t find heavy whipping cream any where and was hoping this recipe would survive if I made homemade heavy cream using milk and butter? Would that suffice for this recipe or do I need it to be actual whipping cream?
My family and I will enjoy this recipe for years to come! Carlsbad Cravings has now become apart of our family table! Thank you for sharing this almost magical recipe!
Jen says
Thank you for your thoughtful comment Michelle, I’m honored this recipe is a new favorite family tradition and that you have been loving my other recipes! While I haven’t personally tried homemade whipping cream in this recipe, I imagine it will work just fine as the cold butter will help the creme brulee set. Good luck!
Mandy says
Hi Jen,
I usually bake with vanilla bean paste instead of extract for that extra vanilla-y flavour. Would it throw off the consistency of the creme bruleé if I used paste instead of extract or would that swap be okay?
Thanks again! My mom requested this for her birthday dessert, so I’m excited to try it for her 🙂
Jen says
What a fun birthday dessert! Yes, you should be able to use vanilla bean paste without any problem, enjoy!
Susan says
Good morning Jen! I LOVE all your recipes that I have made and they have become favorites as well as you!
I want to make a fancy, easy dessert recipe when my friends come to lunch (which I’m making one of your soups) but one of my friends is dairy free. Could I substitute canned coconut milk for the heavy whipping cream? I’ve never cooked any desserts with dairy free heavy whipping cream but thought you might have some suggestions.
Thank you for any help you can give me; I really appreciate it!
Susan
Jen says
Thank you so much for the kind words Susan! I’m sorry I’m just now getting to your comment as things have been crazy with the move! Yes, you can absolutely make this recipe with full fat coconut milk, enjoy!
Jeanie says
Why does the ingredients list 1/2 cup sugar- as divided, and the recipe says to mix in 1/2 cup sugar?
Jen says
Thanks for catching that, fixed! It was leftover from when I didn’t separate the sugar in the topping.
Carolyn Olson says
Can I use this recipe but make it into a pie instead of individual ramekins?
Jen says
Great question! Yes, you can use a larger ceramic dish and increase the baking time. Enjoy!
Shelby says
Hi Jennifer, do these have to be chilled 4+ hours before bruleeing? Supposed to make these for last minute company tomorrow!
Jen says
Hi Shelby! Sorry for the late response, yes these need to be chilled completely before bruleeing.
Roxanne says
Jen!!! I want to use this on top of cookies to make a creme brulee cookie. Can I cook this on the stovetop?
Jen says
Hi Roxanne! Yes you should be able to! Enjoy!
Carlton Chamblin says
Hi there, thank you for this amazing recipe. I love flavors in my crème brûlée, but I don’t see many people commenting that they’re adding things like cardamom or orange zest, etc. What is your take?
Jen says
Personally, I prefer the classic vanilla flavor to shine in its simple, elegant form, but subtle additions like cardamom or orange zest could definitely be delicious if they’re not overdone. The key is keeping the flavors delicate enough that the creamy custard and caramelized sugar still remain the stars. Please let me know what you try!