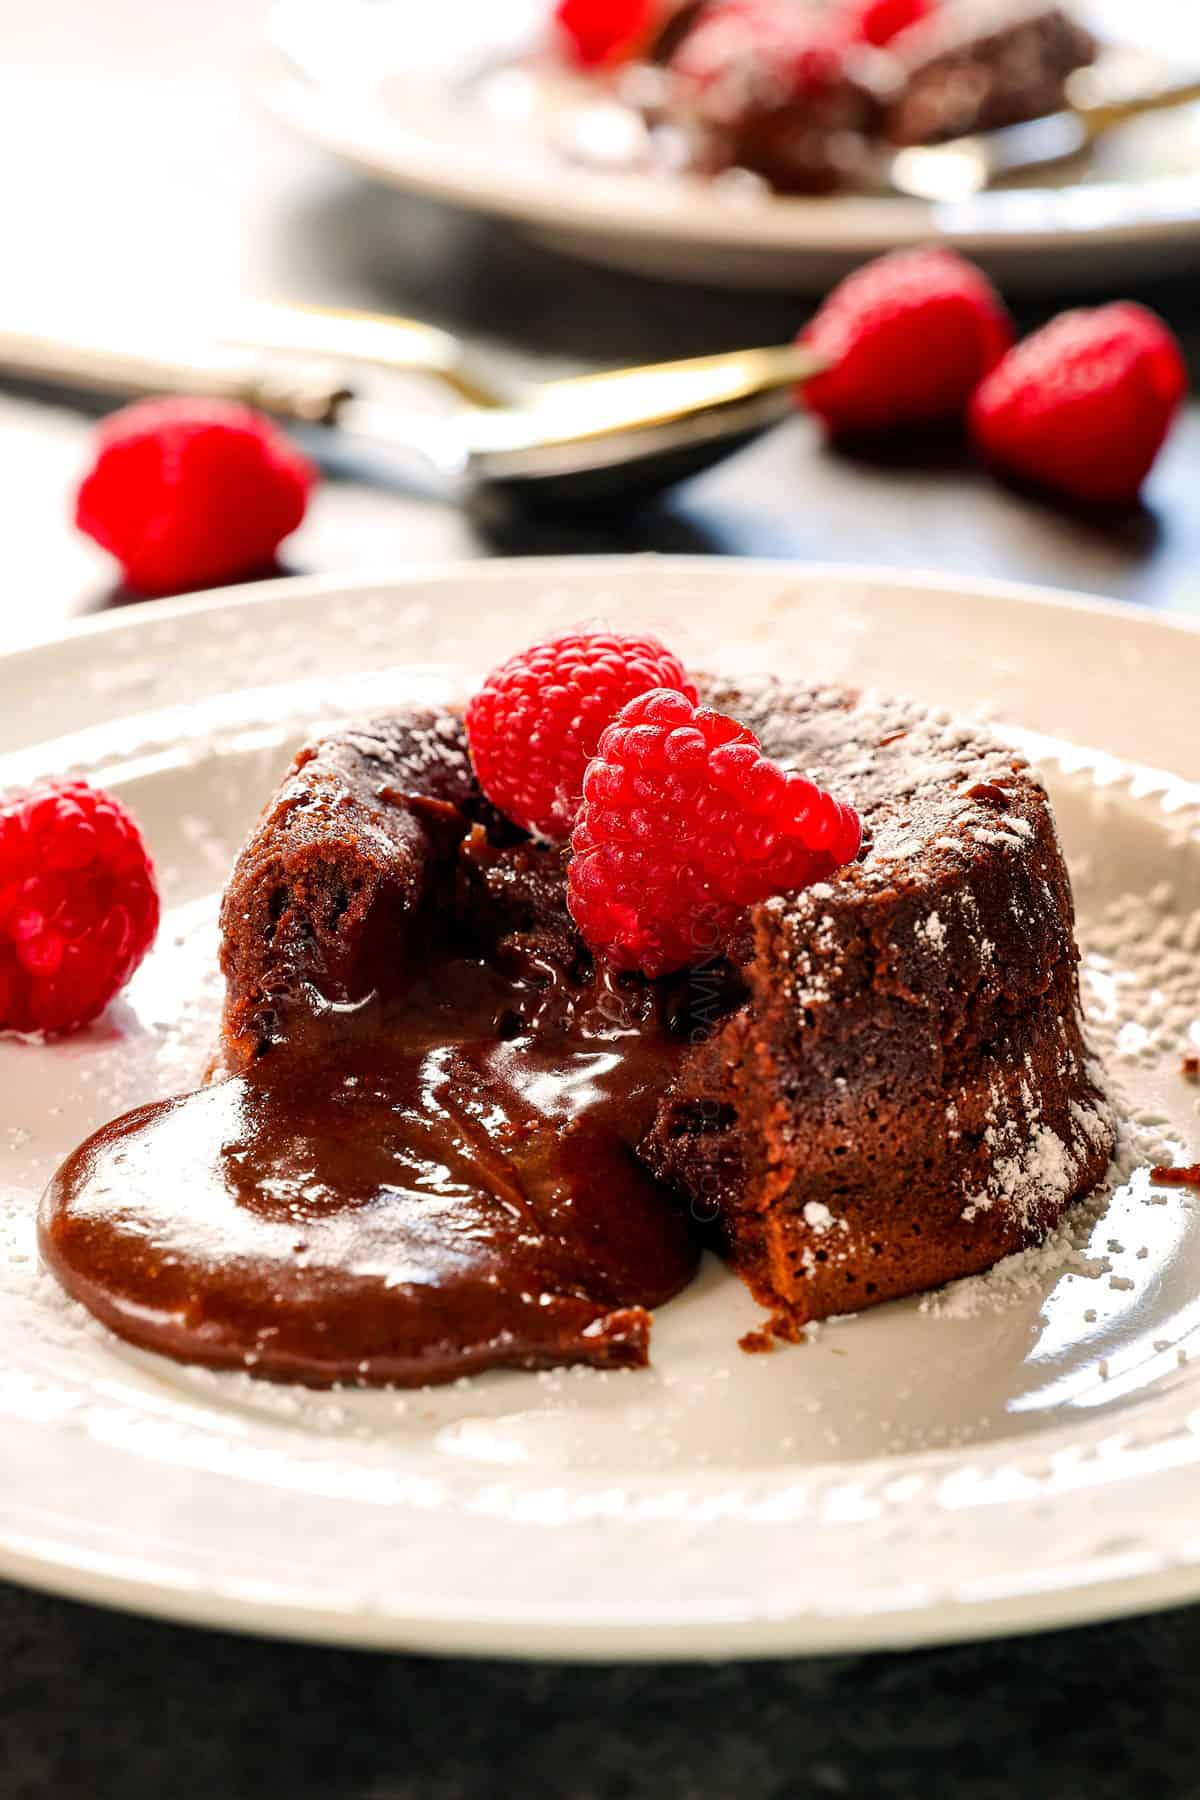
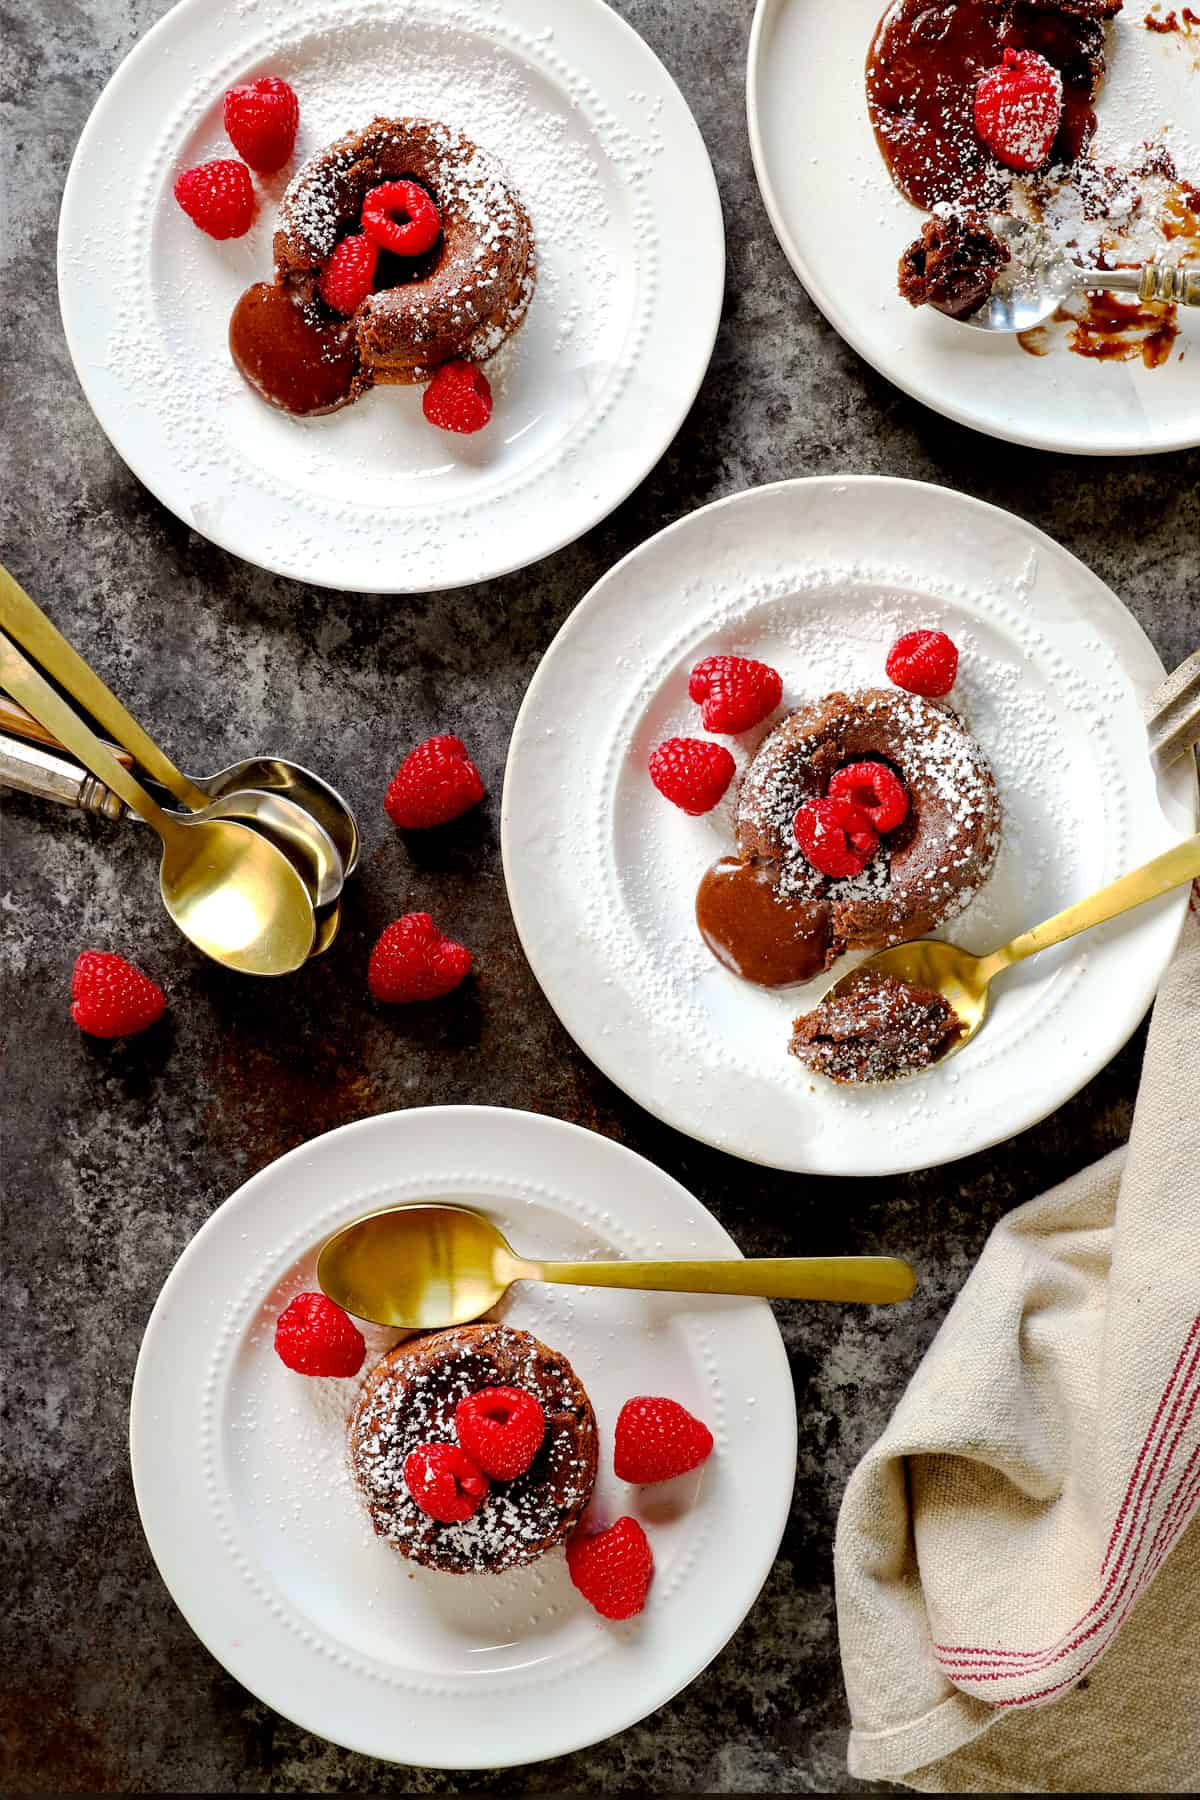
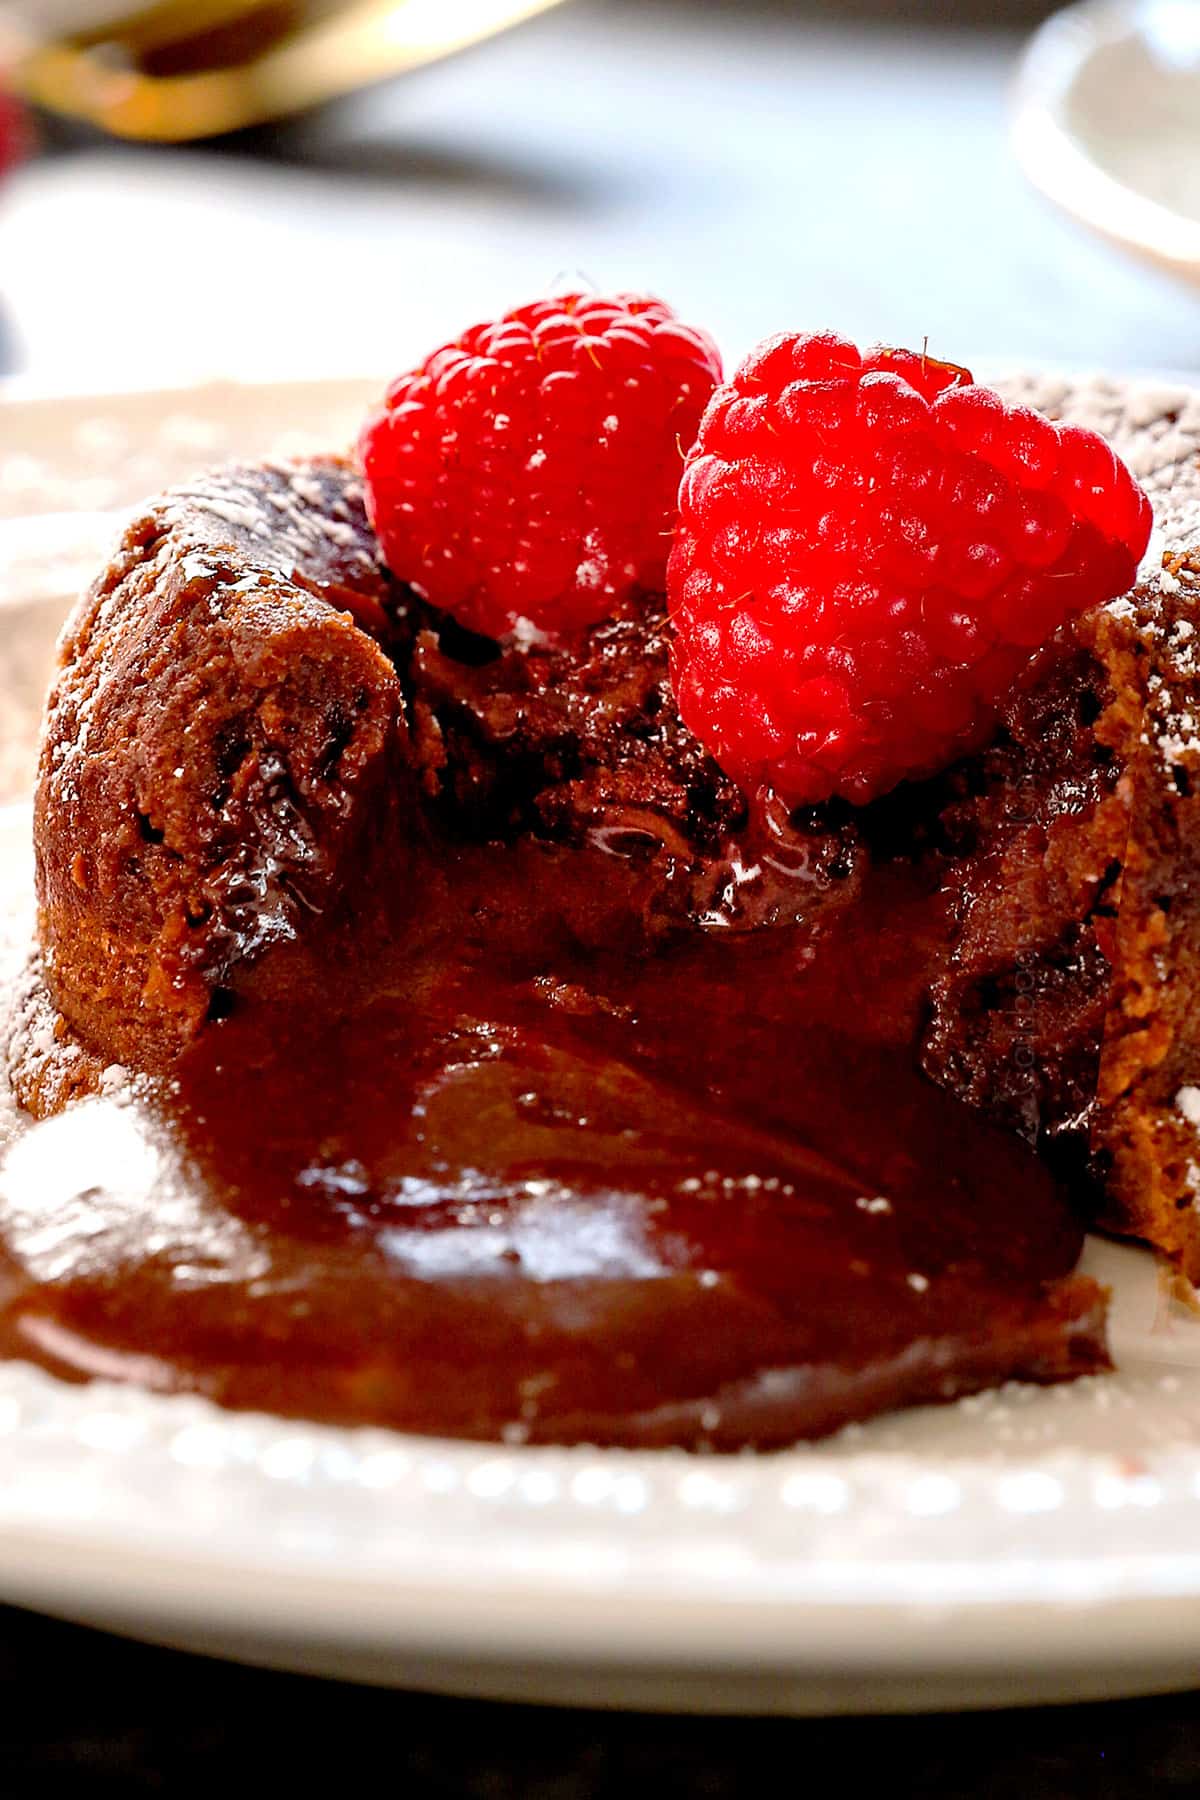
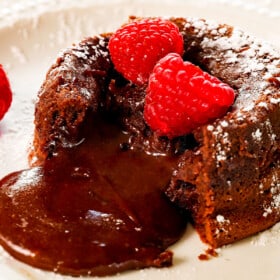
This Chocolate Lava Cake recipe boasts a stunning molten chocolate center but is shockingly easy to make with only 5 ingredients!
These Chocolate Lava Cakes are sure to impress with a rich and decadent cakey outside, and a river of silky, warm chocolate that streams out the center once you slice into it. Best of all, this recipe is shockingly easy to make at home! These Molten Lava Cakes are on your table from start to finish in less than 30 minutes, without any special equipment – just a bowl and a whisk (you can even use a muffin tin instead of ramekins), and 5 pantry friendly ingredients (eggs, powdered sugar, butter, flour, chocolate). You can prep the batter ahead of time and refrigerate then just pop your cakes in the oven for stress free entertaining. Prepare Molten Lava Cakes for holidays, (like upcoming Valentine’s Day!), dinner parties, birthdays, Sunday dinner, movie night or an indulgent late night snack!
For more yummy chocolate, try Chocolate Covered Strawberries, Homemade Hot Chocolate, Chocolate Raspberry Cake and Chocolate Lasagna.
Recipe photos updated 2/1/23 – same great recipe!
WATCH: How to make Lava Cake


What readers are saying about this Chocolate Lava Cake Recipe:
“I don’t usually comment on recipes but this cake was just TOO easy and TOO good to not stop by and say WOW. Amazing cake and really easy to bake.” Jo-Ann
“Just made these for my book club and they were amazing! 5 star!” -Jane
“I made these for Christmas last year and they were a hit!… I’ve tried multiple lava cake recipes before in the past and this one is by far the best—and it’s also so simple. Thanks a million.” – Carly
“…I was amazed at how easy it was. My 3 year old daughter helped me and we had funny making them. The best part was how amazingly delicious they are. So good! So easy! Awesome recipe!!!!!” – Stacy
“I’ve tried three different recipes in preparation for the gourmet club dinner that I will be hosting in December, and my search is over – thank you! Your recipe worked perfectly for me, was delicious and is sure to impress my guests. I can’t thank you enough for sharing.” – Barb (From Ohio)

Why You’ll Love These Lava Cakes
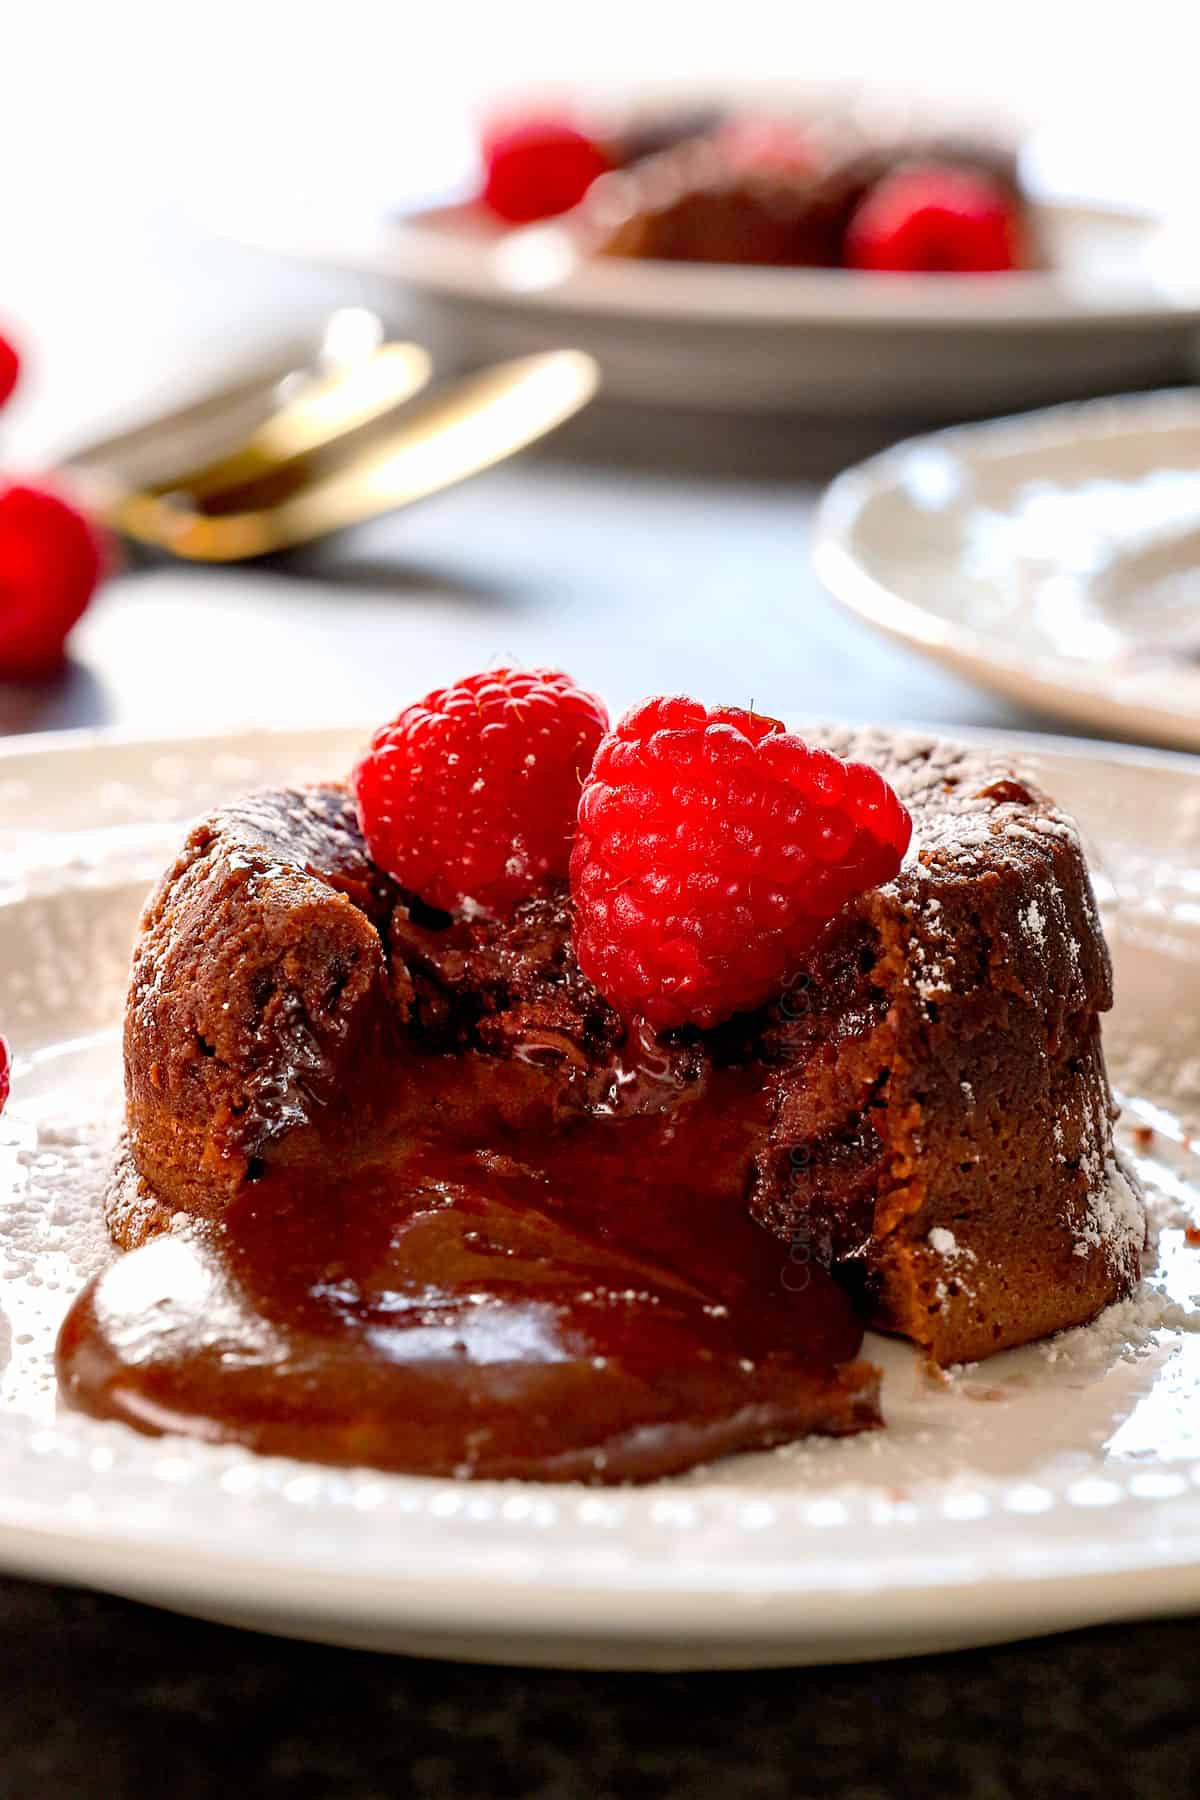
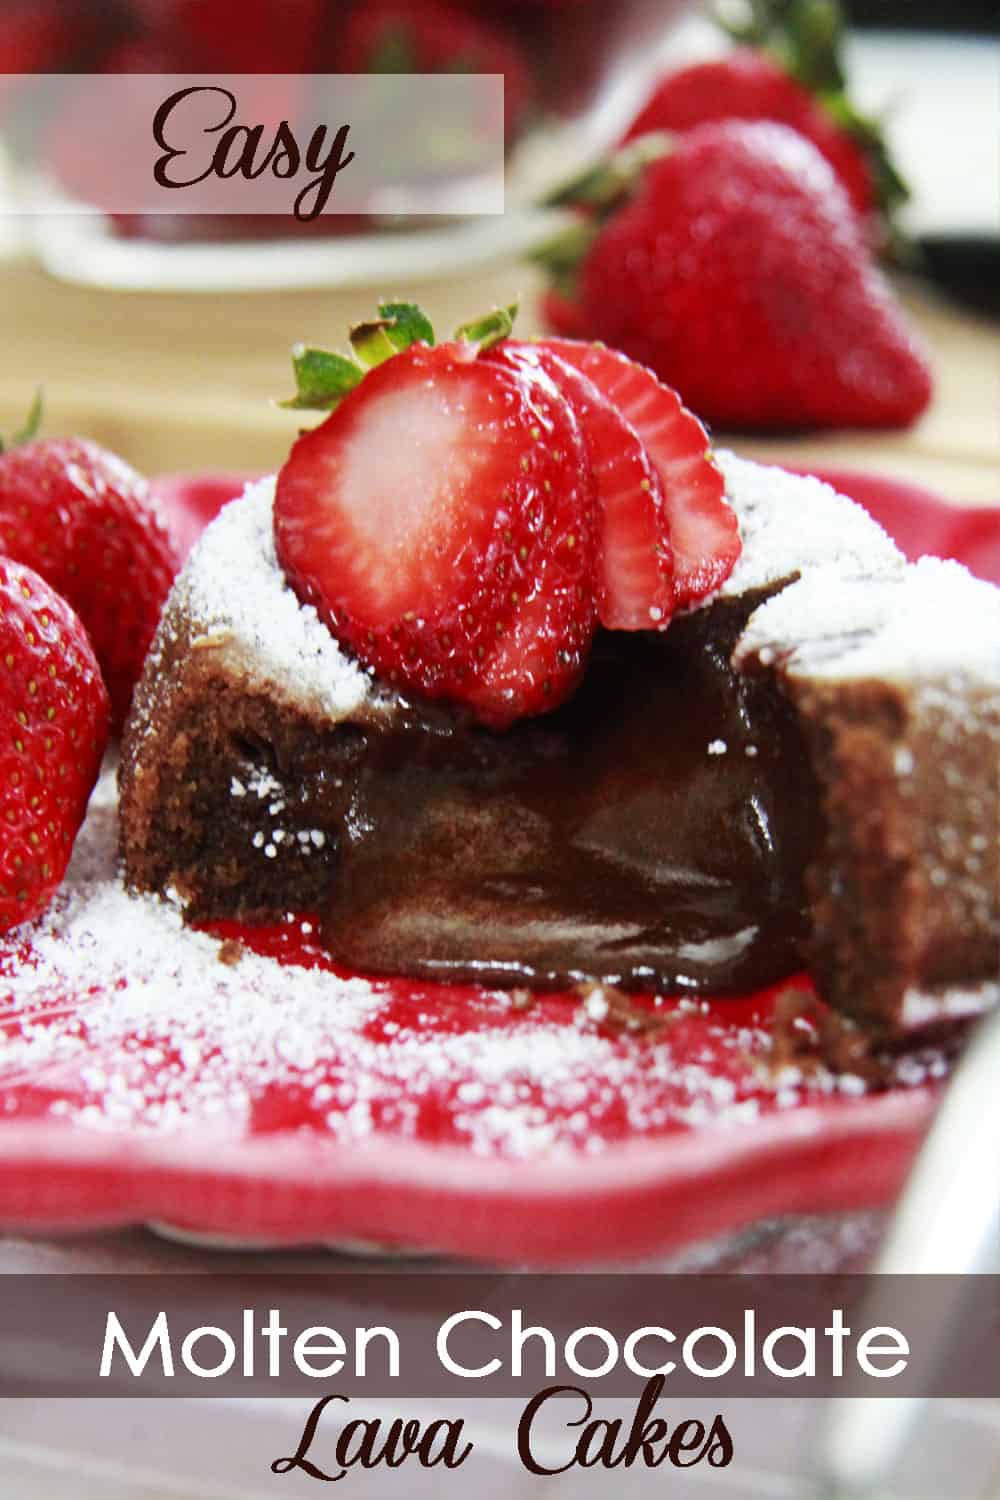
Indulgently chocolaty. This Chocolate Lava Cake recipe is dangerously delicious with rich, warm, fudgy chocolate cake and a warm river of chocolate lava that oozes from its center once sliced into.
Impressive for every occasion. I wanted to update this recipe in time for Valentine’s Day because Molten Lava Cakes look and tastes royally gourmet for special occasions like Valentine’s Day, Mother’s Day, Father’s Day, birthdays, etc. but are secretly super simple to whip up! Win-win!
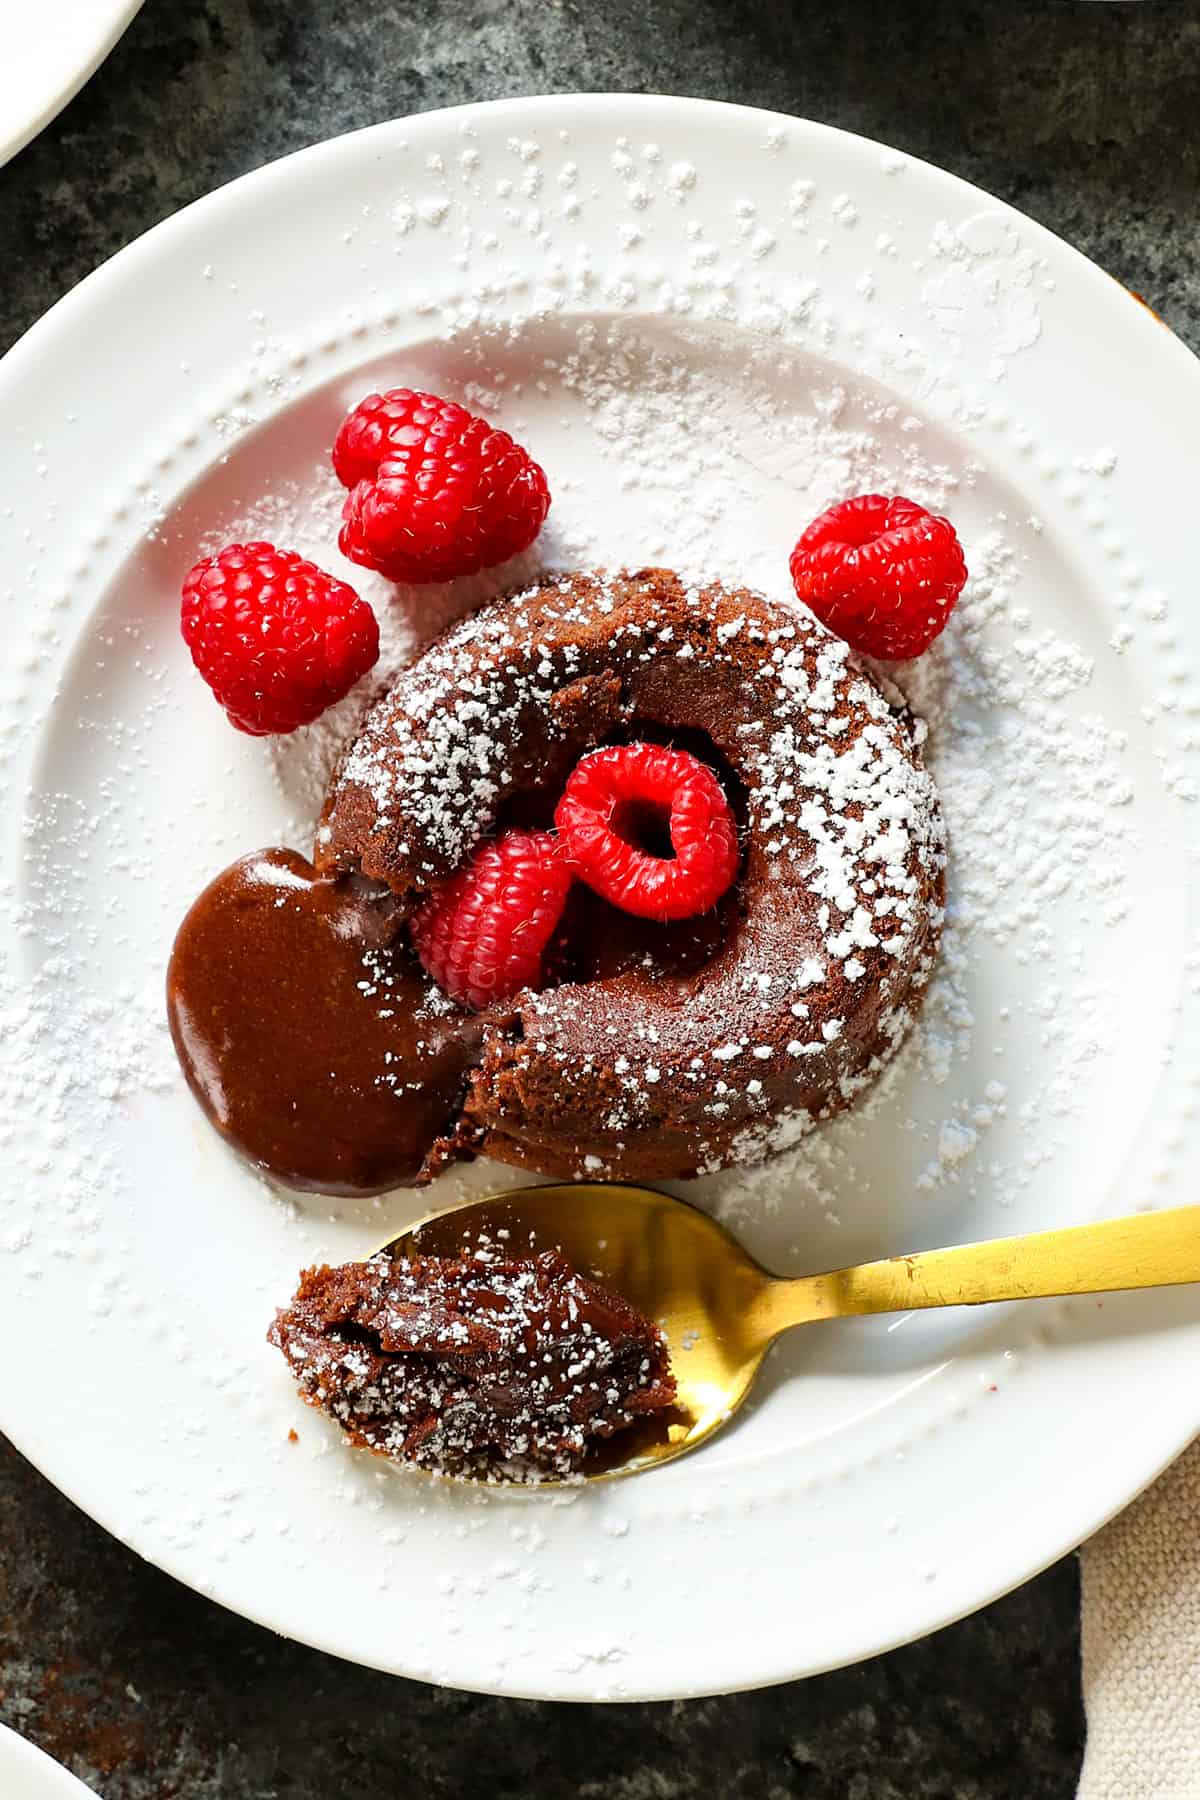
Perfect size. Molten Lava Cakes are the stunning individual-sized cakes of your dreams that make for beautiful presentation – no slicing required!
No mixer or ramekins required. One bowl and one whisk are all you need to make this recipe. And bonus, if you don’t have ramekins, you can use a muffin pan instead!
5 Pantry friendly ingredients. This recipe is made with just chocolate, butter, sugar, eggs, and flour.
Quick to make and bake. This Lava Cake recipe can be whipped up in less then 15 minutes then baked for just 12 minutes – that’s less than 30 minutes for this showstopping, restaurant quality dessert.
No cooling time. This is a hassle-free dessert without any layering, frosting or cooling. That means you don’t have to wait for hours to dig in – the Chocolate Lava Cakes are best straight out of the oven!
Prep ahead friendly. You can assemble the cakes, refrigerate, then just pop them in the oven when guests arrive.
CHOCOLATE LAVA CAKE Recipe INGREDIENTS:
These Chocolate Lava Cakes are fabulous because they’re made with pantry friendly ingredients! Let’s take a closer look at what you’ll need (full recipe in the printable recipe card at the bottom of the post):

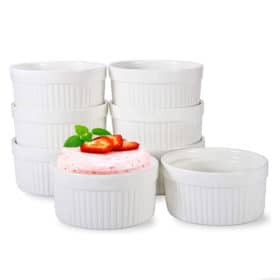
What ramekins should I use?
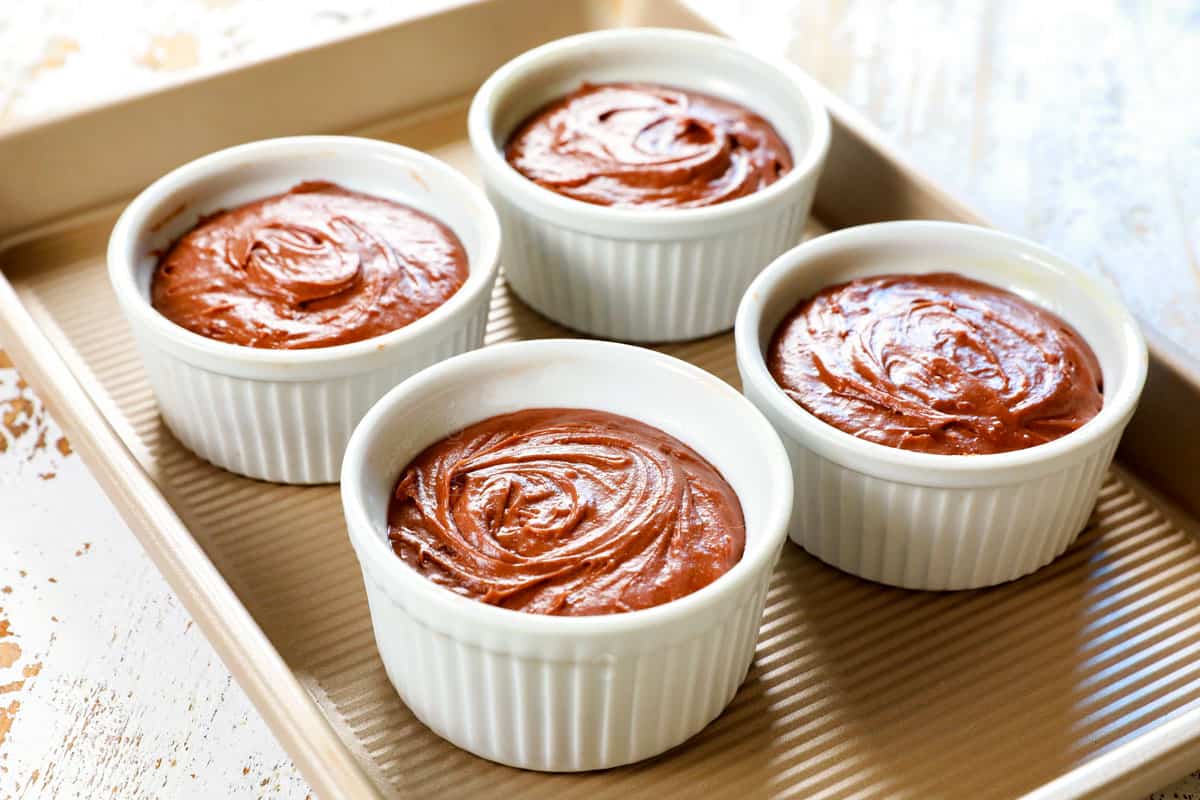
The size of the ramekins, also called soufflé cups, matters because it affects the depth and width of the Molten Lava Cakes which will affect the cooking time. For this recipe, I used four 6 oz. ramekins. If you have smaller or larger ramekins, you can use them, but you will need to adjust the baking time accordingly.
Can I make Chocolate Lava Cakes without Ramekins?
If you don’t have ramekins – never fear, your muffin pan is here! The muffin cups in a standard muffin pan/cupcake pan are 4 ounces, smaller than our 6 ounce ramekins. Therefore, you will need to divide the batter between 6 muffin cups instead of 4 and bake for 8-10 minutes. Use a butter knife, spoon or offset spatula to release the cakes from the pan and place each upside down on individual plates.
How to make Lava Cake
This Chocolate Lava Cake recipe is SO easy to make! Here is a breakdown of the steps for perfect cakes every time (full recipe in the printable recipe card at the bottom of the post):
HOW DO YOU KNOW WHEN MOLTEN CHOCOLATE LAVA CAKE IS DONE?
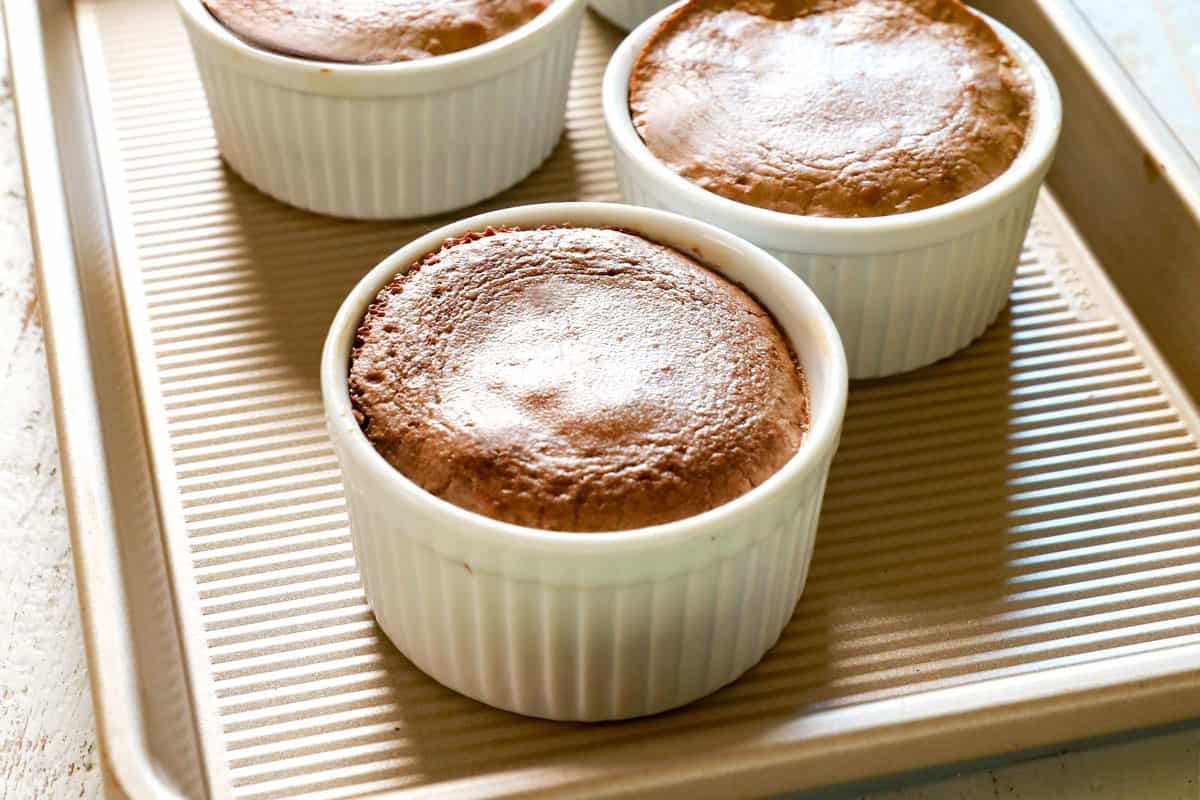
Taking your Chocolate Lava Cakes out of the oven at the correct time is crucial for lava success. I recommend baking the cakes for 11 to 13 minutes; however, because every oven is different, start checking at 11 minutes. You will know your Molten Lava Cakes are done when the edges are cooked, but the center is still slightly shiny and jiggly; it should be set (not wet to the touch) but it will look undercooked.
You can double test for doneness by gently touching the top of a cake with your finger. If your finger is clean, you’re good to remove the cakes from the oven. If your finger has some wet batter on it, bake the cakes for an additional 1 to 2 minutes.

CAN I PREPARE MOLTEN LAVA CAKE AHEAD OF TIME?
YES! I love that Molten Lava Cakes are prep ahead friendly for stress free entertaining. You have a few options to prep ahead:
Individual ramekins: I suggest lining the bottoms of the ramekins with parchment paper before spraying with non-stick spray with flour. This ensures your cakes don’t stick to the bottom of the ramekins after sitting for a longer period of time prior to cooking. Next, add the batter, cover with plastic wrap, and refrigerate for up to one day. When ready to bake, set the ramekins on the counter for 30 minutes to help come to room temperature. I’ve had some readers say the Molten Lava Cakes take a little longer to bake this way, closer to 15-20 minutes, so check for doneness early, but be flexible.
Prepared batter: Prepare the batter according to directions, cover the mixing bowl tightly with plastic wrap and store it for up to two days in the refrigerator.
Frozen batter: Transfer the batter to the ramekins, cover with plastic wrap and freeze for up to 3 months. Thaw in the refrigerator overnight before baking.
HOW DO I BAKE MY Chocolate LAVA CAKES FROM THE REFRIGERATOR?
Before baking your Molten Chocolate Lava Cakes from the refrigerator, place them (or your mixing bowl with batter) on the kitchen counter and allow to come to room temperature for 30 minutes. I’ve had some readers say the Molten Lava Cakes take a little longer to bake this way, closer to 15-20 minutes, so check for doneness early, but be flexible.

Lava Cake Recipe Tips

possible Molten Lava Cake variations
Have fun experimenting with this Lava Cake recipe! Here are just a few ideas:
filling ideas include:

ways to serve Chocolate Lava Cake
Chocolate Lava Cakes are fabulous in their own decadence, but even more delicious with some toppings. Here are a few ideas:

HOW DO YOU STORE LEFTOVER MOLTEN LAVA CAKE?
Chocolate Lava Cake is best eaten immediately. I don’t want you to miss out on the warm melted chocolate lava in the center of the cake! The longer the cake sits once removed from the oven, the more time it has to continue cooking and for the center to solidify.
However, if you want to refrigerate your baked cakes, cover them with plastic wrap and store in the refrigerator for up to three days. Just be aware that your Molten Lava Cake will now just be a tasty chocolate cake.
CAN I FREEZE CHOCOLATE LAVA CAKE?
It’s best to freeze the Molten Lava Cakes before baking. Wrap the ramekins a few times in plastic wrap, followed by foil, then freeze for up to 3 months. Thaw overnight in the refrigerator, then bring to room temperature before baking according to recipe directions.
You can freeze baked Chocolate Molten Lava cake, although you will loose the molten lava center. You will get the best experience from this dessert if you eat your cakes fresh from the oven. If you do freeze them, let the cakes cool completely, then wrap individually and securely in plastic wrap, followed by foil. Freeze for up to three months.
Can I REHEAT baked LAVA CAKE?
Molten Chocolate Lava Cakes are best enjoyed hot, immediately after they are removed from the oven. When you reheat them, you are cooking the center, so it is more likely to be fudgy instead of like “lava.”
However, I have had success by slicing into the cake immediately after it is baked and allowing some of the lava to stream out of the cake before cooling and refrigerating. When you heat the sliced cake, the streaming lava will remain liquidy.
how to reheat chocolate LAVA CAKE
Keeping in mind that reheated Chocolate Lava Cakes will be more gooey then molten, here’s how:
1. Unwrap the cake and place it on a microwave safe dish.
2. Cover with damp paper towel.
3. Heat on medium power for about 15-20 seconds, or until slightly warmed.
CHOCOLATE LAVA CAKE FAQS
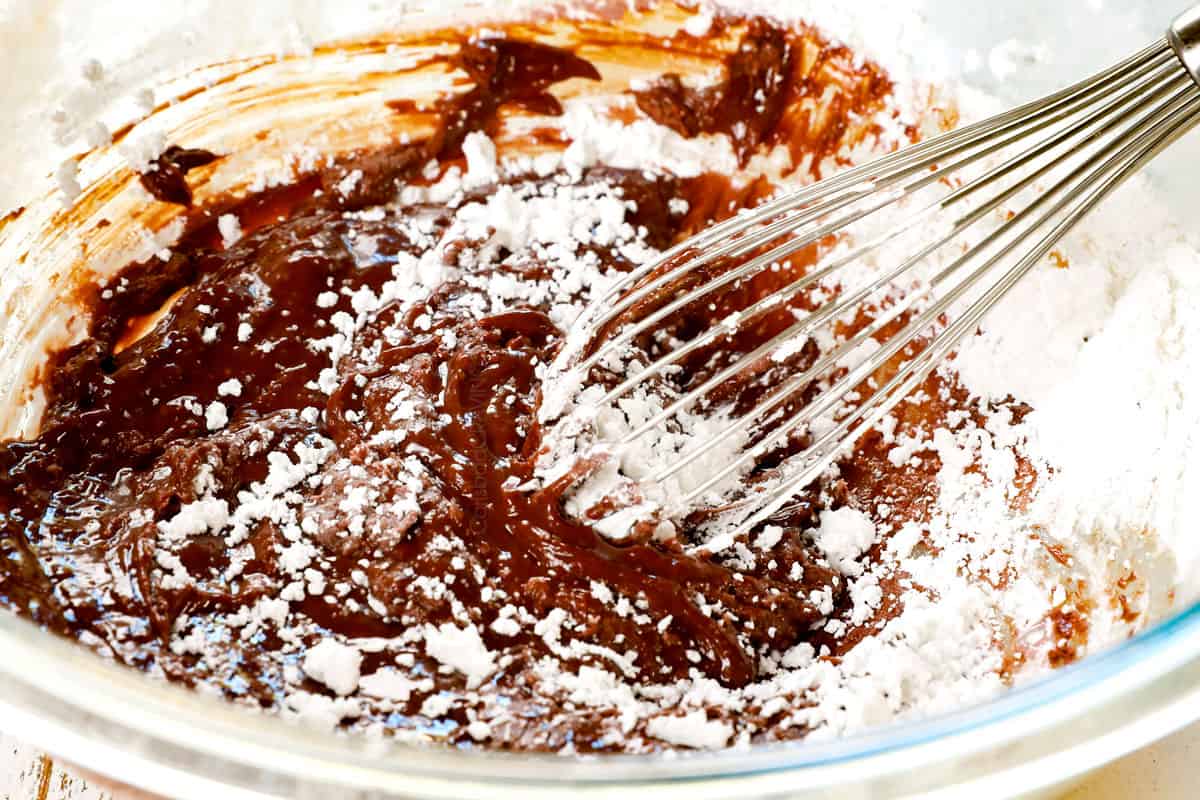
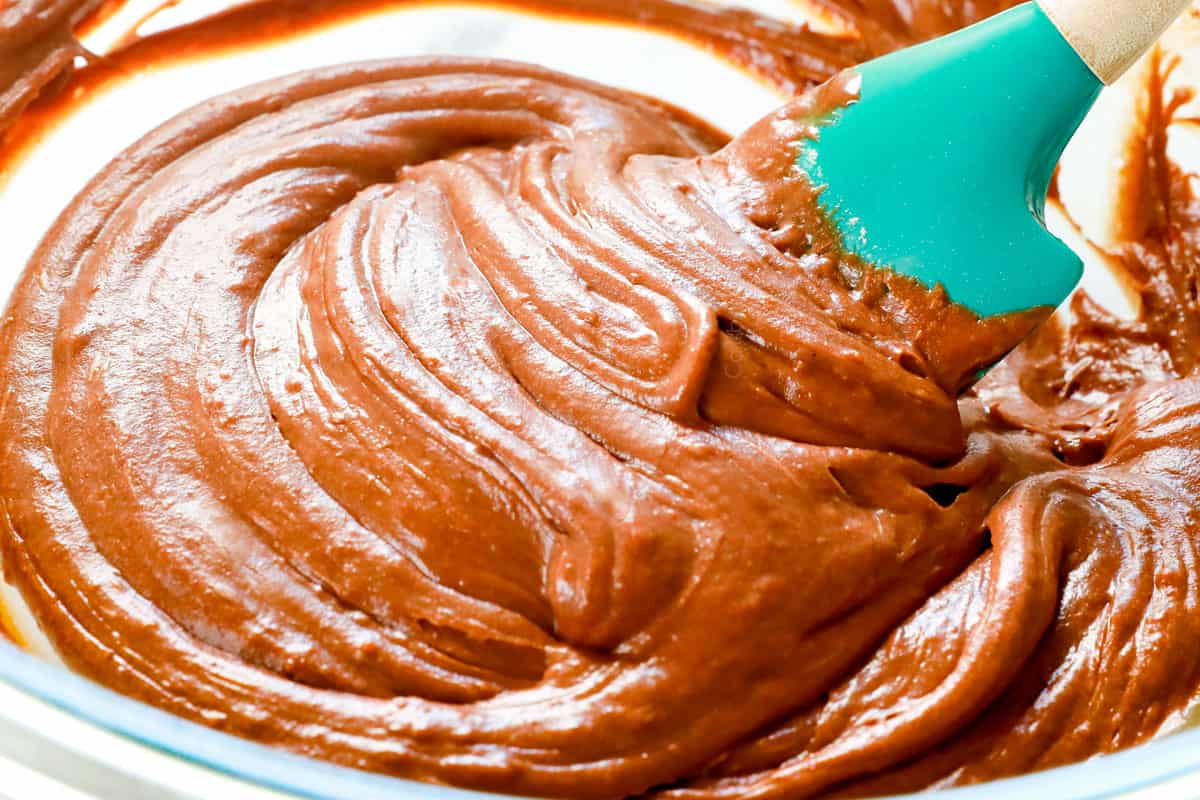
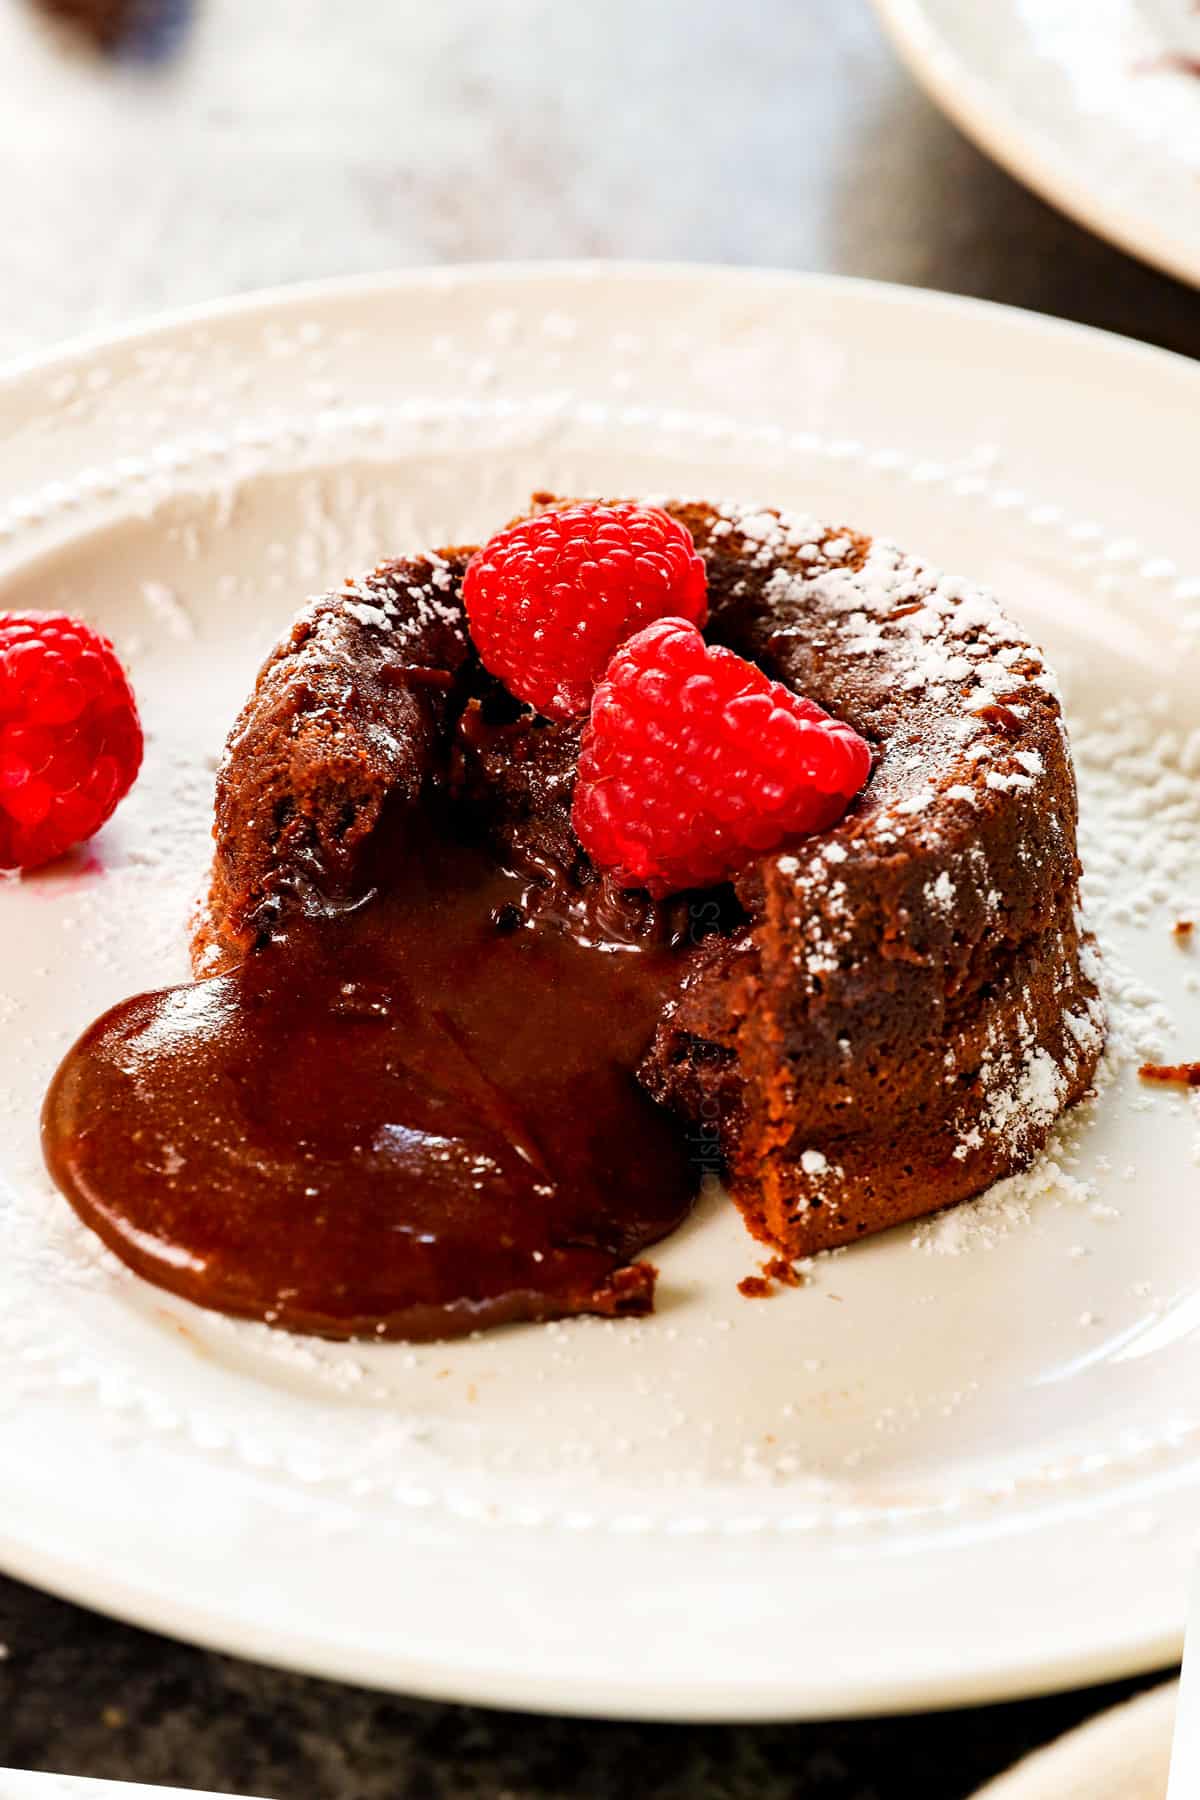
Chocolate Lava Cake is a small, individual-sized cake traditionally baked in a ramekin. It is made by whisking chocolate, flour, eggs, butter and powdered sugar together by hand. What sets Chocolate Lava Cake apart from soufflés and other cake recipes is the center is purposefully slightly under-baked, resulting in a melty, molten chocolate center that oozes out when you cut into it.
Molten Lava Cakes consist of a soft, warm chocolate cake outside giving way to a creamy, smooth stream of warm liquid chocolate inside, ensuring every forkful is bathed in velvety chocolate. It will be love at first bite.
Soufflés and Chocolate Lava Cakes are similar in appearance, share many of the same ingredients and are even served with similar toppings, but don’t be fooled, they are not the same dessert. The differences lie in the texture of the desserts as well as the presentation:
1. A soufflé is fully cooked, whereas a lava cake maintains a runny, chocolatey liquid center. This does not mean that soufflés are the same consistency as cake. A soufflé is definitely moist in the center, much more so than a slice of regular cake would be.
2. The soufflé has a merengue appearance on top and a light texture. Chocolate Lava Cakes are denser than a soufflé, and as previously mentioned, boast a river of chocolate lava that oozes from its center once cut into.
3. Soufflé comes in a variety of flavors like chocolate, lemon or even cheese. Molten lava cake features one flavor- chocolate!
4. While soufflés are typically served in their baking container, Chocolate Lava Cakes are inverted onto serving plates where all of their gooey goodness can flow freely.
A chef in New York City, Jean-Georges Vongerichten, is credited with inventing Chocolate Molten Lava Cake in 1987. Vongerichten removed a sponge cake from the oven too early and realized that while the center was still runny, the outside of the cake had a texture and taste that were desirable.
Fun Food Fact: Vongerichten is the man behind the famous Jean-Georges restaurant located in New York’s Trump International Hotel and Tower. However, Jacques Torres, a French chef and chocolatier, who also happens to be a judge and co-host of the popular food show Nailed It!, says that the Lava Cake already existed in France before Vongerichten claimed to have invented it. Wherever the truth lies, our lives are blessed from the creation of the Chocolate Lava Cake!
Just like in custard, the interior of the Lava Cake reaches over 165 degrees Fahrenheit, which is high enough to eliminate any bacterial risk from the eggs. You may use pasteurized eggs, however, if you have any concerns.
If the centers are still liquidy to the touch after 12 minutes, continue to bake an additional 1 to 2 minutes. When the cakes are done, they will have risen completely, look firm on the outside, but the centers will still look shiny and jiggle just a bit.
No, it reaches past 160 degrees F, just like custard, so it is safe to eat.
No difference whatsoever! They both refer to the rich, personal-sized chocolate cakes with a gooey, chocolaty center. They are also known as Molten Lava Cake, Molten Chocolate Lava Cake.
Chocolate Lava Cakes are served hot from the oven, with just a one to two minute rest before being inverted onto the serving plates. They must be served hot, otherwise, the molten lava centers will thicken as the cakes continue to bake and cool.
Yes, both unbaked and baked Lava Cakes should be refrigerated.
Yes! You can double or triple the recipe, but the cakes will likely need an extra minute or two in the oven. Take extra care to evenly divide the batter between the ramekins or muffin tin.

WANT TO TRY THIS chocolate lava cake RECIPE?
PIN IT to your chocolate or dessert recipe BOARD TO SAVE FOR LATER!
FIND ME ON PINTEREST FOR MORE GREAT RECIPES! I AM ALWAYS PINNING :)!
©Carlsbad Cravings by CarlsbadCravings.com
Molten Lava Cake Recipe
Save This Recipe To Your Recipe Box
You can now create an account on our site and save your favorite recipes all in one place!
Ingredients
- 4 6-8 oz. custard cups/ramekins
- 1/2 cup salted butter (or unsalted butter + ¼ tsp salt)
- 4 oz. semi-sweet baking chocolate, roughly chopped (I HIGHLY recommend Ghirardelli)
- 1 cup powdered sugar
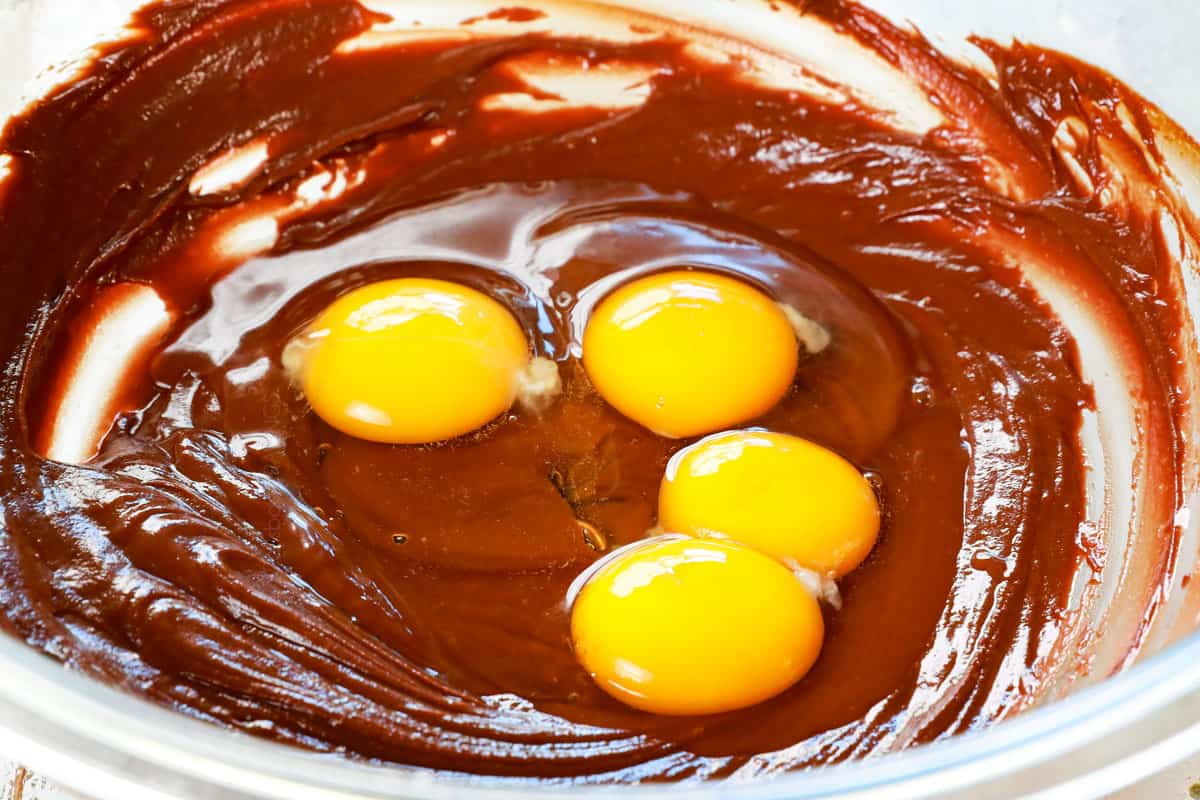
- 2 whole eggs, at room temperature
- 2 egg yolks, at room temperature
- 1/3 cup flour + 1 tablespoon
For serving (Optional, pick your favs)
- powdered sugar
- fresh berries
- vanilla ice cream
Instructions
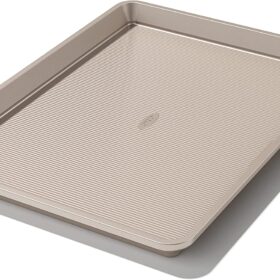
- Preheat oven to 425 degrees. Generously spray 4 small ramekins/custard cups with nonstick baking spray WITH flour or grease and dust your cups with cocoa powder. Place cups on a baking sheet.
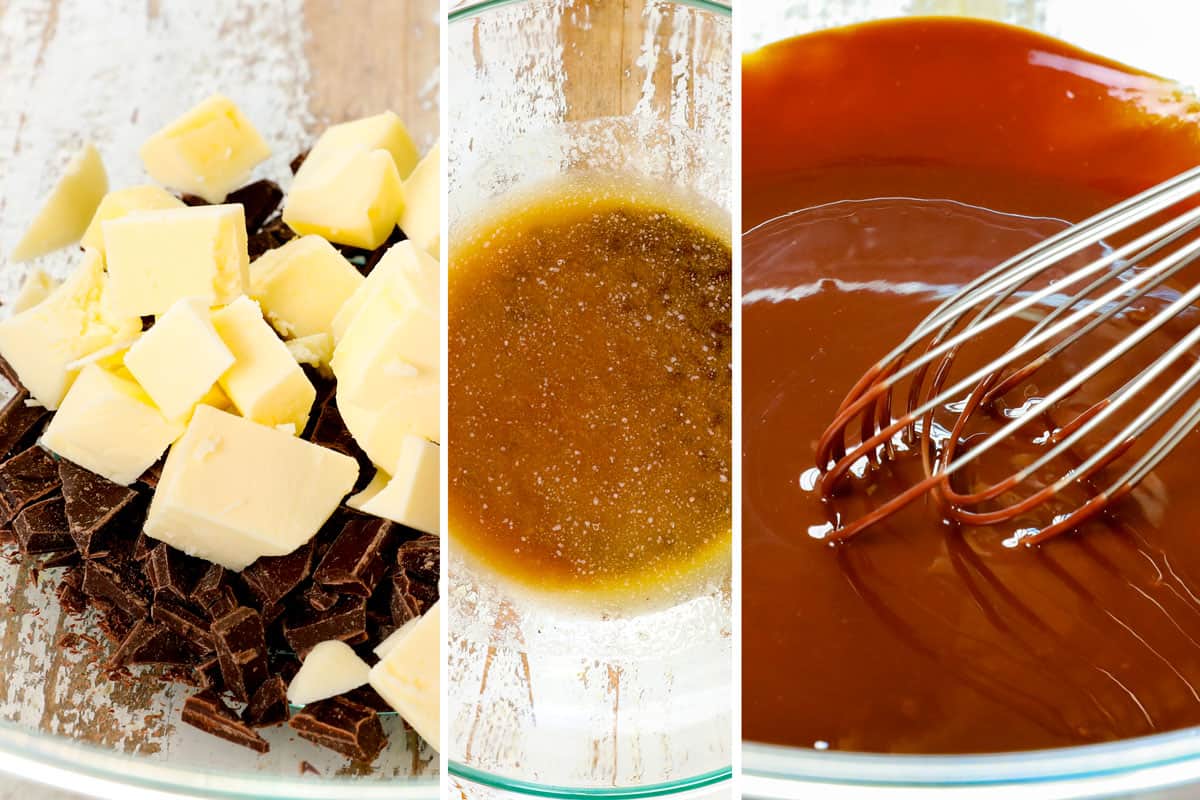
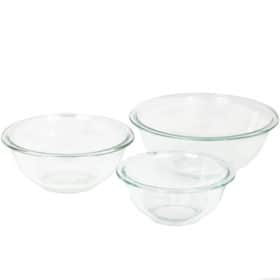
- Add butter and baking chocolate to a large microwave-safe bowl and microwave for 1 minute, or until butter is melted, then stir until butter and chocolate are completely smooth.
- Evenly spoon batter into prepared cups (I use a large cookie scoop). Bake for 11-13 minutes at 425 degrees F, or until the sides are firm but the centers look slightly shiny and jiggly but are not wet to the touch.
- Let cool for 2 minutes, then gently loosen cakes from custard cups by sliding a knife around the edges of each cake; then invert cakes onto serving plates.
- Dust with powdered sugar or top with ice cream and berries if desired. Serve immediately (because the cakes will continue to cook in the center).
Video
Notes
- To use a muffin tin: The muffin cups in a standard muffin pan/cupcake pan are 4 ounces, smaller than our 6-ounce ramekins. Therefore, you will need to divide the batter between 6 muffin cups instead of 4 and bake for 8-10 minutes. Use a butter knife, spoon or offset spatula to release the cakes from the pan and place each upside down on individual plates (and don’t forget to grease your muffin pan!).
- Use quality chocolate: It is CRUCIAL to use quality baking chocolate for this recipe or your filling will be grainy and you may miss the lava center completely. Set yourself up for success by using QUALITY baking chocolate such as Ghirardelli brand. Baking chocolate is cooled, hardened chocolate liquor with a high percentage of cocoa butter because it’s intended to be baked with and therefore melts beautifully, whereas, chocolate chips contain less cocoa butter and will not melt seamlessly.
- Room temperature eggs hack: Add warm (not hot) tap water to a bowl then add eggs (still in their shells) for at least 20 minutes.
- Scoop and level flour: Whenever you measure flour, don’t scoop it into the flour bag/container or else the flour will compress; packed flour yields denser, drier Molten Lava Cakes. Rather, fluff, then scoop the flour into a measuring cup with a spoon and then level.
- Evenly divide the batter: It’s important that you add the same amount of batter to each ramekin so the cakes bake evenly. You can use a measuring cup, cookie scoop or kitchen scale to help.
- Can I reheat baked Molten Lava Cake? Molten Chocolate Lava Cakes are best enjoyed hot, immediately after removed from the oven. When you reheat them, you are cooking the center, so it is more likely to be fudgy instead of like “lava.” However, I have had success by slicing into the cake immediately after it is baked and allowing some of the lava to stream out of the cake before cooling and refrigerating. When you heat the sliced cake, the streaming lava will remain liquidy.
Prep Ahead
I love that Molten Lava Cakes are prep ahead friendly for stress free entertaining. You have a few options to prep ahead:- Prepared batter: Prepare the batter according to directions, cover the mixing bowl tightly with plastic wrap and store it for up to two days in the refrigerator. Bring to room temperature before adding to ramekins.
- Individual ramekins: I suggest lining the bottoms of the ramekins with parchment paper before spraying with non-stick spray with flour. This ensures your cakes don’t stick to the bottom of the ramekins after sitting for a longer period of time prior to cooking. Next, add the batter, cover with plastic wrap, and refrigerate for up to one day. When ready to bake, set the ramekins on the counter for 30 minutes to help come to room temperature. I’ve had some readers say the Molten Lava Cakes take a little longer to bake this way, closer to 15-20 minutes, so check for doneness early, but be flexible.
- Frozen batter: Again, line the ramekins with parchment paper. Transfer the batter to the ramekins, cover with plastic wrap and freeze for up to 3 months. Thaw in the refrigerator overnight before baking.
Want To Make This Recipe?

Did You Make This Recipe?
Tag @CarlsbadCravings and Use #CarlsbadCravngs
Leave a Review, I Always Love Hearing From You!
Recipe Source: Adapted from Kraft Recipes


Julie Klauer says
Made this recipe last night for a dinner party and it was superb!!! I made the batter up in the afternoon and put it in the refrigerator covered in a big bowl. I took it out about an hour before baking so it could come to room temperature. Also, before our guests arrived, I sprayed and floured the ramekins and just put them on the countertop covered loosely with tin foil. It was the best dessert ever!!!
Jen says
Thank you!! I’m thrilled they were a hit!
ALICIA says
We aren’t big dessert folks but wanted to do something special for Valentine’s Day. This was a huge hit – was wonderful! So elegant yet so easy. We halved the recipe and cooked in a counter top oven. Came out perfect. Will definitely make this again.
Jen says
Wow Alicia! What a huge compliment that you chose this recipe to make for your special day! I’m so happy that it turned out so delicious for you!
Stephanie says
My daughter wanted lava cake instead of a traditional cake for her 16th birthday this weekend. She didn’t think I could do it, as if the magical gooey chocolate center was something only a chef at a fancy restaurant could make…but you & I proved her wrong. These lava cakes were so easy to make and came out perfectly, thank you for a great recipe.
Jen says
Oh yay! That’s wonderful news! I’m so thrilled you were able to give your daughter the extra special cake that she wished for on her birthday! Thank you so much for sharing your comment! Tell her happy birthday from me!