Pumpkin Cheesecake with double layers of cheesecake, sandwiched in between Oreos and drizzled with chocolate is the best pumpkin anything and has won multiple awards to prove it!
This Layered Pumpkin Cheesecake Recipe will be the hit of your Thanksgiving AND its way EASIER than you think! I’ve included detailed instructions on how to make a cheesecake so even if you’ve never made cheesecake before, it will be a runaway success!
pin this recipe to save for later
WATCH: How to make Pumpkin Cheesecake
Easy Pumpkin Cheesecake Recipe
Are you ready to be the talk of Thanksgiving? Or rather, are you ready for your Pumpkin Cheesecake to be the talk of Thanksgiving?
Because it will. Well, it will after your cousins, aunts, uncles, sisters, brothers, friends, parents, grandparents have put their forks down long enough to talk in between creamy, chocolaty, Oreo filled mouthfuls.
This Double Layer Pumpkin Cheesecake Recipe is so out of this world delicious that I can guarantee it will become a family favorite handed down for generations – much like my mom’s famous pumpkin bread recipe and famous pumpkin pie. My mom brings her pumpkin pie every year to Thanksgiving. And then one year my mom brought her famous pumpkin pie AND a pumpkin cheesecake. It felt almost like betrayal to say we liked the pumpkin cheesecake better – but we all did. I mean, it is cheesecake AND pumpkin!
Now, let me assure you that if you have never made cheesecake before, it is EASY. I have included detailed instructions to hopefully answer any questions, but the actual method is quite simple so please don’t be scared away because you and your Thanksgiving guests need this cheesecake. Its future tradition. I have also included full proof methods to water proof your cheesecake AND you can make your easy Pumpkin Cheesecake the day before Thanksgiving so there is no last minute stress!
LOOKING FOR MORE EASY CHEESECAKE RECIPES?
- Key Lime Cheesecake Sugar Cookie Cups
- Raspberry Chocolate Cheesecake
- Eggnog Cranberry Cheesecake
- German Chocolate Cheesecake
- Blueberry Cheesecake
- Strawberry Cheesecake
Layered Pumpkin Cheesecake
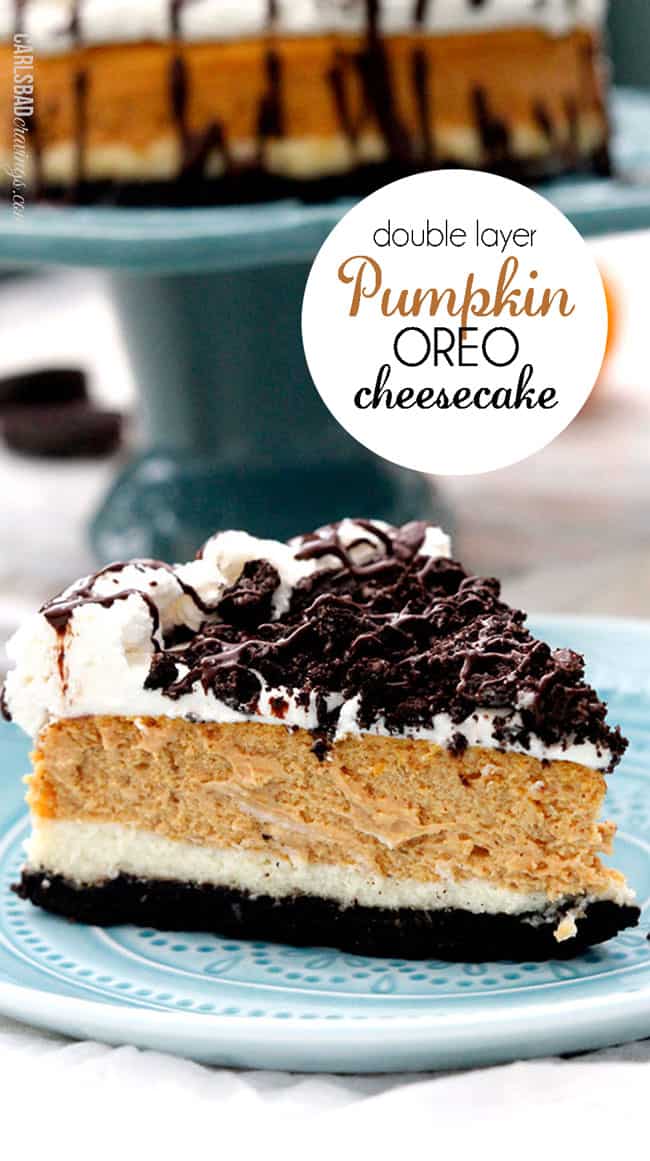
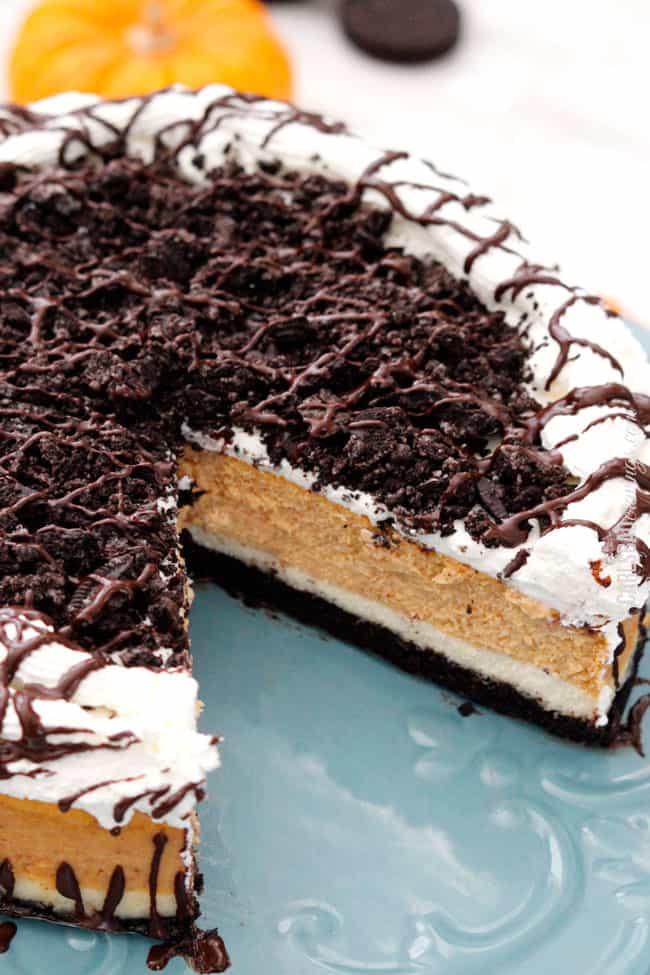
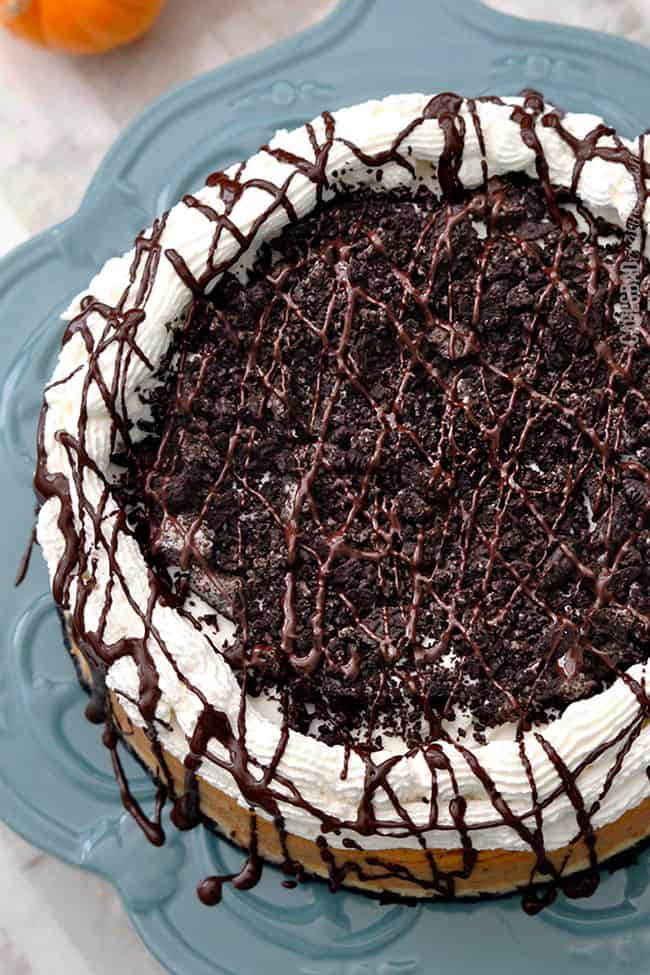
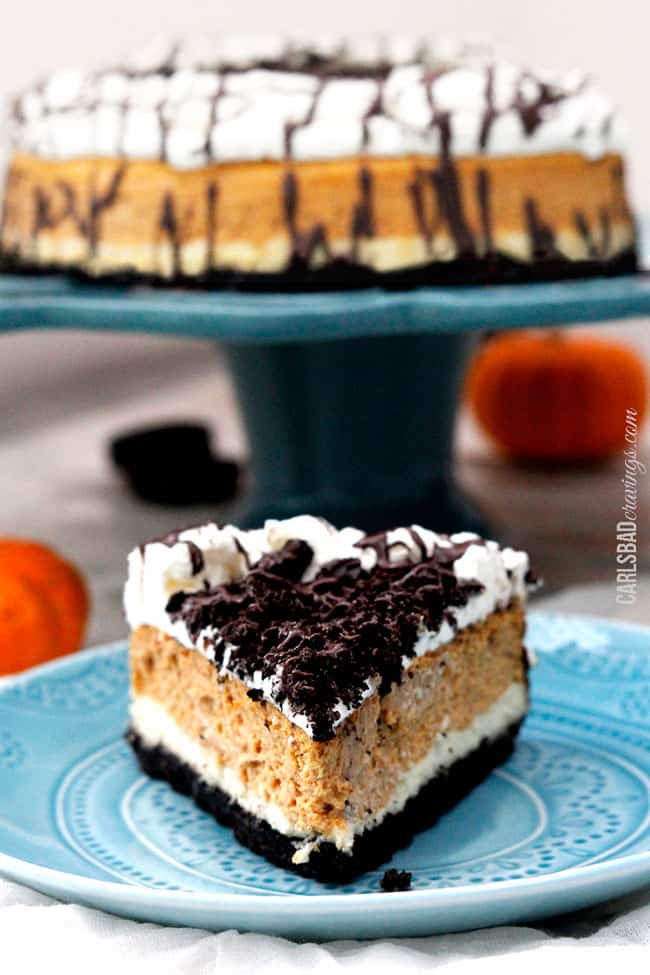
Inspired by my mom’s pumpkin cheesecake, I’ve turned it into a double pumpkin cheesecake – which naturally is exponentially more delicious than plain pumpkin cheesecake with hardly any more effort. Because Thanksgiving is time to bring out the big guns of desserts. Thanksgiving is the time for a crust of buttery Oreos, topped with creamy cheesecake, further topped with creamy pumpkin cheesecake spiced with cinnamon, nutmeg and cloves, topped with homemade whipped cream, crushed Oreos and drizzled with chocolate. Just look at those layers…
Once you taste this Pumpkin Cheesecake you will be itching for the first winds of Fall every year just so your pumpkin cheesecake making can begin because you can’t have this cheesecake just once a year. Its just not possible. The cravings of creamy pumpkin cheesecake, Oreo and chocolate will just be too strong.
Layered Pumpkin Cheesecake Ingredients
Pumpkin Cheesecake doesn’t require any exotic ingredients. You will need:
- Oreos
- Butter: use unsalted butter
- Cream cheese: full fat is best
- Sugar
- Eggs
- Lemon juice: this does not need to be freshly squeezed, bottled is fine
- Vanilla extract
- Sour cream: full fat is best
- Pure pumpkin: NOT pumpkin pie filling because it has already been sweetened
- Ground cinnamon
- Ground cloves
- Ground nutmeg
- Heavy whipping cream: you may substitute cool whip instead of making your own whipping cream
- Semi-sweet bakers chocolate: bakers chocolate melts much better than chocolate chips but if you are in a bind then high quality chocolate chips will work
This list of ingredients may seem ordinary, but I promise they will become extraordinary in this Pumpkin Cheesecake! The addition of sour cream and lemon juice produce the best pumpkin cheesecake flavor and the eggs/egg yolk produce a wonderfully rich cheesecake. The cinnamon, cloves and nutmeg combined with the pumpkin puree translate into warm pumpkin pie flavor and the heavy cream creates the most luscious whipped topping to cut through the richness of your Pumpkin Cheesecake. And then there are the buttery Oreos and chocolate. They elevate this Pumpkin Cheesecake into award winning Pumpkin Cheesecake like none you have tasted before.
How to bake a cheesecake in a water bath
There are two things people are generally afraid of when it comes to cheesecakes: 1) the water bath leaking and 2) cracks. But I have a full proof method for each!
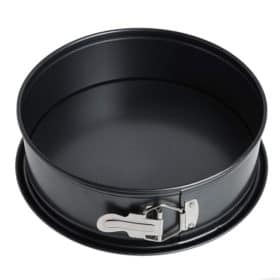
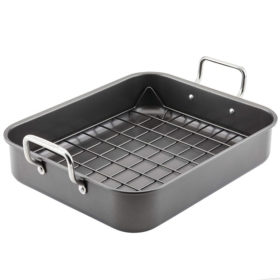
A water bath is simply placing the springform cheesecake pan inside a roasting pan and filling the roasting pan up with water until it reaches about half way up the springform pan. The hot water insulates the outer edges of the cheesecake, so the edges don’t bake faster than the middle. This ensures even baking throughout and lessens the likelihood of the cheesecake cracking.
How to Water Proof Pumpkin Cheesecake
The typical way to waterproof a springform pan involves wrapping it foil but this is not fool proof. Instead, you can either:
- Wrap your springform pan first in a slow cooker liner and tie any excess to the side then proceed to wrap in foil.
- Place your springform into a slightly larger pan that also will fit in your roasting pan, then place both in your roasting pan. I find a disposable foil pan works great for this.
If you use either of the aforementioned methods, your Pumpkin Cheesecake will be 100% leak free and you will be very very happy!
How to prevent cheesecake cracks
We are going to cover our Pumpkin Cheesecake with whipped cream, crushed Oreos and chocolate, so don’t stress too much about cracks. Still, there are some easy steps you can take to ensure a beautifully crack- free Pumpkin Cheesecake.
- Use a water bath: As previously mentioned, the hot water insulates the outer edges of the cheesecake, so the edges don’t bake faster than the middle.
- Room temperature ingredients: Room temperature eggs, sour cream and softened cream cheese allow them to mix more easily and evenly and reduces the risk of cracks. Properly softened cream cheese will also be smooth without any lumps.
- Mix well: Mix your cream cheese and butter very will until it is light and fluffy.
- Don’t peek! It is paramount that you don’t open the oven while your cheesecake is cooking to prevent cracking. Opening the door dramatically lowers the temperature and causes your cheesecake to sink and crack.
- Don’t overbake: Over baking the cheesecake causes the filling to shrink and crack. You want the edges to be firm but the center to wobble slightly when shaken.
- Cool in oven: Sudden changes in temperature can cause cracks so by allowing the Pumpkin Cheesecake to cool in the oven and then on the counter before placing it in thee refrigerator lets it gradually adjust to each temperature. This cooling process can take some time, so plan accordingly and don’t start making your cheesecake at 9pm (guilty!).
HOW TO MAKE PUMPKIN CHEESECAKE
- Crust: Use both the filling and the cookie in the crust. I am always surprised how often I get that question! I use my food processor to finely ground my oreos but you can also put them in a plastic bag and pound or roll with a rolling pin.
- To quickly bring eggs to room temperature: fill a bowl with warm water (not hot) and add eggs and let sit 10-20 minutes.
- Beat until fluffy: Use the paddle attachment on your electric mixture to beat your cream cheese and sugar for about 5 minutes. This is the time to get your cheesecake light and fluffy because you don’t want to overmix after we add the rest of the ingredients.
- Don’t over-beat eggs: After you add the eggs, take care not to overbeat to prevent cracking and a smooth texture.
- Freeze to layer: After you add your first layer of plain cheesecake, place the cheesecake into the freezer while you prepare the pumpkin layer so it can harden a little to create a more defined layers. Take care you place your pan in the freezer so that it is level otherwise your layers will not be even.
- A little jiggle: Your Pumpkin Cheesecake is done when the the edges are firm and the center of the cheesecake is still jiggly, but NOT runny. The Pumpkin Cheesecake will continue to cook and firm up while it cools.
- To gently cool: To prevent cracking due to immediate temperature changes, turn off your oven when the Pumpkin Cheesecake is done and crack open the oven door. Allow your cheesecake to cool in oven for 60 minutes, then remove to a wire rack and gently run a hot knife along the edges of the cheesecake. Release springform and continue to cool for 2-3 hours or until cheesecake is completely cooled. Chill in the refrigerator for at least 3 hours.
WHAT DO I DO IF MY PUMPKIN CHEESECAKE CRACKS ANYWAY?
We have already 99% eliminated the chance of cracks by using a water bath, not peeking on our cheesecake during cooking as sudden changes in temperature often cause cracking, and our slow cooling method (explained above) but for that 1% chance you do experience a crack or two, this recipe boasts a heavy cream whipped topping which means any possible cracks never happened.
- When ready to serve, beat heavy cream and sugar on high speed until stiff peaks form.
- Spread whipped cream over pumpkin cheesecake and top with crushed Oreos.
- Melt chocolate in microwave, mixing at 30 second intervals until melted. Stir in oil and drizzle over cheesecake by placing chocolate in a Ziploc bag, and cutting off the corner.
CAN I USE A STORE BOUGHT CRUST FOR THIS RECIPE?
I don’t recommend a store-bought crust for this Pumpkin Cheesecake because we are using a springform pan and store-bought crusts are made for pie pans and are not enough crust (the ratio of cheesecake to crust would be off).
My oreo crust is very simple and just requires butter + Oreos and is the perfect proportions for our decadent Pumpkin Cheesecake.
Can you freeze Pumpkin Cheesecake?
Yes! Cheesecake freezes very well. You can freeze the Pumpkin Cheesecake before adding the whipped topping and oreos to the top.
How to Freeze Pumpkin Cheesecake:
- Cool cheesecake completely and refrigerate for at least 8 hours.
- Place chilled cheesecake on a baking pan and place, uncovered, in the freezer. Freeze until firm.
- Remove from the freezer then wrap cheesecake in plastic wrap followed by heavy duty aluminum foil and finally in a large heavy duty freezer bag.
- Pumpkin Cheesecake can be frozen for 2-3 months.
- To thaw, remove Pumpkin Cheesecake from freezer to the refrigerator. Let thaw overnight.
- Garnish cheesecake with whipped cream, Oreos and chocolate when ready to serve.
Glorious Double Layer Pumpkin Oreo Cheesecake. Another reason to be thankful.
LOOKING FOR MORE PUMPKIN RECIPES?
- Pumpkin Praline Pie
- Pumpkin Bread
- Soft and Chewy Pumpkin Cookie with Cinnamon Cream Cheese Frosting
- Chocolate Chip Pumpkin Pound Cake with Cinnamon Cream Cheese Glaze
- Pumpkin Bars with Nutella Cream Cheese Frosting
- Easy Pumpkin Dip
- Pumpkin Ice Cream Pie
Want to try this Pumpkin Cheesecake Recipe?
Pin it to your CHEESECAKE, OREO or DESSERT BOARD to SAVE for later!
Find me on Pinterest for more great recipes! I am always pinning :)!
©Carlsbad Cravings by CarlsbadCravings.com
**These directions are long because they are detailed (so there are no questions for anyone has never made a cheesecake before), but they are simple, so please don’t be scared away!**
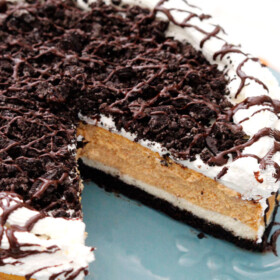
Pumpkin Oreo Cheesecake
Save This Recipe To Your Recipe Box
You can now create an account on our site and save your favorite recipes all in one place!
Ingredients
Crust
- 24 whole oreos, finely crushed (I use my food processor)
- 1/4 cup butter, melted
Plain Cream Cheese Layer
- 3 8 oz. packages cream cheese, softened
- 3/4 cup sugar
- 3 eggs at room temperature
- 1 egg yolk at room temperature
- 1 tablespoon lemon juice
- 1 teaspoon vanilla extract
- 1/4 cup sour cream
Pumpkin Cream Cheese Layer
- 1 cup pure pumpkin puree
- 1 teaspoon ground cinnamon
- 1/4 teaspoon ground cloves
- 1/4 teaspoon nutmeg
Topping
- 1 1/2 cups heavy whipping cream
- 2 tablespoons sugar
- 10 oreos, crushed
- 3 oz semi-sweet Baker’s chocolate
- 1/2 teaspoon Vegetable oil
Instructions
- Waterproof a 9" springform pan by placing 2 18" x 18" pieces of aluminum foil on a flat surface underneath the pan so they form a + then gently fold (to make sure you don't create any holes) up the sides of the foil around the pan. Repeat.* Line bottom of springform with parchment paper and lightly grease the inside of your entire pan with nonstick cooking spray.
- Preheat oven to 350°Fwith the oven rack in lower third of oven. Fill a roasting pan with 1 ½ inches water to create a water bath for your cheesecake (to prevent cracking). Place roasting pan in the oven while you prepare your cheesecake.
- To make the crustpour finely ground Oreos in a large bowl and stir in melted butter; mix until well combined. Pour Oreo crumbs into springform and firmly press the crumbs down on the bottom of the pan until you have an even layer.
- To make the cheesecake filling, add cream cheese and sugar to the bowl of an electric mixer fitted with the paddle attachment and beat on medium speed 5 minutes until light and fluffy. With mixer still running, add the eggs, then the egg yolks, 1 at a time, mixing 30 seconds after each egg/egg yolk, scraping down the sides of the bowl as necessary. Add the sour cream, lemon juice and vanilla and mix until well incorporated. Pour only 1 ½ cups of this plain cheesecake on top of the uncooked Oreo crust and evenly spread to the edges. Place in the freezer while you prepare the pumpkin layer (to create more defined layers).
- To make the pumpkin cheesecake layer, add pumpkin, cinnamon, cloves and nutmeg to the remaining plain cheesecake batter and mix until well blended. Pour this pumpkin cheesecake onto the plain cheesecake and carefully spread over the plain cheesecake layer.
- To bake your cheesecake, place the cheesecake in the water bath and cook for 55-65 minutes OR until the edges are firm and the center of the cheesecake is still jiggly, but not runny.
- To gently cool your cheesecake and prevent cracking, turn off your oven and crack open the oven door. Allow cheesecake to cool in oven for 60 minutes, then remove to a wire rack and gently run a hot knife along the edges of the cheesecake. Release springform and continue to cool for 2-3 hours or until cheesecake is completely cooled. Chill in the refrigerator for at least 3 hours.
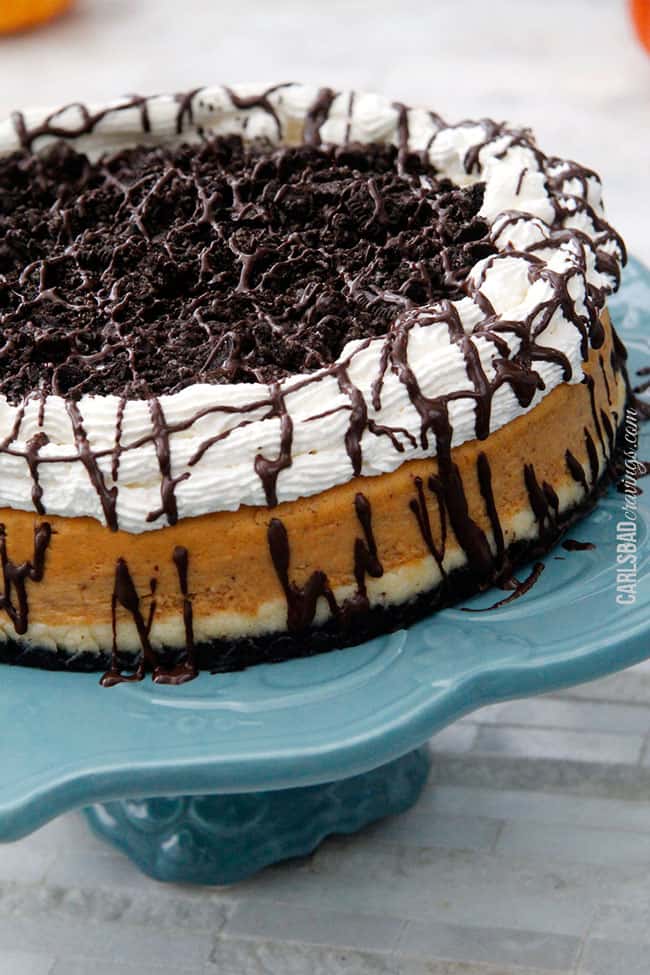
- Prepare topping when ready to serve by beating heavy cream and sugar on high speed until stiff peaks form. Spread whipped cream over pumpkin cheesecake and top with crushed Oreos. Melt chocolate in microwave, mixing at 30 second intervals until melted. Stir in oil and drizzle over cheesecake by placing chocolate in a Ziploc bag, and cutting off the corner.
- Enjoy!
Video
Notes
Make a day ahead of time to alleviate any stress!
How to Freeze Pumpkin Cheesecake:
- Cool cheesecake completely and refrigerate for at least 8 hours.
- Place chilled cheesecake on a baking pan and place, uncovered, in the freezer (WITHOUT toppings). Freeze until firm.
- Remove from the freezer then wrap cheesecake in plastic wrap followed by heavy duty aluminum foil and finally in a large heavy duty freezer bag.
- Pumpkin Cheesecake can be frozen for 2-3 months.
- To thaw, remove Pumpkin Cheesecake from freezer to the refrigerator. Let thaw overnight.
- Garnish cheesecake with whipped cream, Oreos and chocolate when ready to serve.

Did You Make This Recipe?
Tag @CarlsbadCravings and Use #CarlsbadCravngs
Leave a Review, I Always Love Hearing From You!


Leland says
Is it possible to make this without a water bath?
Jen says
If you don’t use a water bath, the cheesecake will taste delicious but almost definitely will have cracks. The cracks probably won’t be too major, and you can cover them up with the whipped topping. If you don’t want to do a full water bath, place any time of rimmed baking tray/pan with water on the rack below the cheesecake. This should help with cracking. Good luck!
Laura H says
I love making cheesecake but always end up with a minor crack, no matter what I try. This was the first cheesecake to turn out perfectly! Must have been the detailed instructions and extra tips! Will be using these instructions from now on! 🙂
Jen says
That’s awesome, victory! I’m so pleased it will be on repeat! Happy thanksgiving!
Jennifer says
I have been saving this recipe since thanksgiving, to make for my son’s birthday “cake.” My husband says I should take the filling out of the oreos before crushing, but your detailed description doesn’t say that. Is he right?
Jen says
Hi Jennifer! No you don’t take the filling out of the Oreos for either the crust or the topping. That should save you some time 🙂 Enjoy and Happy Birthday to your son!
Brian says
I’m wanting to make this recipe for a work function next Friday (3/13/2015). However, my schedule is going to be pretty busy both the Thursday and Wednesday nights before. I wanted to know if I prepare all the layers, sans topping, and stick it in the fridge Tuesday night and wait and add the topping Thursday night, do you think it’ll still be perfectly fresh Friday for my work function?
Jen says
Hi Brian, what a great dessert to make for work – your colleagues will be so impressed with you! Yes! you can absolutely make this Tuesday and it will taste even better Friday as cheesecakes tend to taste better 2-3 days after being made. Just make sure to wrap it in plastic wrap and store it in the coldest part of your refrigerator. Enjoy!
Brian says
It turned out absolutely delicious, and not a crack in it! I also forgot to include that my work function was a pie-baking contest, and I won thanks to your recipe!!! Can’t thank you enough for posting this!
Jen says
YAY! I am so happy it turned out so well and thrilled you won!!! Congratulations!!
Brian says
Thanks for your helpful previous reply! I have one more question for ya that may sound kind-of silly … but I noticed in your directions you heat your waterbath in the roasting pan itself in the oven, then place the springform on top of it when it’s ready to bake. Won’t this cause it to float all around though? Does it make any difference if you heat the water first on the stove and then pour it in the roasting pan with the springform already in it?
Jen says
Hi Brian, the cheesecake is heavy enough that when placed into the water bath it will displace the water and sink. You can also heat the water on the stove if you prefer – both will work. Can’t wait to hear how it turns out!
Tonia says
Just discovered your blog today, and well…WOW!!! I can’t wait to try some of your recipes. Thanks for helping me plan ahead for my Thanksgiving dessert. Last year I made pumpkin tiramisu and this may just top that.
Jen says
Hi Tonia, I am so happy you discovered my blog – welcome! Your pumpkin tiramisu sounds divine! I think you will love this cheesecake though – can’t wait to hear if it tops the tiramisu!
Carin says
I love that you’ve made Thanksgiving so easy and delicious for me. Thanks for sharing and helping me get out of the “usual Thanksgiving sides” rut.
Jen says
You are so welcome Carin! I have had so much fun putting a delicious “spin” on some of the traditional favorites. Have a fabulous Thanksgiving!
Therese says
All I can say is OMGOSH!!!! WHen I saw the picture of this pumpkin Oreo cheesecake I had to make this! SO glad I did and so was everyone else! 🙂 This was amazing! It’s a must try! you won’t be disappointed. It’s our new addiction. 🙂 looking forward to trying other recipes. I have several printed out and ready to go. Thank you for sharing your gift with us.
Jen says
Therese, you made my day, thank you! I am thrilled you (and everyone 🙂 ) loved this cheesecake so much! I am excited for you to try more of my recipes – I hope you love them as much!
Lindsay says
I really want to try to make this soon, but every time I make cheesecake-or any dessert with cream cheese, really-I can never get the cream cheese to whip up smooth. It’s always lumpy. Do you have any suggestions? I’m wondering if I’m just not letting it soften enough. Thanks!
Jen says
Hi Lindsay, yes that is exactly it! You will want to make sure you use full fat cream cheese and make sure the cream cheese is softened and at room temperature (I use the microwave). If its hard or cold at all it will be lumpy. Hope that helps!
Jack Mulder says
JEN!!!! You are simply amazing! I have tried several of your dishes and they come out fantastic!! Do you have any cookbooks for sale? I am thinking of starting my Christmas shopping earily! Since I too live in Carlsbad is there any way of getting them autographed?? You are the best! I’m off to try a new dish!
Have a great weekend!
Jen says
Hi Jack, you are the best! I don’t have any plans for a cookbook at this time but if anything changes I will be sure to let you know 🙂 Thank you for trying my recipes and for all your support and WAY TO GO on the jump on Christmas shopping! I hope you have a great weekend!!
Jen says
Hi Jack,
It’s finally happening! Thank you so much for your previous interest in a cookbook xo
I’m excited to inform you it’s now available for presale! Copy and paste the following into your browser: https://carlsbadcravings.com/home/cookbook/ OR Google “Carlsbad Cravings Cookbook” and yes, I’ll autograph it for you too:)
Happy Cooking!
APRIL says
When making the crust do yu use the whole oreo. Cream and cookie. Or just the cookie part?
Jen says
You use the entire oreo 🙂 Enjoy!
Garagegymplanner says
MY wife will get shocked if I serve this cake in front of her.Thanks, and I’m going to surprise her on this weekend.
Jen says
YES! She will absolutely love it! What an awesome gesture!
Aromatz-foods says
i really like your recipe , it was very tasty
Jen says
thank you so much!
Sheri says
Was hoping to make this in a 10 inch springform pan and increase ingredients to serve a few extra people, as there will be 14 people coming to dinner. Any idea how to adjust this?
Jen says
Hi Sheri, a 9″ pan has approximately 9 cups volume and a 10″ pan has approximately 11 cups volume so in the recipe card, I would change the serving size to 11 and then round all the ingredients down (like down to 4 eggs). I hope this helps!
Sarah Perkins says
First of all, I absolutely LOVE every recipe of yours I have tried, and that has been a lot!!! So thank you!!! Second, no matter what I do, my water bath leaks into my pan! I have tried so many layers of foil and everything else I can think of and it still leaks and then leads to a very soggy crust! But then if I don’t do a water bath the top cracks! Can you give me any other suggestions? Please????
Jen says
Thank you so much Sarah, I’m honored you’re loving my recipe. Have you tried wrapping the springform pan first in a slow cooker liner, tying any excess to the side then proceed to wrap in foil? You can also place the springform pan inside a slightly larger pan (like a disposable aluminum pan) and then placing in the water pan. Good luck!
Therese says
I’ve made this many times because it’s a huge favorite with my family. Friends are now addicted! 🙂 I got a 9×13 springform pan in hopes I can double this recipe. Do you think it would work?
Jen says
I’m thrilled it’s a favorite! I would 1 1/2 times the recipe instead of double it. You can also check out my pumpkin cheesecake bars based on this recipe and swap in the Oreo:https://carlsbadcravings.com/pumpkin-cheesecake-bars/
Roxy says
Jen…. You did it again! It’s getting safe to say that your blog is the only one I trust to make amazing food. Every single one of your recipes is FANTASTIC and I can’t thank you enough! Everyone thinks I’m an amazing cook but it’s really just you . This was soooo yummy just like the rest!
Jen says
Thank you so much Roxy! And you ARE A fantastic cook – you are doing all the work! Thanks so much for making my recipes and my day!
Kim says
I assume the size of the pumpkin puree is 15 ounces is this correct?
Jen says
Hi Kim, it is 1 cup as listed.
Roxanne says
I want to make the top layer some sort of thick caramel sauce instead of whipped cream. Any recommendations??
Jen says
Yes! Try my amazing caramel: https://carlsbadcravings.com/easy-creamy-caramel-sauce/