Homemade Banana Cream Pie

This Banana Cream Pie recipe is an irresistible, from-scratch masterpiece that has me obsessed! You can keep it simple with just the crust and custard, or I’ve included options for an irresistible Nutter Butter crust, layer of chocolate ganache (which also prevents a soggy crust), and peanut butter salted caramel that will have this pie being the most talked about dessert anywhere you serve it! Plus, with detailed make-ahead instructions and step-by-step photos, tips, and tricks, you’ll feel supported and ready to make this crowd-pleaser like a pro.
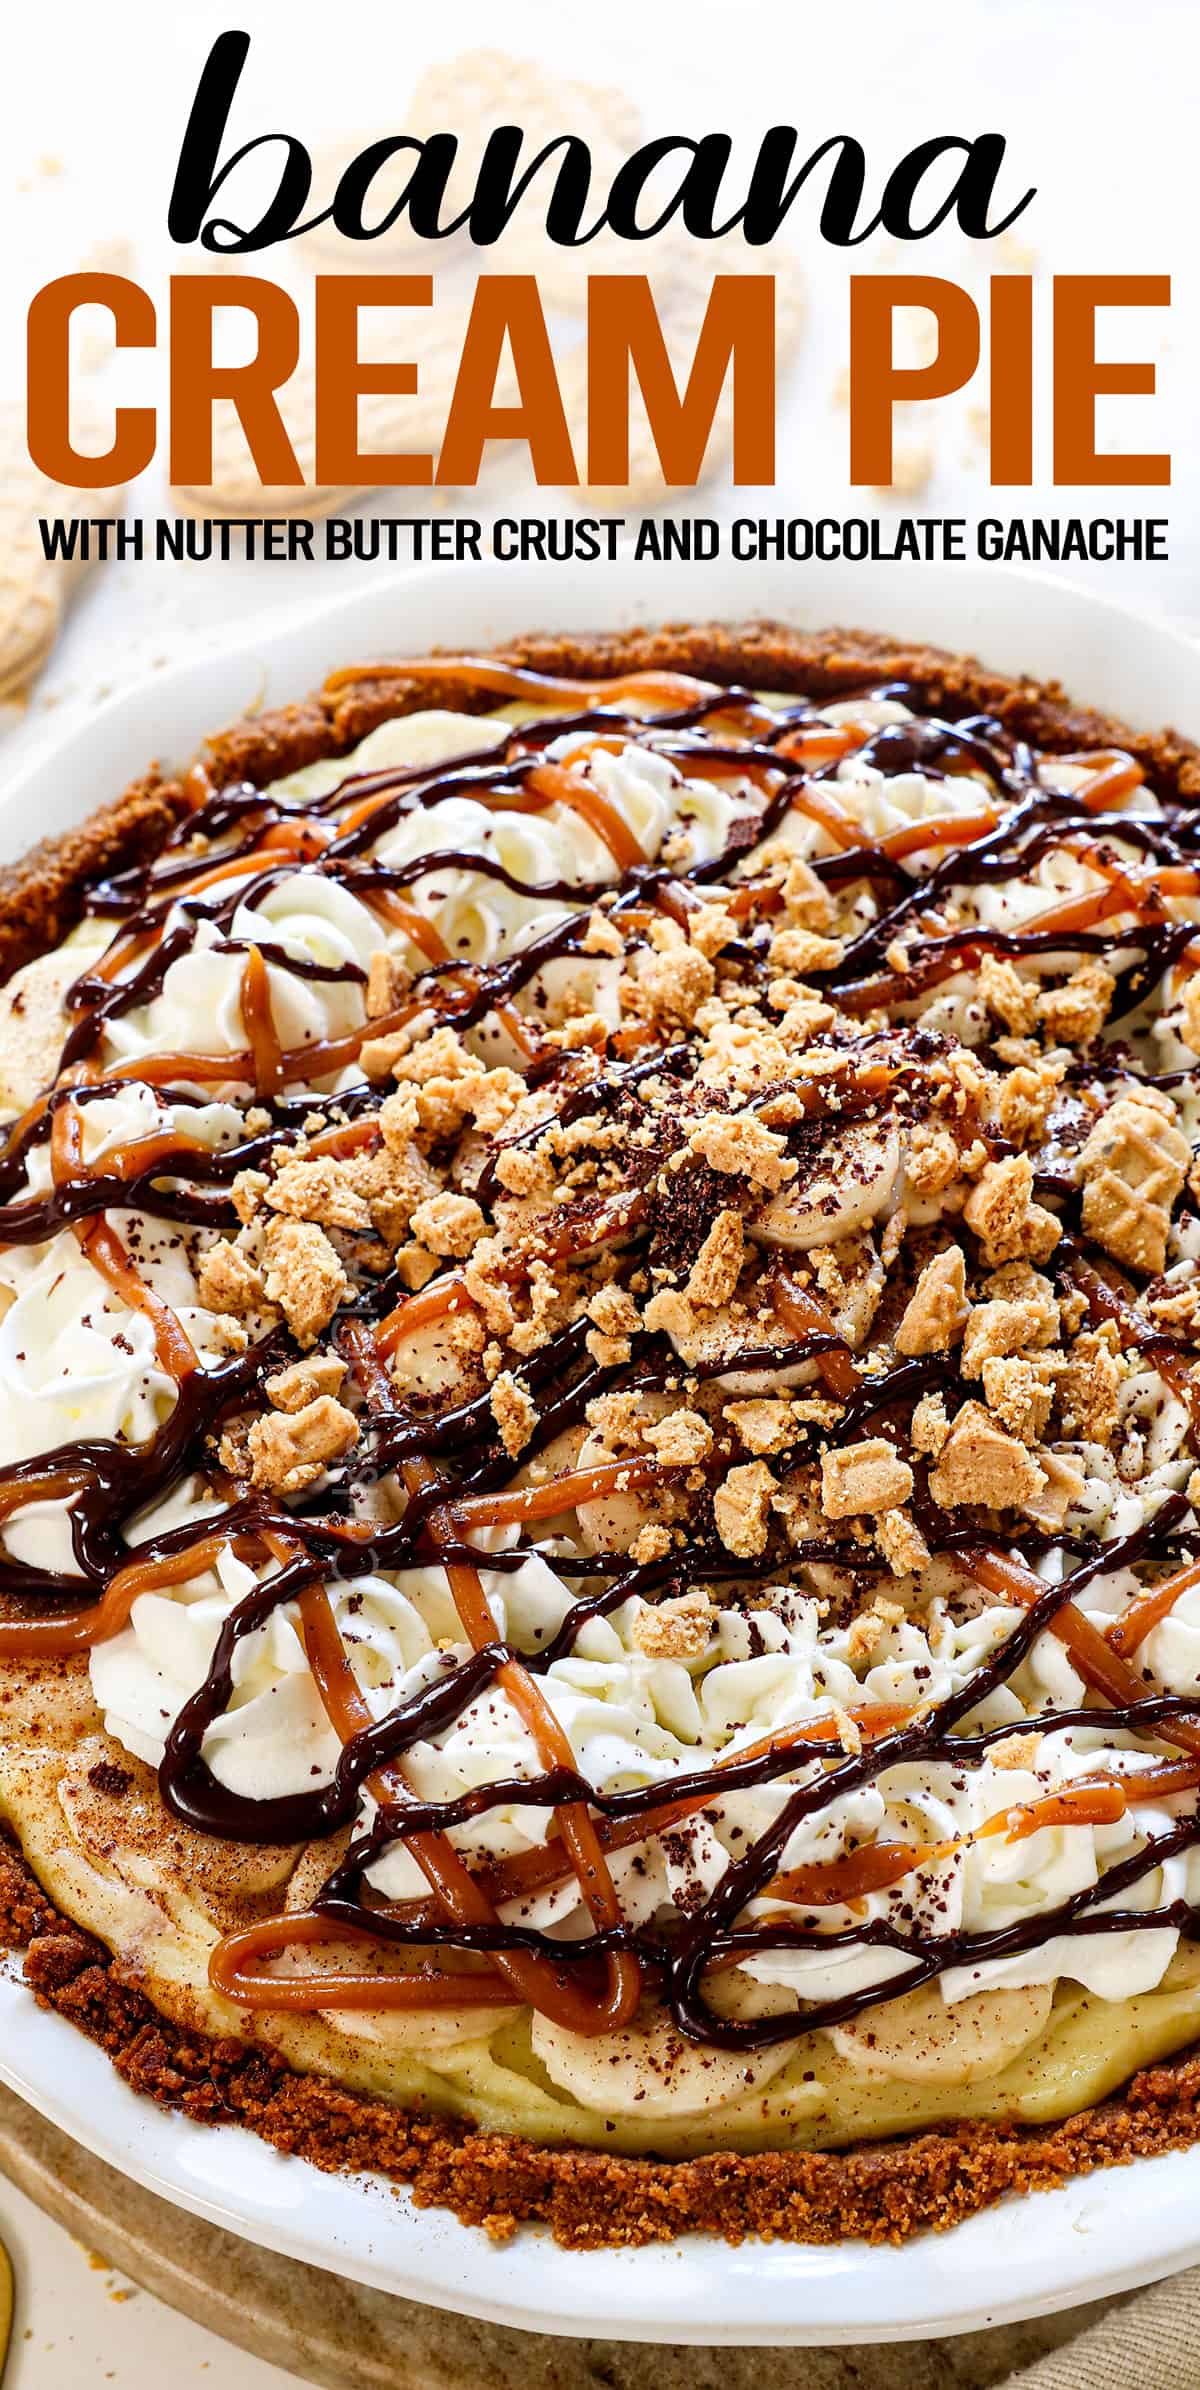
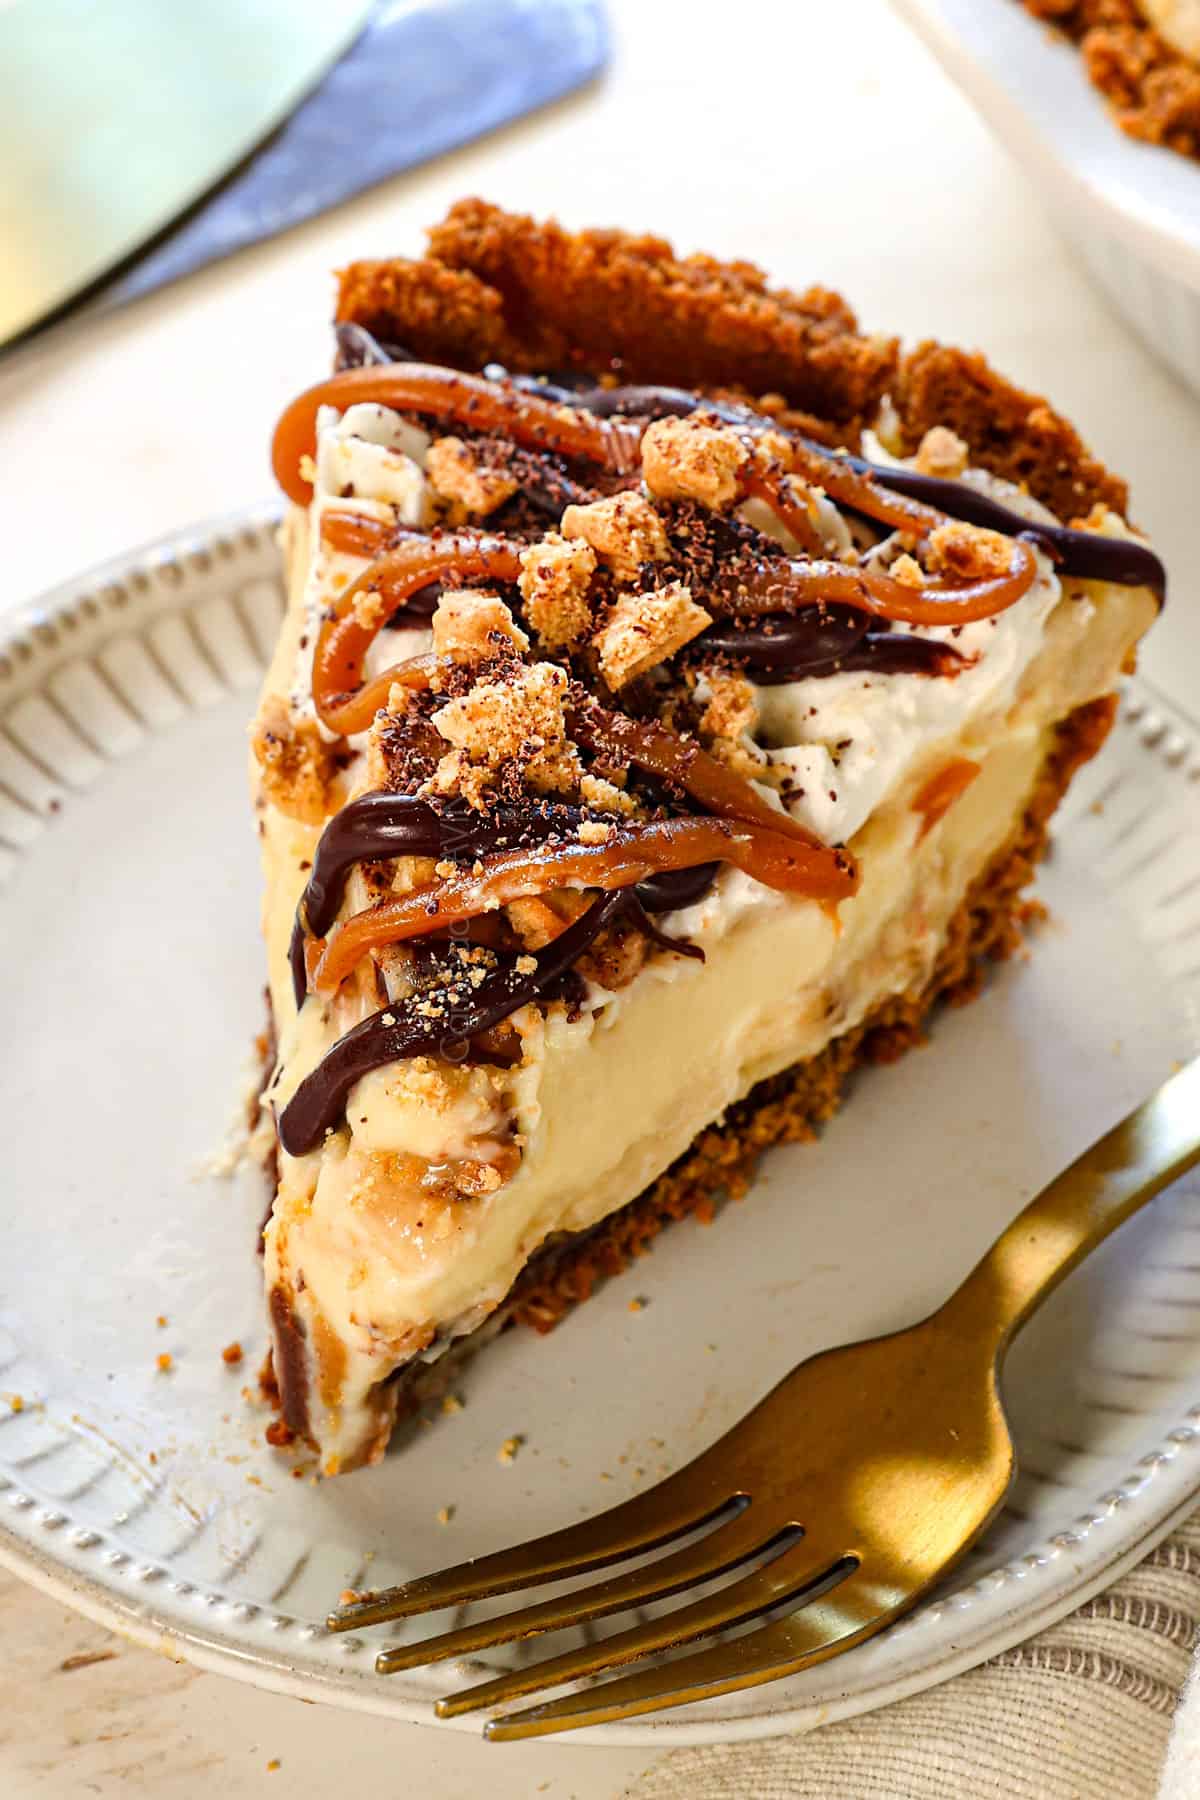
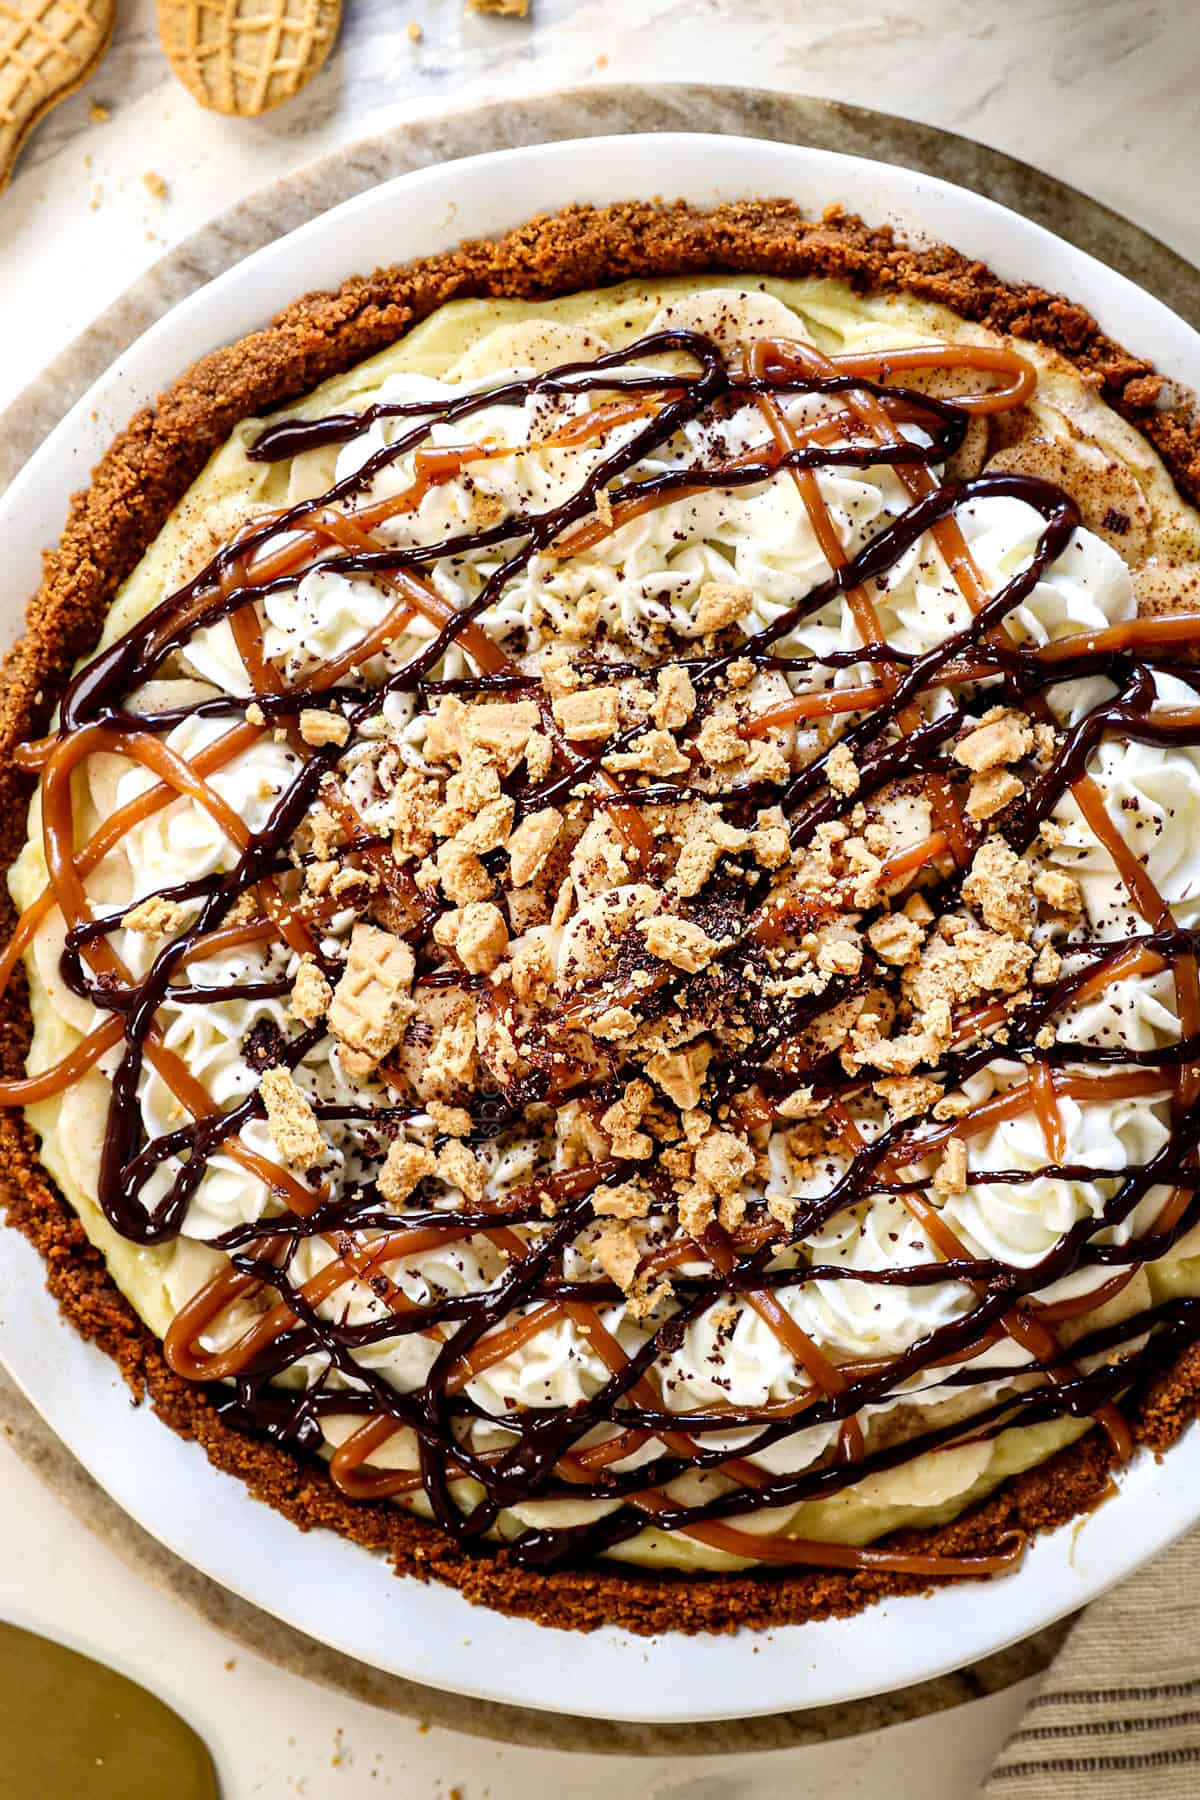
banana cream pie in a nutter butter crust drizzled with chocolate


What makes this the Best Banana Cream Pie Recipe
  • Deceptively Easy to Make: This recipe has a few components, but I promise they are each quick and straightforward! Making the custard from scratch might sound intimidating, but I promise, it’s SO easy, especially with my step-by-step photos, technique, and tips!
  • 100% From Scratch: This custard is silky, smooth, sturdy, and rich in ways box pudding mixes can only dream about. It tastes amazing with the fresh banana slices nestled in between its creamy layers.
  • Nutter Butter Crust: Peanut Butter and bananas are a match made in heaven, so I paired this Banana Cream Pie with a Nutter Butter Crust! Nutter Butters are divine alone and make an irresistible nutty, crunchy, just-sweet enough crust.
  • Chocolate Ganache: Adding a layer of silky chocolate ganache over the crust adds the perfect amount of chocolate yum without overpowering the banana cream. You’ll never want to eat this pie without it!
  • Never Soggy Crust: Many Banana Cream Pie recipes suffer from a soggy crust—not this recipe! The ganache not only elevates the taste but also the texture by creating a moisture barrier so the crust never gets soggy.
  • More Bananas: Instead of a measly three bananas, this recipe uses 5-6 bananas for three layers—two layers nestled between the custard and one finishing layer on top for more satisfying, balanced proportions.
  • Peanut Butter Salted Caramel: A drizzle of this heavenly caramel sauce ties in the crust-plus it’s so good you’ll want to eat it by the spoonful! Of course, this is optional; you can also use store-bought caramel sauce, but the touch of peanut butter in this recipe is extraordinary.
  • Make Ahead: I’ve included detailed instructions for how to make the pie in advance or how to make parts of the pie ahead of time for a stress-free win.
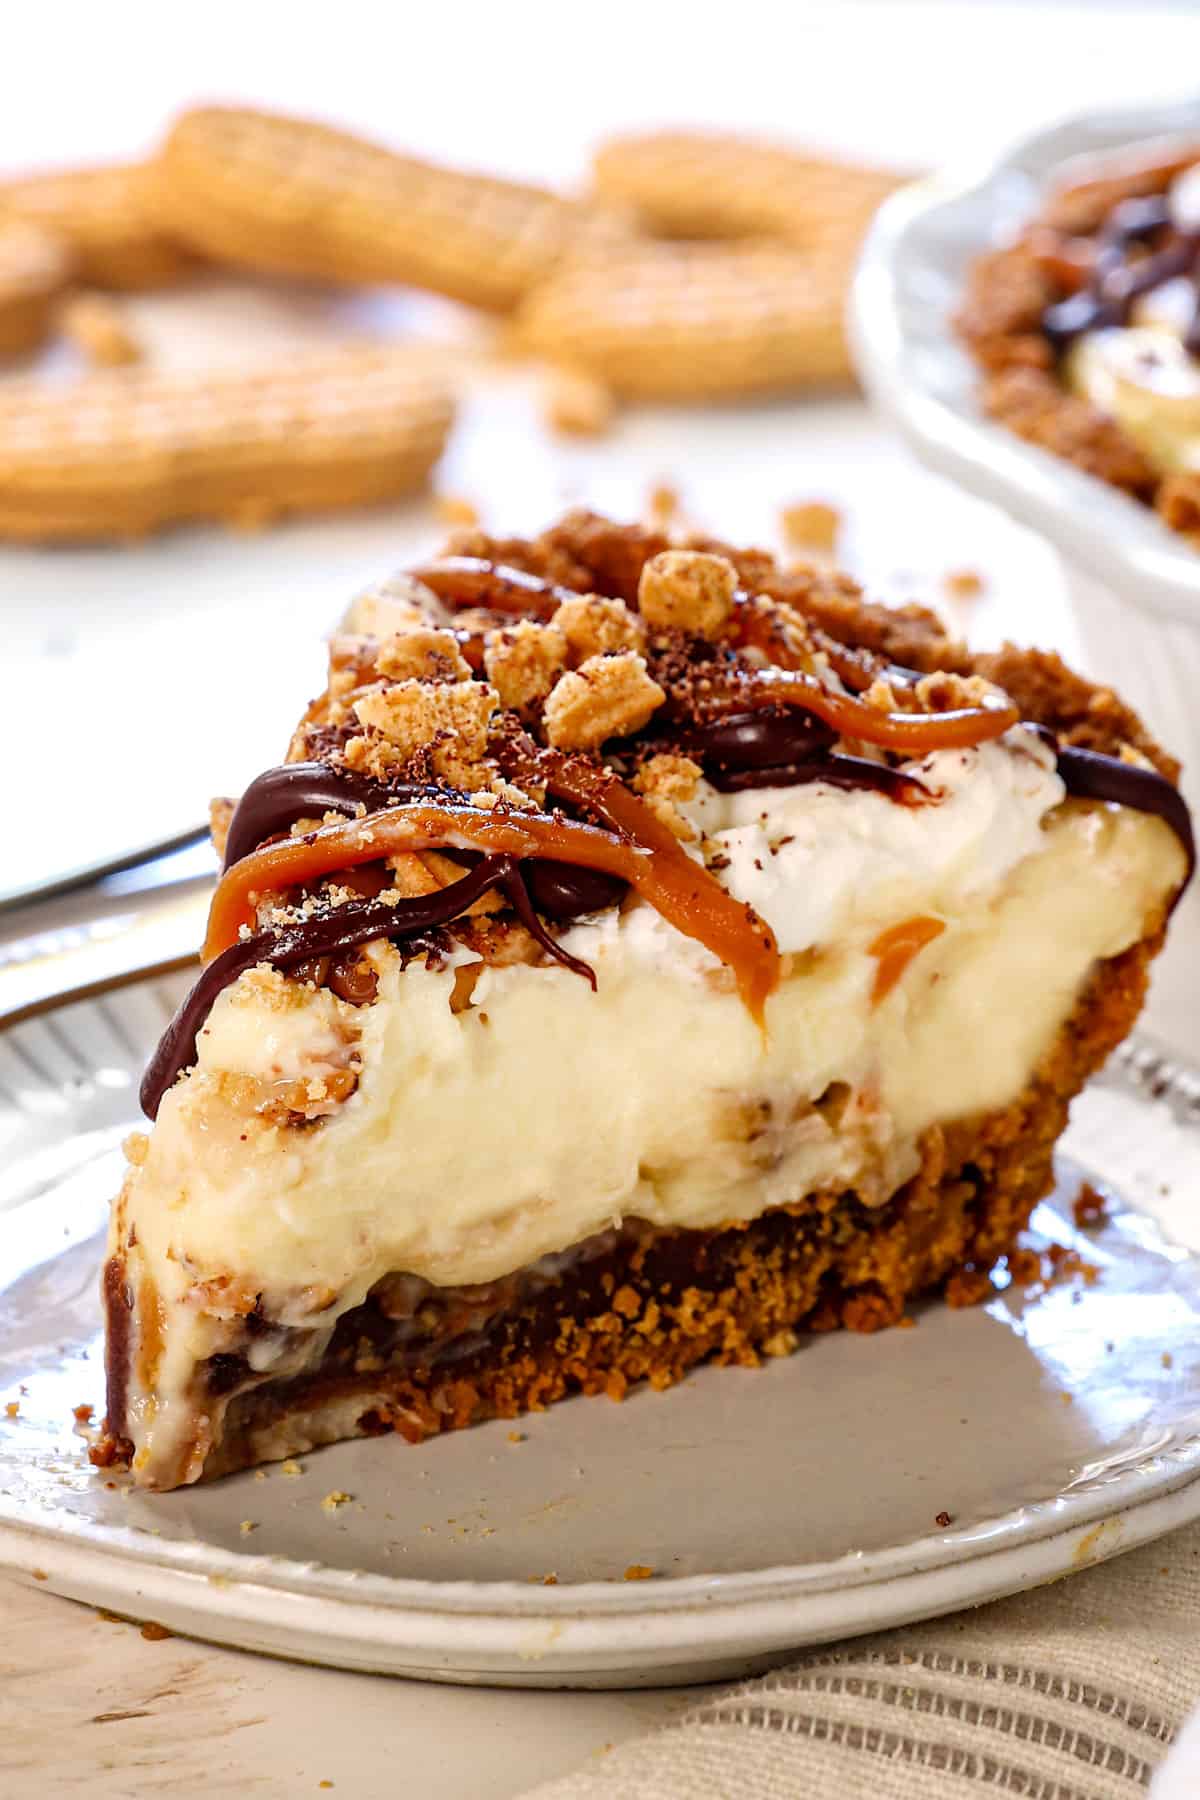
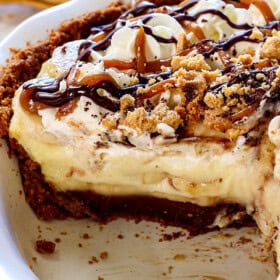
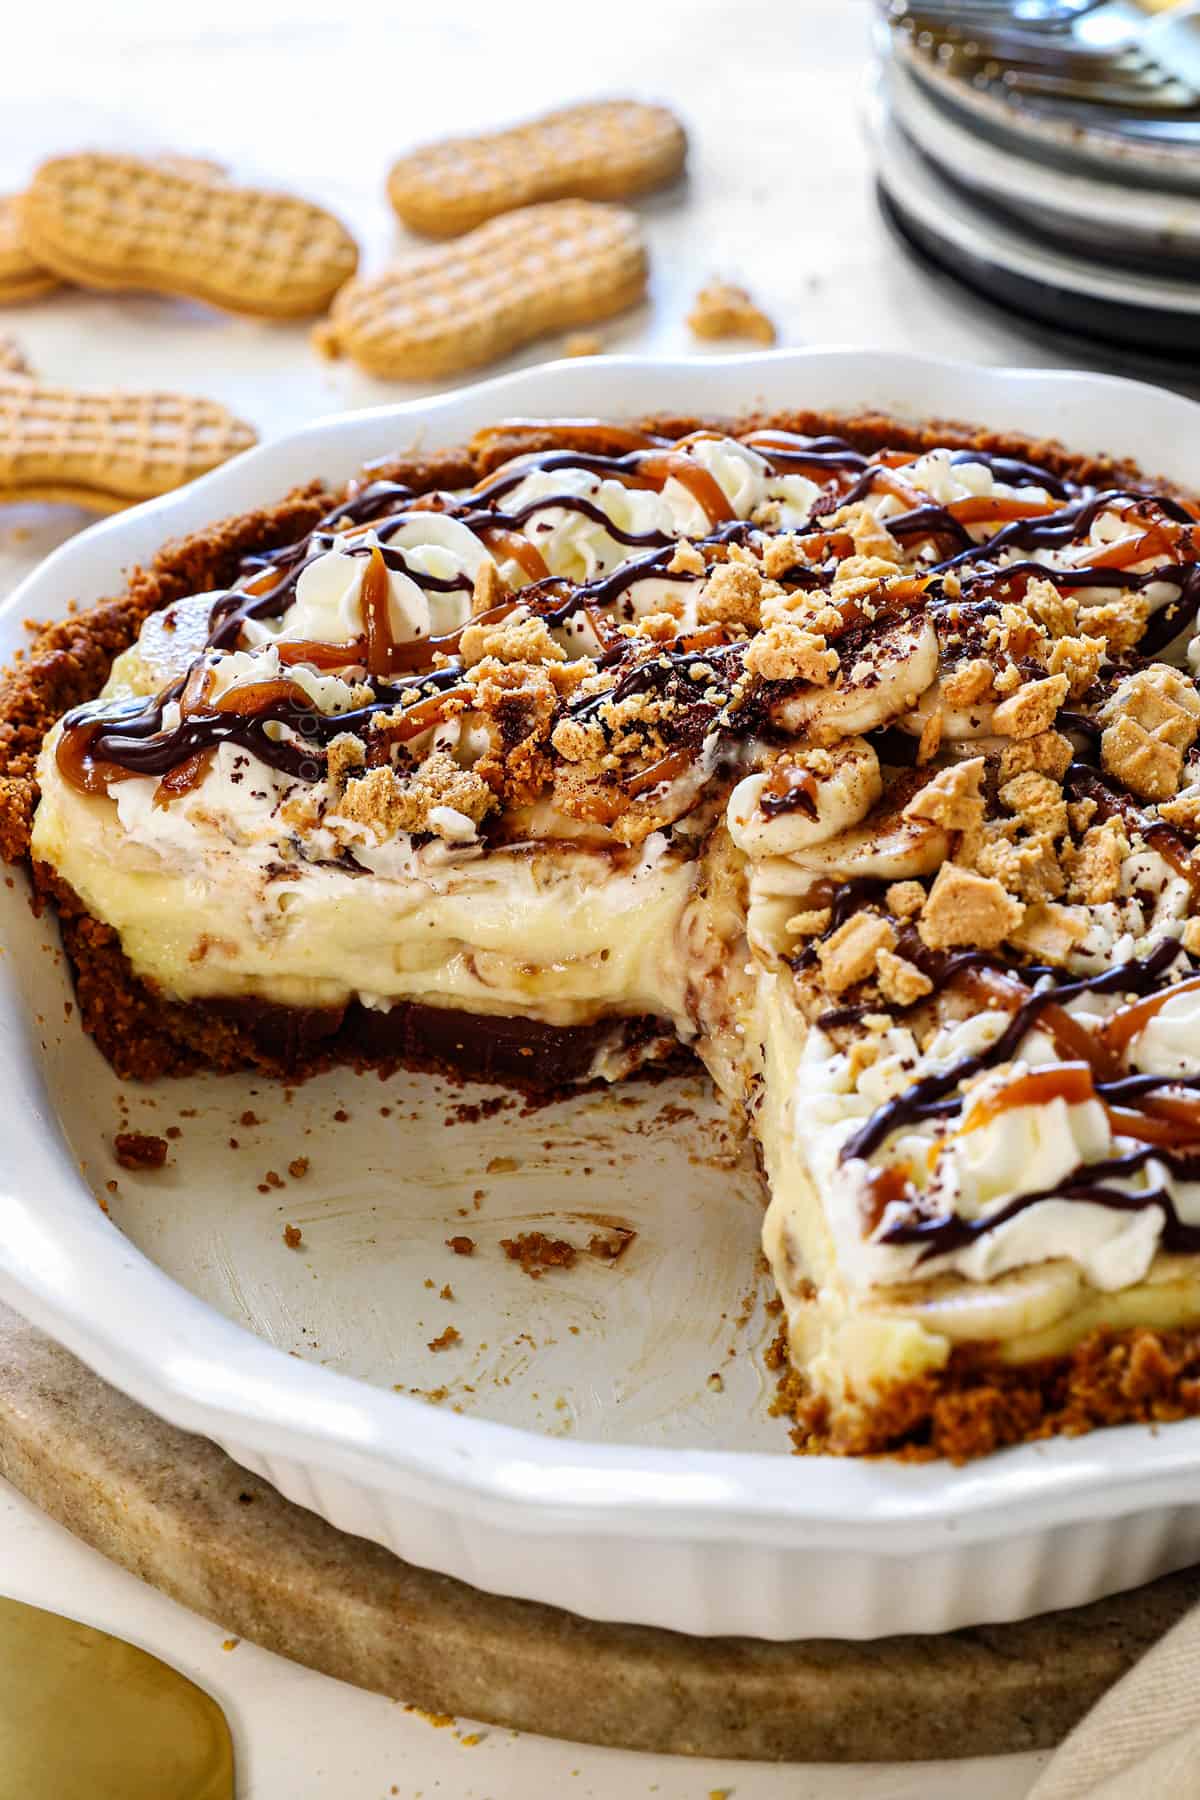
banana cream pie recipe with a few slices removed showing how creamy and silky the banana cream pudding/custard is
ingredient icon

Banana Pie Recipe Ingredients

This Banana Cream Pie recipe has five components: the crust, ganache, custard, whipped cream, and peanut butter caramel sauce. You can make each one (highly recommend) or skip the ganache and caramel sauce. Let’s take a closer look at what you’ll need for each (measurements in the printable recipe card at the bottom of the post):

Nutter Butter CRUST: 

  • Nutter Butter Cookies: You may use your favorite pie crust or Graham cracker crust recipe, but for the BEST Banana Cream Pie—Nutter Butters are the answer! You will need 20 cookies with the filling to yield 2 ½ cups of crushed crumbs.
  • Butter: Use unsalted butter.

chocolate Ganache: 

  • Semi-Sweet Chocolate: You will need 6 ounces of quality semi-sweet baking chocolate bar—NOT chocolate chips unless they are Ghirardelli or Guittard.  Baking chocolate is a cooled, hardened chocolate liquor with a high percentage of cocoa butter that helps it melt beautifully. Ghirardelli/Guittard also has a higher percentage of cocoa butter than other brands, so they also will work.  Other brands will leave you with stubborn, grainy chocolate bits that refuse to melt.
  • Heavy Cream: Enriches the chocolate with a silky, creamy texture and helps create a smooth, luscious consistency. Look for “heavy whipping cream” at the grocery store. 
  • Butter: Just one tablespoon adds a richness and creates a slightly thicker, more stable texture.
  • Corn syrup:  This keeps the ganache smooth and pliable after being refrigerated. You may substitute with honey or maple but be aware it will affect the flavor.

Banana Cream Custard: 

  • Bananas: Barely ripe bananas provide the fresh banana flavor. You will need 5-6 total, about 1 1/2-2 per layer (three layers total), depending on their size and the thickness of your slices.
  • Milk: This forms the pie’s custard base for a smooth and creamy filling without being too rich; however, whole milk is best for richness and flavor.
  • Heavy Cream: Adds extra creaminess and a thicker, silkier consistency.
  • Sugar:  Granulated sugar sweetens the custard without overpowering the banana flavor.
  • Eggs: You will need 2 eggs and 3 large egg yolks. The eggs provide structure and a custard-like texture, with yolks adding richness and a beautiful color.
  • Salt: Balances the sweetness and enhances the overall flavor. Use table salt, double the sea salt, or kosher salt.
  • Cornstarch: Thickens the custard filling to a stable, sliceable texture without making it too dense or tasting gummy or rubbery. It is also very important because it slows down the egg protein coagulation, making the eggs more resistant to overcooking and curdling.
  • Butter: Adds richness, gloss, and a luxurious mouthfeel to the custard. Use unsalted or reduce the salt in the recipe.
  • Vanilla Extract: Enhances the natural banana flavor with a warm, complementary note. Use quality for the best flavor.
a slice of banana cream pie topped with caramel drizzle on a plate

Peanut Butter Caramel Sauce (optional)

  • Granulated sugar: Provides the main sweetness and caramel base; as it melts, it caramelizes, creating a rich, deep flavor.
  • Water: 2 tablespoons helps dissolve the sugar evenly, allowing it to caramelize smoothly.
  • Heavy cream: Adds richness and thickness to the sauce, creating a luxurious, creamy texture. You may substitute with evaporated milk in a bind.
  • Peanut butter: This is what sets this caramel sauce apart! Use commercial peanut butter like Skip or Jiffy and not natural peanut butter because they can make the sauce grainy or separate.
  • Sea salt: A pinch balances the sweetness and enhances the depth of the caramel and peanut butter flavors. Adjust the salt based on personal taste.
  • Vanilla Extract: This adds a warm, aromatic note that complements both caramel and peanut butter. Always add vanilla last, after removing the sauce from heat, to preserve its flavor.

Whipped Cream

Note: You can omit the gelatin and water and make “traditional,” whipped cream. Because it is not stabilized, the pie must be served immediately once added, or it will deflate or weep. With stabilized whipped cream, however, the cream can be made a full day ahead.
  • Heavy cream: Look for “heavy whipping cream” at the grocery store. You must use heavy cream—no other substitutions will work. Make sure the cream is very cold, and remove it from the refrigerator just when ready to use.
  • Powdered sugar: Also known as confectioner’s sugar, sweetens the cream without overpowering it and interacts with the gelatin better than granulated sugar.  
  • Vanilla extract: Use quality extract to boost the flavor of the whipped topping. 
  • Unflavored gelatin: This is a common baking ingredient found next to the packages of Jell-O and pudding at the grocery store. For vegetarians, use one teaspoon agar-agar instead of gelatin.
  • Water: Cold tap water is used to dissolve the gelatin. 
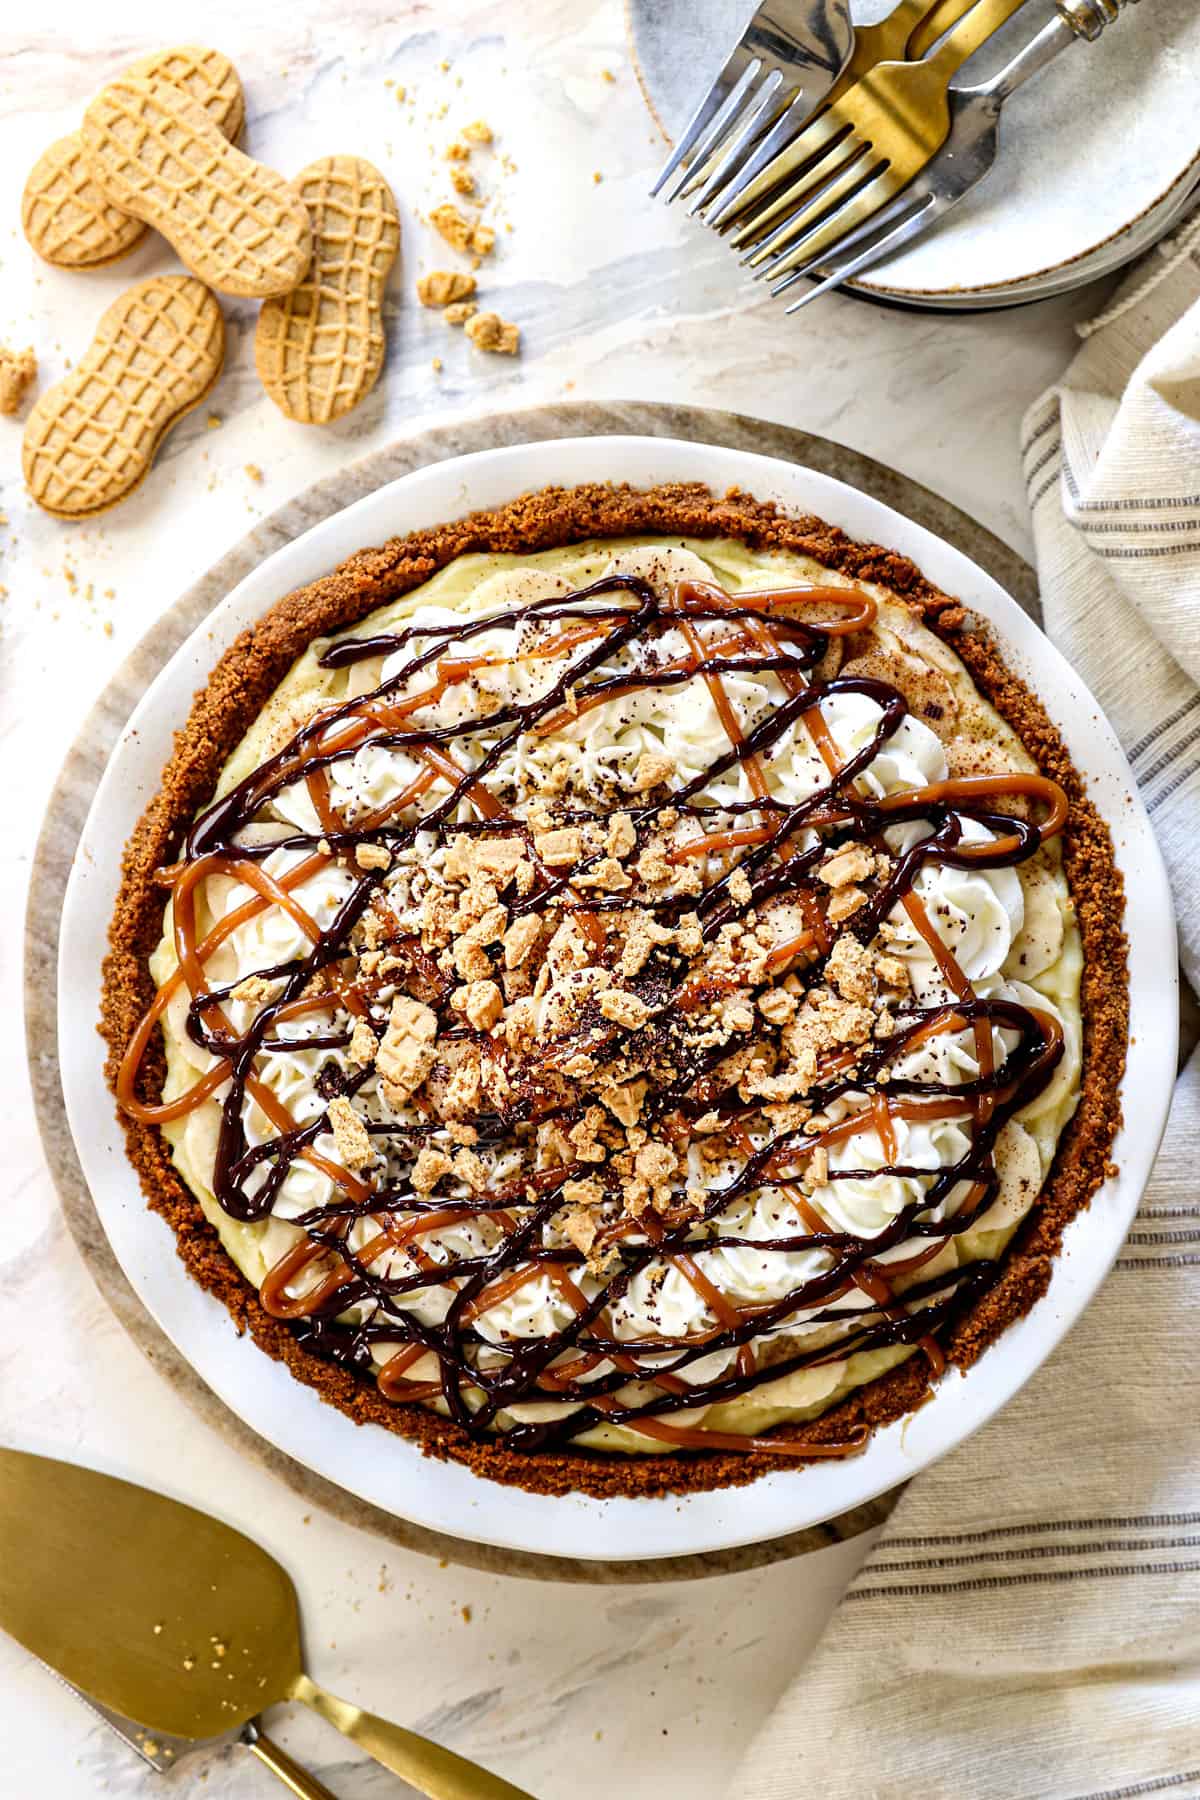
top view of homemade banana cream pie topped with whipped cream and bananas

How to make Homemade Banana Cream Pie

Let’s look at how to make Banana Cream Pie with step-by-step photos. Keep in mind you can pick and choose which elements of the recipe you would like to incorporate (full recipe in the printable recipe card at the bottom of the post):
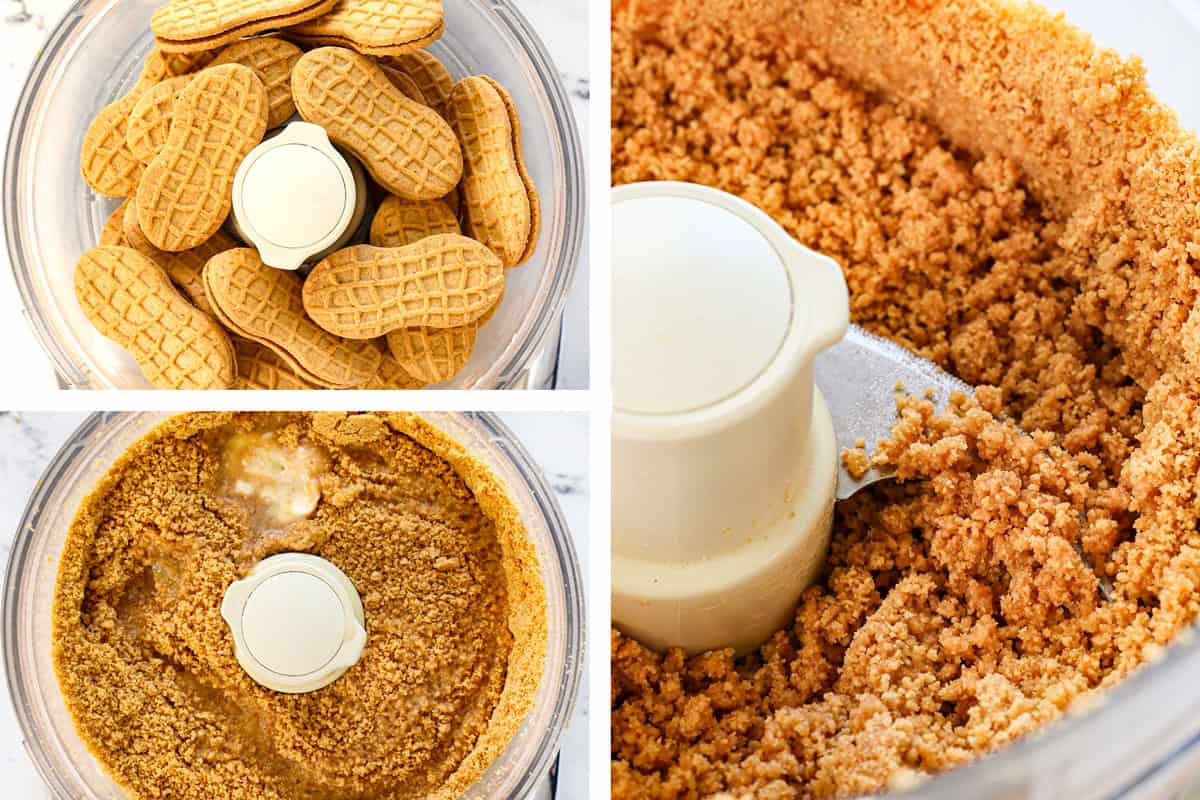
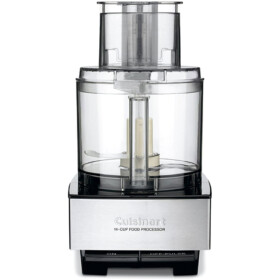
  • Step 1: Make the Crust. Add the cookies (and filling) to a food processor and crush them into a fine crumb (or crush by hand)—pulse in the melted butter. 
a collage showing how to make Banana Cream Pie by adding the cookies to a food processor, pulsing into crumbs, then adding the butter
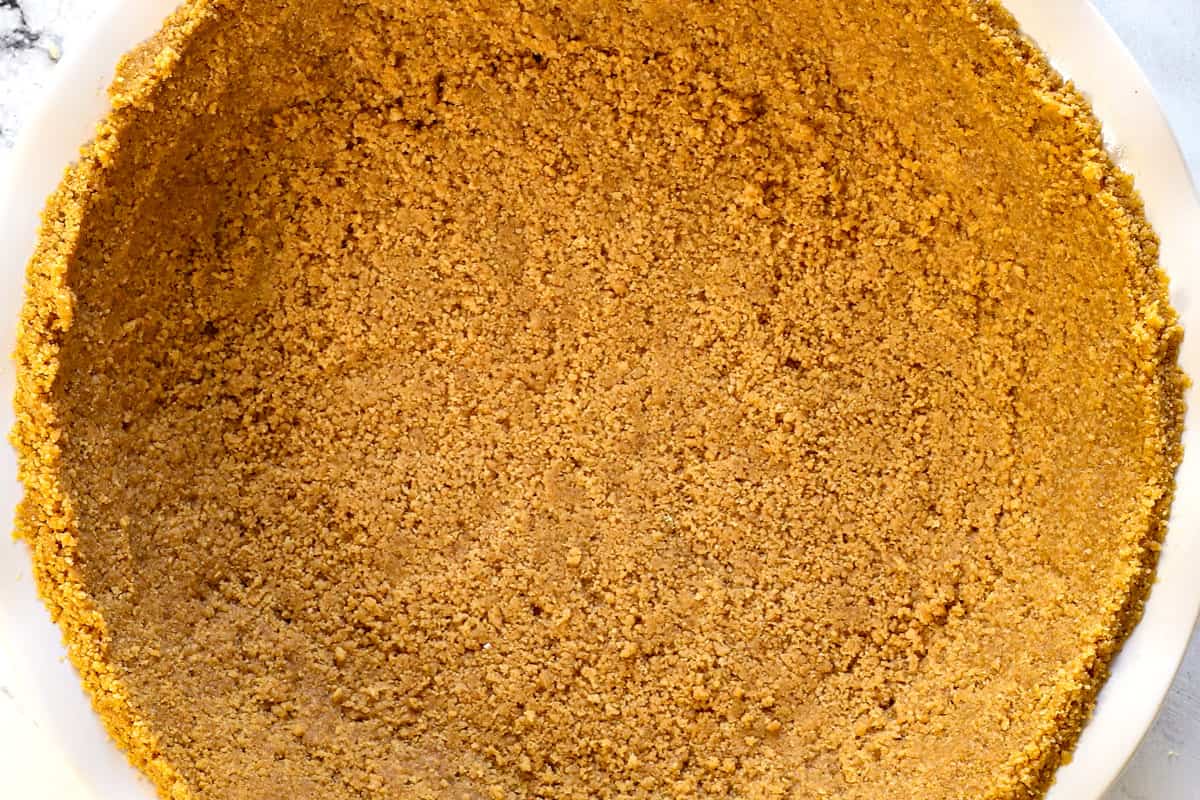
  • Step 2: Bake the Crust. Press the mixture into the bottom and sides of an ungreased 9-inch pie dish. Bake at 350 degrees for 10-12 minutes, until golden. Set aside to cool.  
showing how to make Banana Cream Pie by pressing the crumbs into a pie plate and baking
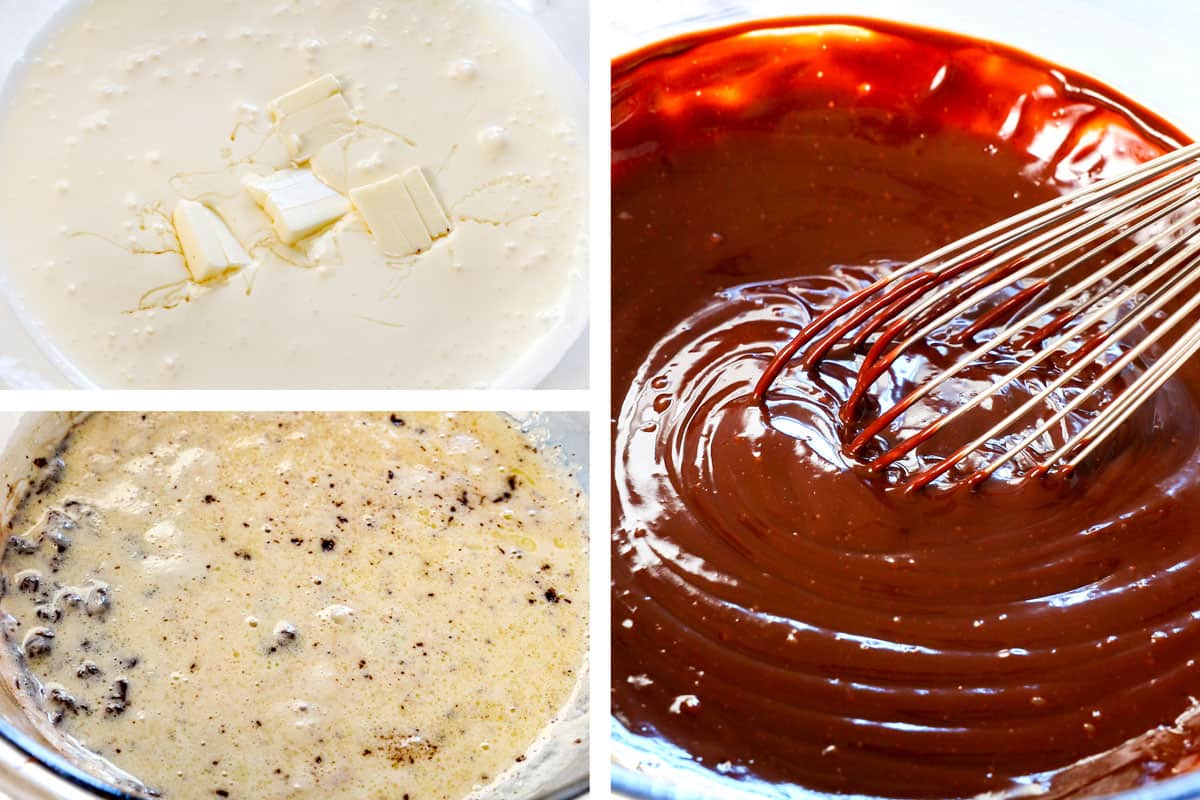
  • Step 3: Make the Chocolate Ganache. Add the heavy cream, butter, and syrup to a microwave-safe bowl and microwave for 1 ½-2 minutes or until simmering. Add the chocolate and give it a swirl so the chocolate is covered. Let stand for 3 minutes, then vigorously whisk until the chocolate is melted and completely smooth.
a collage showing how to make Banana Cream Pie by microwaving heavy cream, butter and corn syrup until simmering, then adding chopped chocolate, then whisking until the chocolate melts and a ganache forms
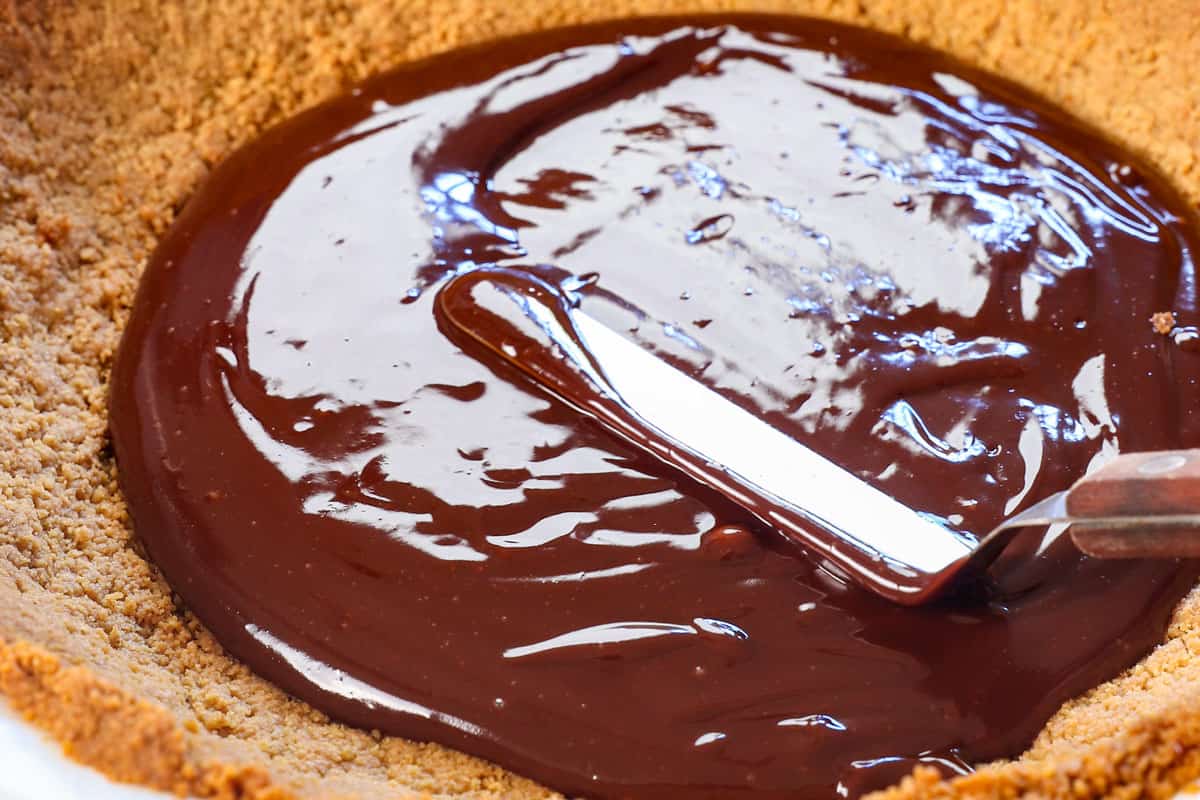
  • Step 4: Add the Ganache to the Pie. Pour the chocolate onto the room-temperature crust and spread it into an even layer.  Let it cool to room temperature before adding the bananas.
showing how to make Banana Cream Pie by spreading the ganache onto the bottom of the pie crust
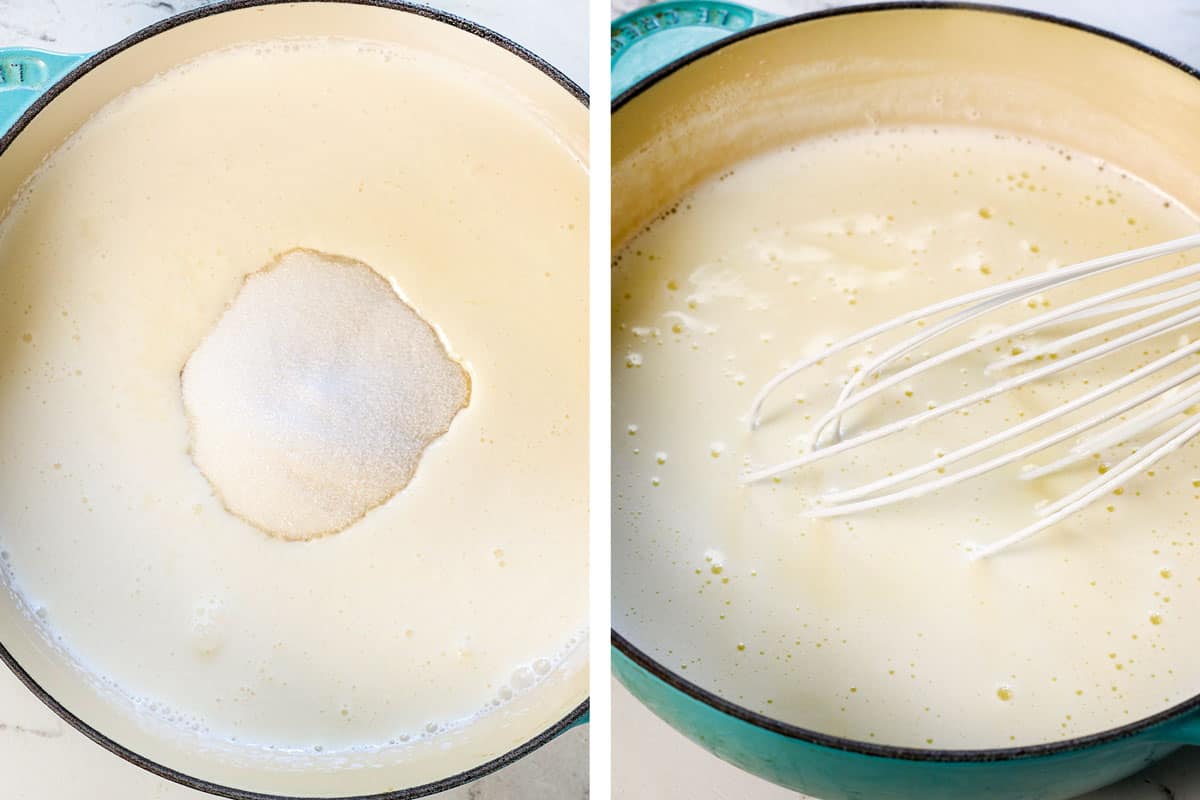
  • Step 5: Simmer the Cream. Add the milk, heavy cream, sugar, and salt to a medium saucepan.  Bring to a gentle simmer for one minute or until the sugar has dissolved, stirring occasionally.
showing how to make Banana Cream Pie by simmering the milk, cream and sugar in a saucepan to make the custard
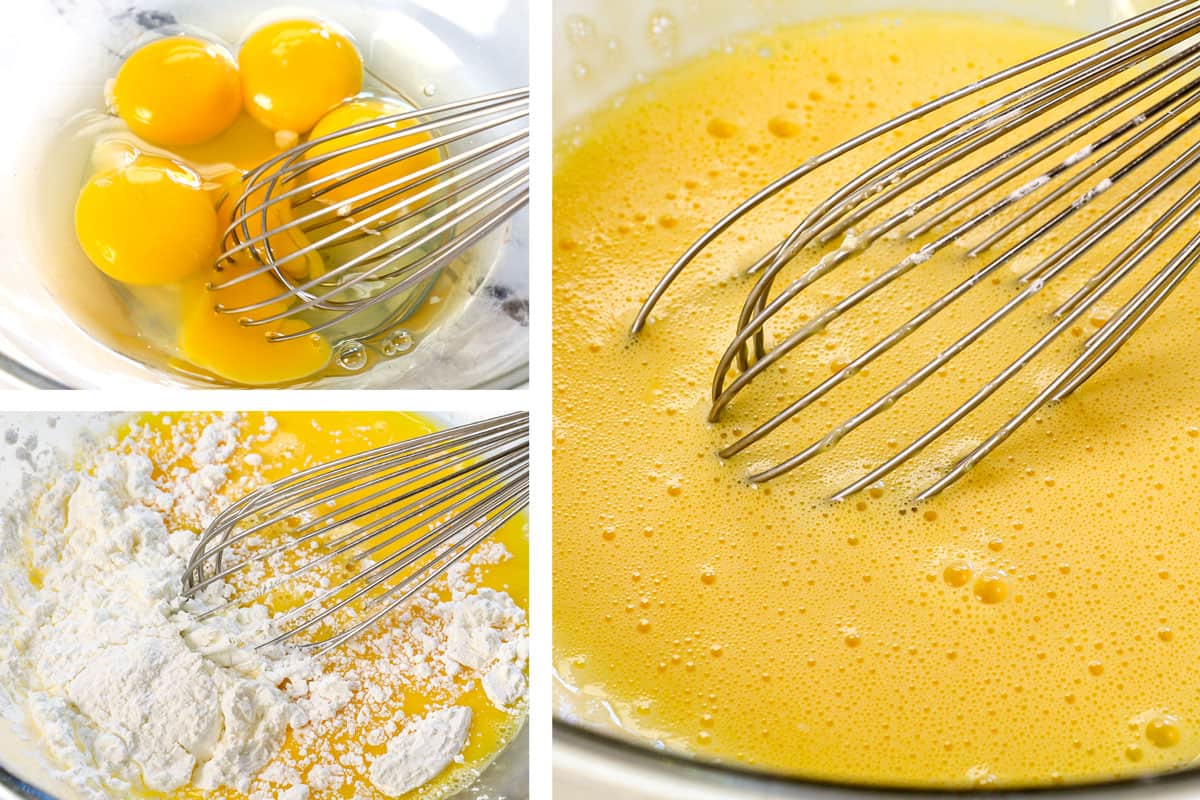
  • Step 6: Combine the Eggs and Cornstarch. In a medium bowl, whisk the eggs and egg yolks, then whisk in the cornstarch.  Vigorously whisk until the cornstarch is completely dissolved.
a collage showing how to make Banana Cream Pie by whisking the eggs, egg yolks and cornstarch together until the cornstarch is dissolved
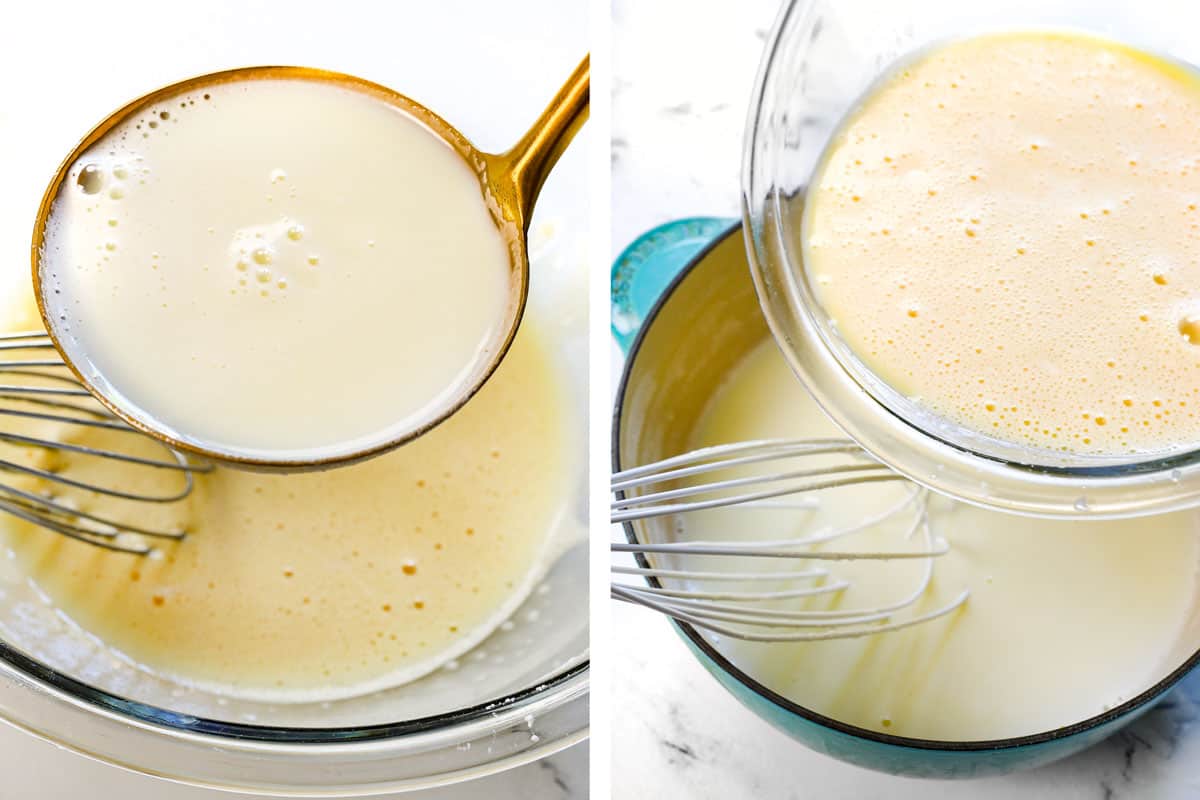
  • Step 7: Temper the Eggs. Gradually ladle one spoonful of the warm milk mixture into the egg mixture while whisking constantly.  Repeat twice, then slowly pour the mixture into the saucepan, whisking constantly.
a collage showing how to make Banana Cream Pie by adding a ladle of hot cream/milk to the egg/cornstarch mixture
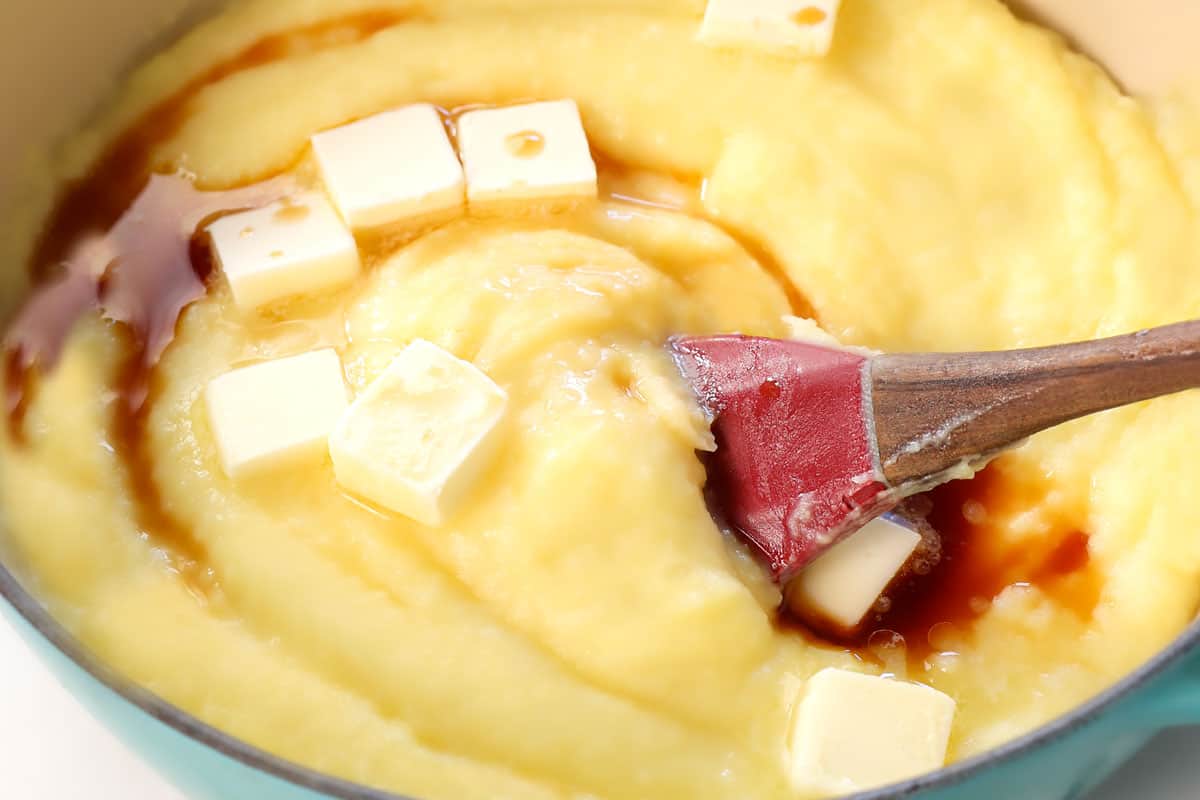
  • Step 8: Thicken the Custard. Bring the mixture to a gentle simmer over medium-low heat, whisking constantly.  After simmering for a few minutes, reduce the heat to low and switch to a silicone spatula so you can stir and scrape the sides of the pan.  Simmer until thickened to the consistency of thick pudding. Remove from the heat and whisk in the butter and vanilla.   Let it cool for 15 minutes until lukewarm. 
showing how to make Banana Cream Pie by simmering the custard until thickened, then adding butter and vanilla extract
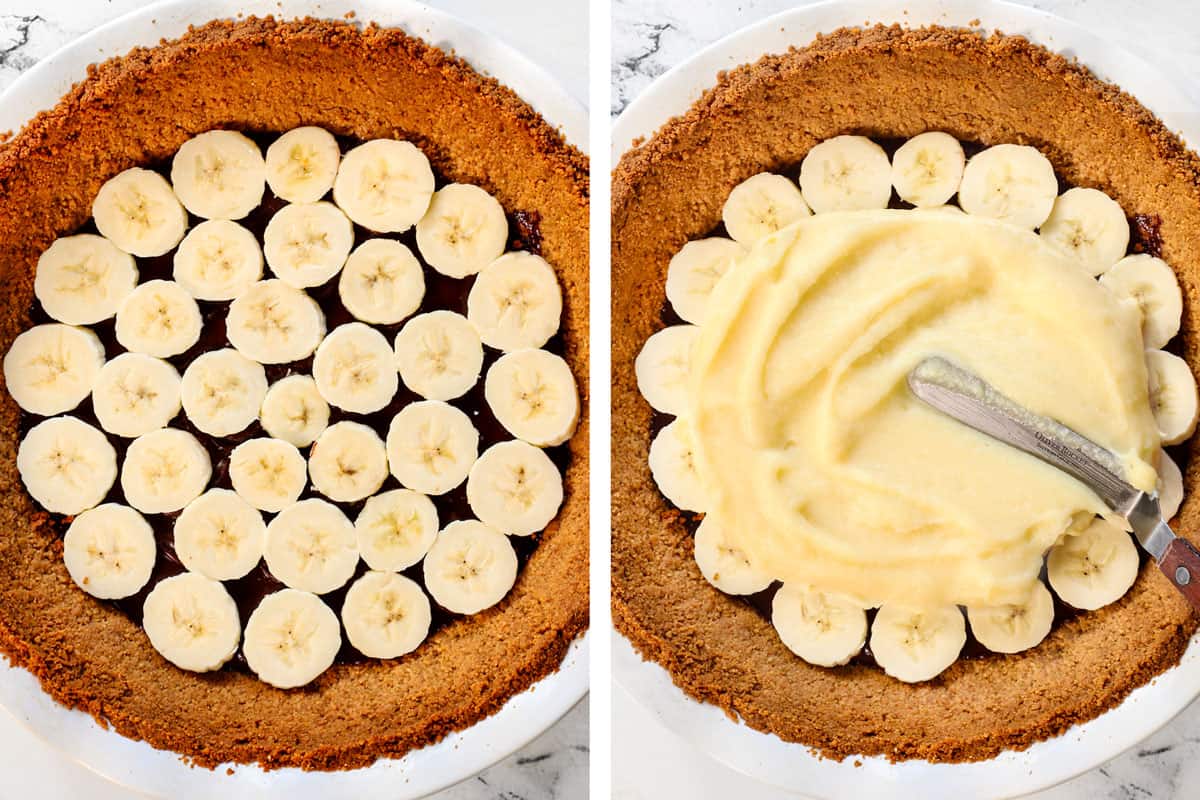
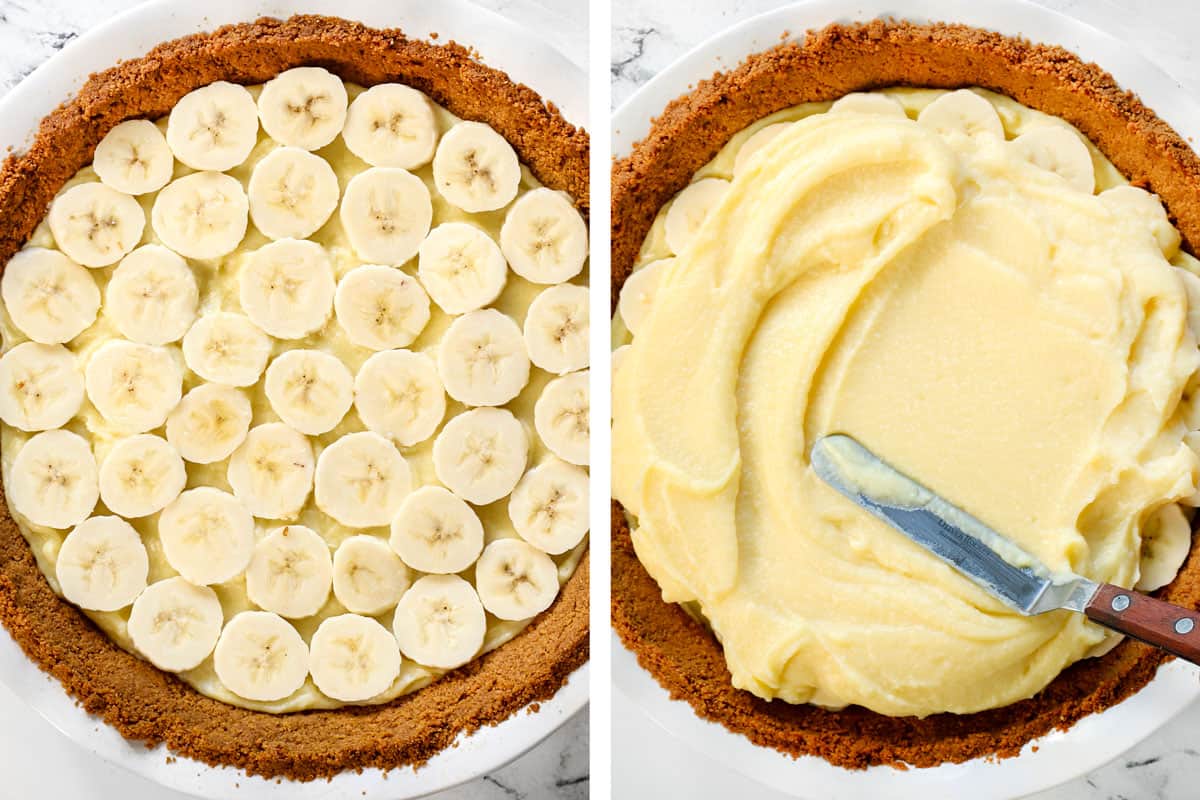
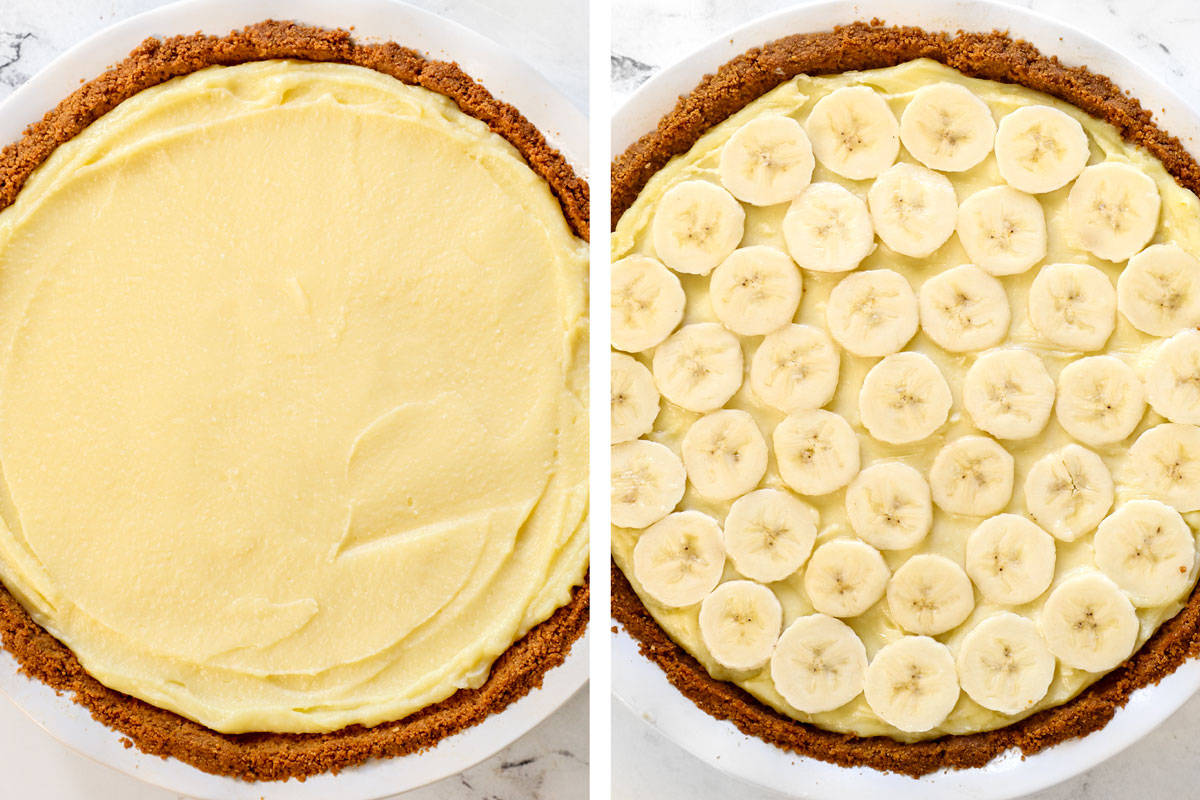
  • Step 9: Assemble and Chill. Line a layer of banana slices over the cooled ganache. Pour half the custard over the bananas and spread it into an even layer.  Add another layer of banana slices and top with the remaining cream. Cover with plastic wrap pressed directly against the cream. Refrigerate for 5-24 hours. 
showing how to make Banana Cream Pie by layering the pie shell with ganache, then sliced bananas, then a layer of banana cream
showing how to make Banana Cream Pie by adding another layer of bananas over the custard, then topping with another layer of banana cream custard
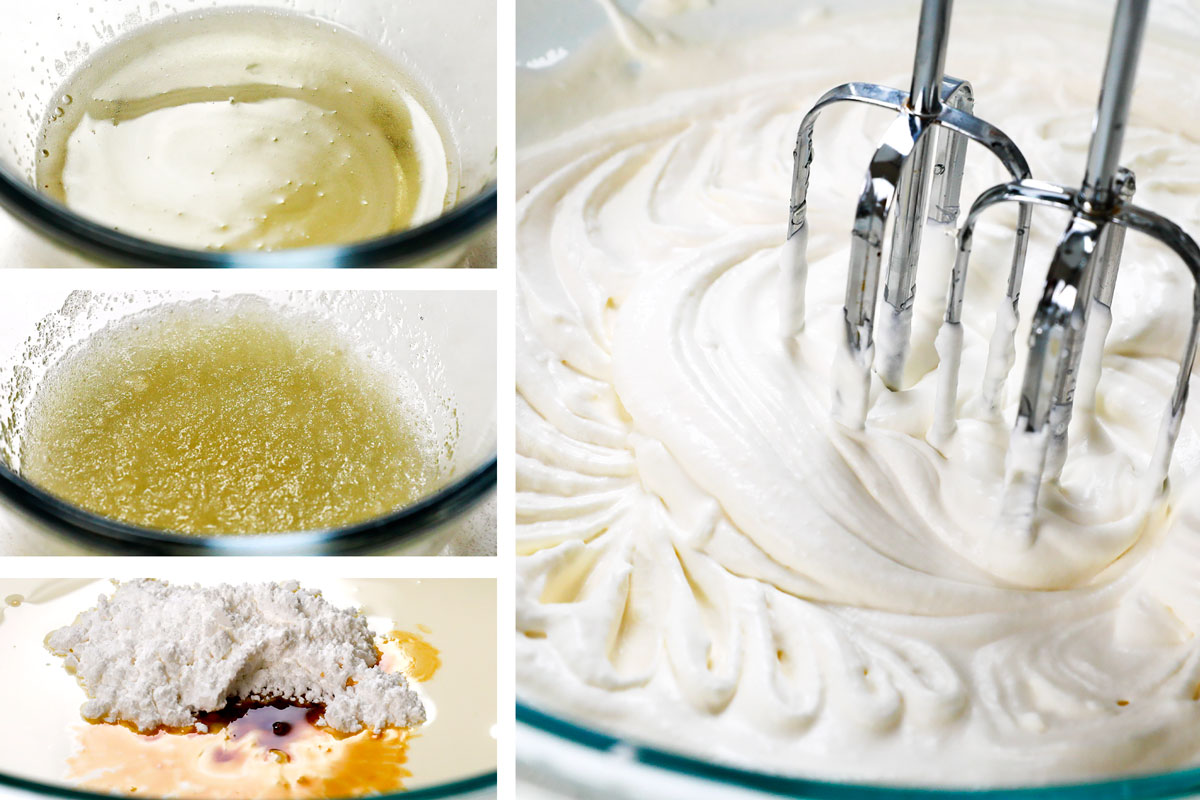
  • Step 10: Make the Whipped Cream. Whisk together the unflavored gelatin and water in a small microwave-safe bowl. Microwave for 20 seconds. Set aside while you whip the heavy cream, sugar, and vanilla, to soft peaks. Slowly pour in the gelatin and continue to whip to stiff peaks.
  • Step 11: Top with Bananas. When ready to serve, you can layer the top evenly with bananas, pipe the whipped cream around the edges (pictured), and serve immediately OR spread the whipped cream over the custard and top with sliced bananas just before serving. 
showing how to make Banana Cream Pie by layering the custard with a final top layer of sliced bananas
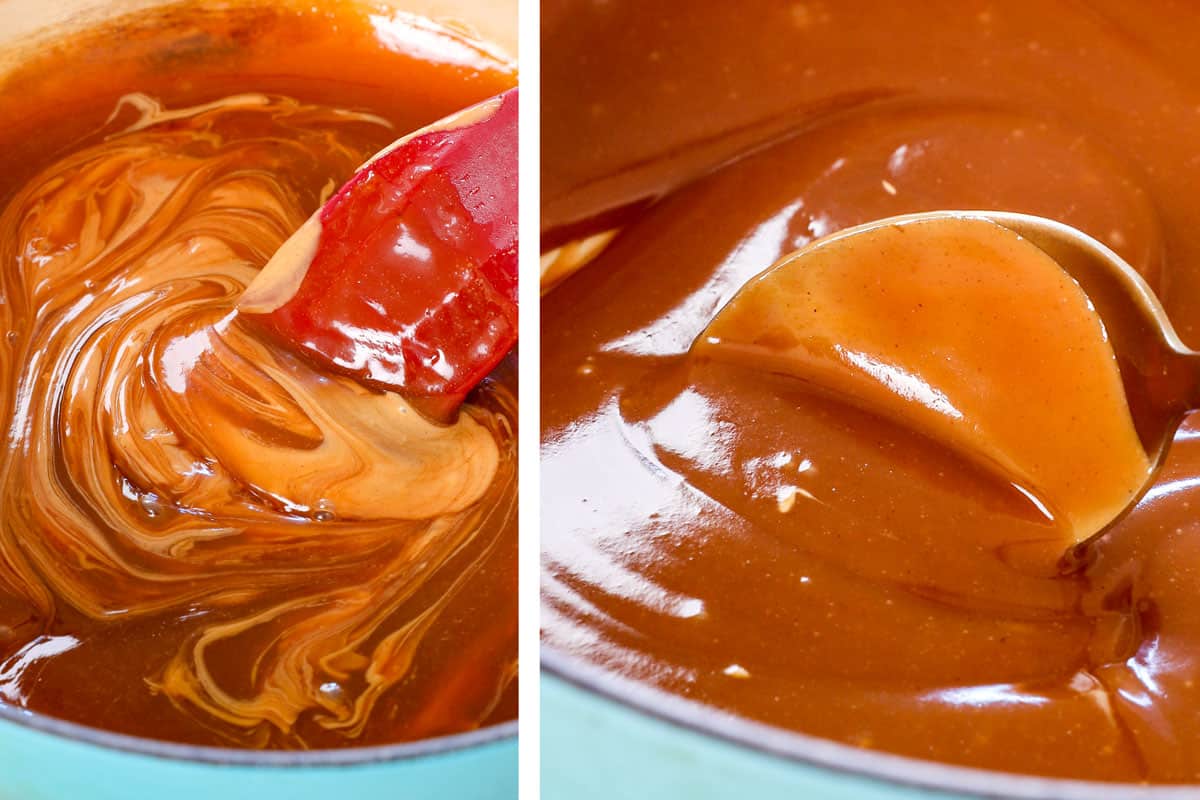
  • Step 12: Make the Peanut Butter Caramel Sauce. In a heavy saucepan, cook the sugar and water over medium heat, stirring often, until the sugar dissolves, turns clear, and starts to bubble.  Continue to cook while swirling the pan (without stirring) until it turns a deep golden amber. (Stirring at this point can cause crystallization, so we gently swirl the pan instead.) Remove the pan from heat and slowly pour in the cream while whisking, followed by the peanut butter, vanilla, and salt. 
showing how to make Banana Cream Pie by whisking peanut butter into caramel sauce to make peanut butter caramel sauce for drizzling over the pie
  • Step 13: Decorate the Pie. Pipe the whipped cream along the edges, drizzle with the caramel and chocolate ganache, then top with crushed Nutter Butters.
showing how to make banana cream pie by topping with whipped cream and drizzling with caramel sauce and chocolate

Banana Pie Recipe Tips

  • Don’t Compact the Crumbs Too Much: Use medium pressure when pressing the crumbs into the pan. Otherwise, they can compact too much, and the crust is more likely to crack when sliced.
  • Use Room-Temperature Eggs for the Custard: Room-temperature eggs blend more easily with the cornstarch. Otherwise, it’s difficult for the cornstarch to dissolve completely.
  • Room-Temperature Egg Hack: Add warm (not hot) tap water to a bowl, then add the eggs for at least 20 minutes. 
  • Don’t Use Too High of Heat: Slow, gentle heat allows the custard to thicken gradually, reducing the risk of curdling. Higher temperatures can cause the eggs to overcook quickly and turn grainy.
  • Simmer the Custard until Thickened: You’ll know the custard is done when it’s the consistency of pudding and registers 175-185°F on an instant-read thermometer.  A thermometer is so helpful for this and eliminates all the guesswork!  At this temperature, the egg proteins coagulate just enough to thicken the custard, giving it a smooth, creamy consistency without curdling. If the custard is cooked past 185°F, it may begin to curdle and develop a grainy texture, so monitoring with a thermometer can help you achieve a perfectly silky result.
  • Stir Custard Constantly: Whisking evenly distributes the heat, prevents sticking and scrambling, and ensures an even, smooth texture. Whisk the pan’s sides, bottom, and corners where the eggs can hide.
  • Don’t Overcook the Custard: Remove the custard immediately from the heat after it’s thickened so it doesn’t continue to cook. Overcooking can cause the cornstarch to break down and thin out the filling or scramble the eggs. Also, prepare your butter and vanilla before you begin so you can add them immediately.
  • Strain the Custard (if needed): If there are small lumps in your custard after cooking—don’t panic! Pour the custard through a fine-mesh sieve to catch any bits of cooked egg or lumps, repeat as needed, using a spatula to press down on the custard. This will help ensure the custard is velvety smooth before filling the pie.
  • Cool the Filling Before Assembling: Allow the filling to cool to room temperature before pouring over the bananas to prevent them from becoming mushy or discolored.
  • Don’t use Overly Ripe Bananas: The bananas should be yellow without browns spots. Overly ripe bananas can become mushy and seep liquid which will break your thick custard filling.
  • Use Gelatin After a Few Minutes: After the gelatin is microwaved, allow it to cool for 2-3 minutes so it doesn’t curdle the whipped cream. However, don’t wait too long to use it, or it will thicken and set.  If this happens, microwave it again for 10-15 seconds until liquidy.
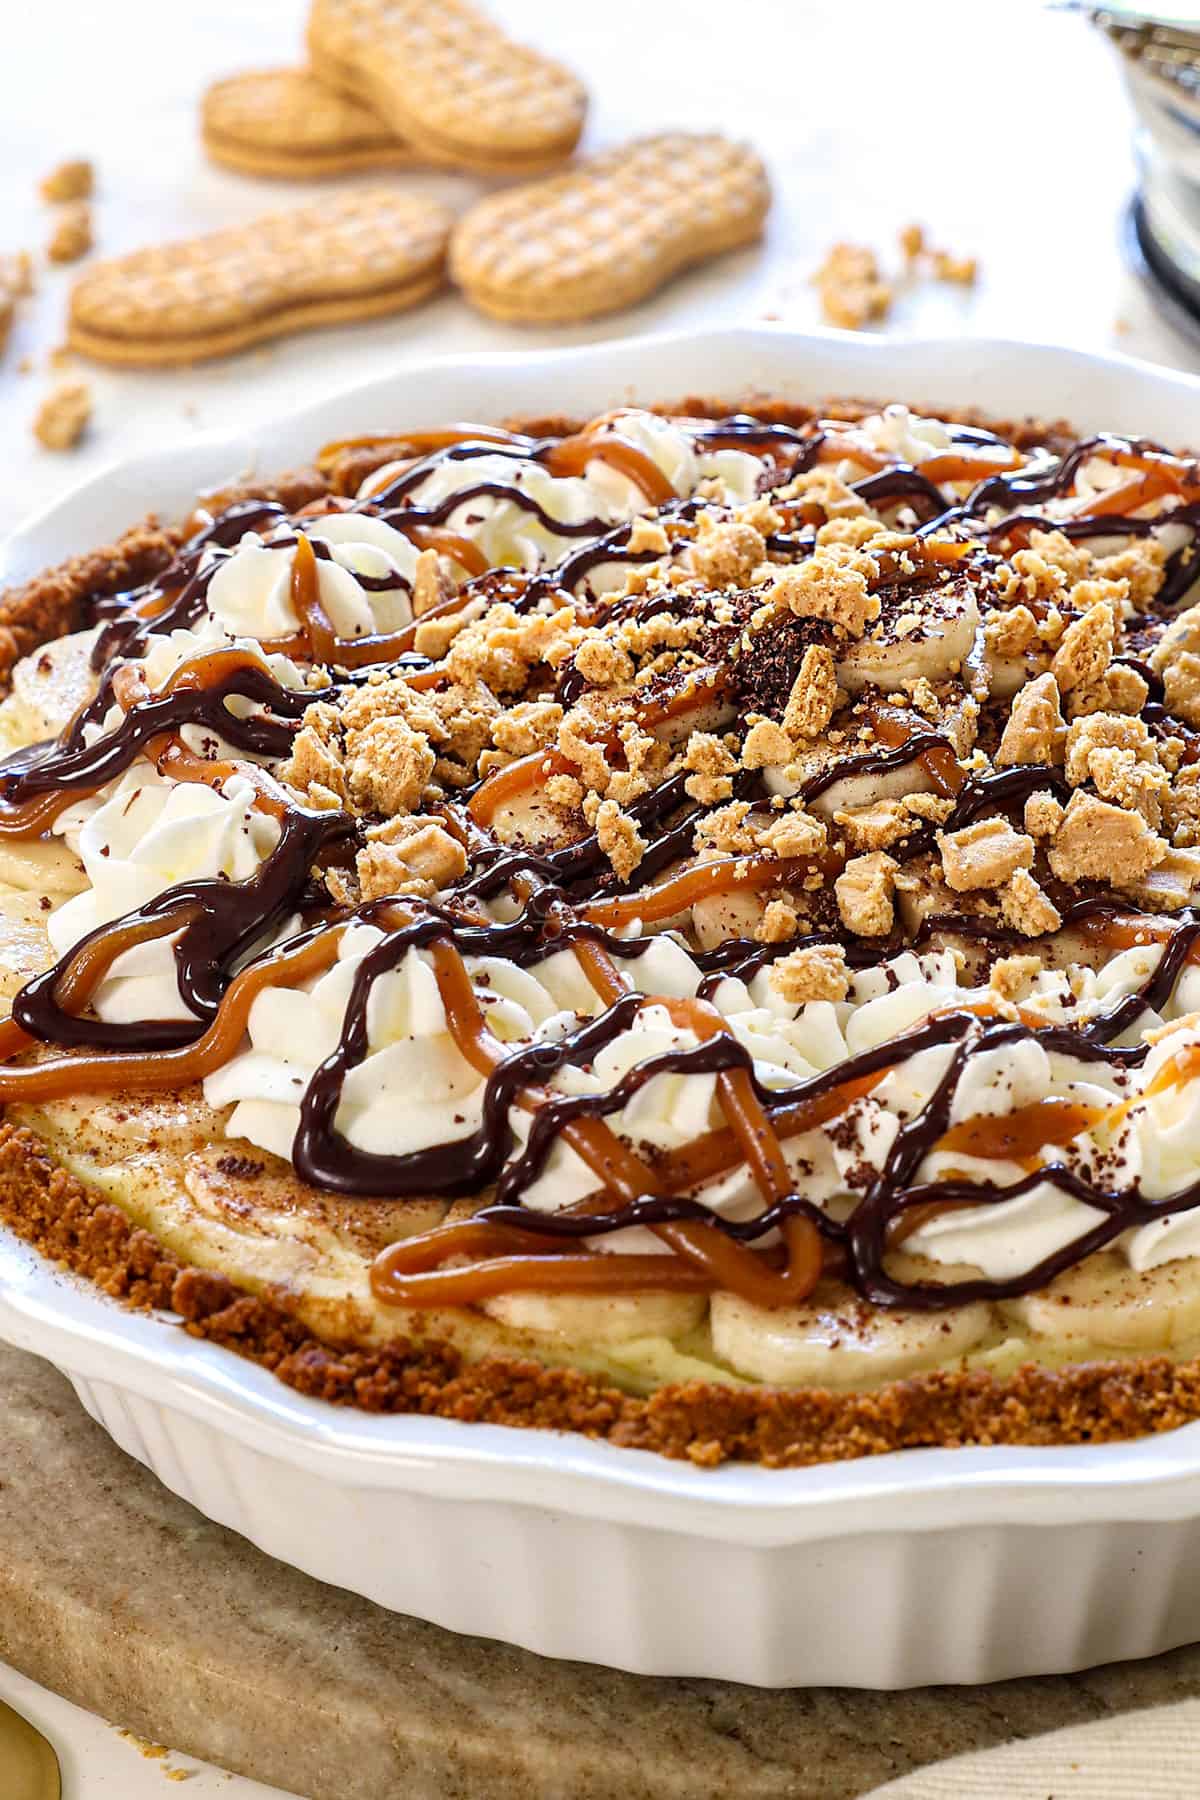
side view of banana pie in a white pie plate topped with whipped cream and bananas

old fashioned banana cream pie Variations

There are many delicious variations of Banana Cream Pie that you can explore to add a twist to the classic recipe. Here are a few ideas:
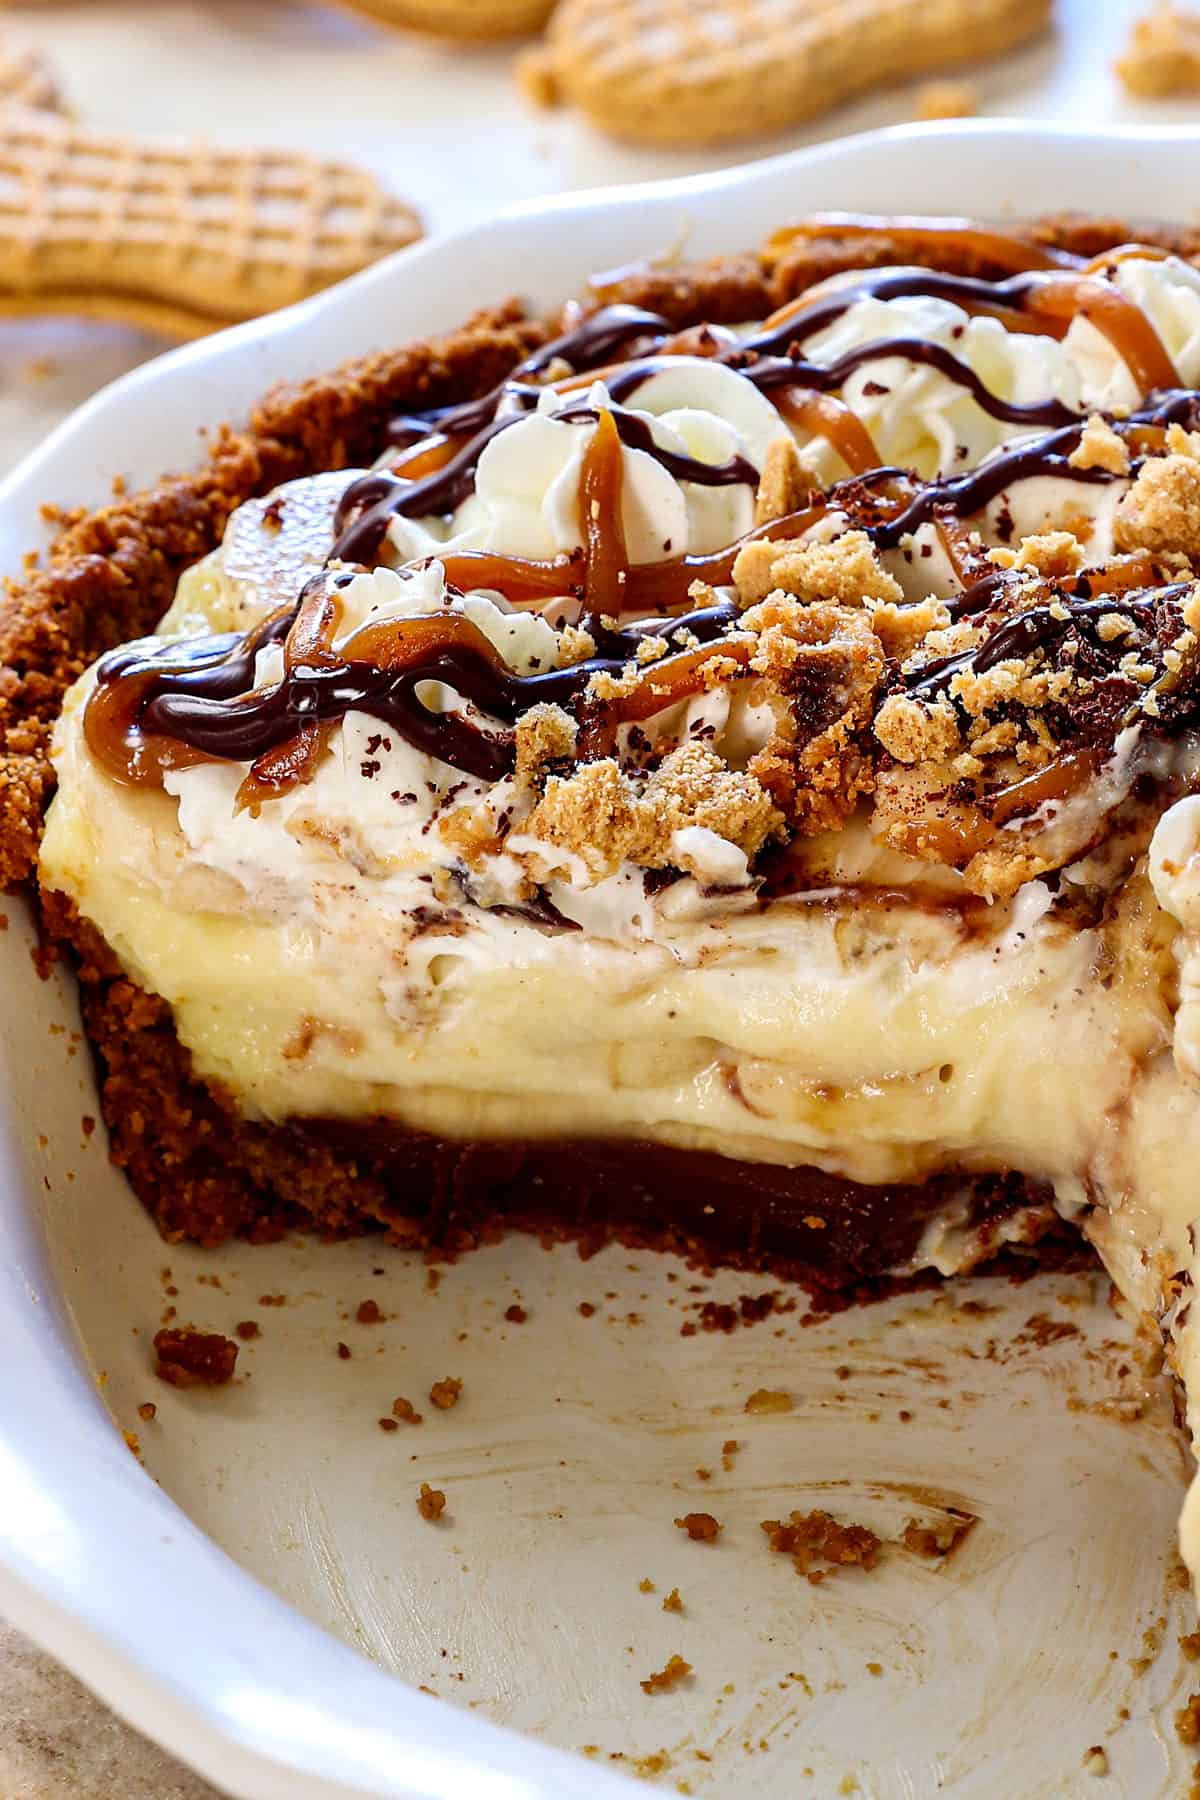
  • Old Fashioned Banana Cream Pie: This recipe is complete with extra bells and whistles that make it my favorite version ever, but you can easily omit them to keep it traditional. Swap in a traditional pie crust or Graham cracker crust, omit the ganache, omit the gelatin to make traditional whipped cream and skip the peanut butter caramel and chocolate drizzles.
  • Chocolate Banana Cream Pie: Incorporate chocolate into the filling by mixing cocoa powder or melted chocolate into the custard. A chocolate cookie crust can also add extra flavor.
  • Caramel Banana Cream Pie: Drizzle caramel sauce over the pie. You can also create a caramel custard by incorporating caramel into the filling.
  • Berry Banana Cream Pie: Add berries over the banana slices in between the custard, then top with berries.
  • Nutty Banana Cream Pie: Add crushed nuts like walnuts or pecans into the crust or sprinkle them on top for added texture. You can also mix nut butter, such as almond or cashew, into the custard for a rich, nutty flavor.
  • Coconut Banana Cream Pie: For a tropical twist, use coconut milk instead of regular milk. Sprinkle toasted coconut flakes on top for added flavor and crunch. See my Banana Coconut Cream Pie recipe for exactly how I make it.
  • Peanut Butter Banana Cream Pie: Use the Nutter Butter Crust and mix peanut butter into the custard or drizzle it over the top.
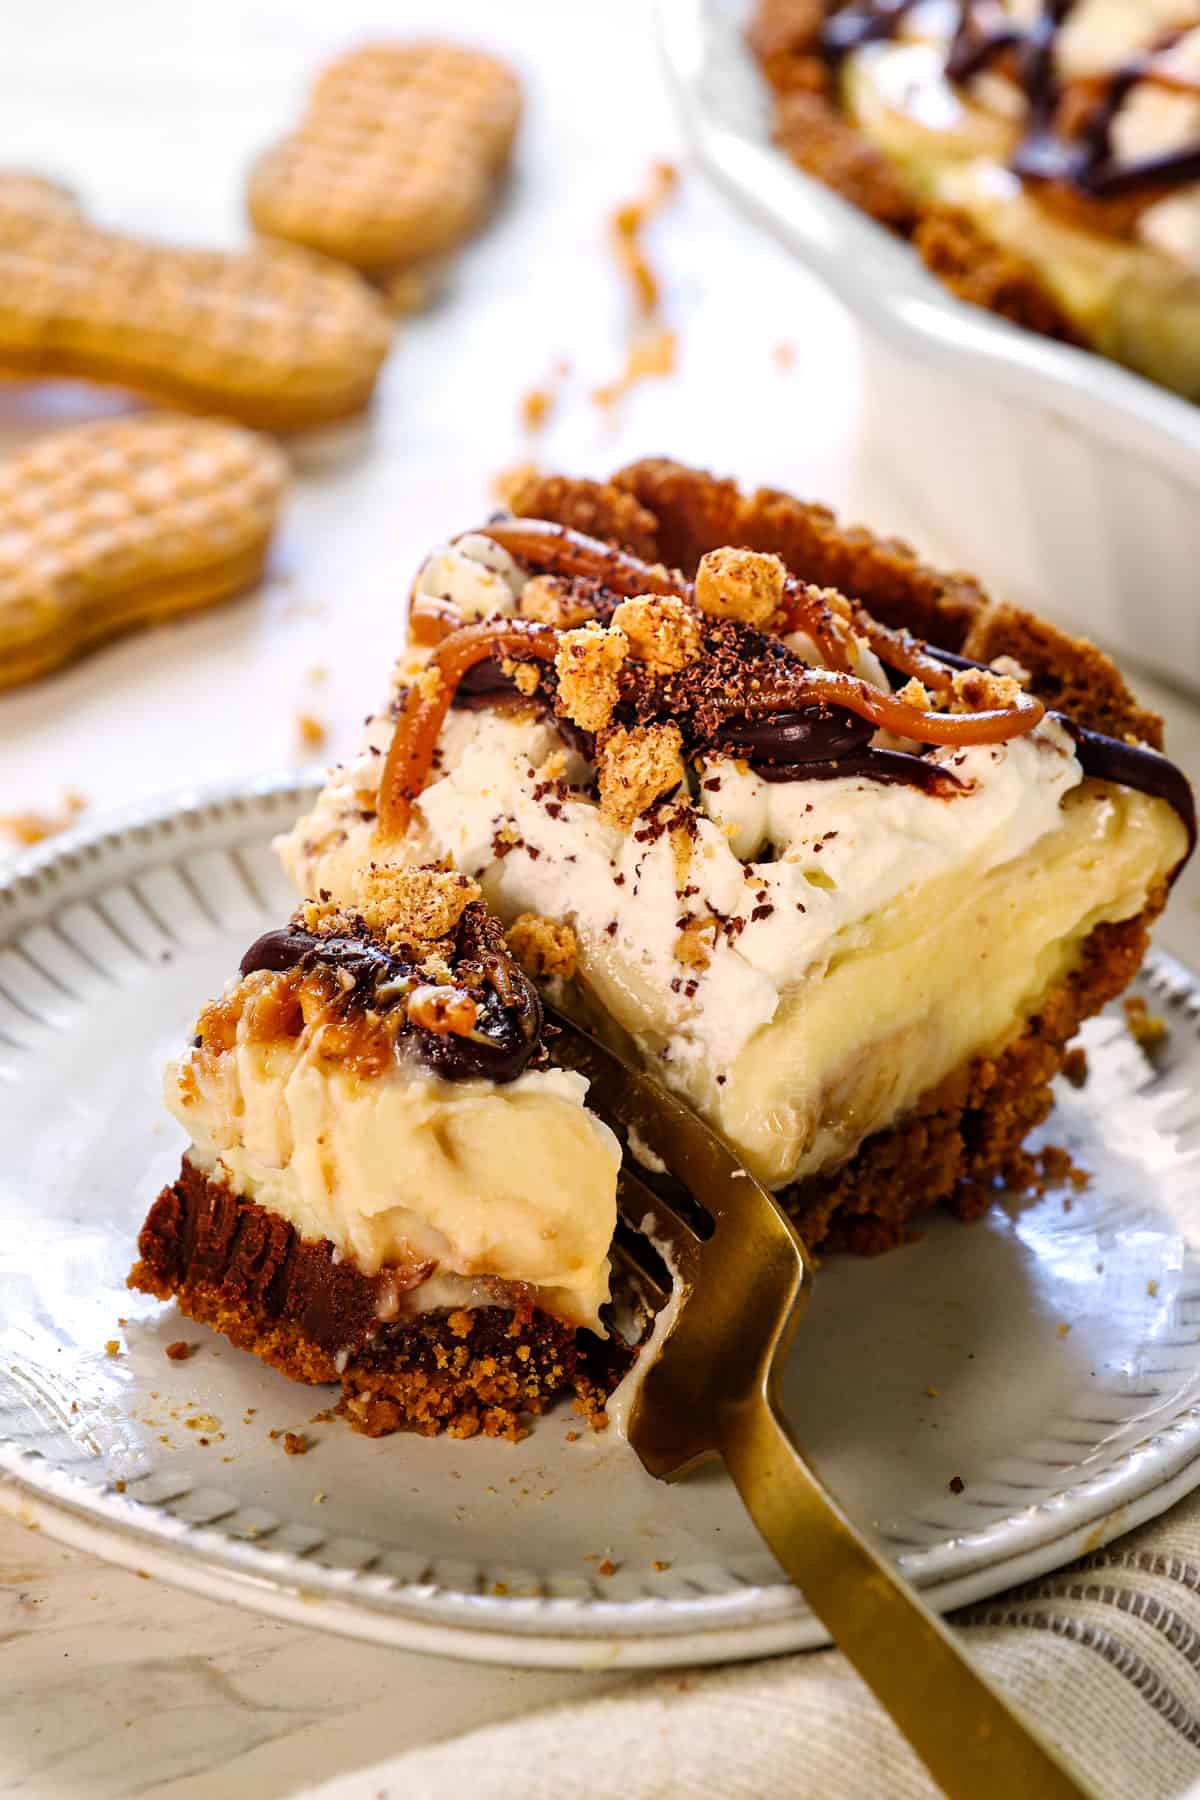
up close of banana pie recipe with slices removed showing the rich, thick, creamy pudding and bananas

How to serve Banana Pie

  • Allow Ample Cooling Time: Chill the pie for at least 4 hours to help it set completely, making it easier to slice neatly. This also helps the banana flavor penetrate the entire pie—yum!
  • Add Fresh Whipped Cream Just Before Serving: If you use the stabilized whipped cream, you can add it up to 24 hours in advance and refrigerate. If you use fresh whipped cream, add it within an hour of serving, otherwise it can weep and deflate.
  • Pipe or Spread the Whipped Cream: The whipped cream can be piped around the edges on top of the bananas (pictured) or spread across the pie, then the bananas added on top.
  • Add the Top Banana Slices Just Before Serving: This will prevent them from oxidizing and turning brown. You can also brush them with apple, orange, or pineapple juice to buy an hour or so. The acidity in the juice slows down the browning process by inhibiting the enzyme responsible for oxidation. I avoid lemon juice because it is too tart.
  • Use a Hot Knife: Before slicing, dip a sharp knife in hot water or run it under hot water, then wipe it dry. The warmth helps cut through the creamy filling smoothly without sticking. Clean the knife with a damp cloth for each slice and reheat it before making the next cut. This will help maintain clean edges on each piece.
  • Garnish as Desired: Drizzle the pie with Peanut Butter Caramel Sauce and/or chocolate or top with toasted coconut, fresh berries, etc.
a slice of banana cream pie topped with caramel drizzle on a plate

Banana Pie Recipe FAQs

What is the best crust for banana cream pie?

A Nutter Butter crust is an ideal choice for banana cream pie due to its rich peanut butter flavor, which enhances the sweetness of the bananas while adding a delightful crunch that contrasts with the creamy filling. You may also use a traditional buttery pie crust, a graham cracker crust for a slightly sweet and crunchy texture, or your favorite cookie like Nilla Wafers with sugar and butter.

How do you keep bananas from turning brown in a banana cream pie?

My favorite method to prevent bananas from turning brown in a banana cream pie is to lightly coat the banana slices in pineapple, apple, or orange juice. The acid helps slow down the oxidation process that causes browning. I would avoid tart lemon or lime juice. Alternatively, you can brush the banana slices with honey, but this adds additional sweetness. Using slightly under-ripe bananas can also be beneficial, as they tend to brown more slowly than very ripe bananas.

Why is my banana cream pie filling runny?

Here are some common reasons why your banana cream pie filling may turn out runny:

1. Insufficient Cooking Time: The custard needs to reach a temperature of 170°F to 180°F (77°C to 82°C) to thicken properly; undercooking it can result in a runny filling.
2. Improper Measurement of Cornstarch: If the cornstarch is not measured accurately or is not fully dissolved before cooking, it may not thicken the filling as intended.
3. Not Allowing Enough Setting Time: The pie needs sufficient time in the refrigerator to set; if it’s cut too soon, the filling may not have thickened properly.
4. Ripe Bananas: Overripe bananas can release excess moisture, making the filling runnier.

How do you keep the bottom crust of a fruit pie from getting soggy?

To prevent the bottom crust of a fruit pie from becoming soggy, consider the following strategies:

1. Blind Baking: Pre-bake the crust before adding the filling. This creates a barrier and helps set the crust, preventing it from absorbing too much moisture from the filling.
2. Add a Thickener: Adding cornstarch or tapioca to the fruit filling can help absorb excess juices released during baking. This thickens the filling and keeps the crust from becoming overly wet .
3. Brushing with an egg wash (a mixture of beaten egg and water) on the crust before baking can create a moisture barrier, reducing sogginess.
5. Add a Layer of Protection: I love adding a layer of ganache or peanut butter to the bottom of the crust to block moisture absorption.
6. Cool Before Serving: Allow the pi before cutting, as this gives the filling time to set and reduces the risk of a runny bottom.

up close of taking a bite out of banana pie recipe showing how creamy it is

WANT TO TRY THIS Banana Cream Pie RECIPE?

PIN IT to your recipe BOARD TO SAVE FOR LATER!

FIND ME ON PINTEREST FOR MORE GREAT RECIPES!  I AM ALWAYS PINNING :)!

©Carlsbad Cravings by CarlsbadCravings.com

up close of banana pie recipe with slices removed showing the rich, thick, creamy pudding and bananas

Best Banana Cream Pie Recipe

This Banana Cream Pie recipe is an irresistible, from-scratch masterpiece that has me obsessed! You can keep it simple with just the crust and custard, or I've included options for an irresistible Nutter Butter crust, layer of chocolate ganache (which also prevents a soggy crust), and peanut butter salted caramel that will have this pie being the most talked about dessert anywhere you serve it! I know the ingredients and recipe are LONG, but don't be intimidated! Each step is easy, straightforward, and quicker than you think! Refer to the post for step-by-step photos, tips, and tricks!
Servings: 8 -10 servings
Total Time: 6 hours 5 minutes
Prep Time: 5 hours 45 minutes
Cook Time: 20 minutes

Save This Recipe To Your Recipe Box

You can now create an account on our site and save your favorite recipes all in one place!

Ingredients

Nutter Butter Crust

  • 20 Nutter Butter cookies (with filling)
  • 4 tablespoons unsalted butter, melted

Chocolate Ganache Layer

  • 3/4 cup heavy cream
  • 1 tablespoon unsalted butter
  • 1 tablespoon corn syrup
  • 6 ounces quality semi-sweet baking chocolate, finely chopped

Banana Cream Filling

  • 2 cups milk
  • 1/2 cup heavy cream
  • 3/4 cup granulated sugar
  • 1/4 teaspoon salt
  • 2 eggs at room temperature
  • 3 large egg yolks at room temperature
  • 1/3 cup cornstarch
  • 2 tablespoons unsalted butter
  • 2 teaspoons vanilla extract
  • 5-6 barely ripe bananas (yellow without any brown spots)

STABILIZED WHIPPED CREAM (Omit Gelatin/Water for Regular)

  • 1 teaspoon unflavored gelatin
  • 1 1/2 tablespoons water
  • 1 cup cold heavy cream
  • 3 tablespoons powdered sugar
  • 1/2 teaspoon vanilla extract

Peanut Butter Caramel Sauce (Optional)

  • 1/4 cup granulated sugar
  • 2 tablespoons water
  • 1/2 cup heavy cream
  • 3 tablespoons creamy peanut butter (commercial like Jif or Skippy, not organic)
  • pinch of sea salt, or more to taste
  • 1/4 teaspoon vanilla extract

Instructions

Nutter Butter Crust

  • Preheat the oven to 350 degrees F. Add the cookies (and filling) to a food processor and crush them into a fine crumb (or crush by hand)—pulse in the melted butter.  Press the mixture into the bottom and sides of an ungreased 9-inch pie dish (use medium pressure so it’s not too compact).
  • Bake at 350 degrees for 10-12 minutes, until golden. Set aside to cool.

Chocolate Ganache:

  • Add the heavy cream, butter, and syrup to a microwave-safe bowl and microwave for 1 ½-2 minutes or until simmering.
  • Add the chocolate and give it a swirl so the chocolate is covered. Let it stand for 3 minutes, then vigorously whisk until the chocolate is melted and completely smooth. Reserve about ¼ of the chocolate in a microwave-safe bowl for drizzling over the pie later.
  • Pour the remaining chocolate onto the room-temperature crust and spread it into an even layer. Let it cool to room temperature before adding the bananas.

Custard Filling

  • Add the milk, heavy cream, sugar, and salt to a medium saucepan. Bring to a gentle simmer for 1 minute or until the sugar has dissolved, stirring occasionally. Reduce the heat to low.
  • In a medium bowl, whisk the eggs and egg yolks, then whisk in the cornstarch. Vigorously whisk until the cornstarch is completely dissolved.
  • Gradually ladle one spoonful of the warm milk mixture into the egg mixture while whisking constantly. Repeat twice, then slowly pour the mixture into the saucepan, whisking constantly.
  • Bring the mixture to a gentle simmer over medium-low heat, whisking constantly. After simmering for a few minutes, reduce the heat to low and switch to a silicone spatula so you can stir and scrape the sides of the pan. Simmer until thickened to the consistency of thick pudding, 175-185°F. Remove from the heat and whisk in the butter and vanilla.
  • Pour the custard through a fine mesh sieve into a bowl to remove any lumps. Let it cool for 15 minutes (don't let it cool longer; it can become too thick to spread nicely).
  • Meanwhile, line a layer of banana slices over the cooled ganache. After the 15 minutes, pour half of the custard over the bananas and spread it into an even layer. Add another layer of banana slices and top with the remaining custard.

Chill

  • Cover with plastic wrap pressed directly against the surface of the custard so it doesn’t develop a film on top. Refrigerate for 5-24 hours

Whipped Cream

  • You can make the stabilized whipped cream at any point while the pie is chilling and refrigerate or skip the gelatin/water and make the whipped cream up to 1 hour before serving.
  • Whisk together the unflavored gelatin and water in a small microwave-safe bowl. Microwave for 20 seconds, then set aside while you proceed to whip the cream:
  • Add the heavy cream, powdered sugar, and vanilla extract to a large mixing bowl. Whip using an electric hand mixer just until soft peaks form (the peaks flop over when the beaters are lifted.) Turn the mixer to low and slowly pour in the gelatin mixture. Mix until combined, then increase speed to medium and continue mixing until stiff peaks form (peaks stand straight up when the beaters are lifted).

Peanut Butter Caramel Sauce (Optional)

  • The sauce can be made ahead and gently reheated, whisking in a tablespoon or so of water to thin if needed.
  • In a heavy saucepan, cook the sugar and water over medium heat, stirring often, until the sugar dissolves, turns clear, and starts to bubble, 1-2 minutes. Continue to cook while swirling the pan (without stirring) until it has turned a deep golden amber color. Keep a watchful eye so the mixture doesn’t burn.
  • Remove the pan from the heat and slowly pour in the cream while whisking until incorporated (the caramel will bubble a lot). Stir in the peanut butter until smooth. Whisk in the vanilla and salt. Set aside to cool for at least 10 minutes before drizzling over the pie. Taste and add additional salt as desired (I like more salt).

Decorating

  • You want to add the banana slices immediately before serving. Traditional whipped cream can be added up to 1 hour in advance and stabilized whipped cream can be added up to 24 hours in advance.
  • When ready to serve, you can layer the top evenly with bananas, pipe the whipped cream around the edges (pictured), and serve immediately OR spread the whipped cream over the custard (and refrigerate if desired), then top with sliced bananas just before serving. 
  • Drizzle the pie with the peanut butter caramel sauce. Reheat the reserved chocolate ganache in a microwave-safe bowl at 50% power at 15-second intervals until pourable consistency, then drizzle over the pie. Top the pie with crushed Nutter Butters.

Notes

  • Old Fashioned Banana Cream Pie: This recipe has extra bells and whistles that make it my favorite version ever, but you can easily omit them to keep it traditional. Swap in a baked traditional pie crust or Graham cracker crust, omit the ganache, omit the gelatin in the whipped cream, and skip the peanut butter caramel and chocolate drizzles.
  • Caramel Sauce: You may use store-bought caramel sauce instead of the PB Caramel Sauce.  Try it at some point though, its amazing!
  • Storage: Banana Cream Pie is best enjoyed within 1-2 days. Any longer, the bananas will brown, and the cream will become weepy. To store, cover with plastic wrap and refrigerate.
  • Make Ahead: The pie can be assembled 24 hours ahead, up to the point of adding the top layer of bananas (don’t add these bananas). The whipped cream and peanut butter caramel sauce can also be made ahead of time if you use the gelatin in the whipped cream.
If you want just to prepare elements of the pie, you can do that as well:
  • Pie Crust: The Nutter Butter crust can be made up to two days in advance before adding the filling. Cool completely, then tightly wrap in plastic wrap and store at room temperature. You may also freeze for up to one month. If making a traditional crust, the pie dough can be prepared and refrigerated up to 5 days in advance or frozen for 3 months.
  • Stabilized Whipped Cream: This can be prepared 2 days in advance and stored in the refrigerator. The gelatin helps the whipped cream maintain its shape and texture. Traditional whipped cream cannot be made ahead of time.
  • Peanut Butter Caramel Sauce: This can be made up to 7 days in advance and stored in an airtight container in the refrigerator. When ready to use it, gently reheat it on the stovetop, adding a little water or cream if necessary to restore its smooth consistency.

Did You Make This Recipe?

Tag @CarlsbadCravings and Use #CarlsbadCravngs

Leave a Review, I Always Love Hearing From You!

Reader Interactions

leave a review

Your email address will not be published. Required fields are marked *