Your search for the best Pizza dough recipe stops here!
This easy Homemade Pizza Dough recipe is EVERYONE’s favorite – just read the reviews! It creates soft, FLAVORFUL pizza crust every time, perfect for whatever type of pizza you’re making – and it’s easier than you think! I’ve included step-by-step photos of how to make pizza dough, including how to make it ahead and how to freeze it. So, skip delivery because you will never want to sink your teeth into another pizza crust again!
PIN THIS RECIPE TO SAVE FOR LATER

What readers are saying about this Homemade Pizza Dough
“I’ve tried different recipes but I just must say that this one is it!!!!” Jinelle
“Hands down the best pizza crust.” – Hanisha
“I’ve made this multiple times and it’s always great. I make bread doughs often and this one is my go-to for pizza dough. -Megan
“Best pizza dough ever!!!! Restaurant style in my kitchen. Great taste and crispy.” – Cathy

Easy Pizza Dough Recipe
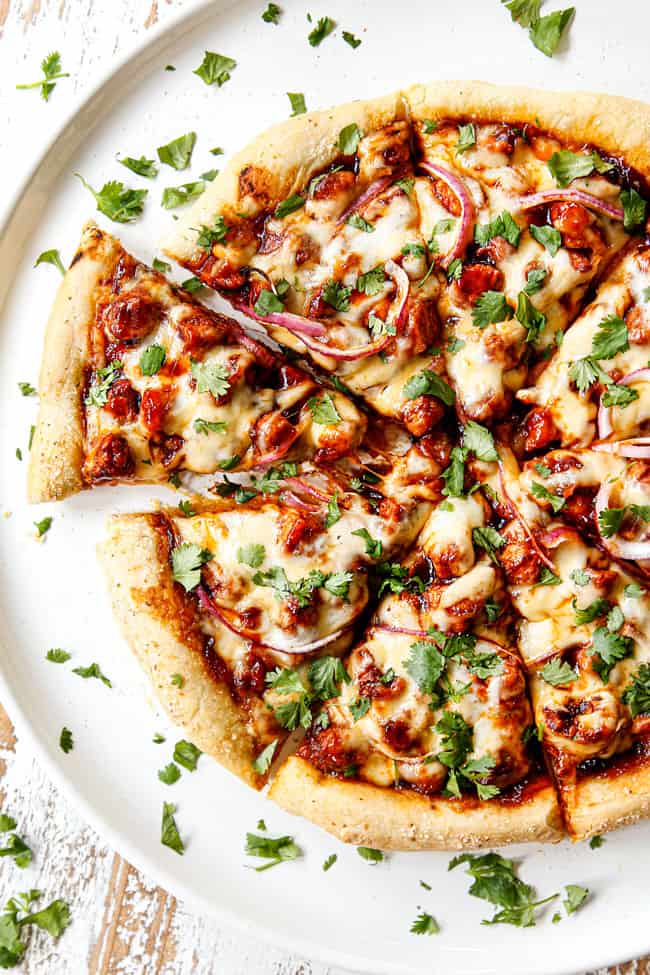
Just like nothing compares to homemade bread, nothing compares to homemade pizza dough – not when it’s this homemade pizza dough recipe. It’s thick, soft, and chewy. It’s baked with olive oil and garlic salt for satisfying flavor every time – no bland pizza crust here!
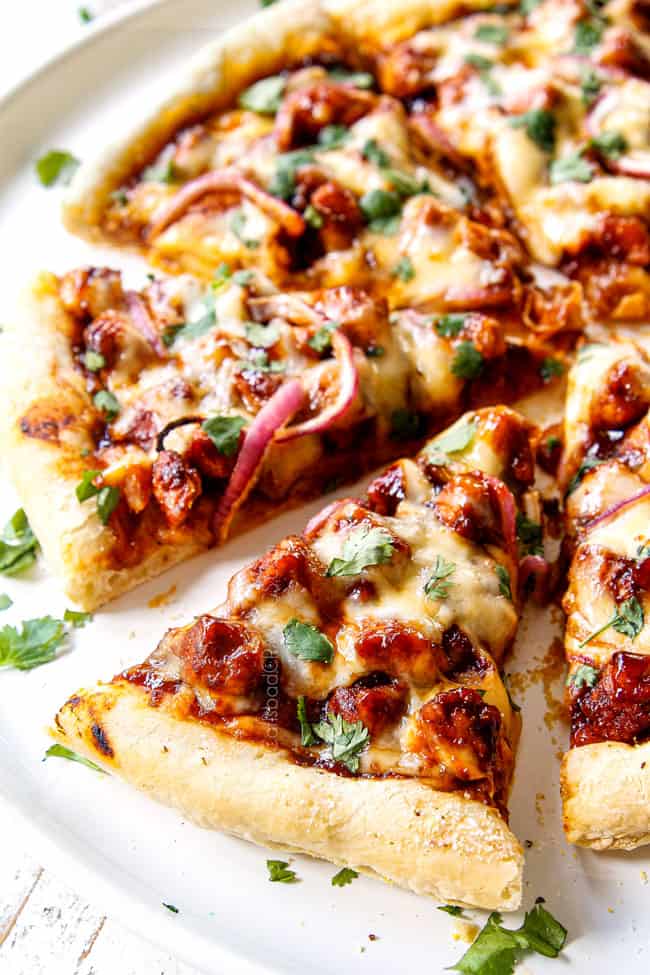
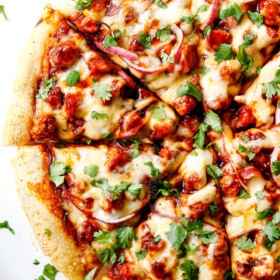
Once you make this recipe, you will never want to waste your money on store-bought pizza dough again – and you will be strongly tempted to make your own pizza instead of going out whenever you get that pizza craving – because I guarantee this will satisfy your pizza cravings! It’s fabulous in any pizza, like BBQ Chicken Pizza, Pulled Pork Pizza, and Philly Cheesesteak Pizza, as well as Stromboli and even pizza pinwheels!
This recipe is also wonderful because you can refrigerate or freeze the dough! After you let the dough rise, you simply divide it into balls, rise some more, then store until ready to use. You can have homemade pizza dough at your fingertips at a second’s notice for an easy, fun dinner any night of the week!
I consider myself a cook first and a baker second because I love the creativity in cooking and spices – whereas in baking, I feel like I’m not completely in control because there are actual chemical reactions at work – eek!
For the longest time, anything with yeast intimidated me, until I actually tackled my first pizza dough recipe. I couldn’t believe how EASY and how DELICIOUS it was! So, if you have never made pizza dough before, PLEASE don’t be intimidated!
I’ve detailed the process for making the dough below, with pictures and more information than you need, so it’s a bit wordy, but that’s just to answer any questions you might have. TRUST me that it really is quick, easy, delicious ,and SO WORTH YOUR TIME!
Reasons to Love Homemade Pizza Dough:

Pizza Crust ingredients
The ingredients for this recipe are very simple. It contains only pantry-friendly ingredients, so it’s easy to make at a second’s notice without running to the grocery store! You will need:

WHAT KIND OF YEAST DO YOU USE FOR HOMEMADE PIZZA DOUGH?
There are two different types of yeast: active dry yeast must be activated before using by first dissolving in water; instant yeast is mixed right into the ingredients. I recommend active dry yeast for the best pizza dough recipe, as I find it results in a chewier crust. If you are short on time, however, feel free to substitute with instant yeast.
- Active Dry Yeast: This is the most common type and is probably what comes to mind when you think of yeast. It is sold in packets or small glass jars with a small, granular consistency. Active dry yeast needs to be “activated” before you make your dough, because it is a living organism that’s dormant until proofed. To activate, simply mix the yeast with warm water (about 110°F) and some sugar (food) and let it sit and ferment for about 10 minutes. Next, you’ll combine the bubbly mixture with your dry ingredients. Active dry yeast dough takes longer to rise than instant yeast – usually an hour or two.
- Instant Yeast (Rapid Rise Yeast, Fast Acting) is just that, fast. There is no need to proof the yeast with warm water. When using fast-acting yeast, you just add it to the dry ingredients. You then add the warm water to the dry ingredients and mix until the dough comes together. There is little or no rise time with instant yeast; just let the dough rest for about 10 minutes before rolling it out.
- Can I Substitute Active Dry Yeast for Instant Yeast and Vice Versa? Yes, active dry and instant yeast can be used interchangeably in recipes (1:1), but don’t let your dough with instant yeast rise as long. For best results, use active dry yeast, as it yields superior flavor, a better rise, and greater volume in the finished product.
What is the best flour for pizza dough?
I rarely stock flours more exotic than all-purpose, so when I was working on this pizza dough recipe, I first and foremost made sure it worked perfectly with good old all-purpose flour. After testing bread flour, wheat flour, etc., all-purpose flour was still my CLEAR favorite! But the type of flour best for pizza dough depends on the type of crust you want. Here is a breakdown:
- All-purpose flour: will give you a chewier crust – my favorite! When we combine AP flour with the technique of placing the rolled out dough directly on the hot pizza stone/pan, we get crispy on the bottom and soft and chewy in the middle.
- Bread flour has more protein and therefore yields a crispier crust, but not as soft and chewy.
- Wheat flour: I don’t recommend using all wheat flour, or your pizza dough won’t rise as well. You can, however, use half wheat flour and half all-purpose flour to give it a more wholesome taste. I would also add an extra tablespoon of sugar or honey to the wheat flour.
- Gluten-free flour: You can use a 1:1 gluten-free all-purpose baking flour, like Bob’s Red Mill. Keep in mind that because there is no gluten, the rolling-out process will be trickier, so pull and push as best you can.

Easy Pizza Dough Recipe variations

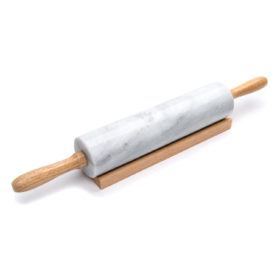
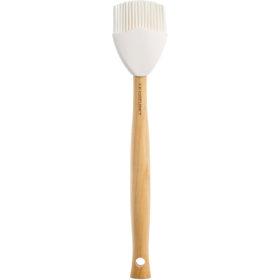
Tools needed for this Homemade Pizza Recipe
I’m sharing what I use for this recipe, but you can still be successful with this recipe without them – these tools just make success easier:
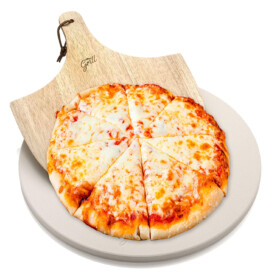
STONES OR PANS BEST FOR PIZZA DOUGH?
Let’s talk more about stones verses pans and which one is best for homemade pizza dough. Rachel Arndt conducted a test between sheet pans vs. stones. You can read the details here. In conclusion, I think if you buy high quality, it just comes down to personal preference – or nostalgia!
I love my pizza stone, so there is no going back for me. However, you can still get a perfectly crispy and tender pizza crust full of flavor with a pan. Make sure to use each item as intended. It’s important that the crust cooks quickly and completely to avoid soggy, undercooked pizza.
- Pizza Stone: The crust begins to cook and sear immediately when the dough is placed on the hot stone, resulting in a beautifully crispy crust. Preheat the stone in a hot oven for 30 to 60 minutes, grease (spray, or parchment paper), and dust with cornmeal. Be very careful when working with hot stone – I’ve got scars to prove it!
- Pizza Pan: A perforated pan is a must. Preheat the pan so the pizza dough will cook as quickly as the toppings. Cook in the middle or bottom of the oven. There is a delay with a pan vs. a stone, as the pan doesn’t heat as hot, but that obstacle is minimized with a perforated pizza pan.

How to make Homemade Pizza Dough
Let’s take a closer look at how to make this recipe with step-by-step photos (full recipe in the printable recipe card at the bottom of the post):
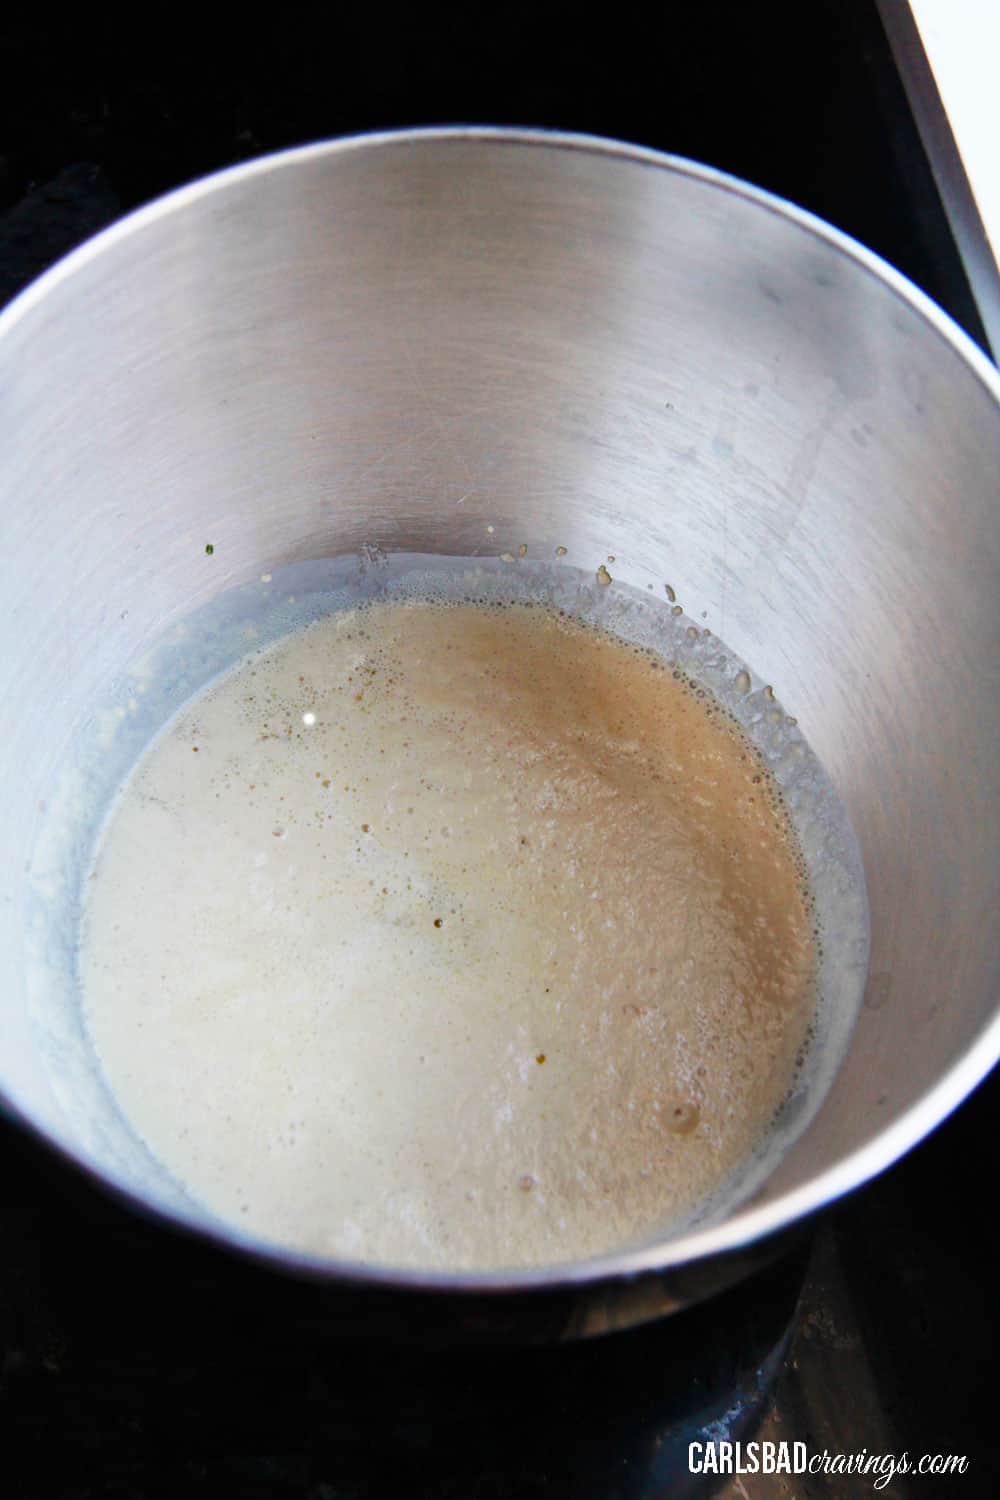
1. PROOF THE YEAST
In a large mixing bowl or the bowl of your stand mixer (preferred), stir in the warm water, sugar, and yeast. Letit sit for 5-10 minutes or until the yeast is foamy and dissolved. If the yeast doesn’t foam, either your water was too warm or your yeast is too old. Yeast should be no older than 6 months, and water should be around 105°F. Repeat until your yeast foams like this (which can take up to 10 minutes):
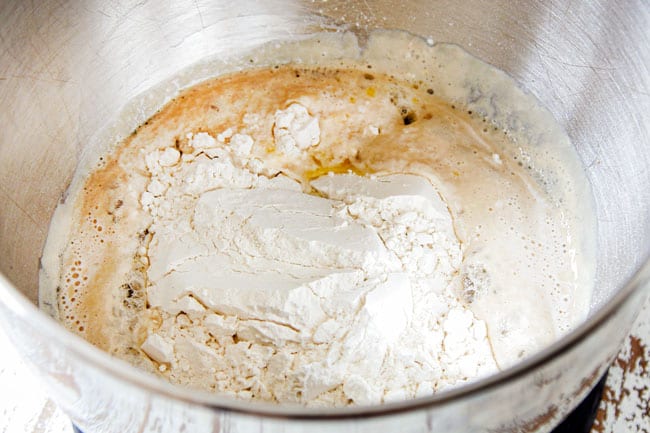
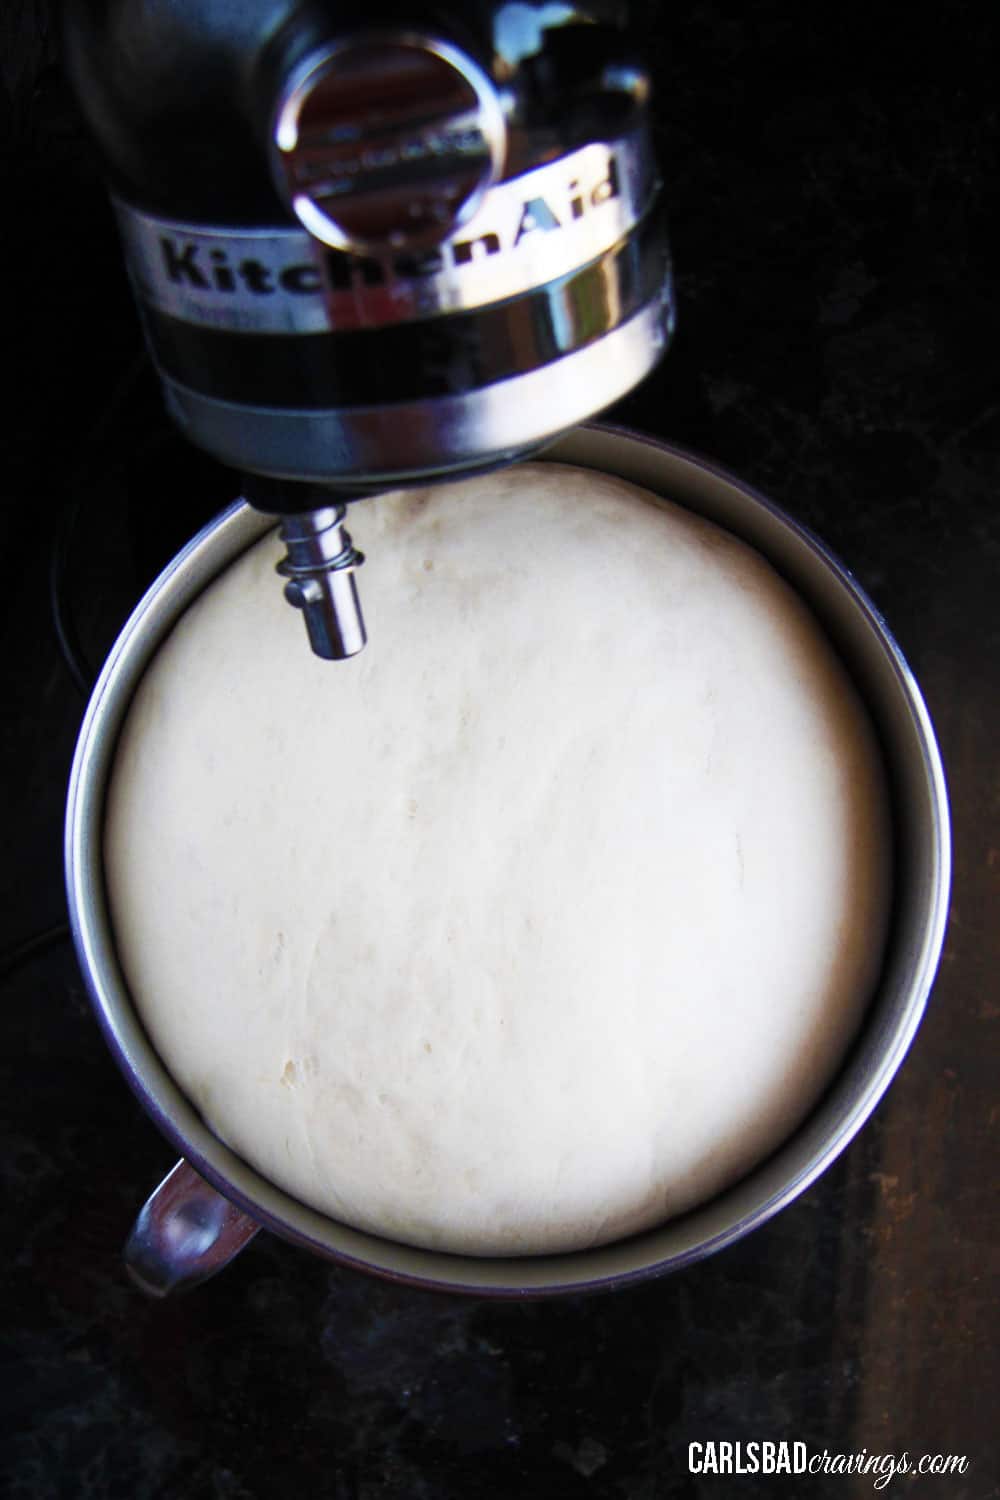
2. MIX THE DOUGH
Add olive oil, salt, and 1 ½ cups of flour, and mix well with your hook attachment. If you don’t have a mixer, you can start to mix with a wooden spoon. Continue to mix while gradually stirring in 2 ¼ more cups of flour.
Once the dough has pulled away from the bowl, continue to mix for 5 more minutes on medium-low speed (or by hand). You may need to place a hand on your mixer so it doesn’t fly off your counter!
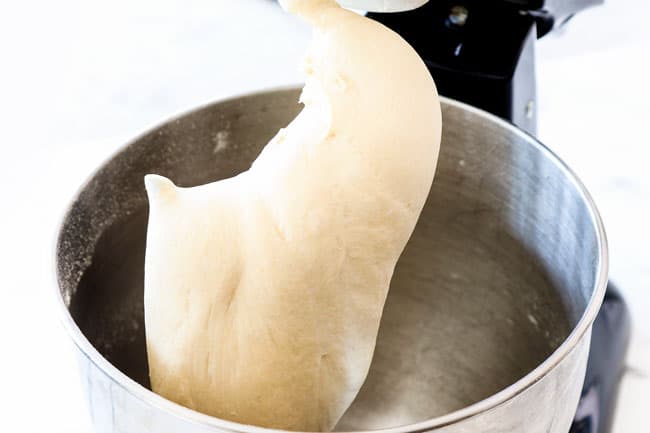
What if my dough is sticky? If your dough is too wet and is not pulling away from the bowl, add 1 more tablespoon of flour at a time (up to ¼ cup) until the dough barely sticks to your fingers.
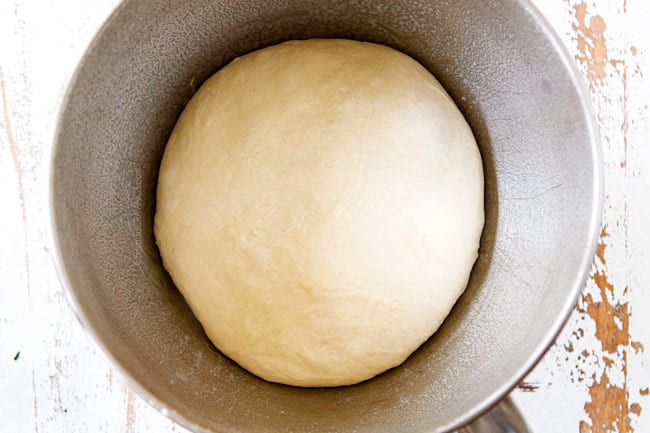
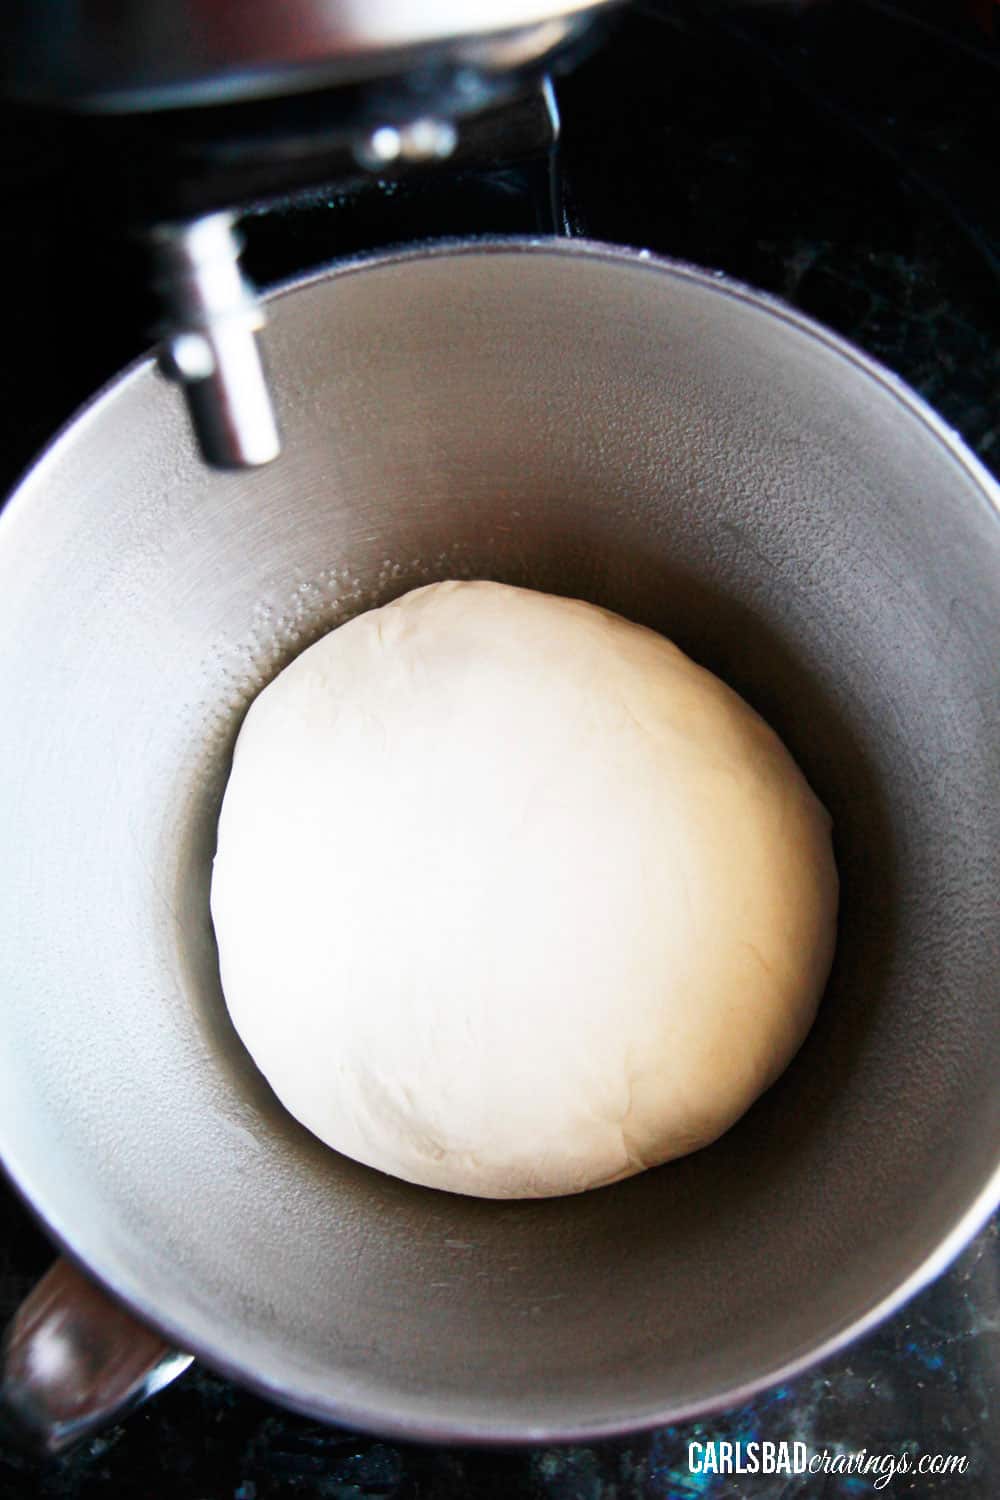
3. SHAPE DOUGH
Shape the pizza dough into a ball and place it back in your large mixing bowl, lightly coated with olive oil or nonstick cooking spray. Turn the dough over to coat with oil on all sides.
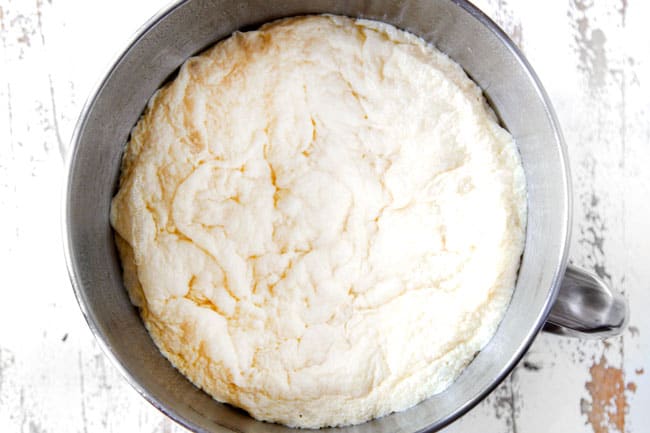
4. LET THE DOUGH RISE
Cover dough tightly with plastic wrap and allow to rise in a warm environment (75-80F), until it has doubled in size. Depending on your yeast (active dry yeast takes longer than instant yeast), climate, etc., this will take between 1-2 hours.
5. WARM PIZZA STONE
Guestimating 15 minutes before your dough is ready, place your pizza stone or baking sheet in the middle rack of your oven set to 475 degrees F. You want to “bake” your stone for 30-60 minutes in order to get it nice and hot. It’s better for your pizza stone to be super hot rather than just hot, so begin warming it sooner rather than later.
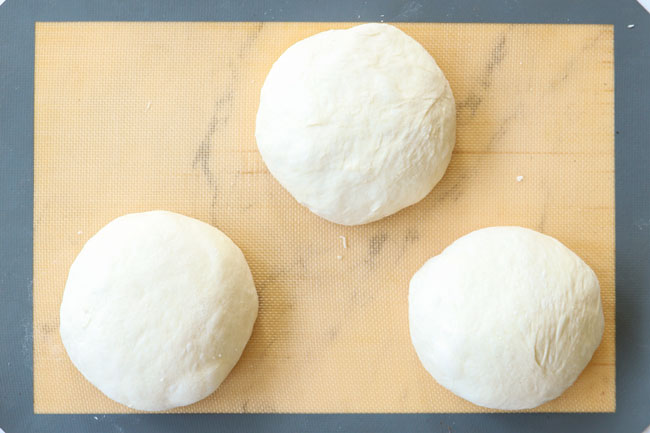
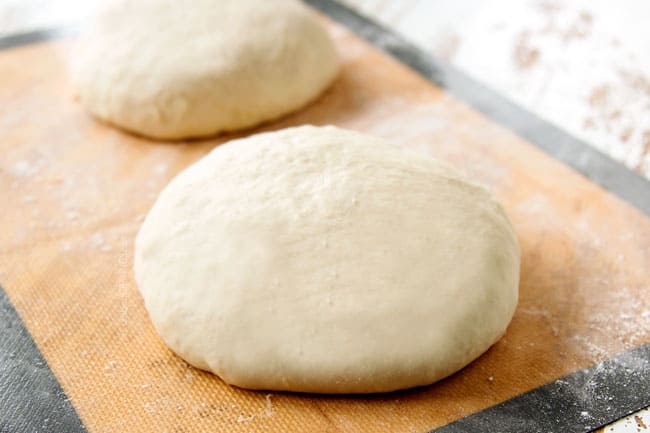
6. SHAPE INTO BALLS
After the pizza dough has doubled in size, punch it down to release the air. Then remove the dough from the bowl, knead a couple of times to further release the air.
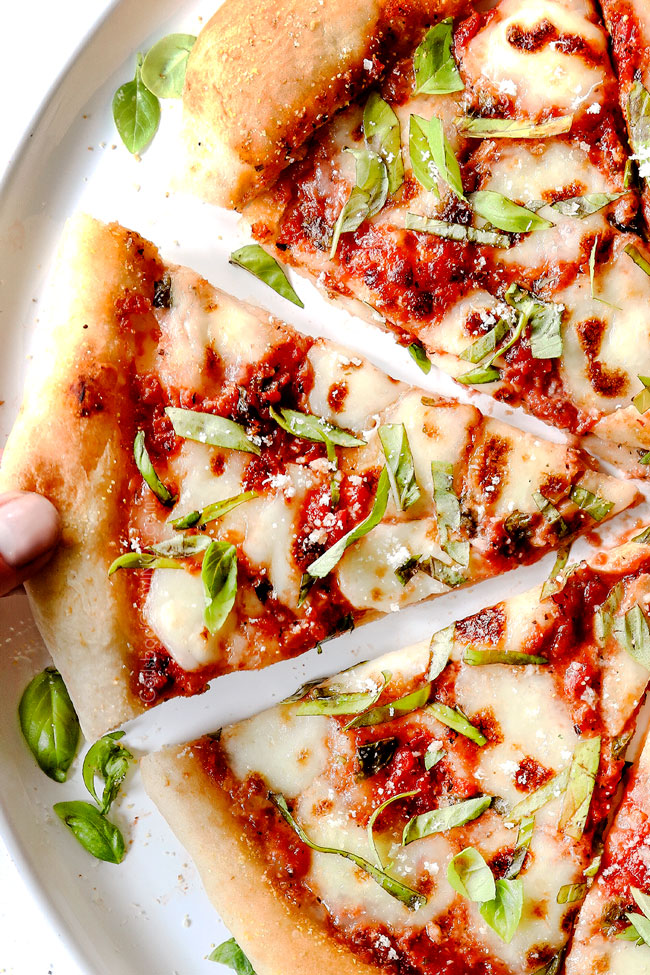
Divide into two equal balls for normal pizza crust or into three equal balls if making margherita pizza or for thin-crust pizzas.
7. LET BALLS RISE
Cover the balls with plastic wrap followed by a towel for 15 minutes to allow them to rise further.
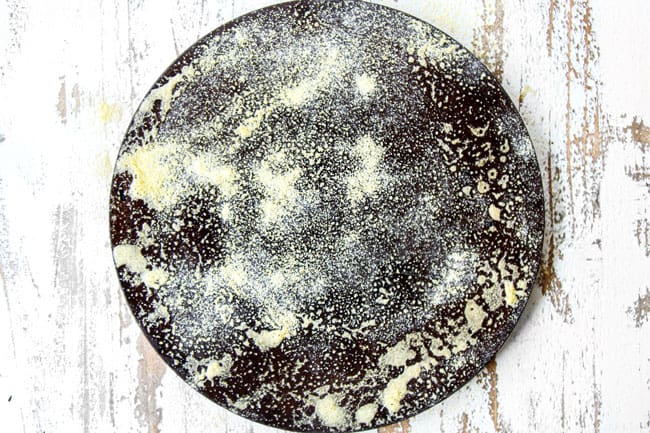
8. PREPARE PIZZA PEEL or PIZZA STONE
Carefully remove your pizza stone/baking sheet and GENEROUSLY grease the entire surface with olive oil or with nonstick cooking spray (I like to spray like crazy). Sprinkle with cornmeal for added flavor, texture, and to prevent sticking.
9. ROLL OUT PIZZA DOUGH
After 15 minutes, roll the dough out onto a lightly floured surface or nonstick slip mat into a 12-inch round circle. Transfer pizza dough to your pizza peel, baking dish, or pizza stone. I simply flip my nonslip mat over onto the stone and gently pull it away from the mat. Immediately after transferring, pinch edges to create a rimmed crust.
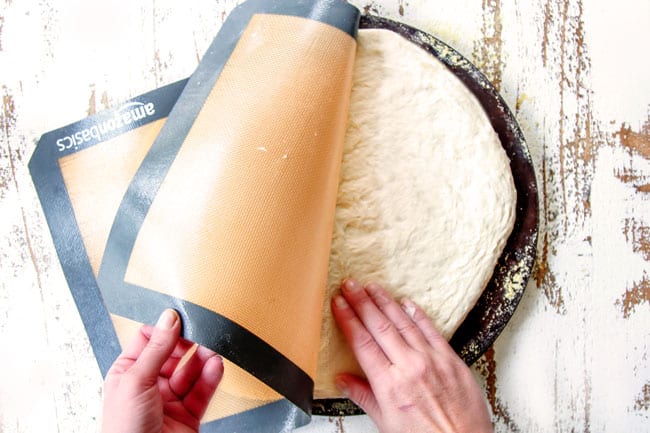
PRO TIP: Once your pizza dough is on your pan, try scooting the dough – if it slides easily, you are good to go – if not, you need more nonstick cooking spray and cornmeal.
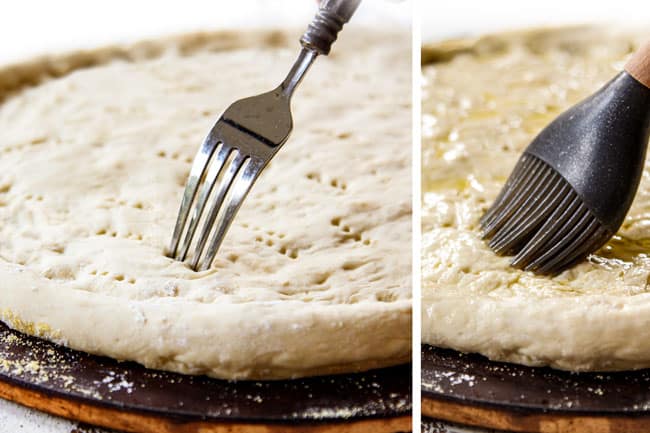
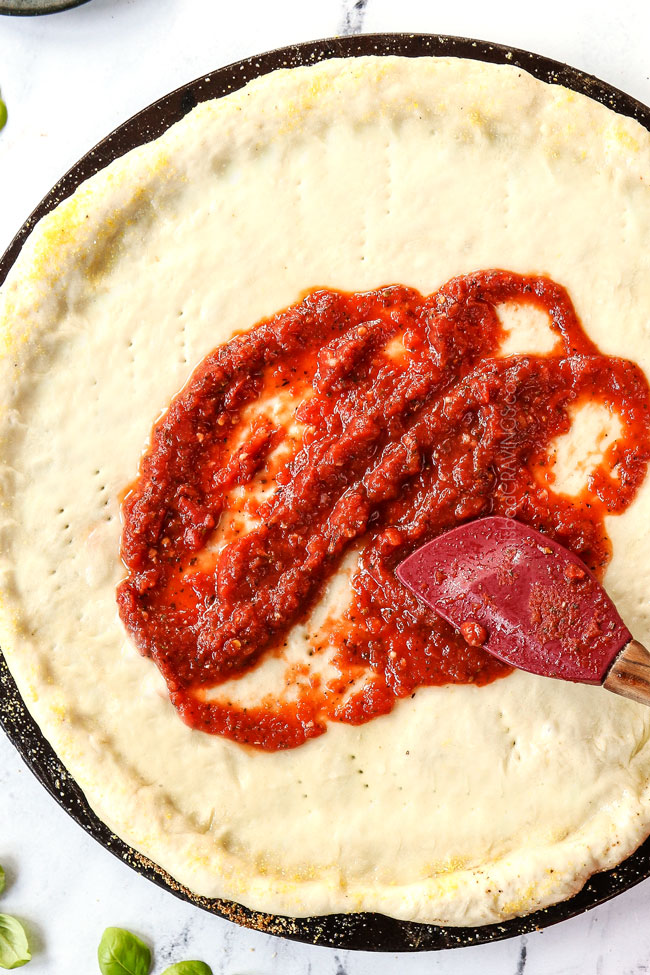
10. SEASON PIZZA DOUGH
Lightly brush the top of the pizza dough with olive oil, then sprinkle with garlic salt (don’t forget the edges!). This will add flavor and prevent the dough from getting soggy with the toppings.
Using a fork, prick several holes in the dough to prevent bubbling.
11. ADD TOPPINGS AND BAKE!
I highly recommend my homemade pizza sauce! It is “to die for” and only takes 5 minutes in your blender! Bake for 12-15 minutes for a normal crust or 8-10 minutes for a thin crust with all your favorite toppings.
DO YOU HAVE TO BAKE PIZZA DOUGH BEFORE ADDING TOPPINGS?
No! Just think of Italian pizza kitchens and how they smear the pizza sauce right on the freshly hand-tossed dough. The olive oil we brush on the pizza dough will prevent it from becoming soggy. To assemble pizza:
1. Brush the rolled-out dough lightly with olive oil and sprinkle with garlic salt
2. Using a fork, prick several holes in the crust
3. Spread pizza sauce directly onto unbaked pizza dough
4. Sprinkle with the desired amount of cheese
5. Add toppings and more cheese if you wish
6. Bake for 12 minutes at 475 degrees F
7. Broil for 2 minutes or until cheese is golden
Tips for the best Pizza Crust

How to Store Homemade Pizza Dough
CAN PIZZA DOUGH SIT OUT ALL DAY?
You can actually over-proof your pizza dough! I don’t recommend letting the dough sit out longer than 4 hours. You don’t want it to rise too much, or it could cause over-fermentation and a super yeasty flavor.
CAN YOU REFRIGERATE HOMEMADE PIZZA DOUGH? (HOW TO MAKE AHEAD)
Absolutely! You will want to let the dough rise completely before refrigerating (through the 15-minute second rise), then tightly wrap the dough balls in plastic wrap. Dough can be refrigerated for up to 2 days. For best results, use pizza dough or freeze it beyond that.
When ready to use, unwrap the dough and place it on a floured surface or parchment paper. Let the dough come to room temperature before rolling out, about 30-60 minutes.
CAN YOU FREEZE HOMEMADE PIZZA DOUGH?
Yes! This recipe makes two pizza crusts, so you can either bake both now or bake one now and freeze the other for later. You can also make the dough in bigger batches very easily, so you can freeze more dough, which means more ready-to-eat pizza later!
You can freeze pizza dough as a ball or as an unbaked, rolled-out crust. In either scenario, dough can stay in the freezer for up to 3 months.
• Dough balls: let the 2 balls of pizza dough rise completely (through the 15-minute second rise). Lightly spray all sides of the dough balls with nonstick spray, remember I love my spray! Place the dough into separate Ziploc bags, squeezing out any air.
• Flattened dough: separate flattened pizza dough with parchment paper, then stack. Cover tightly with two layers of plastic wrap, followed by foil.
• To Thaw: when ready to use, thaw dough in the refrigerator for about 12 hours. Bring to room temperature by placing on the counter; this should take about 30 min.
How to reheat Homemade Pizza
TO REHEAT PIZZA IN THE OVEN:
• Line a baking sheet with foil and preheat the oven to 375 degrees F.
• Transfer pizza (slices) to the baking sheet and bake for 10 minutes or until heated through.
TO REHEAT ON THE STOVE:
• Add slices of pizza to the skillet and cover partially with the lid.
• Heat over medium heat for 2-3 minutes until heated through.
TO REHEAT IN THE MICROWAVE:
• Microwave at 20-second intervals until heated through. Be aware that the crust will lose crunch in the microwave.
Pizza Dough FAQs
Pizza dough and regular dough, like bread dough, are made with similar ingredients, but have distinct differences based the ratio of ingredients and preparation.
Kneading: Pizza dough is generally kneaded less than regular dough so it’s more elastic and tender to create chewy dough. Regular dough, on the other hand, benefits from more extensive kneading to develop gluten and create a desirable structure. However, this can vary based on the desired outcome and recipe.
Fat and Sugar: While fat and sugar are sometimes added to regular dough recipes to enhance flavor and texture, pizza dough typically is a lean dough, made without eggs or butter. Without the extra fat to make the dough soft, you’re promised a crusty pizza crust.
Shaping: Pizza dough is typically shaped into a thin, round or rectangular shape, suitable for baking in a hot oven. Regular dough, on the other hand, can be shaped into various forms, such as loaves, rolls, or braided breads.
One key to making a fantastic pizza crust lies in ideal balance between a crispy exterior and a tender, chewy interior. This is achieved by by preheating your oven, with a pizza stone, to the high temperature of 475 degrees F.
Preheated stone: Using a preheated pizza stone immediately crisps up the bottom of the crust, as the intense heat transfers to the dough.
High temperature: Cooking the pizza crust at a high temperature ensures that the pizza cooks quickly, while keeping the crust interior soft and chewy, resulting in a professional-quality crust with well-developed flavor and texture.
Pizza should be baked at 475 degrees F. This high temperature promotes the highest rise from the dough, enhances the dough’s flavor, melts the cheese evenly, cooks the pizza toppings quickly, and most importantly, bakes the crust so it’s crispy on the outside, and chewy and tender on the inside.
WANT TO TRY THIS RECIPE?
PIN IT to your recipe BOARD TO SAVE FOR LATER!
FIND ME ON PINTEREST FOR MORE GREAT RECIPES! I AM ALWAYS PINNING :)!
©Carlsbad Cravings by CarlsbadCravings.com
Tools Used in This Recipe
See Favorite Tools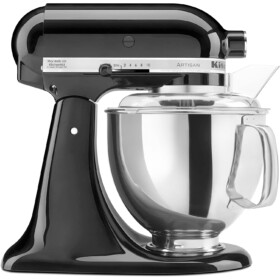
Perfect Pizza Crust
Save This Recipe To Your Recipe Box
You can now create an account on our site and save your favorite recipes all in one place!
Ingredients
- 1 1/2 cups warm water (105-110 degrees)
- 1 tablespoon active dry yeast
- 1 tablespoon sugar
- 1 teaspoon salt
- 1 tablespoon olive oil
- 3 1/2 cups unbleached all-purpose flour (plus more as needed)
- Olive oil/nonstick cooking spray
- Garlic salt
- cornmeal
Topping Ideas
- 6 ounces fresh mozzarella cheese (not packed in water) cut into 1/2-inch cubes or 1 cup freshly grated mozzarella
- 1/2 cup pizza sauce <–click link for recipe
Pizza Recipes Using this Dough
Instructions
- In a large mixing bowl or the bowl of your stand mixer (preferred), stir in water, sugar, and yeast. Let it sit for 5-10 minutes, or until the yeast is foamy and dissolved. Add olive oil, salt, and 1 ½ cups flour and mix until combined with your hook attachment (or with a wooden spoon if not using a mixer).
- Gradually mix in 2 more cups of flour until the dough starts to pull away from the sides of the bowl. If your dough is too wet, add one tablespoon of flour at a time (up to ¼ cup; more humid areas will need more flour) until the dough barely sticks to your fingers. Once the dough has pulled away from the bowl, knead in a mixer on medium-low speed or by hand for 5 minutes.
- Shape the dough into a ball and place it back in your large mixing bowl, lightly coated with olive oil or nonstick cooking spray. Turn the dough over to coat all sides. Cover tightly with plastic wrap and allow to rise until doubled in size, 1-2 hours.
- Guestimating 15 minutes before your dough is ready, preheat your pizza stone or baking sheet in the middle rack of your oven for 30-60 minutes at 475°F FOR NORMAL PIZZA CRUST or 550°F FOR THIN CRUST/MARGHERITA PIZZA:
- After dough has doubled, remove from bowl and knead a couple times. •FOR NORMAL PIZZA CRUST: Divide dough into two equal balls. •FOR THIN CRUST/MARGHERITA PIZZA: Divide dough into three equal balls. •FOR CALZONES: Divide dough into four equal balls. Cover the dough balls with lightly greased plastic wrap, followed by a towel, for 15 minutes. You can freeze one of the balls at this point if desired.* Prep all of your pizza toppings while the dough rests so you can quickly assemble the pizza once the dough is added to the pizza stone/pan.
- After the dough has rested for 15 minutes, roll each dough ball out onto a lightly floured nonstick mat or parchment paper into a 12-inch round circle; set aside.
- Carefully remove your pizza stone/baking pan from the oven. GENEROUSLY grease the entire surface of the pizza stone/baking pan with olive oil or with nonstick cooking spray. Sprinkle with cornmeal.
- Transfer the pizza dough to your prepared pizza stone/baking sheet, then pinch edges to create a rimmed crust (if you have trouble transferring, you can place your entire piece of parchment paper on your stone/baking sheet and bake directly on it). Tip: if the dough slides easily, you are good to go – if not, you need more nonstick cooking spray and cornmeal.
- Lightly brush the top of the crust with about 1 teaspoon olive oil and sprinkle with garlic salt. Using a fork, prick several holes in the crust. Add pizza sauce and desired toppings (see recipe if using).
- FOR NORMAL PIZZA CRUST: Bake assembled pizza for 12 minutes at 475°F, then broil for 2 minutes or until cheese is golden. FOR THIN CRUST/MARGHERITA PIZZA: Bake at 550°F for 8-10 minutes or until cheese is bubbling and crust is golden.
Notes
How to Refrigerate pizza dough/Make Ahead
After the 2 balls of pizza dough have risen (Step 4), you can refrigerate 1 or both of the balls of dough.- Tightly wrap dough balls in plastic wrap.
- Refrigerate for up to 2 days. For best results, use pizza dough or freeze beyond that.
- When ready to use, unwrap the dough and place it on floured surface or parchment paper.
- Let the dough come to room temperature (about 30 minutes) before rolling out.
HOW TO FREEZE PIZZA DOUGH
After the 2 balls of pizza dough have risen (Step 4), you can freeze 1 or both of the balls of dough.- Lightly spray all sides of the dough balls with nonstick spray.
- Place the dough into separate ziploc bags, squeezing out any air.
- When ready to use, thaw dough in the refrigerator for about 12 hours.
- Bring to room temperature by placing on your counter for approximately 30 minutes.
- Preheat pizza stone/baking sheet as in Step 3, then skip to Step 5.
Tips and Tricks
- Proof yeast: Make sure you proof your yeast. You don’t want to go through all the work of making pizza dough only to find it doesn’t rise!
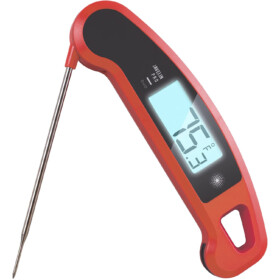
- Use an instant read thermometer: to that end, an instant read thermometer allows you to make sure the water is in that tight range of temperature needed to activate yeast. This way you know that if the yeast doesn’t activate then it’s not the water – it’s the yeast.
- Use correct flour. I don’t recommend bleached flour. Stick with unbleached flour because it has a denser grain and will provide more structure.
- Add more flour. The amount of flour can vary depending on humidity and elevation, so add enough flour a little at a time so it is tacky but not sticky. Before you add more flout, keep in mind it will become less sticky the longer it is kneaded.
- Flour hands. When working with the dough, whether rolling, kneading or pinching the edges to form the crust, dip your hands in flour first to prevent them from sticking.
- Dough should be tacky not sticky. The dough is done kneading when it is tacky, meaning it’s soft but bounces back when pressed with your finger. If it’s sticky, meaning, your fingers are still covered in a fair bit of dough, knead on.
- Use active dry yeast. Allowing the pizza dough to rise slowly allows time for fermentation, which really develops flavor.
- Brush crust with olive oil. Don’t forget to brush the dough with extra virgin olive oil before adding the toppings because it prevents the crust from getting soggy.
- Use fabulous pizza sauce! I like to use my own marinara or store-bought marinara with added Italian seasoning and red pepper flakes.
- Use FRESHLY shredded cheese. Pre-shredded cheeses contain anti-clumping chemicals which prevent the cheese from melting as easily. More importantly, freshly grated tasted better!
- Don’t burn pizza. Watch the pizza carefully, especially once you start broiling. The pizza goes from almost done to too brown fairly quickly -so be careful!
- Let pizza rest. To avoid burning your mouth on lava hot sauce, let the finished pizza cool for at least 5-10 minutes before cutting and serving. You will taste the flavors better when pizza is cooled.
Want To Make This Recipe?

Did You Make This Recipe?
Tag @CarlsbadCravings and Use #CarlsbadCravngs
Leave a Review, I Always Love Hearing From You!


Laura says
I am wondering if you have tried making this with gluten free 1:1 flour? If so, which brand? They are not all created equally!
Jen says
Hi Laura, I personally have not but in other recipes I have had the most success with Bob’s Red Mill Gluten Free 1 to 1 Baking Flour.
Midge says
Fantastic recipe!! End of story! The search is over!
Jen says
Awesome, thanks so much Midge!
Jeff N. says
So I made this crust for a chicken bacon ranch pizza and it turned out great. I only had to add a cup and a half of flour af/er the first cup. thanks for the recipe.
Jen says
Awesome, so glad you loved it!
Marilyn Carwins says
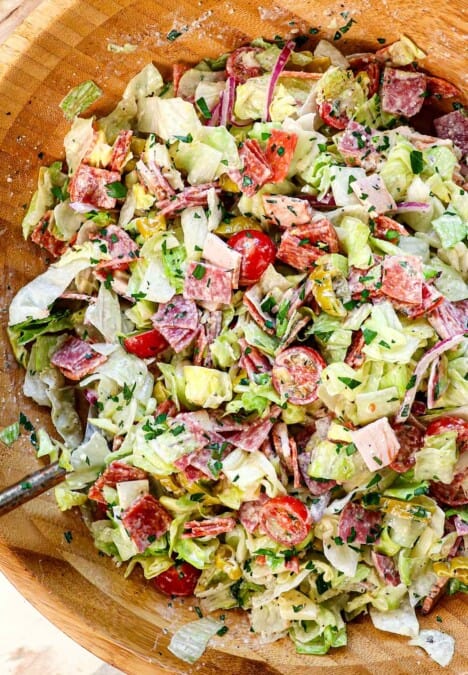
I made the pizza dough. It is by far one of the best pizza dough recipes I have tried. It as easy to make, as well. The dough was very flavorful, I could eat without the toppings. However my toppings were spicy marinara, pesto, thinly sliced red onions, peppered salami and mozzarella cheese.
Jen says
Thanks so much Marilyn, I’m so pleased you loved it so much! And your pizza sounds incredible, love those toppings!
midge says
Can this recipe be doubled??
Jen says
Yes!
Charlie H. says
I have made hundreds of pizza pies over the years. I read this recipe and tutorial and I completely agree with all of it. Nice job!
Jen says
Thank you so much Charlie, I’m excited for you to try it!
Brandy says
I have made this crust 3 times and will make it today, too. It’s perfect. All three of my kids used to complain about homemade pizza night but now they say it’s better than ordering out. I double the recipe so that everyone can make a personal pizza with their choice of toppings.
Jen says
That is the ultimate compliment Brandy, thank you! Your kids have great taste 😉
Erica says
Ok, so my mother in law made homemade pizza every Friday night for years and years. Once we moved away from them I took on the tradition of making homemade pizza every Friday night using her recipe. I’ve been doing this for about 10 years. We were happy with the pizza and every one that happened to be over for pizza night enjoyed it too. Since I’m basically obsessed with your recipes I thought I would give your pizza dough (and sauce!) a try.
Well, sorry MIL there is a new pizza dough and sauce in town and it’s here to stay! Your pizza dough and sauce are really really good and I know my MIL will forgive me once she tries it, haha. (J/k she is a great woman and will be happy for the improvement). Now I need is to finally invest in some pizza stones to bring it over the top.
Jen says
Thank you so much, Erica – WOW! I am thrilled that it did not disappoint! Thank you for taking the time to leave such an awesome review!
allHungry says
This homemade pizza crust recipe is truly amazing—so crispy yet soft inside!
Jen says
It is wonderful to hear that you love it! Thank you!
Eric says
I’ve made this recipe many many times-it’s the go to for pizza at our house; that said i often incorporate garlic powder/onion powder/rosemary/thyme/Parmesan cheese (powdered kind)/basil into dry portion-combine a total of like 50-60g of the spices and replace flour with Same amount-it’s like the best garlic bread with pizza toppings!
But could you use your recipe if using a sourdough starter? And would you know ratios to add for rise? Thanks in advance
Jen says
Hi Eric! Thanks so much for your comment! I’m so glad that it’s your go to pizza crust! I have never tried it with sourdough! Let me know if you try it out!
Jessica A Jarsak says
Is there a possibility to be able to print how you had it before without the topping ideas and pizza recipes? I liked having the ingredients and the beginning of the instructions on one page. But now the instructions are on second page and I just don’t like that. I prefer the original I printed. Other than that, I have used this pizza dough many many times. It’s my favorite pizza dough and my mom’s too.
Jen says
I’m sorry about that! The only way would be to copy and paste it in a word document to be able to edit it how you like. I’m glad you love the recipe though!
Xenia Franko says
How many grams of pizza dough does this make?
Jen says
Hi Xenia! This should be about 250-275g per pizza. I hope you love it!
Lisa says
I’ve found that preheating my pizza stones for at least 30 minutes gives me a better crust. Instead of greasing my stones, I completely prepare my pizzas on parchment paper. Then I slide the parchment paper (with pizza on it) onto my large cutting board, open the oven door, and slide the parchment paper onto the very hot stone. I also get pizza out of the oven this way. My stones stay really hot and I can make multiple pizzas.
Jen says
Hi Lisa! That’s a fantastic tip—thank you for sharing it! Preheating the stones that long definitely makes a big difference for a crisp crust, and I love your parchment method for easy transfer in and out of the oven. Being able to keep the stones hot for multiple pizzas is such a smart way to streamline the whole process too. Really appreciate you taking the time to pass along what’s worked so well for you!