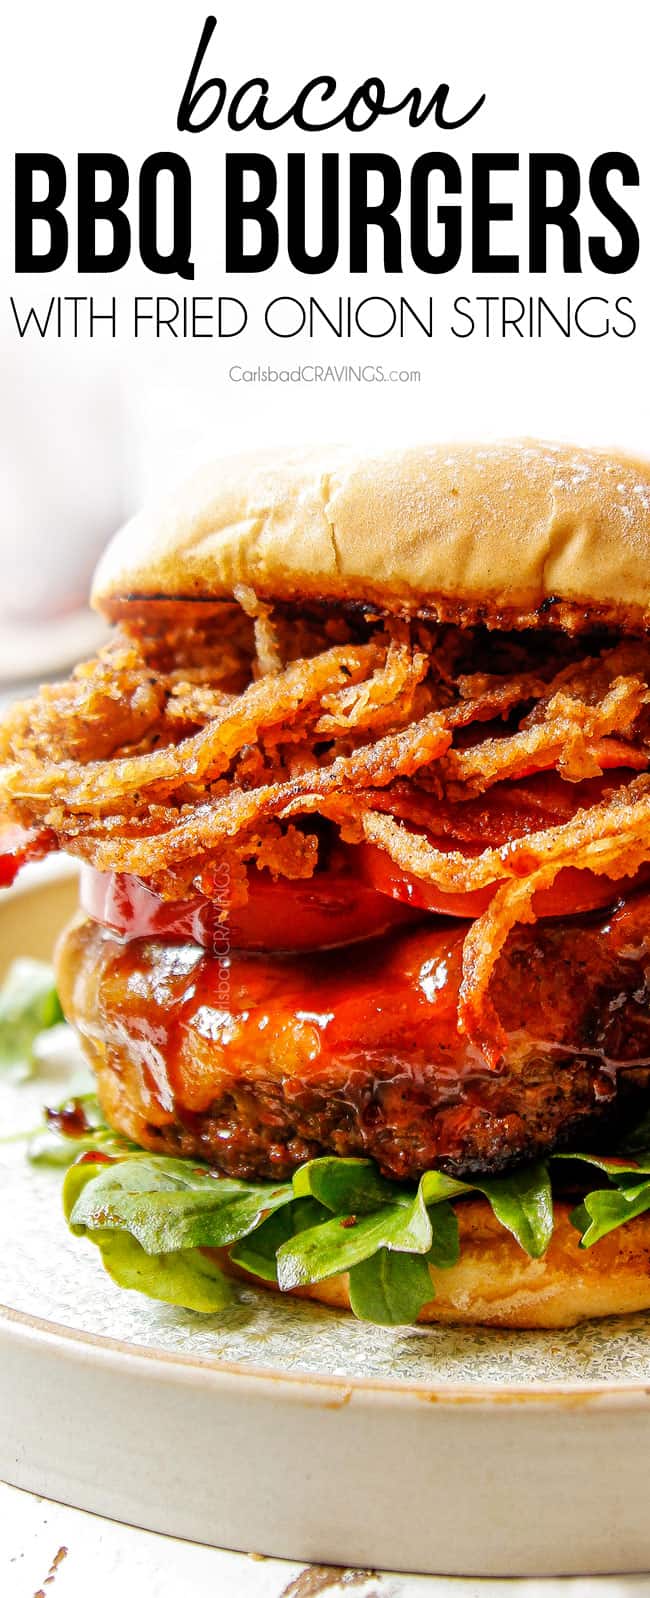
The best BBQ Burgers to rival any restaurant will have you skipping the takeout forever!
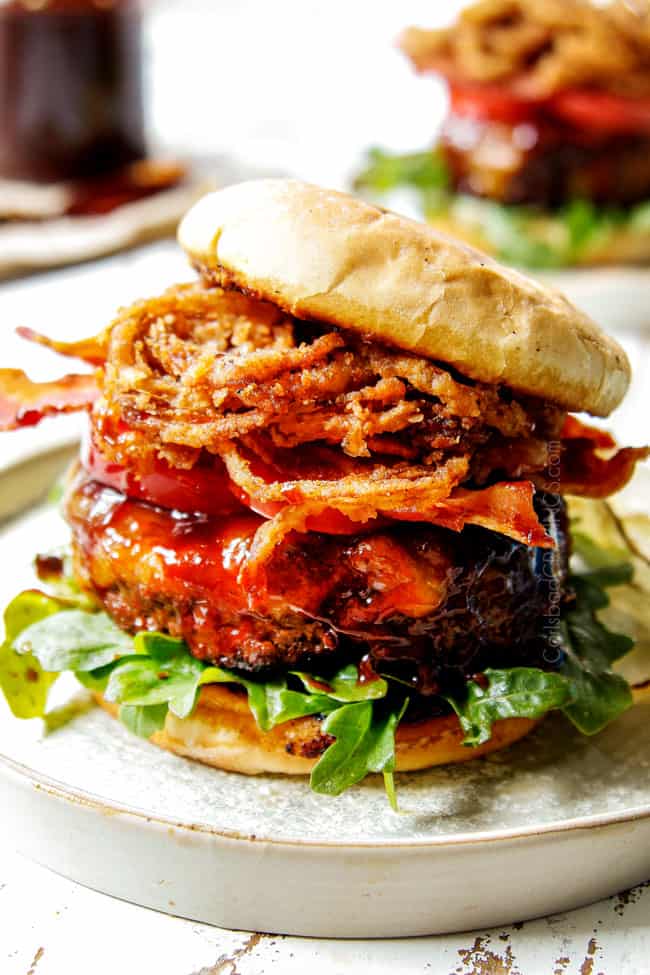
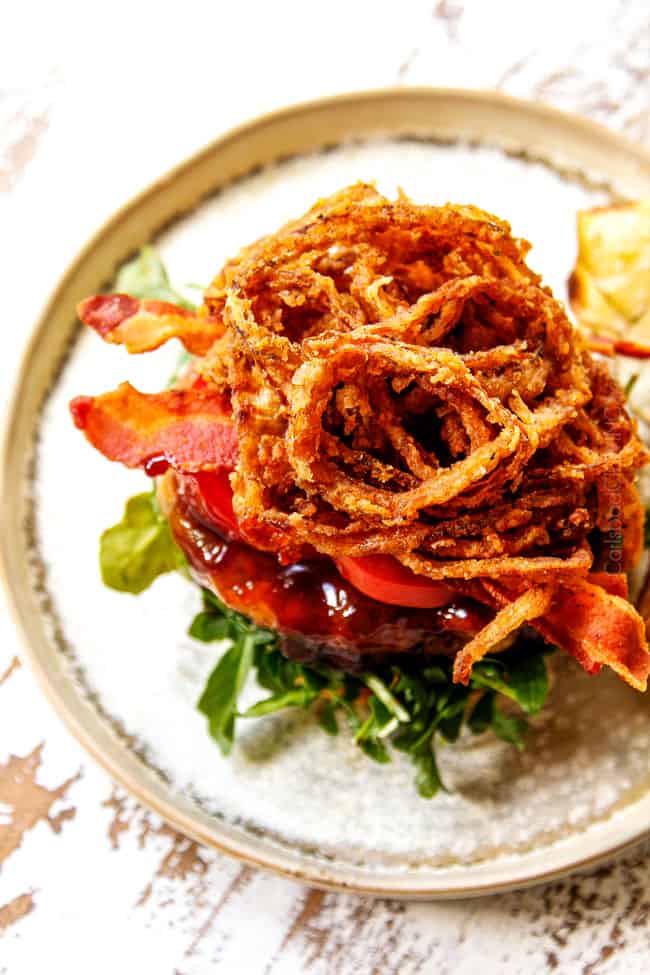
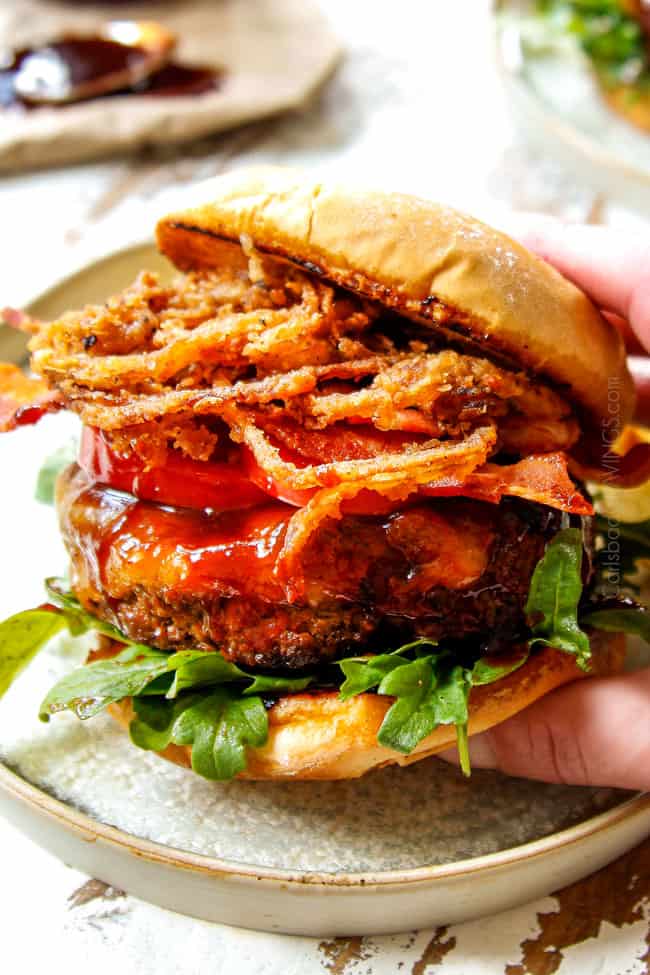
These BBQ Burgers are an amazingly juicy explosion of sweet, tangy, spicy, smokey, crispy deliciousness all at the same time. They’re smothered in homemade BBQ sauce, sharp cheddar, salty bacon, crispy lettuce, juicy tomatoes and crispy onion strings. Of course, all of the toppings are customizable to make it YOUR best burger recipe! I’ve included tips and tricks on how to cook burgers (grilled or stove top), how to make ahead and how to freeze and my secret to the JUICIEST burgers!
PIN THIS RECIPE TO SAVE FOR LATER
The best BBQ Bacon Burger for your next cookout!
Who doesn’t love a good burger? From my Hawaiian, Burgers, Asian Burgers, Best Burgers, and Korean Burgers, we love us some burgers over here. And with warm weather upon us, there’s nothing quite like sinking your teeth into a buttery burger in the great outdoors -especially when that burger is a gourmet BBQ Burger.
BBQ Burgers have to be my most ordered burger. The way the sweet and tangy BBQ sauce is balanced by the oozing sharp cheddar, salty, crispy bacon and crunchy onion strings – it’s a playground of flavor and texture that I can’t get enough of. And now you can make them anytime you want because this burger recipe is every bit as delectable as your favorite restaurant.
So, what makes this the best burger? It comes down to two main components 1) juiciness and 2) flavor. This BBQ burger recipe utilizes the steakhouse burger technique of a panade – or torn bread mixed with liquid. This might sound funny, but I guarantee it is spectacular. In a side by side comparison of a burger cooked with panade and a burger cooked without panade – the burger with panade will always win.
Now to flavor. Our BBQ Burgers are infused with garlic, chili powder, oregano, pepper-and the kicker – barbecue sauce! BBQ sauce gets blended right into the meat mixture so they’re not only exploding with flavor but extra tender as well.
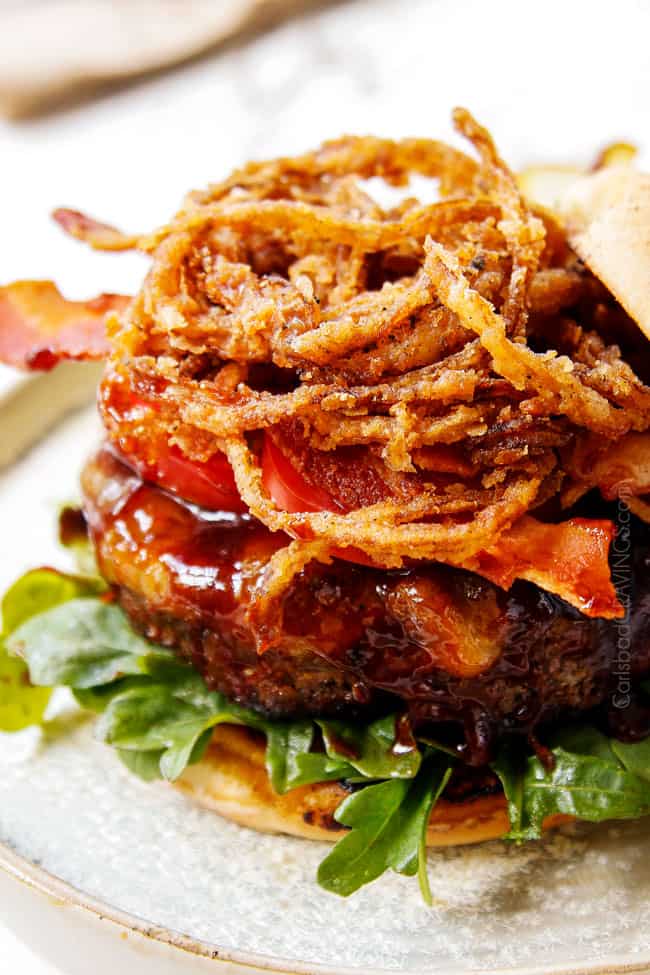
Finish off the epic BBQ Burgers with more BBQ sauce, gooey cheese, lettuce, tomato and onion strings (they deserve they’re very own post) all sandwiched in between warm, toasted buns, and we achieve a burger that is somehow exponentially more delicious than the sum of its parts. Just like the best burger should be.
Barbecue Bacon Burger ingredients
- Buns: Use whatever your heart desires! Usually, the bakery section will have soft buns such as brioche.
- Beef: I recommend 80/20 ground beef chuck.
- Patties: The beef is seasoned with barbecue sauce, garlic cloves, chili powder, dried oregano, salt, and pepper. 1 slice of chopped sandwich bread is added to absorb extra moisture from the barbecue sauce and hold the patties together.
- Cheese: I recommend sharp cheddar for maximum flavor but you may also use Gouda, Havarti, or pepper Jack.
- Bacon: Use thick-cut bacon so it doesn’t get lost. Try my baked bacon recipe for hassle-free, super crispy bacon every time.
- Tomatoes: Choose firm, juicy tomatoes like Beefsteak, Roma, or Campari for a good balance of sweetness and acidity without making the burger soggy.
- Lettuce: Crisp and sturdy lettuces like iceberg or Romaine are best for burgers. They add delightful crunch without wilting too quickly under the heat of the burger patty.
- Onion Strings: These are optional but so tasty! They’re made with 1 yellow onion, buttermilk (or DIY option), egg, flour, panko, salt, and pepper.
WHAT IS THE BEST MEAT FOR BURGERS?
Use 80/20 GROUND CHUCK
For the juiciest, most flavorful, BBQ Burger recipe, set yourself up for success by skipping the extra-lean ground beef and using 80/20 ground chuck. Ground chuck can easily be found at the butcher counter of any grocery store. Ground chuck is optimal for flavor, juiciness and texture.
Freshly ground chuck is also optimal because it hasn’t been compressed together in packaging which means more tender beef. The more freshly ground the meat is, the more tender and flavorful the burger.
Ask your butcher at the store to grind the fresh meat for you. Ask for 80/20 ground chuck which means 80% meat and 20% fat. I find this to be the perfect ratio for a juicy burger that’s not too greasy.
Can I use lean Ground Beef?
If you choose ground beef, look for 80/20 ground beef (which will most likely be chuck anyway) and avoid anything higher or leaner. Some ground beef can have 30 percent fat which is way too greasy. Leaner than 20% and you are left with tough and dry burgers. Also, take care you use QUALITY ground beef, as any combination of cuts can be labeled “ground beef.”
If you use lean ground beef as opposed to 80/20, I recommend adding a couple tablespoons of the bacon drippings directly to the panade before adding the beef, this will prevent dry burgers.
Can I use Ground Sirloin?
Ground sirloin is leaner than ground chuck, usually 90/10 so it is much leaner, less flavorful and tends to dry out when cooked at high heat. If you use ground sirloin, I recommend – same as ground beef – adding a couple tablespoons of the bacon drippings directly to the panade before adding the sirloin to prevent dry, cracking burgers.
How to make BBQ Burger Patties
STEP 1 – START WITH A PANADE
We all know the disappointment of sinking our teeth into a sad, dry burger – but not theses BBQ Burgers! Whenever you cook or grill meat at high heat, you run the risk of losing juiciness and flavor. The secret, fool proof way to guarantee juicy burgers every time is to add a panade. A panade is a simple mixture of starch and liquid that is added to ground beef.
In our BBQ Burger recipe, we’re going to use BBQ sauce (the liquid) and torn bread (the starch). This technique works extremely well because it allows us to add barbecue sauce directly to the burger for added flavor.
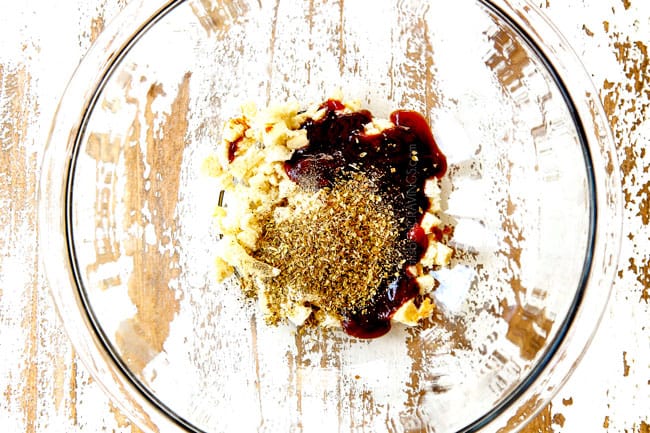
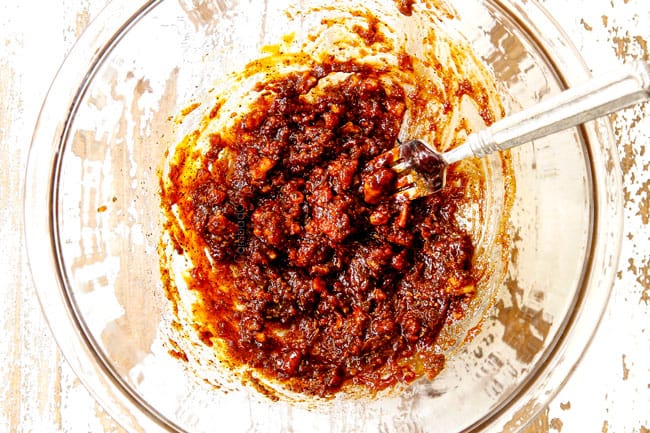
To make, add the bread to a bowl, along with the barbecue sauce and seasonings and mash it together to form a chunky paste. Next, gently mix in the ground beef with your hands. The panade prevents the meat proteins from contracting which causes significant amounts of moisture to be squeezed out.
STEP 2 – Keep BEEF COLD
We want to keep the flavor-carrying fat in the ground beef as much as possible to achieve the juiciest burgers. Unfortunately, the fat can melt and smear at room temperature when handled which causes unevenly distributed fat and too much of the fat to render during the cooking process resulting in dry burgers.
To prevent dry burgers, keep the ground beef as cold as possible by refrigerating it until you have made the panade and are ready to add the beef. Once you add the beef, work quickly and then refrigerate the patties again until ready to cook.
STEP 3 – Don’t OVRWORK THE GROUND BEEF
Stop mixing the ground beef ingredients as soon as they are combined – the more you handle the meat, the tougher your burger will be and the more likely it is to dry out and crumble.
To mix gently, use clean, wet hand, with fingers spread apart then combine until loosely mixed. Damp hands will prevent them from becoming sticky which will help the meat combine faster and prevent over-handling.
STEP 4 – Don’t Pack
When shaping the patties, don’t overwork or pack the meat together or else you’ll end up with tough, dense burgers.
STEP 5 – MAKE PATTIES LARGER THAN BUNS
Burgers will inevitably shrink when cooked as the proteins constrict so it is important to make the burger patties larger than the buns – no one wants a sad burger patty much smaller than the bun.
To make the patties, divide the meat into 4 equal sections. You can use a kitchen scale to make sure they are equal, but I just eyeball it. Form each section into a loose, big meatball, handling as little as possible. We don’t want the balls too compact or overworked or you’ll have a hard burger.
Flatten the ball with the palm of your hand until it is about 1-inch larger than your bun, then proceed to dimple per below instructions.

STEP 6 – DIMPLE THE PATTIES
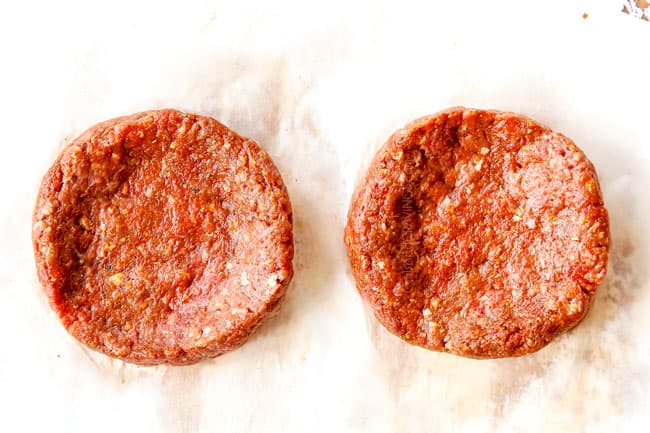
Dimpling the patties, or making a shallow depression, helps the BBQ Burgers cook evenly, prevents them from bulging in the center when cooked and minimizing shrinkage.
But not all dimples are created equal! Instead of just indenting the center of the patty with your thumb, it is best to create a shallow center surrounded by raised edges. Once you flatten the burgers to the desired width, shape them so the outer 1/2-inch of the patty is roughly 1-inch thick and the centers are 1/2-inch thick in the center.
Since patties vary in size, here is a simple formula: make patties 1-inch larger than the buns and the outer edges twice as thick as the center.
STEP 7 – Chill Burgers
Unlike almost every other protein that cook better when brought to room temperature, we want to keep our burger patties cold until cooked. The colder the patties, the better the flavor-carrying fat stays in the meat which means juicer burgers and burgers that don’t crumble when cooked.
Make your BBQ Burgers at least 15 minutes before cooking, place on a parchment lined plate or tray, cover and refrigerate.
How to Cook Burgers
HOW tO COOK BURGERS ON THE GRILL
Cooking burgers on the grill is incredibly easy with almost zero cleanup! First, grease the grill then heat to medium-high heat. Once hot, place the burgers on the grill directly over the heat so they aren’t touching and cover. We want to make sure there is enough room in between the burgers so they grill and don’t steam.
Grill the burgers until golden brown and slightly charred on the bottom, about 3-5 minutes. You’ll know to flip the patties when you see liquid pooling on the uncooked surface. Don’t push down on the burger while grilling or you will lose juices and cause flareups. If flareups happen, move the burgers away from direct heat until the flames diminish.
Flip the burgers over only once then continue to cook until golden brown and slightly charred on the second side. It will take 3-5 minutes depending on desired doneness. If the outsides get charred before the burgers reach desired temperature, move the burgers away from the direct heat, cover, and continue to grill until they reach the desired temperature.
All this said, the grilling time ultimately depends on the thickness of your patties and desired doneness.
HOW tO COOK BURGERS ON THE STOVE
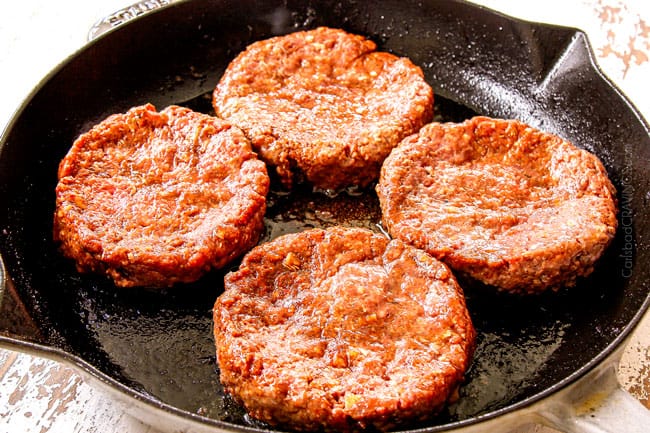
To cook burgers on the stove, choose a cast iron skillet. This will give you a beautiful char. I like to use the same skillet I cooked the bacon in and leave about two tablespoons of bacon drippings. Heat the skillet over medium high heat until it smokes lightly, this can take up to two minutes, so be patient!
We want the skillet nice and hot so it will create a nice crust. At the same time, we don’t want it so hot that the outside will burn before the center is cooked. I find medium-high to be perfect to start with, but you may need to reduce the heat if you like your burgers more well done.
Cook the burgers until brown and charred on one side, about 3-4 minutes, flip, and reduce heat to medium. Glaze each patty with about 1 tablespoon barbecue sauce then cover. Covering the pan ensures the burger will cook evenly all throughout and reducing the heat is necessary so they don’t burn. The pan will still have residual heat, so the bottom will still char. You will cook on this side for 2-5 minutes, depending on the thickness of your burgers and how well done you like them. I suggest using an instant read thermometer to check for doneness.
HOW DO I ADD CHEESE?
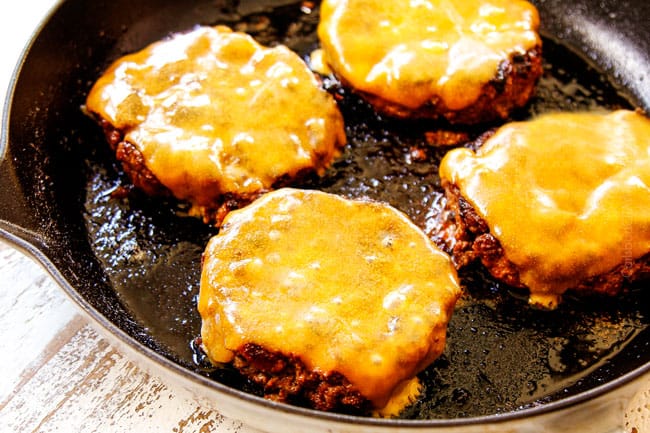
- Skillet: To add cheese, place a slice of cheese on top of each patty the last 2 minutes or so of cooking, then cover the skillet.
- Grill: Add the cheese directly on top of each patty the last 2 minutes of grilling. Close the lid of the grill to melt the cheese.
WHAT TEMPERATURE SHOULD A BURGER BE COOKED TO?
The FDA recommends burgers should be cooked to an internal temperature of 160 degrees F to be considered safe for consumption. I highly recommend an instant read thermometer otherwise you won’t know the temperature of your BBQ Burger without breaking it open.
You can purchase an instant-read thermometer at any grocery store, Target, Amazon, etc. When taking the temperature, make sure you insert it into the middle of the burger, as this is the part that cooks last.
Here is a temperature guide for YOUR perfect burger:
- MEDIUM-RARE BURGER: 125 to 130 degrees, 2 to 3 minutes per side
- MEDIUM BURGER: 135 to 140 degrees, 3 to 4 minutes per side
- MEDIUM-WELL BURGER: 145 to 160 degrees, 4 to 5 minutes per side. 160 degrees is recommended for safe beef consumption
- WELL-DONE BURGER: 160 degrees and up, 5 minutes and up per side
Tips for Cooking Burgers
- Correct Pan. Use a cast iron skillet or heavy bottom pan because they distribute heat more evenly and therefore cook your hamburgers more evenly.
- Clean Grill. If grilling, start with a clean grill for the best flavor and texture.
- Hot: Get the pan very hot before adding the burgers to create a nice crust/char for maximum flavor and juiciness.
- Don’t Press. We’ve all seen it done, but don’t EVER press down on your burgers with your spatula. Pressing down on the burgers squeezes out the flavorful juices just like a sponge which are what make a juicy burger juicy. Every time you press, you lose flavor and moisture resulting in a drier burger.
- Flip Once: as the burger goes from cold to warm, to cooked, it is more likely to fall apart, so handle your burger as little as possible on the stove top or grill. You should only need to flip your burger once. This will also ensure even cooking.
- Let Burgers Rest. Once the burgers are done, place them on a plate and let them rest for 5 minutes. This allows the juices that have been pushed to the outside of the burger when cooking to be redistributed throughout the burger.
- For thick burgers, first sear over direct heat, then finish cooking over indirect heat.
- Look for juices. Burgers are medium when pink juices come out on top.
HOW DO I TOAST BURGER BUNS?
I strongly believe the buns need to be toasted in order to achieve the best BBQ Burgers! The toasted exterior prevents them from becoming soggy as well as delivering a golden, crispy outside, giving way to a soft buttery inside.
OVEN
- Preheat oven to 350 degrees F.
- Line top and bottom buns on a baking sheet, cut side up.
- Spread with softened butter.
- Bake until warmed and lightly crispy about 5 minutes.
- Don’t over bake or they can become dry – we don’t want croutons!
STOVE
The stove is perfect if you only need 4 buns, like in this BBQ burger recipe, although it will still require 2 batches, to toast both the top and bottoms.
- After the burgers are cooked, don’t wipe out pan.
- Heat pan to medium low heat.
- If there isn’t much grease left, then you may want to melt 1-2 tablespoons butter.
- Add buns, cut side down.
- Toast until golden, tilting a bun up to check for doneness.
GRILL
If you’re grilling your burgers, the toasting the buns is super simple and doesn’t require any additional pans. You can toast the bun ahead of time or wait until your burgers are almost done.
- Spread some softened butter on the cut side of the buns.
- Add buns to the grill in a single layer, cut side down.
- Grill until slightly charred, about 1 minute.
INGREDIENTS FOR ONION STRINGS
The crunchy fried onion strings really elevate this burger recipe to restaurant delicious. They are so addicting, I could at them all day sans burger but they’re even better crowing the BBQ Burgers. Here’s what you’ll need:
- Onions: use yellow onions for the most flavor.
- Buttermilk: I often don’t have buttermilk, so I will use a DIY buttermilk. To make your own buttermilk, Add 2 tablespoons lemon juice or white vinegar to a 3 cup+ measuring cup. Add enough milk to equal cups. Give it a stir then wait 10-15 minutes for it to curdle, then give it another stir before using. If you only have 1% milk, then add a splash of heavy cream before filling the rest of the measuring cup with milk.
- Egg: helps bind the flour and panko to the onions.
- Flour: I use all-purpose flour and have not experimented with gluten free flour but I imagine it would work fine.
- Panko: is a Japanese breadcrumb sold in every grocery store (including Walmart) usually next to the other breadcrumbs. Panko breadcrumbs are larger and dryer than normal breadcrumbs so they absorb less moisture and become much crispier. Please do not substitute panko breadcrumbs with Italian breadcrumbs or you will be missing out on the gorgeous, satisfying CRUNCH. If you need to omit the panko, then substitute with flour instead.
- Salt and pepper: to season those onions! I don’t recommend adding herbs because they can burn when fried.
- Oil: You will need oil with a neutral flavor and high smoking point to fry the onions. Vegetable or canola oil work great.
HOW TO MAKE ONION STRINGS
STEP 1: SOAK ONIONS
- Add onions to a shallow baking dish and pour buttermilk/egg mixture over top. Press the onions down so they’re submerged as much as possible.
- Let them soak at room temperature for 15 minutes to an hour, stirring and pushing down occasionally. Cover and refrigerate if soaking longer.
STEP 2: Prep workstations
- When ready to fry onions, fill a deep frying pan, Dutch oven or deep heavy-duty pot with approximately 2 inches of oil. Heat to 375 degrees F.
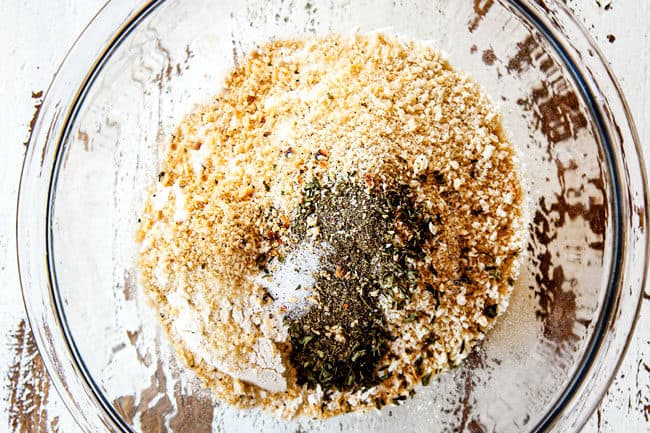
- While heating, combine flour, panko, salt and pepper in a large bowl; set aside.
- Line a large baking sheet with paper towels; set aside.
STEP 3: FRY ONIONS
- Test the oil with a small pinch of panko; if it bubbles and fries, then it is hot enough.
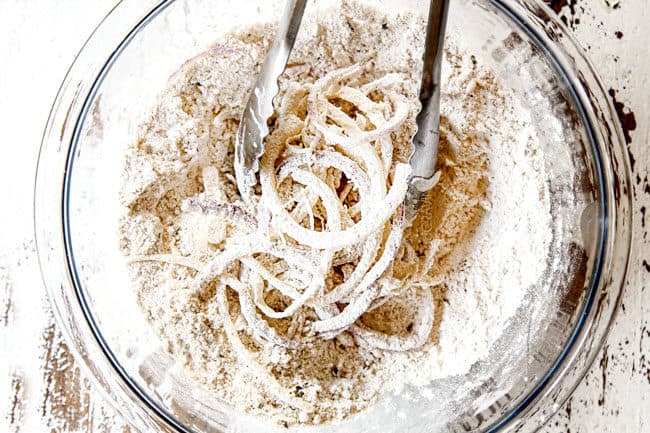
- Using tongs, transfer a handful of onions from the buttermilk to the flour/panko mixture. Toss to combine, shake off any excess flour, then carefully transfer to the hot oil.
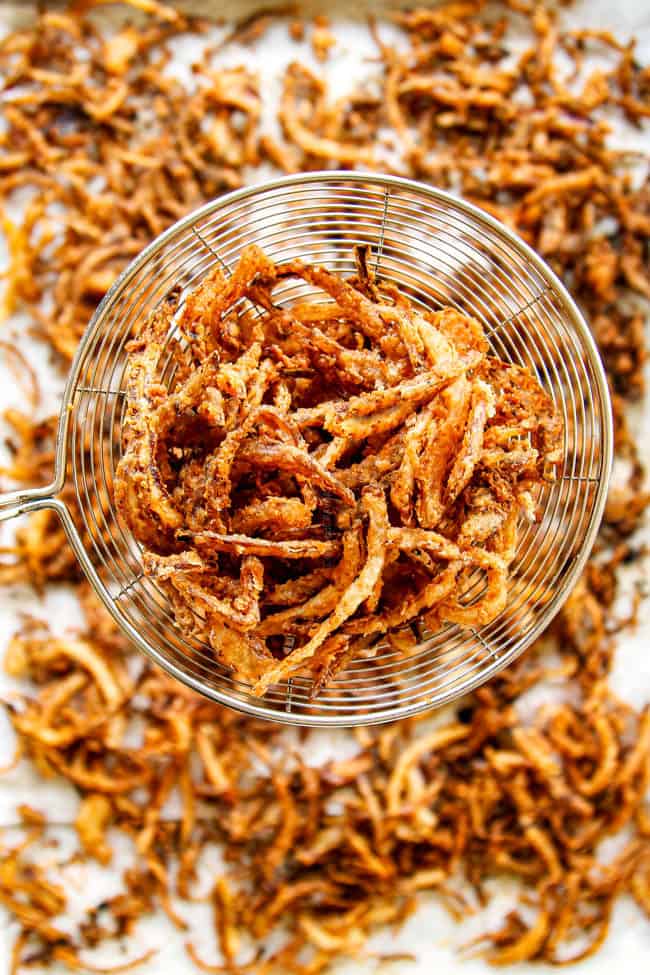
- Fry onions until golden brown (just 1-2 minutes), watch closely! Remove fried onions with a spider strainer, heat-proof slotted spoon or tongs to paper towels. Repeat with the remaining onion slices.
TIPS FOR FRIED ONION STRINGS
- Thinly slice onions. Thinly sliced onions ensure the ideal proportions of onions to coating. To shortcut this process, use a mandolin slicer if you have one.
- Slice onions ahead of time. You can slice the onions a day ahead of time and refrigerate in an airtight bag if you aren’t ready to fry right away. This will cut down on the onion prep significantly.
- Oil temperature. You want your oil to be about 375 degrees F which means it will be shimmering but not smoking. If your oil starts to smoke, lower the heat and give it some time to cool before adding the onions. Once you’ve tested that your oil is hot enough with some panko, you still want to make sure it’s not too hot, so it’s always a good idea to do a small test batch first.
- Stir onions. Once you add the onions to the hot oil, give them a stir to break up any of the onions that may be sticking together.
- Watch closely. The onions don’t take long at all to fry up – just a minute or two per batch, so make sure to watch closely. To check for doneness, use your slotted spoon and lift a few out of the pot because it can be hard to see their true color in the oil.
- Don’t over-fry. The onions should be golden and not dark golden when you remove them from the oil.
What to Serve with BBQ Burgers?
BBQ Burgers are best with all your favorite potluck foods! You can go as simple as chips and watermelon or amp it up with pasta salad, fruit salad and grilled corn. Here are some of our favorite sides to serve with burgers:
- Potluck Favorites. These sides include your favorite potluck/picnic/barbecue sides that everyone always wants more of: Million Dollar Baked Mac and Cheese, or Stove Top Mac and Cheese, Potato Salad, Baked Beans, Corn Casserole, Elote (Mexican Street Corn), Grilled Corn on the Cob and Baked Fingerling Potato Fries.
- Salad. Fresh salad is a delicious, vibrant healthy side to your BBQ Burgers. Some of our warm weather favs include: Wedge Salad, Strawberry Avocado Broccoli Salad, Strawberry Salad, Spinach Berry Salad, Cucumber Tomato Salad, Southwest Salad and Corn Salad.
- Pasta Salad. Nothing says summer like burgers and pasta salad! We love Italian Tortellini Salad, Greek Pasta Salad, BLT Pasta Salad, Cowboy Pasta Salad Bacon and Pea Pasta Salad and Strawberry Avocado Pasta Salad.
- Fruit: Sweet, refreshing fruit is always a welcome addition to the robust burgers. Try Grilled Pineapple, Creamy Grape Salad, Summer Fruit Salad, Perfect Fruit Salad, Tropical Fruit Salad or Berry Salad in Honey Mascarpone.
- Veggies. If you skip the salad, go for one of these nutritious veggies: Roasted Parmesan Asparagus, Roasted Broccoli Roasted Carrots, Sautéed Brussels Sprouts, Roasted Root Vegetables or Roasted Squash.
WHAT GOES ON A BBQ BURGER?
Now that we’ve masted the best burgers, let’s talk toppings! These BBQ Burgers can be extremely simple with just meat, cheese and BBQ sauce or as epic as you like. No matter what you choose, just take care you have the condiments ready to go before you make the burgers otherwise your burgers can get cold. Here’s what I love on my BBQ Bacon Burgers:
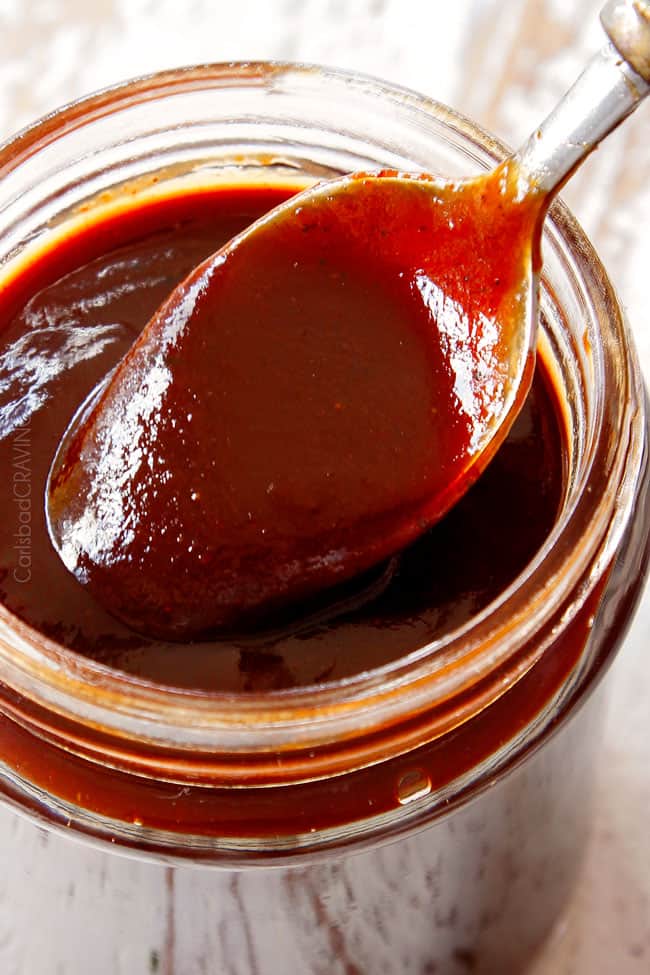
- BBQ sauce: you can use homemade BBQ sauce (highly recommend) that is sweet, tangy, spicy and smokey and can be made two weeks in advance or your favorite store-bought BBQ sauce.
- Buns: you can use whatever your heart desires! Usually the bakery section will have soft buns. We will also toast the buns for added flavor and texture.
- Cheese: my favorite cheese for BBQ Burger is sharp cheddar because it cuts through the sweetness of the BBQ sauce.
- Bacon: makes everything better! Use thick cut bacon so it stands up against the robust burgers.
- Onion strings: the onions are soaked in buttermilk and then coated with crispy panko/flour mixture then fried to golden crunchy perfection. They can also be made days in advance and will stay super crunchy so there’s no reason not to make them!
- Lettuce: any of your favs! Iceberg, Romaine, baby arugula or I like to use butter lettuce as a single leaf is perfection and just so pretty.
- Tomatoes: pick ripe yet firm tomatoes.
Other condiment ideas:
- Pickles
- Jalapenos
- Guacamole or avocados
- Red onions or caramelized onions
- Mushrooms like grilled portobellos
- Fried eggs
HOW DO YOU STORE BURGERS?
Store burger patties separate from buns in an airtight container in the refrigerator. Homemade BBQ Burgers will keep for up to 3 days. For longer storage, freeze hamburger patties instead (see below).
CAN YOU MAKE BURGER PATTIES AHEAD TIME?
Yes! You can make all of the elements for these BBQ Burgers ahead of time so all you have to do is grill and eat:
- Burgers. You can completely assemble the BBQ burger patties, place them on a parchment lined plate or tray, cover tightly with plastic wrap and refrigerate until ready to cook. Store them in the refrigerator for up to 24 hours. DON’T bring to room temperature before cooking – cook straight from the refrigerator.
- BBQ Sauce. Make BBQ Sauce according to recipe directions. Allow to cool to room temperature then transfer to a mason jar or an air-tight container. Store for up to two weeks in the refrigerator.
- Toppings. You can prep your toppings while the burgers are chilling so they are all ready to go as and all you have to do is cook and eat!
- Onion Strings. Fry onions according to directions. Let onions cool COMPLETELY before transferring to an airtight container. Store onions at ROOM TEMPERATURE for up to three days.
CAN YOU FREEZE BURGERS?
Yes, these BBQ Burgers freeze very well without cheese.
- Place cooked patties in a freezer size plastic bag and separate patties with parchment paper OR place patties in individual plastic bags.
- With either option, make sure you squeeze as much excess air out as possible in order to prevent freezer burn.
- Alternatively, you can wrap individual patties tightly in plastic wrap followed by foil.
- When ready to eat, let burgers defrost overnight in the refrigerator then cook within three days.
CAN YOU BAKE FROZEN HAMBURGER PATTIES?
Baking burgers-from-frozen is a great option because it cooks them more evenly than grilling from frozen or cooking on the stove from frozen.
To bake frozen BBQ Burger patties:
- Preheat oven to 350 degrees F.
- Lightly grease a baking sheet with sides.
- Line the frozen hamburger patties on the sheet without touching.
- Cover the sheet loosely with aluminum foil by creating a “tent” and peaking the foil in the center and sealing on the sides.
- Bake for 30-60 minutes depending on thickness of burger and how well done you like them.
CAN YOU FREEZE UNCOOKED BURGER PATTIES?
You can freeze uncooked BBQ Burger patties by flash freezing first so they don’t lose their shape.
To freeze uncooked burger patties:
- Line a baking tray with parchment paper.
- Line patties on the parchment paper in rows so they aren’t touching.
- Place tray in the freezer and freeze until solid, about 1-2 hours.
- Using kitchen shears, cut the along the imaginary grid to separate the patties, this way each patty has its own parchment square.
- Stack patties separated by parchment paper into a freezer bag.
- Squeeze out as much air as possible in order to prevent freezer burn then seal and label.
- Freeze for up to four months.
HOW LONG CAN YOU FREEZE BURGERS?
Ground beef is technically safe to freeze indefinitely but it can suffer freezer burn and lose quality. For bests results, consume your frozen BBQ Burgers within 4 months.
Helpful Tools to make Burger Recipe
- Cast iron skillet: A quality cast iron skillet is a must in your cooking arsenal! It is perfect for searing and creating a deeply golden exterior on everything from roast, to pork to chicken and seamlessly transitions from the stove to the oven. I love my super high quality Staub and Le Creuset. They are a one-time pricey purchase that will last a lifetime. You can also go with a more economical, trusty skillet like this one which also works very well.
- Instant-read thermometer: you need an instant-read thermometer for the juiciest burgers, chicken, steak and pork AND for perfectly fried everything! It allows you to cook any protein to the perfect temperature every time and allows you to heat oil to the correct temperature for frying.
- Deep Frying Pan: this is the deep frying pan I own and LOVE! (Note that different colors are different prices.) I went a long time without owning a deep frying pan/chicken fryer but I can tell you they make HUGE difference! This pan is the perfect size – high enough to protect you and you’re your kitchen from grease splatters, but low enough you can easily drop food into the pot and wide enough so it cooks a large quantity of food evenly.
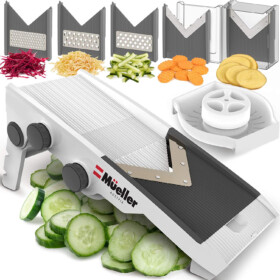
- Mandoline: saves you tons of time prepping and delivers precision slices! You can quickly, thinly slice onions (for our onion strings) apples, zucchini, potatoes, etc. or julienne all sorts of vegetables including French Fries!
- Spider Fry Strainer: is a must for frying and also super helpful for breading chicken! It allows you to lower foods gently into the hot oil without getting burned and retrieve them safely while draining off the excess oil. This is my favorite one as it is more solid and durable than the similar products and it has an extra-long handle to keep you safe.
Want to try this Burger RECIPE?
Pin it to your Dinner, BBQ or Beef Board to SAVE for later!
Find me on Pinterest for more great recipes! I am always pinning :)!
©Carlsbad Cravings by CarlsbadCravings.com
BBQ Burgers
Save This Recipe To Your Recipe Box
You can now create an account on our site and save your favorite recipes all in one place!
Ingredients
Burgers
- 1 1/2 pounds 80/20 lean ground beef chuck
- 1 piece white sandwich bread crust removed and cut into 1/4-inch pieces
- 1/3 cup homemade BBQ Sauce or store-bought
- 3 garlic cloves, minced or 1 teaspoon garlic powder
- 1 tsp EACH chili powder, dried oregano, salt
- 1/2 teaspoon pepper
For serving
- 4 hamburger buns
- BBQ Sauce
- 4 slices sharp cheddar cheese
- 8 slices thick cut bacon
- tomato slices
- lettuce
Fried Onion Strings
- 1 yellow onion thinly sliced
- 2 cups buttermilk see DIY below
- 1 egg
- 3/4 cups all-purpose flour
- 1/2 cup panko breadcrumbs
- 1/2 tsp EACH salt and pepper
- vegetable or canola oil for frying
Instructions
Make Burgers
- Add bread, ⅓ cup BBQ sauce, garlic and all seasonings to a large bowl. Mash together with a fork to form a chunky paste. Add the ground beef and gently mix everything together with your hands just until combined- don’t overmix!
- Divide the mixture into 4 equal sections. Form each section into a loose, big ball. Flatten each ball with the palm of your hand until it is about 1-inch larger than your buns. Create a shallow depression in the middle of each patty so the outer ½-inch edges are almost twice as thick as the center (see photos in post).
- Time permitting, cover patties tightly with plastic wrap and refrigerate for at least 15 minutes (cold patties stay intact better), while you cook your bacon, and prep your toppings. If you're making fried onion strings, make them at this point (see instructions below). DON'T bring patties to room temperature before cooking.
Stove Top
- Leave 2 tablespoons bacon drippings behind in your cast iron skillet or heat 2 tablespoons vegetable oil over medium-high heat. Once hot, add the patties and cook until brown and slightly charred on one side, about 3-4 minutes.
- Flip burgers and reduce heat to medium. Spread each patty with 1 tablespoon BBQ sauce and cover. Cook an addition 2-5 minutes, depending on how rare you like your burger, adding cheese the last 1-2 minutes and covering. Remove to a plate and tent with foil and let rest 5 minutes.
Grill
- Grease grill and heat over medium-high heat. Once hot, add patties and cover. Cook until brown and slightly charred on one side, about 3-5 minutes.
- Flip burgers (but do not press down) and spread each patty with 1 tablespoon BBQ sauce. Cover and cook an additional 3-5 minutes, or to desired doneness, adding cheese the last 1-2 minutes of grilling then cover. Remove to a plate and tent with foil and let rest 5 minutes.
Hamburger Buns
- To toast hamburger buns, spread softened butter on the cut sides of the buns. Add to the grill, or skillet, cut side down and toast for about 1 minute or until golden.
Assemble
- Top toasted buns with lettuce, followed by patties, desired amount of BBQ sauce, tomatoes, bacon and onion strings. Dig in!
FRIED ONION STRINGS
- Whisk buttermilk and egg together. Add onions to a shallow baking dish and pour buttermilk/egg mixture over top. Press the onions down so they're submerged as much as possible. Let them soak at room temperature for 15 minutes up to an hour, stirring and pushing down occasionally. Cover and refrigerate if soaking longer.
- When ready to fry onions, fill a Dutch oven or deep heavy-duty pot with approximately 2 inches of oil. Heat to 375 degrees F.
- While heating, combine flour, panko, salt and pepper in a large bowl; set aside. Line a large baking sheet with paper towels; set aside.
- Test the oil with a small pinch of panko; if it bubbles and fries, then it is hot enough. Using tongs, transfer a handful of onions from the buttermilk to the flour/panko mixture. Toss to combine, shake off any excess flour, then carefully transfer to the hot oil.
- Fry onions until lightly golden brown (just 1-2 minutes), watch closely! - they will continue to darken when baked. Remove fried onions with a spider fry strainer or fine mesh sieve to paper towels. Repeat with the remaining onion slices.
- MAKE AHEAD: Fry onions according to directions. Let onions cool completely before transferring to an airtight container. Store onions at room temperature for up to three days.
Notes
- DIY Buttermilk: I often don’t have buttermilk, so I will use a DIY buttermilk. To make your own buttermilk, Add 2 tablespoons lemon juice or white vinegar to a 3 cup+ measuring cup. Add enough milk to equal cups. Give it a stir then wait 10-15 minutes for it to curdle, then give it another stir before using. If you only have 1% milk, then add a splash of heavy cream before filling the rest of the measuring cup with milk.
QUICK TIPS
- Use quality BBQ sauce. Your burgers are only as good as your sauce! I highly suggest my homemade BBQ sauce recipe.
- Use correct meat. Use 80% lean or 85% lean meat ground beef. Anything greater than 80% lean causes too many flare ups and anything less than 85% lean = dry burgers. Ground Chuck is the best meat to use. You can simply ask your butcher for 80/20 ground chuck and he will know exactly what you mean.
- Lean ground beef or sirloin. If you use lean ground beef or ground sirloin, I recommend adding a couple tablespoons of the bacon drippings directly to the panade before adding the beef, this will prevent dry burgers.
- Don’t overwork meat. Stop mixing the ingredients as soon as they are combined. Overworking the meat will create rubbery, tough burgers. Shape the hamburger patties gently and don’t pack the meat together or else you’ll end up with a hard burger.
- Keep beef cold. To prevent dry burgers, keep the ground beef as cold as possible by refrigerating it until you have made the panade and are ready to add the beef. Once you add the beef, work quickly and then refrigerate the patties again until ready to cook.
- Make an indentation. Making a shallow indentation in the center of each patty will ensure the burgers cook evenly and prevent the centers from bulging as the surrounding collagen tightens.
- Size of patties matters. Since patties vary in size, here is a simple formula: make patties 1-inch larger than the buns and the outer edges twice as thick as the center.
- Chill patties. The colder the patties, the better the flavor-carrying fat stays in the meat which means juicer burgers and burgers that don’t crumble when cooked.
- Use correct pan. Use a cast iron skillet or heavy bottom pan because they distribute heat more evenly and therefore cook your hamburgers more evenly.
- Clean Grill. If grilling, start with a clean grill for the best flavor and texture.
- Hot: Get the pan very hot before adding the burgers to create a nice crust/char for maximum flavor and juiciness.
- Don’t press burgers. We’ve all seen it done, but don’t EVER press down on your burgers with your spatula. Pressing down on the burgers squeezes out the flavorful juices just like a sponge which are what make a juicy burger juicy. Every time you press, you lose flavor and moisture resulting in a drier burger.
- Let burgers rest. Once the burgers are done, place them on a plate and let them rest for 5 minutes. This allows the juices that have been pushed to the outside of the burger when cooking to be redistributed throughout the burger.
STORAGE
Store burger patties separate from buns in an airtight container in the refrigerator. Homemade BBQ Burgers will keep for up to 3 days. For longer storage, freeze hamburger patties instead (see below).MAKE AHEAD
- Burgers. You can completely assemble the BBQ burger patties, place them on a parchment lined plate or tray, cover tightly with plastic wrap and refrigerate until ready to cook. Store them in the refrigerator for up to 24 hours. DON’T bring to room temperature before cooking – cook straight from the refrigerator.
- BBQ Sauce. Make BBQ Sauce according to recipe directions. Allow to cool to room temperature then transfer to a mason jar or an air-tight container. Store for up to two weeks in the refrigerator.
- Toppings. You can prep your toppings while the burgers are chilling so they are all ready to go as and all you have to do is cook and eat!
- Onion Strings. Fry onions according to directions. Let onions cool COMPLETELY before transferring to an airtight container. Store onions at ROOM TEMPERATURE for up to three days.
HOW TO FREEZE COOKED BURGERS
These BBQ Burgers freeze very well without cheese.- Place cooked patties in a freezer size plastic bag and separate patties with parchment paper OR place patties in individual plastic bags.
- With either option, make sure you squeeze as much excess air out as possible in order to prevent freezer burn.
- Alternatively, you can wrap individual patties tightly in plastic wrap followed by foil.
- When ready to eat, let burgers defrost overnight in the refrigerator then cook within three days.
HOW TO FREEZE UNCOOKED BURGER PATTIES
You can freeze uncooked BBQ Burger patties by flash freezing first so they don’t lose their shape.- Line a baking tray with parchment paper.
- Line patties on the parchment paper in rows so they aren’t touching.
- Place tray in the freezer and freeze until solid, about 1-2 hours.
- Using kitchen shears, cut the along the imaginary grid to separate the patties, this way each patty has its own parchment square.
- Stack patties separated by parchment paper into a freezer bag.
- Squeeze out as much air as possible in order to prevent freezer burn then seal and label.
- Freeze for up to four months.

Did You Make This Recipe?
Tag @CarlsbadCravings and Use #CarlsbadCravngs
Leave a Review, I Always Love Hearing From You!
Carlsbad Cravings© Original




jocelyn thompson says
hi my name is jocelyn i was wondering if you had a Thai salad recipe
and Japanese recipes
and Chinese recipes
Jen says
Hi Joceyln, I have an Asian Salad with Thai Dressing: https://carlsbadcravings.com/asian-pineapple-salad-with-peanut-coconut-dressing-recipe/v
You can all my Asian recipes here, enjoy! https://carlsbadcravings.com/recipes/recipe-index/asian-inspired/
duffy dennis says
Instead of a bbq sauce on the bun, I suggest creating a dipping sauce of a normal jus mixed with your favorite bbq sauce. This technique always creates great burger experiences for me, I hope it will for some of you too.
Jen says
Sounds like a great idea, thanks so much!
Abby Bumpus says
These were some of the best burgers we have ever had, totally worth the little bit of extra effort! We live in an apartment and don’t have access to a grill so I did mine in the air fryer at 375 for 8 min on one side, flipped and did 4 more minutes. They were so juicy and flavorful! And the onion strings
Jen says
Thanks! I’m pleased that they were worth the effort in the end!