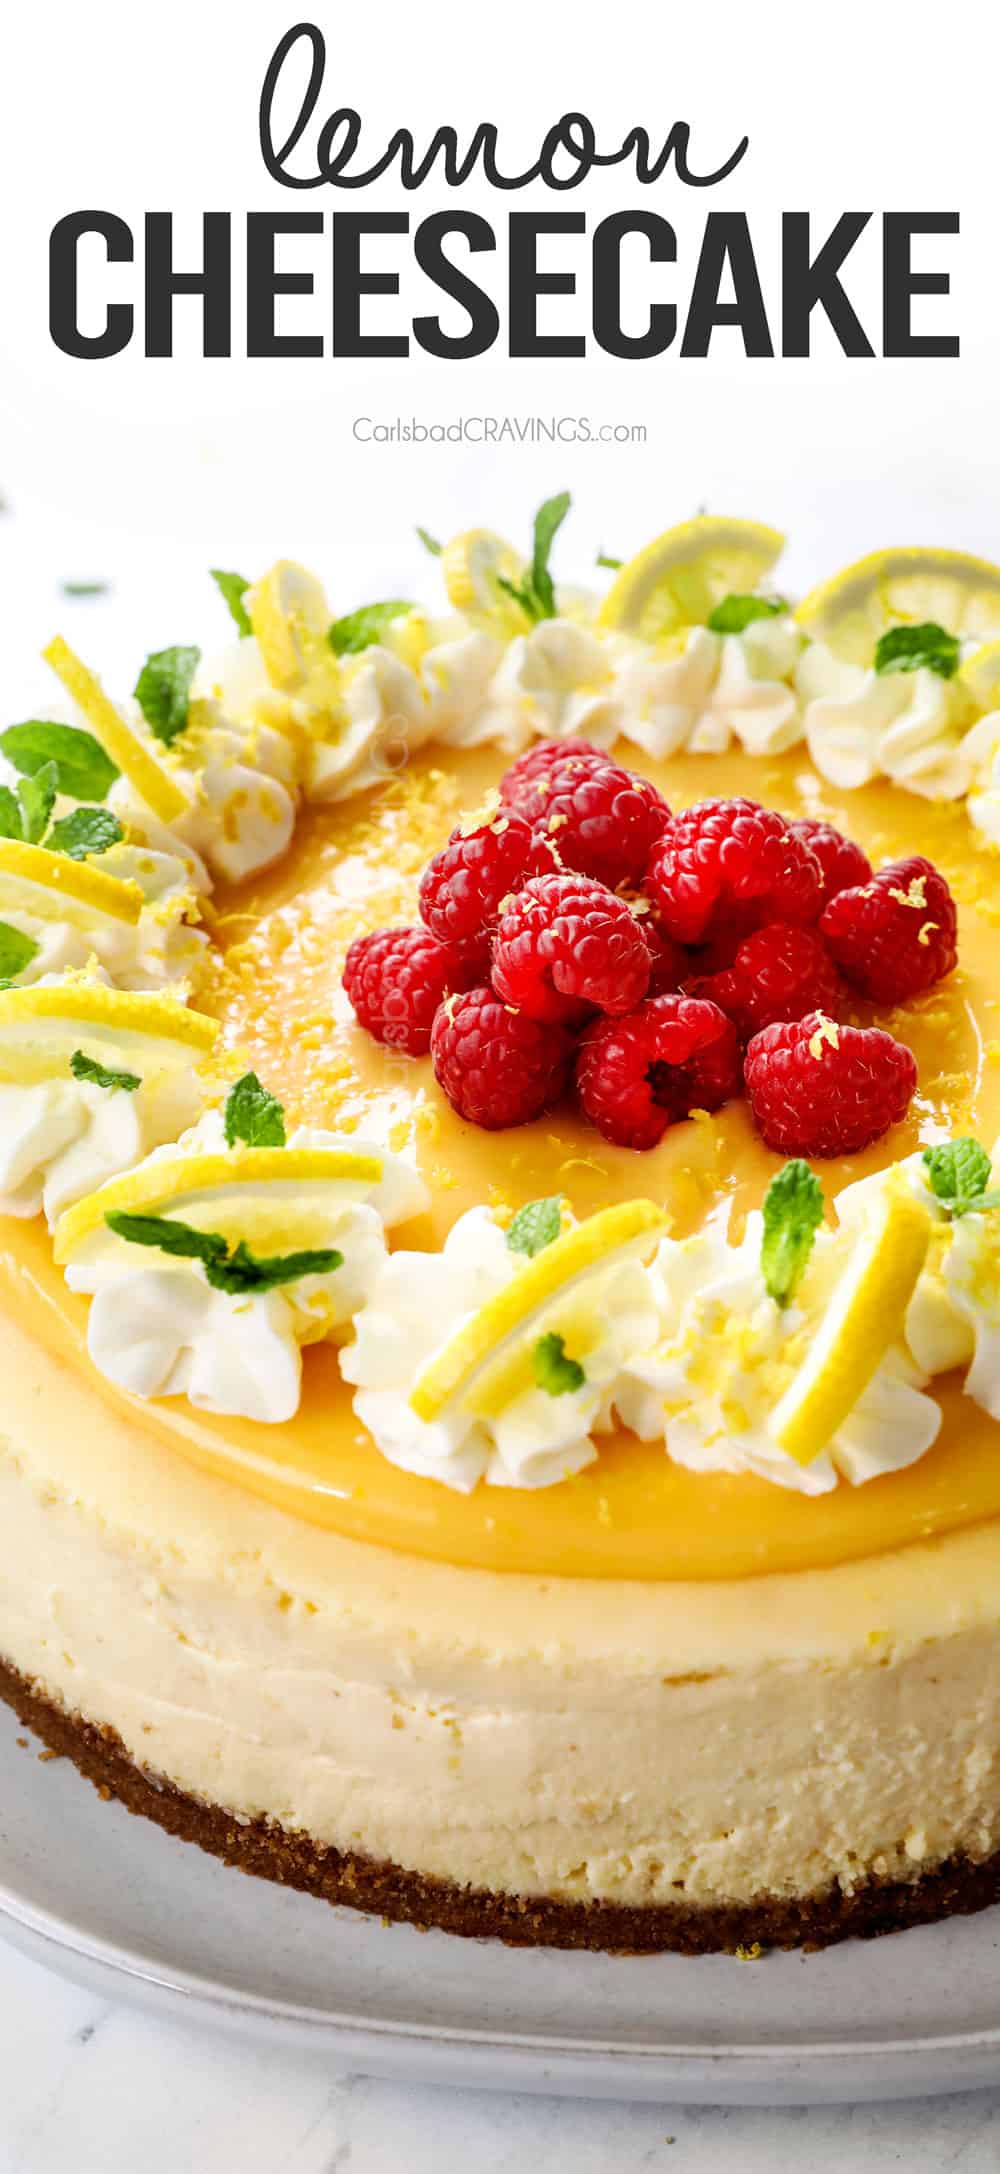
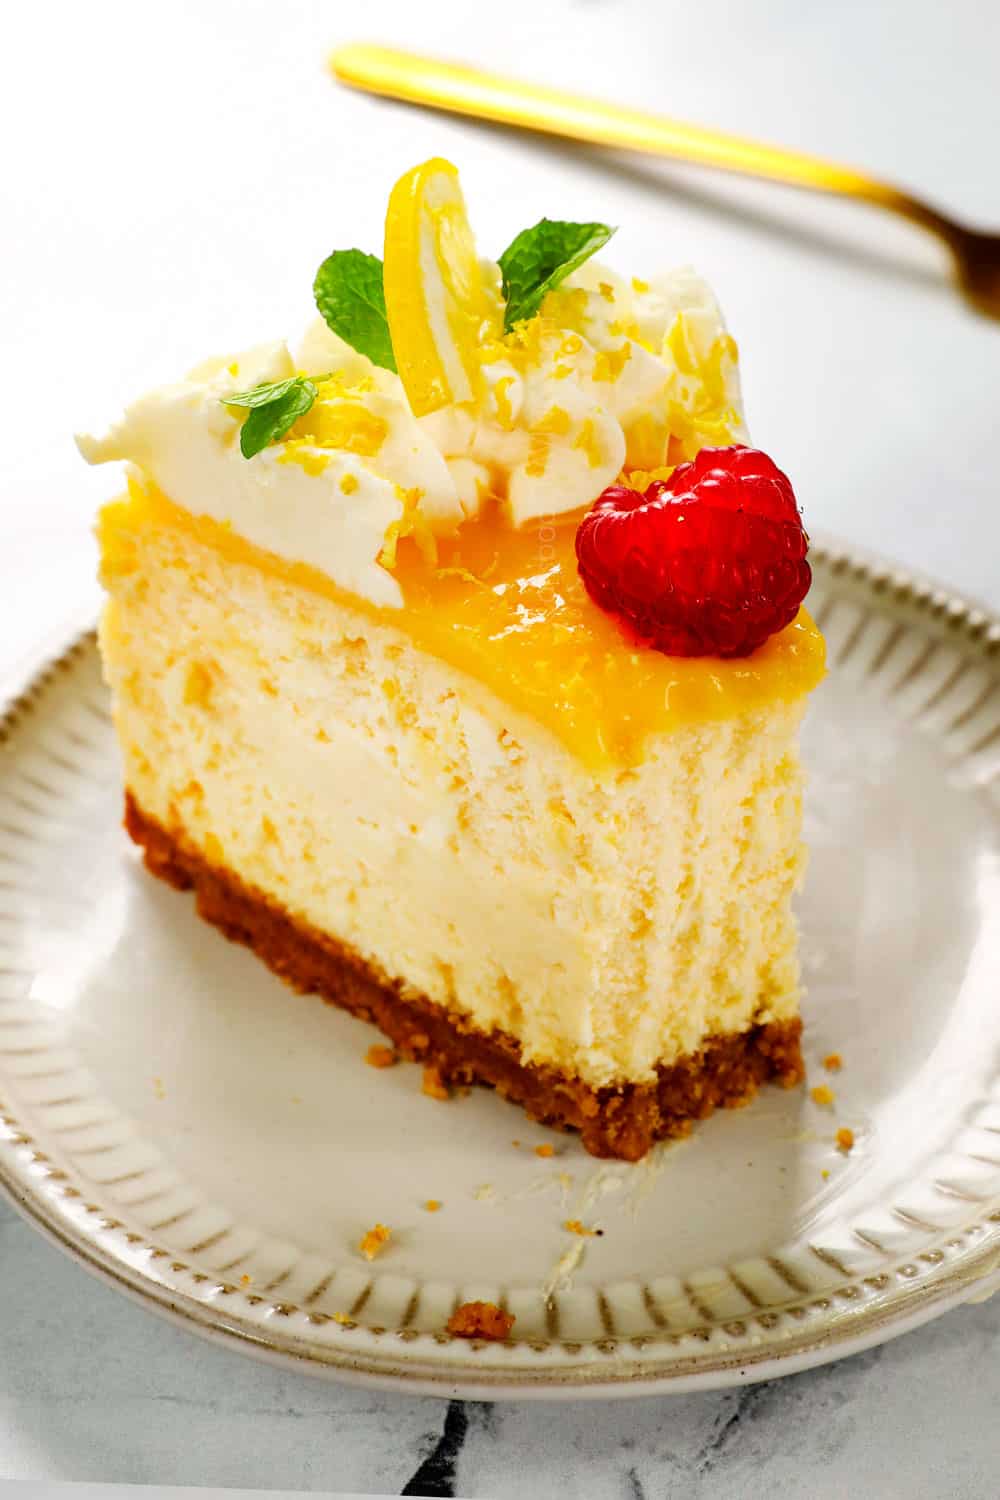
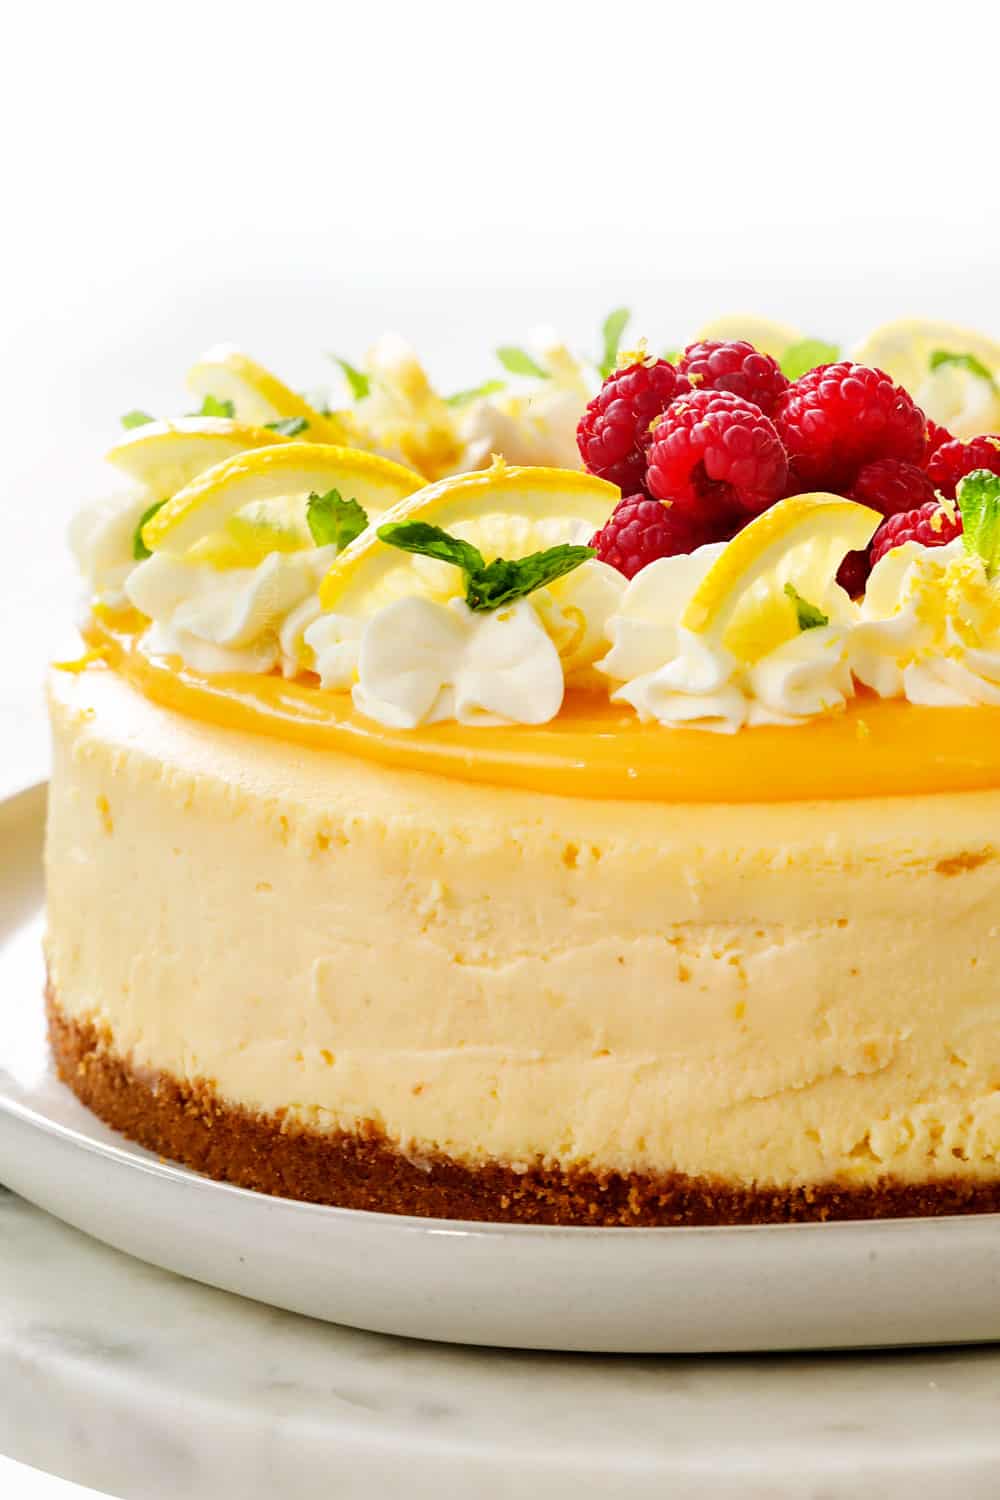
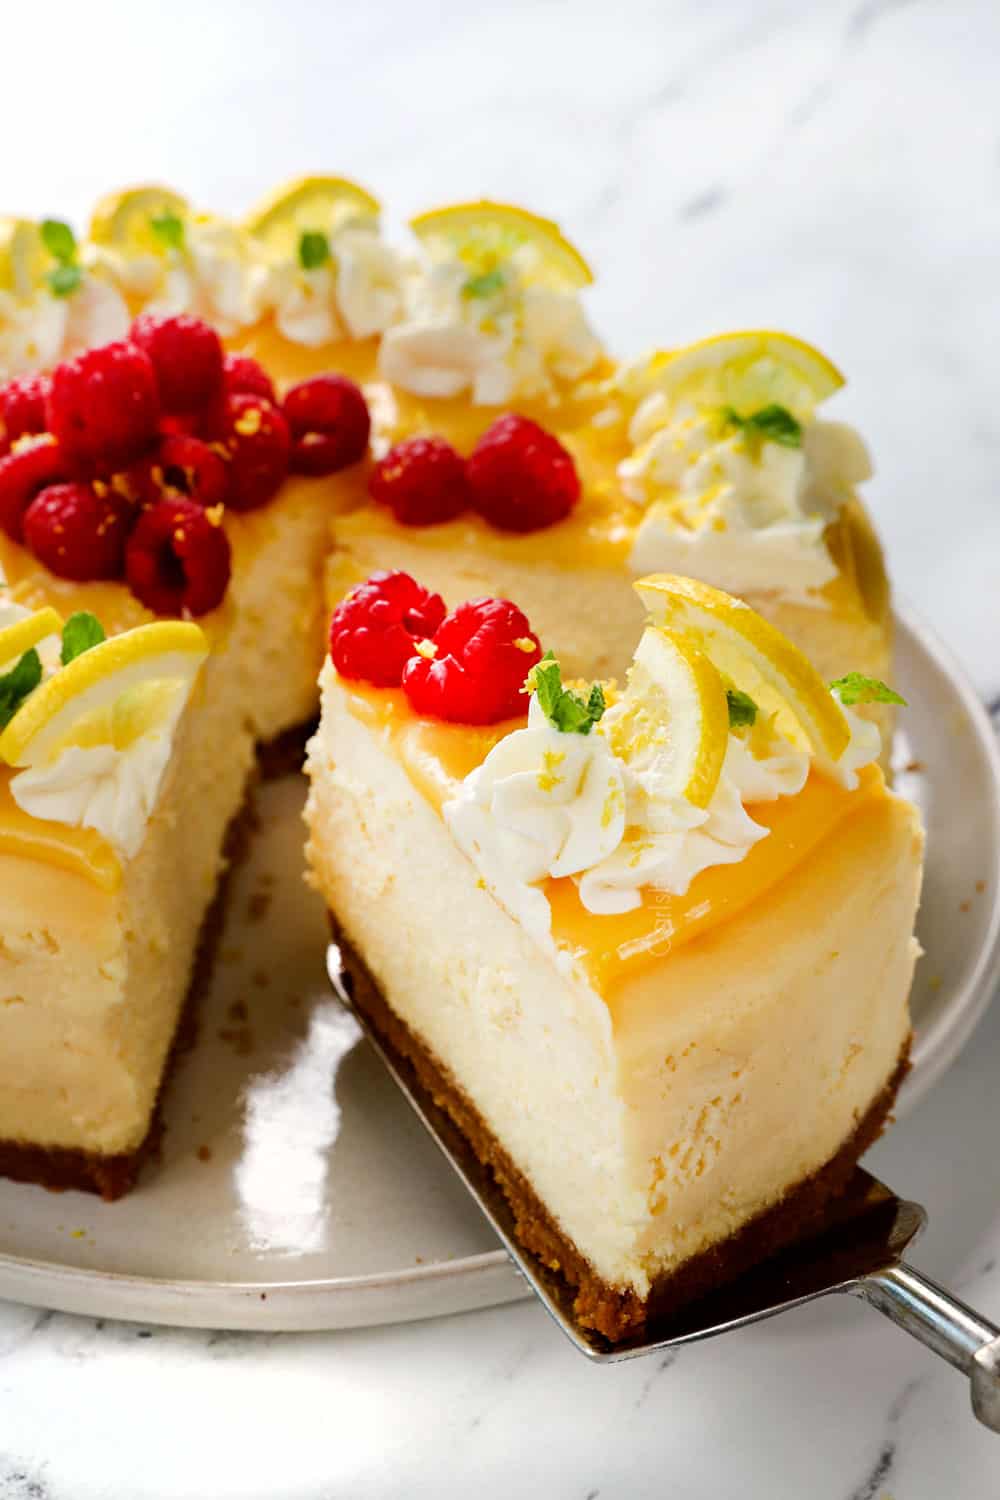
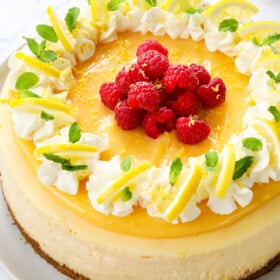
Lemon Cheesecake is luxuriously creamy, bright, sweet and tangy – the ideal make ahead, show stealing spring dessert!
This Lemon Cheesecake is velvety sunshine all wrapped up in the must-make dessert of spring! It’s lusciously creamy, boasts the glorious balance of fresh, tangy sweetness and is crowned with exquisite bright, zingy, silky smooth lemon curd all nestled in a buttery Graham cracker crust – need I say more? This Lemon Cheesecake recipe can be made 100% ahead of time, including the whipped cream (thanks to my stabilized whipped cream technique) for a stress-free dessert! I’ve included detailed instructions on how to make Lemon Cheesecake so even if you’ve never made cheesecake before, it will be a runaway success – and it’s so much easier than you think!
Spring is the time vibrant, fresh desserts! If you’re looking for more Easter, spring and summer cheesecake dessert recipes, don’t miss these favorites: lemon cheesecake bars, key lime cheesecake, strawberry cheesecake, blueberry cheesecake, cherry cheesecake dip, and chocolate chip cookie cheesecake bars.
PIN THIS RECIPE TO SAVE FOR LATER
LEMON CHEESECAKE RECIPE VIDEO
LEMON CHEESECAKE RECIPE
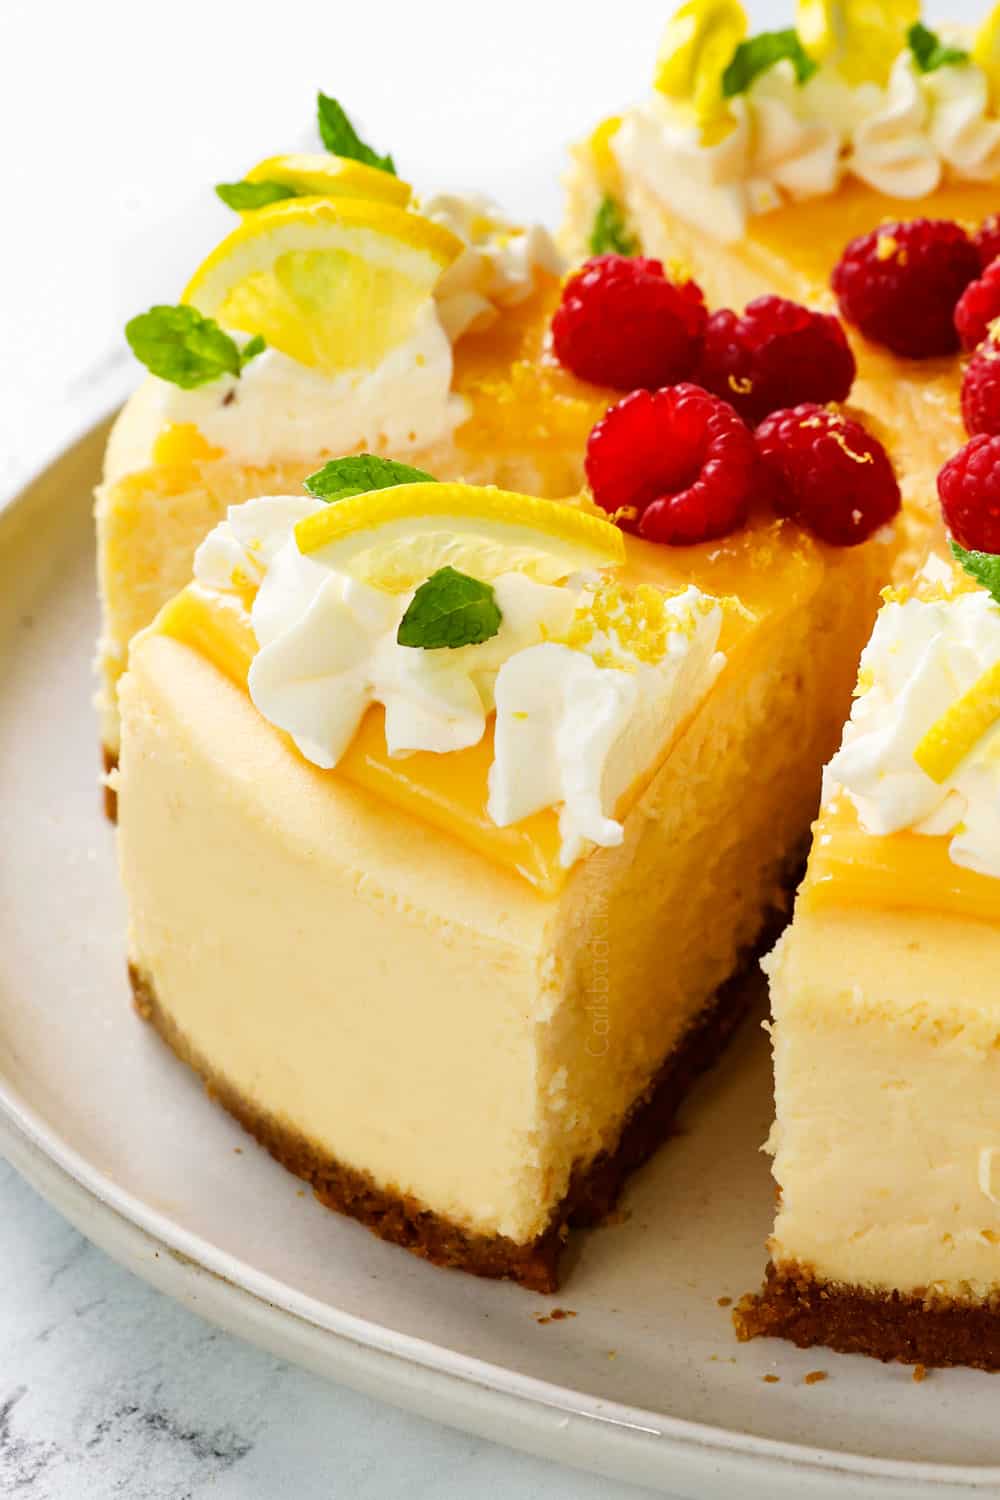
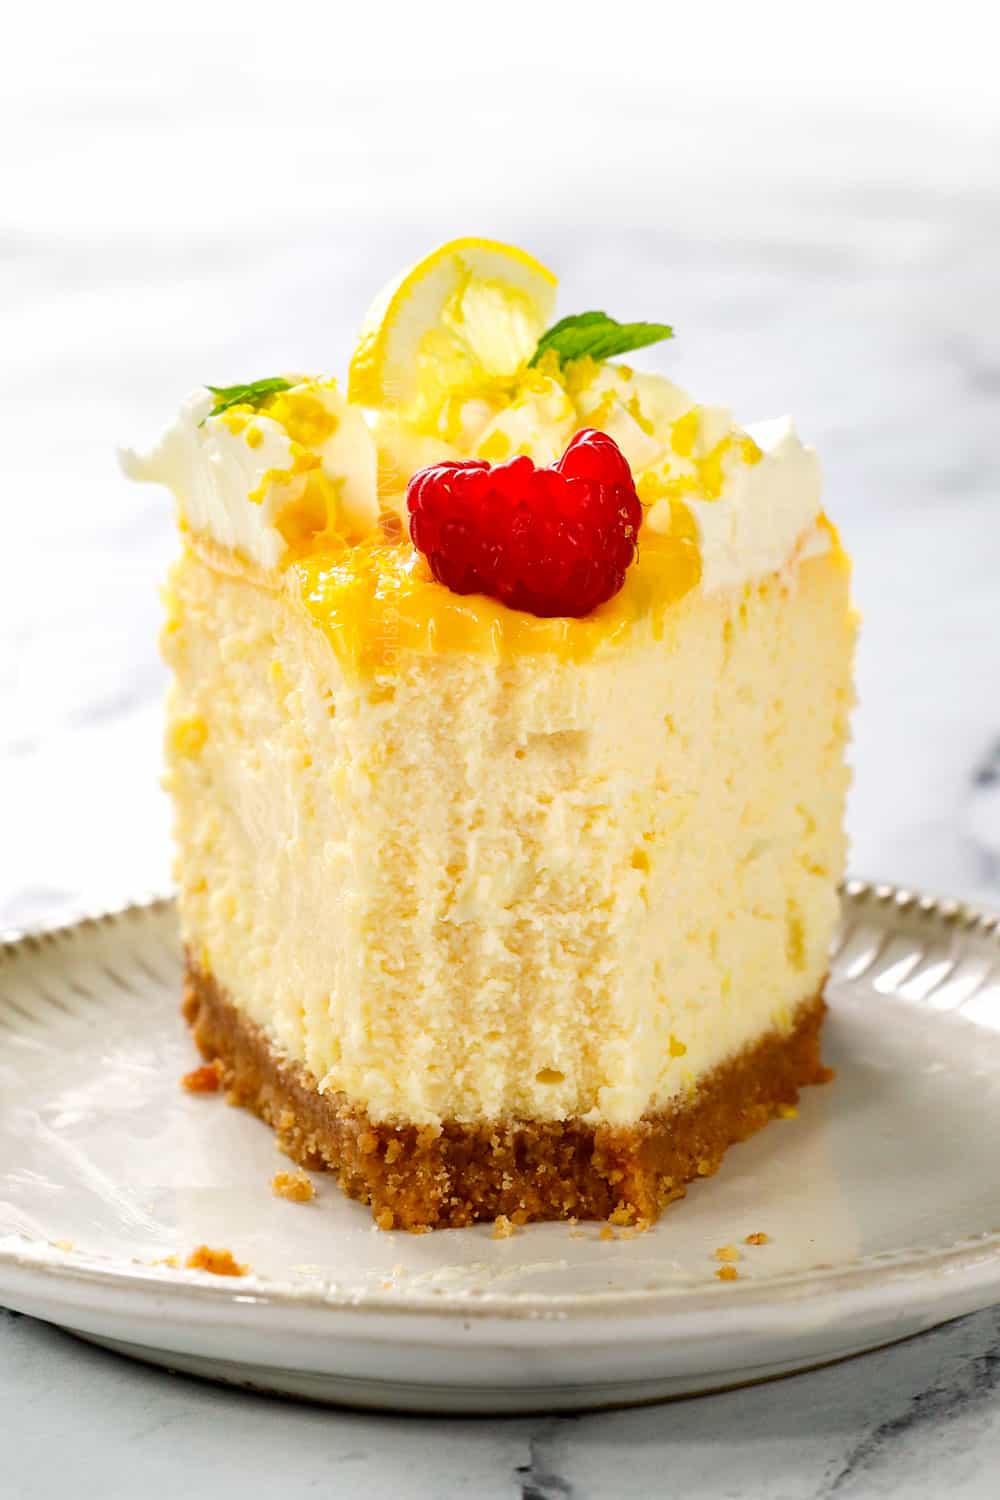
This Lemon Cheesecake recipe is every bit as delicious as it looks – and then some. It’s one of my favorites because it’s not only creamy, rich and decadent, just like cheesecakes should be, but it’s lightened and brightened with fresh lemon juice, lemon zest and vibrant sweet-tart lemon curd so it’s not overly sweet or heavy, just smooth, tangy, bright, perfection.
Why this recipe works:
The Secret to Truly Lemony Cheesecake
This sunny Lemon Cheesecake doubles down on the lemon in both the cheesecake and the lemon curd. It’s a hypnotic mashup of the best of lemon cheesecake – the luscious, rich creaminess bolstered with lemon juice and lemon zest, with the best part of lemon bars – the silky smooth, vibrant sweet, tangy lemon curd. And the best part? Lemon curd is so easy to make in less than 10 minutes on the stove without a double boiler or you can use store-bought.
This Lemon Cheesecake is secretly easy to make
I know you might be intimidated by making homemade cheesecake, but cheesecake is actually one of the absolute easiest deserts to make! Yes, there are a few steps, like waterproofing the pan and using a water bath, but these are quick and simple, and the actual cheesecake filling can be beaten together in less than 10 minutes! Most of the “work” is hands-off waiting while the cheesecake bakes and cools.
The secret to a cheesecake that never leaks
I just served this Lemon Cheesecake for my father-in-law’s birthdays and amid the oohs and aahs, my mother-in-law said she never makes cheesecake because they always leak. Well, I’ve got the no stress solution for you – baking it in a slow cooker liner! Your cheesecake will never leak again!
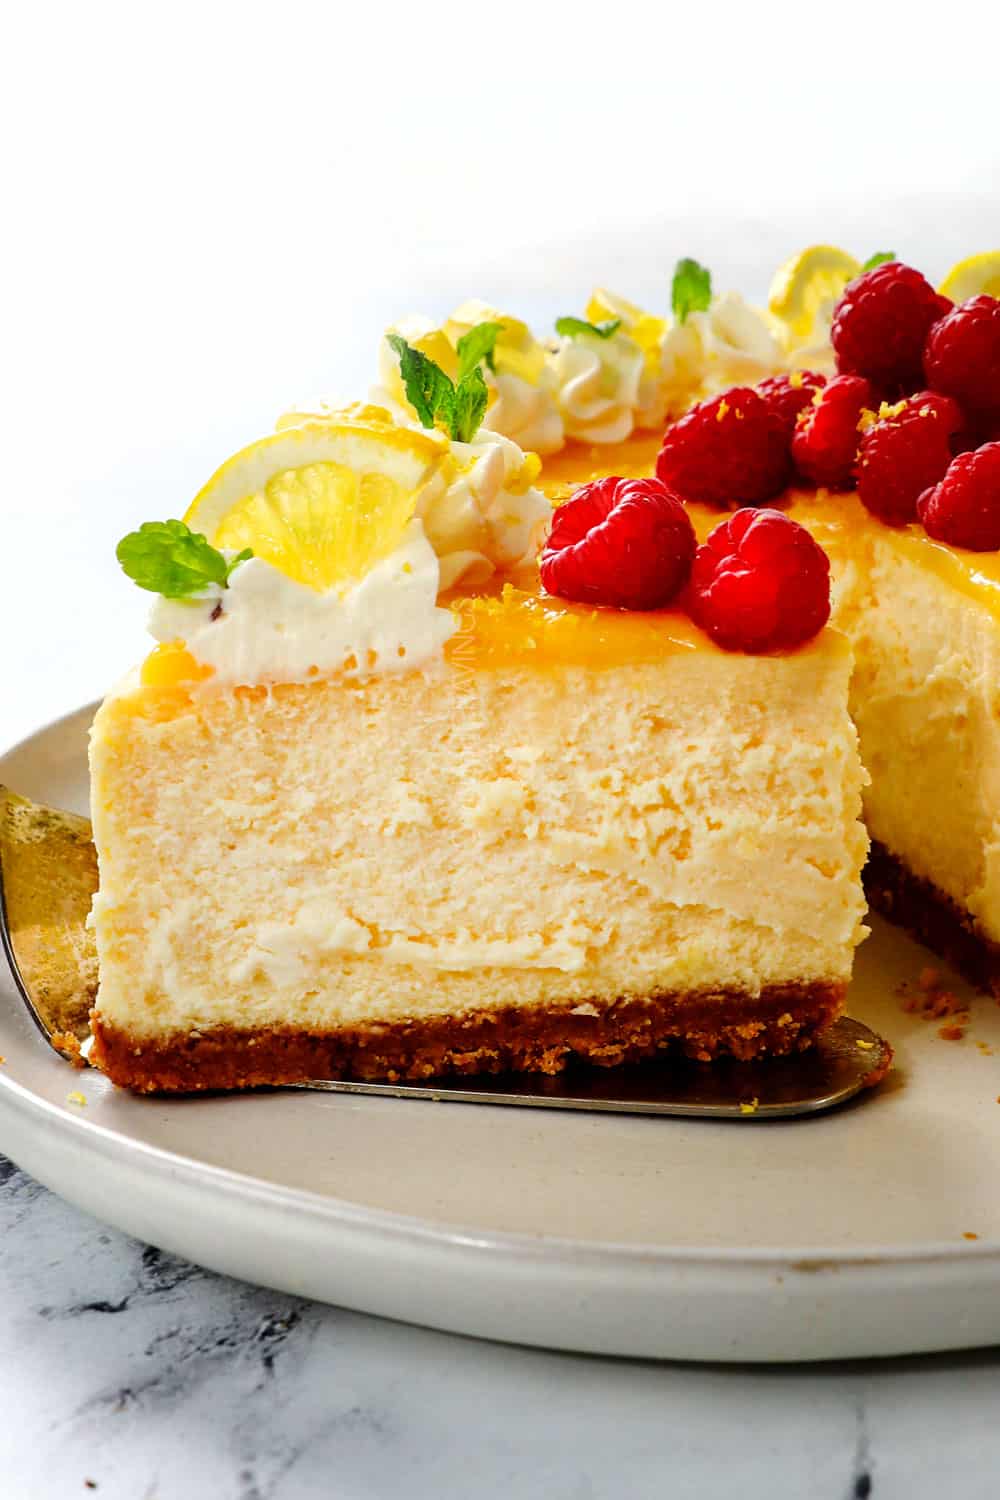
The secret to sensationally smooth, rich and creamy cheesecake
This Lemon Cheesecake boasts the perfect proportions of ingredients to deliver the most exquisite filling. The addition of sour cream and one extra egg yolk make the filling extra creamy, the additional lemon juice and lemon zest deliver the perfect pop of sunshine flavor and the cornstarch allows for extra lemon juice while maintaining the velvety consistency.
The secret to 100% make ahead friendly cheesecake
This Lemon Cheesecake is the ideal dessert for all your spring festivities because it’s make-ahead friendly for days – and tastes even better the next day! The secret? Stabilized whipped cream. If you refrigerate cheesecake with regular whipped cream, it will deflate, or even worse, it will be weeping within the hour. Stabilized whipped cream, on the other hand, is heavy cream that has been whipped with sugar and gelatin in order to give it structure but it doesn’t alter the flavor – it’s magic!
The stabilized whipped cream will hold its shape indefinitely and won’t deflate or weep. This means it can be piped onto the cheesecake hours or days ahead of time for 100% make ahead Lemon Cheesecake AKA 100% stress free.
ABout the LEMON CURD
You’ll need one cup of lemon curd for the cheesecake topping. Lemon curd is lusciously, creamy, wonderfully buttery with an intense sweet-tart lemon flavor. It’s one of my favorite foodie pleasures and so worth the extra 10 minutes it takes to make from scratch but you can use store-bought if need be.
The best part about my homemade recipe is that it’s rich and creamy but sturdy enough to spread over the cheesecake without dripping over the sides, even when sliced. The secret? Adding a bit of cornstarch to the eggs and finishing with cold butter at the end.
Although this Lemon Cheesecake recipe only requires one cup (half the recipe), I encourage you to make the full recipe because it keeps for up to 4 weeks in the fridge or to one year in the freezer and there are so many uses for it from filling crepes, to slathering on muffins and toast to swirling in yogurt and cottage cheese.
LEMON CHEESECAKE RECIPE INGREDIENTS
The ingredients for this Lemon Cheesecake recipe are simple and easy to come by. Let’s take a closer look at what you need (full measurements in the recipe card at the bottom of the post):
FOR THE CRUST
- Graham crackers: I’ve stuck with honey graham crackers to keep the crust delish but neutral so the Lemon Cheesecake can really shine. You will need 14 whole graham cracker sheets or a scant 2 cups crumbs of your favorite cookies/crackers.
- Butter: Salted or unsalted butter will work in the crust.
- Sugar: Granulated sugar please.
FOR THE CHEESECAKE
- Cream cheese: I used full fat cream cheese but it will also work with less fat, but remember less fat = less flavor and creaminess. Please do NOT use nonfat cream cheese.
- Sour cream: Full fat please at room temperature. It will make your cheesecake luxuriously creamy and never dry.
- Sugar: Granulated sugar will sweeten the cheesecake filling while letting the lemon flavor shine.
- Cornstarch: Helps the filling set. If you don’t have cornstarch, you may substitute it with 3 tablespoons flour.
- Egg: Use four large eggs and one large egg yolk (so you will need a total of five eggs). The eggs bind the cheesecake together and the extra yolk makes it extra creamy. Take care your eggs are at room temperature.
- Lemon juice: Use freshly squeezed lemon juice for the best flavor, plus we also need some of the zest. You will need 4-5 lemons total for both the cheesecake and the lemon curd.
- Lemon zest: Adds concentrated lemon flavor. This is the bright yellow outer layer of the lemon peel. Use a micro-plane or a box grater for grating. Make sure you stop grating at the yellow part as the white under part (pith) is extremely bitter.
- Vanilla extract: Use quality extract for best results.
WHAT IF I DON’T LIKE SOUR CREAM?
Sour cream is a secret ingredient I use in all of my cheesecake recipes – you will not be able to taste it! It adds smoothness, creaminess and most importantly, moisture, which prevents your cheesecake from drying out. Trust me when I say adding sour cream to your cheesecake will create the best textured cheesecake you’ve ever tasted!
HOW TO SOFTEN CREAM CHEESE FOR CHEESECAKE
Cream cheese is a key ingredient in this Lemon Cheesecake recipe so it’s important that it’s super soft in order to produce lump free cheesecake. To soften cream cheese, you have a couple options:
- Microwave: This method works great but you must babysit the cream cheese and microwave at small intervals so you don’t overcook/scorch – so proceed with care. Cube cream cheese and transfer to a microwave safe plate. Microwave for 30 seconds then at 15 second intervals, flip/stir cubes and microwave another 15 seconds. Repeat until cream cheese is very soft.
- Outside or counter: Cube cream cheese and lay it in a single layer on a plate. It can sit on the counter or outside for up to 2 hours according to USDairy,com. If it’s a warm day, it won’t need much longer than 20 minutes outside. You can also give the cream cheese a head start in the microwave for 15 seconds or so and then finish softening on the counter.
FOR THE LEMON CURD
- Lemons: For the best zingy and citrusy flavor, Lemon Curd should be made with freshly squeezed lemon juice and lemon zest. We will use a full 2/3 cup freshly squeezed lemon juice which is about 3-4 large lemons and 2 teaspoons lemon zest, although you can add additional zest depending on how tart you like your curd.
- Eggs: Eggs help the curd hold together like pudding. You will need 4 large eggs and 2 large egg YOLKS only for a total of 6 eggs in the recipe. Some recipes strictly use egg yolks and I find those curds way too rich. This recipe uses a combination of eggs and egg yolks for the ideal flavor and consistency.
- Butter: Helps to thicken the curd and makes it super creamy, rich and decadent with a velvety mouthfeel and subtle buttery flavor. Use unsalted butter or omit the salt in the recipe.
- Sugar: Provides the balancing sweetness to the tart lemon juice. Please use only granulated sugar. Do not use brown sugar or honey or the flavor and consistency will be ruined.
- Salt: A pinch of salt balances the flavors. Use regular table salt and not anything larger.
- Cornstarch: Set yourself up for lusciously thick and smooth success with this secret weapon. Cornstarch not only ensures the curd thickens properly but more importantly, it binds to the egg proteins and acts to protect them from denaturing, helping to prevent your curd from curdling.
WHIPPED CREAM (OPTIONAL)
You don’t have to add whipped cream to the cheesecake, but I love the ethereal lightness it brings. You can use stabilized whipped cream (so it can be added ahead of time) or just plain whipped cream with the same ingredients but omit the unflavored gelatin and water.
- Heavy cream: look for “heavy whipping cream” at the grocery store. You must use heavy cream – no other substitutions will work. Take care that your heavy cream is very cold, remove it from the refrigerator just when ready to use.
- Powdered sugar: also known as confectioner’s sugar interacts better with the gelatin than granulated sugar. You also want to use powdered sugar in homemade whipped cream when you’re using more than a couple tablespoons.
- Vanilla extract: use quality extract for best results.
- Unflavored gelatin (optional): is a common baking ingredient and can be found next to the packages of Jell-O and pudding at your grocery store. It is what makes this “stabilized” whipped cream and not just whipped cream.
- Water (optional): cold tap water is used to dissolve the gelatin.
Possible rECIPE VARIATIONS
I don’t recommend straying too far from the cheesecake recipe as baking is science and can go wrong very quickly, but you can make adjustments to the crust or topping. Here are a few ideas:
- Swap crust: You may substitute the Graham cracker crust with your favorite cookie such as shortbread, vanilla wafers or vanilla Oreos. If using shortbread cookies or vanilla wafer cookies, combine them with the sugar and butter per recipe instructions. If using vanilla Oreos, combine them with sugar but reduce the butter to 4 tablespoons because the Oreo filling creates the same binding effect.
- Make it gluten free: Use your favorite gluten free cookie such as gluten-free graham crackers.
- Add blueberries or raspberries: Fold in about 2 cups of fresh or frozen unthawed berries into the cheesecake filling right before pouring over the crust.
- Berry swirl: Pour half of the cheesecake filling onto the crust. Drizzle raspberry sauce over the top, then top with remaining cheesecake filling followed by another drizzle or raspberry sauce. Use a toothpick or knife to gently swirl everything together.
- Whipped topping: Instead of dolloping the cheesecake with whipped cream, you can spread the stabilized whipped cream over the entire top of the lemon curd layer.
- Lemon curd whipped cream: Use the lemon curd whipped cream found in my strawberry shortcakes in place of the lemon curd for a lighter version.
- Toppings: Add a few raspberries, blueberries or strawberries or cover the entire top with raspberries over the lemon curd.
- Other fruit curds: In addition to lemon, you can make curd with Meyer lemons, oranges, limes, grapefruit, or passionfruit. Substitute equal amounts of one juice for another but you may need to reduce the sugar as lemon juice is tarter than some of the other fruit juices.
WHAT PANS DO I NEED FOR CHEESECAKE?
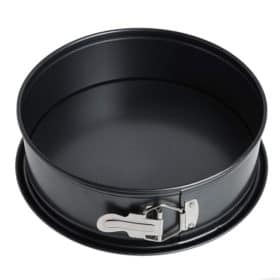
- Springform pan: You will need one 9-inch springform pan or you can use a 10-inch springform pan but be prepared to reduce the baking time. A springform pan is tall enough to hold the cheesecake and most importantly, it springs open and the outside of the pan is removed. This allows you to easily remove the cheesecake and slice it.
- What if I don’t have a springform pan? If you don’t have a springform pan, you can use a 9×13 baking dish and make follow this recipe for Lemon Cheesecake bars.
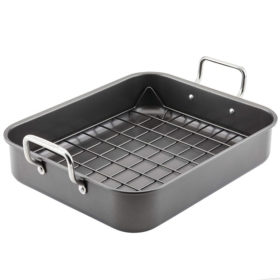
- Roasting pan: You will place the springform pan inside the roasting pan, then pour water around the cheesecake to create a water bath. This prevents the cheesecake from cracking (more on the science below).
- What if I don’t have a large roasting pan? You can purchase a large, disposable foil pan from the grocery store for just a dollar or so if you don’t have a roasting pan. I suggest double stacking two pans because they are quite flimsy and can buckle under the pressure of the water. Take care to use oven mitts and two hands when removing the pans from the oven so you don’t lose your cheesecake!
WHAT IS A WATER BATH AND WHY IS IT IMPORTANT WHEN BAKING A CHEESECAKE?
A water bath may sound exotic but it simply means baking the cheesecake in springform pan set in a larger roasting pan surrounded by hot water. Cheesecakes require a water bath so the cheesecake doesn’t crack. Here’s how it works:
- The water bath helps the cheesecake bake evenly. The hot water insulates the outer edges of the cheesecake so the edges don’t bake more quickly than the middle. This ensures even baking throughout and lessens the likelihood of the cheesecake cracking, sinking, puffing up, darkening or curdling.
- A water bath creates a moist environment. This is important because cheesecakes are egg-heavy. Eggs need steam caused by the humid environment to properly rise and avoid drying out or burning, which again causes cracking.
HOW TO WATER PROOF CHEESECAKE SO IT DOESN’T LEAK!
The springform pan needs to be waterproofed so water from the water bath doesn’t seep through the bottom of the springform pan and soak into the cheesecake. Just surrounding the pan with foil, however, is not foolproof. If you use my two-step waterproofing technique, however, I guarantee you won’t have any leaks!
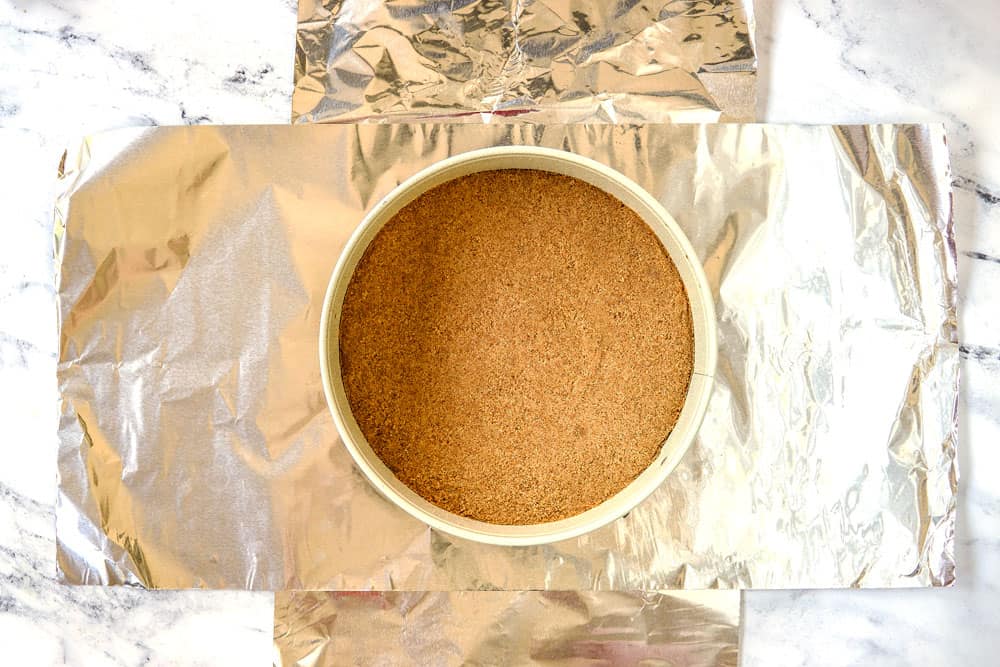
- WATERPROOFING STEP 1: Place 2 large 18″ x 18″ pieces of aluminum foil on a flat surface underneath the pan in the form of a “+.” Gently fold (to make sure you don’t create any holes) up the sides of the foil around the pan.
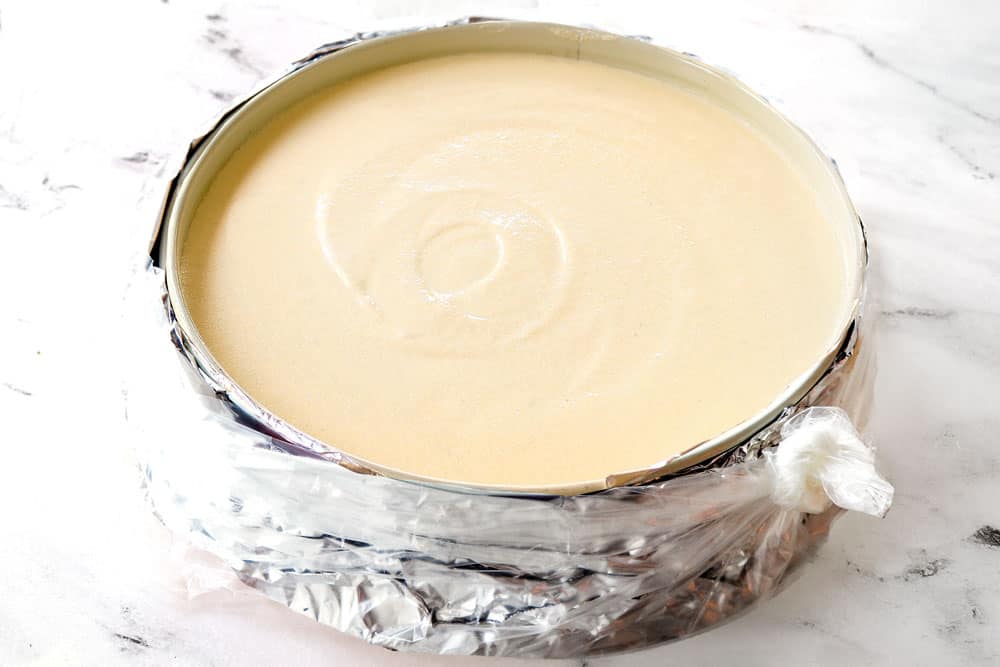
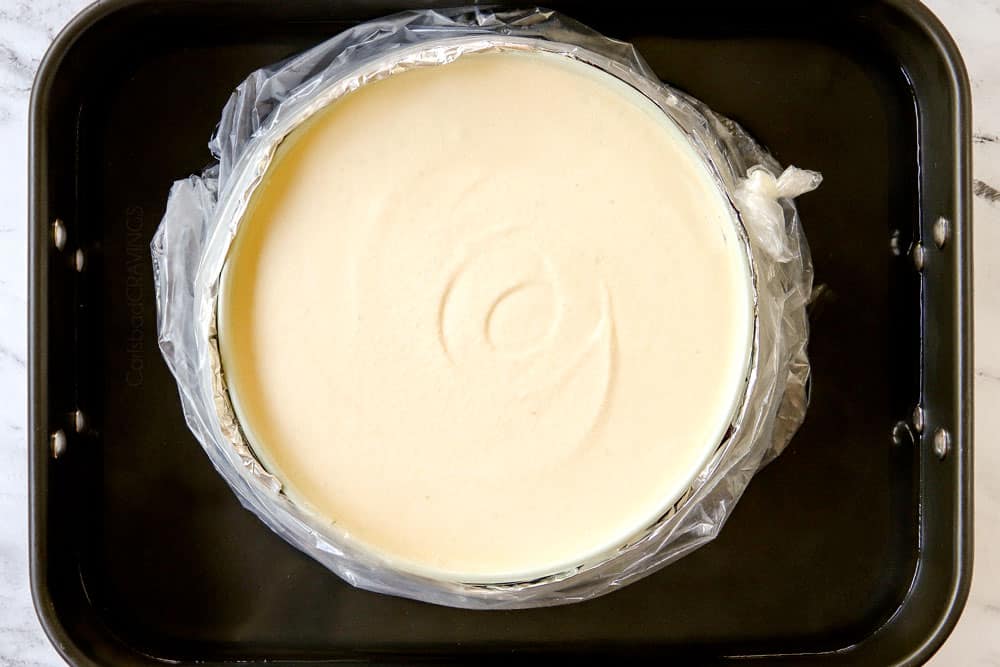
- WATERPROOFING STEP 2 (optional but HIGHLY recommended): Place the foil lined springform pan in the center bottom of a slow cooker liner or large baking bag. Bring the liner bag up to the top of the pan then gather excess to one side and tie it in a knot. If you use a slow cooker liner, you can use regular foil instead of 18-inch.
If you combine these two steps, your Lemon Cheesecake will be 100% leak proof – winning! If you don’t add the liner in step 2, then I suggest 2 more layers of foil around your springform pan.
HOW TO MAKE LEMON CHEESECAKE
Now onto the main event – how to make this Lemon Cheesecake recipe! There are a quite few steps, but each one is very simple and you can make them at different stages/parts of the day if you wish:
STEP 1: HOW TO MAKE THE CRUST
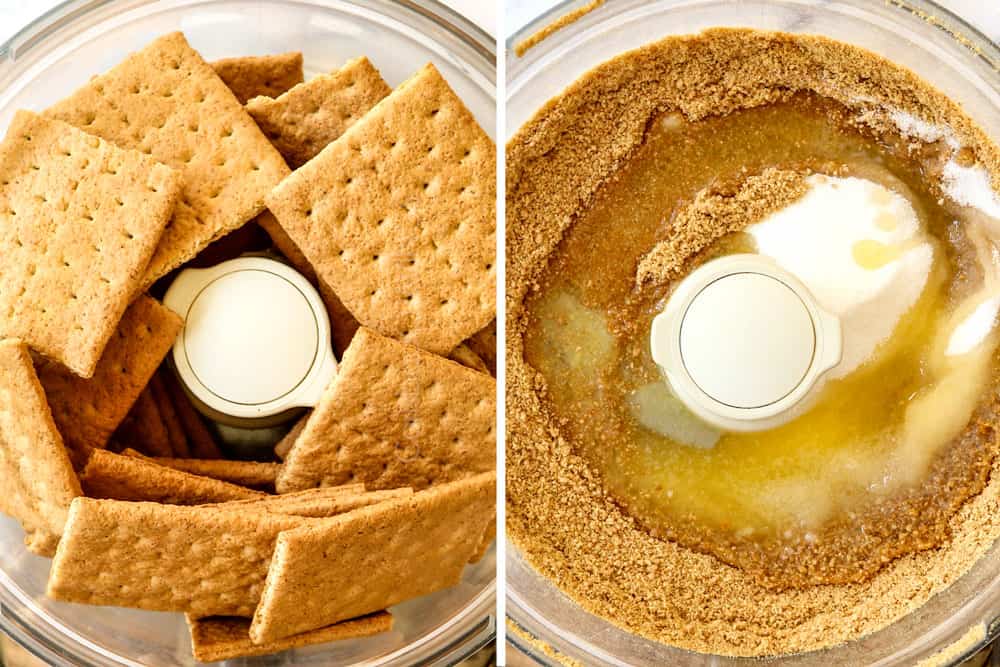
- Grind Graham crackers: First, you’ll want to make crumbs by either pulsing the Graham crackers in your food processor or in a sealable bag with a rolling pin/side of a can. You want very finely ground crumbs because they stick together better.
- Combine crumbs, sugar and butter: If you use your food processor, simply add the sugar and butter directly to the processor and process until the crumbs are moistened. If you don’t have a food processor, add the crumbs, butter and sugar to a bowl and stir until the crumbs are evenly moistened.
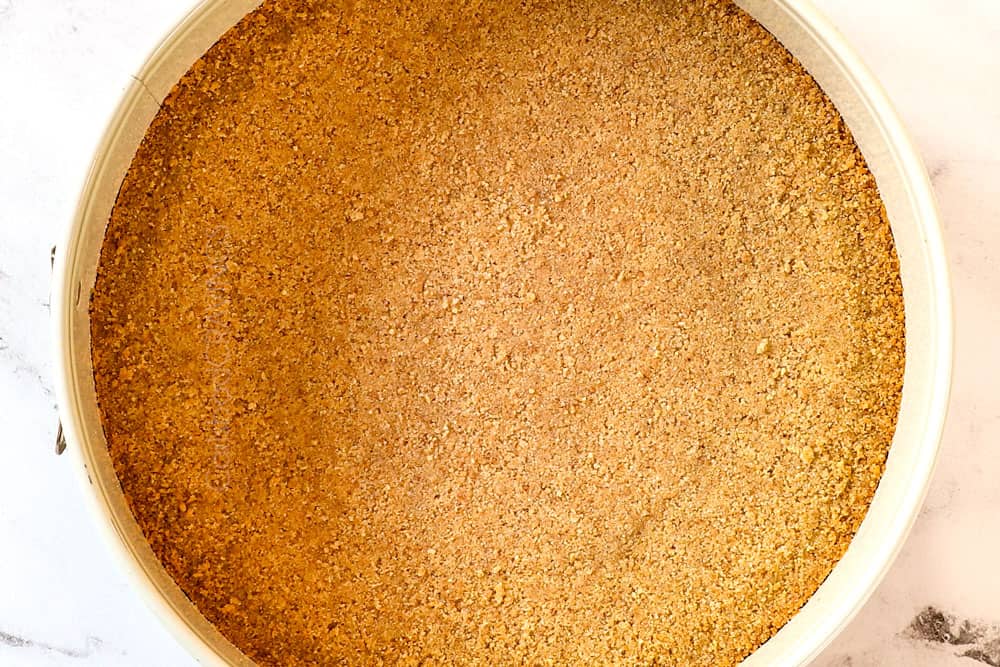
- Make the crust: Transfer the moistened crumbs to your lightly greased springform pan and press firmly into the bottom of the pan in an even layer using a small bowl or bottom of a measuring cup. This helps the crust stay intact and not crumble when sliced. But don’t compact the crumbs too much or the crust will crack when you slice the cheesecake.
- Bake the crust: Bake the crust at 325 degrees F for 10 minutes then allow it to cool while you make the cheesecake filling. Baking the crust before adding the cheesecake allows it to seal together and cooling the crust before adding the cheesecake prevents it from becoming soggy.
STEP 2: HOW TO MAKE THE CHEESECAKE FILLING
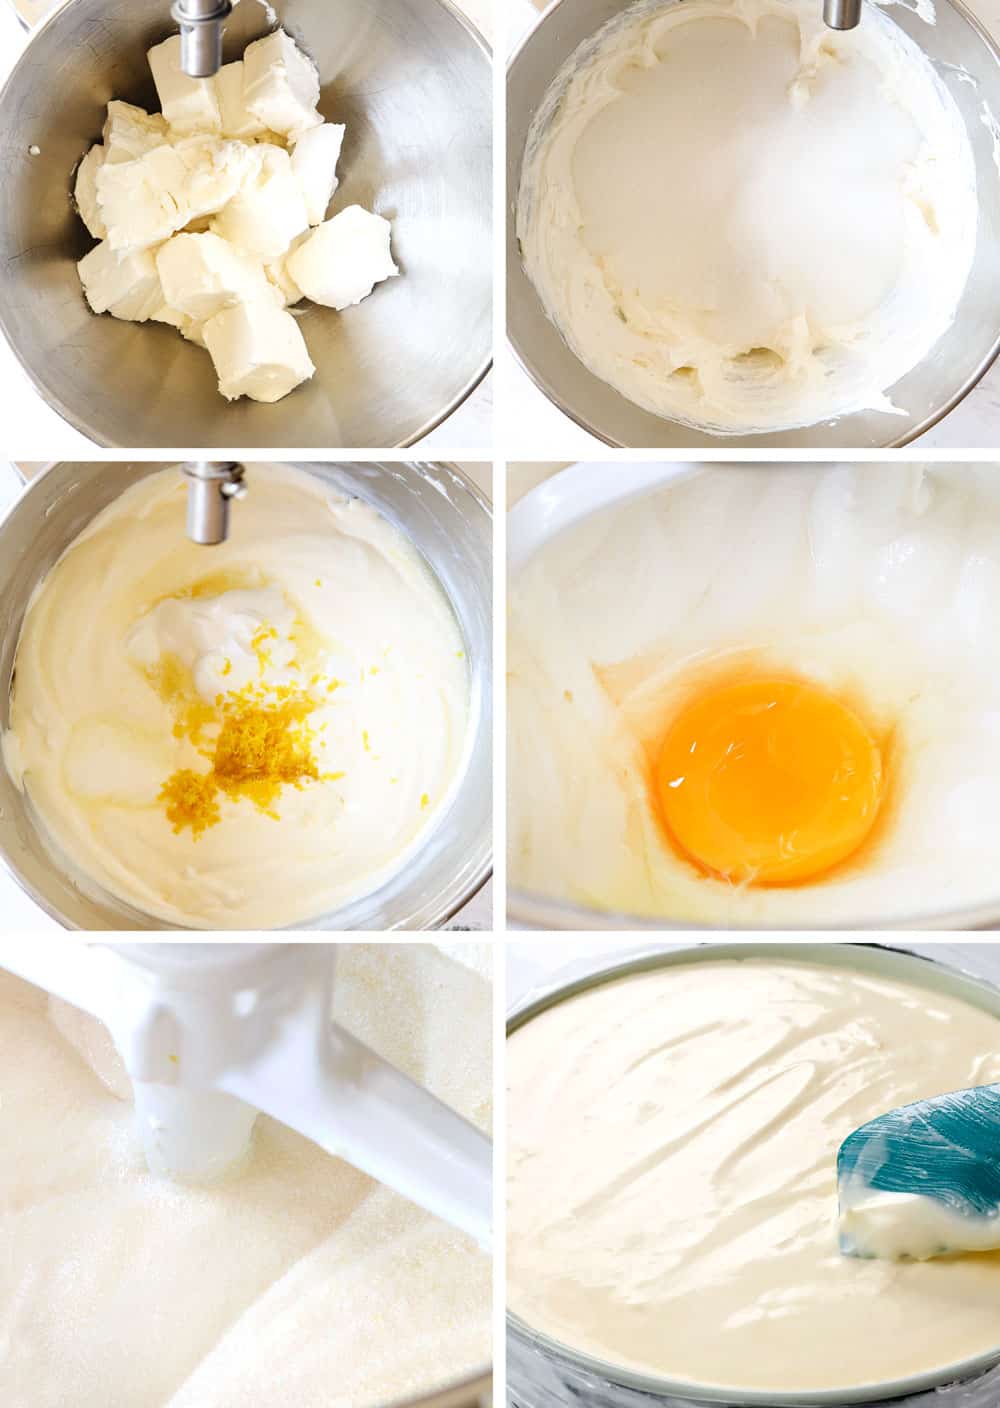
- Beat cream cheese and sugar: Making the cheesecake filling is so easy, the mixer literally does all the work! Beat the cream cheese in the bowl of an electric mixer fitted with the paddle attachment for 4 minutes then add the sugar and cornstarch beat an additional 5 minutes. You don’t want to shortcut the process for the creamiest filling.
- Add sour cream and lemon juice: Add the sour cream, lemon juice, lemon zest, vanilla, and beat until blended.
- Add eggs: Add the eggs one at a time followed by the egg yolk, beating as little as possible because overbeating eggs can cause cracks and the cheesecake to deflate.
- Assemble the cheesecake: Pour the cheesecake filling onto the cooled crust. Drop the pan on counter a few times to get rid of any air bubbles.
STEP 3: HOW TO MAKE THE WATER BATH
- Add cheesecake to roasting pan: Place the waterproofed cheesecake in a roasting pan then place the roasting pan in the oven. I like to place the roasting pan in the oven before adding the water bath or else the pan can become heavy and the water can slosh around and threaten your cheesecake while you transfer it.
- Make water bath: To add the water, use a glass liquid measuring cup or pitcher (something with a spout) to carefully pour in enough boiling water around the cheesecake until it reaches halfway up the side of the springform pan. Make sure to add the water slowly to the corner of the pan so none of it gets on your cheesecake.
STEP 4: HOW TO BAKE THE CHEESECAKE
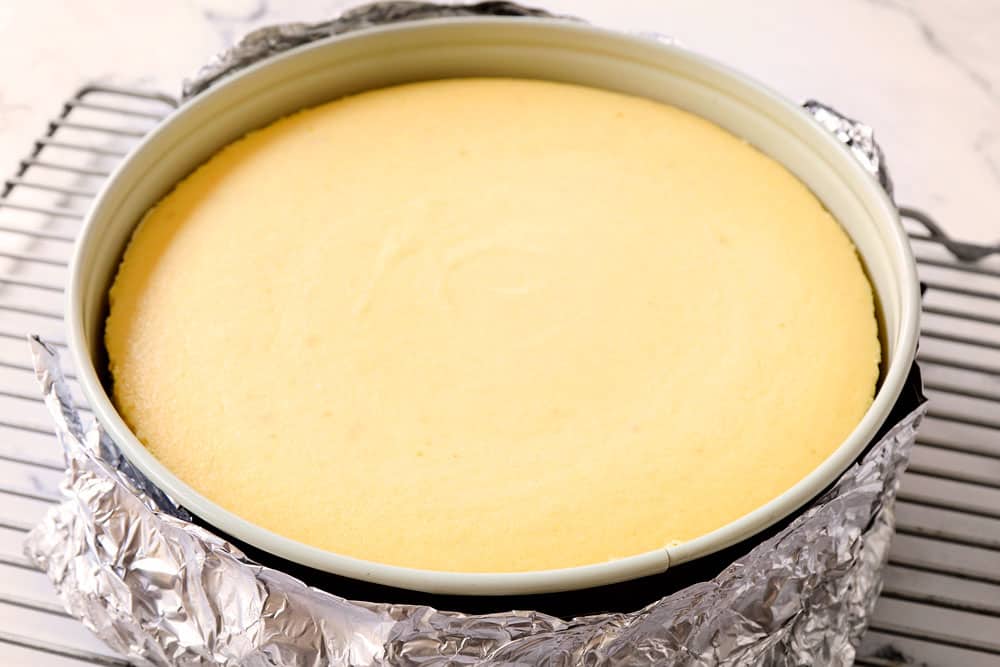
- Bake the cheesecake: Bake the cheesecake at 325 degrees F for 70-85 minutes or until edges are firm and the center 2-3 inches of the cheesecake is still wobbly.
HOW TO KNOW WHEN A CHEESECAKE IS DONE
Cheesecake is the creamiest when not overbaked. You don’t want to bake the cheesecake until completely firm in the middle or it will be overcooked by the time it cools, resulting in dry, heavy, far less creamy cheesecake. Instead, bake the cheesecake until the outside is firm and the center of the cheesecake barely jiggles.
What does this look like? Gently shake the cheesecake wearing oven mitts so you don’t burn yourself. If the outside of the cheesecake is firm and only a small 2-3-inch circle in the center jiggles slightly, it’s done. If the jiggling circle is larger than a few inches, then bake on.
The baking time can vary due to the differences in ovens, baking pans, beating times, etc., so make sure to check the cheesecake at 70 minutes then add additional time as needed.
STEP 5: HOW TO COOL THE CHEESECAKE
- Cool cheesecake in the oven: Turn off your oven and crack open the oven door. Allow the cheesecake to cool in the oven for 60 minutes.
- Cool cheesecake on the counter: Remove the cheesecake from the oven and the water bath and place on a cooling rack on the counter.
- Loosen cheesecake: Run a knife under hot water, wipe it dry, then run it along the edges of the cheesecake to loosen it from the pan. This helps prevent cracking so the cheesecake doesn’t stick to the sides of the pan as it slightly constricts. Unclamp the springform pan.
- Cool cheesecake completely: Continue to cool the cheesecake for 2-3 hours on the counter or until the cheesecake is completely cooled.
- Refrigerate overnight: Cover the cheesecake with foil or transfer to a cake caddy with a lid and chill in the refrigerator overnight, but best if 24 hours.
STEP 6: MAKE THE EASY LEMON CURD
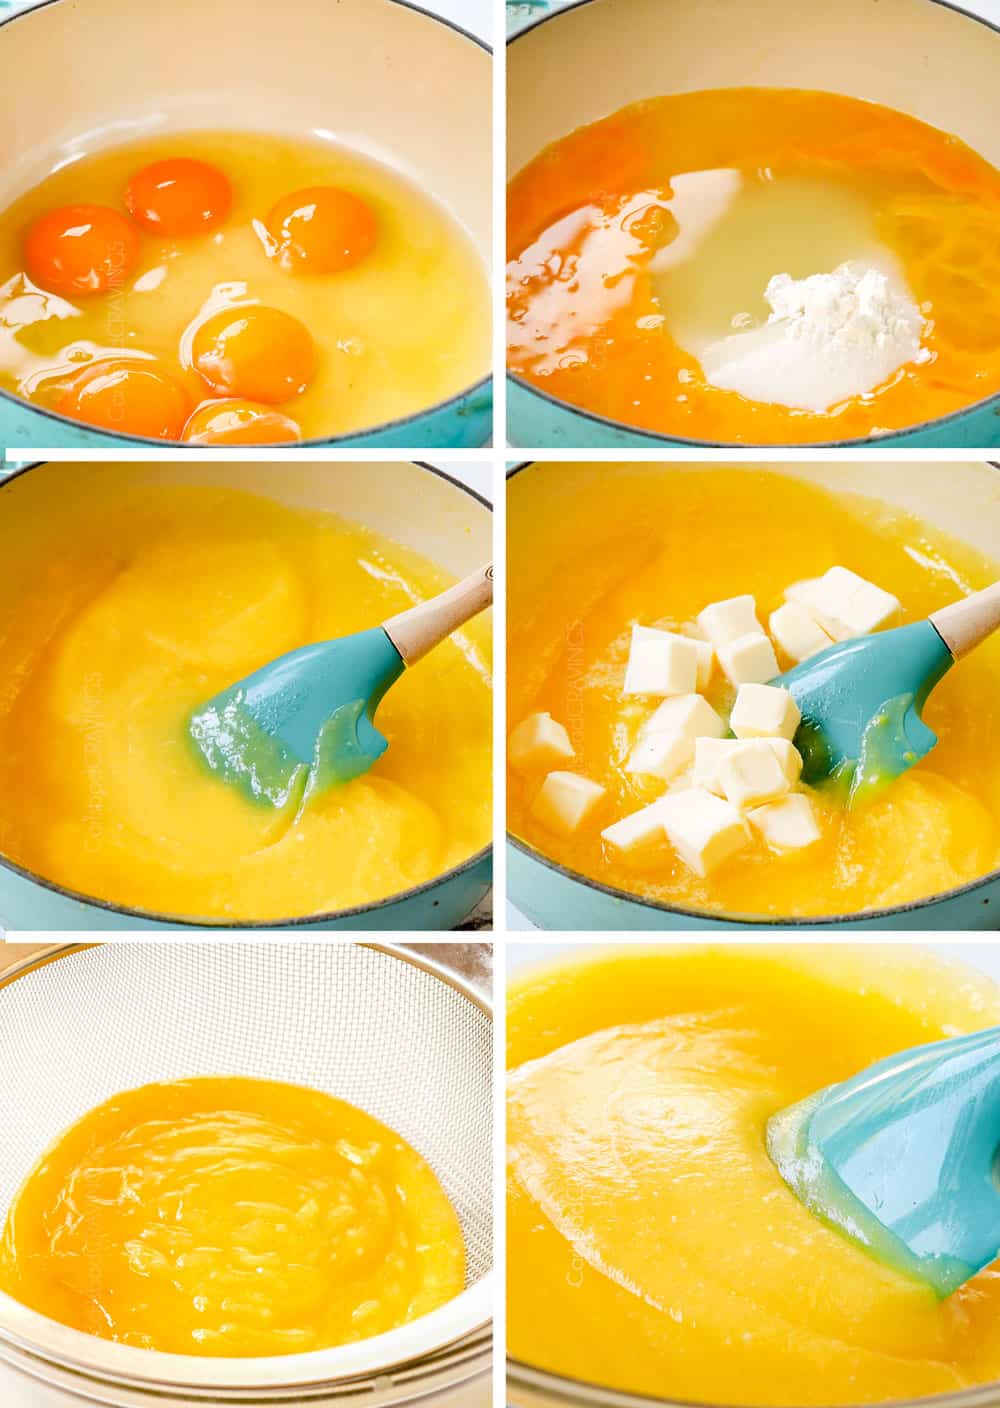
This is the easiest technique I have found for making lemon curd; it doesn’t require a double boiler, tempering the eggs or to zest a ton of lemons, all you need is lemon juice, zest from 1 lemon, eggs, sugar, vanilla extract, and butter – everything we are using already for our Lemon Cheesecake! The key here is to work over medium-low heat and to whisk constantly.
- Combine ingredients: Whisk the lemon juice, lemon zest, sugar, cornstarch and eggs in a small saucepan until the cornstarch dissolves and most of the sugar has dissolved.
- Thicken lemon curd: Cook over medium-low heat, stirring constantly, until thickened, about 4-8 minutes. You’ll know the lemon curd is done when it’s the consistency of pourable pudding and the curd registers about 175°F on an instant-read thermometer. It will continue to thicken as it cools.
- Stir in butter: Once thickened, immediately remove the saucepan from the heat and stir in the cubed butter until melted, followed by the vanilla and salt. At this point you can taste and add additional lemon zest for tangier if you’d like.
- Strain lemon curd: Finally, strain the curd through a fine-mesh strainer/sieve into a small bowl to remove any small egg bits and you have rich, creamy, sweetly tart lemon curd. The lemon curd will thicken as it chills and set beautifully onto the cheesecake and will also taste even more intensely glorious once chilled.
STEP 7: HOW TO MAKE WHIPPED CREAM
You can make stabilized whipped cream or traditional whipped cream. I am a huge fan of stabilized whipped cream because it means I can make the dessert 100% ahead of time and leftovers stay picture perfect. Making stabilized whipped cream is the same process of traditional whipped cream, just with the easy added steps of dissolving the gelatin in water and microwaving it.
- Optional step for stabilized whipped cream: Add unflavored gelatin to a microwave safe bowl then pour the cold water over top; let stand for 5 minutes. Transfer the gelatin mixture to the microwave and microwave for 20 seconds. Stir the mixture, then set aside to cool.
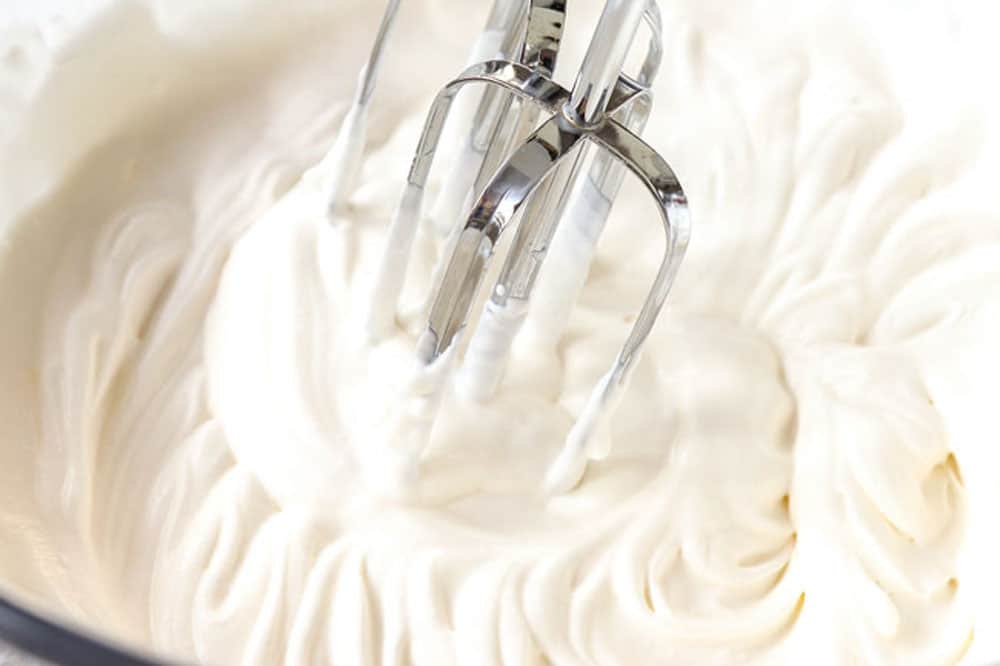
- Whip cream to soft peaks: While you’re waiting for the gelatin to cool, you’ll mix heavy cream, sugar and vanilla in a bowl until it thickens and forms soft peaks (the whipped cream folds over when you lift the beaters out of the bowl).
- Add gelatin: Once you’ve reached the soft peak stage, you’ll slowly pour the cooled gelatin mixture in as you’re mixing the whipped cream and continue to mix until the whipped cream forms stiff peaks (the whipped cream stands straight up and doesn’t fold over when you lift the beaters out of the bowl).
- Add topping: You can pipe the stabilized whipped cream onto the room temperature Lemon Cheesecake before you pop it into the fridge or any time after that. The beauty of stabilized whipped cream is it will hold its shape indefinitely. If using regular whipped cream, top just before serving.
STEP 8: Assemble
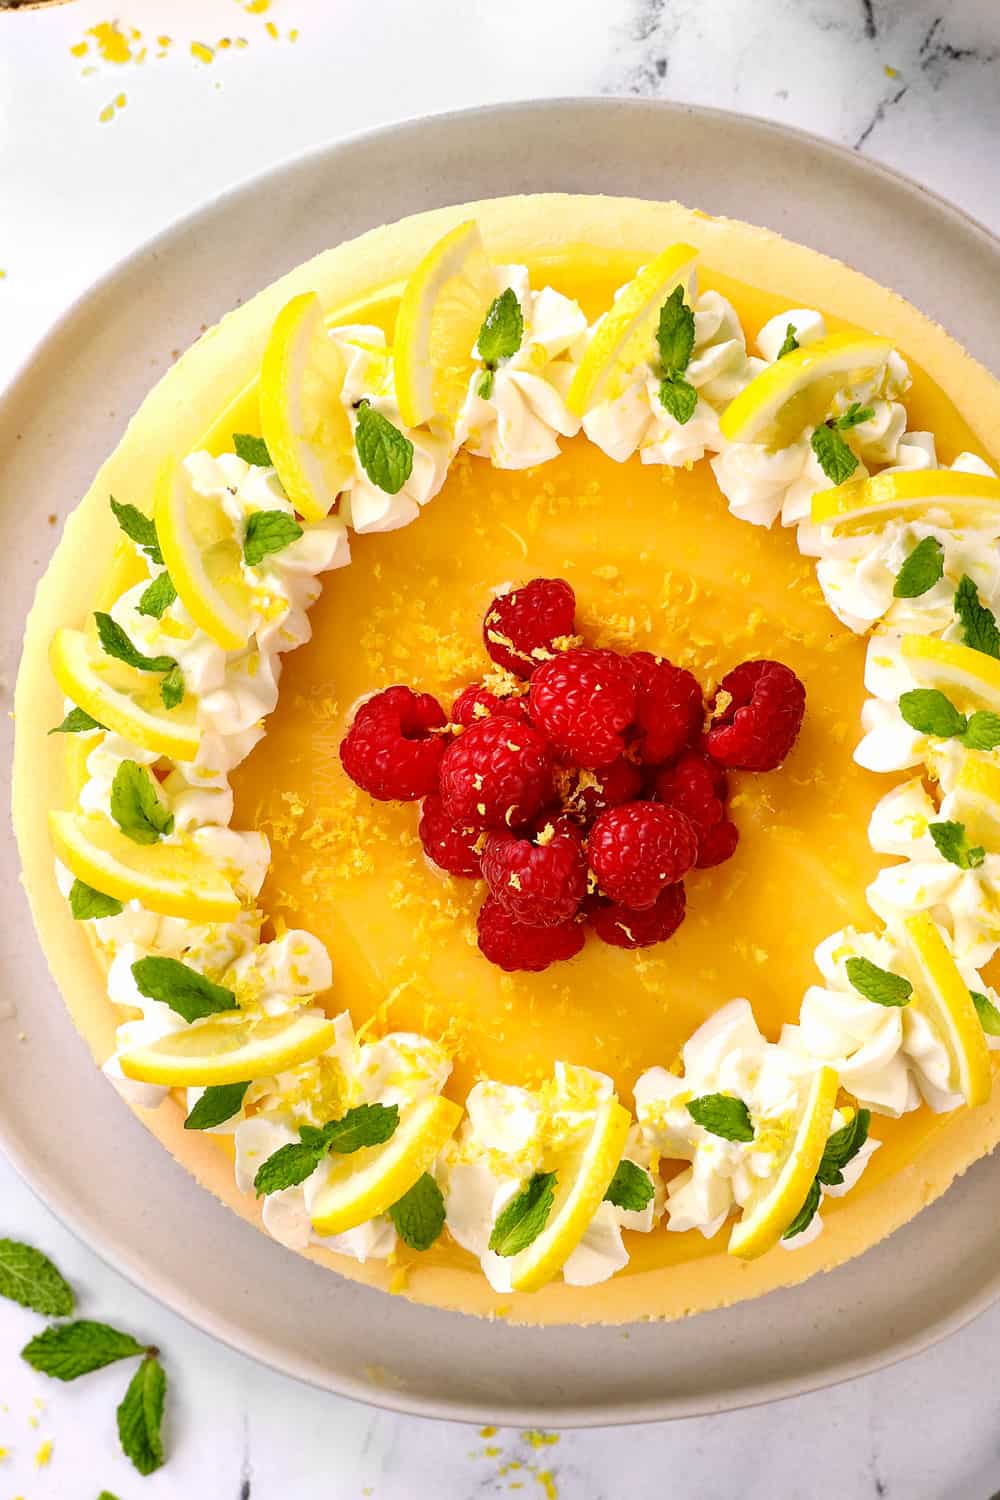
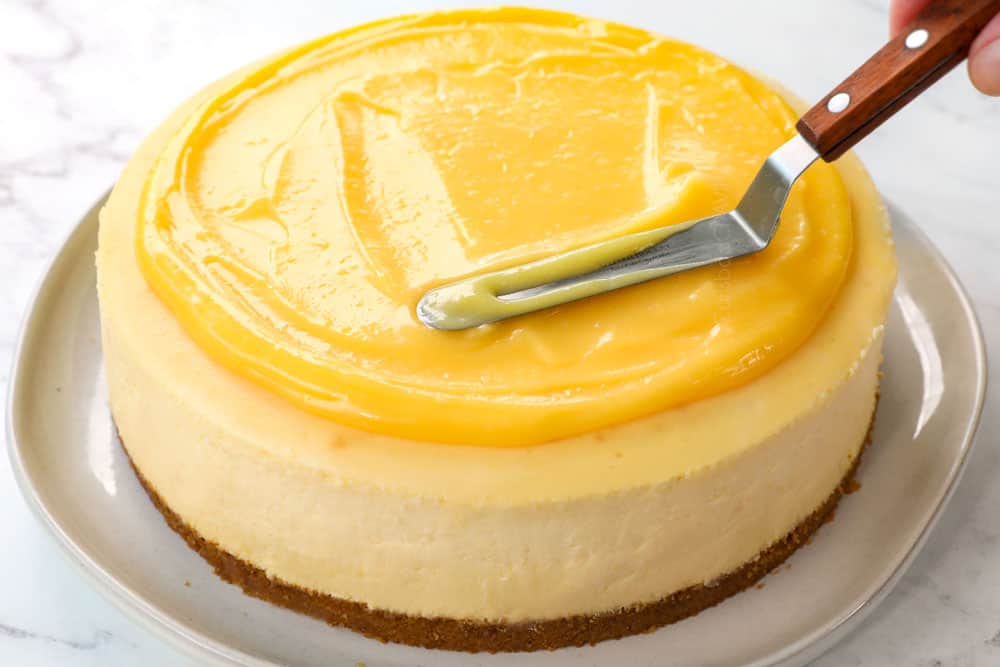
- Add lemon curd: Spread about 1 cup lemon curd over the cooled cheesecake. I like to leave a 1-inch border strictly for looks.
- Add whipped cream: Pipe the whipped cream around the outer edges of the cheesecake and garnish with lemon slices, lemon zest and berries if desired.
STEP 9: HOW TO SLICE CHEESECAKE
- Use a hot knife: Using a hot knife is crucial for clean cuts as the hot knife glides right through the cheesecake. Fill a large glass with hot water, then dip the knife in the hot water before each cut. Wipe knife clean with a paper towel after each cut, then repeat.
- DEVOUR!
How to Prevent Your Cheesecake From Cracking
If you follow this Lemon Cheesecake recipe, your cheesecake will not crack. Here are the rules to follow for success:
- Use a water bath: As previously mentioned, the hot water insulates the outer edges of the cheesecake, so the edges don’t bake faster than the middle.
- Room temperature ingredients: Room temperature eggs, sour cream and softened cream cheese allow them to mix more easily which means you’re less likely to overbeat the eggs which causes cracking (more on that below).
- To quickly bring eggs to room temperature: Fill a bowl with warm water (not hot) and add eggs and let sit 10-20 minutes.
- Don’t overbeat eggs: Eggs trap air, which can rise up and cause cracks and/or the cheesecake to deflate, so mix the eggs/cheesecake filling as little as possible once they’re added.
- Grease the pan: Spraying the entire spring form pan with cooking spray ensures the cheesecake doesn’t stick to the sides of the pan which can cause cracks as it constricts while baking.
- Don’t peak! It is paramount that you don’t open the oven while your cheesecake is cooking before 70 minutes to prevent cracking. Opening the door causes drafts which dramatically lowers the temperature – the culprit of large cracks and a sinking center.
- Don’t overbake: Overbaking the cheesecake causes the filling to shrink and crack. You want the edges to be firm but the center to wobble slightly when shaken. If there is no wiggle, the cheesecake is overbaked and likely to crack.
- Cool gradually: Sudden changes in temperature can cause cracks so allow the cheesecake to cool down gradually first in in the oven and then on the counter before placing it in the refrigerator.
WHAT HAPPENS IF YOUR CHEESECAKE CRACKS?
If you follow the above tips for success, you shouldn’t have any cracks! If you happen to have a crack in your cheesecake, cover the entire surface with lemon curd and no one will know!
expert COOKING TIPS FOR making LEMON CHEESECAKE RECIPE
Here are a few more helpful techniques that ensure the perfect cheesecake every time:
- Start the cheesecake early! The biggest tip when making cheesecake is to start it early in the day because it requires 4 hours of hand’s off time between the baking and cooling before you can transfer it to the refrigerator. The waiting will be the hardest part!
- Line the pan. Lining the base of the springform pan with parchment paper allows you to easily slide the cheesecake onto a platter, otherwise it’s very hard to transfer.
- Grease the pan and the foil. Spraying the entire baking pan with cooking spray before adding the foil helps the foil easily release from the pan and spraying the foil with cooking spray ensures the cheesecake easily releases from the foil.
- To juice lemons for maximum yield: Microwave the lemon for 15-30 seconds or until slightly warm to the touch because warm lemons release more juice than cold lemons. Next, vigorously roll the lemon on the counter for a few seconds to loosen and break down some of the citrus membranes which will get the juices flowing.
- Don’t get the pith: Always zest the lemons before you juice them. It’s practically impossible to zest a squished lemon that has already been juiced!
- Use soft cream cheese. The cream cheese should be soft enough that you can stick your finger in it. If it is not soft enough, then it will yield lumpy cheesecake (see methods to soften cream cheese above).
- Beat cream cheese until fluffy. The most important part of making creamy, smooth cheesecake is to beat the cream cheese and the sugar until light and fluffy with your paddle attachment – about 4-5 minutes each. This can seem like a long time, so set your timer and don’t stop early!
- Don’t rush the chilling process. Chilling the cheesecake allows the flavors to build and marry. You may serve Lemon Cheesecake as little as 6 hours after chilling, but I suggest allowing it to chill for a full 24 hours for the best flavor – you will be amazed at the difference it makes!
- Use the stabilized whipped cream. If you want to prep the cheesecake recipe 100% in advance, stabilized whipped cream is the way to go. You can pipe it on days ahead of time then just pull out your cheesecake when ready to serve.
- Don’t overwhip whipped cream. Stop mixing as soon as stiff peaks form because over-whipped cream becomes grainy. If you’ve accidently reached the grainy stage, you can try and salvage the whipped creamy by adding a few tablespoons of fresh cream and gently mixing it in by hand using a wire whisk. If the whipped cream is separated, then unfortunately it can’t be fixed.
HOW TO MAKE AHEAD
You can completely assemble, bake and chill the Lemon Cheesecake ahead of time or prep different elements of the recipe ahead of time, here’s how:
- Crust: Bake, cool then cover with foil 24 hours ahead of filling. No need to refrigerate.
- Cheesecake: Beat the cheesecake ingredients together, cover and chill for up to 48 hours. Let the filling come to room temperature then give it a whisk before layering onto the cooled crust just before baking.
- Lemon curd: Can be stored in the refrigerator for up to a month according to the National Center for Home Food Preservation. It can also be frozen for up to 1 year. When storing, press plastic wrap directly on surface of curd to prevent a film from forming.
- Stabilized whipped cream: Can be whipped and added to a piping bag 1-2 days before using and stored in the refrigerator.
- Cheesecake: Can be made 48 hours ahead of time and tightly covered in the refrigerator.
HOW TO STORE LEMON CHEESECAKE
This Lemon Cheesecake should be covered and stored in the refrigerator. It is at its prime 24-48 hours after making, but is good for up to 7 days.
I like to use a cake container to cover the cheesecake so I can pipe on the whipped cream and cover it without smooshing the topping. If you don’t have a cake container, you can use a large inverted bowl or tent with foil.
HOW TO FREEZE LEMON CHEESECAKE
- Cool cheesecake completely and refrigerate for at least 8 hours.
- Freeze uncovered on a baking sheet until firm.
- Remove from the freezer then wrap cheesecake in plastic wrap followed by heavy duty aluminum foil and finally in a large heavy duty freezer bag.
- Freeze for up to 2 months.
- To thaw, remove Lemon Cheesecake from the freezer to the refrigerator. Let thaw overnight.
- Top with whipped cream and serve.
LOOKING FOR MORE EASY CHEESECAKE RECIPES?
- Pumpkin Cheesecake
- Lemon Cheesecake Sugar Cookie Cups
- Raspberry Chocolate Cheesecake
- Eggnog Cranberry Cheesecake
- German Chocolate Cheesecake
- Blueberry Cheesecake
- Strawberry Cheesecake
WANT TO TRY THIS LEMON Cheesecake RECIPE?
PIN IT TO YOUR DESSERT OR CHEESECAKE BOARD TO SAVE FOR LATER!
FIND ME ON PINTEREST FOR MORE GREAT RECIPES! I AM ALWAYS PINNING :)!
©Carlsbad Cravings by CarlsbadCravings.com

Lemon Cheesecake
Save This Recipe To Your Recipe Box
You can now create an account on our site and save your favorite recipes all in one place!
Ingredients
SPECIAL EQUIPMENT
- 1 9-inch round 2 3/4” high springform pan
- 1 slow cooker liner or oven bag (optional but recommended)
- 18 -inch wide heavy duty aluminum foil**
- 1 large roasting pan
- parchment paper
- nonstick cooking spray
CRUST
- 14 full sheets Graham crackers (2 scant cups crumbs)
- 8 tablespoons butter, melted
- 3 tablespoons granulated sugar
CHEESECAKE FILLING
- 4 8 oz. pkgs. cream cheese, very soft (full fat is best)
- 1 1/2 cups granulated sugar
- 1 1/2 tablespoons cornstarch
- 1 cup sour cream at room temperature
- 1/3 cup freshly squeezed lemon juice at room temperature
- 1 tablespoon lemon zest
- 2 teaspoons vanilla extract
- ¼ teaspoon salt
- 4 large eggs at room temperature
- 1 large egg yolk at room temperature
LEMON CURD
- 1 cup lemon curd <<click for recipe or use storebought
WHIPPED TOPPING (OPTIONAL)
- 1 teaspoon unflavored gelatin (optional see notes)
- 1 1/2 tablespoons water (optional see notes)
- 1 cup cold heavy whipping cream
- 3 tablespoons powdered sugar
- 1 teaspoon vanilla extract
TOPPINGS (OPTIONAL)
- fresh raspberries, sliced strawberries, lemon wedges, lemon zest and fresh mint (optional)
Instructions
PREP
- Preheat oven to 325 degrees F. Begin boiling a large pot of water (about 4 quarts) for the water bath (you may not need all of it).
- Line the bottom of a 9" springform pan with parchment paper and lightly grease the inside of your entire pan with nonstick cooking spray. (The parchment will allow you to transfer your cheesecake later.)
CRUST
- Add Graham crackers to a food processor and pulse until finely ground (or crush in a bag with a rolling pin). Add butter and sugar and pulse (or stir) until evenly combined.
- Add to the greased springform pan and firmly press the crumbs down on the bottom of the pan using the bottom of a small bowl or measuring cup until you have a compact, even layer.
- Bake crust at 325 degrees F for 10 minutes. Cool completely on a wire rack. (You can prep filling while the crust cools.)
WATERPROOF PAN
- Waterproofing step 1: Place 2 large 18" x 18" pieces of aluminum foil on a flat surface underneath the pan in the form of a “+.” Gently fold (to make sure you don't create any holes) up the sides of the foil around the pan. If you don't add the bag in the next step, then double wrap the foil.
- Waterproofing step 2 (optional but HIGHLY recommended): Place foil lined springform pan in the bottom of a slow cooker liner or oven roasting bag. Bring the liner bag up to the top of the pan then gather excess to one side and tie it in a knot.
CHEESECAKE FILLING
- Add cream cheese to the bowl of an electric mixer fitted with the paddle attachment and beat on medium speed until light and fluffy, about 4 minutes (no less!). Add sugar and cornstarch and beat 5 additional minutes on medium speed.
- Add the sour cream, lemon juice, lemon zest, vanilla and salt and beat until blended. Add the eggs one at a time followed by the egg yolk, beating as little as possible, just until combined after each addition (overbeating once you add the eggs can cause cracks and the cheesecake to deflate).
- Pour mixture onto cooled crust. Drop the pan on counter a few times to get rid of excess air bubbles.
WATER BATH
- Place cheesecake in a large roasting pan then place the roasting pan in the preheated oven. Using a glass liquid measuring cup or pitcher, carefully pour in enough boiling water (add it low in the corner of the pan) until it reaches halfway up the side of the springform pan.
BAKE
- Bake the cheesecake at 325 degrees F for 65-85 minutes or until edges are firm and the center 2-3 of the cheesecake is still wobbly. (DON'T open door before 65 minutes, this can cause cracks.)
CHILL
- Turn off the oven and crack the oven door open about 1-inch. Allow the cheesecake to cool in the oven for 60 minutes, then remove it to a wire rack.
- Gently run a hot knife along the edges of the cheesecake and unclamp the cheesecake (to prevent cracking). Continue to cool for 2-3 hours or until cheesecake is completely cooled. (To quckly heat knife, you can dip it in the hot water bath water.)
- Cover the cheesecake with foil or transfer to a cake caddy and chill in the refrigerator overnight, best if 24 hours, or proceed to add the lemon curd/and or stabilized whipped cream and then chill.
LEMON CURD
- While the cheesecake is cooling, you can make the lemon curd and refrigerate. You can add chilled lemon curd to the cooled cheesecake at any point, as long as the curd has time to chill for at least 2 hours (on or off the cheesecake). Spread the lemon curd onto the cooled cheesecake, leaving an optional 1-inch border around the edge for looks.
WHIPPED TOPPING
- Optional for stabilized whipped cream: Add unflavored gelatin to a microwave safe bowl then pour the cold water over top; let stand for 5 minutes. Microwave for 20 seconds. Stir the mixture, then set aside to cool while you beat the heavy cream.
- Add heavy cream, powdered sugar, and vanilla extract to a large mixing bowl. Whip using an electric hand mixer just until soft peaks form.
- Turn the mixer to low and slowly pour in the gelatin mixture. Mix until well combined then increase the speed to medium and continue mixing until stiff peaks form.
- Transfer whipped cream to a piping bag fitted with a large tip. You can pipe the stabilized whipped cream onto the room temperature cheesecake before you pop it into the fridge or any time after that. The beauty of stabilized whipped cream is it will hold its shape indefinitely. If using regular whipped cream, top just before serving. Garnish cheesecake with berries, lemon wedges, lemon zest and mint if desired.
Video
Notes
- Foil: You can use regular foil instead of 18×18 if using a slow cooker liner as well.
- Stabilized whipped cream: Allows you to make the cheesecake 100% ahead of time! Stabilized whipped cream is heavy cream that has been whipped with sugar and gelatin in order to give it structure but it doesn’t alter the flavor – it’s magic! It can be added to the cheesecake at any point after it’s cooled and it won’t deflate or weep and will hold its shape long after the last bite of cheesecake is gone.
- Unflavored gelatin: Is a common baking ingredient and can be found next to the packages of Jell-O and pudding at your grocery store. It is what makes this “stabilized” whipped cream and not just whipped cream.
- Room temperature ingredients: Room temperature eggs, sour cream, lemon juice and softened cream cheese allow them to mix more easily which means you’re less likely to overbeat the eggs which causes cracking (more on that below).
- Don’t overbeat eggs: Eggs trap air, which can rise up and cause cracks and/or the cheesecake to deflate, so mix the eggs/cheesecake filling as little as possible once they’re added.
- To quickly bring eggs to room temperature: Fill a bowl with warm water (not hot) and add eggs and let sit 10-20 minutes.
- Don’t overbake: Overbaking the cheesecake causes the filling to shrink and crack. You want the edges to be firm but the center to wobble slightly when shaken. If there is no wiggle, the cheesecake is overbaked and likely to crack.
HOW TO STORE
- Lemon Cheesecake should be stored covered in the refrigerator. It is at its prime 24-48 hours after making, but is good for up to 7 days.
- I like to use a cake container to cover the cheesecake so I can pipe on the whipped cream and cover it without smooshing the topping. If you don’t have a cake container, you can use a large inverted bowl or tent with foil.
HOW TO FREEZE
- Cool cheesecake completely and refrigerate for at least 8 hours. You can freeze with the lemon curd but do not freeze with the whipped cream.
- Freeze uncovered on a baking sheet until firm.
- Remove from the freezer then wrap cheesecake in plastic wrap followed by heavy duty aluminum foil and finally in a large heavy duty freezer bag.
- Freeze for up to 2 months.
- To thaw, remove the cheesecake from the freezer to the refrigerator. Let thaw overnight.
Want To Make This Recipe?

Did You Make This Recipe?
Tag @CarlsbadCravings and Use #CarlsbadCravngs
Leave a Review, I Always Love Hearing From You!


Susan says
Good morning Jennifer, first of all I wanted to tell you how much I LOVE your recipes and you are my go-to favorite blogger!! I have never been disappointed with any of your delicious recipes and have shared them with many.
I need to make a lot of mini cheesecakes for a farewell party and was wondering if this could be adjusted to make mini cheesecakes? I really hope so.
I appreciate any advice you can give me.
Enjoy your day!
Jen says
Thank you so much Susan, that means so much to me! Yes, you can absolutely make this recipe into mini cheesecakes. I would look up a mini cheesecake recipe and follow those baking instructions but use these ingredients. Good luck!
Susan says
Many thanks ! I will do that!!
Susan
Pamela Rumsey says
We moved and still have not unpacked my spring form pan so made 6 tartlets using half this recipe. Put other half in fridge. Now made a large tartlet with other half. Baked for 40 minutes as not as thick as cheesecake pan. Turned out absolutely perfect and was a HUGE HIT with everyone. Great recipe and will definitely make again. Please share how to make other flavored curds.
Jen says
Hi Pamela! I have been working my way through a backlog of comments and see yours somehow got lost in the mix! I’m so glad your tartlets turned out amazing, that is such a great idea!
Emily Nelson says
How does yours have no brown spots on top?
Jen says
If there starts to be signs of browning you can pop a piece of tin foil over the top, or move it to a lower rack! Hope this helps!
Emily Nelson says
Also mine rose above the pan so the whole top wobbles when I shake it so I have no idea if it’s done. Baked 80 minutes. So we will see what happens. Hope it works! I tried putting foil over the top to help stop the browning but when I took it off five minutes later it pulled off a chunk of cheesecake. Sad! So don’t do what I did. Maybe use the lowest oven rack? Idk.
Jen says
I hope it worked too! Usually tenting the tin foil overt he top helps with browning, I am so sorry it took a chunk out of it!
Haley says
So I usually use your key lime cheesecake recipe…when my grocery store was all out of limes I figured I would try this one instead! 10/10! Even my family who typically doesn’t do lemon desserts LOVED it!!! I plan on making ALL of your cheesecake recipes! Also subbed vanilla bean paste for vanilla extract because that’s all I had & it gave it such a nice touch!
Jen says
Thank you so much, Haley! I’m thrilled this received such high praises from you and your family! I hope you’re having a wonderful week, and I’m excited to hear how you like my other cheesecake recipes!
Sherie Dracup says
OMG!! I made this cake. I cannot believe how perfect it turned out. Not a crack in sight. I paid close attention to the firm sides and wobble in the middle. Cooked for 75 minutes. My husband and friends who I shared with raved about it. Of course, I used your lemon curd recipe, (which I have made 5 times), and it was a delicious addition to the cake. I actually decorated the same as your photo minus the mint, and everyone thought it looked beautiful. Another Carlsbad recipe under the belt!! I just love trying your recipes.
Jen says
Yay!! I am so thrilled that it was a total success! Thank you for trying so many recipes!
Angel says
Hi! I made this recipe for Mother’s day 2 years ago, and loved it. I am now going to make it again. This time, I want to make it in an orange version by substituting all lemon components with orange. My question is, which other fruits and herbs would you garnish with? Raspeberries and mint were perfect with the lemon.
Jen says
Hi Angel! That sounds like such a beautiful variation! Orange cheesecake would be delicious! For garnish, I think you’re on the right track looking for something that balances the citrus. Fresh berries like raspberries or blackberries would still work really well with orange, and strawberries would be a good addition as well! For herbs, mint is always a safe and refreshing choice, but basil can also be surprisingly nice with orange if you want something a little different. You could also add a little extra citrus flair with thin orange slices or candied orange peel if you want to lean into the flavor. So glad the original recipe was part of your Mother’s Day tradition—hope the orange version is just as special! I hope that helps!