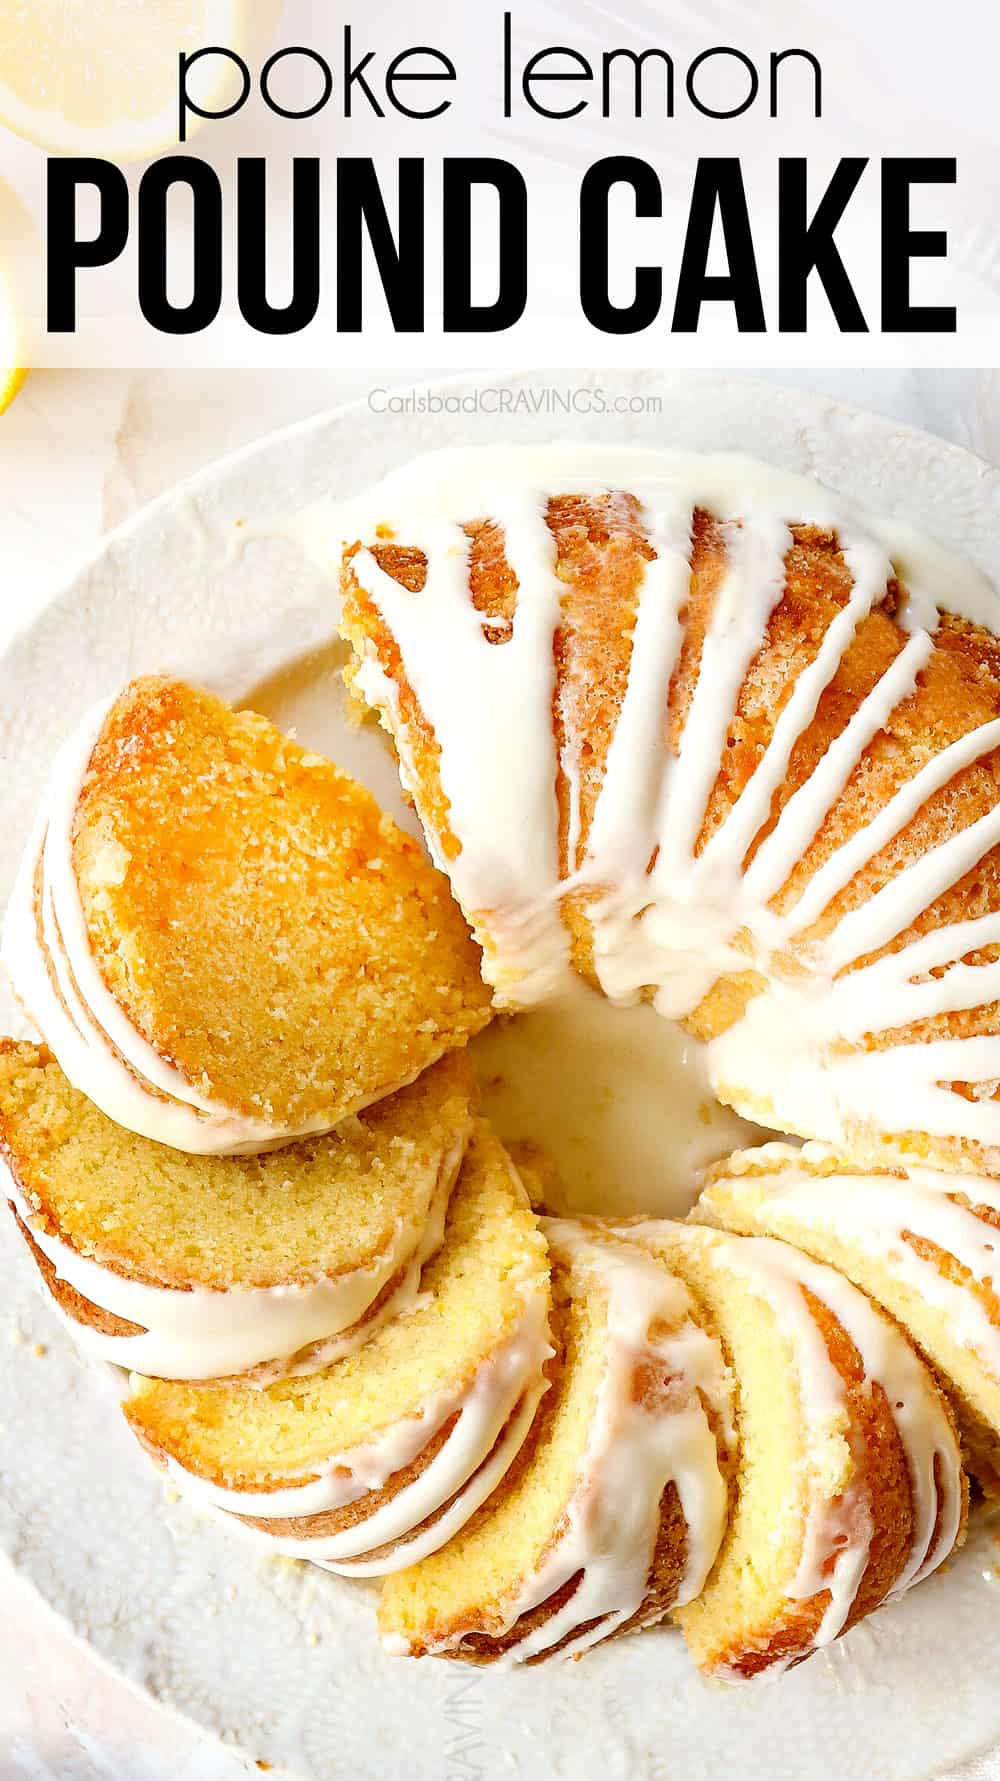
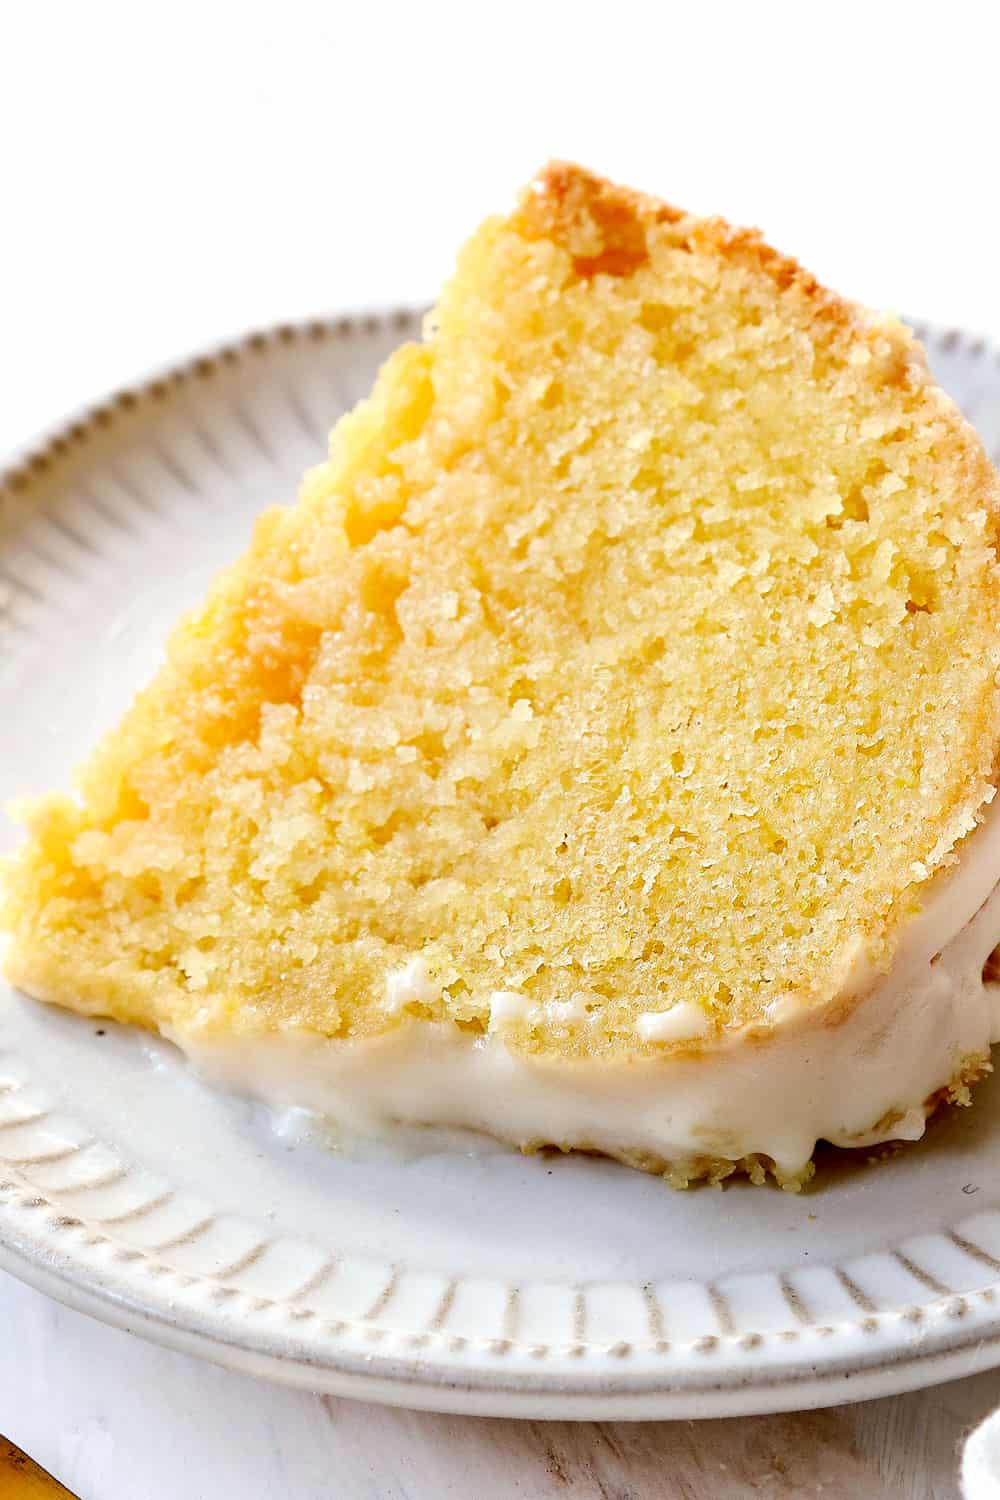
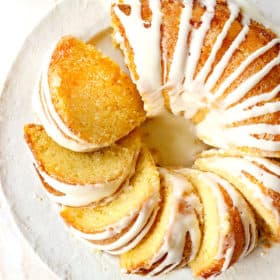
This lemon pound cake is the ultimate dessert for lemon lovers packed with three layers of lemon!
This lemon pound cake recipe is rich, buttery, tender and most importantly, packed with bright lemon flavor! It’s essentially a butter poke cake spiked with lemon juice and lemon zest in the batter then infused with luscious lemon butter syrup that soaks through the cake and finally it’s smothered with an irresistible cream cheese lemon glaze. This tender lemon Bundt cake is easy to make and tastes even better the next day – perfect for stress free entertaining or holidays (like Easter!). Tips and tricks, Step-by-Step Photos, How to Make Ahead, How to Freeze all included!
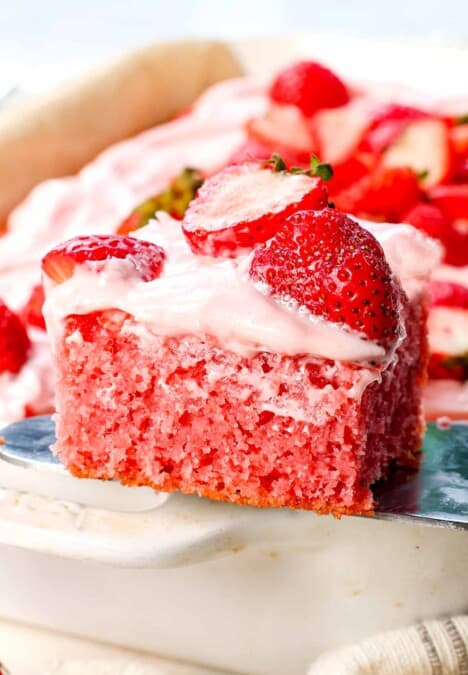
Spring and summer means bright and fresh lemon, blueberry strawberry and carrot cakes! Some of our favorite Easter cakes include: Lemon Blueberry Cake, Strawberry Shortcakes, Strawberry Shortcake Cake, Hummingbird Cake, Carrot Cake with Pineapple Cream Cheese Frosting and Cream Cheese Stuffed Carrot Cake.
PIN THIS RECIPE TO SAVE FOR LATER
lemon pound cake recipe video

Lemon Pound Cake Recipe
This lemon pound cake recipe is based off of my Kentucky butter cake. My Kentucky butter cake is one of my favorite desserts and definitely the dessert I make the most often because it’s a make-ahead friendly, no-fuss cake without any layering or frosting, just a glaze.
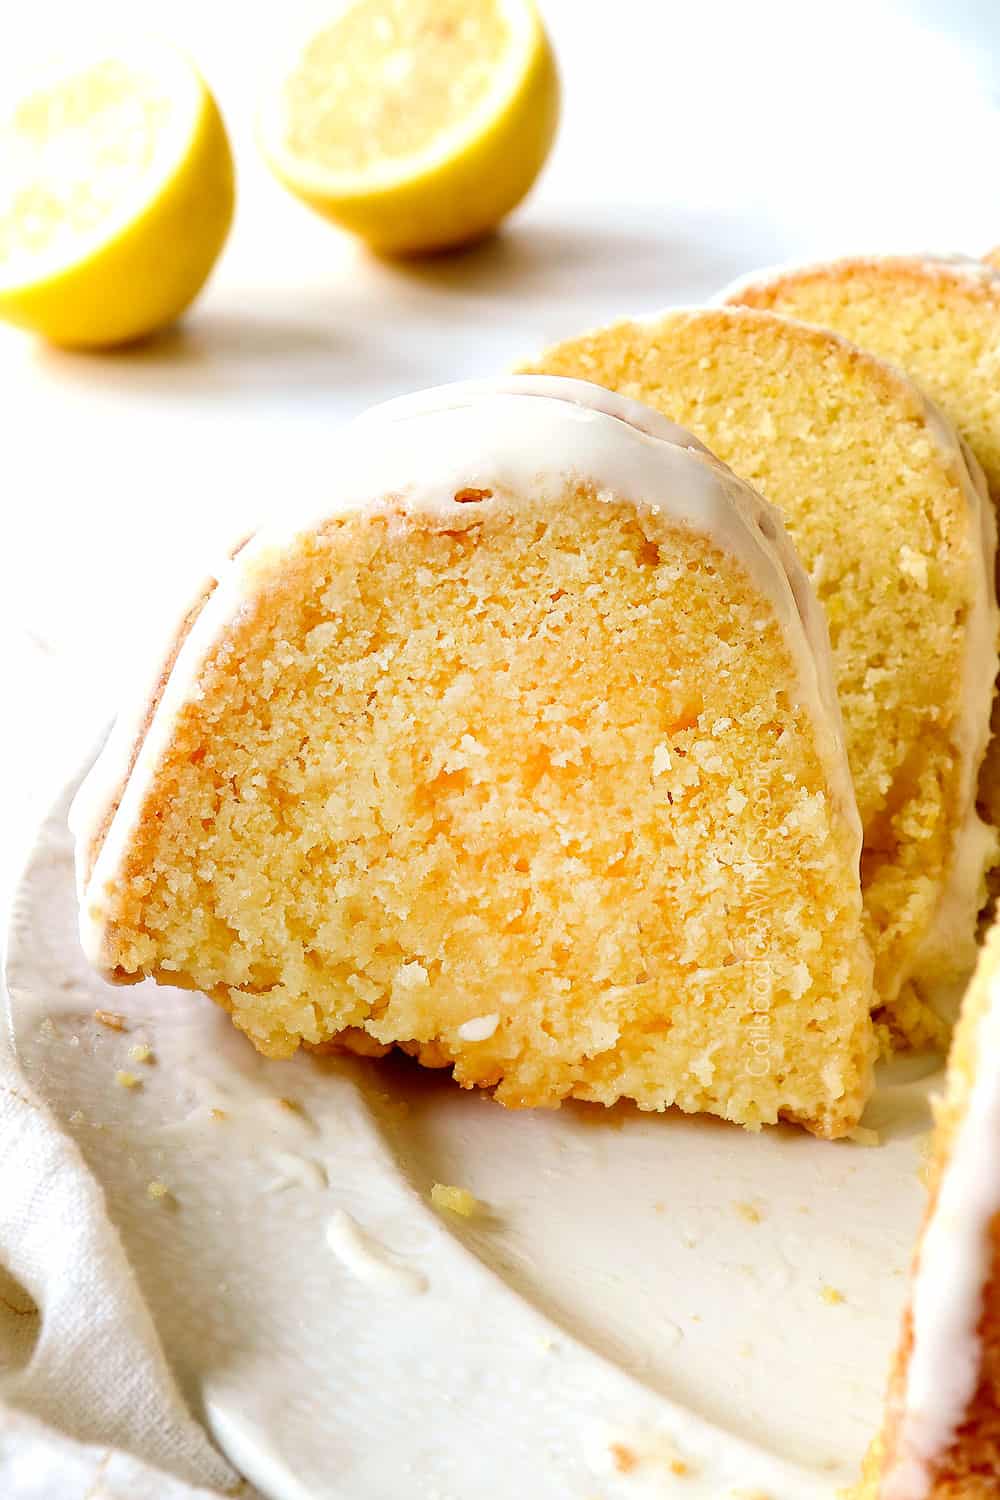
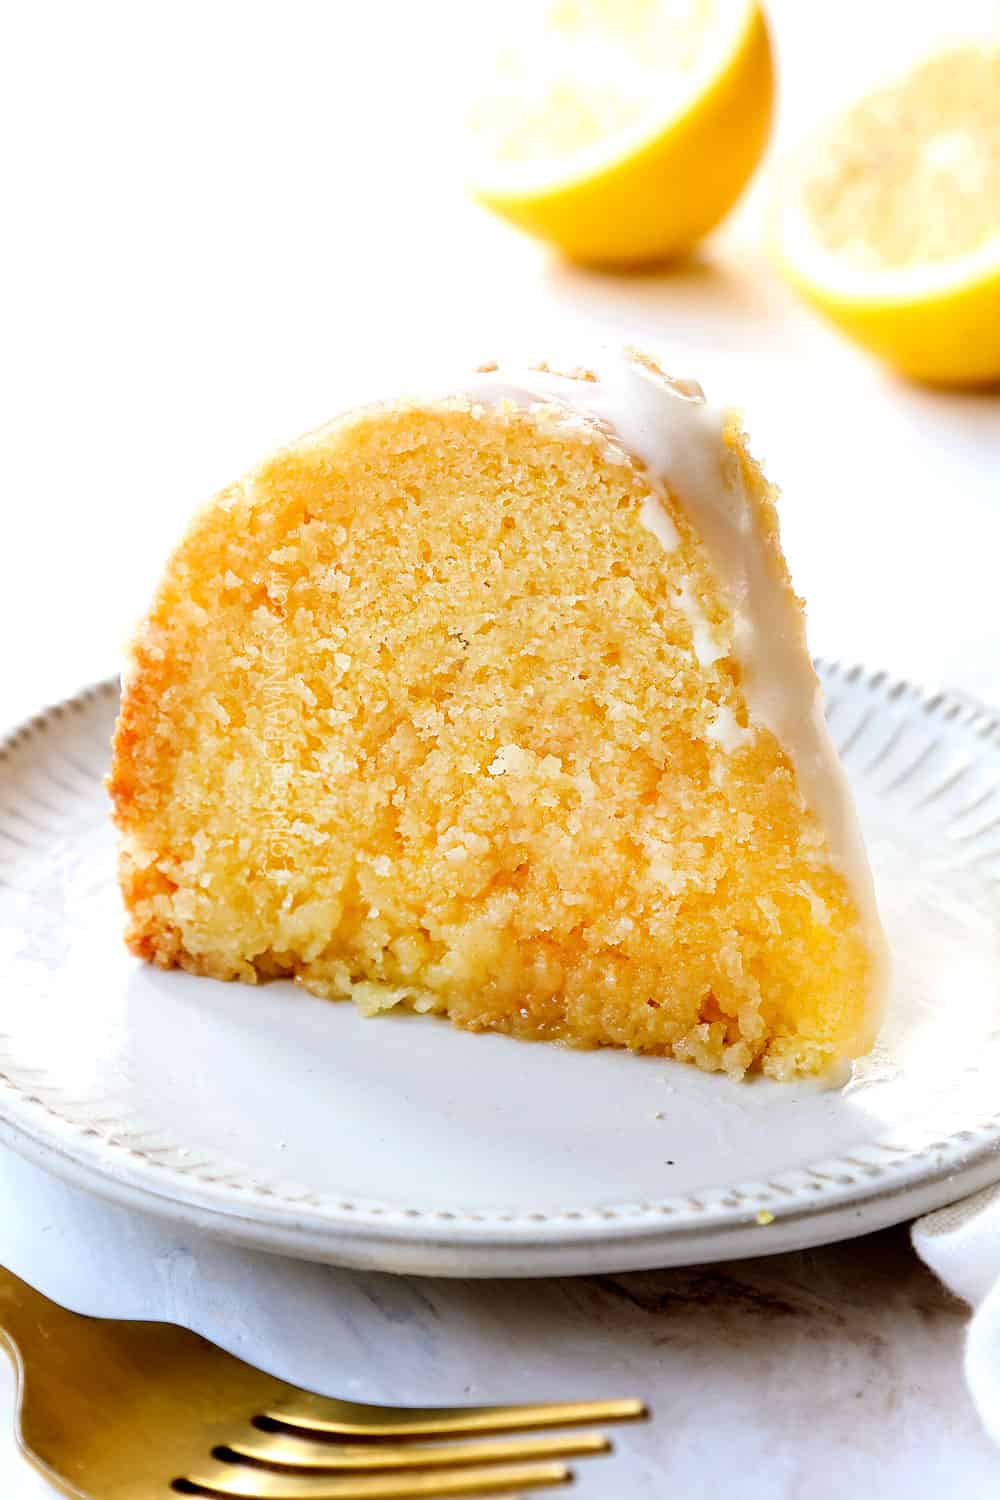
To transform that recipe into this lemon pound cake recipe, I kept the same cake base with the addition of lemon juice and lemon zest, delivering a lemony velvet pound cake – not too tart and not too sweet- and rich, tender, dense and decadent in texture – the perfect sponge for the sweet buttery lemon syrup.
To prepare for the lemon syrup, we poke the bottom of the lemon cake with holes, but instead of drenching it with butter sauce like in Kentucky butter cake, we douse it with lemon syrup, which is essentially butter sauce with added lemon juice. The syrup seeps into the rest of the cake, both intensifying the lemon flavor and creating the most wonderfully moist lemon pound cake you ever did taste.
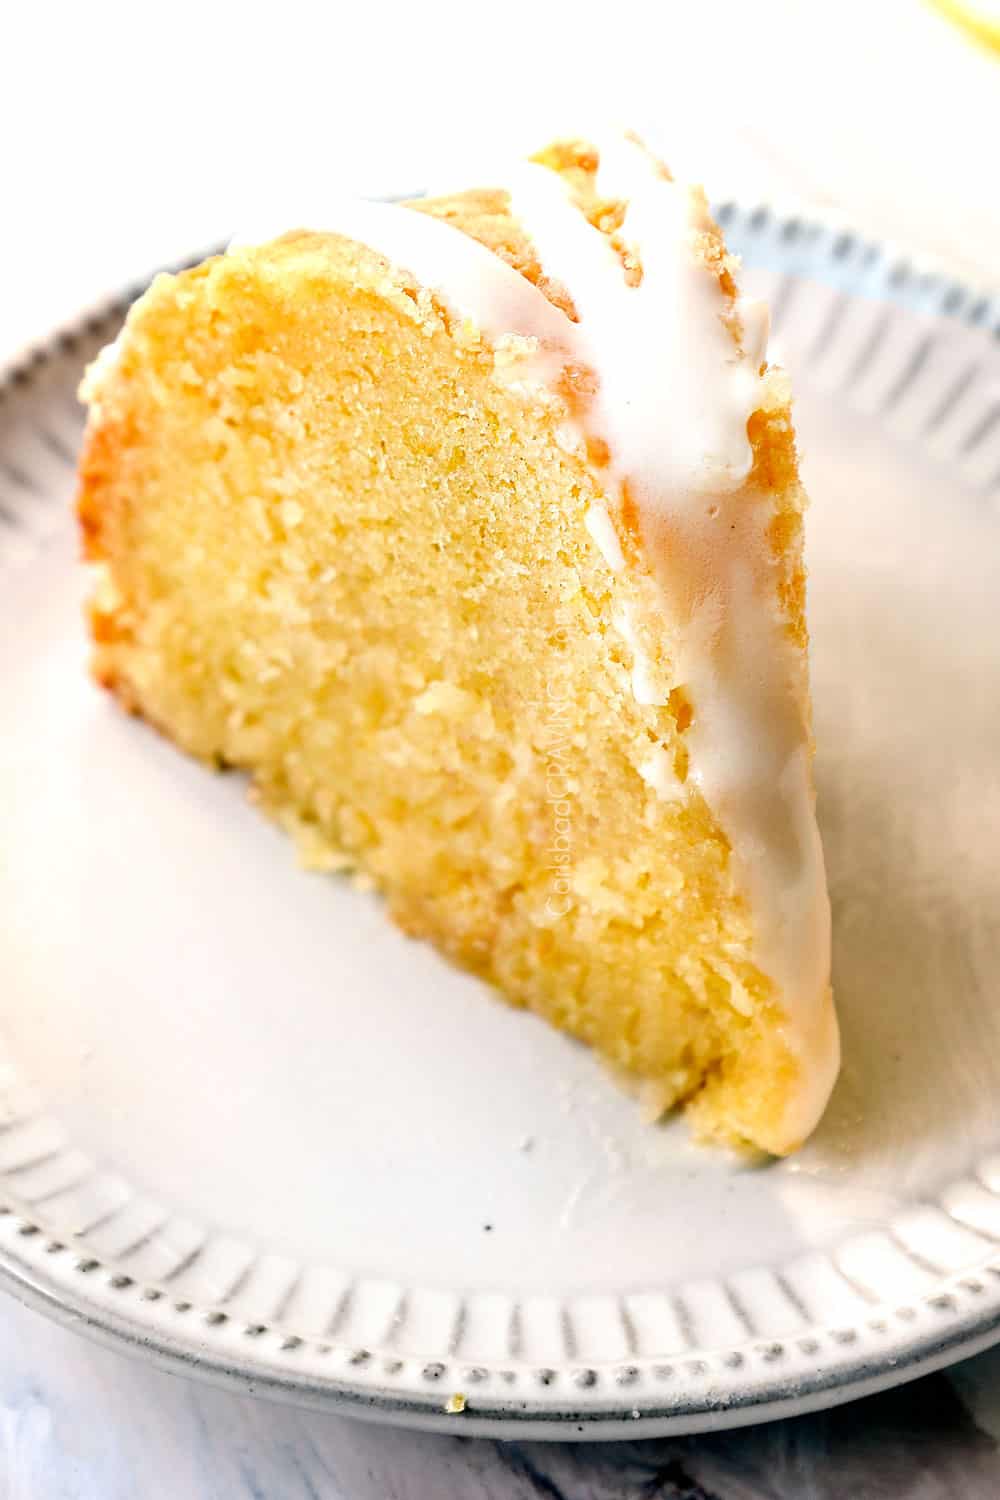
Finally, the lemon pound cake is crowned with a velvety cream cheese lemon glaze kissed with lemon juice for a creamy, silky, sweet, citrus glaze that is one of my favorite things ever.
With the three layers of lemon – in the cake – in the syrup – and in the glaze – you get a crazy tender, buttery lemon pound cake with intense lemon flavor in every bite that’s the perfect balance of sweet and citrus. I hope you love it as much as us!

Why you’ll love this Lemon Pound Cake Recipe
There are thousands of lemon pound cake recipes out there – but my recipe is different. It uses a different cake recipe, techniques, and ratios. Here is what makes this lemon pound cake AMAZING:

IngredientsLemon bundt Cake ingredientsIngredients
To make this lemon pound cake recipe, you’ll need the following ingredients, many of which repeat in the cake, syrup and glaze:

DIY BUTTERMILK
I never keep buttermilk on hand – but I ALWAYS want to make this lemon pound cake! Buttermilk is crucial for a tender crumb because the lactic acid reacts with the baking soda to leaven the cake.
Fortunately, you can make DIY buttermilk by adding 1 tablespoon white vinegar to a measuring glass then adding enough milk to equal one cup. If you only have reduced fat milk, add some half and half or heavy cream to give it body if you have it on hand. Give mixture a stir and let sit 10 minutes. The milk will curdle so you know it’s ready.
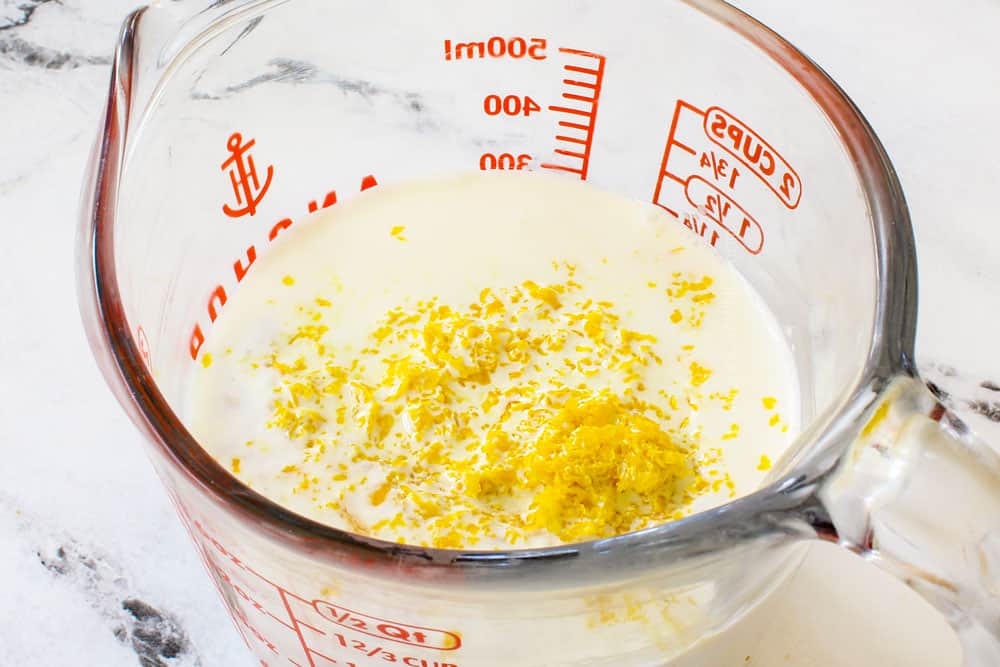
From there, you’ll mix the lemon juice, lemon zest and vanilla extract into the sour milk/buttermilk.

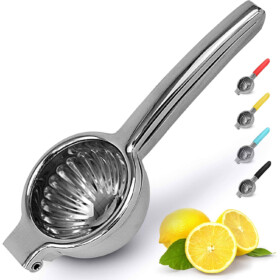
HOW TO JUICE A LEMON FOR MAXIMUM YIELD!
You will need 7 tablespoons lemon juice for this lemon pound cake recipe – for the cake, syrup and glaze. Fresh lemon juice is always best, so it is important to know how to juice a lemon for maximum yield.
First, you need to break down the membranes inside the lemon. The membranes hold all the juicy goodness we want!
• Start with room temperature lemons. Microwave the lemon for 15-30 seconds if needed; or simply let warm in a bowl of war water. Allow to cool down and proceed.
• Vigorously roll the lemon on the counter top for a few seconds.
• Use a lemon squeezer or reamer to extract more juice.

How to Make The Perfect Iced Lemon Pound Cake
This lemon pound cake takes less than 15 minutes to mix – so please don’t be intimidated by the thorough tips and tricks! It takes another 20-30 minutes to make the syrup and the glaze and pour them over the cake – the rest of the time is waiting for the cake to cool. Here’s how to make it:
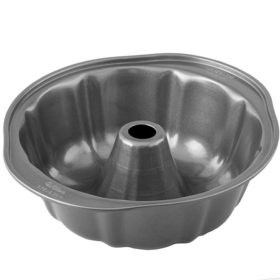
Step 1: GREASE BUNDT CAKE PAN well
You will need a 10-inch, 12 cup nonstick Bundt cake pan for this lemon pound cake recipe. I usually love using nonstick cooking sprays with flour to grease my pans – but please do NOT use a spray for this cake because the cake is too sticky!
Instead, you can use good old shortening or butter with flour OR add in a little sugar. I like to butter, sugar and flour my pan for this lemon Bundt cake because it creates a divine sugar crust like on a doughnut!
Also, please be aware that older Bundt pans have a tendency to stick, especially if the coating has rubbed off in any area and will NOT work for this sticky recipe unless you omit the syrup.
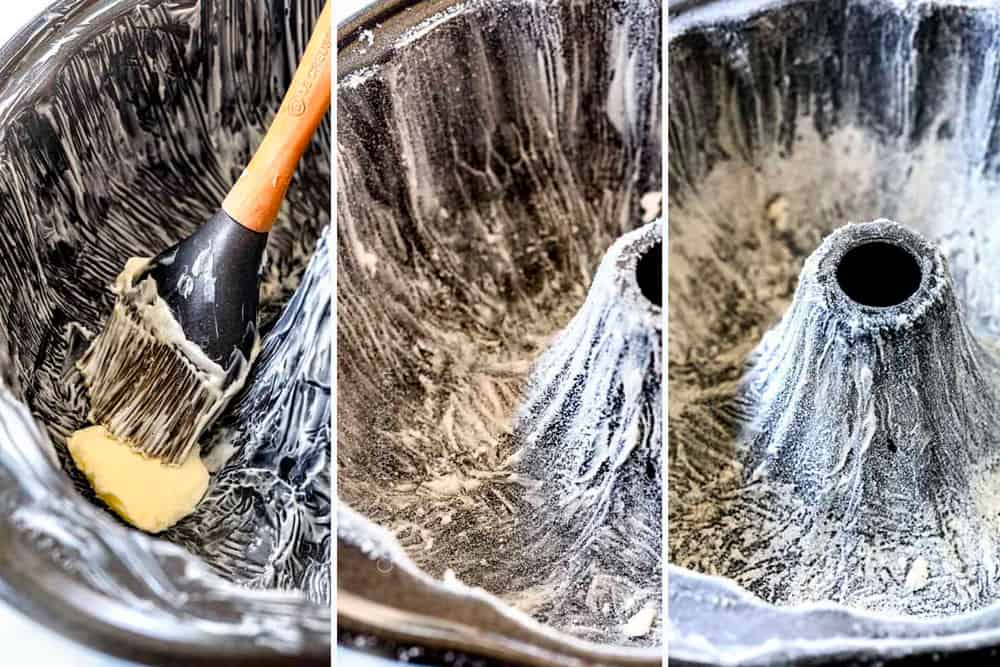
To grease, sugar and flour your pan:
- Brush an even layer of softened butter all over the inside of the pan (about 1 ½ tablespoons). Make sure you get every nook and cranny!
- Next, sprinkle in 2 tablespoons of granulated sugar – starting with the top edges of the pan so it trickles down the pan – make sure you do the same to the tube too, and tap and turn the pan to evenly coat.
- Repeat with one tablespoon of flour. Tap a few times to remove any excess.
You can also follow the same technique and omit the sugar and just use 2 tablespoons flour but you’ll be missing that coveted crackling sugar crust.
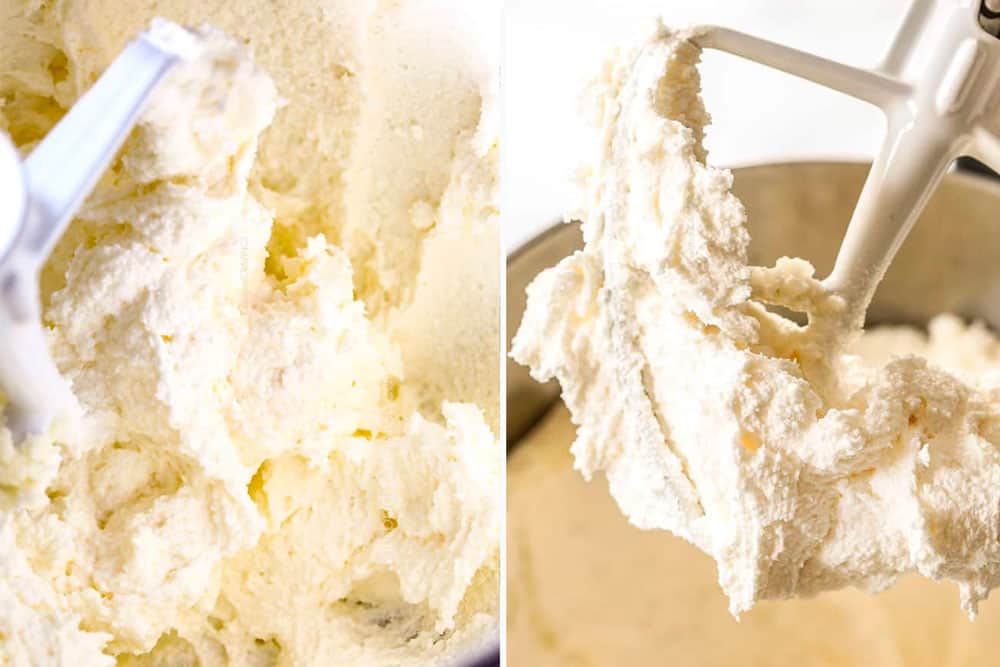
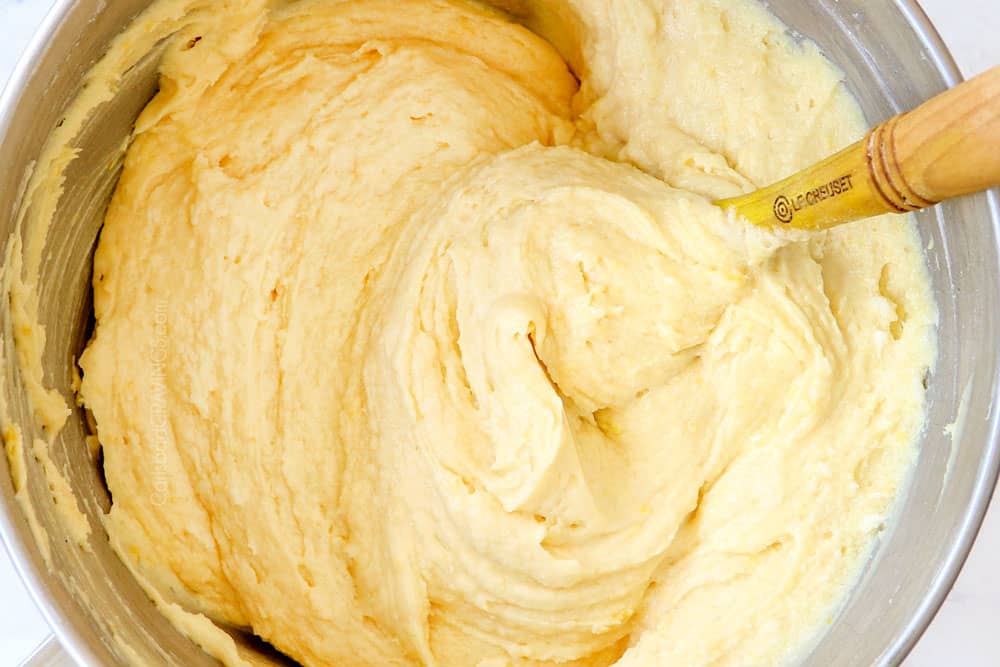
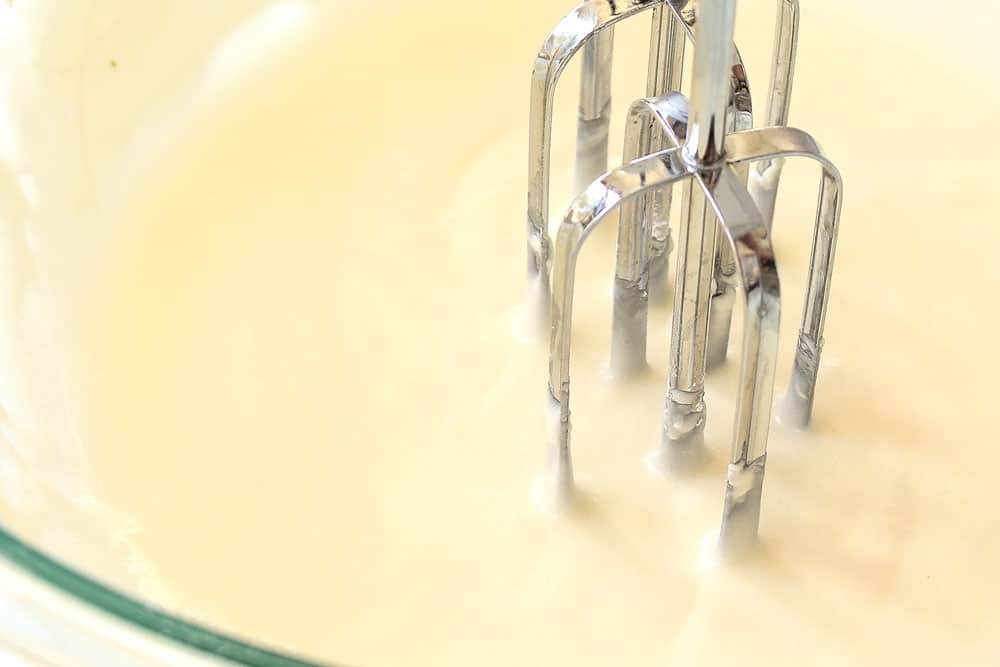
Step 2: CREAM butter and sugar UNTIL FLUFFY
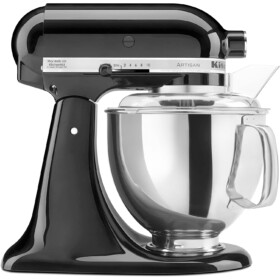
One of the keys to a soft lemon pound cake is to cream your sugar and butter until light and fluffy. You should beat your butter and sugar at medium – high speed for at least 3-5 minutes. I suggest setting a timer because 3 minutes will seem extra-long but you don’t want to cut it short.
This step is so important because it is the only time you want to whip air into the lemon cake batter to create bubbles. The bubbles will expand as the cake bakes, resulting in a lighter cake. If you don’t cream them enough, your cake will be denser, not as tender, or rise as high.
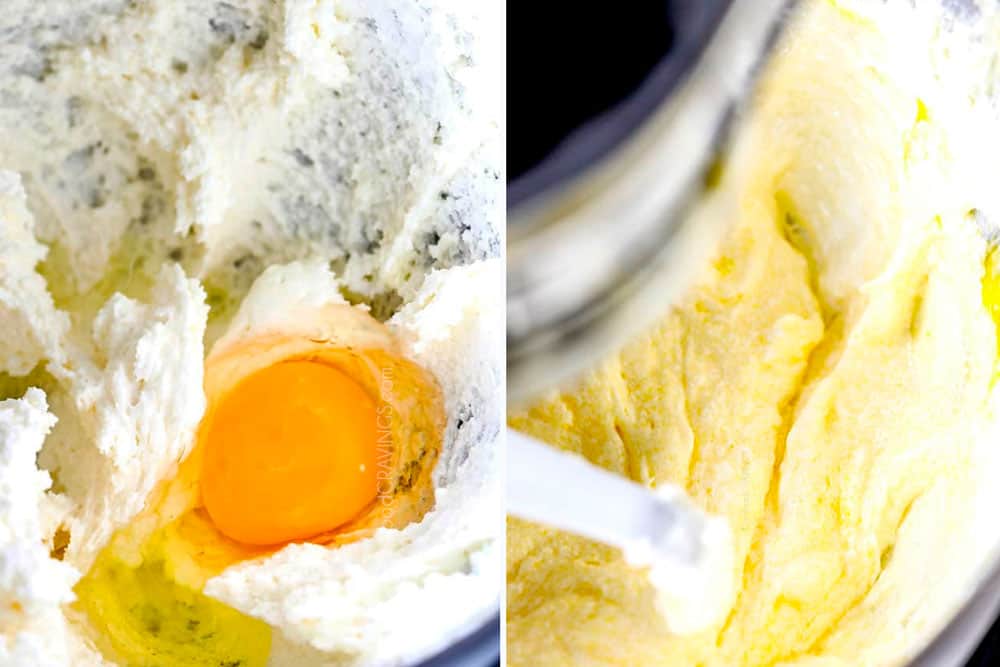
Step 3: BEAT EGGS LOW AND SLOW
Once you’re done creaming the butter and sugar, you want to add the eggs one at a time and beat slowly which gives the batter time to thicken and emulsify because eggs and butter don’t mix naturally. Mixing slowly adds emulsifiers from the egg yolks and will not break the fat (from the butter and egg yolks) and water emulsion (from water contained in the butter or fat and eggs). It results in a creamy batter that holds in the air bubbles in, previously created through creaming and beating.
Overbeaten eggs can also create a fragile crust that crumbles and separates from the cake as it cools.
Step 4: Alternate Dry and wet Ingredients
Now it’s time to incorporate the dry and wet ingredients. The dry ingredients are whisked together separately so they can be evenly divided into the batter without over working it. They dry ingredients include: flour, baking soda, baking powder and salt. The wet ingredients include buttermilk, lemon juice, lemon zest and vanilla extract all whisked together in a pourable liquid measuring cup.
You will want to alternate slowly adding the dry and wet ingredients to the batter in order to keep it stable. If you add all of the wet ingredients at once, it can break the emulsion and cause the batter to separate. If you add all of the dry ingredients at once, the batter will be too thick which will result in overmixing and a tougher cake. Instead, adding them in alternating thirds beginning and ending with the dry ingredients, keeps the batter stable and easy to mix.
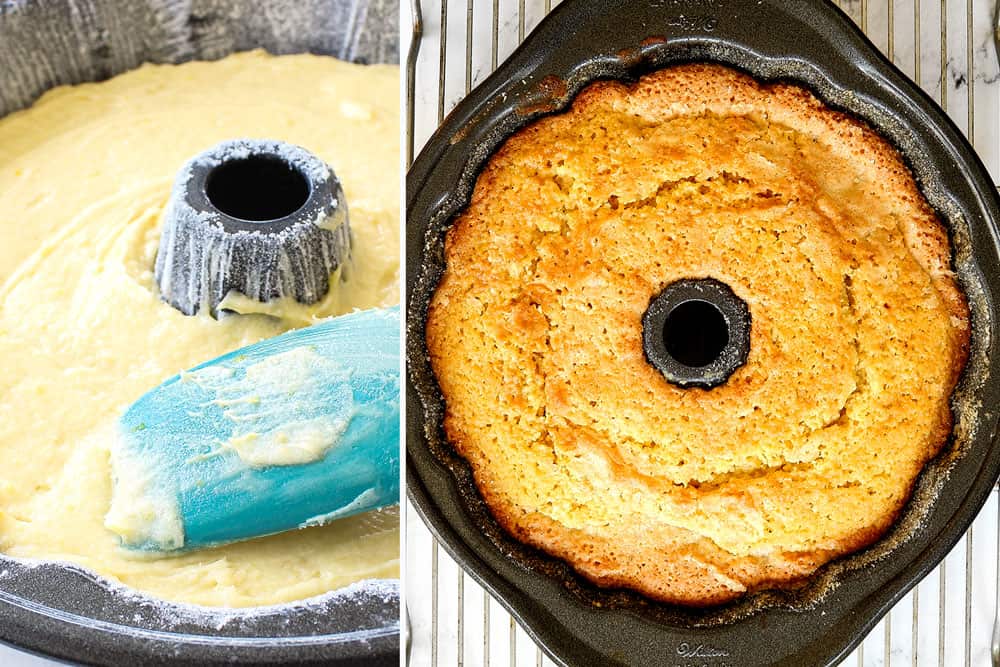
Step 5: BAKE
One of the main reasons people complain of dry cakes is because they over bake their cake You want to remove your cake when there are just a few crumbs clinging to a toothpick. Check your lemon pound cake at 55 minutes then continue to cook as needed, setting a timer so you don’t overbake it.
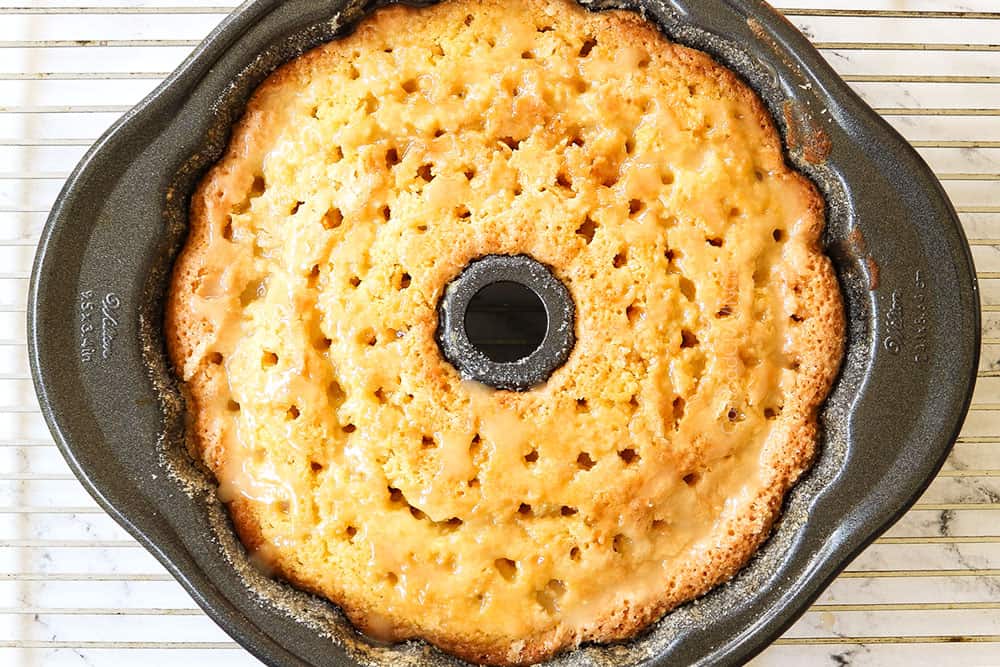
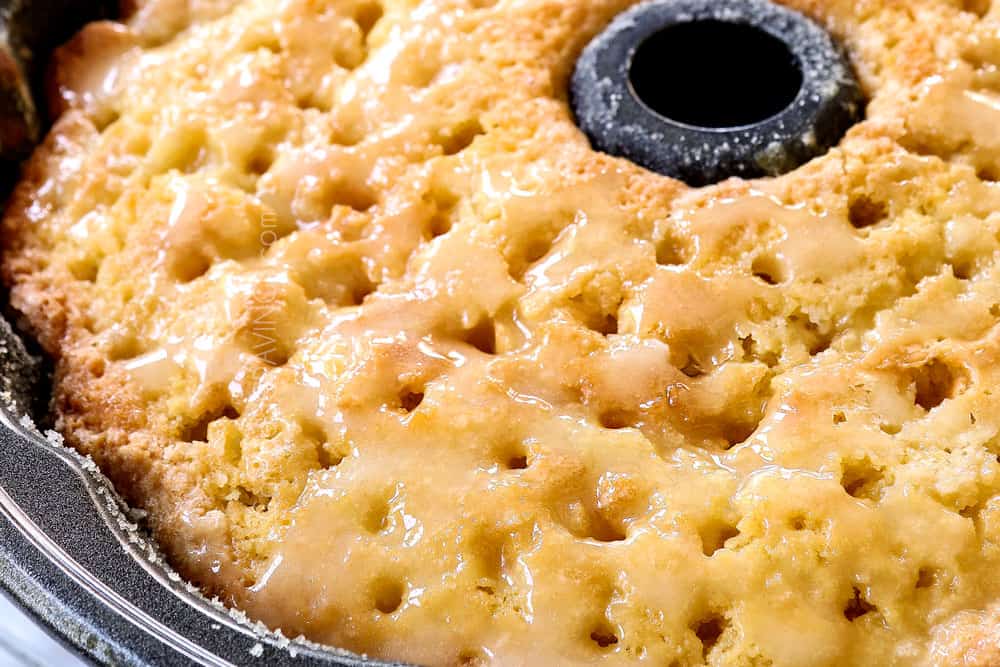
Step 6: POKE HOLES in the bottom of the cake
Here comes the fun part! Let the lemon cake rest for 5 minutes then poke holes all over the bottom of the cake, about 45 holes. I have found the thin end of a chopstick to be just the right size. Skewers are too thin and the back of a spoon is too big.
If you don’t have chopsticks, try and find something similar in size such as the back of a utensil. If all else fails, you can use a skewer but wiggle it around a little to create a bigger hole.
You will want to poke the holes about ¾ of the way down. This allows the butter sauce to penetrate the lemon cake without oozing out the top and sticking to the pan.
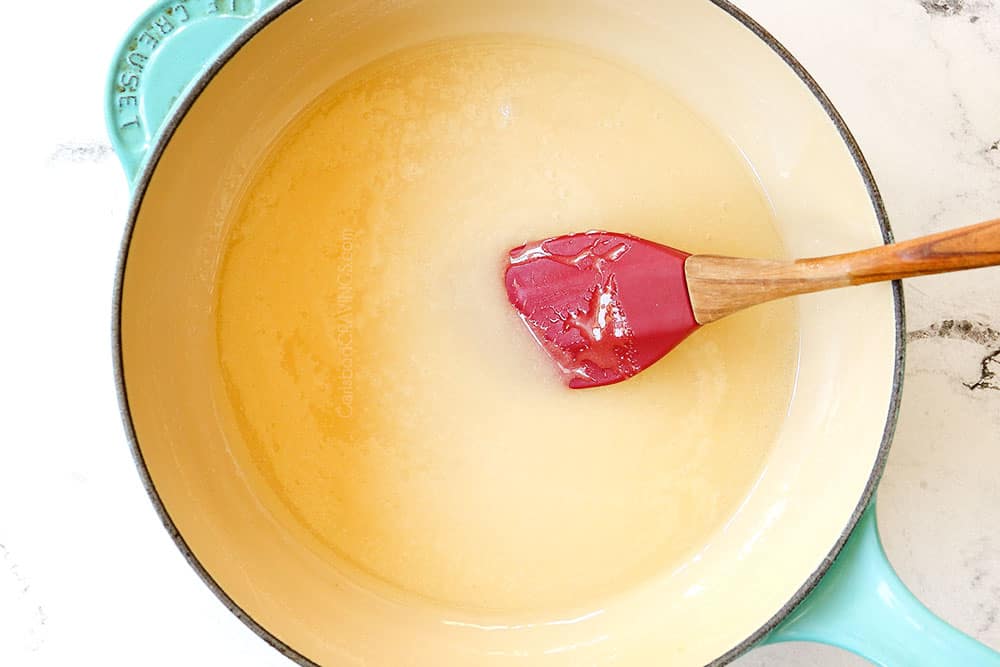
Step 7: MAKE lemon BUTTER syrup
Immediately after poking holes in the cake, make the lemon butter syrup by combining butter, sugar and lemon juice in a saucepan and cooking until the sugar mostly dissolves.
You don’t want to make the syrup too soon because it will thicken and even crystallize and harden. Making the syrup when the cake comes out of the oven is perfect timing because it also gives the cake a few minutes to cool.
Step 8: POUR SYRUP INTO the HOLES
Slowly pour the syrup into the holes of the cake. You’ll want to work slowly so the it actually seeps into the holes of the lemon cake and doesn’t pool and drip down the edges into the pan. Tilt the pan as needed so the syrup doesn’t run down the sides of the pan because this will glue the cake to the pan and it won’t come out in one piece.
Step 9: REMOVE CAKE FROM PAN
After you’ve poured the syrup over lemon pound cake, let it sit for 15 minutes. This allows the cake to retract from the pan and become firm enough to remove without breaking. If you leave it for too long, then it can become damp and stick to the pan and more importantly, the glaze can stick and harden like glue.
When you’re ready to remove the cake, run a knife around the edges of the cake. Firmly tap the outside of the pan a few times until you feel the cake is loose, then invert the cake onto a plate or cake stand.
Step 10: Make CAKE
To make the lemon glaze, beat the cream cheese, powdered sugar and 3 tablespoons lemon juice until smooth. Make sure to sift the powdered sugar into the bowl so you don’t end up with lumps. Once the glaze is smooth, taste and add additional lemon juice if you would like a tangier glaze.
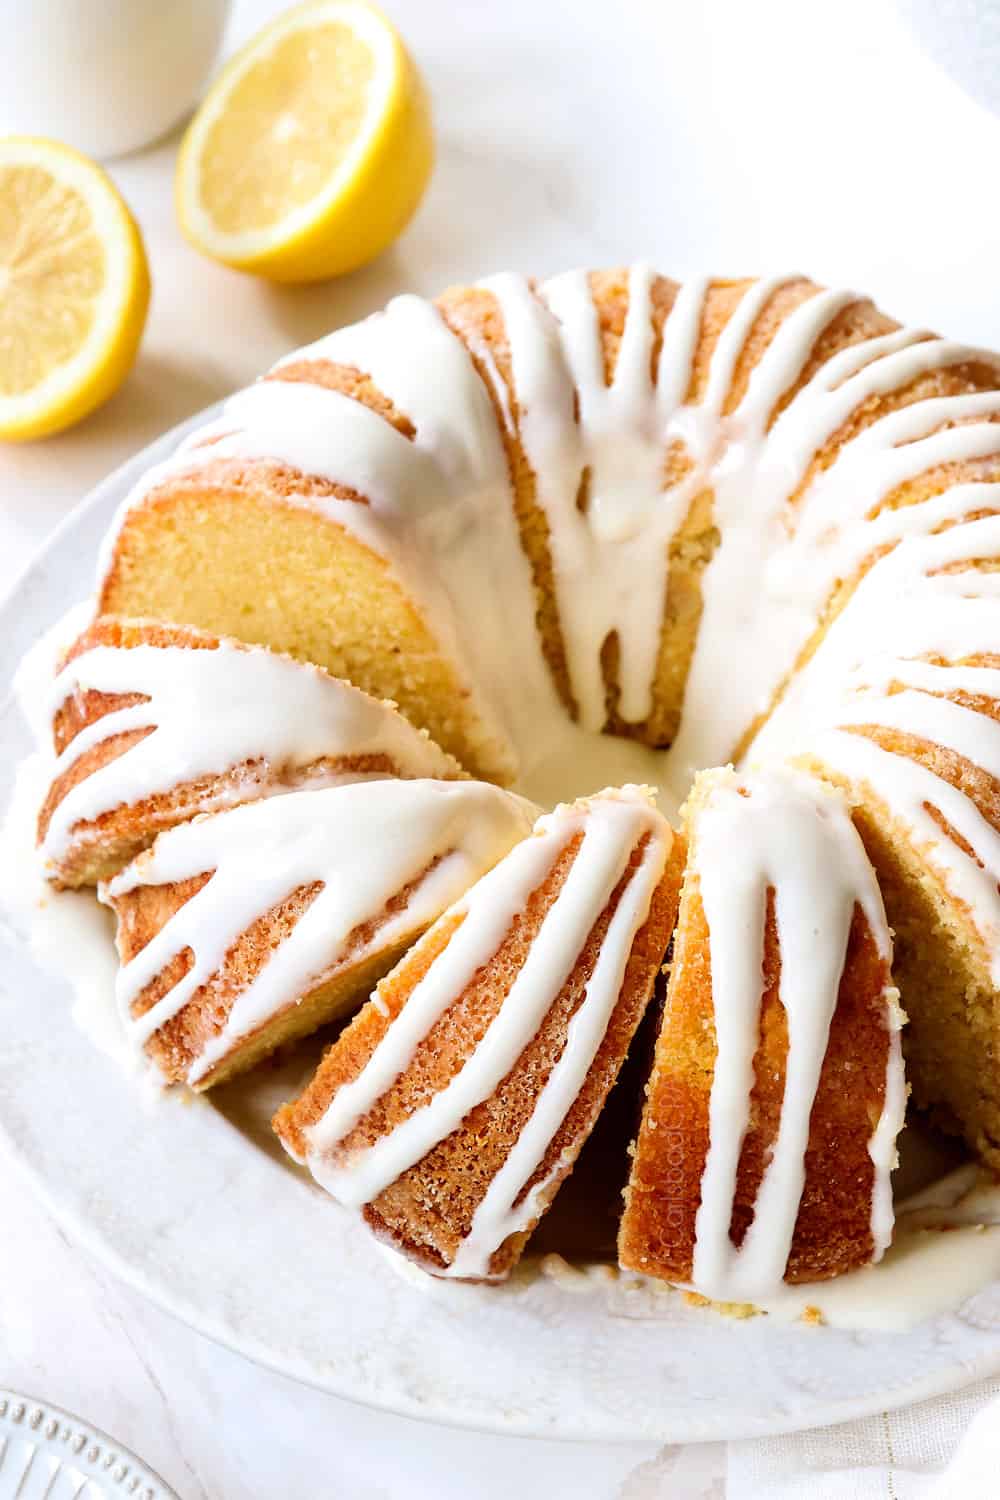
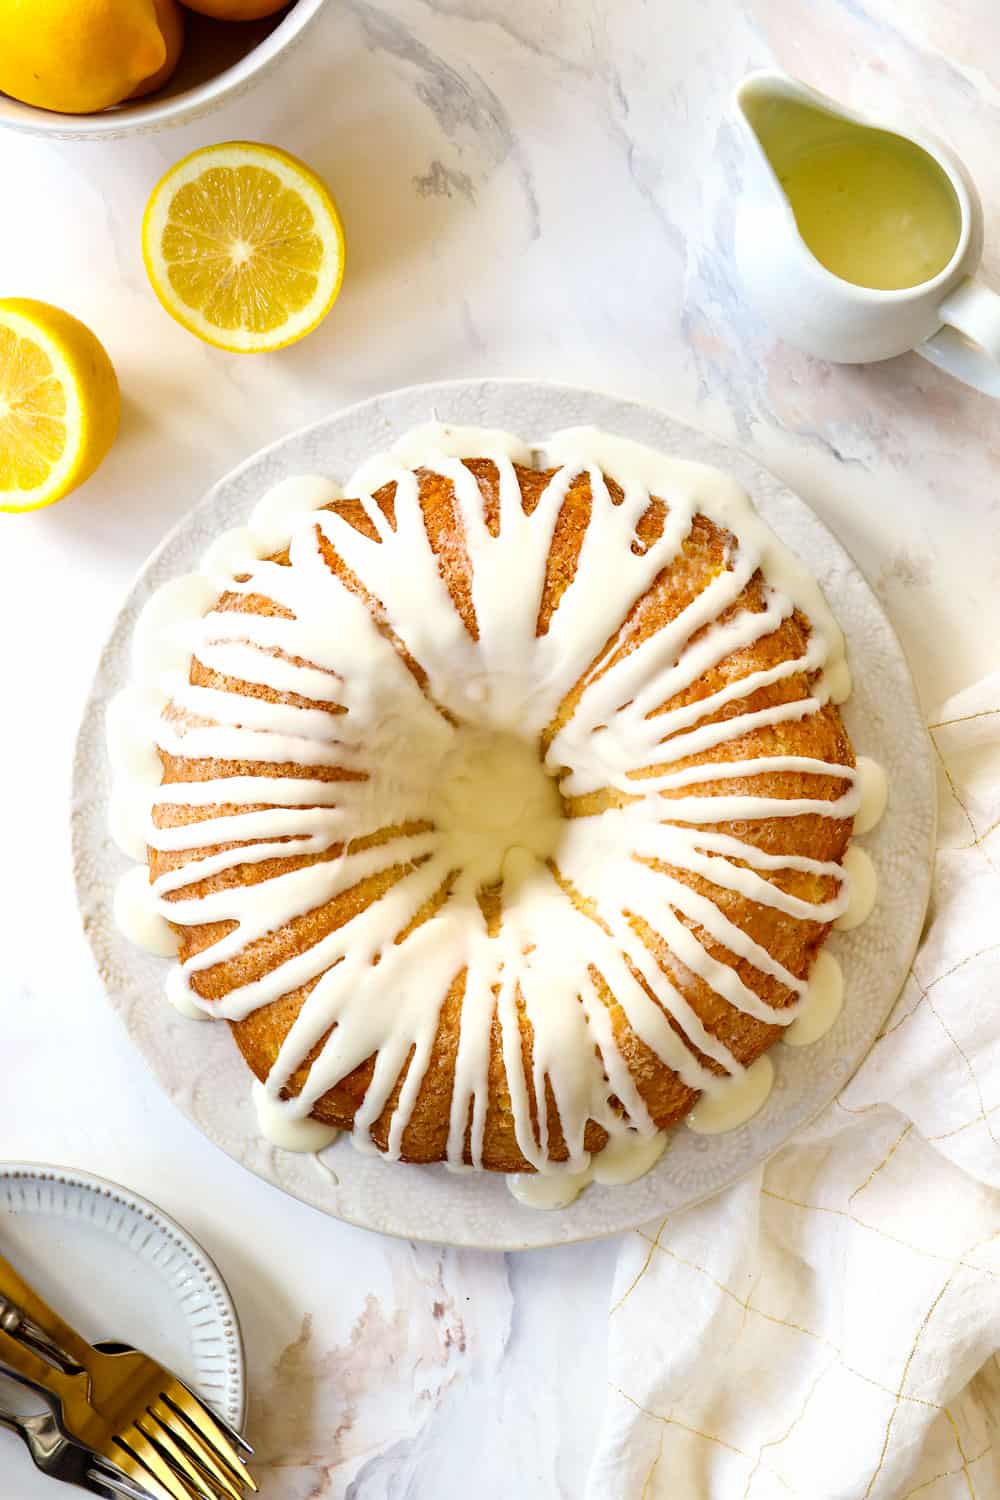
Step 11: Glaze CAKE
Now the finishing touch! Drizzle the lemon glaze all over the cake, letting it drip down the sides. I use a small gravy boat but you can also use a spoon or piping bag. Some of the glaze will pool at the bottom of the cake, which just means extra glaze for that piece of lemon cake!

Make This Recipe For Lemon Pound Cake Ahead of time
This lemon pound cake tastes equally delicious the next day, just hold the glaze! To make ahead, cool the cake completely on a baking rack, then wrap the cake tightly in plastic wrap. Store at room temperature until ready to serve, then add the glaze and voila!
Alternatively, you can make the entire lemon cake including the glaze, cover with a cake container or tent with foil, refrigerate (due to the cream cheese in the glaze) then let sit at room temperature for one hour before serving to remove some of the chill. Even better, microwave individual slices for 20 seconds or so – SO good! Microwaving individual slices makes them incredibly moist and soft – even better than freshly made!

Lemon Pound Cake Recipe Tips
We’ve gone over most of the tips for success in the above section, but here are a few more areas to pay attention to:
Ingredient Tips
Cake Making Tips
Serving Tips
USE ROOM TEMPERATURE INGREDIENTS
You will need room temperature butter, buttermilk and eggs for this lemon pound cake recipe. Room temperature ingredients help the emulsion be more successful between the butter, sugar and eggs, or in other words, they will mix much easier together (so it’s harder to overmix) and whisk to a higher volume which results in a softer lemon Bundt cake with maximum volume.
Room temperature eggs also create a runnier batter which is easier to spread/not overwork so the lemon cake has more lift and rises more evenly. Cold eggs can break the emulsion of the sugar and butter, so the batter loses air cells, resulting in a baked cake that is grainy or flat in texture, dry or dense.
What to Serve With Lemon Pound Cake
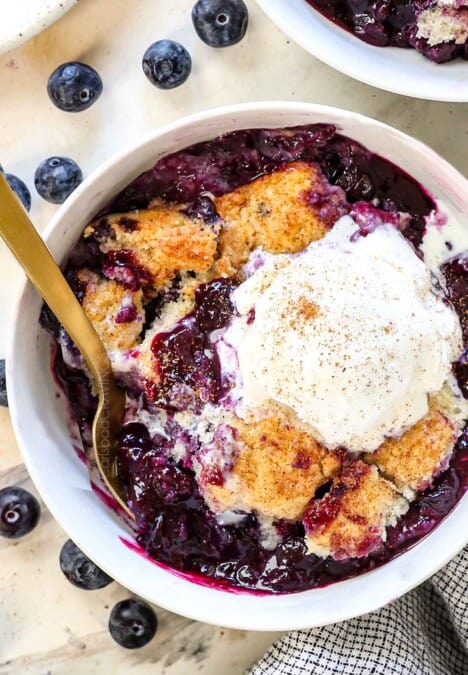
Lemon pound cake is fabulous in its citrus, buttery simplicity, but it’s also wonderful with fresh berries such as strawberries, raspberries, blueberries and/or blackberries, Vanilla ice cream (and berries!), or a dollop of homemade whipped cream (and berries!) are also tasty.

Buttermilk Lemon Pound Cake Variations
This lemon pound cake recipe is extremely versatile so you can bring your personal taste and mood every time you make this recipe! You can use the recipe as a springboard to make lemon blueberry cake, lemon poppy seed cake, lemon almond cake and lemon pistachio cake:

How to Store an Iced lemon Pound Cake
Cover the lemon pound cake and store in the refrigerator for up to 3 days. Cakes tend to dry out in the fridge, so be sure to wrap it tightly and microwave individual slices for 20 seconds to make it extra moist.
Freezing Buttermilk Lemon Pound Cake
It is best to freeze lemon pound cake without the glaze (but with the syrup drizzled in the holes). To freeze:
1. Double wrap the cake tightly in plastic wrap.
2. Freeze cake for up to 3 months.
3. Allow the cake to thaw overnight in the refrigerator then unwrap and come to room temperature on the counter before adding the glaze.

LOOKING FOR MORE EASTER CAKE RECIPES?
You can see all my Easter recipe cakes HERE. Here are a few to wet your palate:
Coconut Cake
Carrot Cake
Cream Cheese Stuffed Carrot Cake
Lemon Poke Cake
Chocolate Raspberry Cake
Chocolate Eclair Cake
White Chocolate Raspberry Cake
Lemon Blueberry Cake
Strawberry Pound Cake
Blueberry Muffin Cake
Strawberry Shortcakes
WANT TO TRY THIS RECIPE?
PIN IT to your recipe BOARD TO SAVE FOR LATER!
FIND ME ON PINTEREST FOR MORE GREAT RECIPES! I AM ALWAYS PINNING :)!
©Carlsbad Cravings by CarlsbadCravings.com


Buttermilk Lemon Pound Cake
Save This Recipe To Your Recipe Box
You can now create an account on our site and save your favorite recipes all in one place!
Ingredients
CAKE
- 24 tablespoons (3 sticks) unsalted butter, softened
- 2 ¼ cups granulated sugar
- 5 large eggs at room temperature
- 3 cups all-purpose flour
- 1 teaspoon salt
- 1 teaspoon baking powder
- 1/2 teaspoon baking soda
- 1 cup buttermilk or sour milk* at room temperature see notes
- 2 tablespoons fresh lemon juice
- 2 tablespoons grated lemon zest, packed
- 1 tablespoon vanilla extract
LEMON BUTTER SYRUP
- 3/4 cup granulated sugar
- 3 tablespoons unsalted butter
- 2 tablespoons lemon juice
- 1 tablespoon water
- pinch of salt
- 1 teaspoon vanilla extract
CREAM CHEESE LEMON GLAZE
- 4 oz. cream cheese softened to room temperature
- 2 cups powdered sugar, sifted
- 3-4 tablespoons lemon juice
Instructions
FOR THE CAKE
- Preheat oven to 325 degrees F. Generously and thoroughly grease and flour a 10-inch (12-cup) Bundt pan (I also sugar the pan.) Please see Notes.
- In a medium bowl, whisk together flour, baking powder, baking soda and salt. Set aside.
- Whisk buttermilk with 2 tablespoons lemon juice, 2 tablespoons lemon zest and 1 tablespoon vanilla in a liquid measuring cup; set aside.
- Add butter and sugar to a stand mixer fitted with the paddle attachment and beat on medium-high speed for at least 3-4 minutes (no less!), until light and fluffy, scraping down sides occasionally. Reduce speed to medium and add eggs, one at a time, beating just until the yellow disappears after each egg.
- Reduce speed to low and gradually add flour mixture to butter mixture in thirds, alternately with buttermilk mixture in between each third. Beat just until combined, giving the batter a final stir by hand to get any flour at the bottom.
- Transfer batter to the prepared Bundt pan and tap the pan on the counter a few times to get rid of any air bubbles. Bake at 325 degrees F until a wooden pick inserted near the center of cake comes out with a few crumbs, 55- 70 minutes.
- Place cake on a wire rack and let rest 5 minutes then poke holes all over the cake, going about ¾ of the way down using the thin end of a chopstick. You may also use the back of a utensil or a skewer, but you’ll want wiggle it around so the holes become larger.
FOR THE LEMON BUTTER SYRUP
- Immediately after poking holes in the cake, make the Lemon Butter Syrup. Add sugar, butter, lemon juice, water and salt to a medium saucepan. Heat on low until the butter is melted, stirring occasionally. Cook until the sugar is mostly dissolved, without letting the mixture boil, then stir in the vanilla.
- Slowly pour or spoon the Syrup all over the bottom of the cake (which is currently the top), moving slowly so it has time to seep into the holes. Tilt the cake as needed so the syrup doesn't run over the edges of the cake or it will act like glue in the pan. Brush any extra glaze into the holes.
- Let the cake cool for 15 minutes (no longer or the glaze can stick and harden like glue) then run a knife around the edges of the cake, shake a few times until loose then invert the cake onto a plate or cake stand. Take note that if you have extra glaze on the bottom of the cake, you should invert the cake onto a parchment paper lined plate otherwise it can stick to the plate when serving.
- Let the cake cool to room temperature before adding the Glaze in the next step. You can also tightly wrap the cooled cake in plastic wrap and store at room temperature then add the Glaze the next day.
FOR THE CREAM CHEESE LEMON GLAZE
- In a large mixing bowl, beat cream cheese, powdered sugar and 3 tablespoons lemon juice until smooth. Taste and add additional lemon juice if you would like a tangier glaze. Drizzle the Glaze all over the cake, letting it drip down the sides. Enjoy!
Video
Notes
How to GREASE and sugar pan
You need to grease and flour/sugar the pan very well because this is a sticky cake. Please be aware that older Bundt pans have a tendency to stick, especially if the coating has rubbed off in any area and will NOT work in this recipe unless you omit the syrup.
I like to butter, sugar and flour my pan for this lemon Bundt cake because it creates a divine sugar crust like on a doughnut, otherwise you can use good good old shortening with flour but you’ll be missing that coveted crackling sugar crust.
To grease, sugar and flour your pan:
- Brush an even layer of softened butter all over the inside of the pan (about 1 ½ tablespoons). Make sure you get every nook and cranny!
- Next, sprinkle in 2 tablespoons of granulated sugar – starting with the top edges of the pan so it trickles down the pan – make sure you do the same to the tube too, and tap and turn the pan to evenly coat.
- Repeat with one tablespoon of flour. Tap a few times to remove any excess.
More tips for success
- DIY buttermilk/sour milk: Add 1 tablespoon white vinegar to a measuring glass then adding enough milk to equal one cup. If you only have reduced fat milk, add some half and half or heavy cream to give it body if you have it on hand. Give mixture a stir and let sit 10 minutes.
- Lemon yield: An average lemon will provide you with about 2-3 teaspoons lemon zest and 3 tablespoons of lemon juice, so for this lemon pound cake recipe you will need about 3-4 lemons; go with 4 to be safe, more if they are small.
- Follow the recipe: Use room temperature buttermilk and eggs, don’t shortcut the creaming, add eggs one at a time, don’t overmix and don’t overbake. There is science behind each of these steps (explained in the recipe post) which ensure a tender cake.
- Room temperature eggs hack: Add warm (not hot) tap water to a bowl then add eggs (still in their shells) for at least 20 minutes. You can microwave your buttermilk until room temperature (NOT hot).
- Don’t microwave cream cheese! For the glaze, use cream cheese softened at room temperature. If you soften the cream cheese in the microwave, it can be too runny.
- Thicken glaze: If your glaze is too thin, pop it into the refrigerator for 15 minutes to thicken up.
- Patch up any missing cake: I have never had a problem with any of my lemon pound cakes sticking, but if any cake is left behind in the pan, simply pick up the pieces and patch them back into the cake. The glaze added to the top of the cake will hide any imperfections and can also be used as glue.
Make AHEAD
This lemon pound cake tastes equally delicious the next day, just hold the glaze! To make ahead, cool the cake completely on a baking rack, then wrap the cake tightly in plastic wrap. Store at room temperature until ready to serve, then add the glaze and voila! Alternatively, you can make the entire lemon cake including the glaze, cover with a cake container or tent with foil, refrigerate (due to the cream cheese in the glaze) then let sit at room temperature for one hour before serving to remove some of the chill. Even better, microwave individual slices for 20 seconds or so – SO good! Microwaving individual slices makes them incredibly moist and soft – even better than freshly made!HOW TO STORE lemon pound cAKE
Cover the lemon pound cake and store in the refrigerator for up to 3 days. Cakes tend to dry out in the fridge, so be sure to wrap it tightly and microwave individual slices for 20 seconds to make it extra moist.CAN I FREEZE lemon poud CAKE?
It is best to freeze lemon pound cake without the glaze (but with the syrup drizzled in the holes). To freeze:- Double wrap the cake tightly in plastic wrap.
- Freeze cake for up to 3 months.
- Allow the cake to thaw overnight in the refrigerator then unwrap and come to room temperature on the counter before adding the glaze.
Want To Make This Recipe?

Did You Make This Recipe?
Tag @CarlsbadCravings and Use #CarlsbadCravngs
Leave a Review, I Always Love Hearing From You!


Ramya says
will be making this soon with few subs i never had lemon pound cake before as am a vegan will dm you if i make this and let you know how it goes Thanks Ramya
Jen says
Thanks Ramya, I can’t wait for you to try it!
Deidre says
Love the new site design..only someone as petite as you are could afford to eat this dreamy creation- that being said I’m going for it anyway..lol thank you so much for this post!
Jen says
LOL! I’m glad you’re going to live on the edge and still indulge in a slice – you deserve it!
Jessica says
Delicious, moist, and tender crumb. Highly recommend! Thank you for sharing.
Jen says
Thank you! I’m so happy to hear that you enjoyed it!
Dayle says
This comment isn’t for the cake. I won’t be baking the cake until April for a special birthday. This comment is for the way the recipe is written. Bravo to you, Jennifer!!
Both my Grandmother and Great Grandmother were professional bakers so I am no stranger to eating and baking great cakes. In my 60 plus years of baking, I have never read a recipe as well written as yours. I love and appreciate the explanation you give for the various steps in the baking process. The “how” of the preparation was not new to me. What was new was the “why”. It’s a good day when you learn something new.
This recipe would be a great primer for anyone who wants to bake a cake.
Thank You!!
Jen says
What a wonderful comment to wake up to, thanks Dayle! I’m honored a baker as experienced as yourself learned something new in this post! I hope you love it as much as us!
Jessica says
Hi, Jen. Do you think your lovely lemon pound cake recipe could be turned into an orange pound cake where I would just replace the same amount of the lemon juice and zest with freshly squeezed orange juice and zest?
Jen says
Yes, I think that would be tasty!
Donna says
Will definitely be making this cake but really wanted to comment on how much I love your new website! Great feature adding the videos too so please keep including them also. It really helps having a recipe demonstrated!
Jen says
Thanks so much Donna, I’m so happy you’re loving the new design and the video! I have recipe videos for a few hundred of my recipes but they are at the top of the posts, so I’m slowly adding them to the bottom recipe card-one of these days it will be done ;).
Yvonne says
I baked this yesterday as a trial run before Easter and man oh man is it a keeper! The whole family loved it. It has the perfect balance of sweet and tart and is just as deliciously moist on Day 2 as it was yesterday. Thanks for a terrific recipe!
p.s.: The video was glitching every time I tried to see it on two different browsers. Not sure if others have had the same trouble? From what I could see it looked very helpful!
Jen says
YAY! Thanks for being the first to review this recipe Yvonne, I love hearing it was a hit! I’m sorry about the video glitching! It’s not glitching on my end so maybe it’s an internet speed issue? You can also try viewing it on Facebook but it’s a slightly shortened version: https://business.facebook.com/carlsbadcravings/videos/286240596199473/
Yvonne says
Thanks for sharing the FB link, that worked perfectly! I need to get tech support (aka hubby) to help troubleshoot the video viewing problem. The ad plays fine and then the content glitches. But I can watch Netflix, YouTube, etc without a problem so I didn’t think it could be a speed issue. I’m going to get to the bottom of this so I can watch your lovely videos!
Jen says
Oh good, I’m glad the FB link worked, but I’m sorry the other still isn’t working! Good luck troubleshooting!
Rhonda says
I made the lemon poke pound cake with gluten free flour. It turned out wonderful!
Jen says
Yay, I’m so happy to hear that! Thanks Rhonda!
Jen says
Which brand of gluten free flour did you use? Thanks!
Jen says
I use Bob’s Red Mill Gluten Free 1-to-1 Baking Flour. Enjoy!
Blanca says
Can I let this cool overnight and add the syrup the next day? If so, should I take it our of the pan the same night or should I leave in the pan until I add syrup?
Jen says
Hi Blanca, the syrup should be added while the cake is still warm so the that it soaks into the cake better – sorry!
Laurie says
Would I be able to use a tube pan to make this recipe rather than a Bundt pan? I am looking to make this into a birthday cake with a surface to write on. Thanks in advance!!!
Jen says
Absolutely! I would line the bottom of the tube pan with parchment paper to make sure it doesn’t stick.
Chtoya Zanella says
Just made this and letting it cool to eat it tomorrow for Thanksgiving. Should it stay in the pan while cooling?
Jen says
You’ll want to add the lemon butter syrup while it’s still in the pan and then remove it.
Step 3 under Lemon Butter Syrup: Let the cake cool for 15 minutes (no longer or the glaze can stick and harden like glue) then run a knife around the edges of the cake, shake a few times until loose then invert the cake onto a plate or cake stand. Take note that if you have extra glaze on the bottom of the cake, you should invert the cake onto a parchment paper lined plate otherwise it can stick to the plate when serving.
Sharon Wiseman says
This cake looks devine! Do you think I could bake it in my Pampered Chef stone bundt pan? I got rid of my non stick pan, but not sure if the syrup would stick in the stone. It is well seasoned already, so cakes normally come out with no issue.
Jen says
Hi Sharon! Thank you for your interest in this recipe! I would be worried about the syrup sticking as well. As long as it’s properly seasoned and prepped with butter/shortening and flour then I don’t foresee any issues. Lmk how it turns out!
Debi in Carlsbad says
Gluten-free home chef here. I’ve made Jen’s Kentucky Butter cake and many of her other recipes and LOVED every single one of them. However, my attempt at this particular cake was an utter disaster. I followed the recipe very carefully, EXCEPT that I subbed Bob’s Red Mill GLUTEN-FREE 1-1 Baking flour for regular flour, so maybe that was the problem. The batter over-flowed my pan a bit during baking, and the final result was too dense, gummy, grainy, and sickeningly sweet. None of my family could eat it, and everyone asked why I didn’t stick with the tried-and-true Kentucky Butter Cake that I usually make for holidays. So bummed. I think the Bob’s flour was the problem, and I’ll try again with King Arthur, although they’ve changed their formula and it’s not as good as it used to be.
Jen says
Hi Debi! I am so sorry to hear that the cake didn’t turn out for you! Since I do not use GF Flour I am not an expert on it but I found out that possible reasons it becomes gummy is that GF flours absorb moisture differently and can become oversaturated, leading to a dense, wet texture. To counter this issue: you can reduce the liquid (milk or the lemon juice) slightly in the recipe, or add a little more dry ingredients. I also heard that GF flours and starches need time to absorb liquid and fully hydrate, which reduces a gritty or gummy result. Let the batter rest for 20–30 minutes before baking to allow the flours to soften and the binders to activate. I hope that helps!