Your search for the best Pizza dough recipe stops here!
This easy Homemade Pizza Dough recipe is EVERYONE’s favorite – just read the reviews! It creates soft, FLAVORFUL pizza crust every time perfect for whatever type of pizza you’re making – and it’s easier than you think! I’ve included step by step photos of how to make pizza dough including how to make ahead and how to freeze. So, skip delivery because you will never want to sink your teeth into another pizza crust again!
PIN THIS RECIPE TO SAVE FOR LATER

What readers are saying about this Homemade Pizza Dough
“I’ve tried different recipes but I just must say that this one is it!!!!” Jinelle
“Hands down the best pizza crust.” – Hanisha
“I’ve made this multiple times and it’s always great. I make bread doughs often and this one is my go-to for pizza dough. -Megan
“Best pizza dough ever!!!! Restaurant style in my kitchen. Great taste and crispy.” – Cathy
Easy Pizza Dough Recipe
Just like nothing compares to homemade bread, nothing compares to homemade pizza dough – not when it’s this homemade pizza dough recipe. It’s thick, soft and chewy. It’s baked with olive oil and garlic salt for satisfying flavor every time – no bland pizza crust here!
Once you make this recipe, you will never want to waste your money on store-bought pizza dough again – and you will be strongly tempted to make your own pizza instead of going out whenever you get that pizza craving – because I guarantee this will satisfy your pizza cravings! It’s fabulous in any pizza like BBQ Chicken Pizza, Pulled Pork Pizza, and Philly Cheesesteak Pizza as well as Stromboli and even pizza pinwheels!
This recipe is also wonderful because you can refrigerate or freeze the dough! After you let the dough rise, you simply divide into balls, rise some more then store until ready to use. You can have homemade pizza dough at your fingertips at a seconds notice for an easy, fun dinner any night of the week!
I consider myself a cook first and a baker second because I love the creativity in cooking and spices – whereas in baking I feel like I’m not completely in control because there are actual chemical reactions that go on – eek!
For the longest time, anything with yeast intimidated me, until I actually tackled my first pizza dough recipe. I couldn’t believe how EASY and how DELICIOUS it was! So, if you have never made pizza dough before, PLEASE don’t be intimidated!
I’ve detailed the process to make the dough below with pictures and with more information than you need, so it’s a bit wordy, but that’s just to answer any questions you might have. TRUST me that it really is quick, easy, delicious and SO WORTH YOUR TIME!
Reasons to Love homemade Pizza Dough:
- No time spent in traffic or lines at store, no added cost of tipping.
- This recipe has no added preservatives or chemicals that can be found in some pre-made crusts.
- This pizza dough recipe has so much flavor you will not want to go back to frozen, basic recipes again.
- My favorite is you get EXACTLY the versions of pizza you want. You get to customize the toppings, make a heart with the olives, or try fun new ingredients at home with no risk!
- This pizza dough is so forgivable, you can ignore it, come back to it and dinner won’t be spoiled.
- If you like thinner crust, you can simply roll out the dough more and bake it on a baking sheet.
- Master this pizza dough recipe and a new world of bread sticks and flatbreads opens up to you!
Pizza Crust ingredients
The ingredients for this recipe are very simple. It contains only pantry friendly ingredients so it’s easy to make at a seconds notice without having to run to the grocery store! You will need:
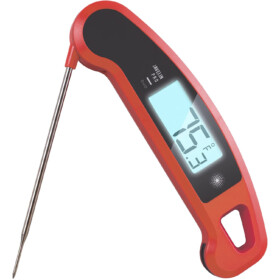
- Water: it must be the right temperature to activate the yeast. Too hot will kill it, too cold will not feed it. I use an instant-read thermometer; you can also use the baby bottle method and feel the water on the underside of your wrist.
- Yeast: active or instant (Rapid Rise) both work. Active yeast takes more time but is my preferred yeast. I go into more detail below.
- Sugar: AKA yeast food. Sugar increases the yeast’s activity! It also helps to tenderize the dough. Any sugar will do, you can even substitute honey, but I recommend granulated sugar.
- Salt: yummy flavor! Salt also attracts water which helps keep your leftover pizza tender and fresh.
- Olive oil: any oil can be used but use extra-virgin olive oil for the very best flavor. Don’t forget to brush the dough with olive oil before adding the toppings, which prevents the crust from getting soggy.
- Flour: basic flour found in every pantry; unbleached all- purpose flour. I will give a more detailed explanation on flour below.
- Cooking spray, parchment paper: no ruined, sticking crust for us!
- Garlic Salt: my secret ingredient you will LOVE!
- Cornmeal: I love this added taste and texture, used as a barrier between the crust and pan/stone to keep it from sticking.

WHAT KIND OF YEAST DO YOU USE FOR HOMEMADE PIZZA DOUGH?
There are two different types of yeast: active dry yeast must be activated before using by first dissolving in water; instant yeast is mixed right into the ingredients. I recommend active dry yeast for the best pizza dough recipe as I find it results in a chewier crust. If you are short on time, however, feel free to substitute with instant yeast.
- Active Dry Yeast: this yeast is the most common and probably what comes to mind when you think of yeast. It is sold in packets or small glass jars with a small, granular consistency. Active dry yeast requires being “activated” before you make your dough because it is a living organism that’s dormant until proofed. To activate, simply mix the yeast with warm water (about 110°F) and some sugar (food) and let it sit and ferment for about 10 minutes. Next, you’ll combine the bubbly mixture with your dry ingredients. Active dry yeast dough requires a longer time to rise than instant yeast – usually an hour or two.
- Instant Yeast (Rapid Rise Yeast, Fast Acting) : is just that, fast. There is no need to proof the yeast with warm water. When using fast acting yeast you just add it to the dry ingredients. You then add the warm water to the dry ingredients and mix until the dough comes together. There is little or no rise time with instant yeast, usually just let the dough rest for about 10 minutes before it rolling out.
- Can I Substitute Active Dry Yeast for Instant Yeast and Vice Versa? Yes, active dry and instant yeast can be used interchangeably in recipes (1:1), but don’t let your dough with instant yeast rise as long. For best results, use active dry yeast as it results in superior flavor, in a better rise and better volume in the finished product.
What is the best flour for pizza dough?
I rarely stock flours more exotic than all-purpose flour, so when I was working on this pizza dough recipe, I first and foremost made sure that it worked perfectly with good old all-purpose flour. After testing bread flour, wheat flour, etc., all purpose flour was still my CLEAR favorite! But the type of flour best for pizza dough depends on what type of crust you would like. Here is a breakdown:
- All purpose flour: will give you a chewier crust – my favorite! When we combine AP flour with the technique of placing the rolled out dough directly on the hot pizza stone/pan we get crispy on the bottom and soft and chewy in them middle.
- Bread flour: has more protein and therefore will yield a crispier crust but not as soft and chewy.
- Wheat flour: I don’t recommend all wheat flour or your pizza dough won’t rise as nicely. You can, however, use half wheat flour and half all-purpose flour to give it more wholesome taste. I would also add an extra tablespoon of sugar or honey with wheat flour.
- Gluten free flour: you can use gluten free 1:1 all-purpose baking flour like Bob’s Red Mill. Keep in mind that because there is no gluten, the rolling out process will be trickier, so pull and push the best you can.
Easy Pizza Dough Recipe variations
- Vegan pizza dough. This easy pizza dough recipe is naturally vegan so you can keep it that way with your choice of toppings.
- Thick-crust pizza dough. This recipe will make two thick crust pizzas for your enjoyment. For even thicker crust, roll out the dough smaller so the crust will be thicker. You will need to adjust baking time accordingly.
- Thin crust pizza dough. You get twice the fun by making two 12” crusts out of one ball of dough or you can use one ball and roll it out thinly on a baking sheet. You will need to adjust baking time accordingly, about 8-10 minutes.
- Individual pizzas. If it’s a party or you simply want individual pizzas for family night, you can divide the dough into 4, 6 or 8 pieces and roll out.
- Ingredients. Play around with the special ingredients to add fun flavors to the pizza dough. Try roasted garlic pieces in the crust, or some Italian seasoning. Sprinkle on some Parmesan cheese, etc.
- Not looking for pizza? Try breadsticks, stromboli, focaccia or cheesy rolls!
Tools needed for this Homemade Pizza Recipe
I’m sharing what I use for this recipe, but you can still be successful with this recipe without them – these tools just make success easier:
- Instant read thermometer: allows you to make sure the water is in that tight range of temperature needed to activate yeast. This way you know that if the yeast doesn’t activate then it’s not the water – it’s the yeast and you don’t waste your time trying to get the water right. It also gives you the peace of mind that once the water is in the right range, you’re guaranteed perfect pizza dough.
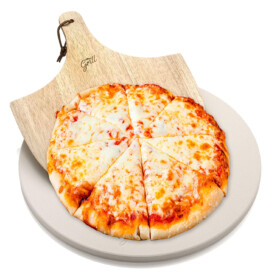
- I love my Pizza stone! There are many pizza stone options, find the right one for you – you can even find steals at TJ Maxx. I also like a pizza pan. I recommend using a vented one so that the crust cooks faster.
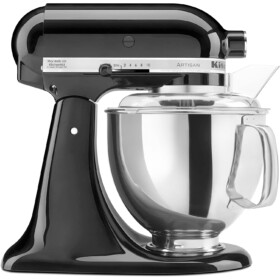
- Stand mixer: I use my stand mixer because it saves time, elbow grease and it keeps my hands from getting gooey – but it’s not 100% necessary – the dough will just take a few more minutes and elbow grease without one.
STONES OR PANS BEST FOR PIZZA DOUGH?
Let’s talk more about stones verses pans and which one is best for homemade pizza dough. Rachel Arndt conducted a test between sheet pans vs. stones. You can read the details here. In conclusion, I think if you buy high quality, it just comes down to personal preference – or nostalgia!
I love my pizza stone, so there is no going back for me. However, you can still get a perfectly crispy and tender pizza crust full of flavor with a pan. Make sure to use each item how it is intended to be used. It’s important that the crust cooks quickly and completely to avoid soggy, undercooked pizza.
- Pizza Stone: the crust begins cooking/searing immediately when the dough is placed on the hot stone which results in a beautify crispy crust. Preheat the stone in a hot oven for 30 to 60 minutes, grease (spray, or parchment paper) and dust with cornmeal. Be very careful when working with hot stone – I’ve got scars to prove it!
- Pizza Pan: a perforated pan is a must. Preheat the pan to so the pizza dough will cook as quickly as the toppings. Cook in the middle or bottom of the oven. There is delay with a pan vs stone, as the pan doesn’t heat as hot, but that obstacle is minimized with a perforated pizza pan.
How to make Homemade Pizza Dough
1. PROOF THE YEAST
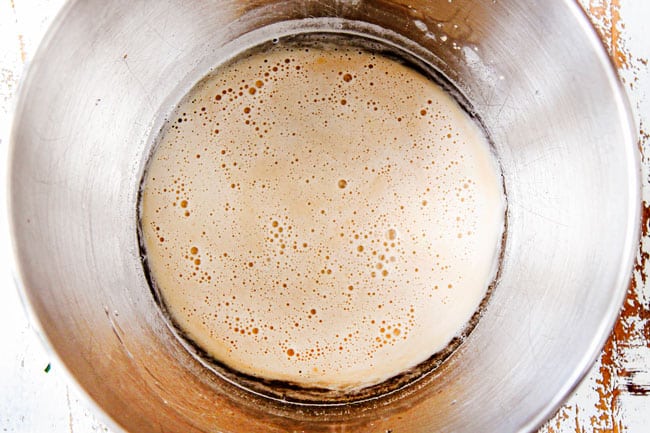
In a large mixing bowl or the bowl of your stand mixer (preferred), stir in the warm water, sugar and yeast. Let sit for 5-10 minutes or until the yeast is foamy and dissolved. If the yeast doesn’t foam, either your water was too warm, or your yeast is too old. Yeast should be no older than 6 months, and water should be around 105 degrees F. Repeat until your yeast foams like this (which can take up to 10 minutes):
2. MIX THE DOUGH
Add olive oil, salt, and 1 ½ cups flour and mix well with your hook attachment. If you don’t have a mixer, you can start to mix with a wooden spoon. Continue to mix while gradually stirring in 2 ¼ more cups of flour.
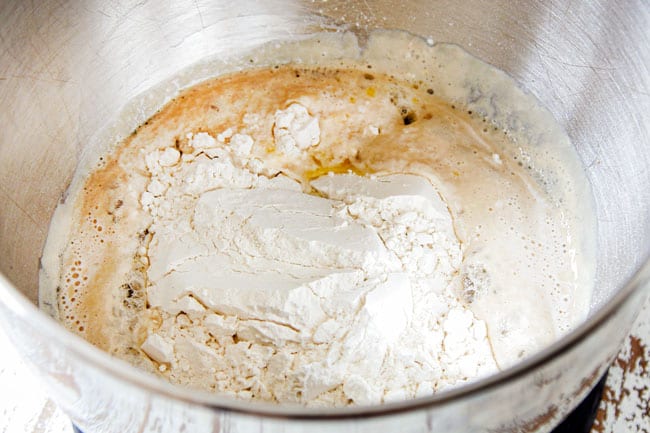
Once dough has pulled away from the bowl, continue to mix for 5 more minutes on medium-low speed (or by hand). You may need to place a hand on your mixer so it doesn’t fly off your counter!
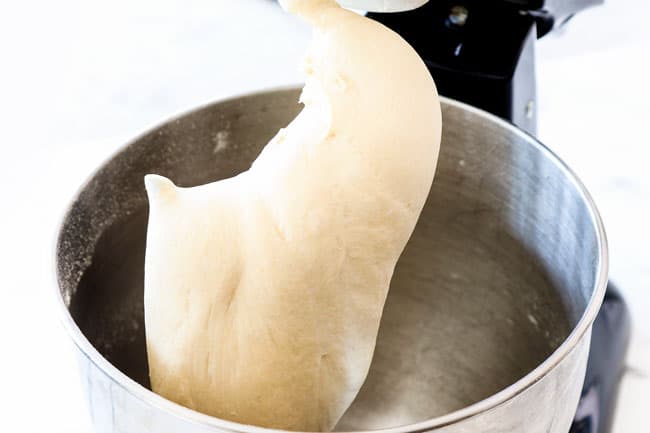
What if my dough is sticky? If your dough is too wet and is not pulling away from the bowl, add 1 more tablespoon of flour at a time (up to ¼ cup) until dough barely sticks to your fingers.
3. SHAPE DOUGH
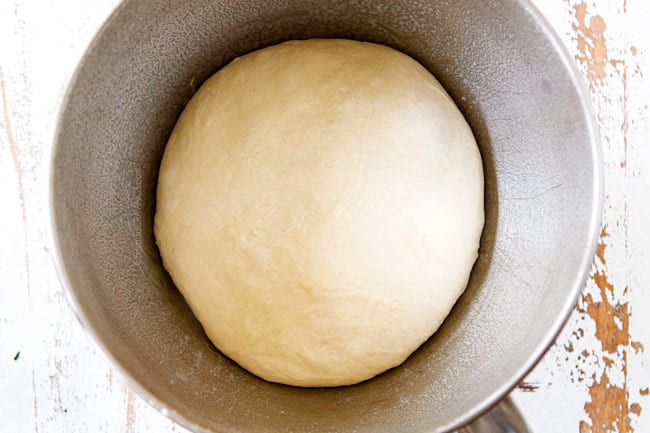
Shape the pizza dough into a ball and place back into your large mixing bowl that has been coated lightly with olive oil or nonstick cooking spray. Turn dough over to coat with oil on all sides.
4. LET DOUGH RISE
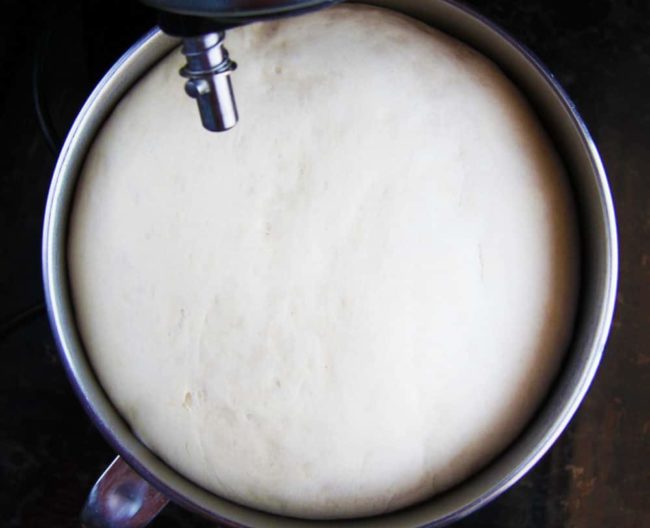
Cover dough tightly with plastic wrap and allow to rise in a warm environment (75-80F), until it has doubled in size. Depending on your yeast (active dry yeast takes longer than instant yeast), climate, etc. this will take between 1-2 hours.
5. WARM PIZZA STONE
Guestimating 15 minutes before your dough is ready, place your pizza stone or baking sheet in the middle rack of your oven set to 475 degrees F. You want to “bake” your stone for 30-60 minutes in order to get it nice and hot. It’s better for your pizza stone to be super hot vs. hot, so begin warming it sooner rather than later.
6. SHAPE INTO BALLS
After pizza dough has doubled in size, punch down to release the air. Then remove the dough from bowl, knead a couple times to further release the air.
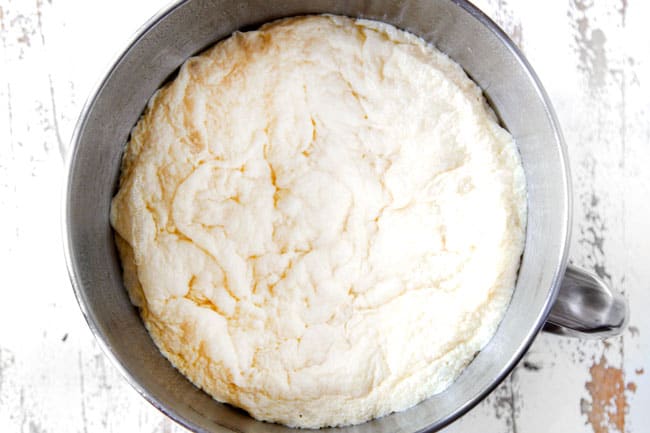
Divide into two equal balls for normal pizza crust or into three equal balls if making margherita pizza or for thin crust pizzas.
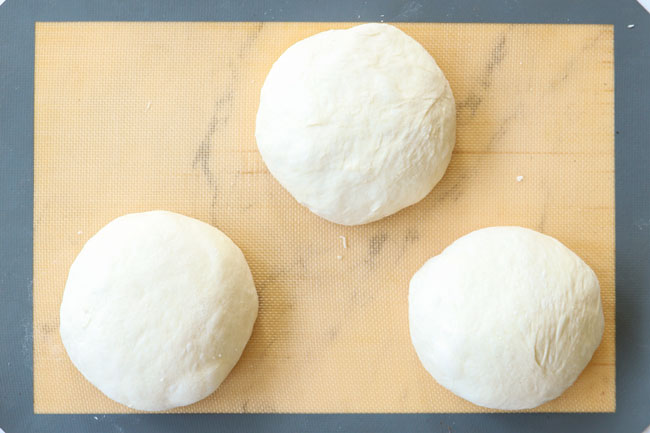
7. LET BALLS RISE
Cover the balls with plastic wrap followed by a towel for 15 minutes to allow them to rise further.
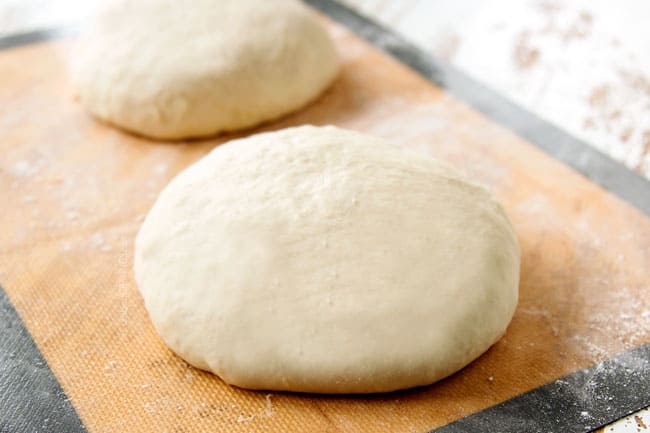
8. PREPARE PIZZA PEEL or PIZZA STONE
Carefully remove your pizza stone/baking sheet and GENEROUSLY grease the entire surface with olive oil or with nonstick cooking spray (I like to spray like crazy). Sprinkle with cornmeal for added flavor, texture and to prevent sticking.
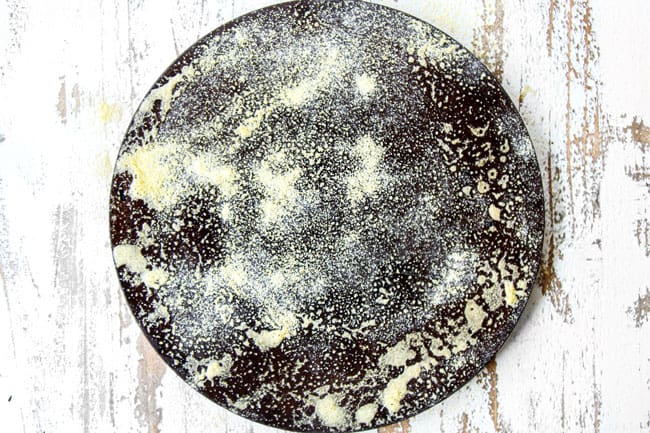
9. ROLL OUT PIZZA DOUGH
After 15 minutes, roll dough out onto a lightly floured surface or nonstick slip mat into a 12-inch round circle. Transfer pizza dough to your pizza peel, baking dish or pizza stone. I simply flip my nonslip mat over onto the stone and gently pull it away from the mat. Immediately after transferring, pinch edges to create a rimmed crust.
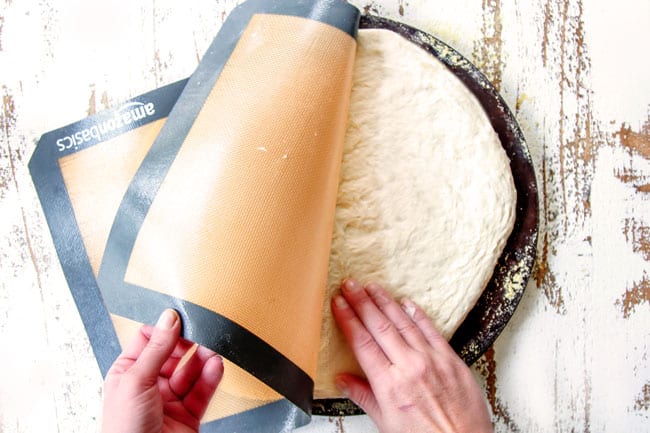
PRO TIP: Once your pizza dough is on your pan, try scooting the dough – if it slides easily you are good to go – if not, you need more nonstick cooking spray and cornmeal.
10. SEASON PIZZA DOUGH
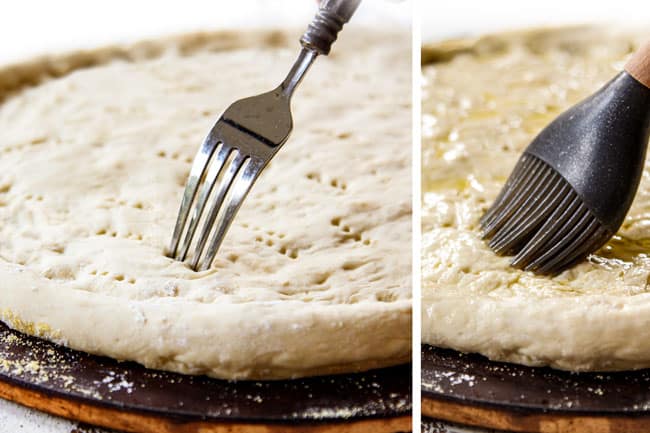
Lightly brush the top of the pizza dough with olive oil and sprinkle with garlic salt (don’t forget the edges!) This will add flavor and prevent the dough from getting soggy with the toppings.
Using a fork, prick several holes in the dough to prevent bubbling.
11. ADD TOPPINGS AND BAKE!
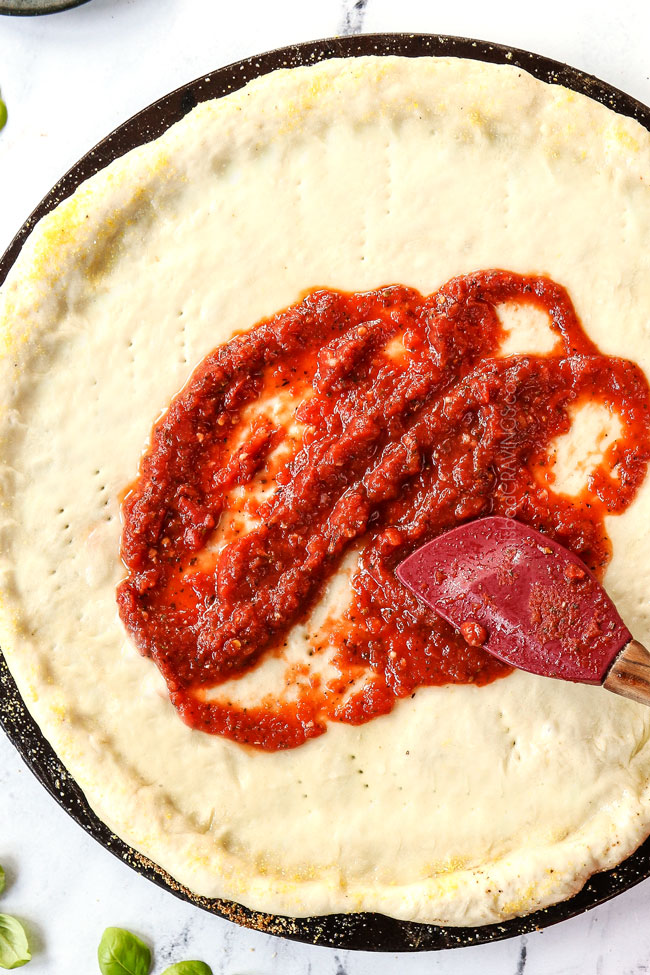
I highly recommend my homemade pizza sauce! It is “to die for” and only takes 5 minutes in your blender! Bake for 12-15 minutes for normal crust or 8-10 minutes for a thin crust with all your favorite toppings.
DO YOU HAVE TO BAKE PIZZA DOUGH BEFORE ADDING TOPPINGS?
No! Just think of Italian pizza kitchens and how they smear the pizza sauce right on the freshly hand-tossed dough. The olive oil we brush on the pizza dough will prevent it from becoming soggy. To assemble pizza:
- Brush rolled out dough lightly with olive oil and sprinkle with garlic salt
- Using a fork, prick several holes in the crust
- Spread pizza sauce directly onto unbaked pizza dough
- Sprinkle with desired amount of cheese
- Add toppings and more cheese if you wish
- Bake for 12 minutes at 475 degrees F
- Broil for 2 minutes or until cheese is golden
Tips for the best Pizza Crust
- Proof yeast: Make sure you proof your yeast. You don’t want to go through all the work of making pizza dough only to find it doesn’t rise!
- Use an instant read thermometer: to that end, an instant read thermometer allows you to make sure the water is in that tight range of temperature needed to activate yeast. This way you know that if the yeast doesn’t activate then it’s not the water – it’s the yeast.
- Use correct flour. I don’t recommend bleached flour. Stick with unbleached flour because it has a denser grain and will provide more structure.
- Add more flour. The amount of flour can vary depending on humidity and elevation, so add enough flour a little at a time so it is tacky but not sticky. Before you add more flout, keep in mind it will become less sticky the longer it is kneaded.
- Flour hands. When working with the dough, whether rolling, kneading or pinching the edges to form the crust, dip your hands in flour first to prevent them from sticking.
- Dough should be tacky not sticky. The dough is done kneading when it is tacky, meaning it’s soft but bounces back when pressed with your finger. If it’s sticky, meaning, your fingers are still covered in a fair bit of dough, knead on.
- Use active dry yeast. Allowing the pizza dough to rise slowly allows time for fermentation, which really develops flavor.
- Brush crust with olive oil. Don’t forget to brush the dough with extra virgin olive oil before adding the toppings because it prevents the crust from getting soggy.
- Use fabulous pizza sauce! I love my homemade pizza sauce recipe which takes minutes to make or you can use store bought marinara and add extra Italian seasoning and red pepper flakes.
- Use FRESHLY shredded cheese. Pre-shredded cheeses contain anti-clumping chemicals which prevent the cheese from melting as easily. More importantly, freshly grated tasted better!
- Don’t burn pizza. Watch the pizza carefully, especially once you start broiling. The pizza goes from almost done to too brown fairly quickly -so be careful!
- Let pizza rest. To avoid burning your mouth on lava hot sauce, let the finished pizza cool for at least 5-10 minutes before cutting and serving. You will taste the flavors better when pizza is cooled.
How to store Homemade Pizza Dough
CAN PIZZA DOUGH SIT OUT ALL DAY?
You can actually over-proof your pizza dough! I don’t recommend letting the dough sit out longer than 4 hours. You don’t want it to rise too much and cause over-fermentation and a super yeasty flavor.
CAN YOU REFRIGERATE HOMEMADE PIZZA DOUGH? (HOW TO MAKE AHEAD)
Absolutely! You will want to let the dough rise completely before refrigerating (through the 15 minute second rise), then tightly wrap dough balls in plastic wrap. Dough can stay in the refrigerator for up to 2 days. For best results, use pizza dough or freeze beyond that.
When ready to use, unwrap the dough and place it on floured surface or parchment paper. Let the dough come to room temperature before rolling out about 30-60 minutes.

CAN YOU FREEZE HOMEMADE PIZZA DOUGH?
Yes! This recipe makes two pizza crusts so you can either bake them both now or use one now and freeze one for later. You can also make the dough in bigger batches very easily so you can freeze more dough – which means more ready to eat pizza later!
You can freeze pizza dough as a ball or as a roll out, unbaked crust. In either scenario, dough can stay in freezer for up to 3 months.
- Dough balls: let the 2 balls of pizza dough rise completely (through the 15-minute second rise). Lightly spray all sides of the dough balls with nonstick spray, remember I love my spray! Place the dough into separate Ziploc bags, squeezing out any air.
- Flattened dough: separate flattened pizza dough with parchment paper, then stack. Cover tightly with two layers of plastic wrap followed by foil.
- To Thaw: when ready to use, thaw dough in the refrigerator for about 12 hours. Bring to room temperature by placing on counter, this should take about 30 min.
How to reheat Homemade Pizza
TO REHEAT PIZZA IN THE OVEN:
- Line a baking sheet with foil and preheat oven to 375 degrees F.
- Transfer pizza (slices) to the baking sheet and bake for 10 minutes or until heated through.
To reheat pizza on the stove:
- Add slices of pizza to skillet and cover partially with the lid.
- Heat over medium heat for 2-3 minutes until heated through.
To reheat pizza in the microwave:
- Microwave at 20 seconds intervals until heated through. Be aware that the crust will lose crunch in the microwave.
Pizza Dough FAQs
Pizza dough and regular dough, like bread dough, are made with similar ingredients, but have distinct differences based the ratio of ingredients and preparation.
Kneading: Pizza dough is generally kneaded less than regular dough so it’s more elastic and tender to create chewy dough. Regular dough, on the other hand, benefits from more extensive kneading to develop gluten and create a desirable structure. However, this can vary based on the desired outcome and recipe.
Fat and Sugar: While fat and sugar are sometimes added to regular dough recipes to enhance flavor and texture, pizza dough typically is a lean dough, made without eggs or butter. Without the extra fat to make the dough soft, you’re promised a crusty pizza crust.
Shaping: Pizza dough is typically shaped into a thin, round or rectangular shape, suitable for baking in a hot oven. Regular dough, on the other hand, can be shaped into various forms, such as loaves, rolls, or braided breads.
One key to making a fantastic pizza crust lies in ideal balance between a crispy exterior and a tender, chewy interior. This is achieved by by preheating your oven, with a pizza stone, to the high temperature of 475 degrees F.
Preheated stone: Using a preheated pizza stone immediately crisps up the bottom of the crust, as the intense heat transfers to the dough.
High temperature: Cooking the pizza crust at a high temperature ensures that the pizza cooks quickly, while keeping the crust interior soft and chewy, resulting in a professional-quality crust with well-developed flavor and texture.
Pizza should be baked at 475 degrees F. This high temperature promotes the highest rise from the dough, enhances the dough’s flavor, melts the cheese evenly, cooks the pizza toppings quickly, and most importantly, bakes the crust so it’s crispy on the outside, and chewy and tender on the inside.
Tools Used in This Recipe
See Favorite Tools
Perfect Pizza Crust
Save This Recipe To Your Recipe Box
You can now create an account on our site and save your favorite recipes all in one place!
Ingredients
- 1 1/2 cups warm water (105-110 degrees)
- 1 tablespoon active dry yeast
- 1 tablespoon sugar
- 1 teaspoon salt
- 1 tablespoon olive oil
- 3 1/2 cups unbleached all-purpose flour (plus more as needed)
- Olive oil/nonstick cooking spray
- Garlic salt
- cornmeal
Topping Ideas
- 6 ounces fresh mozzarella cheese (not packed in water) cut into 1/2-inch cubes or 1 cup freshly grated mozzarella
- 1/2 cup pizza sauce <–click link for recipe
Pizza Recipes Using this Dough
Instructions
- In a large mixing bowl or the bowl of your stand mixer (preferred), stir in water, sugar and yeast. Let sit 5-10 minutes or until the yeast is foamy and dissolved. Add olive oil, salt, and 1 ½ cups flour and mix until combined with your hook attachment (or with a wooden spoon if not using a mixer).
- Gradually mix in 2 more cups of flour until dough starts to pull away from the sides of the bowl. If your dough is too wet, add one tablespoon of flour at a time (up to ¼ cup, more humid areas will need more flour) until dough barely sticks to your fingers. Once dough has pulled away from the bowl, knead in mixer on medium-low speed or by hand for 5 minutes.
- Shape the dough into a ball and place back into your large mixing bowl that has been coated lightly with olive oil or nonstick cooking spray. Turn dough over to coat all sides. Cover tightly with plastic wrap and allow to rise until doubled in size, 1-2 hours.
- Guestimating 15 minutes before your dough is ready, preheat your pizza stone or baking sheet in middle rack of your oven for 30-60 minutes at 475 degrees F FOR NORMAL PIZZA CRUST or 550 degrees F FOR THIN CRUST/MARGHERITA PIZZA:
- After dough has doubled, remove from bowl and knead a couple times. FOR NORMAL PIZZA CRUST: Divide dough into two equal balls. FOR THIN CRUST/MARGHERITA PIZZA: Divide dough into three equal balls. Cover dough balls with plastic wrap followed by a towel for 15 minutes. You can freeze one of the balls at this point if desired.* Prep all of your pizza toppings while the dough rests so you can quickly assemble the pizza once the dough is added to the pizza stone/pan.
- After dough has been resting 15 minutes, roll each dough ball out onto a lightly floured nonstick mat or parchment paper into a 12-inch round circle; set aside.
- Carefully remove your pizza stone/baking pan from the oven. GENEROUSLY grease the entire surface of the pizza stone/baking pan with olive oil or with nonstick cooking spray. Sprinkle with cornmeal.
- Transfer pizza dough to your prepared pizza stone/baking sheet then pinch edges to create a rimmed crust (if you have trouble transferring, you can place your entire piece of parchment paper on your stone/baking sheet and bake directly on your parchment paper). Tip: if the dough slides easily you are good to go – if not, you need more nonstick cooking spray and cornmeal.
- Lightly brush the top of the crust with about 1 teaspoon olive oil and sprinkle with garlic salt. Using a fork, prick several holes in the crust. Add pizza sauce and desired toppings (see recipe if using).
- FOR NORMAL PIZZA CRUST: Bake assembled pizza for 12 minutes at 475 F degrees then broil for 2 minutes or until cheese is golden. FOR THIN CRUST/MARGHERITA PIZZA: Bake at 550 degrees F for 8-10 minutes or until cheese is bubbling and crust is golden.
Notes
How to Refrigerate pizza dough/Make Ahead
After the 2 balls of pizza dough have risen (Step 4), you can refrigerate 1 or both of the balls of dough.- Tightly wrap dough balls in plastic wrap.
- Refrigerate for up to 2 days. For best results, use pizza dough or freeze beyond that.
- When ready to use, unwrap the dough and place it on floured surface or parchment paper.
- Let the dough come to room temperature (about 30 minutes) before rolling out.
HOW TO FREEZE PIZZA DOUGH
After the 2 balls of pizza dough have risen (Step 4), you can freeze 1 or both of the balls of dough.- Lightly spray all sides of the dough balls with nonstick spray.
- Place the dough into separate ziploc bags, squeezing out any air.
- When ready to use, thaw dough in the refrigerator for about 12 hours.
- Bring to room temperature by placing on your counter for approximately 30 minutes.
- Preheat pizza stone/baking sheet as in Step 3, then skip to Step 5.
Tips and Tricks
- Proof yeast: Make sure you proof your yeast. You don’t want to go through all the work of making pizza dough only to find it doesn’t rise!
- Use an instant read thermometer: to that end, an instant read thermometer allows you to make sure the water is in that tight range of temperature needed to activate yeast. This way you know that if the yeast doesn’t activate then it’s not the water – it’s the yeast.
- Use correct flour. I don’t recommend bleached flour. Stick with unbleached flour because it has a denser grain and will provide more structure.
- Add more flour. The amount of flour can vary depending on humidity and elevation, so add enough flour a little at a time so it is tacky but not sticky. Before you add more flout, keep in mind it will become less sticky the longer it is kneaded.
- Flour hands. When working with the dough, whether rolling, kneading or pinching the edges to form the crust, dip your hands in flour first to prevent them from sticking.
- Dough should be tacky not sticky. The dough is done kneading when it is tacky, meaning it’s soft but bounces back when pressed with your finger. If it’s sticky, meaning, your fingers are still covered in a fair bit of dough, knead on.
- Use active dry yeast. Allowing the pizza dough to rise slowly allows time for fermentation, which really develops flavor.
- Brush crust with olive oil. Don’t forget to brush the dough with extra virgin olive oil before adding the toppings because it prevents the crust from getting soggy.
- Use fabulous pizza sauce! I like to use my own marinara or store-bought marinara with added Italian seasoning and red pepper flakes.
- Use FRESHLY shredded cheese. Pre-shredded cheeses contain anti-clumping chemicals which prevent the cheese from melting as easily. More importantly, freshly grated tasted better!
- Don’t burn pizza. Watch the pizza carefully, especially once you start broiling. The pizza goes from almost done to too brown fairly quickly -so be careful!
- Let pizza rest. To avoid burning your mouth on lava hot sauce, let the finished pizza cool for at least 5-10 minutes before cutting and serving. You will taste the flavors better when pizza is cooled.

Did You Make This Recipe?
Tag @CarlsbadCravings and Use #CarlsbadCravngs
Leave a Review, I Always Love Hearing From You!





April says
OK we NEED the recipe for the WHOLE pizza! It looks delish.
Jen says
Thanks so much April!! Just posted it 🙂
Kungphoo says
I love homemade pizza crust.. there is so much you can do with it..
Jen says
So true! Can’t wait to make calzones for my next “pizza” recipe!
Paula Parker says
Well illustrated post! The finished pizza looks so good. You have a lucky family!
Jen says
Thanks Paula! We do have lots of fun eating, and eating, and eating 🙂
Bola says
I am a sucker for pizza crust. I know- cut back on the carbs but I just can’t get enough of them sometimes.
I doubt that I will have the courage to make my own crust anytime soon so I will delight myself in your pizza crust pictures.
Jen says
I am happy you are able to delight yourself in my pictures – I guess its a win win if you are cutting back on carbs :)! I admire your will power!
Carol Hunt says
This one is very easy and fail proof, I now make it about once a week and we love it.
Jen says
That is awesome Carol, I am thrilled you love this recipe so much and take advantage of it every week! Thank you!
Meredith Elizabeth says
Ah, you have cystic fibrosis! I can’t imagine having two different organ transplants. You’re a survivor- girl! It’s a lovely thought that these recipes have gotten you through some tough times. I have a lot of cooking related memories too. Cook away- I enjoy your posts. Blessings to you~
Jen says
You are so sweet Meredith, thank you for sending blessings my way! I have been told I am a prettier version of Frankestein with body parts from 3 different people 🙂 I am so grateful for modern medicine! I am so happy you enjoy my posts, the feeling is mutual!
Ann Bacciaglia says
Making pizza dough is on my list of food to try making. Thank you for sharing.
Jen says
You are most welcome Ann! I am super excited for you to try this because I know you will love it! It will open up a whole new world of homemade pizza!
Danielle says
I love pizza and that pizza crust looks amazing.
Jen says
Thanks so much Danielle! I’m excited for you to try it!
Crystal @ Simply Playful Fare says
I think we may be pizza twins! I’ve made a recipe similar to this, and it tastes amazing. I love my Kitchnaid! And I couldn’t help but notice your marble rolling pin. Love!
Jen says
I like the sound of “pizza twins” 🙂 Isn’t homemade crust the best?! My rolling pin was a gift for my wedding way back in the day and I love it! Thanks Crystal!
Amy | Club Narwhal says
Jen, this looks fabulous! I love making pizza at home and can’t wait to try your crust. Great tutorial, too!
Jen says
Thanks so much Amy! Can I just say how much I love your blog name?! Makes me smile!
Alexis says
Alright..this makes me want to make pizza tonight!! I’ve never made pizza dough before actually, but your directions are very easy to follow. If I can master this, I’m sure pizza will be on the menu must more often.
Steve says
Hi this looks great. Any thoughts for converting this for my breadmaker(machine)?
Jen says
Hi Steve, I am so sorry but I am going to be of no help whatsoever as I have never used a breadmaker before – sorry!
Linda says
I can’t see why you couldn’t put your bread machine on the dough setting, and make as if you were making bread or rolls. Then just proceed with rolling it out and putting on a pan to bake. That’s how I will try it one of these days.
Jen says
Thanks Linda!
Platter Talk says
Thanks for dropping this fantastic recipe off for our Pizza Party! Can’t wait to try 🙂
Jen says
You are most welcome! Thanks for sharing! I am loving all the recipes on your page!
Sandra Strickland says
I just found this recipe! I’m super excited to try it! Thank you so much!
Kristin Porter says
I have been making home-made pizza for years, and this is by far the best recipe I have used. I previously used a recipe that included the same ingredients that you noted, but the ratios were a little different. I like to include a lot of cheese and other toppings on pizza (hey, I’m from Wisconsin, I like cheese!) and this dough is thick enough, but not too thick, to stand up to the toppings. Oh, and it’s also delicious! 🙂
Thanks so much for sharing!
-Kristin
Jen says
I am so flattered Kristin, thank you for making my day! I am so happy you loved the crust and I am glad it stands up with all your cheese – I like your style :)!
Emily says
This looks so yummy! Definitely pinning and sharing!
Jen says
Thank you so much Emily, I really appreciate it! Enjoy! Its a good one 🙂
Rylee's Mom says
As the Mom of a 5 year old son, Rylee, with CF, I just have to say, ‘ROCK ON, girl!!!!” 🙂
Thanks for sharing your recipes and passion for life!
Jen says
Ah, thanks so much Wendy! It has never been a more exciting time in CF history with the potential approval of ivacaftor and lumacafto next year – simply amazing! CF moms are my heroes – you are my hero! Thank you for all you do for your son. He has no idea now, but one day he will thank you!!!
melissa says
just wondering if youve ever made this in big batches?
Jen says
Hi Melissa, I haven’t made it in big batches before but I think it should work just fine. Let me know if you try it!
shan says
hi, im from barbados. searched high and low for a good pizza recipe. this 1 is perfect
Jen says
Hello all the way from Barbados! I am so happy you found my site and my pizza crust recipe! Thank you for letting me know you love it and happy pizza making :)!
Terrie says
Just found you (via Pinterest) and I’ve been making pizza crust for about 5 yrs now (I’m 24) from a VERY old (1950s) recipe book (was my MIL’s) it is very similar to yours minus the GARLIC!!! Now I know what mine has been missing! 😉
My hubby loves Philly ANYTHING I am looking forward to making your version for dinner soon!
-Thank you much for the post-
Jen says
You are so welcome Terrie! The garlic adds such a nice flavor, I think you will love it! and the Philly Pizza is one of my favs! Enjoy!
Jolly says
I have been in search of a good pizza dough recipe, this one was amazing!
Jen says
Thank you so much Jolly, I am so happy you enjoyed it!!!
~Nancy says
I’m so excited to find this recipe and I know two munchkins who will be beyond ecstatic!
One question though, is it safe to pile the pizza stone? I haven’t done so and have had issues of dough sticking to it.
~Nancy.
Jen says
Hi Nancy, welcome to my site! I hope I can answer your question but I am afraid I don’t quite understand – what do you mean by “pile the pizza stone?” Thanks!
~Nancy says
OMG, so embarrassing! I meant to type: is it safe to oil the pizza stone. I’ve never oiled mine and have had issues with the dough sticking from time to time.
Thanks for getting back to me!
Jen says
LOL! No worries! I actually googled “pile the pizza stone” because I was afraid I didn’t know the terminology you were talking about 🙂 It is definitely safe to oil a pizza stone – it will probably smoke more the first time you oil it but over time it will become seasoned with more grease so eventually you won’t need much or any grease (the more discolored the pizza stone the better). You can also use parchment paper to keep the crust from sticking instead of greasing. Enjoy!
norma o'keefe says
I made this dough tonight for dinner, and it was without a doubt the best pizza we have ever had. It will be a staple in our house for sure.
Jen says
YAY Norma! That makes me so happy! Homemade pizza is such a fun tradition and even better with a great crust 🙂 Thanks for letting me know it made it as a staple in your house!!
lina says
What am I doing wrong. My dough “rips” when I handle it. I can’t seem to get it right.
Jen says
Hi Lina, sorry for my delay in getting back to you! Dough usually rips/tears when the gluten isn’t developed enough or its too dry. To solve this, you can try adding less flour. Also, make sure your dough is resting long enough for the gluten to activate – both in the first rise and in the second. I hope this helps!!!
Allison says
Ahhh I don’t know what I’m doing wrong! My dough is STILL sticky after adding more and more flour! I can’t form it into a ball because it’s sticking all over my hands! Please help!
Jen says
Hi Allison, that is very odd! It should be a little sticky but not THAT sticky! I would suggest greasing your hands with nonstick cooking spray in order to handle the dough. This works wonders. Also, the amount of flour in the recipe should be adequate, but because you have tried with no success, I would suggest adding less water. The room temperature, the humidity, moisture content of the flour, etc. can all affect how much flour you need, but hopefully with less water, nonstick spray on your hands and kneading in flour until its the right consistency should work. Good luck, hope this helps!
Brooke says
Do you bake the pizza at 475?
Jen says
Hi Brooke, sorry for the confusion! Yes, bake the pizza at 475. Enjoy!
Brooke says
Thank you!! The pizza was amazing! My husband said it’s the best homemade pizza he has ever had. We loved it, and it was sooo easy! Thanks so much!
Jen says
YAY! so happy you both loved it! Thanks Brooke!
Cassie says
This crust is amazing! So tender and delicious and easy to make. Thank you for the perfect recipe.
Jen says
You are most welcome Cassie! Thank you for letting me know you love the crust! I hope you have many fun pizza nights ahead!
A.J says
What if I wanted to add pizza sauce. Would that ruin the crust in anyway?
Jen says
Hi AJ! Absolutely add pizza sauce! In the very last step when I say “add favorite toppings” – I should have specified that this means sauce too. I hope you enjoy!
marissa says
Could the unbleached all purpose flour be substituted with whole wheat flour?
Jen says
Hi Marissa! Yes, you can substitute the AP flour with wheat flour. Enjoy!
Vic says
I used the very same recipe for at least 20 years. A couple years ago I ran across the “Cooks Illustrated” recipe for pizza dough and have used it ever since. Try it if you like to experiment. I find it comes out much lighter with a beautiful bubbly crust. The biggest difference is it must be made a minimum of 24 hours ahead. Only 1/2 teaspoon of yeast is used, and it’s made with ice water and proofed in the refrigerator. I tell everyone about it. I think you’ll love the results.
Jen says
Hi Vic, thank you! I love to experiment so I am very excited to try this! Pizza night soon at my house 🙂
CJ says
Recipe sounds great. I know you said you can freeze it, but how long can you leave in your frig? If I make enough would like to have one in my frig for later in the week.
It’s amazing what we can do these days in surgical technology. Worked in surgery for many years, now retired, every donor case breaks your heart. Then we receive a letter from the American Donor that tells us where and how that person saved many lives. One donor saves many lives, it’s a wonderful gift you received.
Jen says
Hi CJ, great question! You can leave the dough in the coldest part of your fridge for up to 4 days. When ready to bake, let it rest at room temperature for 1 hour before baking.
Thank you for all your hours working in surgery! I cannot imagine the emotional rollercoaster. I am so grateful for modern medicine, miracles and people like you! THANK YOU so much for your countless hours dedicated to helping save lives!
Suzanne Oliver says
I made this dough today for a snow day project with my sons. We have tried many recipes since we got our pizza stone and they all kinda sucked, no flavor. As others have said, this was, without a doubt, the best pizza we have ever had. The crust was crispy on the bottom, but not stiff like some of the other (cardboard like) recipes we tried. They even ate the crust. 🙂 I put one of the dough balls in the fridge after the 15 minute rest and it seems to be getting bigger… should I punch it down and re-wrap or stick it in the freezer? I didn’t expect that. And THANK YOU!! THANK YOU!! THANK YOU!!
Jen says
Hi Suzanne, I am so happy everyone loved this dough – even enough to eat the crust – the highest compliment! If you are planning making the dough within 4 days, then you should punch it down before rolling it out. If you are freezing it, then I would freeze it as is in greased plastic wrap. hope this helps!
Tiffany wynia says
We make homemade pizza all the time. I use the bread machine to mix the dough. I put my yeast in the freezer. Will have to try this crust.
Jen says
I hope you love it Tiffany, especially if you make pizza all the time. Enjoy!
Jolanda says
This looks amazing! I’m fairly new to cooking, so I have a question for you! To use this recipe for Calzones, would I have to add any special steps so that the crust is good on both sides of the calzone? Thank you in advance!
Jen says
Hi Jolanda! To use this in calzones, no special steps needed! Just make sure your circles are about the thickness of a silver dollar and about 12 inches across before folding so they cook evenly. Enjoy!
Tiffaynay says
This pizza dough was AMAZING!!!
Jen says
Awesome! So happy you loved it Tiffany!!!
Noreen says
I made this dough today for the first time, actually I doubles the recipe because my 2 grandaughters alsway need their own ball to play with. This will definitely be my go to pizza dough, it was perfect. I preheated the pizza stone in oven, baked dough plain for 10 minutes then added sauce and cheese. thanks!
Jen says
YAY! Thrilled this will be your new “go to pizza dough” – that is the ultimate compliment. Thank you!
Stacey @ Stacey Homemaker says
This is the BEST pizza dough recipe I have tried yet. I’m so happy I found it! Every time I make it, I’m shocked how delicious it is. It makes 2 perfect pizzas EVERY TIME!!! Whenever I make it for someone else, they can’t believe I made it!!!
Jen says
I love your comments Stacey and I love that you love this pizza dough recipe! Thank you!
Kalise says
hi there!
i’ve never made pizza dough before, but going to attempt this weekend. for the final baking step, does it need to be baked before you put the toppings on? or you just put the sauce/topping right on top of the uncooked dough? just wanted to clarify. thank you!
Jen says
Hi Kalise! No need to bake the crust beforehand – simply add your sauce and toppings on the raw dough then bake for about 12 minutes. Hope this helps! Good luck and enjoy your first homemade pizza!!
Daina says
Amazing job!! I just crafted my own pizza for my sister and me and it tastes AWESOME! Totally using this again for future pizza-crafting events 🙂
Jen says
YAY! So happy your pizza crust turned out awesome – and what a nice sister you are :)!
julie says
hey jen!
i’ve been testing out different recipes for pizza crust to find my favorite- and i’m going to try yours next! I have a question about this recipe- do you think i can refrigerate it to keep it for a day or two, instead of freezing? or do you think i could do a long slow rise in the fridge instead of the first rise?
thanks so much for your lovely recipes!!
julie
Jen says
Hi Julie! I definitely think you can refrigerate it for two days instead of freezing – that might even work better than freezing. I hope you love this crust and your search will be over 🙂
Stephanie @DailyAppetite says
Made this crust for dinner tonight and it was perfect. I have to make pizza from scratch because of my kids allergies. This is the 3rd crust I have tried and it is the winner! Thanks so much for sharing this recipe. It is my now go-to pizza crust recipe!
Stephanie
Jen says
Awesome Stephanie! I am thrilled you found a winner in this recipe, yay! Thank you!!! I wish you lots of happy pizza making 🙂
Carissa Almanza says
I actually made the dough in my bread maker yesterday. After it was done in the bread maker I let it rise for a second time. I’ve been having horrible issues getting other recipes to work and this actually worked for me. I have one in the oven right now and my husband ate the other one from last night. It didn’t last long. Definitely a keeper!
Jen says
Awesome! I am so happy you had success with this recipe Carissa! I know how exciting it can be to find a recipe that actually “works”! I hope you enjoy many more pizzas to come 🙂
Angel says
that was too much water, but otherwise a good crust; still, a bit too hard (on the outside) for me, maybe a bit more of oil?
Jen says
Hi Angel, you can adjust the water next time so hopefully it can be perfect 🙂 as far as being too hard, maybe cook it for less time?
Jaclyn says
Beautiful recipe! Question…do you ever bake your crust prior to putting toppings on? I’ve made pizza in the past and popped it in the oven with toppings and all for recommended time, and the dough wasn’t finished in the center but the toppings were burning. My oven was only at 350 so I’ve been hesitant to try again. Thanks!
Jen says
Hi Jacclyn, with this recipe, I never bake my crust prior to the toppings and it works great every time. 🙂
Nicole says
OMGoodness just saw this post and your dough/pizza looks fantastic…Cant wait to try! Quick question, Can this be made with whole wheat flour? Sorry if thats been a previous question.
Nicole
Jen says
Hi Nicole, I have never made it with wheat flour but it should work just fine. Enjoy!
Peter says
Hi! You didn’t mention (or I’m blind 😉 how much olive oil to use in the pizza dough recipe. 🙁
Jen says
Hi Peter, it is on the 4th line – 1 tablespoon 🙂
Lori Johnson says
Can this recipe be made using a bread machine?
Jen says
Hi Lori! I have never tried it but I believe others have with success. Enjoy!
Gina says
I just made this. It’s fantastic! I must have spread it rather thin in the pizza pan because it came out very thin crust. I don’t normally care for this crust and I still loved this. The consistency is perfect. I can only imagine how great it’ll be when I make it so that the crust is a bit thicker. Thank you for sharing this excellent recipe. I may never order pizza again.
Jen says
Hi Gina, I was going to reply to your cornmeal question and then saw this so I am so happy it turned out and was such a hit! I hope you enjoy many homemade pizza nights from now on!
Nida Salman says
what quantityin gm or tbspoon of yeast is used in the recipe …as it says 1 package of yeast
Jen says
Hi Nida, it says one tablespoon yeast – hope that helps!
RaeAnna says
I have made this many times and my flour amount never turns out right, I need at least 4 cups and this time it was probably closer to 5 by the time I said screw it it’ll just have to be sticky! Anyone else have that issue? What’s the problem??
Jen says
Hi RaeAnna, sorry you are having problems with the amount of flour – I have never had this problem and haven’t had any comments to that point but maybe someone will chime in. Sorry I can’t be of more help!
Jamie says
I use this recipe all the time for pizza crust. It always cones out sticky for me even though I add more flour than called for. That being said, it still always comes out yummy. I’m sure it’s sticky for me due to humidity, cause sometimes I only need to add a little bit of extra flour and sometimes a lot.
After reading through the comments I’m going to try 1/4 cup less water to see if it helps and tweak from there. But like I said, either way, this recipe always tastes yummy.
Emily says
First off, my family loves this pizza crust! For years I’ve been trying to find one that everybody will eat (hubby likes thick and chewy, I like thinner, kids have no opinion). This one hit the mark! As such I make it multiple times a month and everybody is happy every time!
In fact,I discovered today that the crust is so well loved that my toddler had pushed her chair over to the mixer while I was kneading the dough (by hand) and was eating the leftovers on the dough hook!
So thank you for the awesome pizza! It’s the best of both worlds!
Jen says
Hi Emily, that is awesome! I love hearing everyone loves this crust and that you make it multiple times a month – yay! The visual of your toddler pushing her chair over to eat leftovers is adorable! Thank you, thank you!
Lissette says
Carl, I must thank you for this recipe! I have been using this sole pizza dough recipe for about 8 months now, at leat twice a month. Yes, I know your name is not carl, it’s Jen. But I must admit the first few times I used this recipe I truly thought the author was a male named Carl. There is something sexy and risqué in a recipe that a man has created. I am from New York, THE place to have the best pizza. So….. homemade pizza can be a joke knowing the best pizza is just a few blocks away. But I must say Jen, this is by far the closest I’ll ever get to pizzeria dough at home. It’s quick, it’s cheap and soooo delish. I have used this recipe for pizza, stromboli and focaccia. I have tried various ways in letting rise and the winner goes to an oven pre heated to 200° then turned off. It rises in about 30 minutes. It’s amazing……. thank you for this recipe.
Jen says
LOL! When I first started reading your comment, I thought you had the wrong blog! I have seen my blog listed as “Carl’s Bad Cravings” on several sites which makes me laugh but honestly is a much more creative name 🙂 Anyway, THANK YOU for your comment! I am so honored this is the best pizza dough recipe you’ve found and that you make it so often – that makes my heart happy! Thank you also for your preheated oven rising tip – I definitely need to add that to the recipe – can’t beat 30 minute rising time! Thanks again Lissette!
Jen says
Hi Jen,
I have tried several different pizza cough recipes and I’ve never had a great result. But I tried your recipe this last weekend and I am happy to say the pizza turned out so good on Saturday night that I made a second pizza for lunch on Sunday. This is definitely a recipe I will try again. Thank you for sharing.
For anyone that is curious, I made the full recipe as stated in the post. I used half of the dough to make a large pizza on Saturday night. The second half went into a plastic bag and into the refrigerator. I pulled the bag out of my fridge and let the dough come to room temperature before stretching it out to make the second large pizza. ( I stretched the dough out by hand instead of rolling it out. )
Jen says
You are so welcome Jen, I’m so happy it was a winner and thank you also for sharing your tips on saving the dough! Super helpful!
Lisam says
Love this pizza recipe. It’s a great hit at home. But I always end up having to add more flour than 3 1/2 cups all purpose flour, even when I add up to a 1/4 cup, it still seems too wet and needs more flour.
What would you suggest or is it okay for the dough to be still tacky and sticking to my hands?
Jen says
I am so glad this recipe is a hit! The amount of flour can vary depending on humidity and elevation, so I would just add enough so it doesn’t stick to your hands – hopefully you can find the magic amount!
Fatima says
I just finished my first slice of pizza using your crust. I was worried top say the least because I’ve had little luck with homemade pizza but you were right! Your crust is THE BEST crust. it was just like pizza hut! It was both tasty and beautiful thank you so much I can’t wait to share this with the rest of my family!
Jen says
Awesome Fatima, I am thrilled you finally found a crust that works for you! Thank you so much for taking the time to comment!
Shalonda says
This recipe is the best that I found for homemade pizza crust. Not only does the pizza crust taste good it also looks good. The best homemade pizza I have made using your recipe.Thank you for sharing this recipe!
Jen says
I am so happy to hear that Shalonda, homemade pizza is the best! – Thank you!
Rosie says
Wow! This is an amazing recipe ! I’m a fisrt time pizza dough maker and i can’t belive how good it cane out. I was a little scared that i was doing it wrong cause my dough was too stick compared to your pictures but i kept at it and wooow! I was also scared that there wasnt enough dough for two pizzas so i jut made one . It made the best deepdish pizza ive ever haf !
You’re inseuctions and pictures were very helpful !
Thanks so much for the recipe, my two year olds are very thankfull too!
Jen says
Hi Rosie, baking is intimidating as it is, I know pizza sounds even scarier! I’m so glad you and your kids tried it out though and LOVED it. I hope you continue to find recipes you and the kids will love!
judi says
after frezzing the dough how long does it take to thaw and do you let it rise again
Jen says
Hi Judi, when ready to use, thaw dough in the refrigerator for about 12 hours then bring to room temperature by placing on your counter for approximately 30 minutes. Preheat pizza stone/baking sheet as in Step 3, then skip to Step 5. enjoy!
shifu says
Hello dear. .
Planning on trying this out.. and would like to know if this works fine in an airfryer. . I recently purchased one and im looking for recipes to try in my airfryer. . Would love to try this in the airfryer if possible. .. do let me know about the time and temperature settings please…
Shifu..
Jen says
I’m sorry I don’t have an air fryer so I can’t help you out. Sorry!
Traci says
I just made this crust tonight. We’re having taco pizza. I have to bake it longer than the 12 minutes because it’s not done yet, but I’m hoping a few more minutes will do the trick and the center won’t be doughy. I’ll update after trying it. Can’t wait!
Traci says
Alright, I tried my taco pizza. It’s good. I figured out my error in baking. I forgot to poke holes in the dough. I am making the second crust tomorrow and will remember to do that. Thank you for sharing this recipe.
Jen says
You are so welcome! I’m so happy you enjoyed it and figured out the holes! Its amazing what a difference a simple step can make!
Lauren says
I had to make pizzas for my daughter for school today. Came across this recipe on Pinterest. This is a FABULOUS recipe. This was my first time making pizza crust and it came out perfect! I will definitely be making pizza dough again. Thanks!!
Jen says
Thank you so much for your awesome comment Lauren! I am thrilled your first attempt with pizza dough was a huge success! I hope there are lots of homemade pizza nights in your future 🙂
Jasmine says
Hello , will it work if i put the bread in an air fryer?
Jen says
Hi Jasmine, I’m sorry but I don’t have any experience with air fryers.
Celeste says
I love this recipe. I’ve been using it for a few years and have shared it w/friends. My family loves this crust
Jen says
Thank you so much Celeste, I love hearing that!
Jinelle says
OMG! I’ve tried different recipes but I just must say that this one is it!!!! I just made one and added shredded mozzarella, fried some shrimp half way and baked on parchment paper. It came out PERFECT! My daughter is on her third slice! Thanks for a great recipe!!
Jen says
WAHOO! I’m so pleased you finally found the perfect pizza dough recipe! And I love the sound of your pizza with fried shrimp – mmmm!
Meg says
Do you have the nutritional breakdown for the pizza dough? We love this recipe!
Jen says
Hi Meg, I’m so pleased you love this recipe! You can calculate info at: https://www.myfitnesspal.com/recipe/calculator
Sue says
I love this recipe. The crust is so delicious. I keep making this recipe anytime I bake my own pizza. Thank you for sharing.
Jen says
You’re so welcome Sue, I love hearing it’s on repeat!
Sue says
Could I use regular bleached flour?
Jen says
Hi Sue, I recommend unbleached flour because it has a denser grain and will provide more structure.
jessica says
Could I let the dough rise for longer than two hours?
Jen says
Hi Jessica, you could let it rise for up to 4 hours, but you would have to watch it. You don’t want it to rise too much to prevent over-fermentation and a super yeasty flavor.
Brenda says
I just made your pizza dough today.It is wonderful.I have been trying recipes for years,trying to get one I liked.The instructions were very good & easy to follow.Thank you so much for sharing.
Jen says
You are so welcome Brenda! I’m so pleased you finally found a winning pizza dough recipe! Thank you!
Jen says
Hi Eilene, if every recipe you make is still “sticky” it might be because you aren’t kneading it long enough. I would try kneading longer and see if that helps.
Rachel says
Thanks for this Amazing pizza dough I recommend!! My husband and I made this recipe and we were glad it turned out. We are new at making pizza dough.
Jen says
You’re so welcome Rachel! I’m so pleased you found and love this pizza dough recipe! Now the possibilities of pizza are endless!
Carol says
This pizza dough was excellent. Easy to make and light with a bit of a crispy edge. I did use about half whole wheat flour and it substituted great.
Jen says
Thanks so much Carol, I’m so happy you enjoyed it and that it worked great with half whole wheat flour!
Hanisha says
Hands down the best pizza crust. I have tried other recipes before and this is the first time me and my husband have been both happy how it turned out. I have the other half of the dough in the fridge and can’t wait to make it again. I did half half a teaspoon of Italian seasoning in the dough and it was delicious!
Do you recommend letting the dough rise in the fridge? And if so, for how long? Thank you!
Jen says
YAY! Thank you so much Hanisha, I’m thrilled both you and your husband loved this pizza dough! I would let the dough rise and then refrigerate (see instructions below post).
Megan says
I’ve made this multiple times and it’s always great. I make bread doughs often and this one is my go to for pizza dough.
Jen says
Thank you so much Megan! I’m honored this is your go-to pizza dough recipe!
Cori says
You mentioned that bread flour will yield a crispier crust. Can I swap bread flour instead of the unbleached? Thanks and can’t wait to try!
Jen says
Hi Cori, yes if you prefer a crispier crust go for it!
Cathy says
Best pizza dough ever!!!! Restaurant style in my kitchen. Great taste and crispy.
Jen says
Thank you so much for taking the time to comment Cathy, I’m so pleased it was a winner!
Rebecca Casey says
Could you make the dough in a food processor?
Jen says
Hi Rebecca, I haven’t personally tried it but yes you definitely can. enjoy!
Shalon says
This is the best pizza dough ever! Doubled it for family pizza night, and ended up using the second batch a couple of days later for calzones — which turned out AMAZING. I filled with your marinara sauce, then a layer of provolone, then pepperoni, mozzarella, and any veggies people wanted. Then folded them over, brushed with melted butter, and sprinkled with your garlic breadstick seasoning. Baked at 425 for 15 minutes, and they were PERFECTION. So, so good. Thank you for another new go-to!
Jen says
Thank you Shalon! I’m thrilled you love this pizza dough and your calzones sound AMAZING! It’s been a while sine I’ve made calzones but you’ve definitely inspired me – you’ll probably be seeing a calzone recipe on here really soon thanks to you!
Susan says
Was really good very happy with the recipe. It’s a keeper
Jen says
Thanks so much Susan!
Lesley says
Best ever! Thank you
Jen says
Thank you so much Lesley!
Vivian says
If I use “00” pizza flour are there any adjustments in volume to be considered?
Jen says
It’s generally fine to substitute all-purpose flour for “00” flour, but it can absorb water differently, so you may need a little more or a little less water.
Kaylin says
I am looking to make this on the grill. Any different things I need to do to make sure it still turns out good? Very excited to try it!
Jen says
Fun! The dough is all ready to go but you’ll want to follow the right technique as outlined in this recipe: https://www.simplyrecipes.com/recipes/how_to_grill_pizza/
Olga says
Thank you Jen for yet another wonderful recipe!!! I’ve had great results on both a pizza stone as well as an OXO pizza pan. I find that the pan still gives a lovely crispy crust but is a bit more convenient to use. I just dust it with cornmeal (no need to grease the pan). Sometimes I seem to need a little less flour, maybe closer to 3.5 cups, so I just add it slowly after 3 cups and see what the dough does. The sprinkling of garlic salt is such a nice touch that definitely takes the flavor next level!
Jen says
Thanks so much Olga, I’m so pleased this pizza dough has been a hit! It sounds like you are enjoying lots of pizza nights at your house -yum! And thanks for the info on the pizza pan, glad to hear that works equally well!
Beth says
Excellent pizza dough!! I’ve been using pioneer woman’s recipe for YEARS but recently started experimenting with others on the grill. I made 2 large pizzas and froze the third ball. I cooked one around 475 for 10 minutes on a baking stone in the grill and the other in the oven on a preheated baking sheet at 500 for 10 minutes. The grill was our favorite, but both were good. Will make again!
Jen says
Thanks for taking the time to comment Beth, I’m so pleased this pizza dough recipe was a hit!
angela says
How much water and sugar is needed in proofing the yeast?
Jen says
Hi Angela, it’s in the recipe:
1 1/2 cups warm water (105-110 degrees)
1 tablespoon active dry yeast
1 tablespoon sugar
Laura says
I am wondering if you have tried making this with gluten free 1:1 flour? If so, which brand? They are not all created equally!
Jen says
Hi Laura, I personally have not but in other recipes I have had the most success with Bob’s Red Mill Gluten Free 1 to 1 Baking Flour.
Midge says
Fantastic recipe!! End of story! The search is over!
Jen says
Awesome, thanks so much Midge!
Jeff N. says
So I made this crust for a chicken bacon ranch pizza and it turned out great. I only had to add a cup and a half of flour af/er the first cup. thanks for the recipe.
Jen says
Awesome, so glad you loved it!
Marilyn Carwins says
I made the pizza dough. It is by far one of the best pizza dough recipes I have tried. It as easy to make, as well. The dough was very flavorful, I could eat without the toppings. However my toppings were spicy marinara, pesto, thinly sliced red onions, peppered salami and mozzarella cheese.
Jen says
Thanks so much Marilyn, I’m so pleased you loved it so much! And your pizza sounds incredible, love those toppings!
midge says
Can this recipe be doubled??
Jen says
Yes!
Charlie H. says
I have made hundreds of pizza pies over the years. I read this recipe and tutorial and I completely agree with all of it. Nice job!
Jen says
Thank you so much Charlie, I’m excited for you to try it!
Brandy says
I have made this crust 3 times and will make it today, too. It’s perfect. All three of my kids used to complain about homemade pizza night but now they say it’s better than ordering out. I double the recipe so that everyone can make a personal pizza with their choice of toppings.
Jen says
That is the ultimate compliment Brandy, thank you! Your kids have great taste 😉
Erica says
Ok, so my mother in law made homemade pizza every Friday night for years and years. Once we moved away from them I took on the tradition of making homemade pizza every Friday night using her recipe. I’ve been doing this for about 10 years. We were happy with the pizza and every one that happened to be over for pizza night enjoyed it too. Since I’m basically obsessed with your recipes I thought I would give your pizza dough (and sauce!) a try.
Well, sorry MIL there is a new pizza dough and sauce in town and it’s here to stay! Your pizza dough and sauce are really really good and I know my MIL will forgive me once she tries it, haha. (J/k she is a great woman and will be happy for the improvement). Now I need is to finally invest in some pizza stones to bring it over the top.
Jen says
Thank you so much, Erica – WOW! I am thrilled that it did not disappoint! Thank you for taking the time to leave such an awesome review!