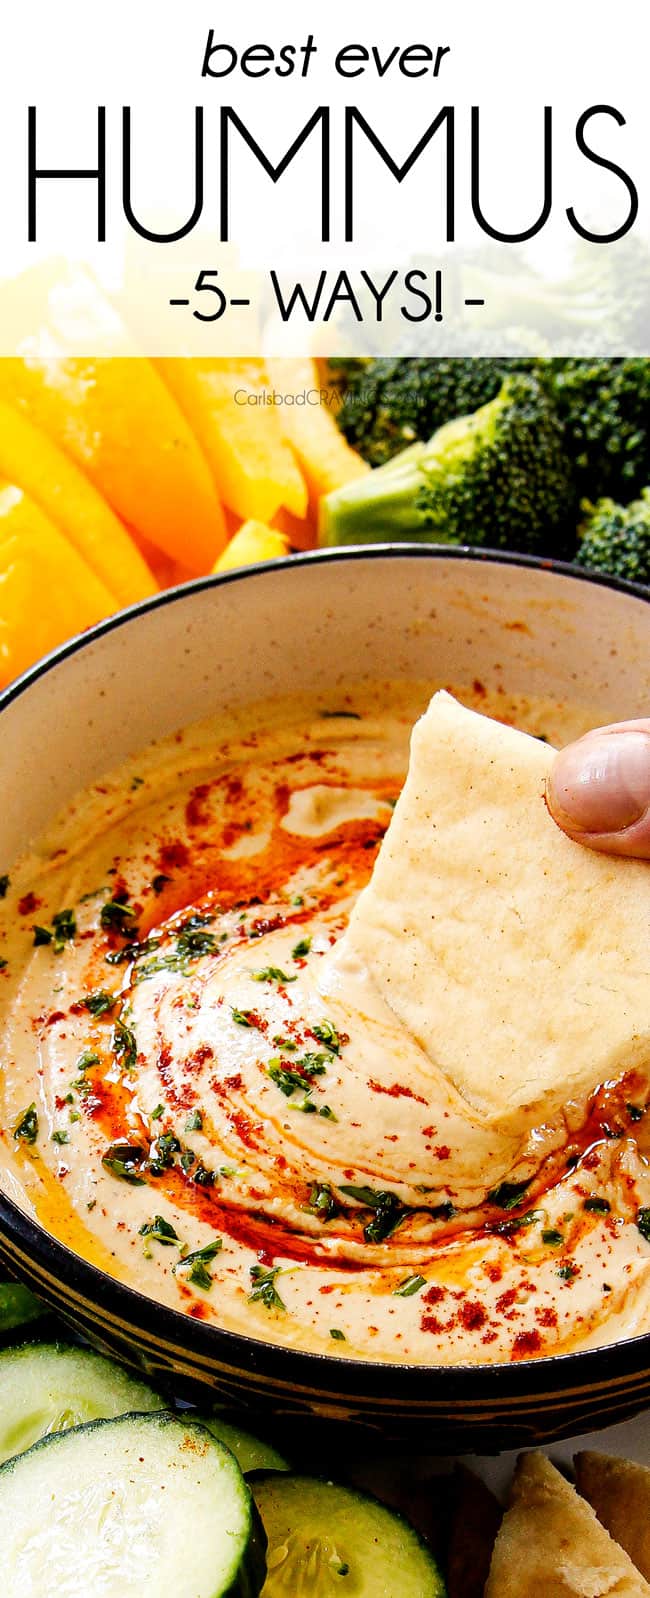
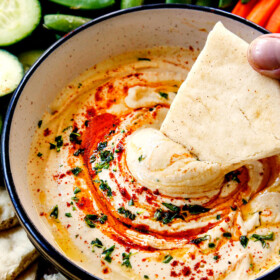
Learn how to make hummus that’s better than store-bought and utterly addicting!
This hummus recipe is silky smooth, divinely creamy yet somehow light and fluffy. It’s nutty, tangy, bright, garlicky, mega fresh and SO flavorful, plus it’s healthy, vegan and loaded with protein! I honestly think it’s the best hummus recipe out there due to a few simple tips and tricks to create the smoothest, creamiest hummus. Plus, it’s super simple. All you need is a can of chickpeas, some tahini, olive oil, lemon juice, garlic and a food processor. I’ve also included 5 other hummus recipe variations – because one hummus recipe is never enough. Enjoy your homemade hummus with pitas, crunchy veggies or slather it on sandwiches or wraps. Now, get ready for the best, utterly creamy hummus of your life!
PIN THIS RECIPE TO SAVE FOR LATER

Are you ready for the Best Homemade Hummus?
Oh hummus, how do I love thee? Let me count the ways….
What can’t you imagine your life without? Coffee? Diet Coke? Chocolate? For me, it’s hummus and tzatziki. I absolutely love hummus and am always dunking my veggies in hummus, slathering wraps with hummus or adding it to grain bowls.
In the past, I would always keep my fridge stocked with various tubs of hummus until I learned just how easy it is to make homemade hummus – and how much better it tastes. It’s not only uber fresh, lusciously smooth with a bright lemony garlic blend, but it’s made with just a handful of pantry friendly ingredients. This means you can make homemade hummus any time for the creamiest snack, or as a last-minute dip for movie night, backyard barbecues, parties or potlucks. Everyone will be raving about the recipe and wondering your secret to the creamiest every homemade hummus.
So, what is the secret to the tastiest, creamiest hummus recipe? After scouring the internet, reading all sorts of theories and claims and conducting my own experimenting and taste test after taste test, I’ve come up with a clear winner: boiling chickpeas (canned or dried) until their skins are popping off and they’re practically mushy then blending for a full four minutes.
To arrive at this conclusion, I put several popular theories to the test from peeling individual chickpeas to using chickpeas straight out of the can, to Solmonov’s famous method of soaking dried chickpeas overnight and then boiling them in baking soda, to using canned chickpeas and boiling them with baking soda for 20 minutes, to overcooking chickpeas without the baking soda.
You would think peeling the chickpeas or boiling the chickpeas to a mush would produce promising results, but the hummus was dense and grainy. The only methods that blended into a silky, creamy, light, whipped texture were: 1) soaking dried chickpeas and boiling with baking soda and 2) boiling canned chickpeas with baking soda for 20 minutes.
The baking soda breaks down and softens the texture of the chickpeas so they are ready to blend into the silkiest hummus on the planet. The two methods were both SO unbelievably creamy and, in all honesty, practically indistinguishable from each other. So, in my opinion, it’s not worth using dried chickpeas for the best homemade hummus recipe.
Now that the hummus was ready to blend, I discovered that processing them for a full 4 minutes was another game changer. Two batches of hummus can be prepared exactly the same way and the one processed for longer will win every time.
Armed with this knowledge, I set off to tackle other theories such using ice verses ice water, adding tahini first or with the chickpeas and of course, the quantities of ingredients. My results are in this hummus recipe. I hope you love it as much as we do!
You can read on or use the “jump to recipe” button at the top of the post to skip to the hummus recipe.

What is hummus?
I’m sure you’re familiar with hummus from your favorite Mediterranean or Middle Eastern restaurant or the rows of options lining your grocery store shelf. But what exactly is hummus?
Hummus is the quintessential Middle Eastern dip or spread popular in Turkish, Lebanese, Syrian, and Egyptian cuisine, among others such as Greek. It is made by blending chickpeas (garbanzo beans), tahini (sesame paste), lemon juice, olive oil, garlic and salt. It is appropriately named as hummus, also known as humus, houmous, hommus, or hommos, is Arabic for chickpea.
Chickpeas are a legume packed with folic acid, dietary fiber, and protein. They are sweet and nutty and become luxuriously creamy when blended in a food processor. Tahini is a rich, nutty, slightly bitter paste made from sesame seeds and adds another depth of creamy flavor. Bright lemon juice balances out the rich nuttiness and garlic adds the requisite aromatic punch.
Hummus can be made with just these simple ingredients or there are thousands of variations (see hummus recipe variation section) – you can add almost anything to hummus! The hummus company Sabra boasts over 14 different hummus flavors alone. Different countries and regions claim their own spin on hummus with different staple ingredients such as cumin or sumac.
Hummus is traditionally served cold as a dip for pitas or veggies, as a spread for wraps or sandwiches or in grain bowls or salads. Once you learn how to make your own homemade hummus, you will be adding it to everything!

Origins of Hummus
Hummus is likely as old as its main ingredient, the chickpea, dating back more than 10,000 years to Turkey. The exact origin of hummus is difficult to pinpoint, however, as most Middle Eastern countries from Turkey to Lebanon, to Syria to Israel claim its origin, even earning the phase, “hummus wars.” Hummus expert Rosenfeld said, “Hummus is a Middle Eastern food claimed by all and owned by none.”
We do know that the first recorded recipe for hummus appeared in a 13th century Egyptian cookbook, but it was likely a common staple for centuries before that. American food historian Charles Perry explains he believes Damascus, Syria, to be the most likely candidate as the originator of hummus. He states, “Historically, Egypt has been more likely to adopt Syrian dishes than vice versa.”
He further explains Damascus was a sophisticated city with a powerful ruling class: “The practice of whipping hummus up against the wall of the bowl indicates a sophisticated urban product, not an ancient folk dish.”
In conclusion, although cultural appropriation is an important issue, when it comes to hummus, we will likely never know its true origin. One thing we can all agree on, however, is hummus is DELICIOUS!

Best Hummus ingredients
If you have never made homemade hummus before, you might be surprised how few ingredients it requires. Most of the ingredients can be found in your pantry right now, and if not, they are easy to stock which makes hummus the perfect last-minute dip for potlucks, backyard barbecues, game day or just a family snack. You will need:
FRESH CHICKPEAS VS CANNED CHICKPEAS
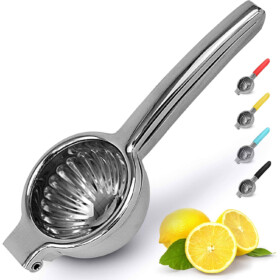
You can use canned or dried chickpeas for this hummus recipe. For canned chickpeas, you’ll rinse, drain, then simmer for 20 minutes to soften; for dried chickpeas, you’ll soak, then cook on the stove, in the oven, in the slow cooker or pressure cooker. Making your own chickpeas can be short-cutted by combing the rapid-soak method (60 minutes +) and cooking in the pressure cooker (30 minutes) , but even then, this will require over 90 minutes.
Although making your own chickpeas is more authentic, I am in the canned chickpeas camp because it makes homemade hummus super accessible, quick and easy; but most importantly, I don’t find a noticeable difference in taste or texture.

How to make Homemade tahini
Homemade tahini is easy to make and less expensive than store-bought if you purchase the sesame seeds in bulk. I recommend hulled sesame seeds as opposed to unhulled or sprouted. This homemade tahini recipe yields approximately ½ cup and can be kept in the refrigerator for one month. It is also easy to double and triple.
Tahini substitutions: what can I use instead of tahini?
Tahini is a prominent flavor in hummus and should not be omitted for authentic tasting hummus – it will be missed. It is not only creamy and nutty but slightly bitter. If you find yourself in a bind or if you are allergic to sesame seeds, you can try unsweetened peanut butter, cashew butter, almond butter, or Brazil nut butter. Please be aware these nut butters taste different than tahini and therefore will affect the end result.
How to make Homemade Hummus
This homemade hummus recipe is SO easy to make, you’ll have it on weekly repeat! Here is my step by step guide for how to make hummus with photos. You will find the ingredient measurements in the printable recipe at the bottom of the post.
How to make Hummus from Dried Chickpeas
- Cook chickpeas. If using dried chickpeas, you’ll need to soak and cook according to one of the aforementioned methods. If using canned chickpeas, rinse and drain then transfer to a medium saucepan. Sprinkle with baking soda then fill the pot so the chickpeas are covered by several inches of water. Bring to a boil then reduce to a simmer until the chickpeas are practically mushy and the skins are popping off; about 15-20 minutes. Don’t worry if the chickpeas get super mushy- that’s a good thing. Soft chickpeas = smooth hummus.
How to cook Chickpeas for Hummus
Cooking your own chickpeas for hummus is very easy, it just takes some planning ahead. Here are four methods to cook dried chickpeas:
SOAK BEANS
Before we jump into cooking the beans, you will need to soak the beans. You can either use the quick soak method which only takes about an hour but requires simmering the beans or the long soak method which take longer but is more hands off.
•Quick soak method: add chickpeas to a large pot and cover with 3” of water above the surface of the beans. Bring to boil and boil for 5 minutes. Remove from heat and let the beans continue to soak for 1 hour.
•Long soak method: add the beans to a large bowl and cover with 3” of water above the surface of the beans – don’t skimp on the water because the beans will rehydrate and triple in size. Soak the beans for at least 8 hours or up to overnight.
COOK BEANS
- How to cook beans on the stove: soak beans per preferred method, rinse and drain. Refill the pot with water along with ¼ teaspoon salt and ½ teaspoon baking soda. Boil 2-3 hours or until skins are popping off and they’re practically mushy.
- How to cook beans in the oven: no need to soak beans, simply add beans to a Dutch oven along with ¼ teaspoon salt and ½ teaspoon baking soda and cover with 3” of water above the surface of the beans. Cover beans with a tight-fitting lid and bake at 375 degrees F for 2 hours or until skins are popping off and they’re practically mushy. Add additional water if needed if the beans are not fully cooked after 2 hours.
- How to cook beans in the slow cooker: soak beans per preferred method. Add beans to slow cooker along with ¼ teaspoon salt and ½ teaspoon baking soda. Cover and cook on high for 4 hours or on low for 8-9 hours or until or until skins are popping off and they’re practically mushy.
- How to cook beans in the pressure cooker: no need to soak beans, simply add beans to your pressure cooker along with ¼ teaspoon salt, ½ teaspoon baking soda and cover with 1” of water above the surface of the beans. Close the lid, set pressure valve to “sealing.” Pressure cook on HIGH for 30 minutes followed by a 10-minute natural pressure release. Release steam by turning pressure release valve to “venting.” For hummus, the skins should be popping off and the beans should be practically mushy, if not, repeat the pressure cook process in 5-minute intervals.
MAKE AHEAD: For any of the above cooking methods, if you don’t use the cooked chickpeas immediately, store them in their water/juice (just like canned chickpeas) in an airtight container; refrigerate for up to 5 days.
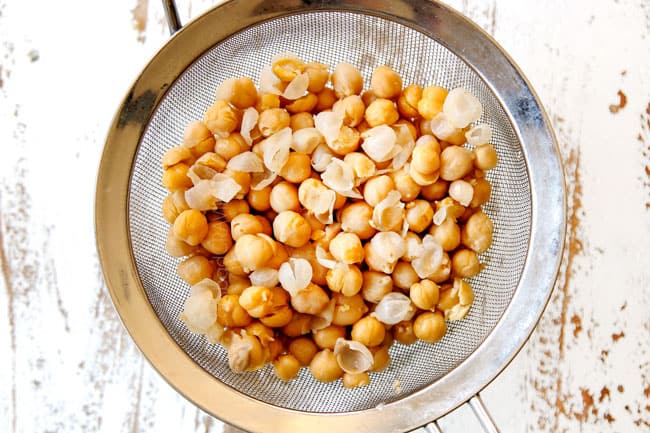
- Peel chickpeas. Rinse and drain the cooked chickpeas in a fine mesh strainer, running them through your fingertips to rub off any loose skins. Most of their skins will have sloughed off while cook which makes them easy to pick out instead of peeling individual chickpeas. Pick out the noticeable skins the best you can, but don’t worry if you can’t get all of them. Any remaining skins will be soft from simmering and won’t affect the overall texture significantly.
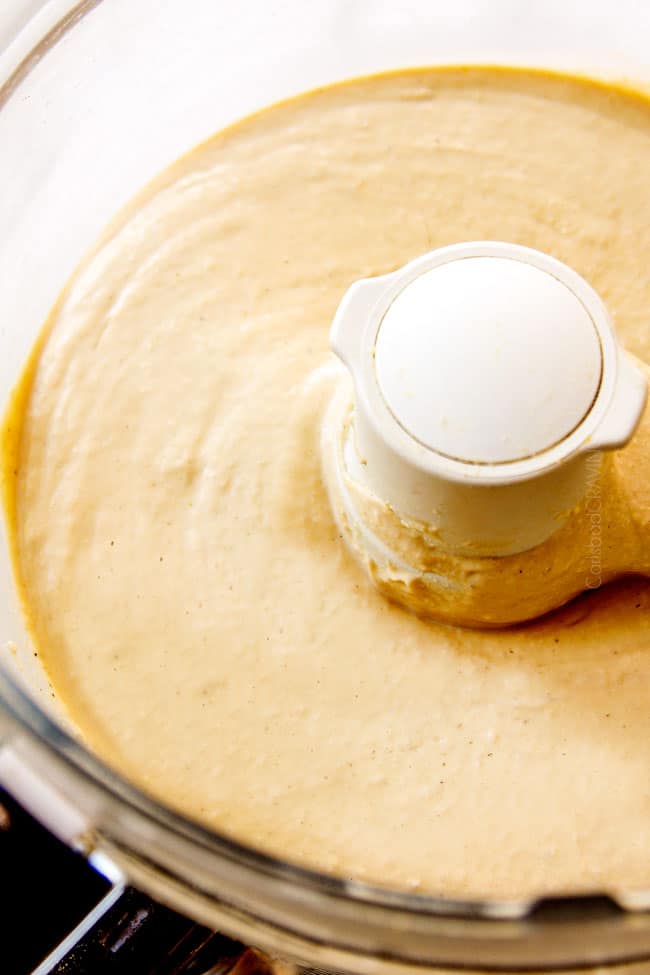
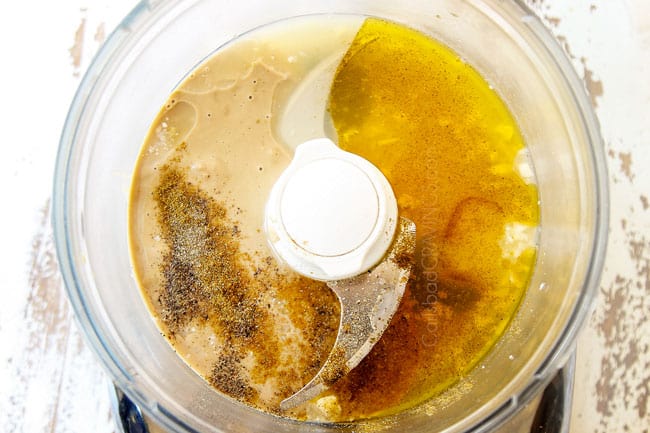
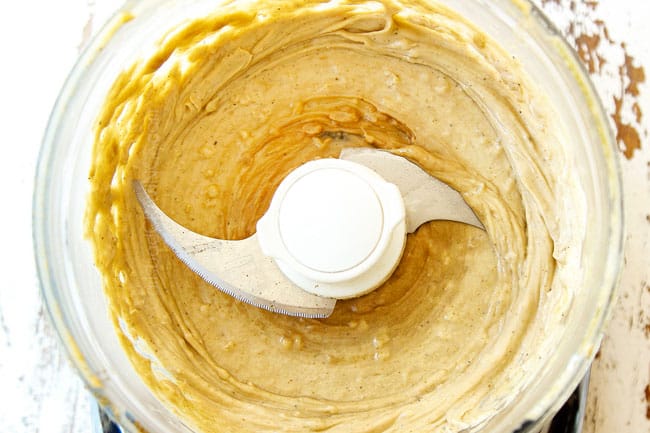
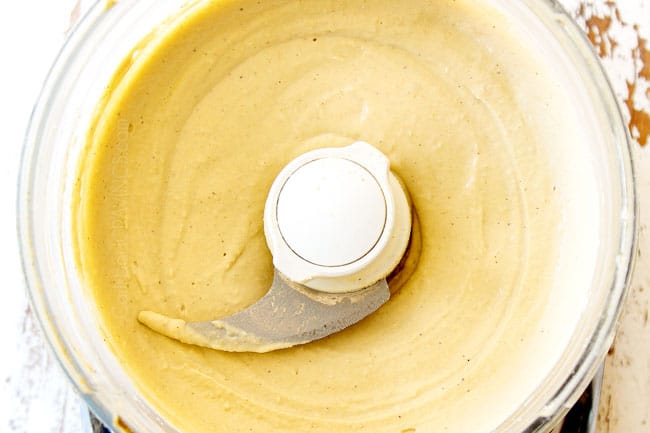
- Blend tahini. Add tahini, lemon juice, garlic, olive oil, ground cumin and salt to your food processor and process for 2 minutes. This will not only chop the garlic and blend the ingredients but aerate them for lighter hummus.
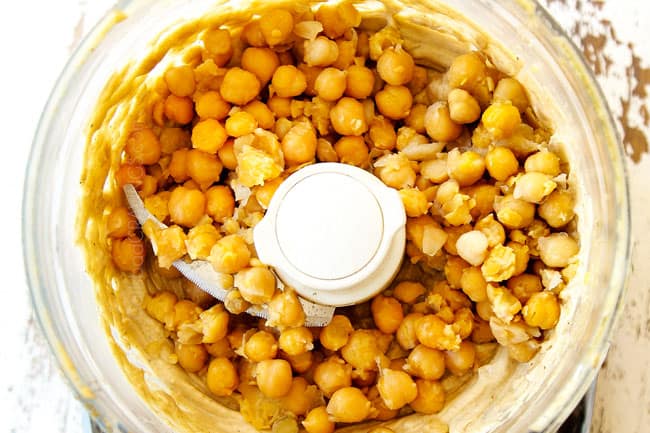
- Blend chickpeas. Add the cooked and drained chickpeas along with 2 ice cubes to the food processor and process for 4 minutes – no less! Blending for 4 minutes is the secret to the smoothest hummus recipe.
- Adjust consistency. After 4 minutes you can check your hummus for consistency and seasonings. For thinner hummus, add water, one tablespoon at a time, for tangier hummus add lemon juice, for more flavorful hummus, add salt.
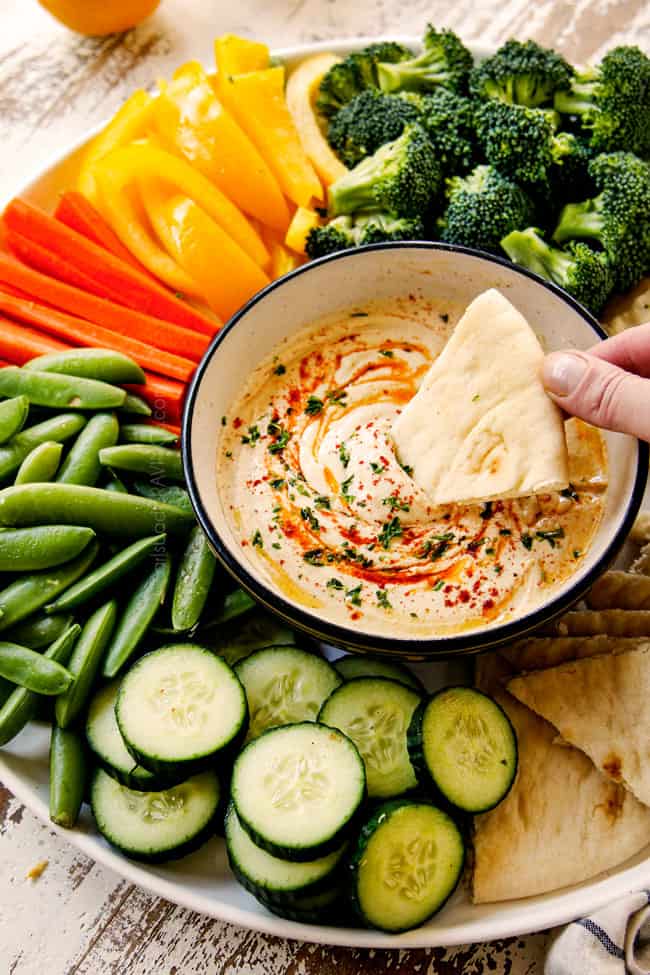
- Garnish. If serving hummus as a dip, transfer to a serving bowl and drizzle with extra virgin olive oil. As far as other toppings – the sky is the limit!

Best Homemade Hummus recipe tips
Homemade hummus is wonderfully simple with just a few ingredients. This means it is important to use quality ingredients and the best techniques. Read on for a few tips and tricks that will transform your hummus recipe from ordinary to extraordinary.
Cook chickpeas with baking soda
Cooking either your canned or dried chickpeas with baking soda until almost mushy is the #1 tip for the creamiest homemade hummus.
The baking soda softens the chickpeas and helps the skins slough right off of the chickpeas as they cook. This means you don’t have to painstakingly peel each chickpea – it’s okay to leave whatever skins don’t pop off by themselves. Note that the baking soda is key here, you can’t just simmer chickpeas until mushy and expect the same luxuriously smooth results. An added bonus of baking soda is it can help reduce gas and bloating – win, win!
Some brands of canned chickpeas are harder than others, so don’t limit yourself to simmering them for 20 minutes. Cook the chickpeas until they are soft and the skins are popping off. It is better to “overcook” the chickpeas than undercook them.
Peel Chickpeas
Peeling the chickpeas is a game changer to create extra smooth hummus. Although you don’t have to peel each chickpea thanks to the baking soda, it is ideal to remove as many of the skins as possible.
The baking soda will cause many of the skins to slough right off. If you don’t see a bunch of skins after you’ve simmered your chickpeas- it means you haven’t cooked them long enough. Cook until you see a bunch of scaly looking skins. Pick these noticeable skins out before you rinse the chickpeas.
After you’ve picked over the chickpeas, rub them in between your fingers as you rinse them. This will quickly remove most of the remaining skins.
Use quality tahini
All tahini is not created equal. Unfortunately, tahini spans a wide range of flavor and quality. Some are more oily, nutty, pasty or bitter. I’ve had hummus so bitter it’s ruined my hummus – so choose wisely! The variances come from the type of sesames seed used, how they are processed and how they are roasted. Some sesame seeds have a higher oil-to-meat content which yields richer tahini, some seeds are left unhulled which yields more bitter, grittier tahini, some are roasted more which results in stronger-tasting tahini. In additional, some brands contain additives such as oil, salt sugar, and even coloring.
So how do you know which tahini to purchase? It is actually quite simple. Tahini made from 100% roasted and pressed organic Ethiopian white Humera sesame seeds is considered the gold standard.
Humera sesame seeds are named after Humera, a small town in Ethiopia. They are one of the most sought-after sesame seed types in the world due to their white color, favorable aroma, high oil content, incomparable richness and reliable nutty and sweet flavor. They are also hand-harvested in small amounts for consistent quality.
Recommended Tahini Brand: My favorite brand of tahini is Soom. There is almost no competition to be honest. It is made from 100% Humera sesame seeds, is velvety smooth, and boasts a clean, rich, nutty flavor with the ideal hint of bitterness. Soom tahini will elevate your hummus to the next level. It is pricier than others, but is the epitome of getting what you pay for. You can find Soom tahini on Amazon here as well as some specialty stores and Whole Foods. It is SO worth the purchase. (Note Soom also has chocolate tahini-drool )
Honorable mentions: Other tahini brands made from Humera sesame seeds include Seed & Mill and Pepperwood Tahini (they have two kinds, so look for “Organic Ethiopian Hulled Sesame Tahini”).
If you don’t want spend quite as much money on tahini, you can still find quality tahini made from 100% sesame seeds, even if they aren’t Humera sesame seeds. Here is what to look for:
- Made from 100% hulled sesame seeds
- Lighter colored
- Minimal oil separation in the jar
Use fresh tahini
Tahini can last for up to 6 months if refrigerated, but you’ll still want to check and make sure your tahini is fresh. If your tahini has been sitting around longer than that, it’s best to toss it because the sesame oil can become rancid over time. If you use rancid tahini without knowing it, your homemade hummus will taste terrible, not to mention you’ve wasted time and ingredients.
Stir tahini
Depending on your brand and age of tahini, you will notice that some of the solids and oil will have separated, similar to natural peanut butter. You will want to stir the tahini until it’s completely incorporated before scooping out so you don’t get mostly oil or all solids. If your tahini is extra difficult to stir, empty it into a bowl to mix.
Blend tahini first
You will be amazed at what this simple step does to elevate your hummus recipe! No matter what variation of homemade hummus you make, always process the tahini first with whatever additional add-ins before adding the chickpeas. This will whip the tahini into a smooth, rich, creamy paste while aerating the ingredients to create lighter, fluffier hummus.
Use ice cubes
Many hummus recipes call for ice water, but instead, use ice cubes! Ice cubes create a creamier, fluffier, more luxurious hummus as they slowly breakdown and are incorporated into the hummus – just think freshly churned ice-cream. They also help you not short change the processing. You can add ice water at the very end if your hummus needs to thin or smooth out.
Don’t rush it!
This tip is HUGE! After you add the chickpeas, let the food processor run for a solid 4 to 5 minutes. The longer you process the hummus, the smoother it will become, it’s as simple as that. For the most intoxicatingly creamy hummus, blend for the full 5 minutes.
How to make Hummus Creamier
There are several ways to make hummus creamier:
- Peel the Chickpeas: Removing the outer skins of chickpeas will result in a smoother and creamier texture.
- Boil canned chickpeas with baking soda. The baking soda breaks down and softens the texture of the chickpeas and warm chickpeas can blend more easily.
- Use Tahini: Tahini is a key ingredient in hummus that contributes to its creamy texture. You can increase the amount of tahini you use to make the hummus creamier.
- Use Ice Water: Cold water helps the hummus emulsify better and become creamier.
- Blend Longer: Keep on blending if your hummus isn’t as creamy as you like. The longer you blend, the creamier!
- Soften Chickpeas: If you’re using dried chickpeas instead of canned, cook them until they are very soft and easily mashed. Overcooked chickpeas can be easily mashed into a creamy consistency.
- Add Yogurt or Greek Yogurt: Adding a small amount of plain yogurt or Greek yogurt can lend a creamier texture to your hummus while also adding a tangy flavor.
How do you thin hummus?
Reserve the ice water until the very end because you probably won’t need it. After your ice cubes are completely blended and you still would like a thinner hummus or a smoother hummus, then add ice water a little at a time until it thins to desired consistency.

Best Hummus Recipe variations
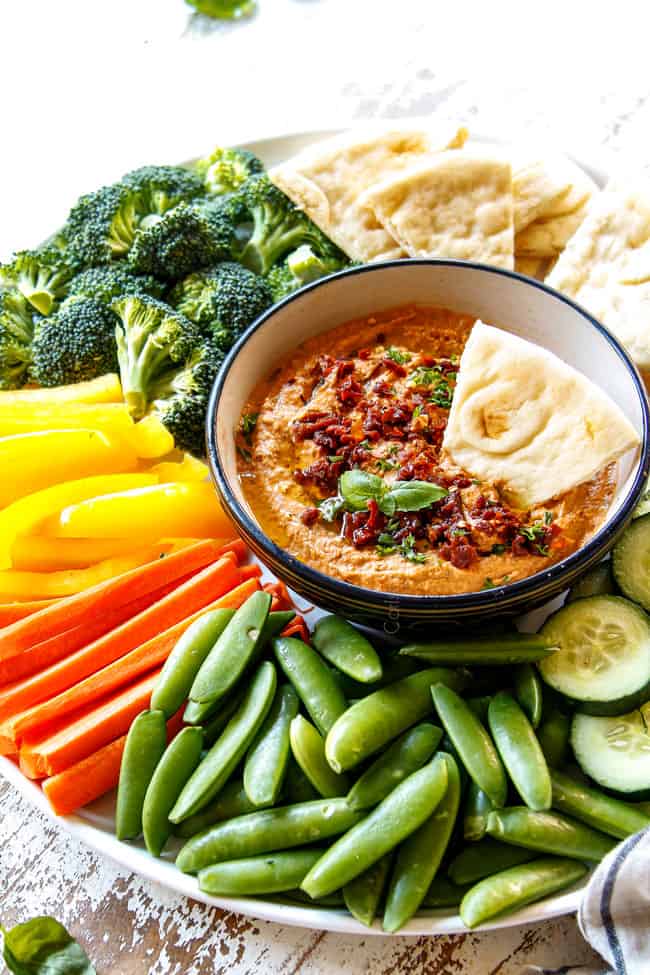
There are countless variations of hummus because hummus is a chameleon of sorts when it comes to flavorings and tastes amazing with practically everything. My favorite remains this traditional homemade hummus recipe, but don’t let that keep you from experimenting. I’ve also included recipes for my other favorite variations: sun-dried tomato hummus, roasted, red pepper hummus, pesto hummus and avocado hummus.
In addition to trying these hummus recipes (section below), you can also blend any of the following into your homemade hummus when you add the tahini, before adding the chickpeas:
HUMMUS WITHOUT CHICKPEAS:
- Beet hummus: is a little different in that you won’t just add beets but replace the chickpeas with ½ pound cooked beets. To cook the beets, scrub clean and cut the tops off. Place in a baking dish with 1/-4-inch water. Cover with foil and bake until fork tender.
- Fresh pea hummus: swap the chickpeas for 2 cups shelled peas, fresh or frozen. Add peas to a saucepan, cover with water and simmer for 5 minutes; drain. Pea hummus also likes other herbs such as mint and chives.
Seasoning variations:
You can completely change the flavor profile of your hummus by adding different seasonings. Here are just a few options:
- Za’atar seasoning for an exotic blend of sesame, sumac, salt and herbs
- Fresh or dried herbs for a more herbaceous hummus
- Everything bagel seasoning with its mix of black and white sesame seeds, dried minced garlic and onion, sea salt flakes and poppy seeds – extra yummy for pitas!
- Dill and oregano for a Greek tzatziki flair
- Cajun seasoning for an instant oomph of spicy heat
- Spice it up with cayenne pepper, chipotle chile powder, or blend in jalapenos or chipotle chile peppers
- Lemon pepper for a bright and peppery flair
- Layer the flavor with cumin, coriander, paprika, etc.
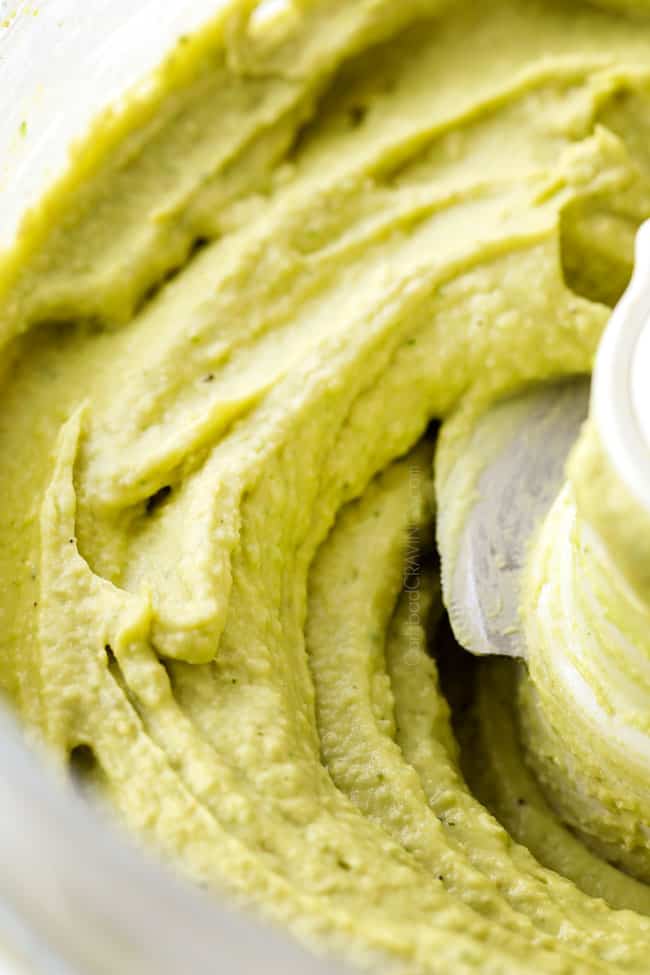
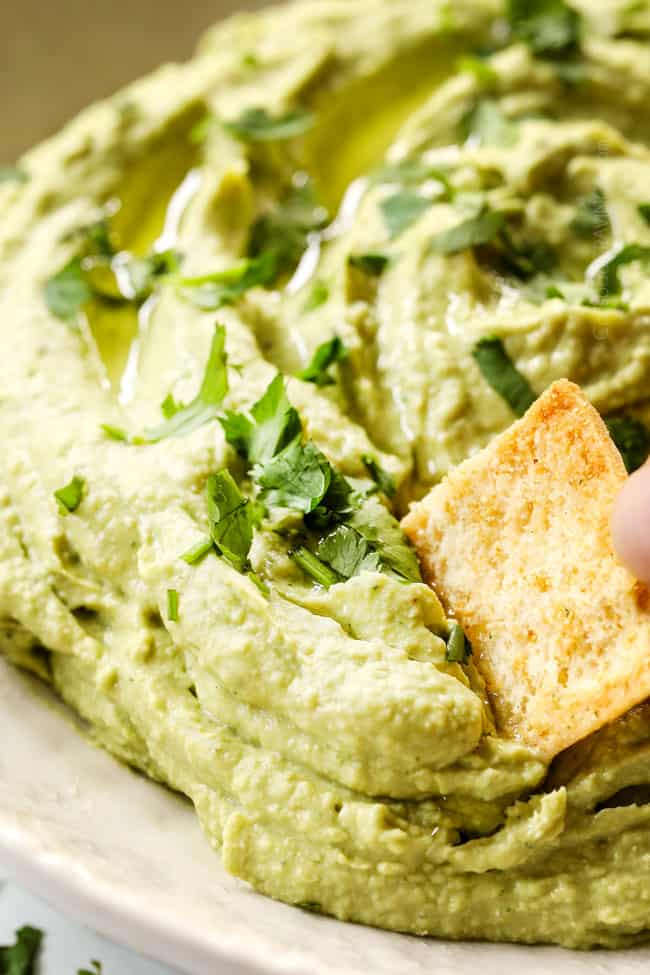
HOW TO MAKE AVOCADO HUMMUS Recipe
- 1 15 oz. can chickpeas
- ¼ cup lime juice
- ¼ cup packed cilantro
- 2 tablespoons extra virgin olive oil
- 1 ½ tablespoons well-stirred tahini
- 2 garlic cloves, minced
- ½ -1 jalapeno, peeled, deveined, roughly chopped
- ¾ teaspoon salt plus more to taste
- 1/2 teaspoon ground cumin
- 1 large avocado pitted, and peeled
- 2 ice cubes
DIRECTIONS:
- Cook chickpeas per plain hummus recipe instructions.
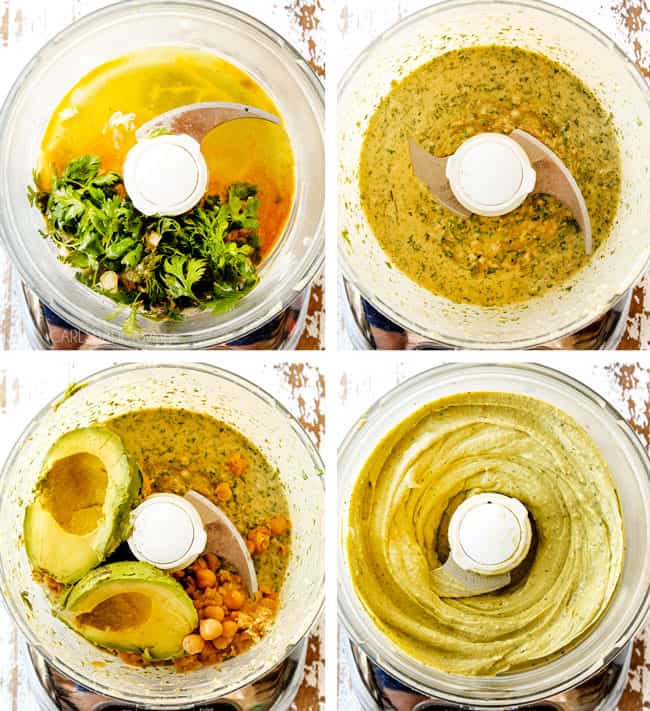
- Add all the ingredients to your food processor except avocados, chickpeas and ice cubes; puree until very smooth, about 3 minutes.
- Add avocados, chickpeas and ice cubes and process for 4 minutes, no less! Once completely smooth, add ice water, one tablespoon at a time, if needed, to thin to desired consistency.
- Season with additional salt and lime juice to taste
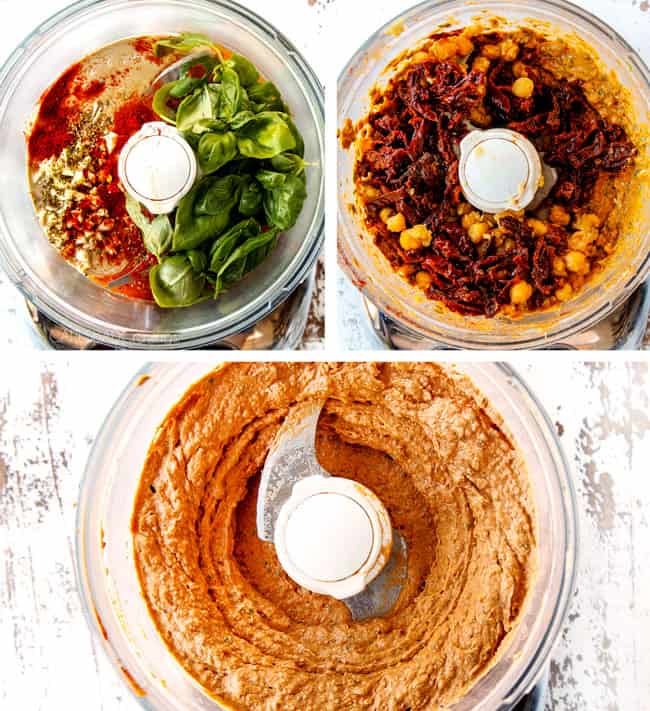
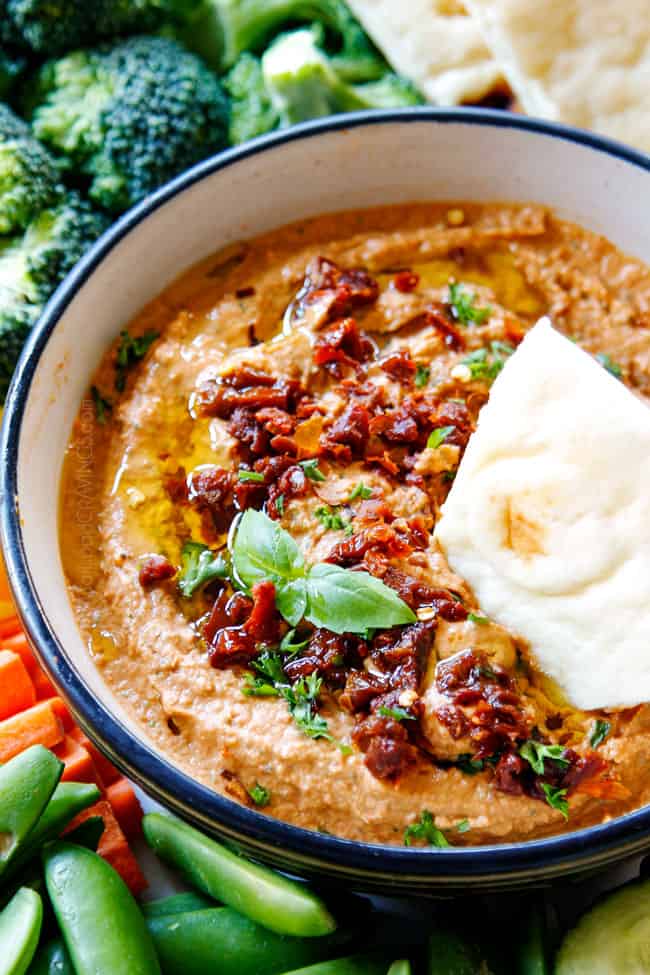
HOW TO MAKE Sun-Dried Tomato Hummus Recipe
- 1 15 oz. can chickpeas
- ¼ cup well-stirred tahini
- ¼ cup fresh basil
- 3 tablespoons fresh lemon juice
- 2 tablespoons oil from sun-dried tomato jar
- 2 garlic cloves peeled
- ¾ teaspoon salt plus more to taste
- ¼ tsp EACH dried oregano, dried parsley, smoked paprika, red pepper flakes
- 1 cup drained oil-packed sun-dried tomatoes (6.7-ounce jar, drained)
- 2 ice cubes
Directions:
- Cook chickpeas per plain hummus recipe instructions.
- Add all the ingredients to your food processor except chickpeas, sun-dried tomatoes and ice cubes; puree until very smooth, about 3 minutes.
- Add chickpeas, sun-dried tomatoes and ice cubes and process for 4 minutes, no less! Once completely smooth, add ice water, one tablespoon at a time, if needed, to thin to desired consistency.
- Season with additional salt and lemon juice to taste.
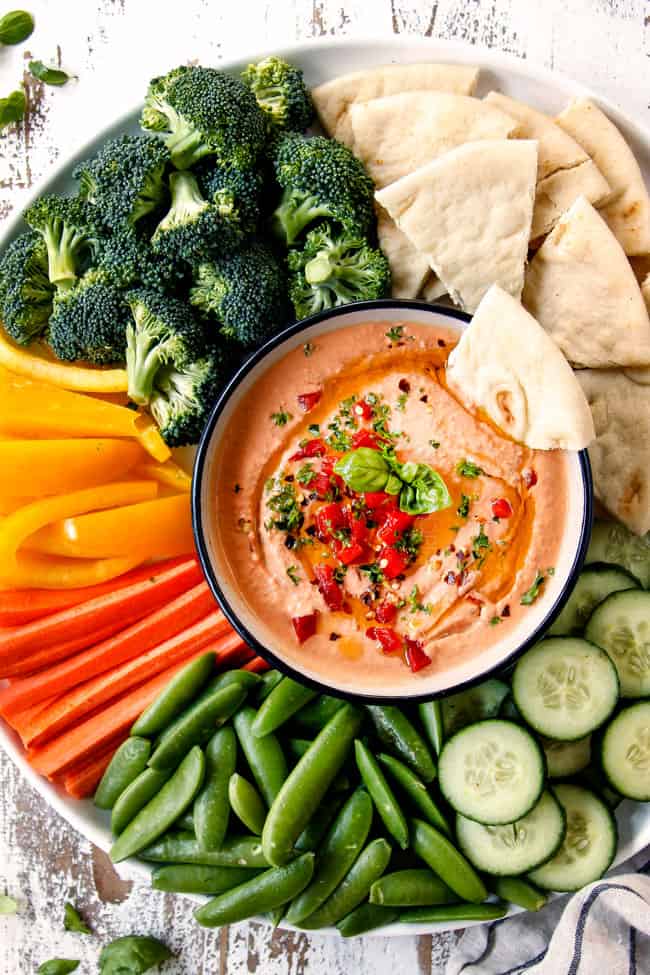
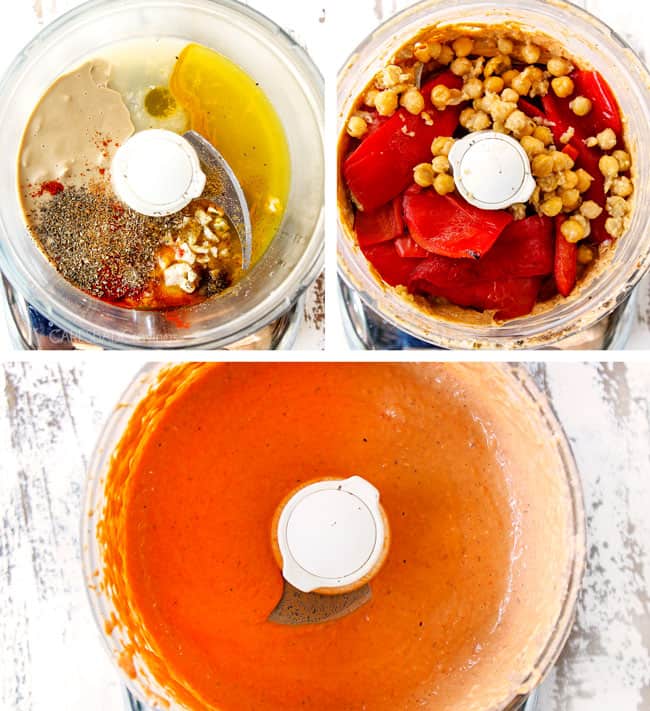
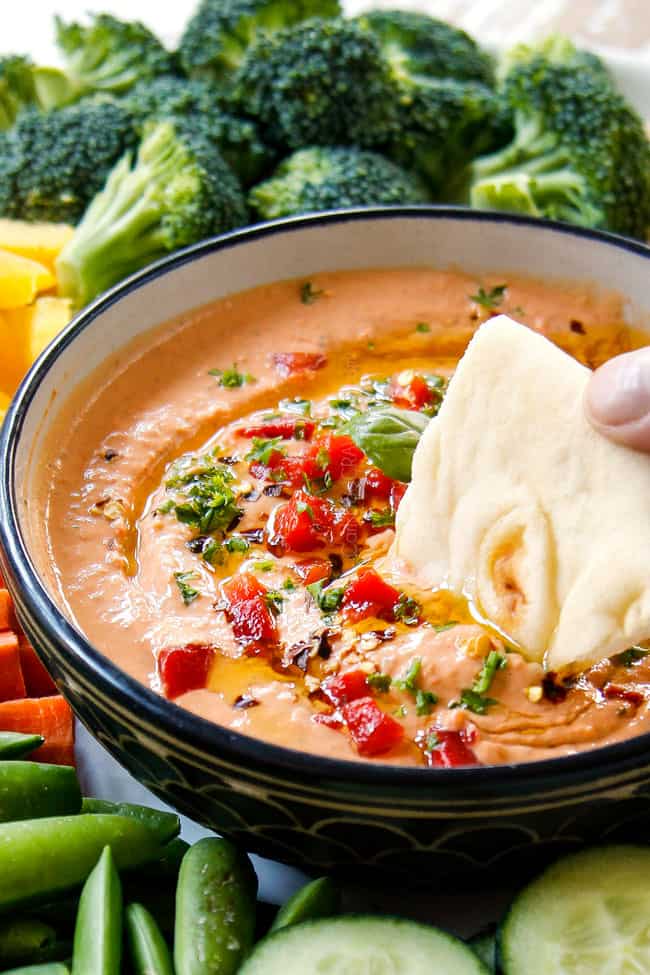
HOW TO MAKE Red Pepper Hummus Recipe
- 1 15 oz. can chickpeas
- ¼ cup well-stirred tahini
- ¼ cup fresh lemon juice
- 2 tablespoons extra virgin olive oil
- 2 garlic cloves peeled
- ½ tsp EACH smoked paprika, dried basil, salt
- ¼ tsp EACH ground cumin, dried oregano
- Pinch cayenne pepper
- 2 whole red bell peppers (substitute about ¾ cup jarred roasted red peppers)
Directions:
- Cook chickpeas per plain hummus recipe instructions.
- Add all the ingredients to your food processor except chickpeas and roasted red peppers; puree until very smooth, about 3 minutes.
- Add chickpeas, red peppers and process for 4 minutes, no less! Once completely smooth, add ice water, one tablespoon at a time, if needed, to thin to desired consistency. Typically, the bell peppers have extra moisture so you don’t need any water.
- Season with additional salt and lemon juice to taste.
- Garnish with extra olive oil and a sprinkling of chopped fresh herbs.
HOW TO ROAST PEPPERS
- Move an oven rack so that it is about 5 inches from the broiler. Turn oven broiler on.
- Remove core of peppers then cut into large flat pieces. Arrange pepper pieces, skin-side up, on a baking sheet. Broil 5 to 10 minutes until the peppers skin has charred.
- Add peppers to a brown plastic bag, seal then wait 10 to 15 minutes or until cool enough to handle. Gently peel away the charred pepper skin and discard. Reserve 1 to 2 pieces of the peeled roasted pepper pieces to use as a garnish when serving then roughly chop the rest.
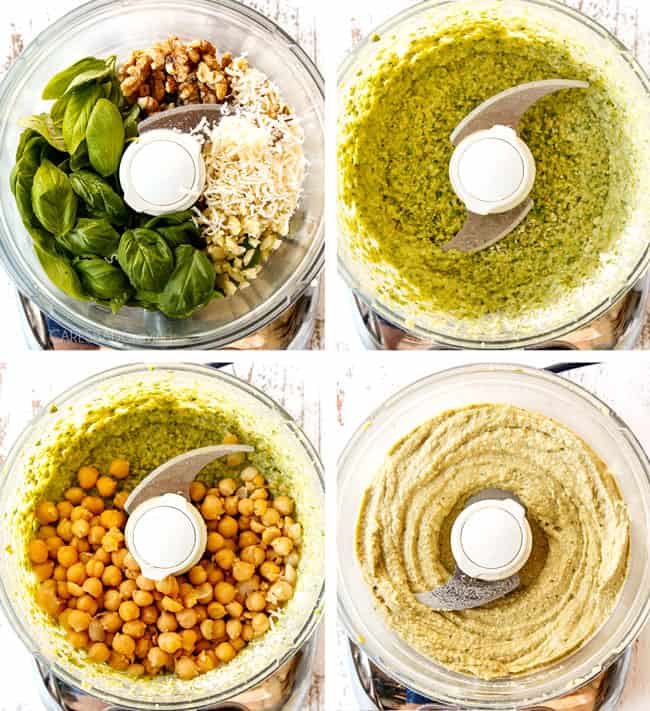
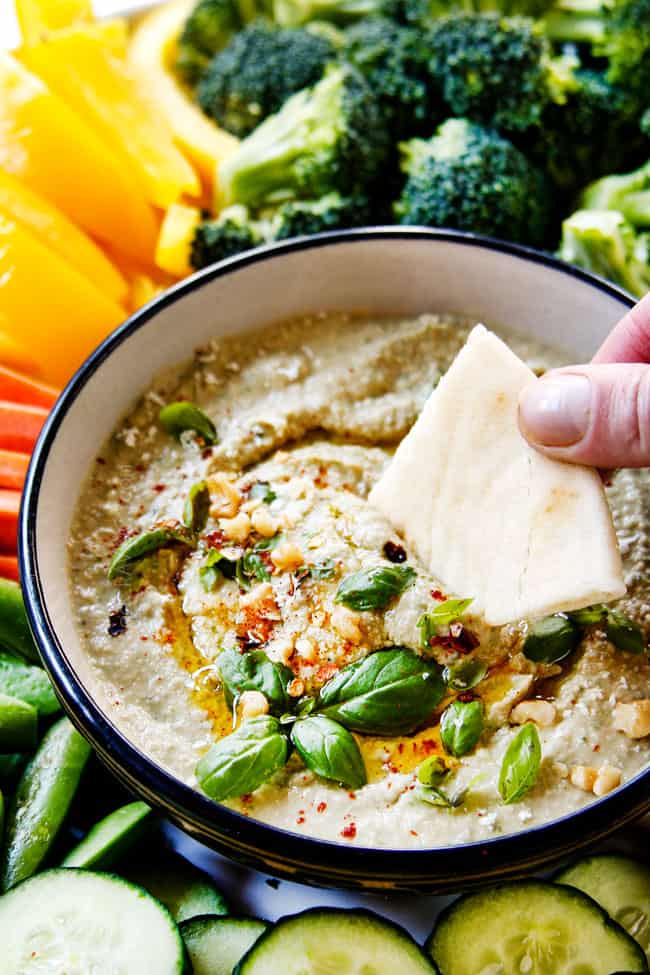
HOW TO MAKE Pesto Hummus Recipe
- 1 15 oz. can chickpeas
- ½ cup fresh basil leaves
- ¼ cup olive oil
- ¼ cup freshly grated Parmesan cheese
- ¼ cup pine nuts or walnuts
- 3-4 tablespoons lemon juice
- 3–4 garlic cloves peeled
- ½ teaspoon sea salt
- Pinch red pepper flakes
- 2 ice cubes
Note we don’t add tahini because we are adding pine nus or walnuts instead.
DIRECTIONS:
- Cook chickpeas per plain hummus recipe instructions.
- Add all the ingredients to your food processor except chickpeas and ice; puree until very smooth, about 3 minutes.
- Add chickpeas and ice cubes and process for 4 minutes, no less! Once completely smooth, add ice water, one tablespoon at a time, if needed, to thin to desired consistency.
- Season with additional salt and lemon juice to taste.
- Garnish with extra olive oil and a sprinkling of chopped fresh herbs.

How to serve this recipe for Hummus
Homemade hummus is sensational as a dip for pitas, pita chips, and veggies. I can eat 10X more veggies when I’m dunking them in hummus – it’s just so good! Serve hummus with any of the following or make it the center of your crudité board and surround it with all of the following:
Hummus Garnishes
Hummus is delicious with just a drizzle of olive oil, but even more fabulous with a few simple garnishes. Here are some to choose from:
- Olive oil: use extra virgin olive oil for the best flavor
- Finely chopped herbs: such as parsley, basil, mint, chives, etc.
- Sumac: a tangy, slightly sour seasoning made from the dried and ground berries of the wild sumac flower; it’s often used in Mediterranean and Middle Eastern cooking
- Za’atar: an exotic seasoning made from a blend of sesame, sumac, salt and herbs
- Nuts: sesame seeds, pine nuts or dukkah, a Middle Eastern mixture of herbs, nuts, and spices
- Middle Eastern hot sauce: zhoug or shatta
- Everything bagel seasoning: mix of black and white sesame seeds, dried minced garlic and onion, sea salt flakes and poppy seeds
Other Hummus Serving Suggestions:
- Toast and bagels: hummus make a flavorful spread for toast, bagels or crostini; serve them with just hummus or top with sliced avocados, tomatoes, sprouts, etc.
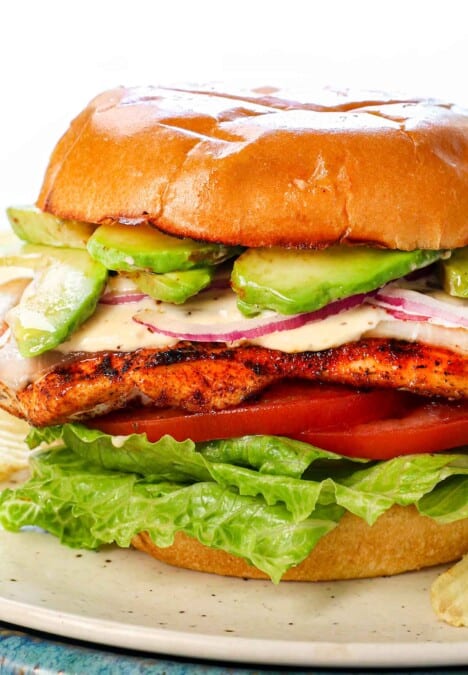
- Burgers/sandwiches: swap hummus for mayo on your burgers or sandwiches.
- Wraps: slather hummus on flatbread, pitas, etc. before adding your toppings. It’s a traditional topping on doner kabobs but would also be tasty in gyros as well.
- Salads: whisk in some extra lemon juice and oil to create a dressing.
- Roasted veggies: use the aforementioned hummus dressing then drizzle it on your favorite fresh, grilled and roasted veggies.
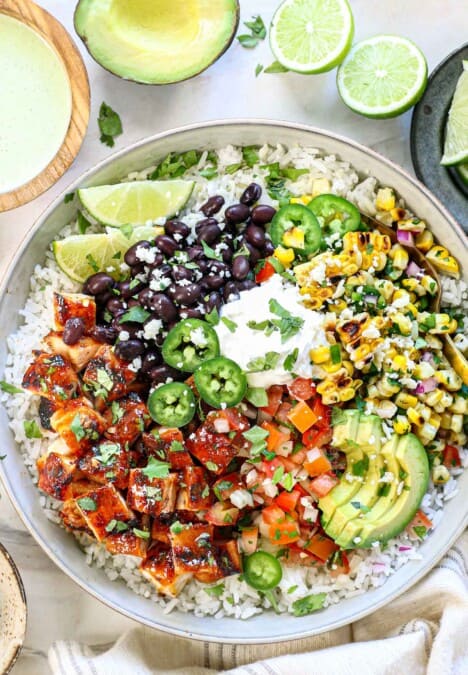
- Grain bowls: add hummus to grain bowls with Greek chicken, chicken shawarma, roasted curry cauliflower, tomatoes, cucumbers, etc.
- Pizza: spread it on pizza like my Greek Chicken pizza.
- Eggs: add it to scrambled eggs, omelettes, etc.
- “Glue” for chicken: instead of slathering chicken in mayo or an egg wash, slather in hummus instead before crusting with panko, chips, etc.
- Mashed potatoes: stir directly into your favorite mashed potato recipe instead of sour cream – I know it sounds weird, but is SO good!
- As a side: hummus is perfect alongside Chicken Souvlaki, Beef Souvlaki, Greek Salmon or other fish, Chicken Shawarma, Doner kebabs, and Greek rice.

Simple Hummus Recipe storage
How long does homemade hummus last?
Hummus should be stored in an airtight container in the fridge for up to 7 days. I find homemade hummus keeps its flavor beautifully and even tastes better the next day but other variations such as roasted red pepper, pesto, avocado, etc. mellow somewhat and need a little spritz of lime juice and possibly salt/pepper to brighten up.
Can I freeze hummus?
Hummus freezes very nicely because although it is creamy, it doesn’t contain any cream. To freeze, transfer hummus to an airtight container. Freeze for up to three months. Defrost in the refrigerator where it can keep for up to one week.
Hummus Recipe FAQs
If for some reason your hummus ends up thinner than you like, you can add additional tahini or stir in a couple tablespoons of Greek yogurt. Chilling the hummus will also thicken it up a bit.
Hummus a protein powerhouse, loaded with protein, fiber and nutrients. Here are just a few benefits:
Hummus nutrition
Protein: hummus is a great source of plant-based protein at 7.9 grams per serving. It is an excellent way to meet your protein intake, especially if you follow a vegetarian or vegan diet. Protein is an essential building block of your bones, muscles, cartilage, skin, hair, nails and blood. Your body needs protein to heal from everyday wear and tear as well as relieve muscle aches and build muscle.
Fiber: chickpeas are loaded with insoluble fiber which is essential for gut health. Fiber keeps your digestive track moving food along (AKA preventing or relieving constipation). Insoluble fiber can also help lower “bad” cholesterol, lower the risk of colorectal cancer, lower the risk of diabetes and heart disease.
Vitamins and minerals: hummus provide a wide variety of vitamins and minerals including iron, manganese, folate, zinc, phosphorus and B vitamins:
Iron: is needed to carry oxygen from the lungs to all parts of the body. Your body also needs iron to make some hormones and keep your hair, skin and nails healthy. If you do not have enough iron, you won’t have healthy oxygen circulation, which will cause fatigue and grogginess.
Manganese: is considered an essential nutrient required for aiding in metabolism, bone formation, regulating blood sugar, decreasing inflammation and immune response.
Vitamin B-12 and folate: are two B complex vitamins that the body needs to support cellular functions such as dividing cells and breaking down carbohydrates, proteins and fats to produce energy. These vitamins also help your body build red blood cells which allows oxygen to be used by the body.
Zinc: is vital for a healthy immune system, correctly synthesizing DNA, and healing wounds.
Phosphorous: forms and strengthens bones and teeth. It also helps produce ATP, a molecule the body uses to store energy.
Potassium: helps to lower blood pressure and combat heart disease. It also supports heart and muscle function and may reduce the risk of developing kidney stones and help to decrease bone loss.
How many carbs are in hummus?: Chickpeas have a fair amount of carbs at 78 grams in one 15 oz. can, or 4 grams in 1 tablespoon. The actual carb count of your hummus will reduce slightly with the addition of tahini, lemon juice, etc.
Is hummus keto? No, traditional hummus made with chickpeas is not keto because chickpeas are legumes which contain carbs and little fat.
Yes, you can definitely make hummus up to 3 days in advance. In fact, allowing hummus to sit in the refrigerator for a few hours or overnight can often enhance its flavors. Store it in an airtight container and give it a good stir before serving.
Yes, hummus can have anti-inflammatory properties due to its ingredients like chickpeas, olive oil, and various spices. Chickpeas contain nutrients that may help reduce inflammation, and olive oil contains compounds with potential anti-inflammatory effects.
Hummus is primarily a source of carbohydrates, as it is made from chickpeas, which are a legume rich in carbohydrates. While chickpeas do contain some protein, the protein content in hummus is relatively moderate compared to its carbohydrate content.

WANT TO TRY THIS RECIPE?
PIN IT to your recipe BOARD TO SAVE FOR LATER!
FIND ME ON PINTEREST FOR MORE GREAT RECIPES! I AM ALWAYS PINNING :)!
©Carlsbad Cravings by CarlsbadCravings.com

Simple Hummus Recipe
Save This Recipe To Your Recipe Box
You can now create an account on our site and save your favorite recipes all in one place!
Ingredients
- 1 15 oz. can chickpeas (garbanzo beans) rinsed and drained
- 1/2 teaspoon baking soda
- 1/3 cup tahini (well stirred)
- 1/4 cup fresh lemon juice
- 2 tablespoons extra virgin olive oil plus more for serving
- 2 garlic cloves minced
- 1/2 teaspoon ground cumin
- 1/2 teaspoon salt plus more to taste
- 2 ice cubes
- Dash of ground paprika or sumac fresh herbs and extra virgin olive oil, for serving
Instructions
- Place the chickpeas in a medium saucepan; sprinkle with baking soda. Fill the pot so the chickpeas are covered by several inches of water. Bring to a boil then reduce to a simmer until the chickpeas are practically mushy and the skins are popping off; about 15-20 minutes.
- Once cooked, rinse and drain the chickpeas in a fine mesh strainer. Pick out the skins that have popped off as best you can, but don’t worry if you can’t get all of them.
- Add all the ingredients to your food processor EXCEPT chickpeas and ice cubes and puree for 2 minutes.
- Add cooked/drained chickpeas and 2 ice cubes to the food processor and process for 4 minutes – no less! Add additional water, one tablespoon at a time, if needed, to reach desired consistency.
- Season with additional salt and lemon juice to taste. Serve hummus with a drizzle of extra virgin olive oil and dash of paprika or sumac.
Notes
HOW TO STORE AND FREEZE HUMMUS
- Refrigerate: Hummus should be stored in an airtight container in the fridge for up to 7 days. I find homemade hummus keeps its flavor very nicely but other variations such as pesto, avocado, etc. mellow significantly and need a little spritz of lime juice and possibly salt/pepper to brighten up.
- Freeze: Transfer hummus to an airtight container. Freeze for up to three months. Defrost in the refrigerator where it can keep for up to one week.
Tips and Tricks
See post for step by step instructions, tips and tricks, how to use and cook dried chickpeas, the best tahini brand, and more recipe variations than listed below.AVOCADO HUMMUS
- ¼ cup lime juice
- ¼ cup packed cilantro
- 2 tablespoons extra virgin olive oil
- 1 ½ tablespoons well-stirred tahini
- 2 garlic cloves, minced
- ½ -1 jalapeno, peeled, deveined, roughly chopped
- ¾ teaspoon salt plus more to taste
- ½ teaspoon ground cumin
- 1 15 oz. can chickpeas, rinsed, drained cooked
- 1 large avocado pitted, and peeled
- 2 ice cubes
- Add all the ingredients to your food processor except avocados, chickpeas and ice; puree until very smooth, about 3 minutes.
- Add avocados, chickpeas and ice cubes and process for 4 minutes, no less! Once completely smooth, add ice water, one tablespoon at a time, if needed, to thin to desired consistency.
- Season with additional salt and lime juice to taste
Pesto Hummus
- ½ cup fresh basil leaves
- ¼ cup freshly grated Parmesan cheese
- ¼ cup pine nuts or walnuts
- ¼ cup olive oil
- 3-4 tablespoons lemon juice
- 3–4 garlic cloves, minced
- ½ teaspoon salt
- Pinch red pepper flakes
- 1 15 oz. can chickpeas, rinsed, drained cooked
- 2 ice cubes
- Add all the ingredients to your food processor except chickpeas and ice; puree until very smooth, about 3 minutes.
- Add chickpeas and ice cubes and process for 4 minutes, no less! Once completely smooth, add ice water, one tablespoon at a time, if needed, to thin to desired consistency.
- Season with additional salt and lemon juice to taste.
- Garnish with extra olive oil and a sprinkling of chopped fresh herbs.
Sun-Dried Tomato Hummus
- ¼ cup well-stirred tahini
- ¼ cup fresh basil
- 3 tablespoons fresh lemon juice
- 2 tablespoons oil from sun-dried tomato jar
- 2 garlic cloves peeled
- ¾ teaspoon salt plus more to taste
- ¼ tsp EACH dried oregano, dried parsley, smoked paprika, red pepper flakes
- 1 15 oz. can chickpeas, rinsed, drained cooked
- ¾ cup drained oil-packed sun-dried tomatoes (6.7-ounce jar, drained)
- 2 ice cubes
- Add all the ingredients to your food processor except chickpeas, sun-dried tomatoes and ice cubes; puree until very smooth, about 3 minutes.
- Add chickpeas, sun-dried tomatoes and ice cubes and process for 4 minutes, no less! Once completely smooth, add ice water, one tablespoon at a time, if needed, to thin to desired consistency.
- Season with additional salt and lemon juice to taste.
Roasted Red Pepper Hummus
- ¼ cup well-stirred tahini
- ¼ cup fresh lemon juice
- 2 tablespoons extra virgin olive oil
- 2 garlic cloves peeled
- ½ tsp EACH smoked paprika, dried basil, salt
- ¼ tsp EACH ground cumin, dried oregano
- Pinch cayenne pepper
- 2 whole red bell peppers (substitute about ¾ cup jarred roasted red peppers)
- 1 15 oz. can chickpeas, rinsed, drained cooked
- Add all the ingredients to your food processor except chickpeas and roasted red peppers; puree until very smooth, about 3 minutes.
- Add chickpeas, red peppers and process for 4 minutes, no less! Once completely smooth, add ice water, one tablespoon at a time, if needed, to thin to desired consistency.
- Season with additional salt and lemon juice to taste.
- Garnish with extra olive oil and a sprinkling of chopped fresh herbs.
- Move an oven rack so that it is about 5 inches from the broiler. Turn oven broiler on.
- Remove core of peppers then cut into large flat pieces. Arrange pepper pieces, skin-side up, on a baking sheet. Broil 5 to 10 minutes until the peppers skin has charred.
- Add peppers to a resealable plastic bag, seal then wait 10 to 15 minutes until cool enough to handle. Or, add peppers to a bowl then cover with plastic wrap and wait 10 to 15 minutes. Gently peel away the charred pepper skin and discard. Reserve 1 to 2 pieces of the peeled roasted pepper pieces to use as a garnish when serving then roughly chop the rest.
Want To Make This Recipe?

Did You Make This Recipe?
Tag @CarlsbadCravings and Use #CarlsbadCravngs
Leave a Review, I Always Love Hearing From You!
Carlsbad Cravings© Original


Faith M says
I made the pesto version because I had tons of fresh basil I needed to use – it was WONDERFUL! I used canned chickpeas – but I do have a bag of dried that I’m going to try (for fun LOL). Next, I’m going to give the sun-dried tomato version a go.
I’m wondering about doubling or even tripling the recipe (I would love to share with some friends) – should I just double/triple ALL on the ingredients, or do you have some other advice? I tried adjusting the “servings”, but it just zero’d out all of the measurements… Can’t wait to make more!
Just a side note: Thank you for all of your recipes! (((hugs))) I have a binder of all of our favorite recipes, and most of them I found right here. You give me the confidence to try new flavors and new techniques- all which have made me a better cook. I check my email each day to see what’s new.
Jen says
That’s awesome you made the pesto hummus already, I’m so happy you loved it! As far as doubling the recipe, you can just double all of the ingredients but make sure to processes a couple extra minutes longer. Also, thank you so much for your “side note!” I am honored you are loving my recipes so much!
Sue says
I made the plain hummus and the pesto hummus today and they are awesome!!! Absolutely delicious! I cannot wait to take them to a dinner get together this evening!! Thanks for the great recipes!!
Jen says
Yay! I’m so happy you love them both Sue, thank you! Have fun sharing tonight!
JUDY says
The regular hummus was sooo amazing~!! Thanks for a great RECIPE~!!
Jen says
You’re so welcome Judy, I’m so pleased you loved it!
Erika L. says
I just made this hummus recipe yesterday for the first time, and it is truly amazing! I’ve tried so many recipes for hummus over the years and gave up on making them myself because they never turned out smooth enough or tasting how I wanted. I decided to give this one a shot because literally every single of Jen’s Carlsbad Cravings recipes I’ve made turn out amazing. I’m not a great cook, so that’s really saying something! She really has a knack for adding the perfect blends of flavors and spices and making recipes approachable and easy for people like me!
This hummus recipe was no exception! I followed all of the instructions for the traditional “plain” hummus, even ordering the Soom brand Tahini on Amazon. (Came the same day!) I used canned garbanzo beans I had on hand, (O Organics brand). It came out smooth, creamy, the perfect amount of lemony acidity, garlic, and hint of cumin. To me, this tasted a lot like Trader Joe’s Mediterranean hummus which is my very favorite store bought hummus—but even better! I have honestly been eating this by the spoonful…it’s incredible! Can’t wait to try it with another of our family favorites—Carlsbad Cravings Gyros—this week! Yet another favorite recipe from Carlsbad Cravings! Thank you so much, Jen! You are so talented!
Jen says
You made my day Erika! I am honored you trust my recipes and that you gave this hummus a go – I’m thrilled it didn’t disappoint! Thank you so much for the glowing review! Enjoy it with your gyros -yum!
Lori says
I made the roasted red pepper version. It turned out great! It’s the best hummus, I’ve ever made.
Thanks!
Lori
Jen says
Thanks so much for the ultimate compliment Lori!
Vonda says
I made the regular hummus and then topped it with smoked paprika and sliced green onion. It was wonderful! I can’t wait to try some of the other recipes.
Jen says
Welcome to my site Vonda! I’m so pleased the hummus was a hit! I hope you enjoy exploring my site and hopefully discover many new favorites!
Liz M says
Oh M Gee!! This is the best hummus ever! Super velvety, creamy and fluffy. I’m never buying hummus again this is absolutely delicious.
Jen says
YAY, thank you so much Liz! I’m so pleased you loved it so much!
Lindsey says
This turned out perfectly the first time and was delicious! I’ve tried several other hummus recipes over the years, but yours is the one I will keep. Can’t wait to try the variations!
Jen says
So glad this is a keeper! Thanks so much, Lindsey!
Linda Stranzl says
This is best hummus I’ve ever made! Cooking the chickpeas is a game changer. So smooth and creamy. I’m never going to make hummus again without cooking the chickpeas first. So happy I found this method!
Jen says
Yay! Thank you, Linda! I’m so happy this method was a success!
Lorie says
I made the regular hummus today. It’s the best one I’ve ever made! Thanks for sharing your recipe.
Jen says
You are so welcome, Lorie! I am so pleased you love this recipe! Thank you for taking the time to comment!
Shonda says
Unbelievable!! I really didn’t want it to be this good, as I was dreading adding the extra step of cooking the chickpeas. I can’t not cook them now. This is a must try, thank you so much!!
Jen says
It is so worth the extra time! I am glad you loved it!!
Ginny says
Outstanding and my first time making hummus. I used the can version. Not my last
Thank you
Jen says
Happy to hear that your first attempt was a success!
Julie R says
Jen, have you ever made carrot hummus? I bought some a long time ago but have never been able to find it since. It was such a good flavor. I’m definitely going to try your recipes for all the different hummus recipes! Thanks so much!
Jen says
Hi Julie! I haven’t ever made that! It sounds intriguing though! I’ll have to look into that! I hope you enjoy exploring my recipes and find some favorites for your kitchen!
Hilary says
i am deleting all of the other hummus recipes that i have, this is the only version you need. Thank you Jen
Jen says
Thank you! I’m thrilled this one is a winner!
Al Bern says
This recipe is talking about cooking dry chickpeas but unfortunately the recipe does not specify the amount of dry chickpeas
Jen says
Hi Al, thank you so much for catching that! It’s about 3/4 C of dried chickpeas to equal 15 oz. Hope that helps!
Dessica says
Made “Simple Hummus” recipe and it was fantastic. I have had many hummus recipes but this one was perfect for me. Simple, fluffy, right texture and taste was amazing!!! Thank you!!!
Jen says
Yay Dessica! I’m thrilled that you loved the flavors and texture of this hummus! Cheers!
Linda Perry says
No doubt, the best hummus ever!! I have only made the regular twice but I want to venture into some of the others. I literally love the plain to much I am afraid to do any others. LOL!! Thanks for perfecting this to be the creamiest dreamiest hummus ever!!! Happy vegging!!
Jen says
Wow! Thank you so much for your glowing review Linda! That made my day to hear how much you love my hummus recipe! Let me know how you like the variations when you’re ready to try them out! Happy vegging to you as well! 🙂
MARTY KINER says
This is my go to recipe now. I came back to see if there were any tips on doubling the recipe for a larger party. Couldn’t find anything but fingers crossed it works just by doubling everything.
Jen says
Hi Marty! I’m so glad that you love this recipe! As long as you have a large enough food processor doubling the recipe shouldn’t be a problem! I hope it turned out just as good as always!