This post may contain affiliate links. Please read our disclosure policy.
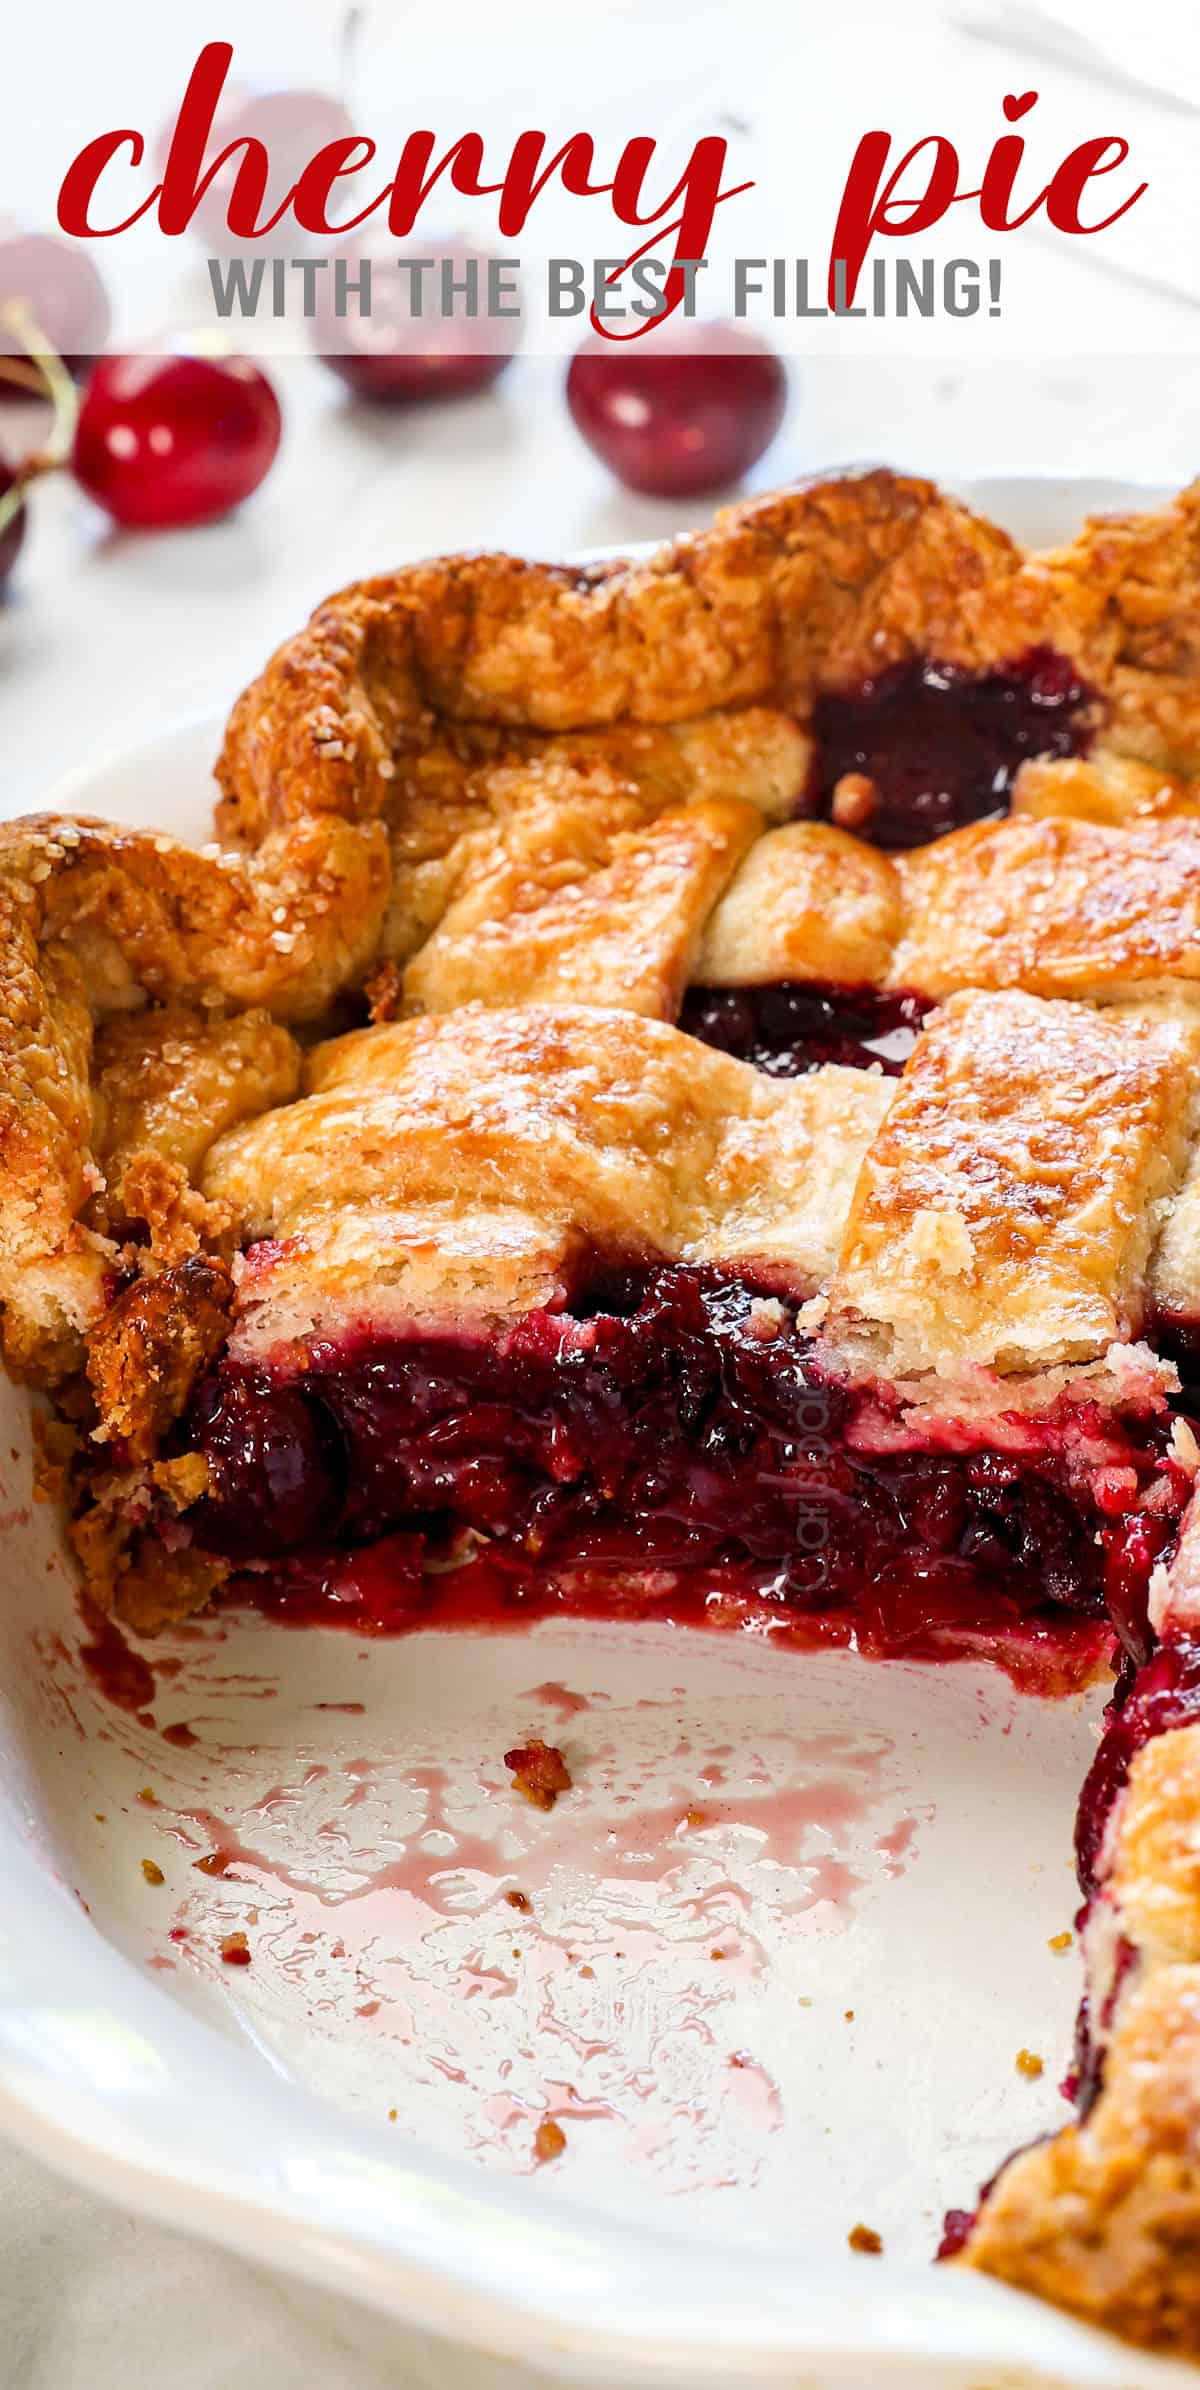
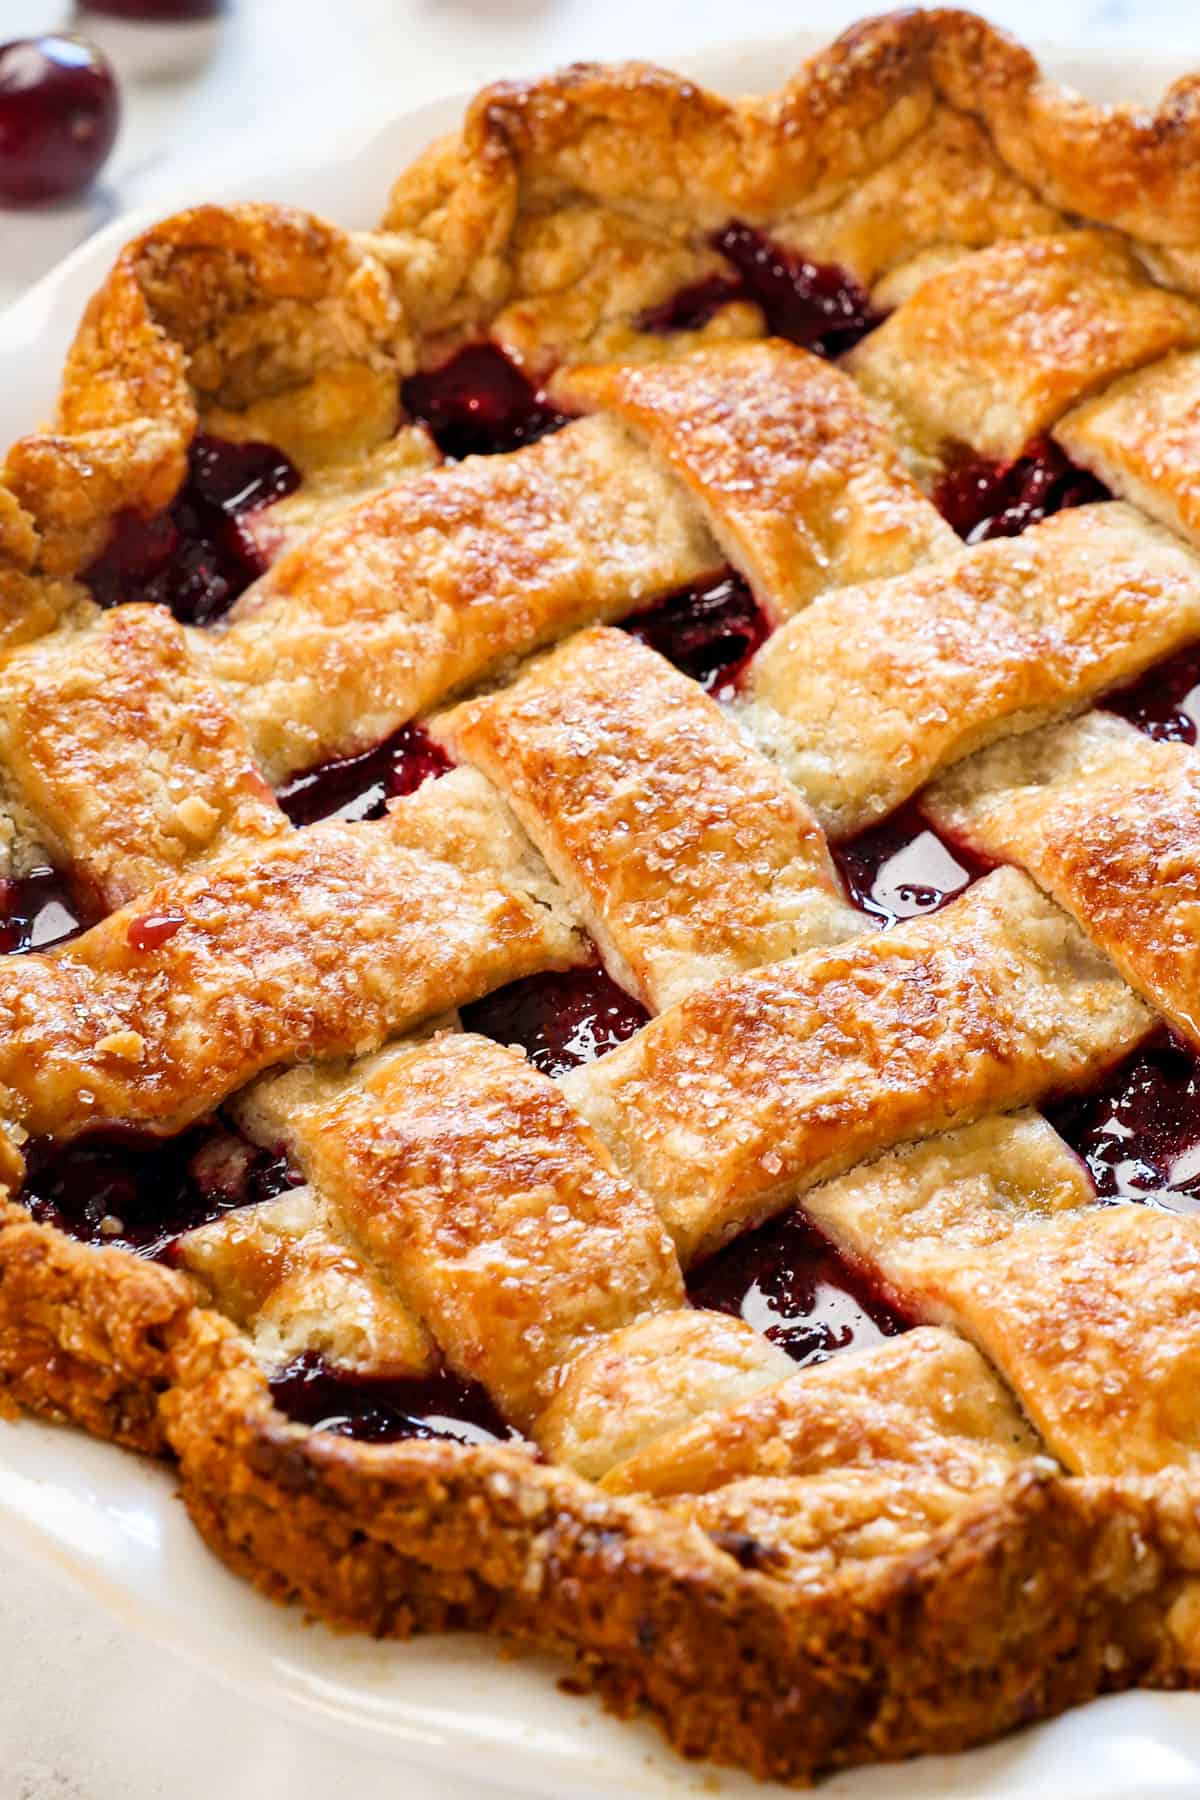
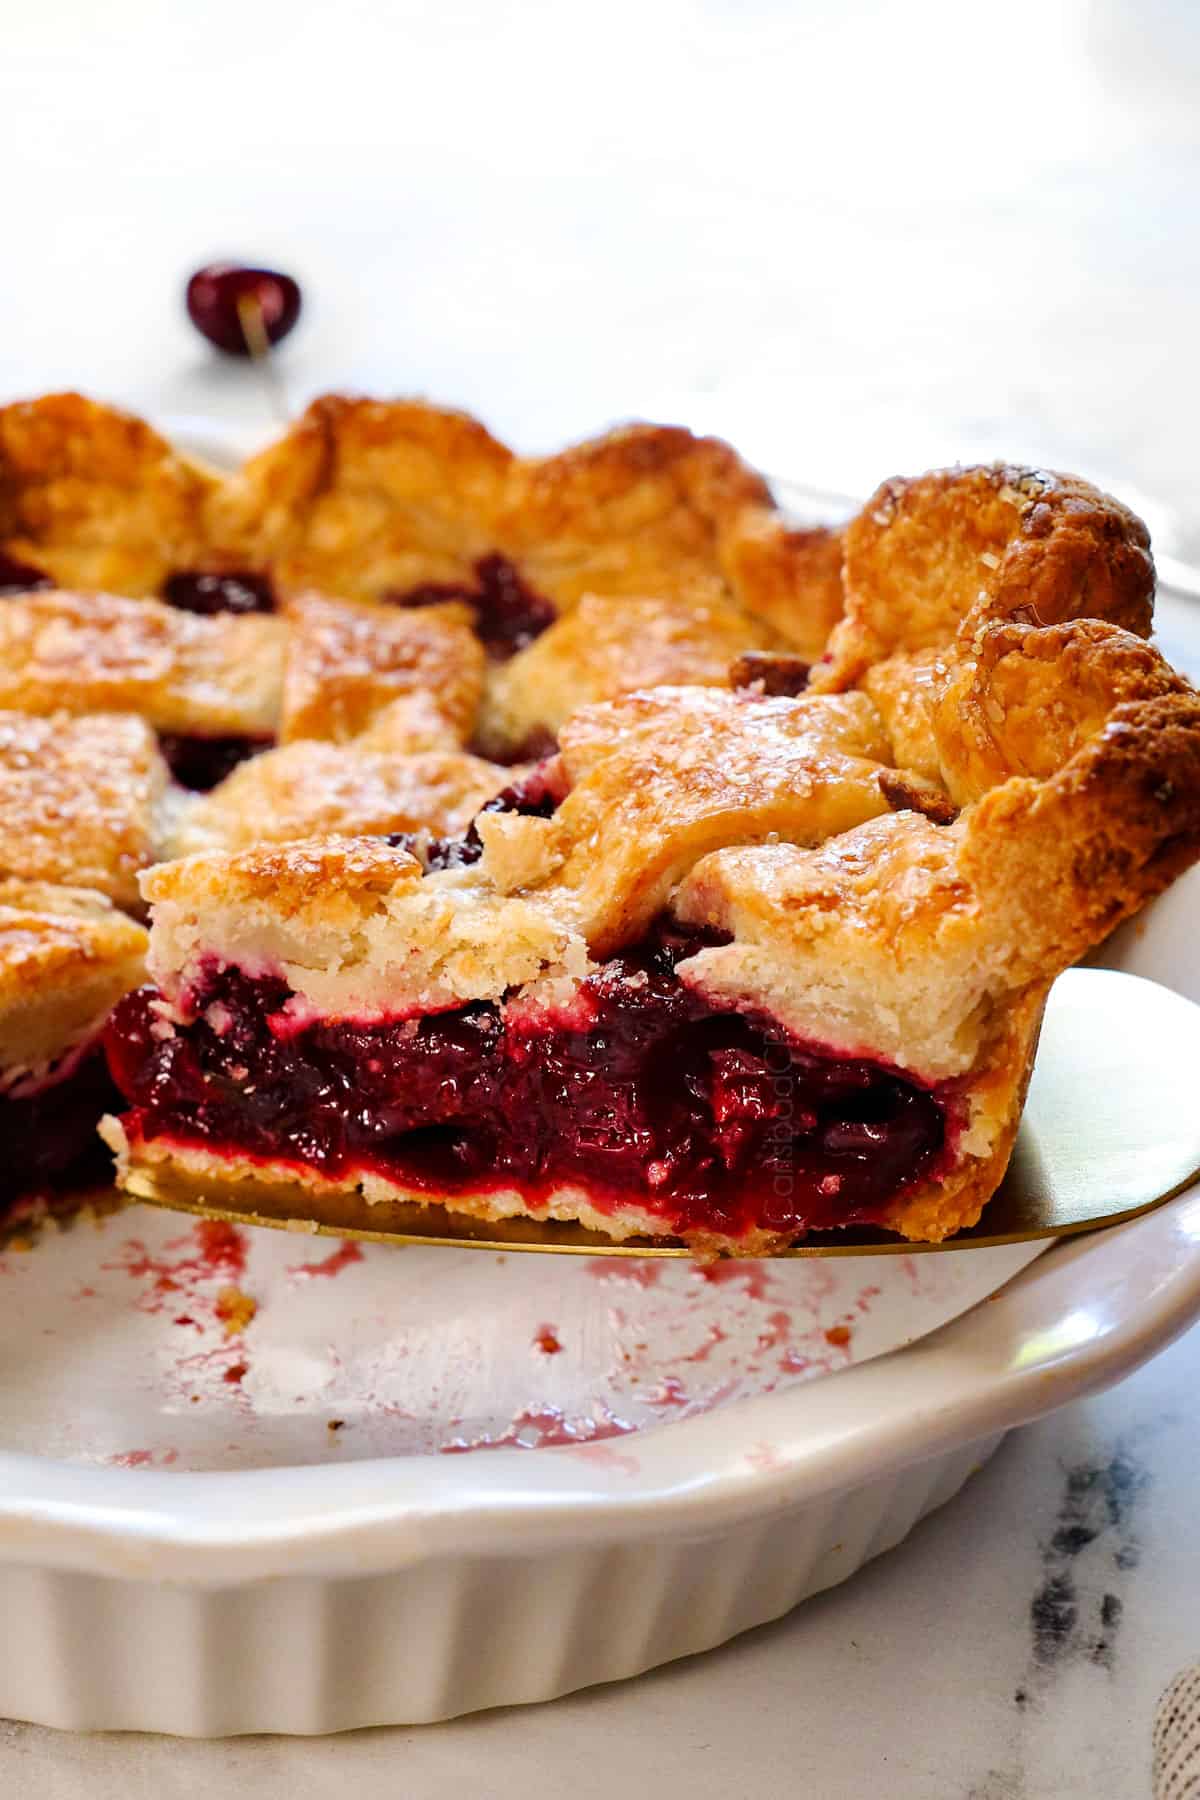
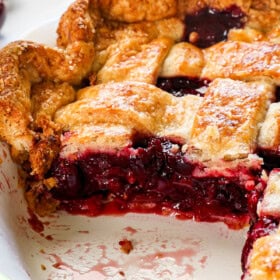
Discover the ultimate cherry pie stuffed with 2 pounds of perfectly sweet and tartcherries! The filling is juicy, thick, and jammy (never watery or gummy), balanced by a hint of lemon, spices, almond, and vanilla, and stuffed in a buttery golden crust. Our step-by-step guide with detailed photos and tips ensures a gorgeous, foolproof lattice top and a perfectly sliceable, pie every time!
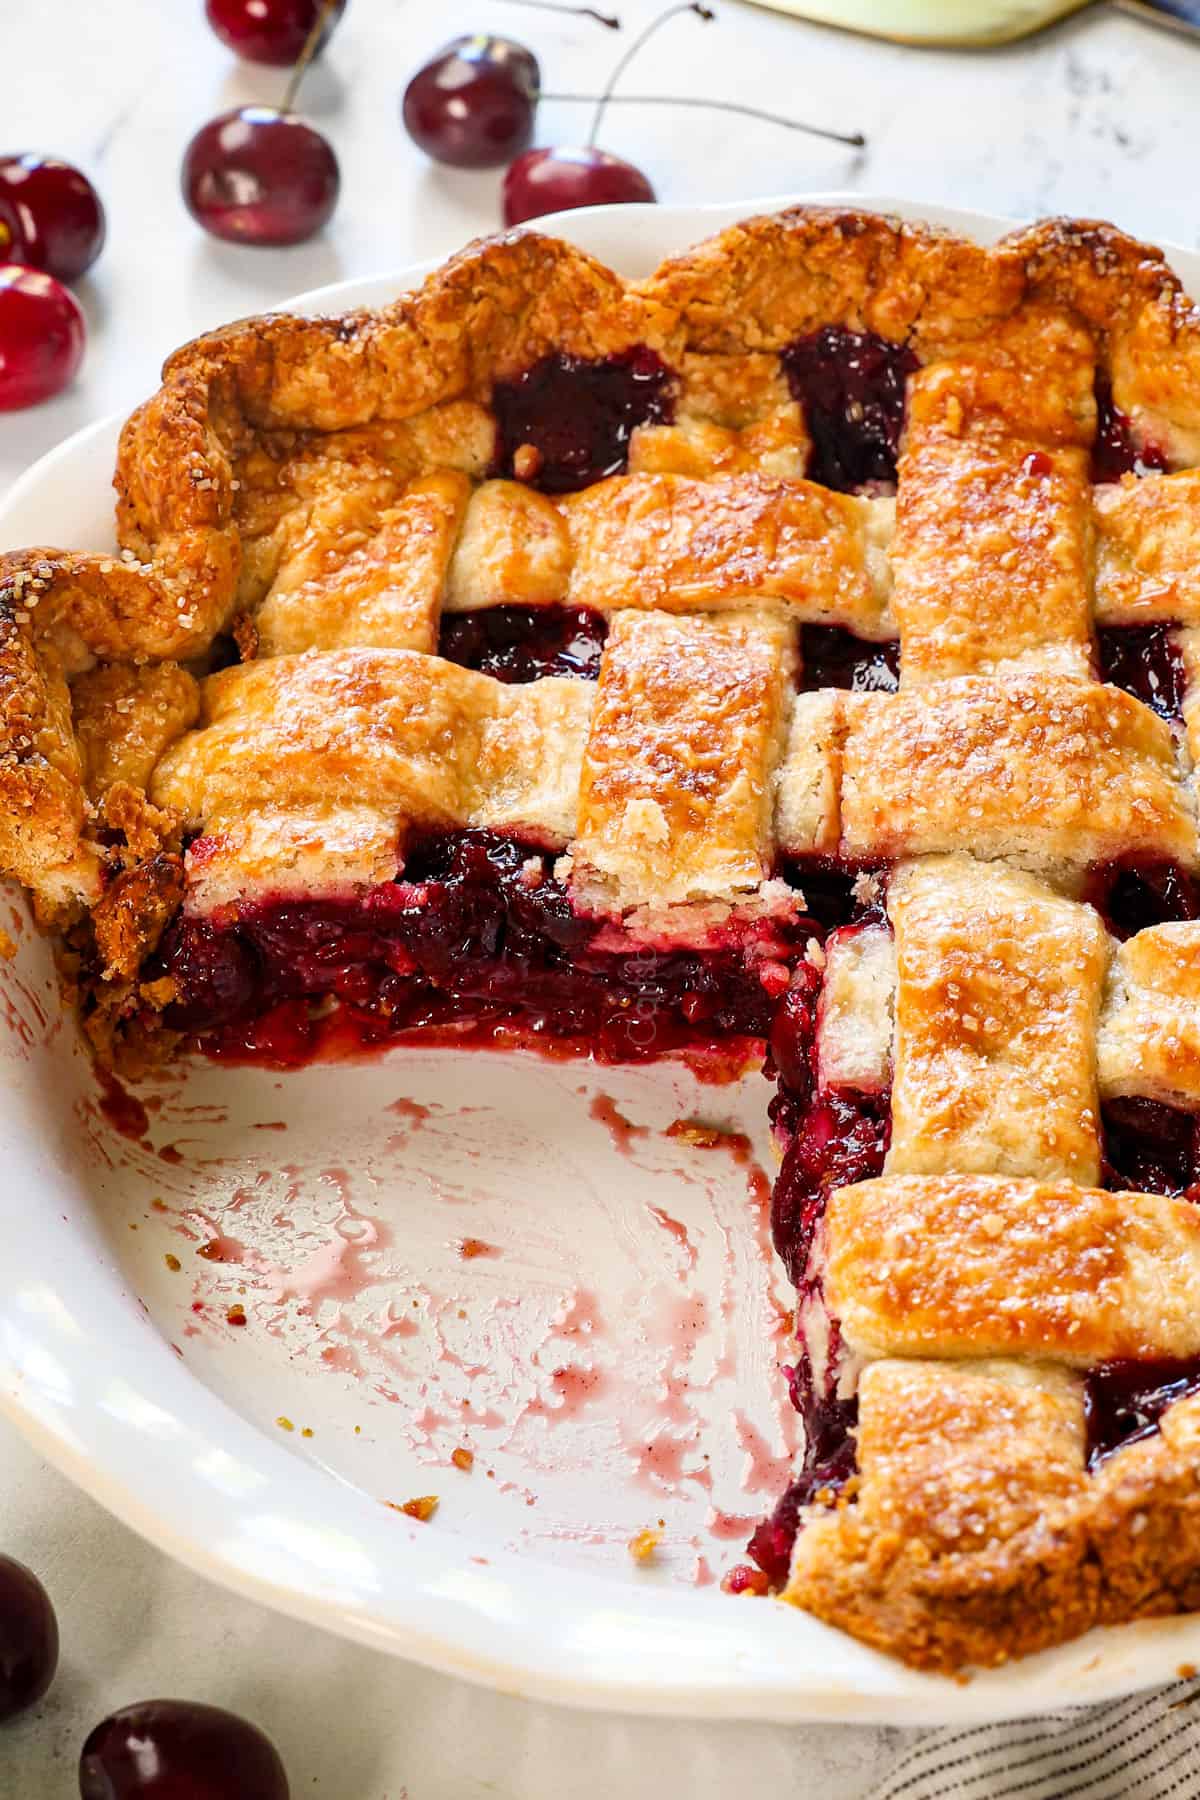
Perfectly textured filling. The cherry filling is thick, jammy, and stays intact while slicing due to a few factors: 1) Combining some of the ingredients before adding the cherries ensures the cornstarch is evenly dispersed; 2) Quartering and halving the cherries creates a cohesive, binding texture; 3) Reducing a specific amount of juices on the stovetop ensures the filling sets up perfectly.
Perfectly flavored filling. The filling is neither too sweet nor tart but just right, so you’ll want to return for more! Vanilla and almond extracts enhance the cherry flavor, while a touch of lemon juice keeps it fresh and bright. Ground allspice, ground ginger, and ground cinnamon add richness and depth.
The best homemade pie crust. The crust is made with both butter and shortening to create the best flavor and texture: mega buttery, mega tender, mega flaky deliciousness—I use it in all of my pie recipes! The crust can also be made ahead of time and stashed in the refrigerator or freezer.
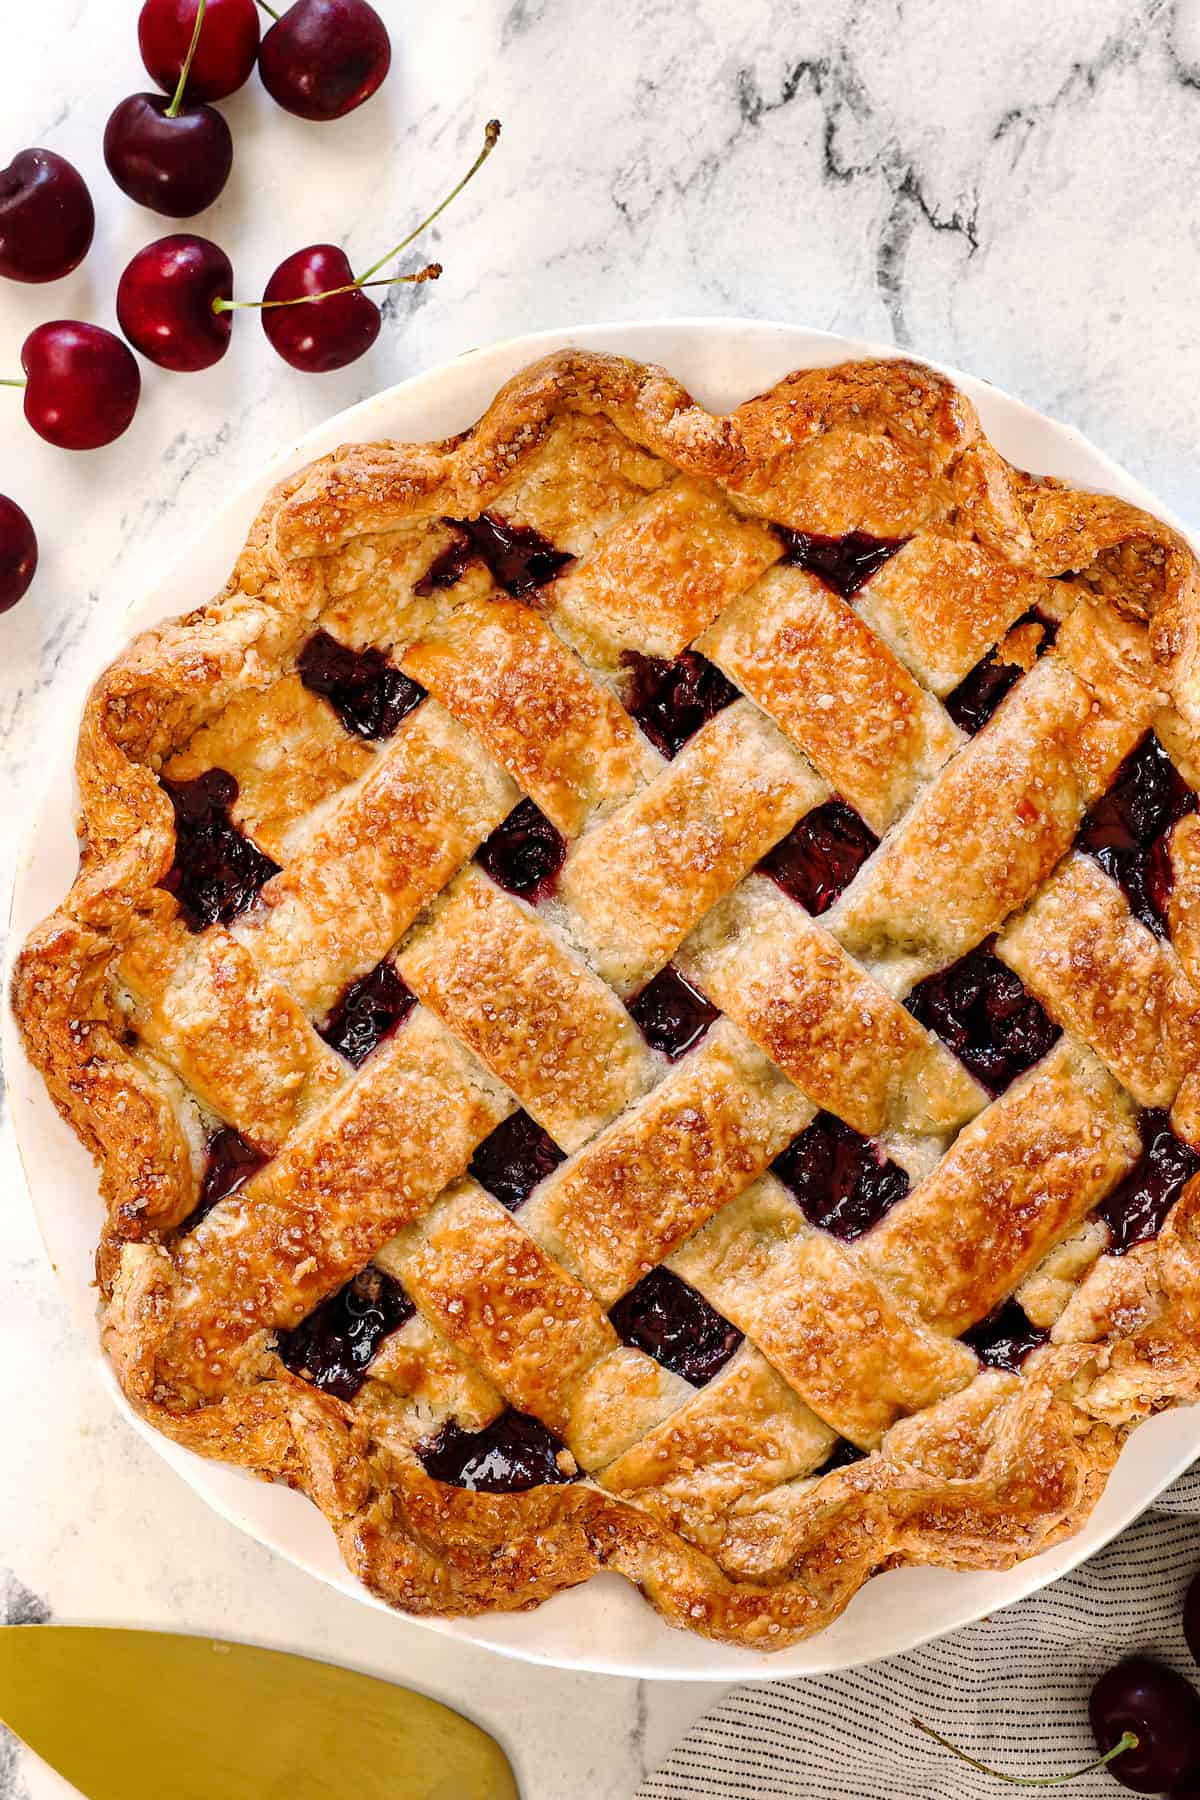
Easy, gorgeous, foolproof lattice top. If you’ve been intimidated by making a lattice top before, fear no more! My tips for chilling the strips make the dough super easy to work with so the lattice top comes together in minutes (after chilling).
Step-by-Step guide. This recipe includes detailed photos so it can be made perfectly every time, even if you’ve never made a pie before! Tips for making the filling and crust ahead of time are also included. With this detailed guide, you’ll feel reassured and supported at every step of the process.
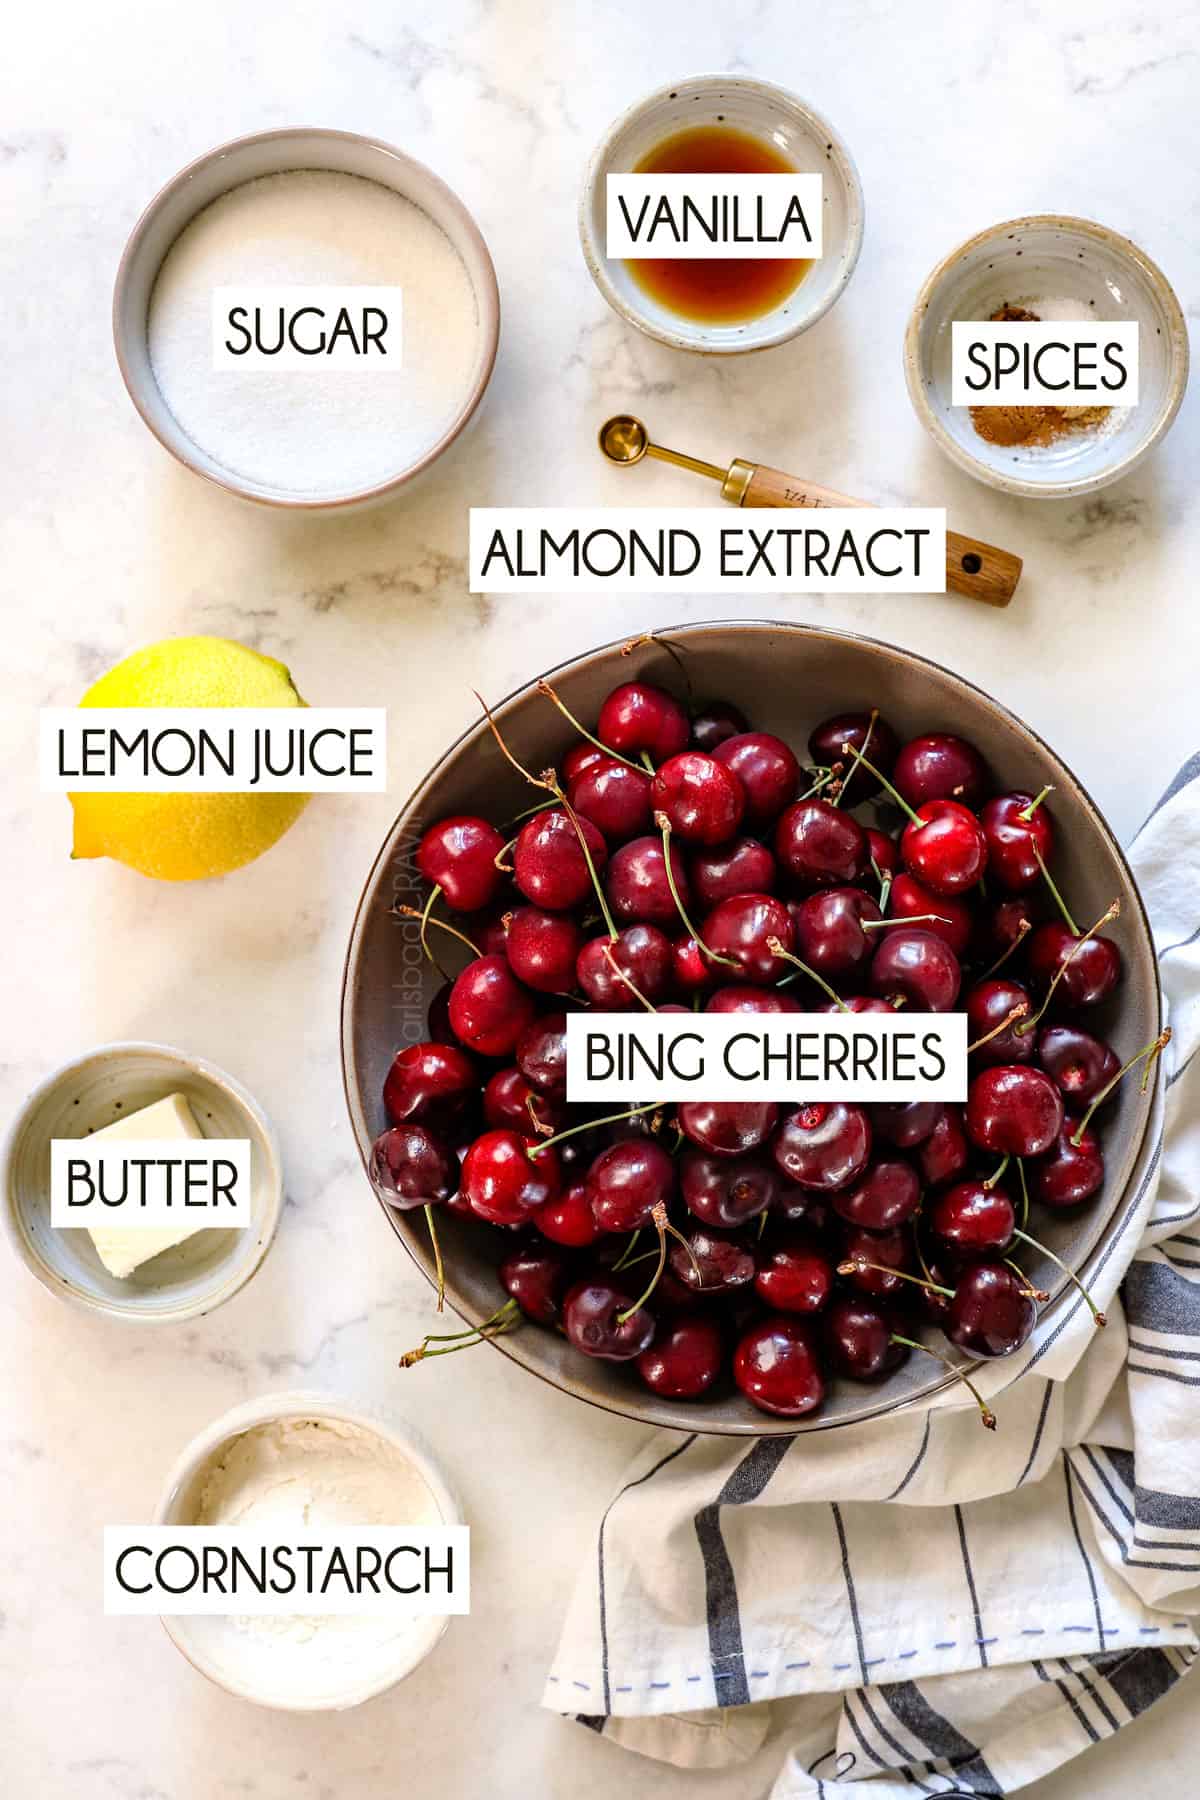
Ingredients Needed to Make The Best Cherry Pie Recipe
Let’s take a closer look at the ingredients you’ll need to make this cherry pie recipe and answer any possible questions (measurements in the printable recipe card at the bottom of the post):
Pie Crust: The pie crust is made with minimal, pantry friendly ingredients. You’ll need butter for flavor and flakiness and shortening for tenderness and workability. Additionally, you’ll need flour for structure, just 1 tablespoon sugar for sweetness and ice water.
Cherries: This recipe is made with fresh sweet cherries, specifically commonly found Bing cherries. They arelarge, dark red to almost black, with a firm and juicy texture. They have a deep, sweet flavor that intensifies when baked, making them perfect for a rich and flavorful cherry pie. You can also use other sweet varieties or a mix of Bing and sweet Rainer, Lambert, Sweetheart, Skeena, or Tulare for a unique twist.
Frozen Cherry Option: When using frozen cherries, it’s best to slice them while they’re still frozen. Then, toss them with the sugar mixture ingredients and allow them to thaw in the fridge. Remember to adjust the sugar based on whether you’re using sweet or sour cherries.
Sour Cherry Option: This recipe is written for sweet cherries. If using sour fresh or frozen cherries, increase the sugar to 1 cup.
Sugar: Even though sweet cherries (as opposed to sour) are used in the recipe, they are still sweet and tart. Granulated sugar adds sweetness to the pie filling, balancing its tartness.
Cornstarch: This thickening agent helps the cherry filling set and achieve a jammy consistency. It is preferred over flour because it creates a clearer, more glossy finish and has a neutral flavor that doesn’t overshadow the cherries. It is also a more effective thickener, requiring less quantity to achieve a smooth, jammy consistency.
Seasonings: Ground ginger, ground allspice, ground cinnamon, and a pinch of salt add richness, warmth, and complexity to the cherry filling.
Lemon juice: Adds brightness and a touch of acidity, keeping the filling fresh and preventing it from tasting flat. Fresh juice is always best, but you may substitute with bottled in a bind.
Vanilla extract: Enhances the flavor of the cherries and adds a rich, sweet note to the filling. Use the best quality for the best flavor.
Almond extract: Just a dash complements the cherry flavor and adds depth with its nutty, sweet aroma.
Butter: Melts into the filling while baking, adding richness and helping to create a silky texture. Use unsalted or skip the salt in the filling.
Egg Wash: One large egg beaten with one tablespoon of heavy cream (you may substitute milk) is the secret to a glossy, golden-brown finish. Heavy cream is recommended over milk because the wash is thicker and, therefore, easier to spread uniformly to achieve a more uniform and attractive appearance on the baked crust.
Coarse raw sugar: This is optional but sprinkling it over the crust before baking adds a delightful crunch and extra sweetness, enhancing both the texture and flavor of the crust. It also creates a beautiful, sparkling finish, making the pie more visually appealing.
How to Make Cherry Pie
Let’s take a closer look with step-by-step photos at how to make the best cherry pie recipe (full recipe in the printable recipe card at the bottom of the post):
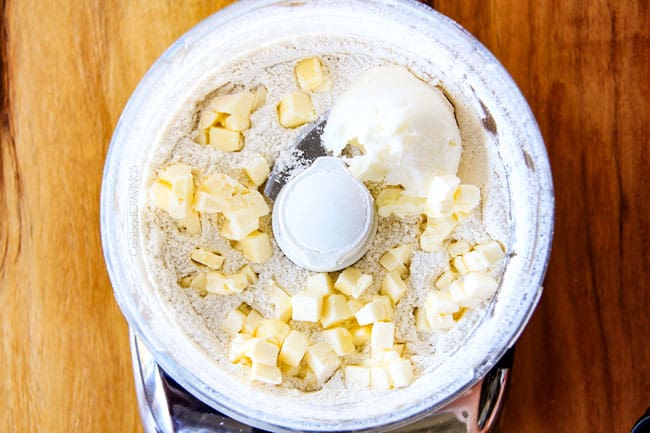
How to make the Pie crust
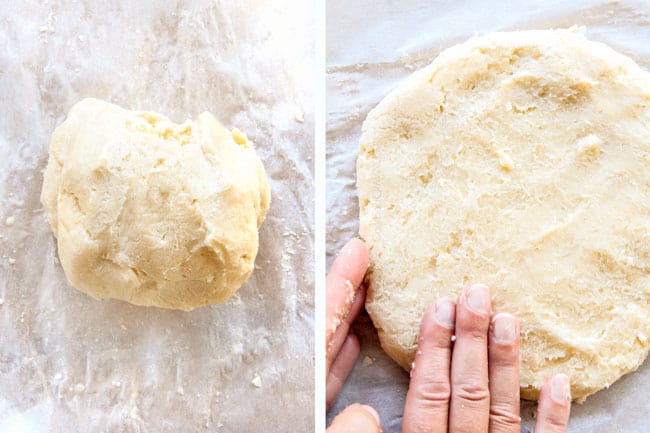
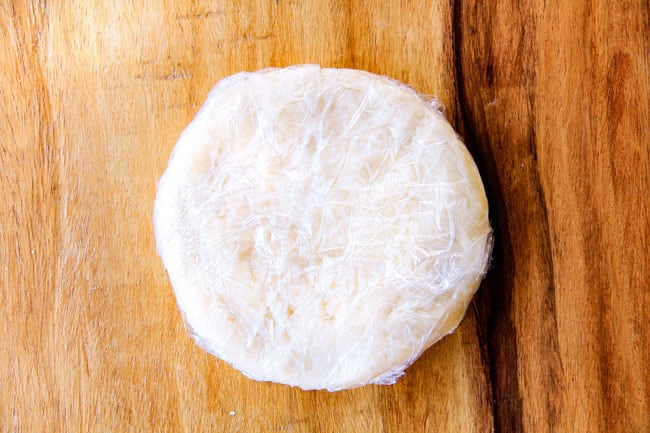
Step 1: Make the Pie Crust. I suggest making the crust the night before so it’s rolled out and ready to fill the next morning. This homemade pie crust post is full of tips and tricks for foolproof pie crust even if you’ve never made it before. Essentially, you’ll pulse the ingredients together, form them into a ball, flatten and chill, then roll out.
How to make the cherry pie filling
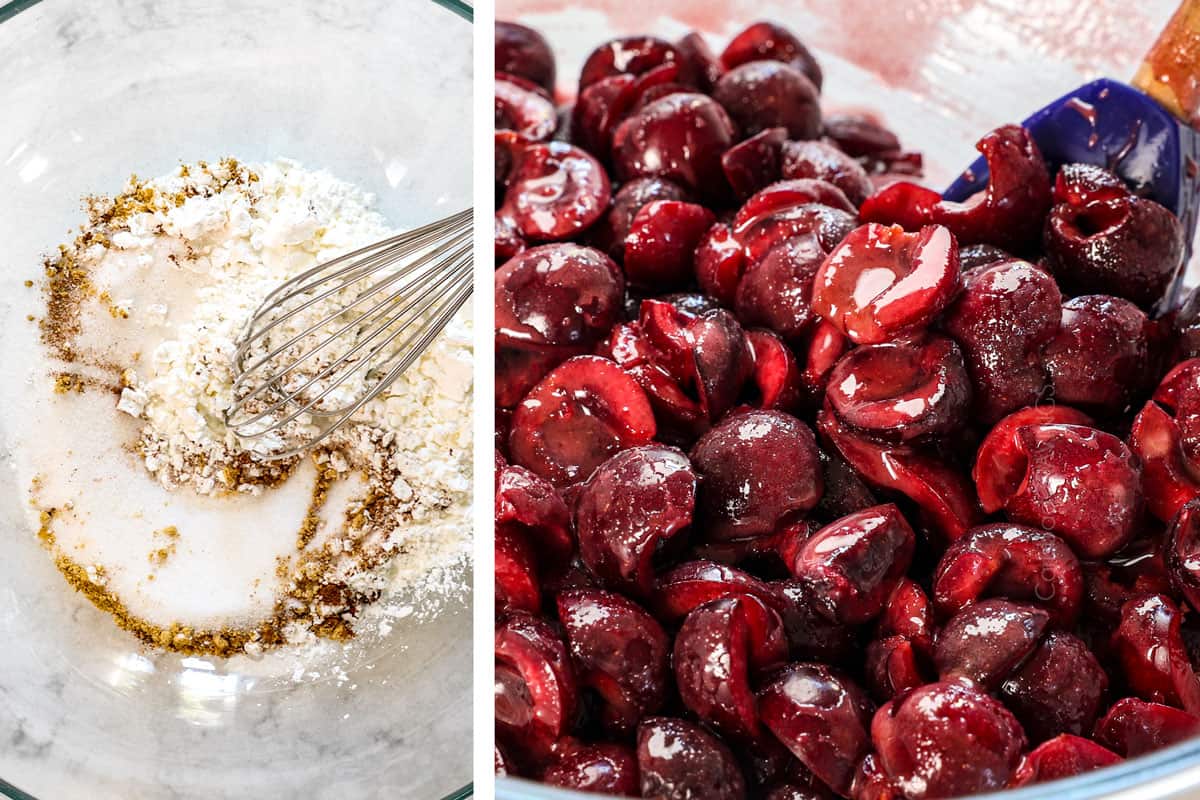
Step 1: Combine the Cherry Filling Ingredients. In a large bowl, mix the sugar, cornstarch, cinnamon, ginger, allspice, and salt. Stir in the halved and quartered cherries, lemon juice, vanilla, and almond extract until thoroughly combined. Refrigerate the filling while you roll out the pie dough and make the strips for the lattice top, or for up to 24 hours.
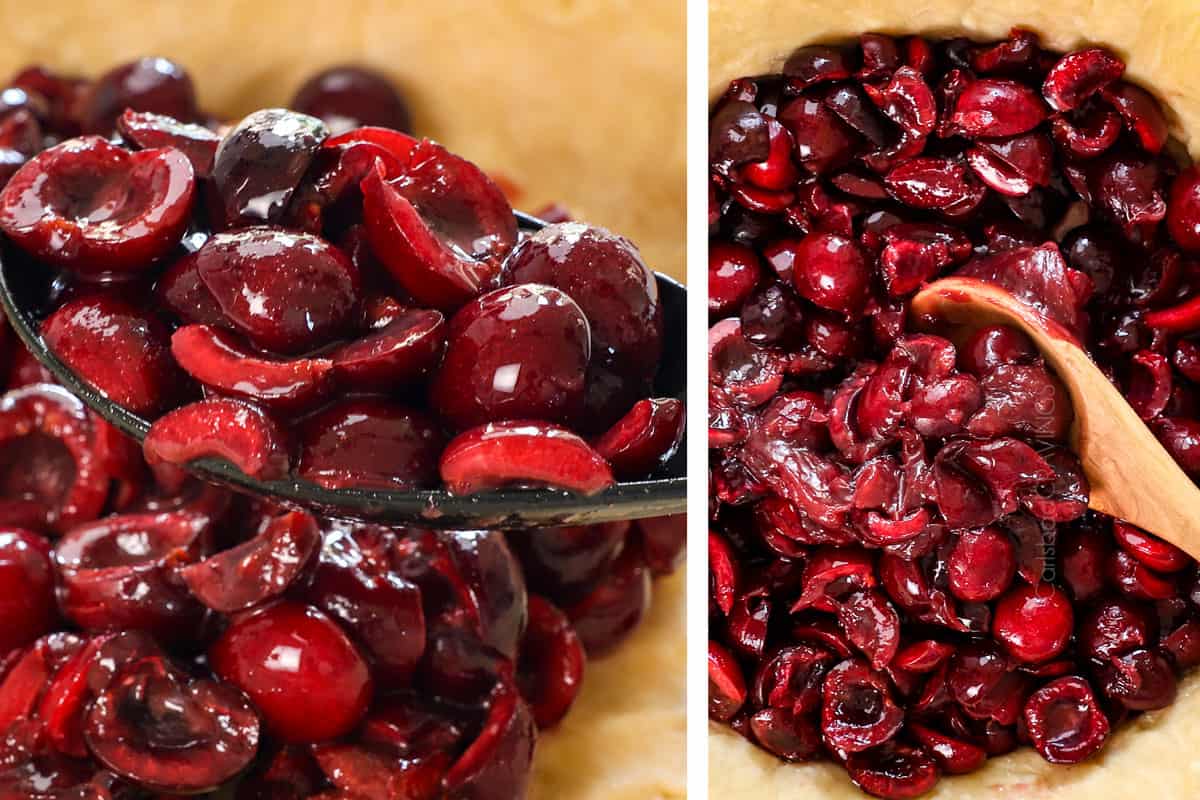
Step 2: Thicken the Juices. Transfer ⅓ cup of the cherry juices to a small saucepan. Cook over low heat until the juices have thickened to the consistency of thick syrup, about 3-4 minutes. Remove from the heat and cool for 5 minutes.
Step 3: Add the Cherries and Butter. Transfer the cherries to the pie crust using a slotted spoon. Pour the thickened juices over the cherries and stir to combine (it will be thick, but will thin in the oven). Dot the pieces of butter evenly over top of the filling.
How to Assemble Cherry Pie
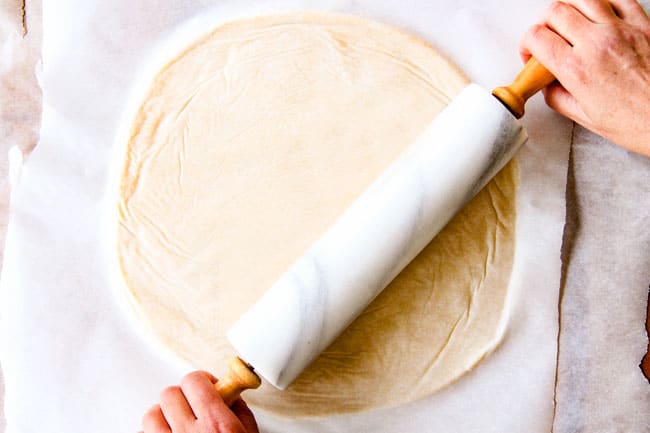
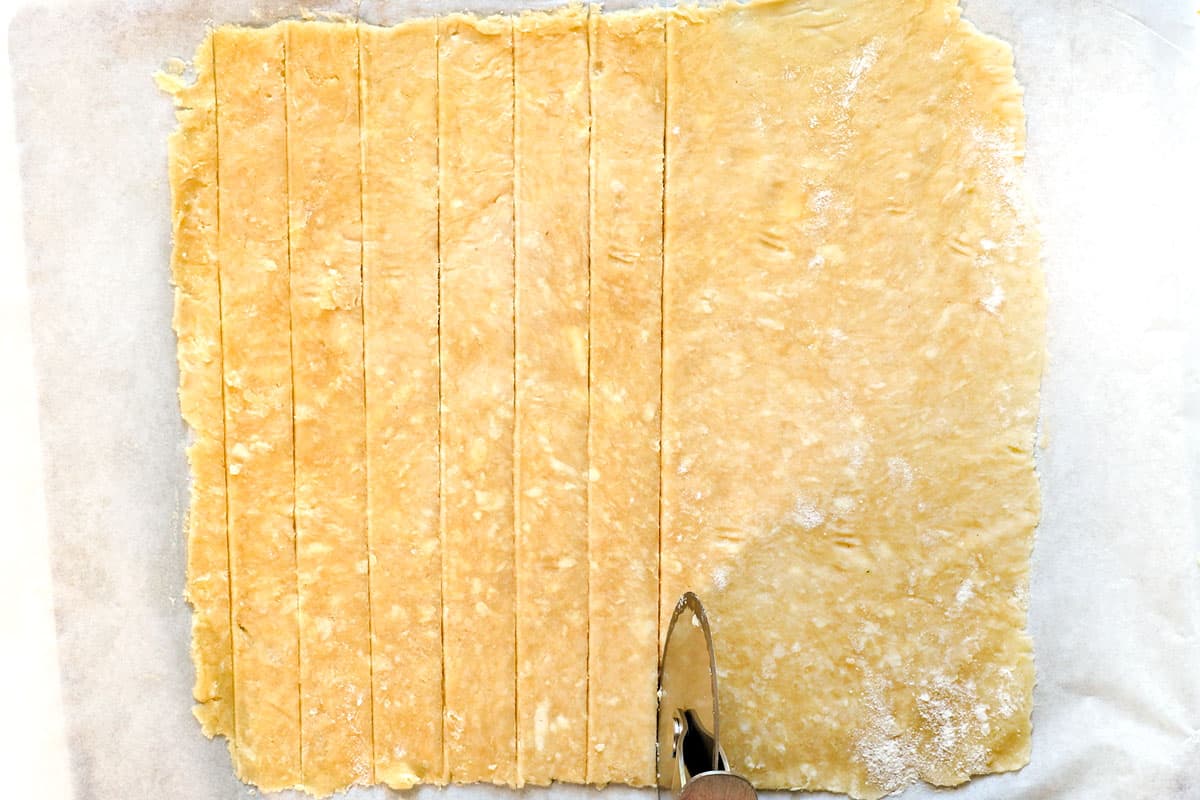
Step 1: Roll Out the Lattice Dough: Place a large piece of parchment paper on a baking sheet and generously dust with flour. Roll the dough into a 12×10-inch rectangle. At this point, I cover and freeze the dough (on the baking sheet) for 30 minutes for easier/cleaner slices.
Step 2:Make the Lattice Strips: Using a ruler and a pizza cutter, pastry wheel, or sharp knife, cut the dough into 1-inch-wide strips. For MUCH easier-to-handle lattices, cover with plastic wrap and freeze for 30 minutes or refrigerate for up to 24 hours.
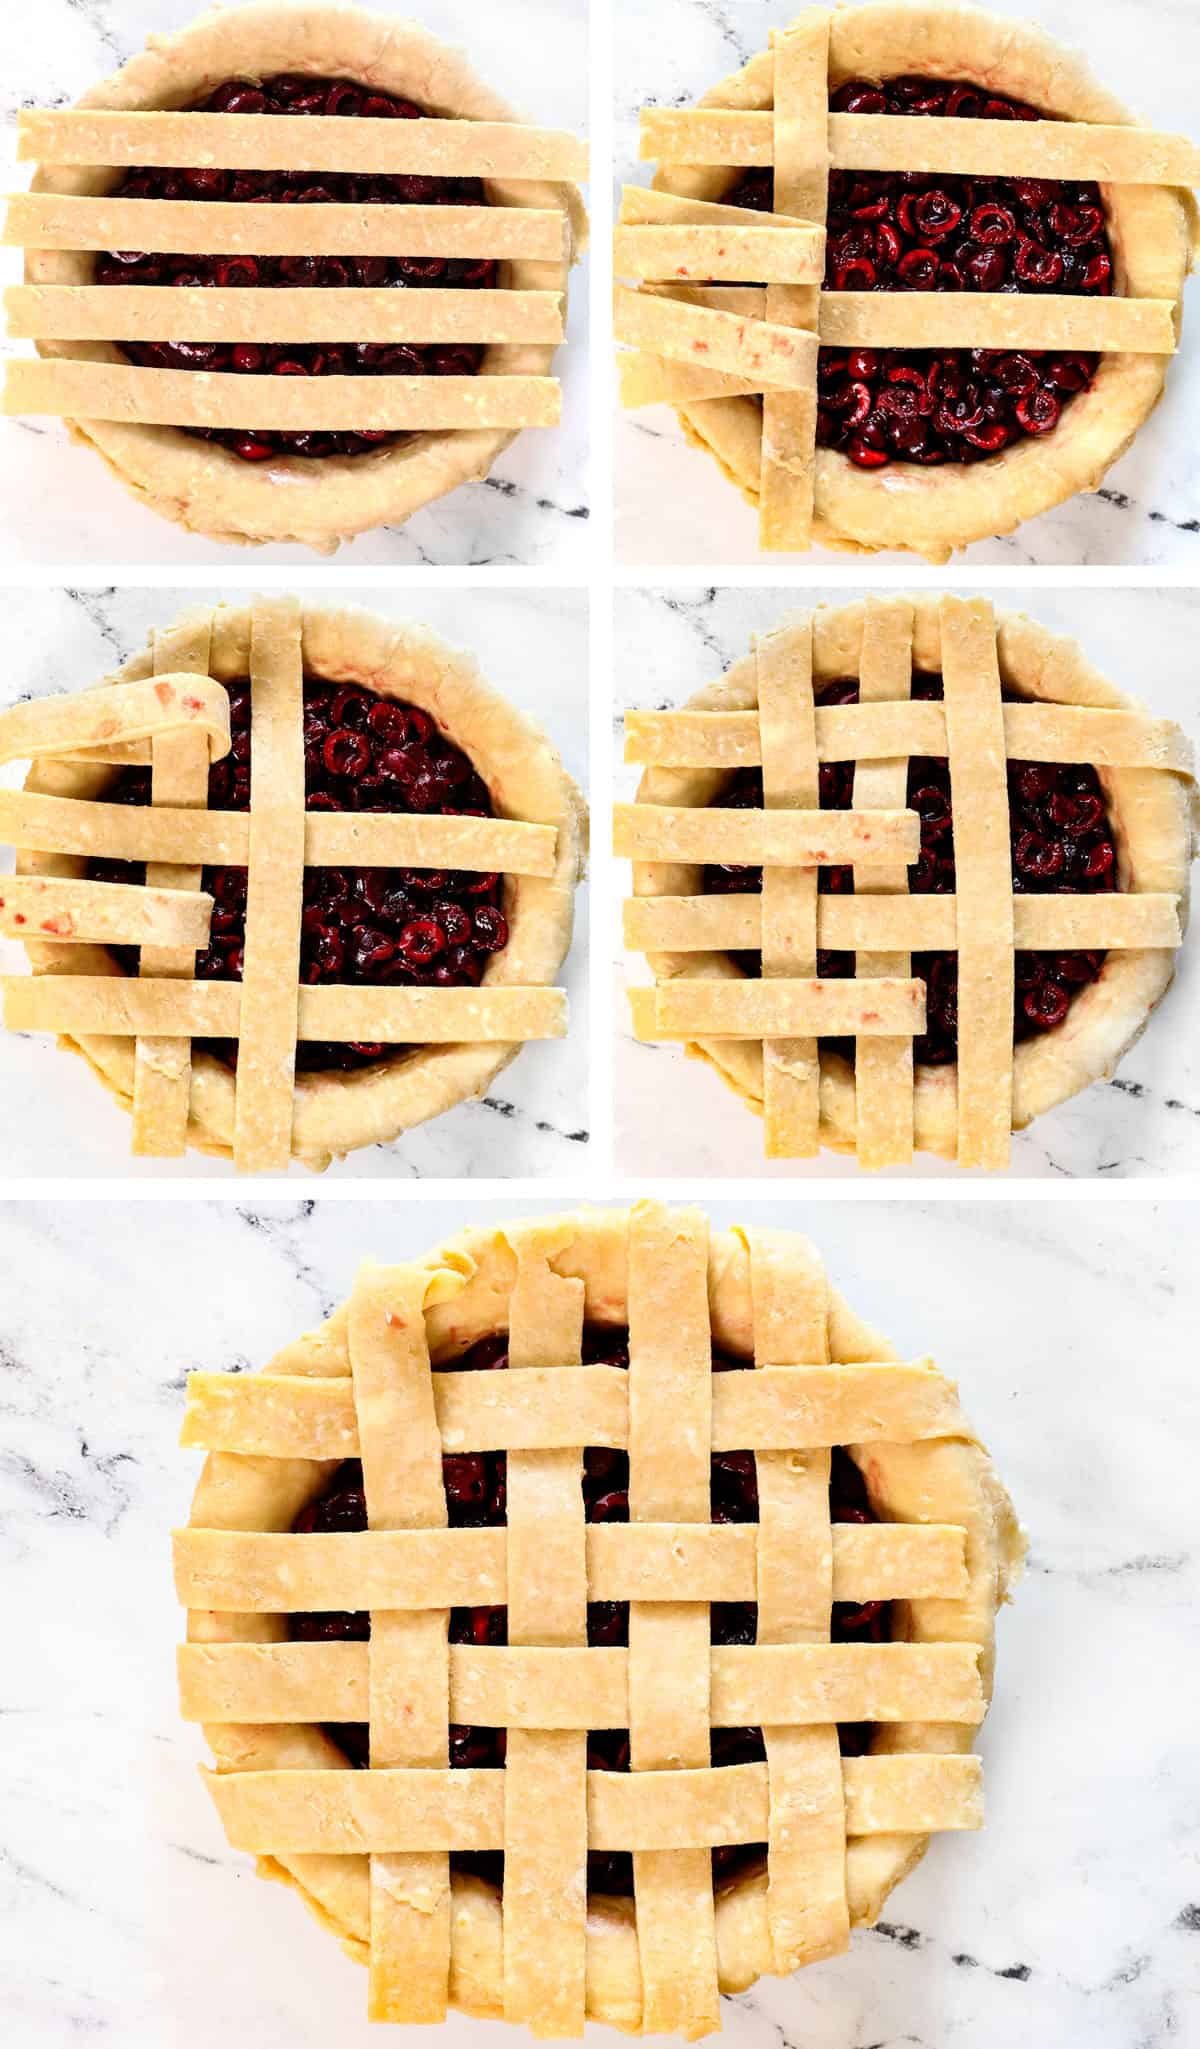
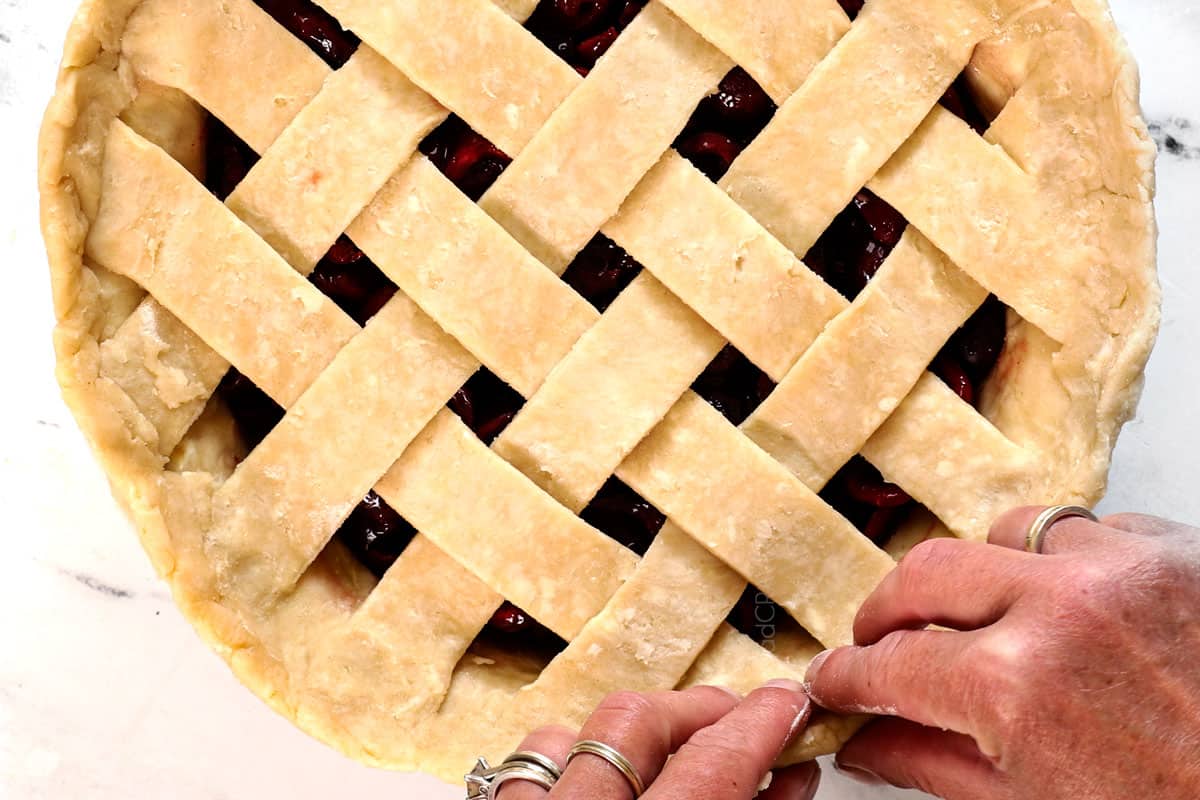
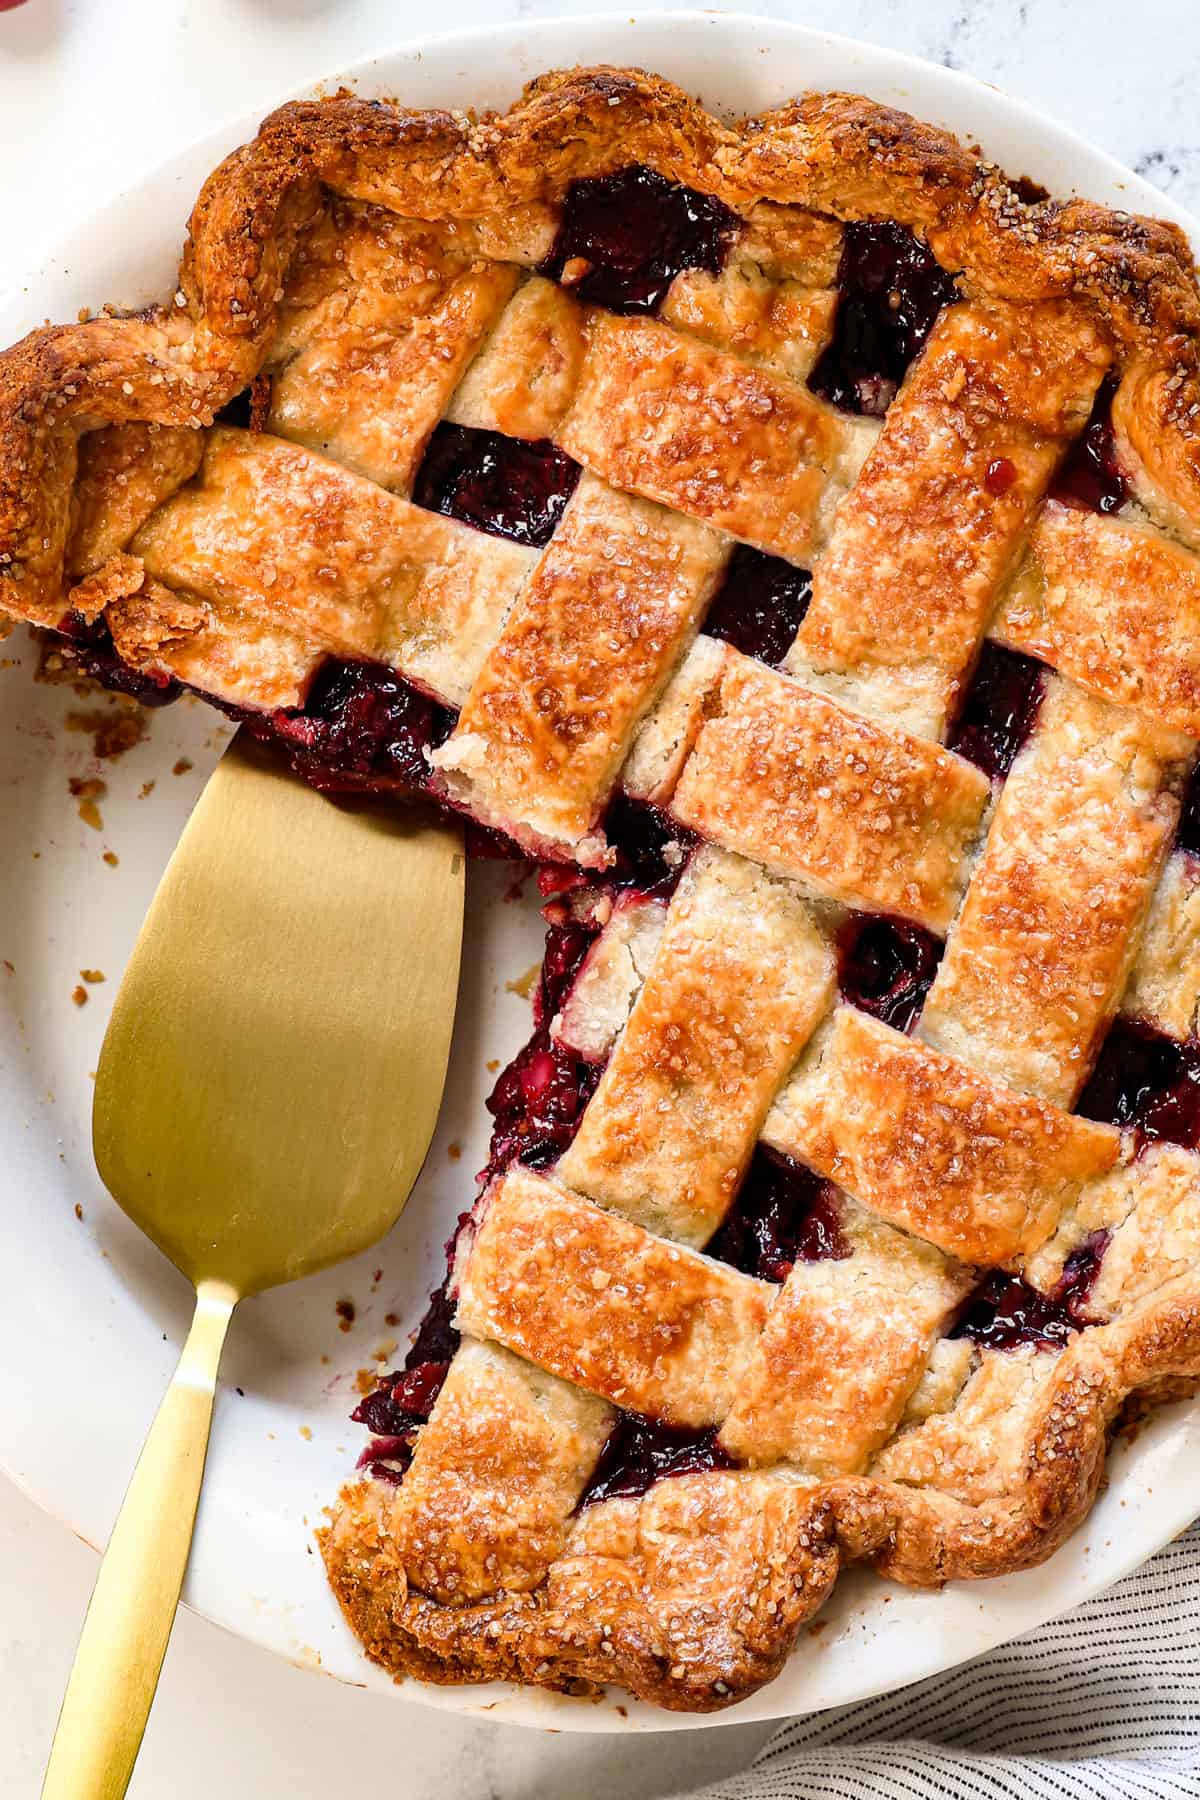
Step 3:Weave the Lattice Top. Start by laying four horizontal strips evenly spaced over the pie. Fold the first and third horizontal strips back and place a vertical strip on the left side. Unfold the first and third strips over the perpendicular strip and fold the second and fourth strip back. Add a second perpendicular strip, then unfold the second and fourth strip. Repeat the process with two more perpendicular strips for a total of eight strips, four running each direction.
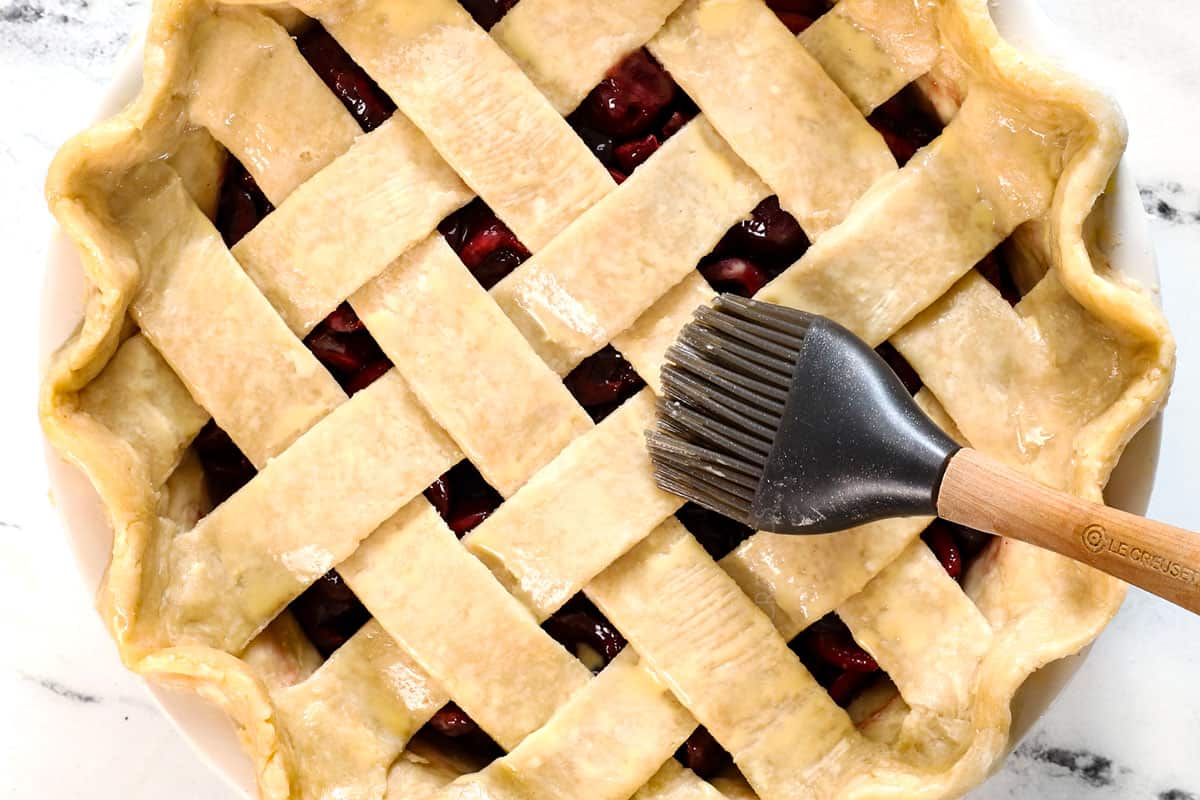
Step 4: Flute the Edges. Press the edges of the strips into the edges of the crust to seal. Flute, crimp or create whatever edge design you prefer.
Step 5:Brush with Egg Wash. Lightly brush the edges and lattice top with the egg wash. Sprinkle the top with coarse sugar.
Step 6: Refrigerate. Refrigerate the unbaked pie for 30 minutes. Don’t skip this step–this will help the crust not shrink.
How to Bake Cherry Pie
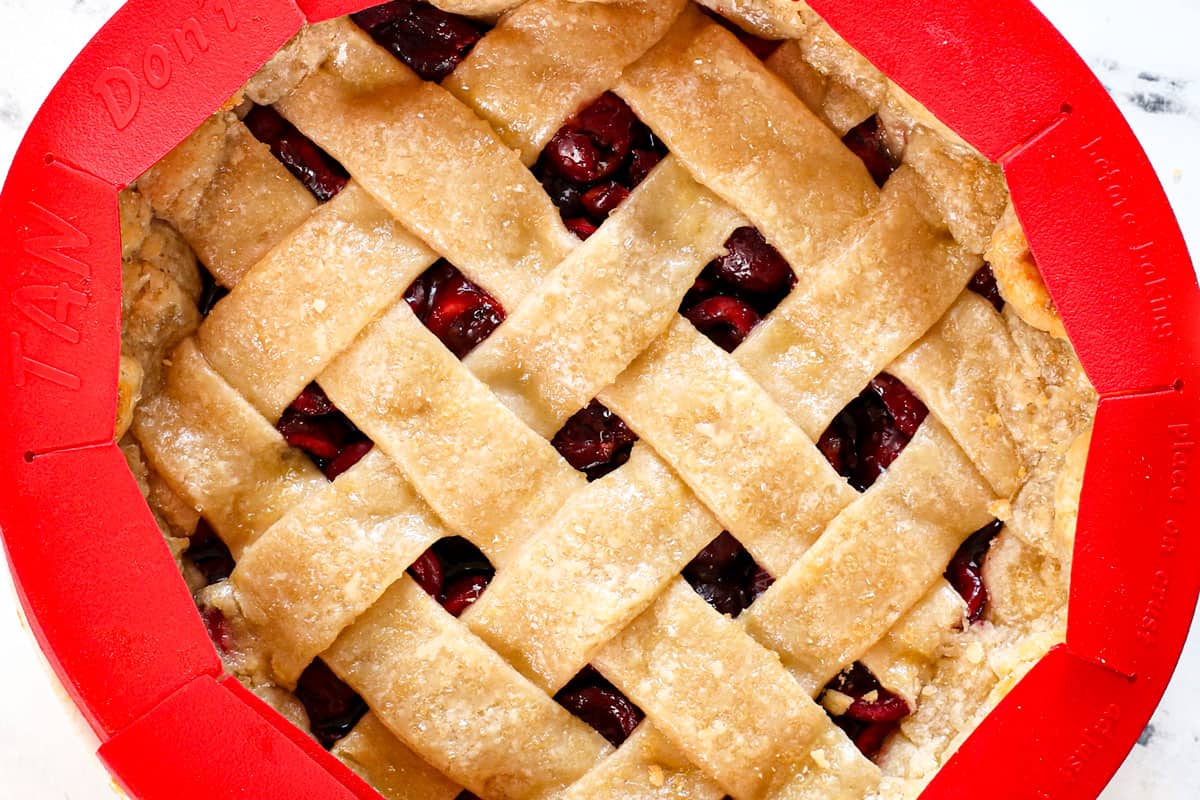
Step 1: Bake and Cover. Bake the pie at 400°F for 20 minutes. After this initial baking period, cover the edges of the crust with a pie shield or foil to avoid over-browning.
Step 2: Finish Baking. Lower the oven temperature to 375°F and continue baking for another 30-40 minutes, until the filling juices have been bubbling through the lattice vents for at least 5 minutes.
Cherry Pie Recipe Tips
Use cold ingredients for the pie crust. It is important that the shortening, butter, and water are very cold because keeping the fat cold until it enters the oven is what ensures a flaky crust as opposed to a crunchy one. According to Baking Illustrated, as the fat pellets melt during baking, steam is produced which creates pockets in the dough resulting in flaky layers—so we need our fat to not melt before the oven.
Handle the dough as little as possible. This will prevent the flour from being over worked, and it will keep the butter cold—both of which ensure a flaky pie crust.
Make pie dough ahead of time. I suggest making the dough up through adding it to the pie plate and folding the overhanging edges onto the dish. You can do this up to two days ahead of time. This will give the dough time in the refrigerator to firm up which will help prevent it from shrinking when baked.
A lattice crust isn’t just for looks! The lattice top allows steam to escape and the filling to bubble and thicken properly.
Make the lattice top quickly. Chilling the lattices before weaving makes them easy to work with and allows you to work quickly. If they start to become difficult to work with, pop them back in the refrigerator.
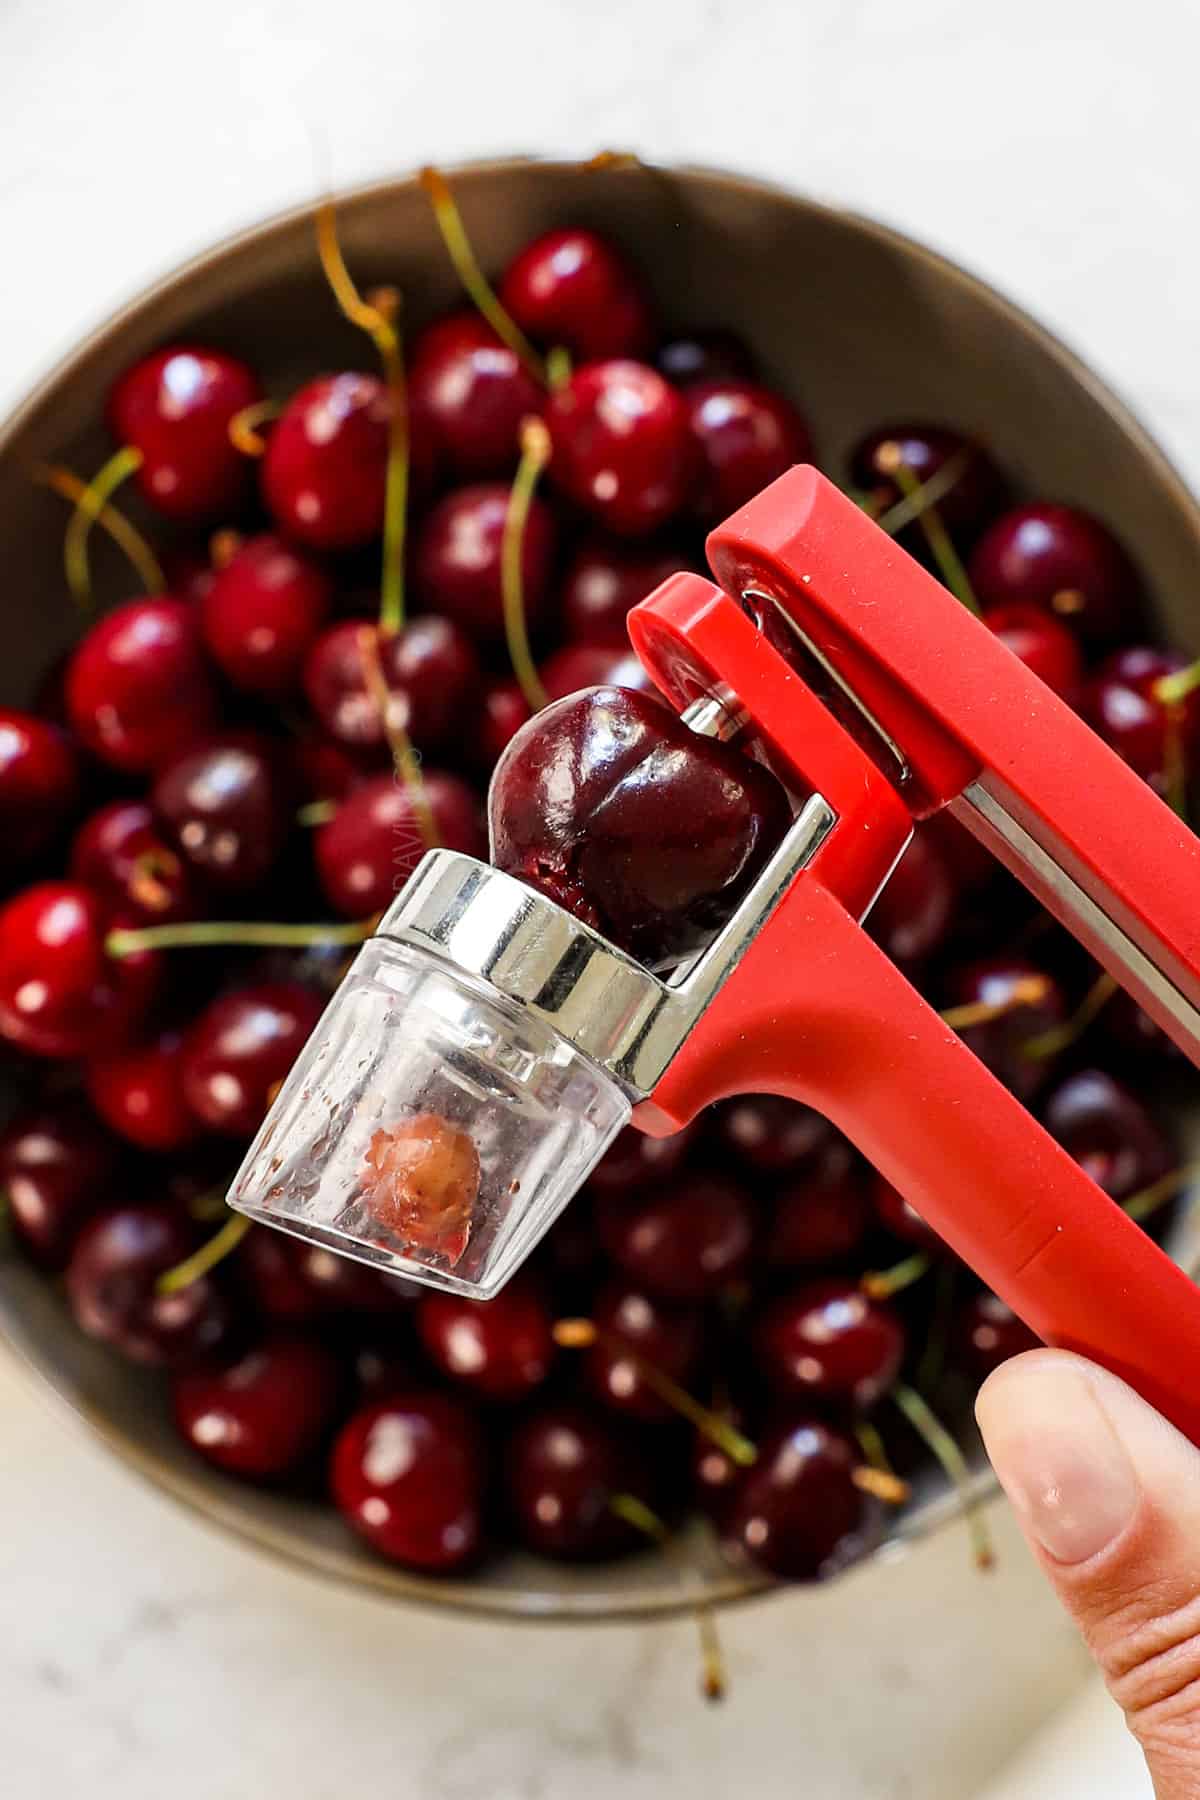
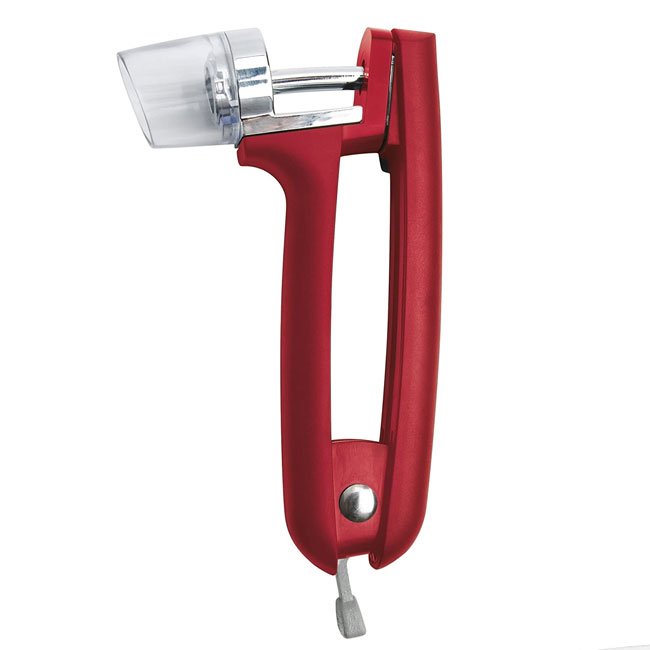
Use a cherry pitter. This cherry pitter pits cherries in minutes!
Don’t be alarmed when combining the thickened juice and cherries. When the warm, thickened juice comes in contact with the chilled cherries, the juice will harden a bit and become even thicker, this is perfectly normal. Try and stir everything together the best you can. The thickened juice will bake into the perfect consistency.
Don’t skip the egg wash. This is critical for a crispy, golden crust.
You don’t need to blind bake or par bake the pie crust. This is typically done so the bottom doesn’t get soggy. However, in this recipe the juices are reduced and thickened on the stove which prevents the bottom of the pie from becoming soggy. Additionally, the baking time is long enough to sufficiently bake the crust.
Use a pie shield. Cover the crust edges with a pie shield (the one I use) or aluminum foil after baking for 20 minutes to prevent over-browning.
Watch for bubbling filling. Check the pie with your oven light at the early end of the cooking window. As soon as you see bubbling around the edges, set a timer for 5 minutes. This will ensure the cornstarch in the filling is activated and the cherry pie will be thick. If you don’t want a thicker filling, don’t bubble for the full 5 minutes.
Pitting cherries made easy!
This cherry pitter makes pitting cherries quick and easy for snacking and desserts like this!
There are several options for preparing the full pie in advance or parts of the pie in advance:
Pie dough: The pie discs can be covered in plastic wrap and refrigerated for up to 5 days. Alternatively, make the dough through rolling it out and placing it in the pan. At this point, it can be covered and refrigerated for up to 5 days.
Cherries: You can pit the cherries up to 2 days in advance. When ready to use, transfer the cherries and any juices to the sugar mixture. Alternatively, you can make the cherry mixture up to 24 hours ahead and refrigerate or freeze it for up to 3 months. Thaw the mixture, then proceed to thicken the juice per recipe instructions.
Complete Pie: Bake and cool the pie, then cover and store at room temperature for up to one day. Baked pie can also be frozen for up to three months and thawed overnight in the refrigerator. Allow the pie to come to room temperature before serving, or reheat individual servings in the microwave for 10 seconds or so.
Cherry Pie Recipe variations
Cherry Crumb Pie: Top with a buttery, crumbly streusel instead of a top crust like in this pear pie recipe.
Chocolate Cherry Pie: Combines cherries with a layer of chocolate or chocolate chips.
Cherry Peach Pie: Mixes cherries with fresh peaches for a delightful fruit combination.
Cherry Cream Cheese Pie: Features a layer of sweetened cream cheese beneath the cherry filling.
Serving Homemade Cherry Pie
Temperature: Serve the cherry pie at room temperature or slightly warmed for the best flavor. Microwaving individual slices for 10 seconds or so is a game changer.
Accompaniments: Pair each slice with a scoop of vanilla ice cream or a dollop of whipped cream for a creaming cooling contrast.
Presentation: Garnish with a sprig of mint or a light dusting of powdered sugar for a beautiful presentation.
Cutting: Ensure the pie has cooled completely before slicing to maintain the integrity (perfectly sliceable) and avoid a runny filling.
How to Store Leftover Sweet Cherry Pie
Let the pie cool completely before tightly covering with foil or plastic wrap. Store at room temperature for up to 24 hours. For longer storage, refrigerate the pie for up to 5 days. Whether the pie is at room temperature or refrigerated, we like to warm individual servings in the microwave for 10 seconds or so.
HOW TO freeze Cherry Pie
To freeze the pie, wrap it tightly in plastic wrap and then in aluminum foil. Store it in the freezer for up to 3 months. Thaw in the refrigerator, then either allow to come to room temperature before serving or microwave individual servings for 10 seconds or so.
Discover the ultimate cherry pie stuffed with 2 pounds of perfectly sweet and tartcherries! The filling is juicy, thick, and jammy (never watery or gummy), balanced by a hint of lemon, spices, almond, and vanilla, and stuffed in a buttery golden crust. Our step-by-step guide with detailed photos and tips ensures a gorgeous, foolproof lattice top and a perfectly sliceable, pie every time!
Servings: 810 hours
Total Time: 7 hourshrs25 minutesmins
Prep Time: 1 hourhr30 minutesmins
Cook Time: 55 minutesmins
Chilling 5 hourshrs
Save This Recipe To Your Recipe Box
You can now create an account on our site and save your favorite recipes all in one place!
1½tablespoonscold unsalted butter,cut into small cubes
Egg wash: 1 egg beaten with 1 TB heavy cream(may 1 TB sub milk)
Optional: Coarse raw sugarfor sprinkling on crust
Instructions
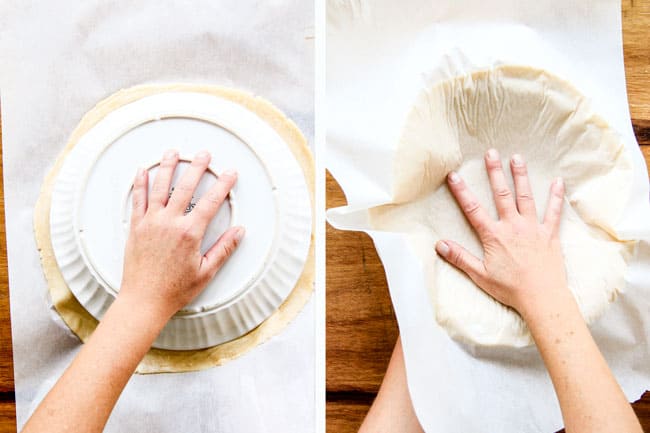
Prepare Pie Crust: Follow this recipe and prepare one pie crust (the bottom crust) through ROLL DOUGH: Step 2 (folding overhanging dough onto the edges of the pie pan). Prepare the second pie crust through MAKE DOUGH: Step 6 (refrigerating the disc).
Make the Cherry Filling: In a large bowl, mix the sugar, cornstarch, cinnamon, ginger, allspice, and salt. Cut half of the cherries into halves and the rest into quarters. Stir in the cherries, lemon juice, vanilla, and almond extract into the sugar mixture until thoroughly combined. Cover and refrigerate while you prep the lattice top or up to 24 hours.
Roll Out Dough for Lattice Top: Place a large piece of parchment paper on a baking sheet and generously dust with flour. Roll the dough disc into a rough 12×10-inch rectangle on the parchment paper. At this point, I cover and freeze the dough (on the baking sheet) for 20-30 minutes for easier/cleaner slices.
Make Lattice Strips: After chilling, use a ruler and a pizza cutter, pastry wheel, or sharp knife to cut the dough into 1-inch-wide strips. Cover with plastic wrap and freeze for 30 minutes or refrigerate for up to 24 hours for MUCH easier-to-handle lattices. When you're ready to use the lattices, finish the cherry filling first:
Thicken Cherry Juice: Transfer ⅓ cup of the juice from the cherry mixture (or ¼ cup if that’s all there is) to a small saucepan. Cook over low heat until the juice has thickened to the consistency of thick syrup, about 3-4 minutes. Remove from the heat and cool for 5 minutes; set aside.
Add Cherry Filling to the Pie: Using a slotted spoon, transfer the cherries to the pie crust. Pour the thickened juices over the cherries and stir to combine (it will be thick but will thin in the oven). Dot the pieces of butter evenly over the top.
Weave the Lattice Top (See Post for Photos):If the strips become too stiff to work with, let them rest on the counter for 10 minutes or so. Start by laying four horizontal strips evenly spaced over the pie. Fold the first and third horizontal strips back and place a vertical strip on the left side. Unfold the first and third strips over the perpendicular strip and fold the second and fourth strip back. Add a second perpendicular strip, then unfold the second and fourth strip. Repeat the process with two more perpendicular strips for a total of eight strips, four running in each direction.
Make the Edges: Press the edges of the strips into the edges of the crust to seal. Flute, crimp, or create whatever edge design you prefer. Lightly brush the entire crust and lattice top with the egg wash. Sprinkle the top with coarse sugar.
Refrigerate: Chill the unbaked pie for 30 minutes. Meanwhile, preheat the oven to 400 degrees F. Don’t skip this step—it will help the crust not shrink.
Bake: Bake the pie at 400°F for 20 minutes. After this initial baking period, cover the edges of the crust with a pie shield or foil to avoid over-browning. Lower the oven temperature to 375°F and continue baking for another 30-40 minutes, until the filling juices have bubbled through the lattice vents for at least 5 minutes.
Cool: Transfer the pie to a cooling rack for 4 hours before slicing. We love to warm our slices for about 10 seconds in the microwave and serve with vanilla ice cream – yum!
Video
Notes
This cherry pitter makes pitting cherries quick and easy for snacking and desserts like this!
Cherries: This recipe is made with fresh sweet cherries, specifically commonly found Bing cherries. However, you can also use other sweet varieties or a mix of Bing and sweet Rainer, Lambert, Sweetheart, Skeena, or Tulare for a unique twist.
Sour Cherry Option: This recipe is written for sweet cherries. If using sour fresh or frozen cherries, increase the sugar to 1 cup.
Frozen Cherry Option: When using frozen cherries, it’s best to slice them while they’re still frozen. Then, toss them with the sugar mixture ingredients and allow them to thaw in the fridge. Remember to adjust the sugar based on whether you’re using sweet or sour cherries.
Storage: Let the pie cool completely before tightly covering it with foil or plastic wrap. Store at room temperature for up to 24 hours. For more extended storage, refrigerate the pie for up to 5 days. Whether the pie is at room temperature or refrigerated, we like to warm individual servings in the microwave for 10 seconds.
Prep and Make Ahead Instructions
Pie dough: The pie discs can be covered in plastic wrap and refrigerated for up to 5 days. Alternatively, make the dough through rolling it out and placing it in the pan. At this point, it can be covered and refrigerated for up to 5 days.
Cherries: You can pit the cherries up to 2 days in advance. Transfer the cherries and any juices to the sugar mixture when ready to use. Alternatively, you can make the cherry mixture up to 24 hours ahead and refrigerate or freeze it for up to 3 months. Thaw the mixture, then proceed to thicken the juice per recipe instructions.
Complete Pie: Bake and cool the pie, then cover and store at room temperature for up to one day. Baked pie can also be frozen for up to three months and thawed overnight in the refrigerator. Allow the pie to come to room temperature before serving, or reheat individual servings in the microwave for 10 seconds or so.


leave a review