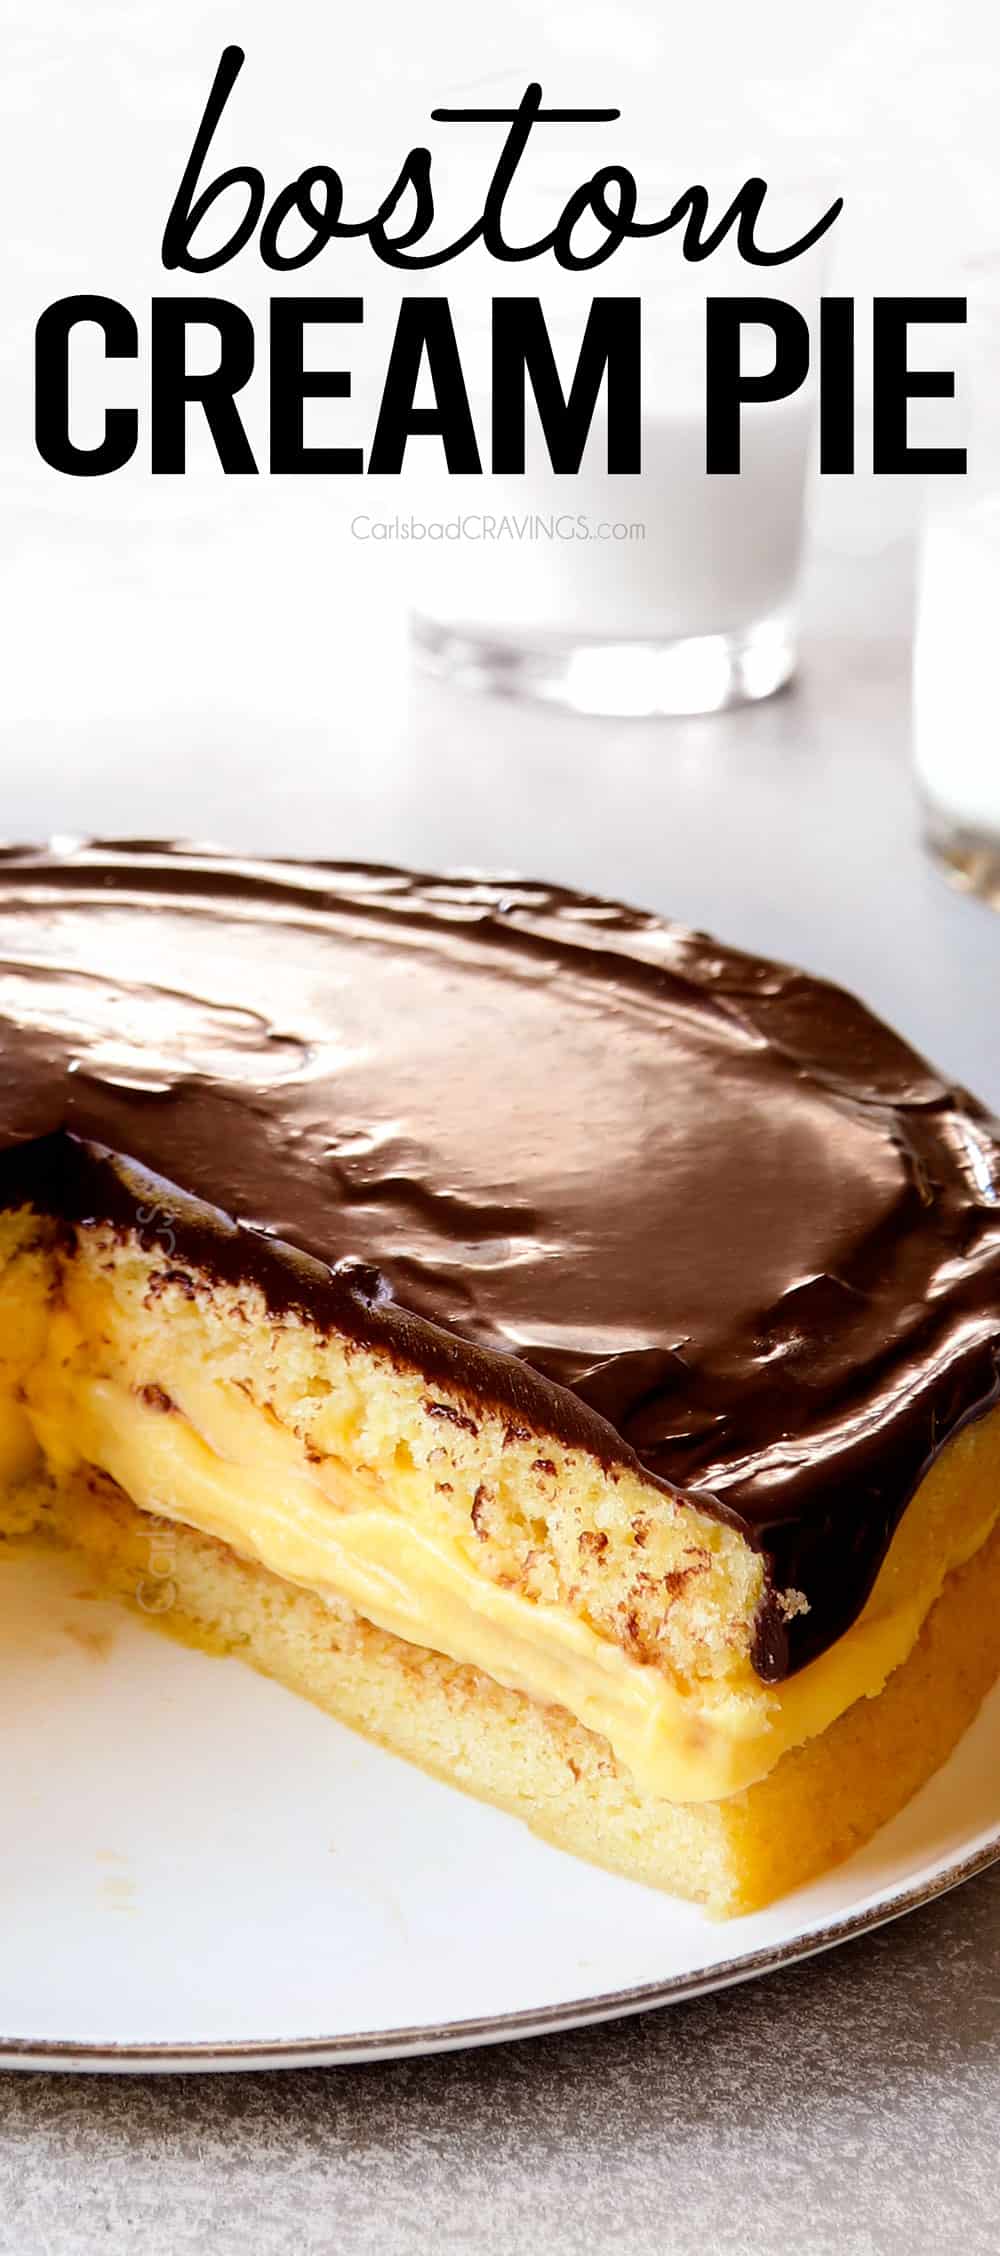
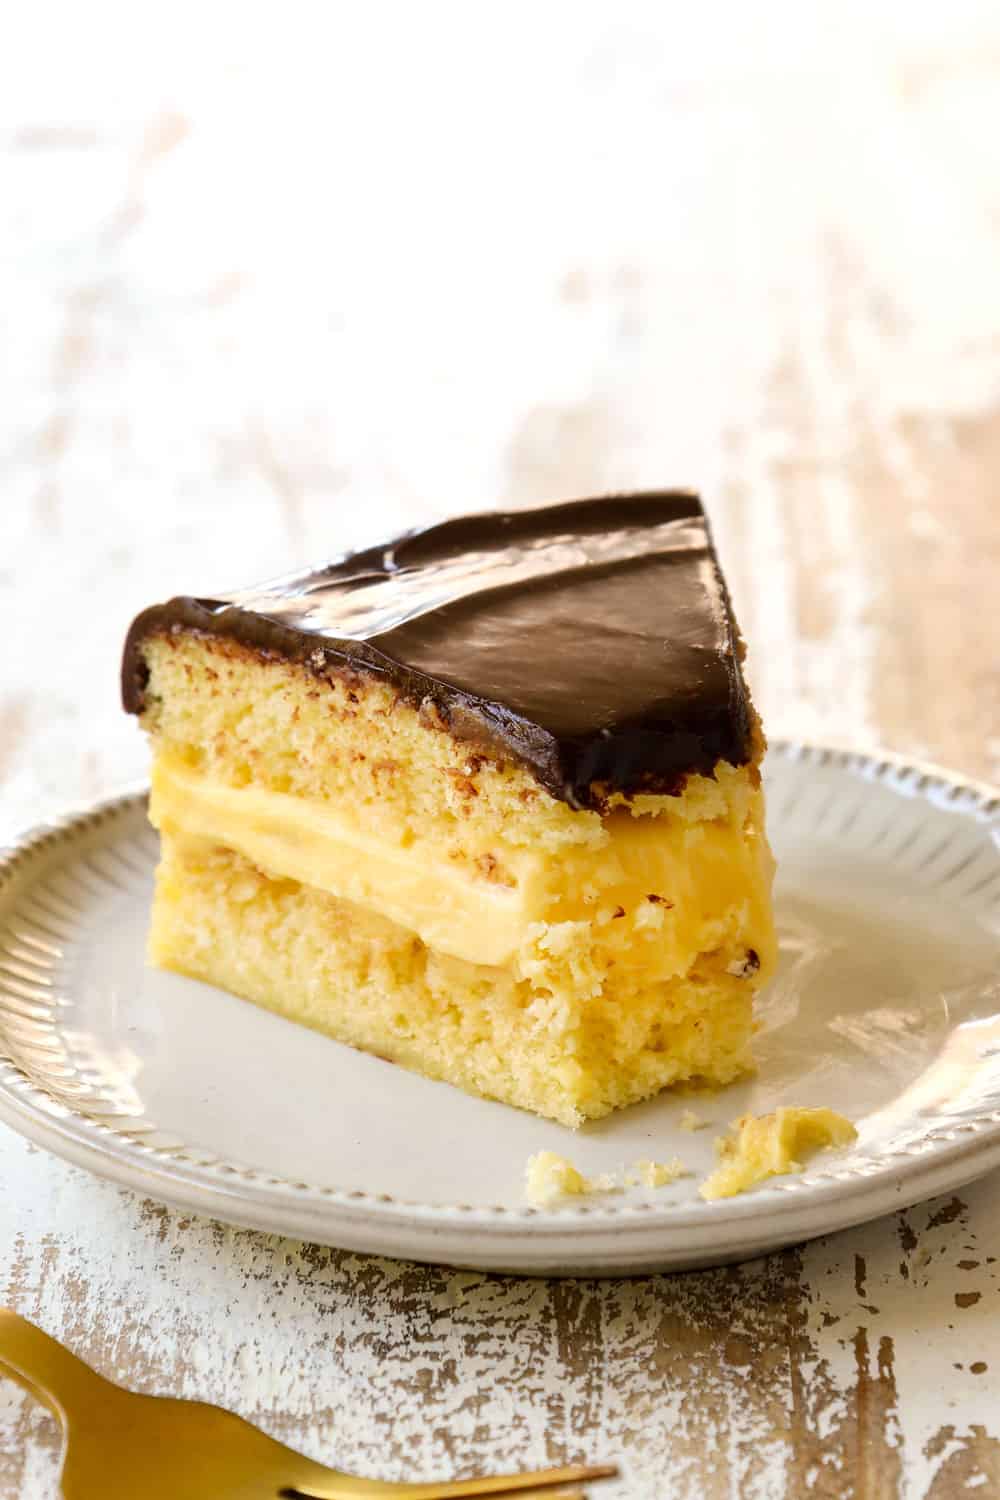
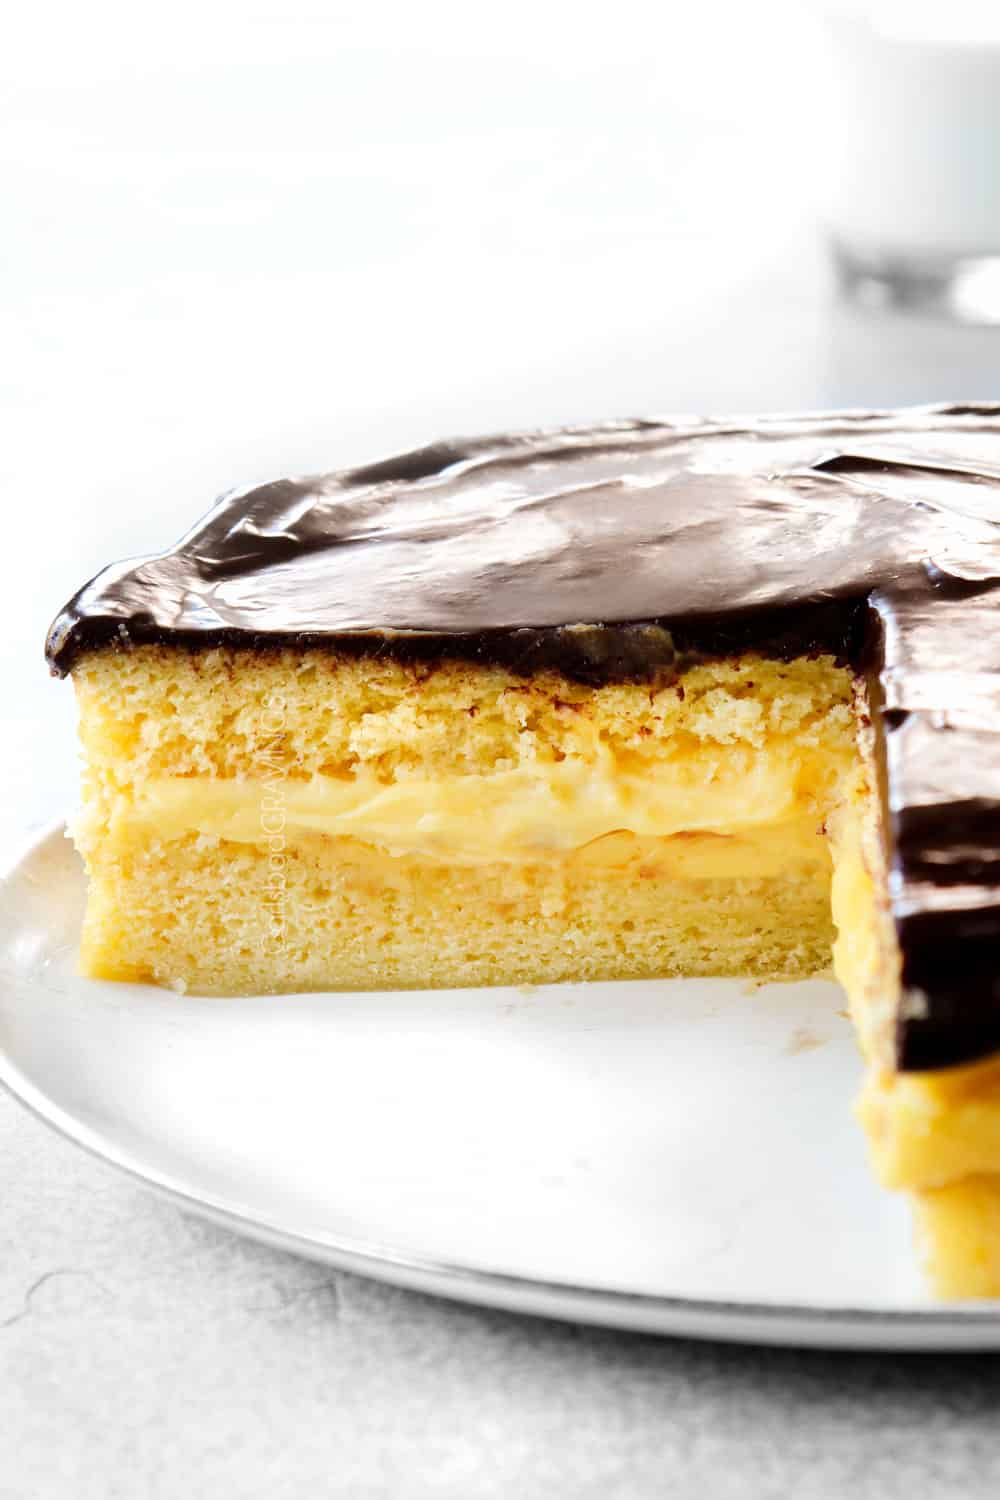
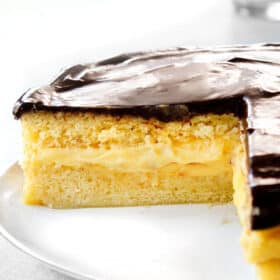
Boston Cream Pie is an American classic, a trifecta of tender sponge cake layered with rich vanilla pastry cream covered in a silky chocolate glaze. It’s what sweet dreams are made of!
It doesn’t get much better than Boston Cream Pie. It’s a stunner for holidays, birthdays, special occasions, etc. and is destined to become a requested family favorite. This decadent dessert will satisfy all your cravings with its tender vanilla sponge cake, luxuriously thick, silky, custard and decadent chocolate glaze. This Boston Cream Pie recipe is easy to make with my tips and tricks, step-by-step photos, and video tutorial. I’ve also included make ahead instructions for a stress-free win!
Despite its beloved name, Boston Cream Pie is indeed a cake. Some of our decadent, hypnotic, must try favorite cake recipes include: Chocolate Mousse Cake, White Chocolate Raspberry Cake, Chocolate Éclair Cake, Chocolate Raspberry Cake, Chocolate Lava Cakes, Kentucky Butter Cake and Tres Leches Cake.
Pin this recipe to save for later
How to make Boston Cream Pie Video
boston cream pie recipe
There are thousands of Boston Cream Pie recipes out there – but my recipe combines the best cake + the best pastry cream + the best ganache to = the best Boston Cream Pie!
We are simply head over heels over this recipe around here, my husband is still talking about it! And we’re not the only ones. When I brought dinner and this dessert to a friend, she texted me, “the cake was to die for. Not going to lie, I ate it first.” No judgement here. Patrick and I may or may not have eaten half the pie in one day. And would have eaten more.
Here’s why this recipe works:
- Buttery sponge cake: instead of using a genoise-like sponge cake which is practically weightless, this recipe uses what is referred to as a hot-milk method which is more fool-proof and results in a more flavorful, lighter yet sturdier cake with a more tender crumb.
- Sturdy pastry cream: the pastry cream is so luxuriously creamy you’ll want to eat it with a spoon! Too often pastry cream is finicky and too thin, but this recipe creates foolproof pastry cream by using easier-to-whisk-in cornstarch instead of flour, dissolves the sugar in the hot half and half before adding the eggs yolks, tempers all of the cream and finishes it off with pads of butter to create a sturdier cream that holds up against slicing.
- Silky chocolate glaze: the crowning chocolate glaze can become dull and hard after sitting for no time at all. The addition of corn syrup keeps it soft, shiny and gorgeous even after being refrigerated.
What is Boston Cream Pie? Why is it called Boston Cream Pie?
The dessert looks like a cake, tastes like a cake but it’s called Boston Cream Pie? Boston Cream Pie is, in fact, a layered sponge cake with cream filling and chocolate glaze that originated in Boston, Massachusetts (see section below). The dessert gets its name from the 19th century when pie pans were more common in kitchens than cake pans, so both desserts were baked in pie pans and the terms cake and pie were used interchangeably.
Where did the Boston cream pie originate from?
Boston Cream Pie is an adaptation of the early New England favorite American Pudding-Cake Pie. This dessert consisted of two layers of sponge cake filled with thick custard. What makes Boston Cream Pie unique is the addition of the chocolate glaze.
The Parker House Hotel in Boston (now the Omni Parker House Hotel) claims credit for the creation of Boston Cream Pie. This was also the first hotel in Boston to have hot-and-cold running water, and the first to have an elevator. Chef Anezin took the American Pudding Cake Pie, brushed it with rum syrup, coated the sides with toasted sliced almonds, and coated the top with chocolate fondant.
Until that time, chocolate had been reserved for eating plain, in hot chocolate and puddings, but never drizzled on dessert. It only seemed right to add chocolate to baked goods in Boston because America’s first chocolate mill had opened in neighboring Dorchester in 1765 and chocolate was in no short supply in the area.
The first Boston Cream Pies were served at the hotel’s opening in 1856 and instantly became a sensation. The dessert was originally served at the hotel under the names Chocolate Cream Pie or Parker House Chocolate Cream Pie and is now known across the world as simply Boston Cream Pie.
The Boston Cream Pie was proclaimed the official Massachusetts State Dessert on December 12, 1996 thanks to a civics class from Norton High School who sponsored the bill. The pie beat out other candidates, including the Toll House Cookie, the Fig Newton and Indian Pudding. I think they made the right decision.
Boston Cream Pie Ingredients
There are three important components to this Boston Cream Pie recipe: 1) the sponge cakes, 2) the pastry cream filling, and 3) the chocolate glaze. These components use many of the same ingredients. You will need:
- All-purpose flour: I have only made this recipe with all-purpose flour, but I assume gluten free baking flour such as Bob’s Red’s Mill 1 to 1 would also work.
- Baking powder: is a common ingredient in hot milk sponge cakes but not in traditional sponge cakes. The leavening agent helps to tenderize the cakes and works with the whipped eggs to help the cakes rise. This means you don’t have to be overly concerned about folding in the dry ingredients into the whipped eggs to maintain that air and volume, the baking powder will help compensate batter that is handled a little too roughly 😊.
- Salt: regular old table salt please.
- Milk: you’ll want to use whole milk for the cake. If you only have nonfat, skim or 2% on hand, then just swap some of the milk for heavy cream which you will need anyway for the chocolate glaze.
- Heavy cream: is used in the chocolate glaze and combined with milk to create your own half and half for the pastry cream. Look for “heavy whipping cream” at the grocery store.
- Butter: unsalted is typically best for baked goods so you can add the precise amount of salt. If you only have salted, butter, you will need to reduce the salt in the recipe.
- Sugar: use granulated sugar only.
- Eggs: you will need 3 whole eggs for the cake and 6 egg yolks for the pastry cream. The eggs need to be at room temperature. More on in the tips section.
- Vanilla extract: use quality extract for best results.
- Cornstarch: is used to thicken the pastry cream. It is easier to work with and produces better results than flour in this recipe.
- Chocolate: use quality baking chocolate. Baking chocolate is cooled, hardened chocolate liquor with a higher percentage of cocoa butter than chocolate chips because it’s intended to be baked with and therefore melts more seamlessly.
- Corn syrup: keeps the ganache shiny, smooth and pliable after being refrigerated. You can omit the corn syrup if you really are opposed but the ganache will not be as smooth, shiny, flexible or overall successful.
How to Make Boston Cream Pie
This recipe takes a bit to put together because you have to wait for the pastry cream to chill and the cakes to cool. So, you can either make the cream, cakes and chocolate glaze spaced throughout one day or on two separate days. Here’s how to make Boston Cream Pie (full measurements in the recipe card at the bottom of the post):
Step 1: How to Make the Pastry Cream
The pastry cream should be made first so it has time to chill. It has to be refrigerated for a minimum of 3 hours, up to 2 days. Pastry cream is cooked on the stovetop after tempering the eggs with the warm cream, much like homemade pudding. There are a few steps to it, but it is actually quite quick and easy to make if you follow these foolproof instructions:
- Heat cream, milk and sugar. Add the heavy cream, ½ cup milk and sugar to a medium saucepan. Bring it to a simmer and then remove from the pan from the heat. Some recipes don’t initially add the sugar, but I find it helps to dissolve the sugar for a more successful end texture.
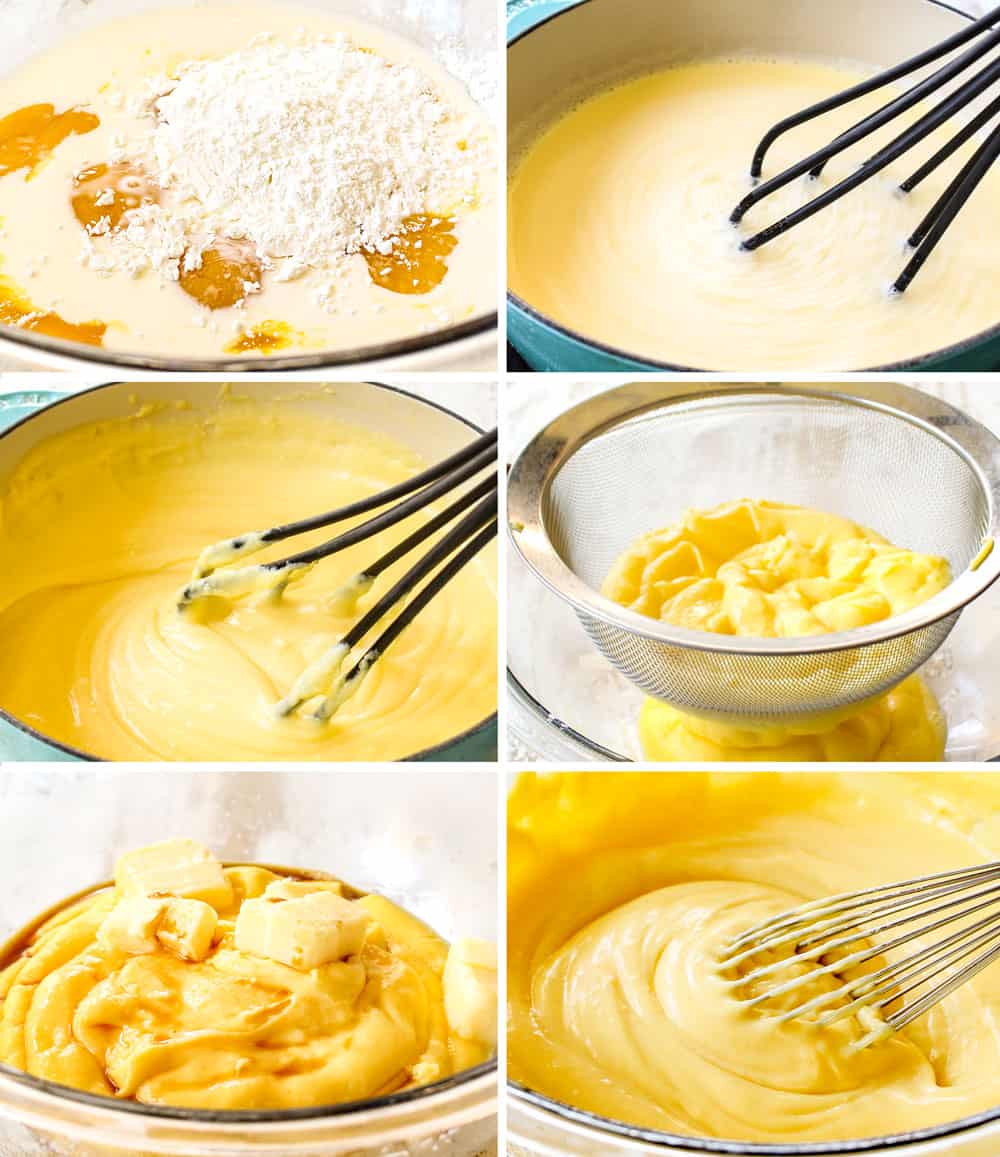
- Combine eggs and cornstarch. Next, whisk together the remaining ½ cup milk, egg yolks and cornstarch in a medium bowl until smooth. Adding some of the milk to the mixture makes it easier for the cornstarch to dissolve. Make sure to whisk the cornstarch vigorously until no lumps remain.
- Temper the egg yolk mixture. This simply means slowly raising the eggs’ temperature by diluting the mixture with hot liquid to prevent the eggs from scrambling. Slowly pour ¼ cup of the hot half and half mixture into the egg mixture while whisking constantly, then gradually add another ¼ cup and then another, then the rest of the mixture in a slow stream.
- Simmer until thickened. Pour the tempered mixture back into the pot. Bring it to a simmer over medium heat, whisking CONSTANLTY until it has the texture of thick pudding. Continue to cook an additional minute after thick and glossy and the bubbles are popping on the surface.
- Strain and add butter. Strain the mixture through a fine mesh strainer into a bowl to catch any little cooked egg specks (if it’s done right there will be hardly any). Whisk in the butter and vanilla until the butter is completely melted and the mixture is smooth.
- Chill. Lightly spray a piece of plastic wrap with nonstick cooking spray and place it directly on the surface of the pastry cream (prevents a skin from forming). Chill in the refrigerator for at least 3 hours, up to 2 days.
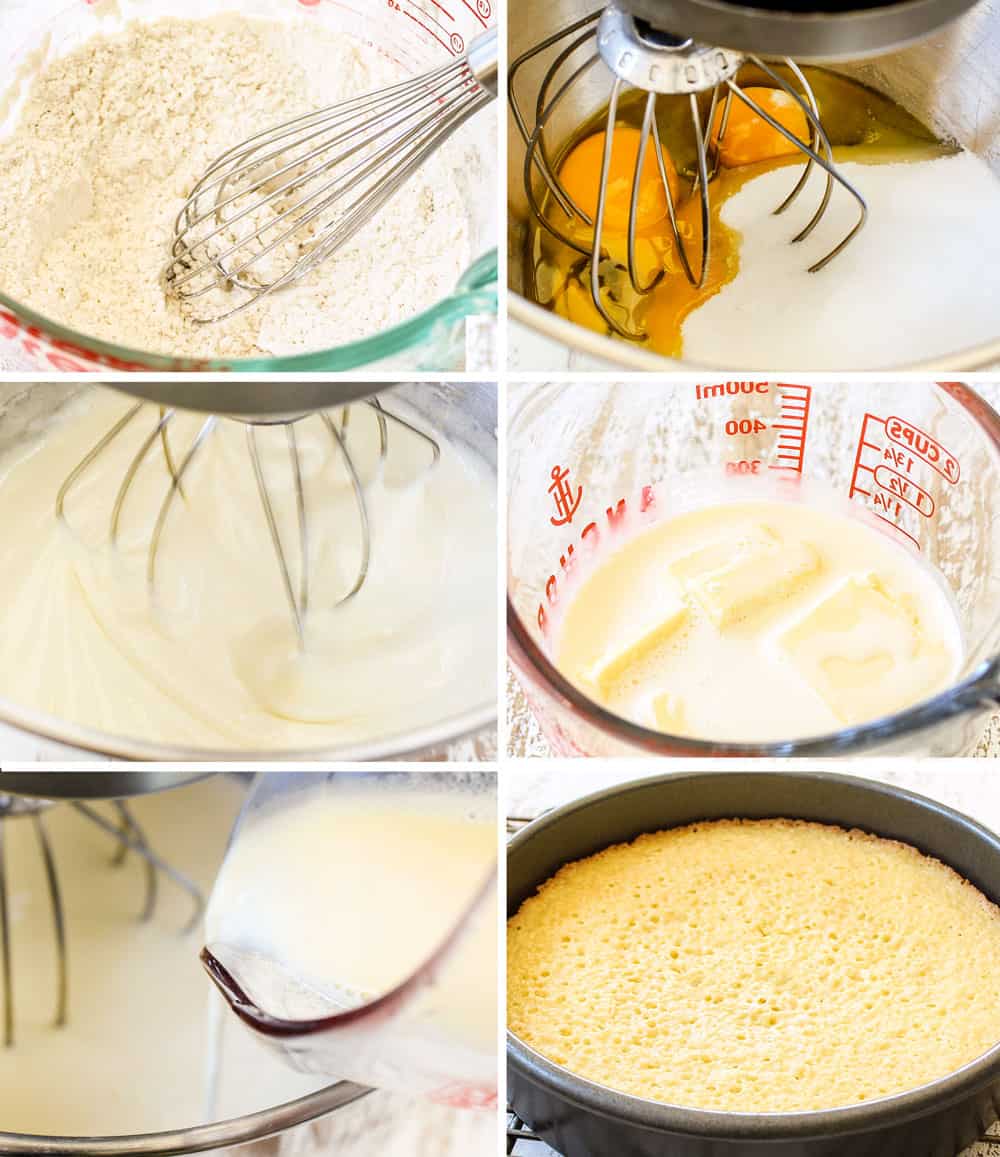
Step 2: How to Make Sponge Cake
I opted for a hot milk sponge cake as opposed to a traditional genoise sponge cake. Hot milk cake is a wonderfully light and fluffy sponge cake that gets its name by using milk warm enough to melt the butter, two ingredients that aren’t typically included in sponge cakes.
This hot milk cake is airier, more tender, boasts a finer crumb and has more structure than a classic génoise. And bonus, it’s much easier to throw together without whipping the egg yolks and whites separately. It’s also more forging thanks to the baking powder. Here’s how to make it:
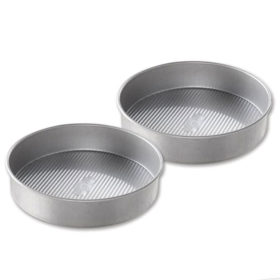
- Prepare pans. You will need two, 9-inch round cake pans that have been sprayed with nonstick spray with flour or you can butter and flour the pans. As extra insurance, line the bottoms of the pans with parchment paper.
- Mix dry ingredients. In a medium bowl, whisk together the flour, baking powder, and salt; set aside.
- Whisk eggs. In a stand mixer fitted with a whisk attachment, or using a hand mixer fitted with a whisk attachment, whisk the eggs and sugar together on high speed until light and airy, about 4-5 minutes. Don’t shortcut this process! The egg mixture should be quite thick.
- Warm milk. Meanwhile, add the milk and butter to microwave safe liquid measuring cup or bowl and microwave until the butter is melted. Stir in the vanilla. Cover with foil to keep warm.
- Combine. Turn the mixer to low and slowly whisk in the warm milk/butter into the egg mixture just until combined. Gently fold in the flour mixture just until combined. Don’t overmix.
- Bake. Working quickly, divide the batter evenly between the prepared cake pans. Bake the cakes until a toothpick inserted comes out clean and the edges are pulling away from the pan. Let the cakes cool completely in the pans.
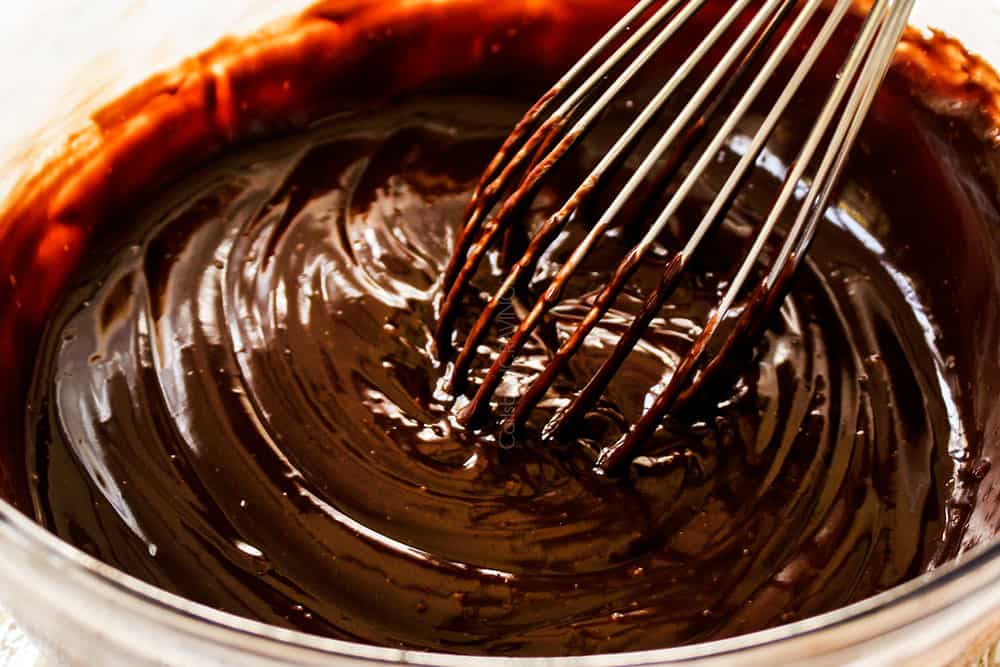
Step 3: How to Make Chocolate Glaze
The glaze on this cake is essentially a chocolate ganache, a smooth and shiny chocolate sauce. You only need 3 ingredients for the chocolate glaze – chocolate, heavy cream and corn syrup.
- Heat heavy cream. Add the heavy cream and corn syrup to a microwave safe bowl. Heat until the cream is simmering, about 2 minutes.
- Add chocolate. Add the chopped chocolate and let the mixture stand for a few minutes, then whisk vigorously until chocolate is melted and smooth. See my chocolate ganache page if you need extra help with it. Let the glaze cool slightly to lukewarm before adding to the cake.
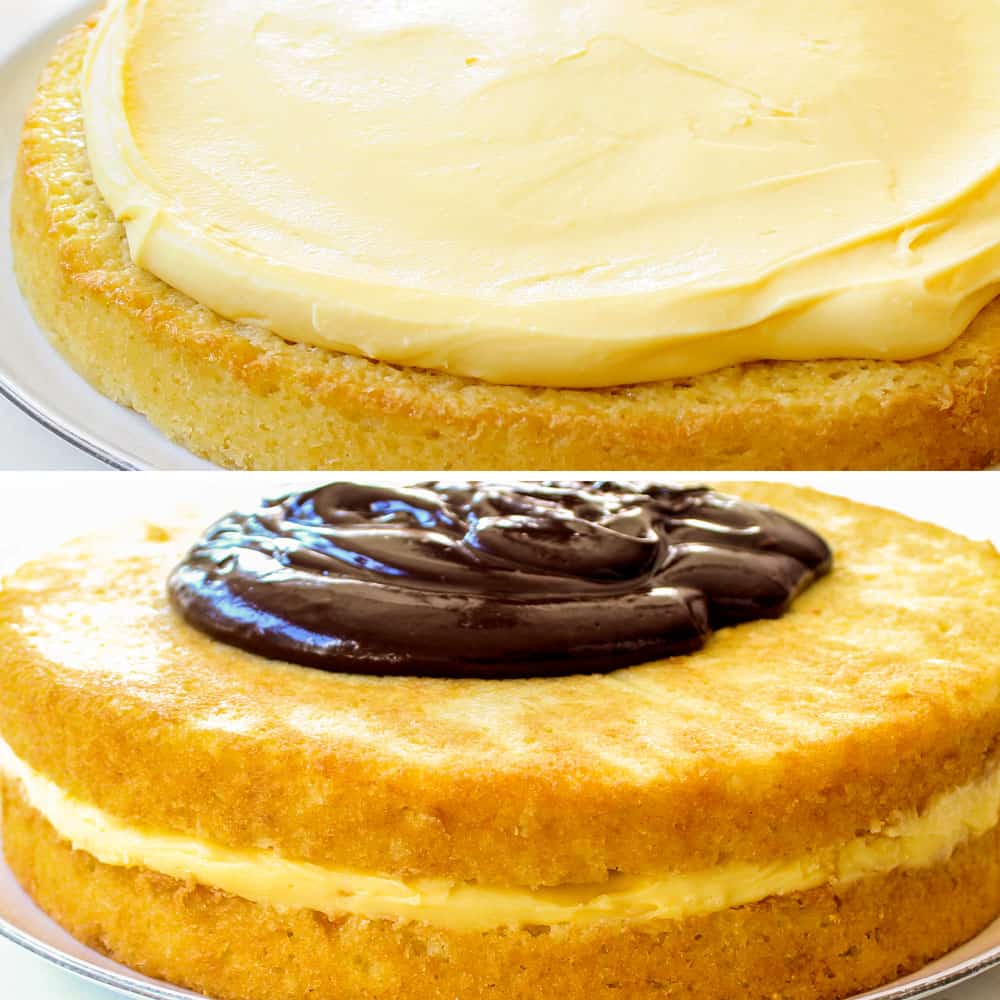
Step 4: How to Assemble Boston Cream Pie
You are almost done! Now it’s time to assemble and dig into our beautiful Boston Cream Pie.
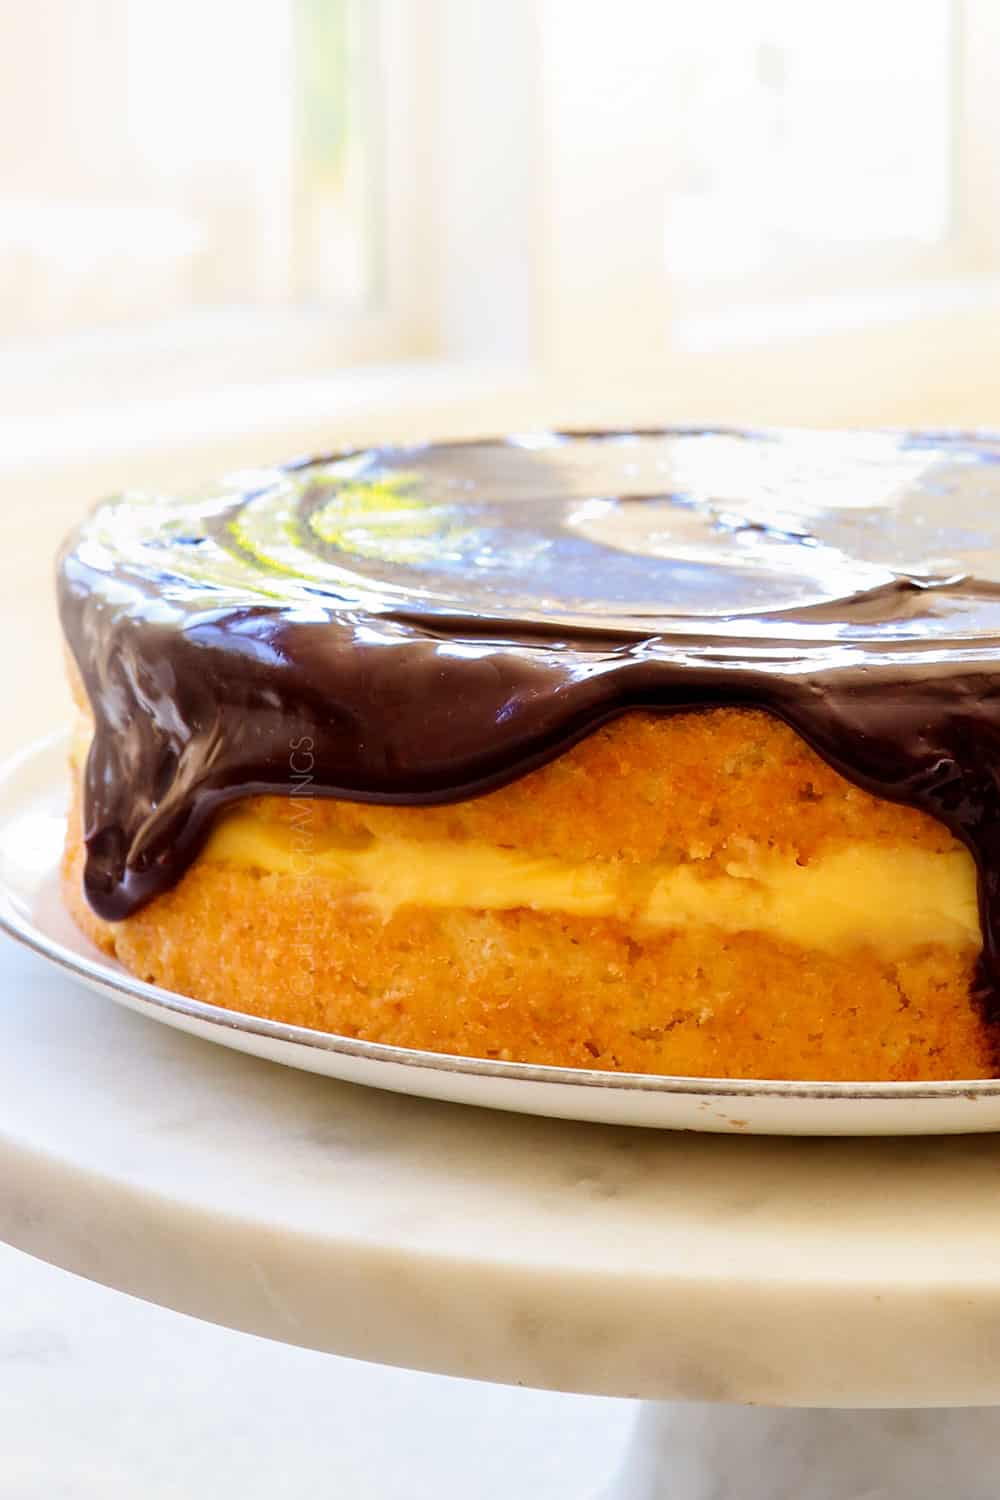
- Assemble. Place one of the cakes in the center of a cake plate or pedestal, right side up. Spoon the pastry cream onto the cake and spread it to within ¼-inch of the edges. Top the cream with the second cake, bottom side up. Press lightly to adhere and to spread the cream to the edges. You’ll pop the cake in the refrigerator while you whip up the chocolate glaze.
- Add glaze. Pour the glaze over cake and spread into a smooth layer, letting some glaze drip down the edges if you wish. Chill for 30 minutes in the refrigerator to set the glaze (makes for cleaner cuts). It this time you can also cover the cake and refrigerate if you wish to serve later.
TIPS FOR making boston cream pie RECIPE
Boston Cream Pie has a few steps which means there are more opportunities for things to go wrong. But never fear, follow these tips and you’ll have a winning cake every time.
- Use room temperature egg yolks for the pastry cream. This will help the cornstarch dissolve into the egg yolks more smoothly and aid in tempering the eggs more gradually so there is less chance of scrambling.
- Use room temperature eggs for the cake. Room temperature eggs help the cake whisk to a higher volume which results in a softer, fluffier texture. Cold eggs, on the other hand, can break the emulsion of the sugar and butter, so the batter loses air cells, resulting in a baked cake that is grainy, dry or dense.
- Whisk the cornstarch until smooth. Make sure the cornstarch is completely dissolved and no lumps remain before adding the warmed cream or the lumps will seize up and be practically impossible to get rid of.
- Room temperature eggs hack. Add warm (not hot) tap water to a bowl then add eggs (still in their shells) for at least 20 minutes.
- Don’t stop whisking the pastry cream. Some people get nervous about making pastry cream, but there is no need to worry about it scrambling as long as you never stop whisking. Whisk constantly while adding the warm cream to temper the eggs and whisk constantly while the cream is heating and thickening in the pan.
- Don’t pack the flour. It is important that you measure the flour correctly because too much flour will result in denser, drier cakes. To measure flour, scoop the flour into the measuring cup and then level as opposed to scooping the measuring cup into the flour which can cause the flour to compress.
- Whisk the eggs for the full 5 minutes. The trick to of a light, fluffy sponge with tender crumb is to incorporate as much air in as possible. The entrapped air will expand in the oven, creating the magic of the cake rising. Whisk until the eggs are very light, airy, and thick. If you don’t cream them enough, your cake will be denser, not as tender, or rise as high.
- How to know when the eggs are done: your eggs are ready when you can stop the beaters and the mixture falls back like a ribbon that doesn’t dissolve back into the mixture right away.
- Don’t overmix the flour. The baking powder will help compensate for overmixed flour, but set yourself up for success by being as gentle as possible. Our goal is to preserve the airiness of the batter by folding in the flour instead of mixing it. When folding flour into the beaten eggs, use a spatula to cut through and lift just until the flour is incorporated.
- Use your scale to make even cakes. Pour the batter evenly into two prepared cake tins. For two perfectly even baked cakes, weigh the mixture into each cake tin.
- Bake the cakes immediately. Don’t forget to preheat your oven before you start making the cake batter so you can pop the cakes in the oven immediately. Just think of how quickly bubbles rise and pop – we don’t want them popping before the cakes are in the oven. Instead, we want to trap the bubbles while baking otherwise the cakes won’t rise as high or be as tender.
- Don’t overbake the cakes. A sponge cake is done when you gently press down on the top and it springs back up. If the indentation remains, cook the cake a little longer.
- Don’t underbake the cakes. On the opposite end of the spectrum, don’t underbake the cakes or they will sink in the middle. A little indentation is okay and can easily be leveled, but we don’t want any doughy texture or the center won’t have the chance to set.
- Use quality chocolate for the ganache. Use baking chocolate bars because they melt beautifully due to the higher percentage of cocoa butter. If you have to use chocolate chips, use a quality brand with a higher percentage of cocoa butter like Guittard or Ghirardelli. Many other chocolate brands contain less cocoa butter and will not melt as seamlessly and can leave you with stubborn chocolate pieces that won’t melt.
- Don’t skip the corn syrup. The corn syrup keeps the chocolate glaze shiny, smooth and pliable even after being refrigerated.
- Slice with a hot knife. Using a hot knife is the best method for creating clean slices of pie. You can either run the knife under hot water or fill a large glass with hot water, then dip the knife in the hot water before each cut. Wipe the knife clean with a paper towel after each cut, then repeat.
Make Ahead Boston Cream Pie
This Boston Cream Pie can be made ahead in stages and then assembled or the finished cake can be made ahead and stored:
- Pastry cream: can be covered and chilled in the refrigerator for up to 2 days before assembling.
- Hot milk sponge cake: the cooled cakes can be wrapped in plastic wrap and stored at room temperature for up to 24 hours or frozen for up to two months then thawed before assembling.
- Finished cake: can be fully assembled, including the chocolate glaze, and stored in the refrigerator for 1 day. Make sure the cake is covered completely so the cake does not dry out. Use a cake container (I like this one) or loosely tented with foil as to not damage the glaze. Let the cake come to room temperature before serving.
Should I refrigerate Boston Cream Pie?
Yes, Boston Cream Pie should be refrigerated because it contains dairy in the pastry cream. Cover it with a cake container or foil and refrigerate for up to 5 days, although it is freshest days 1 and 2. When ready to serve, slice the cake with a hot knife then let it sit at room temperature in order for the chocolate glaze to soften for 30-60 minutes (it’s 10X better with a softer glaze).
CAN I FREEZE Boston Cream PIe?
The cakes can be frozen but the assembled Boston Cream Pie should not be frozen because the pastry cream contains cornstarch. This will cause the filling to weep, break down and become watery once thawed. If you know you would like to freeze the pie, then look for another filling recipe using flour instead.

WANT TO TRY THIS boston cream pie RECIPE?
PIN IT TO YOUR dessert, cake OR holiday BOARD TO SAVE FOR LATER!
FIND ME ON PINTEREST FOR MORE GREAT RECIPES! I AM ALWAYS PINNING :)!
©Carlsbad Cravings by CarlsbadCravings.com

Boston Cream Pie
Save This Recipe To Your Recipe Box
You can now create an account on our site and save your favorite recipes all in one place!
Ingredients
PASTRY CREAM:
- 1 cup heavy cream
- 1 cup milk, divided
- ½ cup granulated sugar
- pinch of table salt
- 6 large egg yolks, at room temperature
- 3 tablespoons cornstarch
- 3 tablespoons unsalted butter, cut into six pieces, room temperature
- 2 teaspoons vanilla extract
HOT MILK SPONGE CAKE:
- 1 ½ cups all-purpose flour
- 1 ½ teaspoons baking powder
- ¾ teaspoon salt
- ¾ cup whole milk (see notes for skim)
- 6 tablespoons unsalted butter
- 2 teaspoons vanilla extract
- 3 large eggs, at room temperature
- 1 ½ cups sugar
CHOCOLATE GLAZE
- ½ cup heavy cream
- 6 ounces semi-sweet baking chocolate, chopped
- 2 tablespoons corn syrup
Instructions
PASTRY CREAM:
- Add the heavy cream, ½ cup milk, sugar and salt to a medium saucepan over medium heat. Bring to a simmer then remove from the heat.
- In a medium bowl, whisk together the remaining ½ cup milk, egg yolks and cornstarch until smooth. While whisking constantly, slowly pour ¼ cup of the hot cream mixture into the egg mixture, then slowly whisk in another ¼ cup then another ¼ cup, followed by all of the remaining cream in a slow stream (never stop whisking until all the cream is added).
- Pour the tempered mixture back into the saucepan. Bring to a simmer over medium heat, whisking CONSTANLTY until it has the texture of thick pudding. Continue to cook an additional minute after thick and glossy and the bubbles are popping on the surface.
- Strain the mixture through a fine mesh strainer into a bowl then whisk in butter and vanilla until completely smooth. Lightly spray a piece of plastic wrap with nonstick cooking spray and place it directly on the surface of the pastry cream (prevents a skin from forming). Chill in the refrigerator for at least 2 hours, up to 2 days.
HOT MILK SPONGE CAKE:
- Preheat the oven to 325 degrees F. Line the bottom of two 9-inch round cake pans with parchment paper and spray with nonstick cooking spray WITH FLOUR or butter and flour the pans.
- In a medium bowl, whisk together the flour, baking powder, and salt; set aside.
- Add the milk and butter to microwave safe liquid measuring cup or bowl and microwave until the butter is melted. Stir in the vanilla. Cover with foil to keep warm.
- In a stand mixer fitted with a whisk attachment, or using a hand mixer fitted with a whisk attachment, whisk the eggs and sugar together on high speed until thick, light and airy, about 4-5 minutes. When done, the mixture should fall back like a ribbon that doesn't dissolve back into the mixture right away.
- Turn the mixer to low and slowly whisk in the warm milk/butter into the egg mixture just until combined. Remove the cake from the mixer and gently fold in the flour mixture just until combined. Don’t overmix.
- Working quickly, divide the batter evenly between the prepared cake pans (a kitchen scale is helpful for even cakes).
- Bake the cakes until a toothpick inserted comes out clean and the edges are pulling away from the pan, about 23-28 minutes. When you gently press down on the top, it should spring back up. If the indentation remains, cook the cakes a little longer. (Can take more or less time depending on your pans)
- Let the cakes cool completely in the pans. Once cooled, the cakes can be wrapped in plastic wrap and stored at room temperature for up to 24 hours until ready to assemble the cake.
ASSEMBLE THE CAKE:
- Place one of the cakes in the center of a cake plate or pedestal, right side up. Spoon the pastry cream onto the cake and spread to within ¼-inch of the edges. Top the cream with the second cake, bottom side up. Press lightly to adhere and to spread the cream to the edges. Refrigerate the cake while you make the chocolate glaze.
CHOCOLATE GLAZE:
- Add the heavy cream and corn syrup to a medium microwave safe bowl. Microwave until just boiling, about 2 minutes. Remove from the microwave and add chopped chocolate. Let stand for 5 minutes, then whisk vigorously until the chocolate is melted and smooth.
- Pour the glaze over the cake and spread into a smooth layer, letting some glaze drip down the edges if you wish. Chill for 30-60 minutes in the refrigerator to set the ganache (makes for cleaner cuts) or cover with a cake dome until ready to serve. If the cake has been refrigerated longer than 1 hour, then let it come to room temperature before serving, 30-60 minutes (tastes much better and the glaze will soften).
- Slice using a hot knife for the cleanest cuts. You can either run the knife under hot water or fill a large glass with hot water, then dip the knife in the hot water before each cut. Wipe the knife clean with a paper towel after each cut, then repeat.
Video
Notes
storage
Cover the cake with a cake container or foil and refrigerate for up to 5 days, although the cake is freshest days 1 and 2. When ready to serve, slice the cake with a hot knife then let it sit at room temperature in order for the chocolate glaze to soften for 30-60 minutes (it’s 10X better with a softer glaze). I do not recommend freezing because the pastry cream contains cornstarch. This will cause the filling to weep, break down and become watery once thawed.Make Ahead
This Boston Cream Pie can be made ahead in stages and then assembled or the finished cake can be made ahead and stored:- Pastry cream: can be covered and chilled in the refrigerator for up to 2 days before assembling.
- Hot milk sponge cake: the cooled cakes can be wrapped in plastic wrap and stored at room temperature for up to 24 hours or frozen for up to two months then thawed before assembling.
- Finished cake: can be fully assembled, including the chocolate glaze, and stored in the refrigerator for 1 day. Make sure the cake is covered completely so the cake does not dry out. Use a cake container (I like this one) or loosely tented with foil as to not damage the glaze. Let the cake come to room temperature before serving.
Want To Make This Recipe?

Did You Make This Recipe?
Tag @CarlsbadCravings and Use #CarlsbadCravngs
Leave a Review, I Always Love Hearing From You!


Erin says
We loved this recipe. Even though there is a few steps involved, This dessert is so worth the time and steps. The reward is top notch. I made this gluten free and I brought it to my siblings home to visit and no one even knew it was gluten free. I will definitely be making this again. Than you!!
Jen says
That is amazing you made this dessert already, thanks for being the first to leave a review! I’m thrilled you all loved it so much and were able to make it gluten free. Thanks so much Erin!
Esther says
Any non dairy substitutions for the pastry cream?
Jen says
Sorry Esther I have not experimented with substitutions but you may be able to google it. Good luck!
Kamar says
Wow! This cake looks delicious and I’d like to try it. I don’t have corn syrup, can I just skip it in the ganache?
Jen says
The ganache won’t be as shiny or smooth without the corn syrup, but it will still taste amazing! Hope you enjoy!
Beth says
Are just the cakes, without the filling or ganache, able to be frozen and then the cake assembled at a later date?
Jen says
Yes! They can be wrapped in plastic wrap and stored for up to 2 months in the freezer.