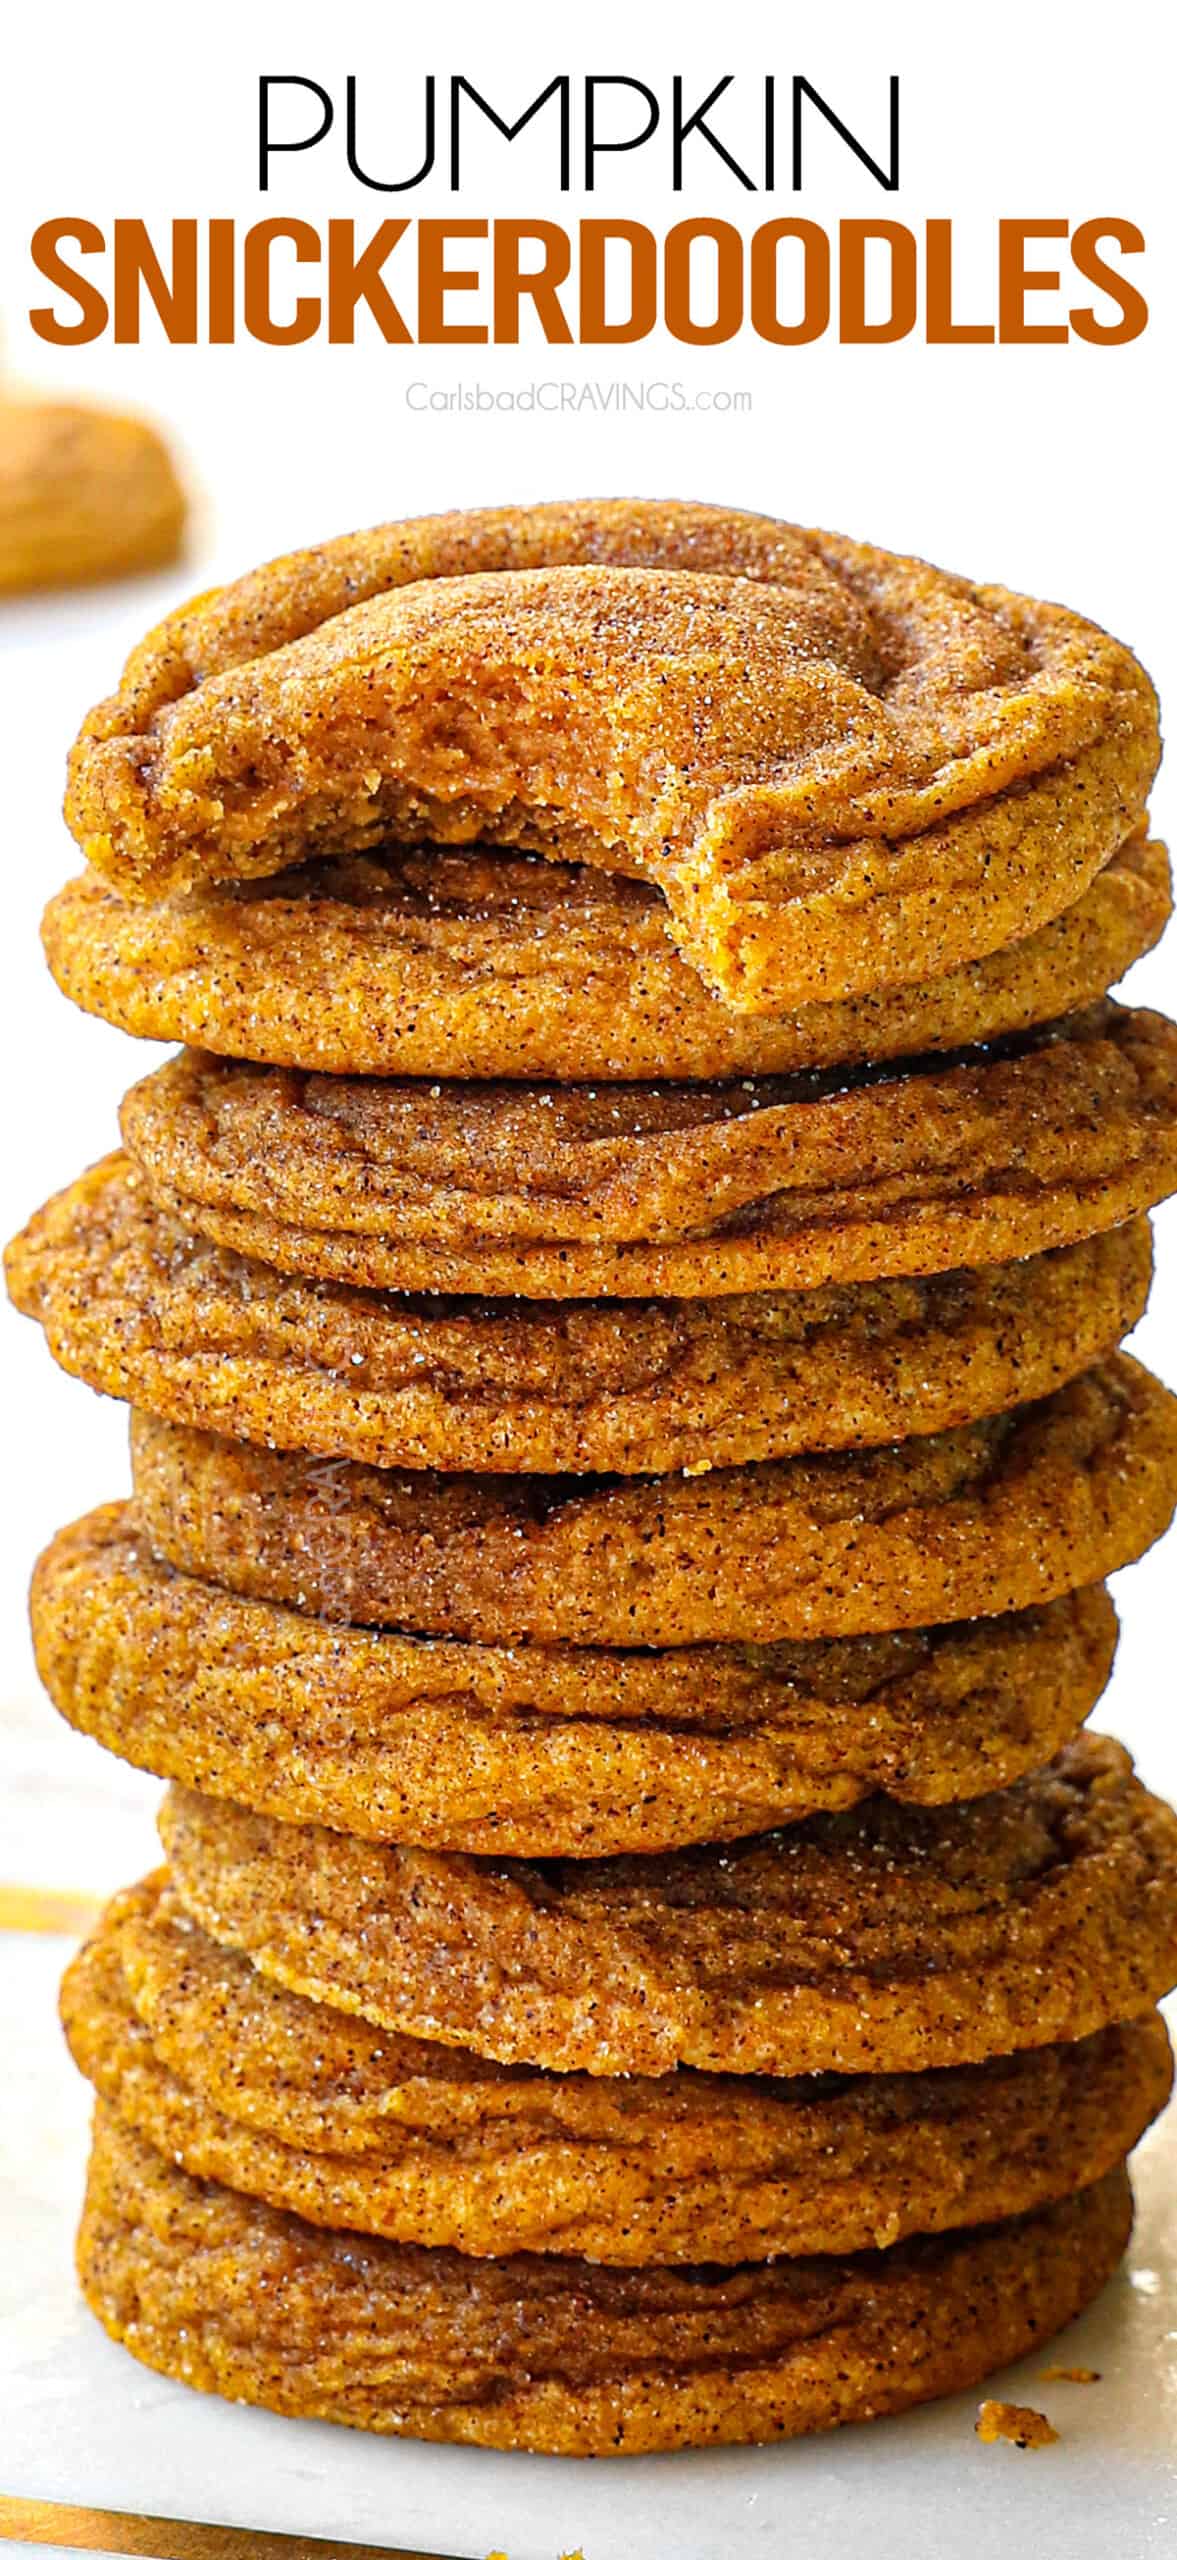
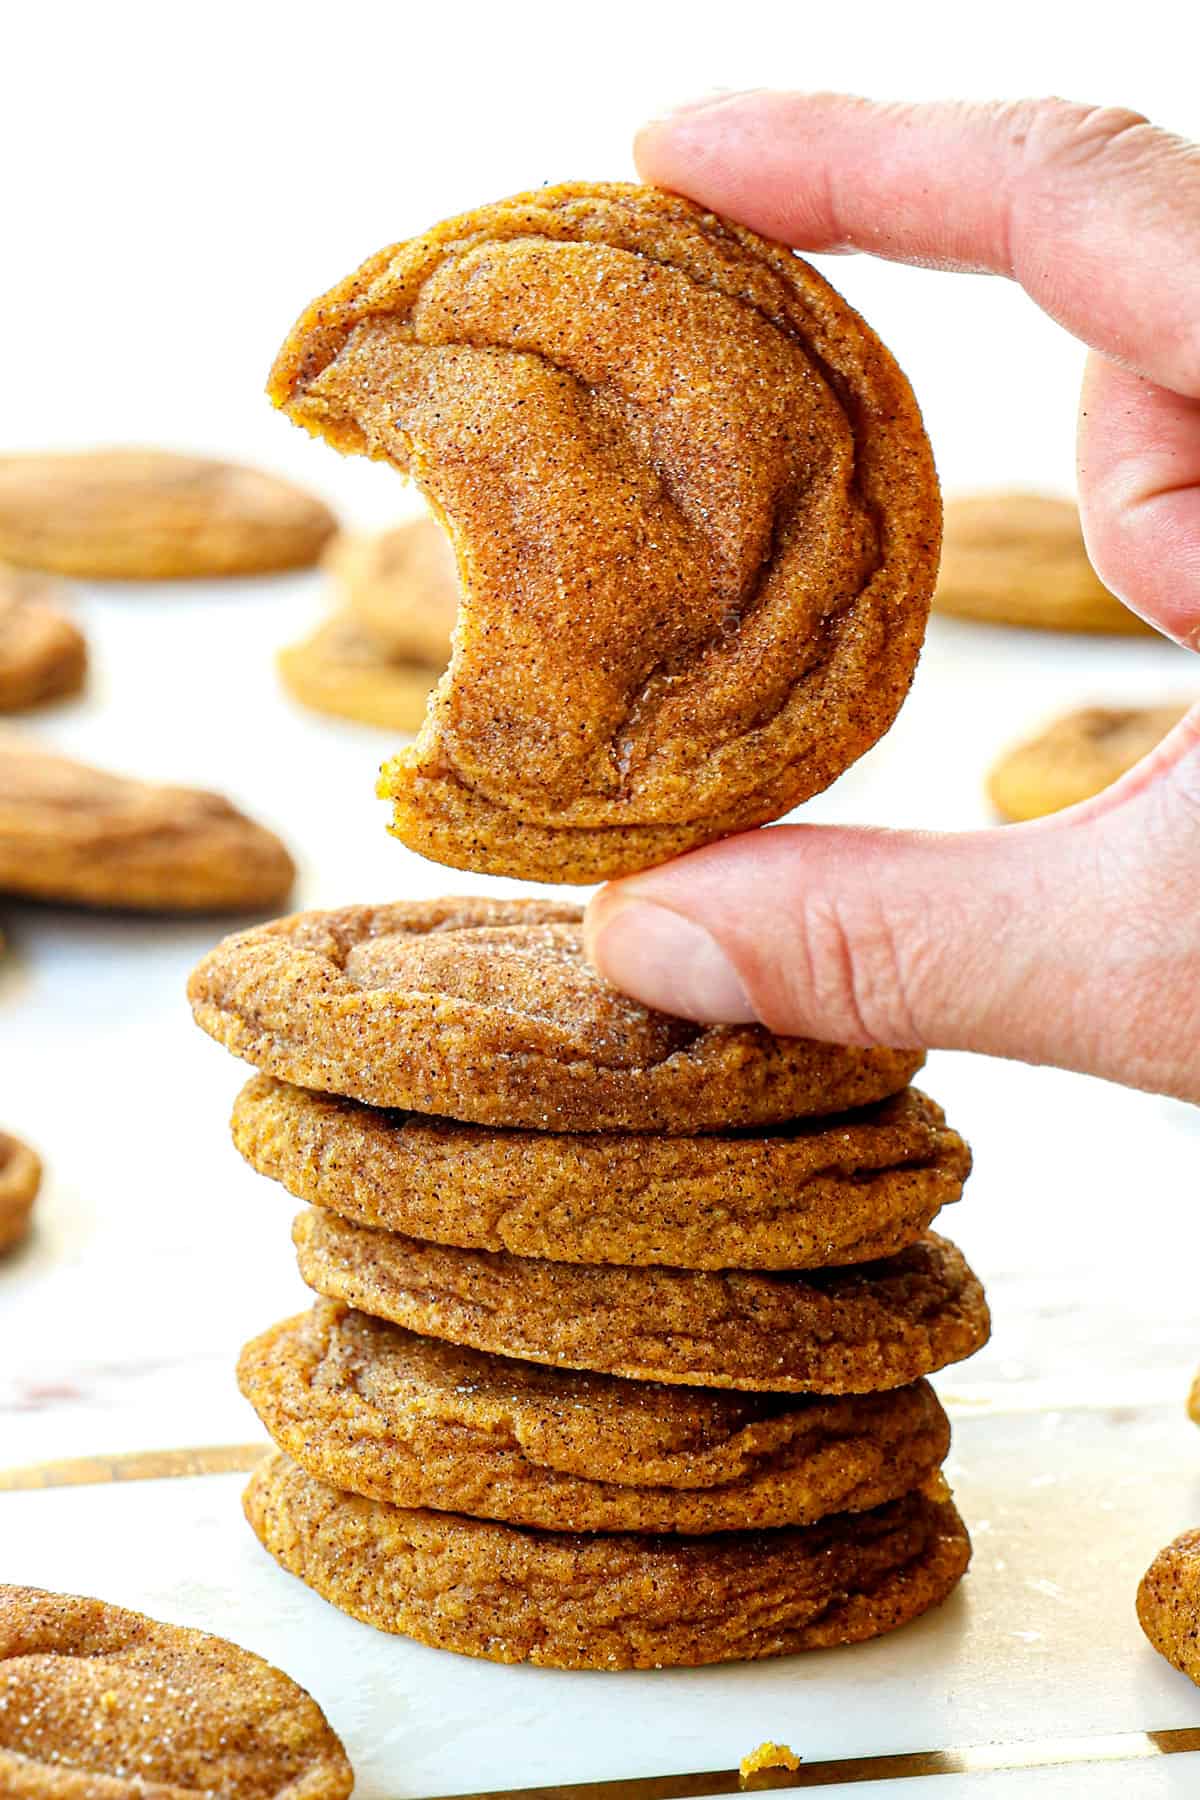
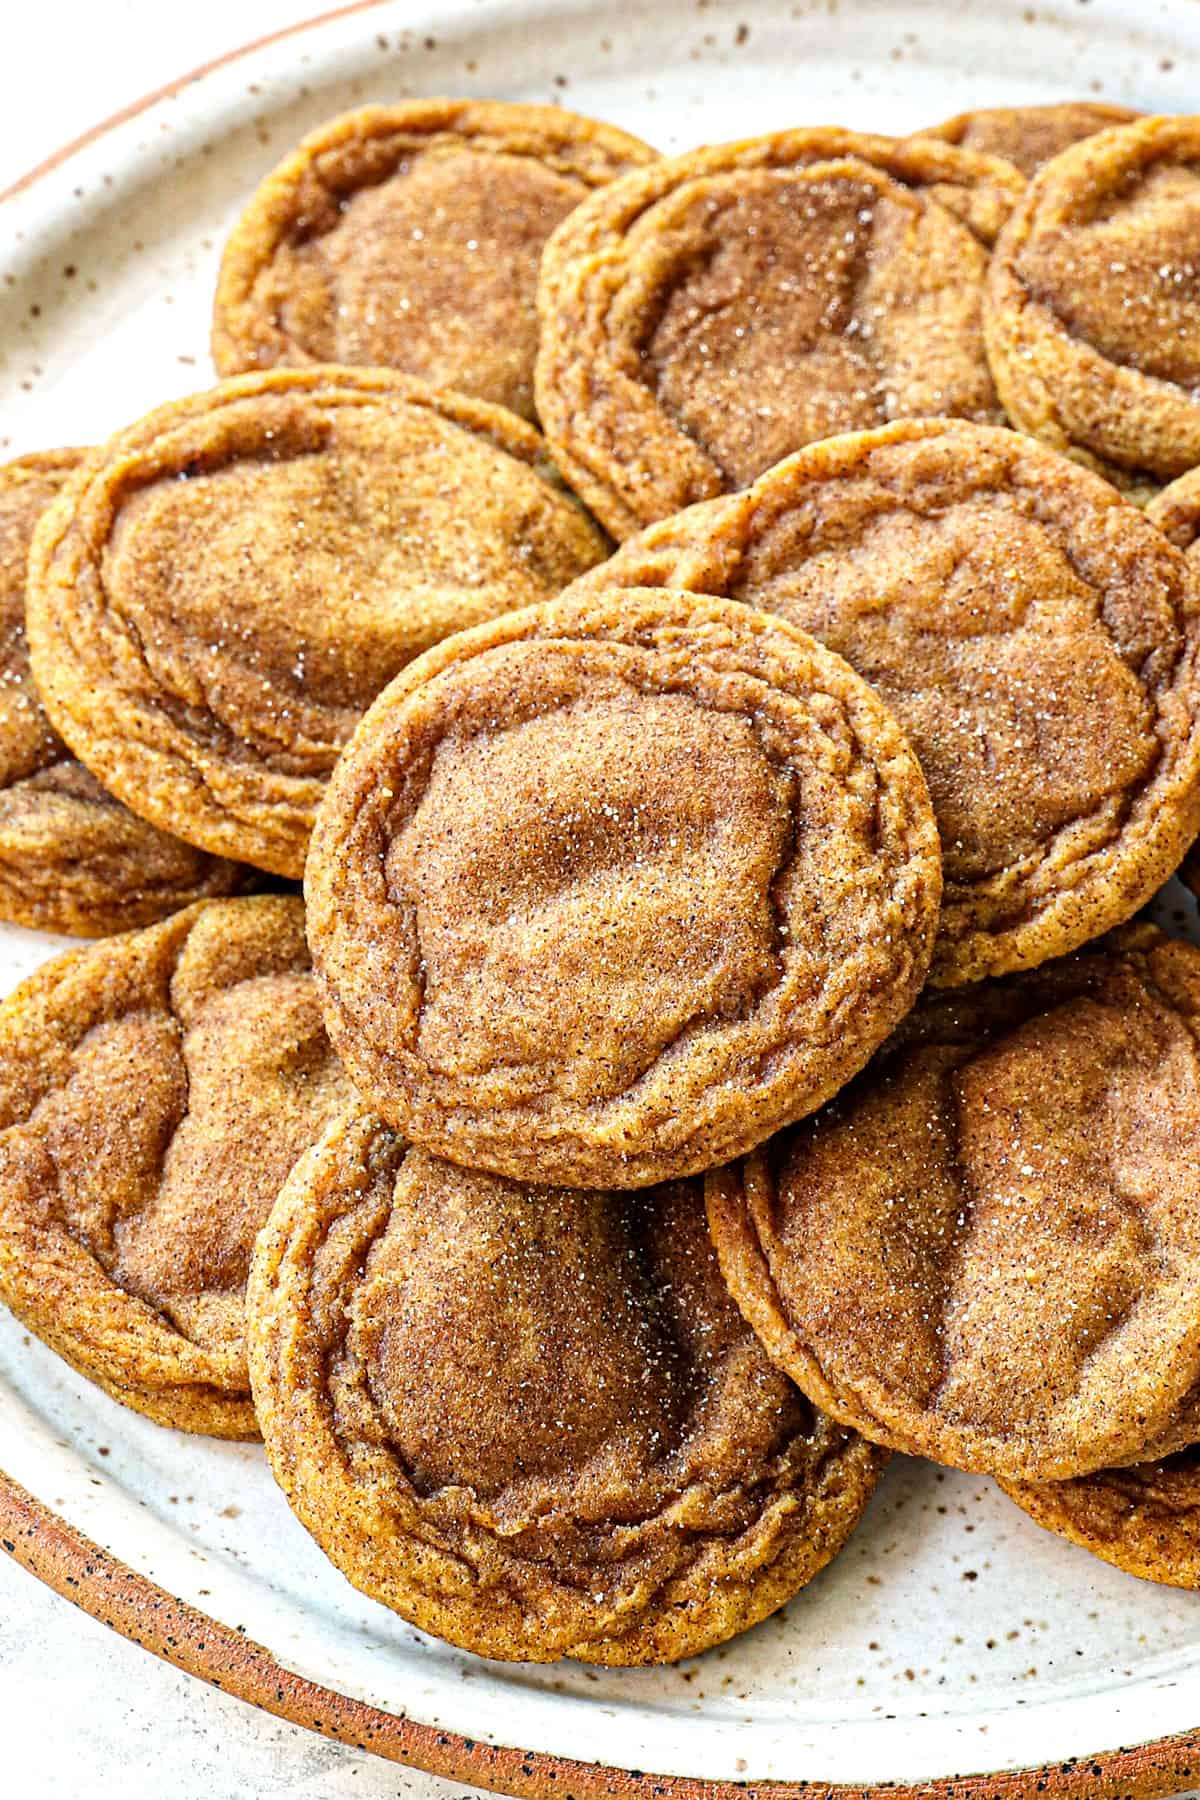
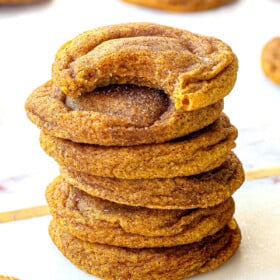
These Pumpkin Snickerdoodles are thick, super soft and chewy (not cakey!), loaded with pumpkin flavor and warm cozy Fall spices!
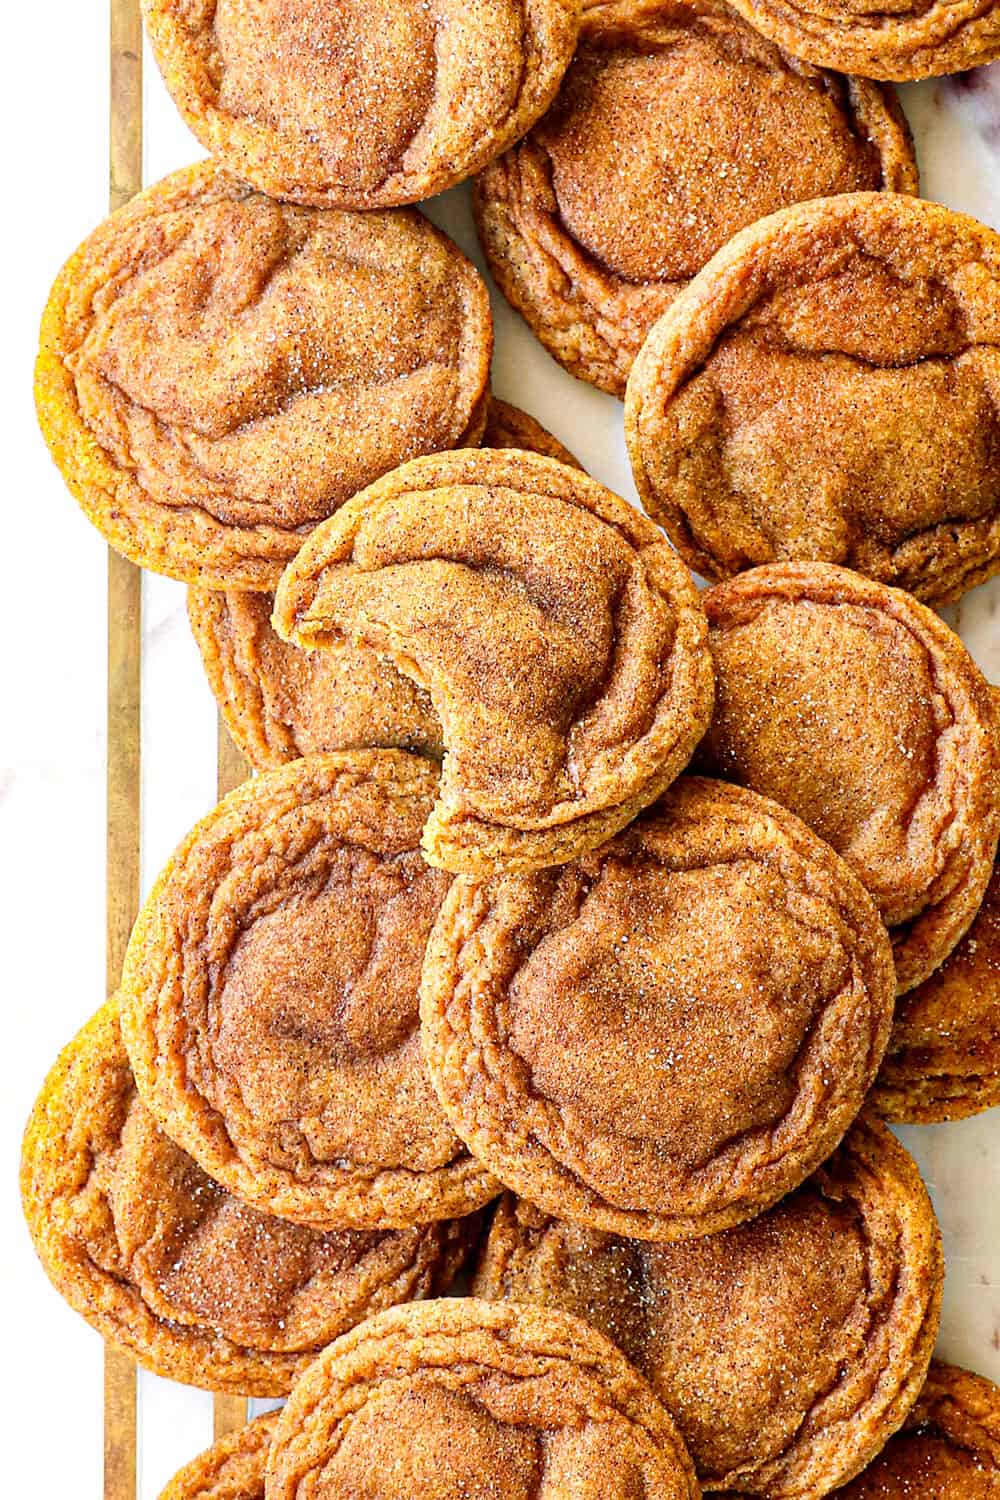
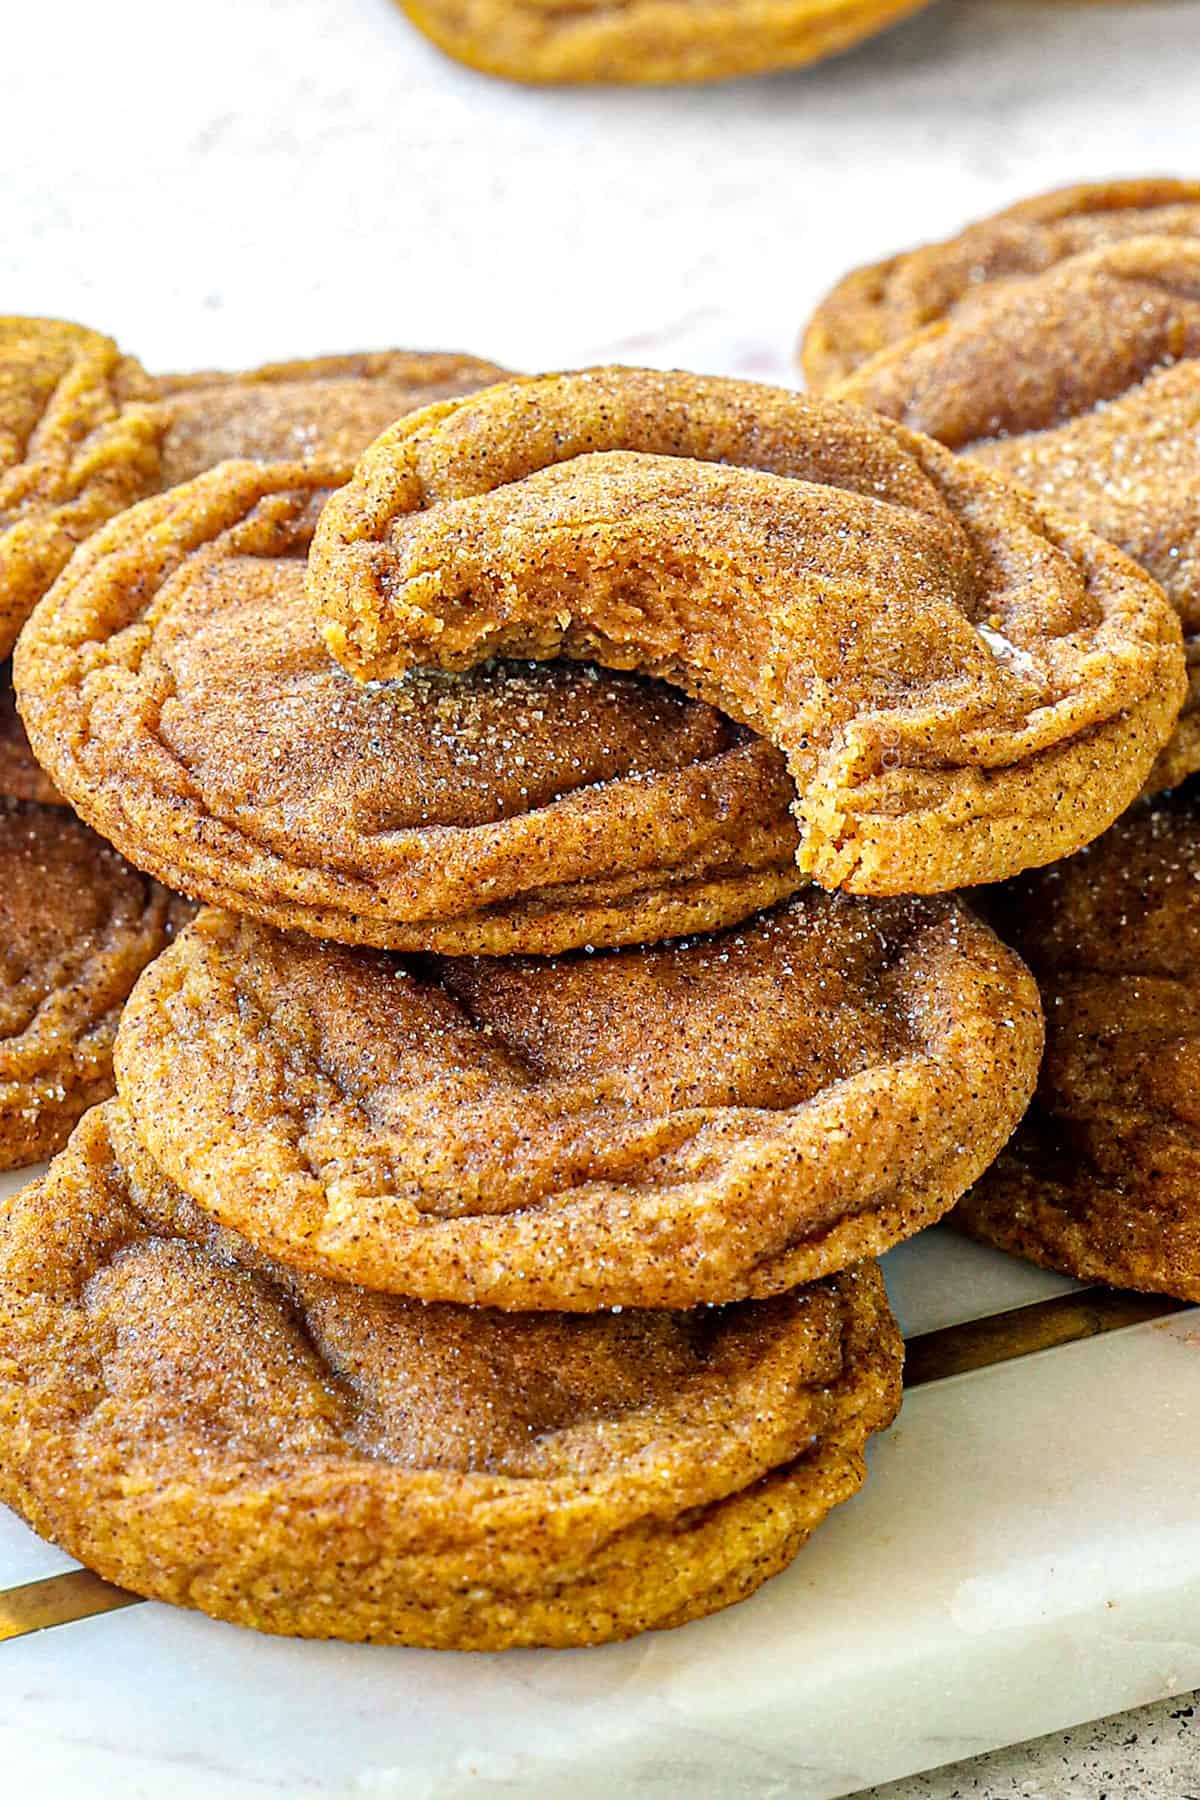
These Snickerdoodle Pumpkin Cookies are the perfect sweet, buttery, pumpkiny, cinnamon-dusted crinkly-topped Fall cookie! They will be the hit at all of your Halloween and Thanksgiving get togethers and they taste even better the next day (AKA stress-free, make ahead cookies)! These Pumpkin Snickerdoodles are a celebration of fall made with real pumpkin and loaded with brown sugar, cinnamon, nutmeg, cloves and ginger. They’re finished off with a coating of cinnamon and sugar that bakes into the signature lightly crispy and crackly exterior giving way to the chewy, soft interior without ever being caky. With one bite, you’ll be hooked! PS. If you’re looking for a cakey cookie, try these instead!
Fall is a celebration of everything pumpkin! If you love pumpkin, don’t miss: Pumpkin Oatmeal Cookies, Mom’s Famous Pumpkin Bread which I make every year (fabulous for sharing in mini loaves), Pumpkin Bars with Nutella Cream Cheese Frosting (another must make recipe), Pumpkin Muffins, Pumpkin Bundt Cake, Pumpkin Mini Cheesecakes, Pumpkin Cheesecake Bars, soft and fluffy Pumpkin Pancakes and of course these new Pumpkin Snickerdoodles!
HOW TO MAKE Snickerdoodle Pumpkin Cookies VIDEo

Why you’ll love these Pumpkin Spice Snickerdoodles
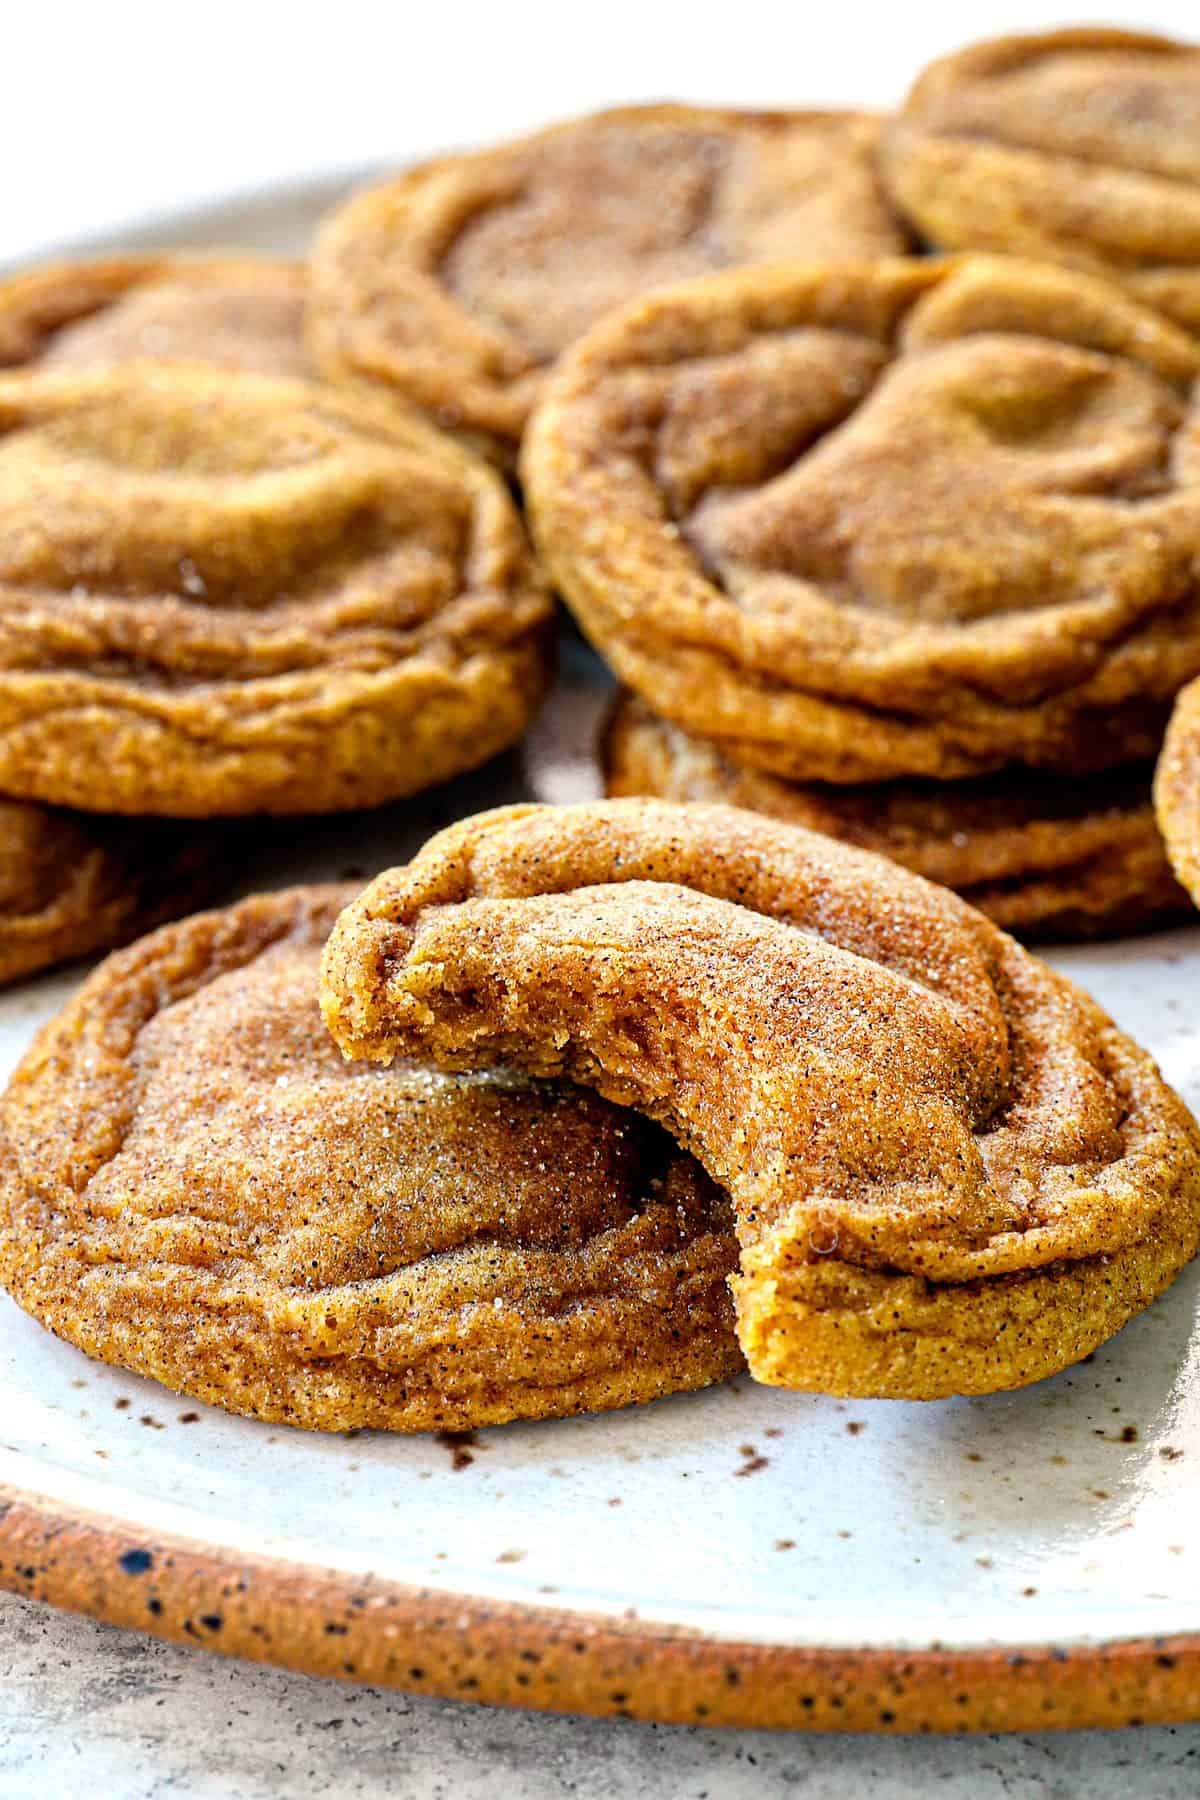
Texture: I’m not exaggerating when I say I could not stop inhaling these Snickerdoodle Pumpkin Cookies! Too often Pumpkin Snickerdoodles teeter the line between chewy cookies and cake-like cookies – and fail. But not these cookies! They’re mega soft, mega chewy, and mega fabulous thanks to a few extra tips like adding cornstarch to the batter. If you’re looking for a cakey pumpkin cookie, try these Pumpkin Cookies with Cinnamon Cream Cheese Frosting instead.
Flavor: These Pumpkin Snickerdoodles taste like Fall in cookie form! They are loaded with fragrant, earthy Fall spices of cinnamon, nutmeg, cloves, allspice and ginger with a full ½ cup of pure pumpkin.
Make ahead: Possibly the best part about these pumpkin cookies is they taste fabulous for days – even better days later in fact! So, make them Sunday, serve them Wednesday and eliminate all of the stress!

Pumpkin Snickerdoodle Recipe Ingredients
This pumpkin cookie recipe begins with basic snickerdoodle ingredients, then adds pumpkin puree and warm Fall spices to transform them into deliciously soft Pumpkin Snickerdoodles! Here’s what you’ll need to make the recipe (measurements in the printable recipe card at the bottom of the post):

How to Make Pumpkin Snickerdoodles
Let’s take a closer look at how to make this recipe with step-by-step photos (full recipe in the printable recipe card at the bottom of the post):
- Step 1: In a mixing bowl, whisk together the Dry Ingredients until thoroughly combined; set aside.

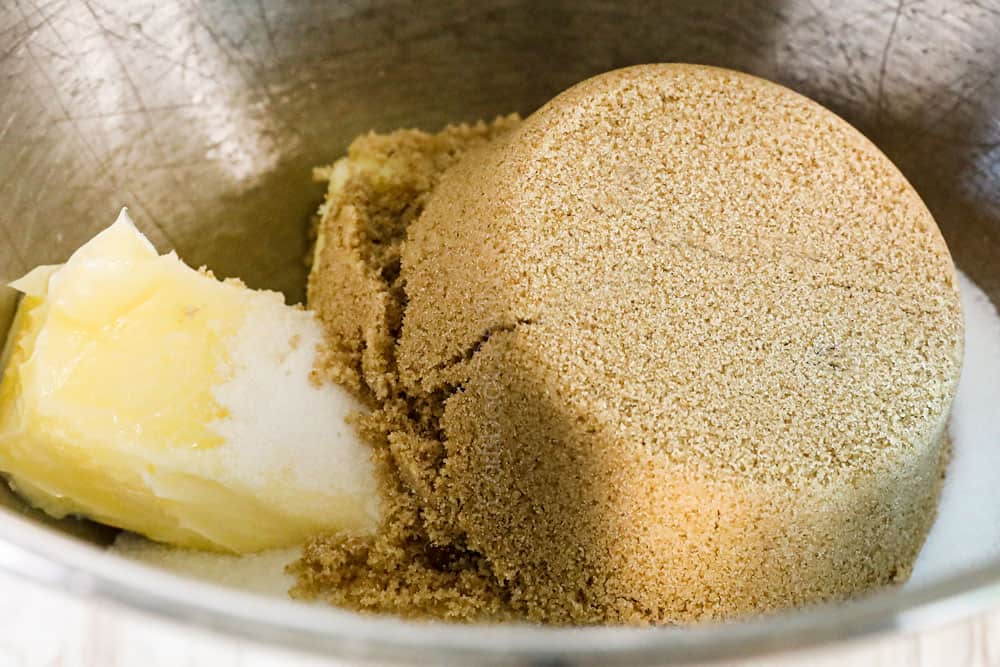
Step 2: In the bowl of an electric stand mixer fitted with the paddle attachment, cream together the butter and sugars on medium speed until combined.
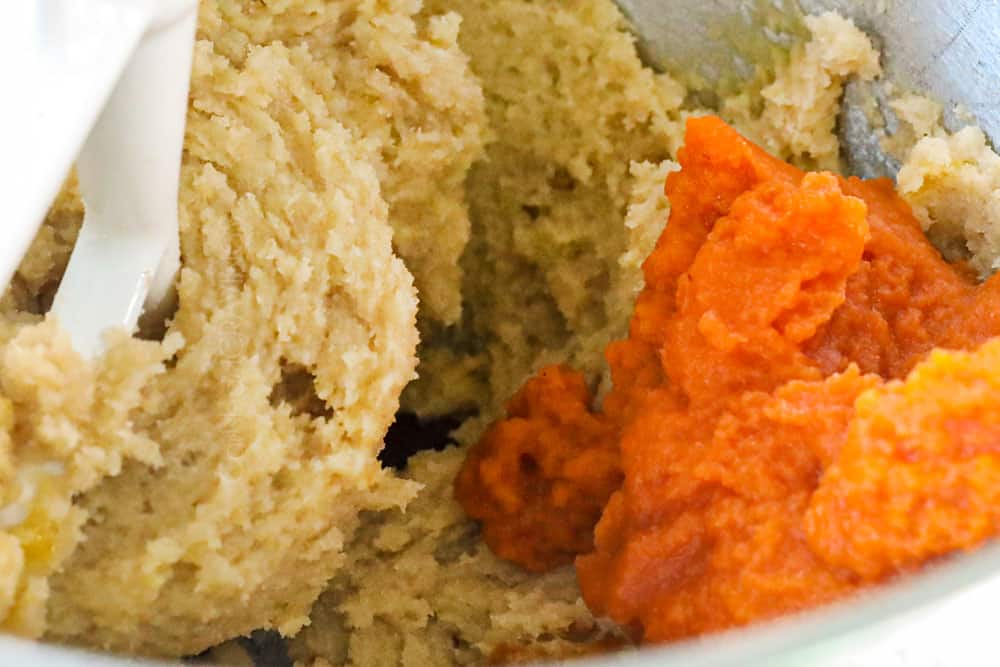
Step 3: On medium low, mix in the egg yolk, followed by the pumpkin and vanilla extract.
Step 4: On low, slowly mix in the Dry Ingredients just until combined. Give the dough a stir by hand to scrape up any dough at the bottom of the bowl.

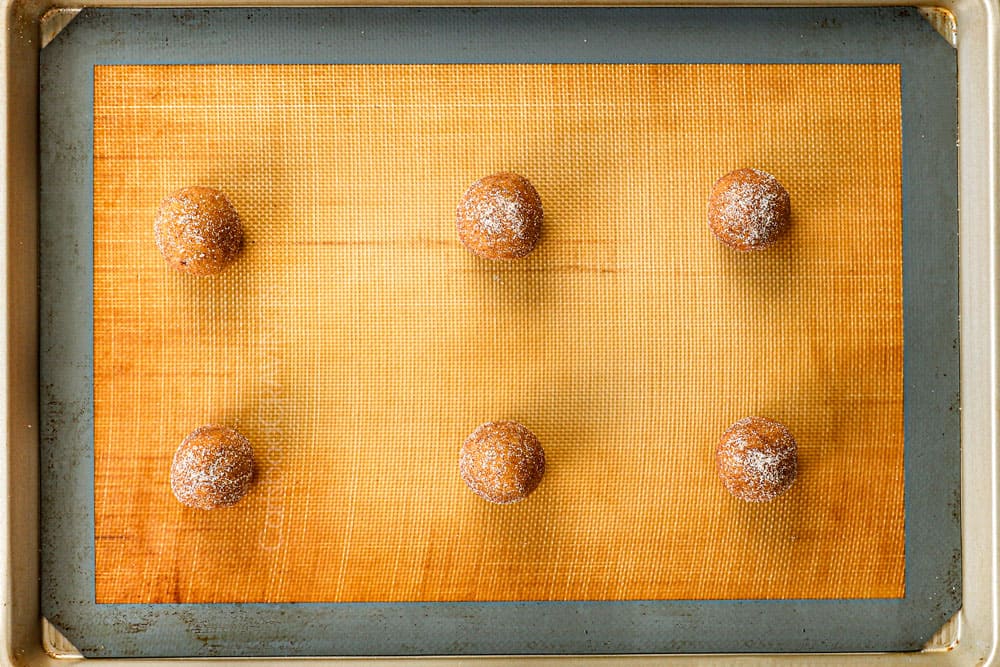
Step 5: Cover the dough and chill for at least one hour, upwards of 3 hours is optimal to reduce spreading. Meanwhile, whisk together the ¼ cup granulated sugar with 1 teaspoon cinnamon in a small bowl.
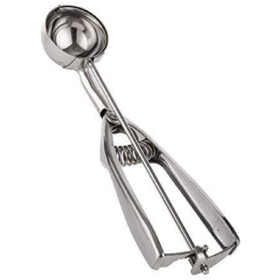
Step 6: Using a 2-tablespoon cooking scoop, scoop the dough and shape it into a ball, roll the dough ball in the cinnamon sugar mixture to thoroughly coat, then transfer to the baking mat, spacing cookies 2-inches apart.

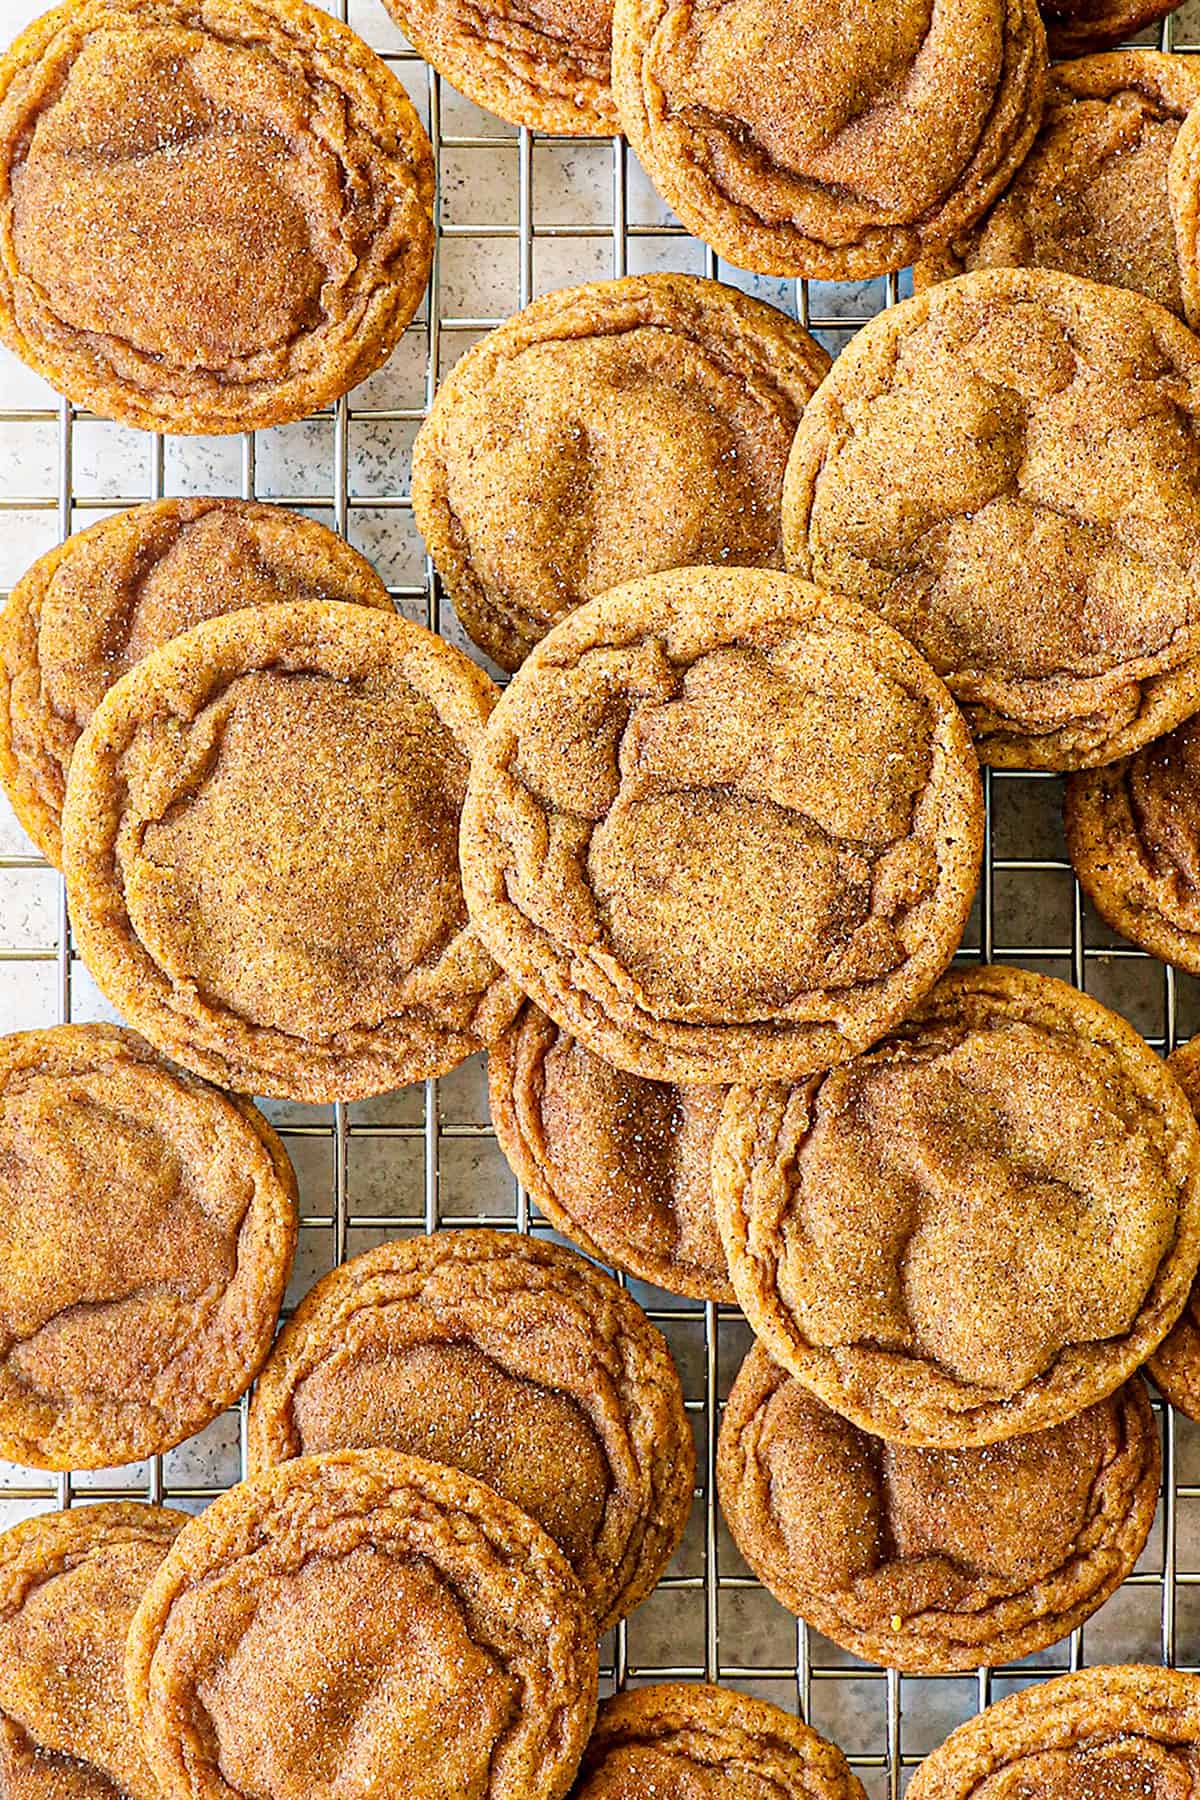
Step 7: Bake in the preheated oven for 9-11 minutes (they should look just slightly under-baked; they will cook more once removed from oven).
Step 8: Cool on the baking sheet about 5 minutes then transfer to a wire rack to cool completely.

make Ahead
The cookie dough can be covered and chilled in the refrigerator for up to 3 days.

Tips for Making the Best Pumpkin Snickerdoodles
I’ve experimented and perfected this recipe and techniques so you don’t have to! Follow these tips for success and you’ll have the best chewy Pumpkin Snickerdoodles every time:

possible recipe variations
This pumpkin cookie recipe is extremely versatile. They are fabulous plain or try 1 cup of add-ins or a combination add-ins to equal 1 cup:

HOW TO STORE
Pumpkin Snickerdoodles can be stored in an airtight container at room temperature for up to 10 days (if they last that long😉). Chewiness and pumpkin flavor are even stronger/better after day 2!
HOW TO Freeze Pumpkin Cookies
These Pumpkin Snickerdoodles freeze very well. You can either freeze the cookies before or after baking.
TO FREEZE COOKIE DOUGH:
1. Roll balls per instructions and fit as many as you can on a parchment/nonstick lined baking sheet without touching.
2. Freeze the balls until the outsides are hard (about 1-2 hours).
3. Transfer the dough balls to a freezer size plastic bag and freeze for up to 3 months.
4. To BAKE: Place frozen cookie dough balls on a lined baking sheet (6 per sheet) and bake according to instructions without thawing first, adding a couple extra minutes to the baking time.
TO FREEZE BAKED COOKIES
1. Fit as many cooled cookies on a parchment/nonstick mat lined baking sheet without touching.
2. Freeze until solid (about 1 hour).
3. Transfer cookies to a freezer size plastic bag with sheets of parchment in between any layers. Freeze for up to 3 months.
4. TO EAT: Remove any parchment paper and let the cookies sit at room temperature in a single layer until thawed completely.
Pumpkin Snickerdoodle FAQS
Cream of tartar is the key ingredient to developing that tangy taste, chewy texture, and distinct craggly surface of the classic snickerdoodle. The tartar’s acid gives snickerdoodles their distinctive tangy flavor, and the chewiness is achieved because the cream of tartar prevents sugar in the cookie dough from crystalizing into crunchiness. Lastly, the combination of the cream of tartar and baking soda helps leaven the cookies so they’re thick and fluffy.
Cream of tartar is a dry, powdery, acidic byproduct of fermenting grapes into wine. It’s what separates a tangy, chewy snickerdoodle from a run-of-the mill cinnamon-coated sugar cookie. You can omit it if you must, but the final taste and texture won’t quite be the same (see below).
If you want to make snickerdoodles without cream of tartar, you can substitute the cream of tartar AND the baking soda with 2 teaspoons of baking powder which has both cream of tartar and baking soda in it. The only difference is that a classic snickerdoodle recipe has more cream of tartar than baking soda so you will lose a bit of that tangy flavor if you use just baking powder.
There are 6 important elements in preventing flat snickerdoodles:
1. Most importantly, make sure your leaveners are fresh! Both the baking soda and cream of tartar need to be fresh, otherwise, you are doomed for flat cookies. To test the cream of tartar, add a pinch to a bowl of hot water. If the water slightly fizzes, then you’re good to go, if it stays flat, then it needs to be replaced. To test the baking soda, add a pinch to a bowl, followed by a splash of vinegar. If it doesn’t fizz, your baking soda needs to be replaced.
2. Chill the dough for at least 1 hour.
3. Bake the cookies immediately after rolling, or place the rolled balls back in the refrigerator to chill again.
4. Don’t overbake.
5. Calibrate your oven. If your oven is not calibrated correctly, it might be baking at a lower temperature than intended. Try increasing your temperature by 25 degrees which will help set the snickerdoodles before they spread too far.
6. Lastly, if there isn’t enough flour to hold the butter as it melts, the cookies will over-spread. So, if you’ve followed the above steps and your cookies are still spreading, try adding an extra 2 tablespoons of flour to the cookie dough.
Dry snickerdoodles are usually the result of overbaking. You should NOT pull your cookies out when they’re set and crispy. It’s best to slightly under bake the cookies, then let them finish cooking/firm up on the baking sheet after they’re removed from the oven. Another culprit could be that there isn’t enough fat in the dough. Either the recipe itself didn’t call for enough fat (this recipe is perfect) or it was just measured incorrectly.
No, you should not flatten the snickerdoodles before baking or they will spread out too much as the butter melts and become flat instead of thick and chewy.
Make sure to mix the dough sufficiently until light and creamy. This gives lift to the cookies and will cause them to rise and fall, creating those beautiful cracks.
The term snickerdoodle is based off the German word Schneckennudel, a German pastry, which literally translates as “snail pasta.” A Schneckennudel is a yeast dough roll that resembles a cinnamon roll, so perhaps the term snickerdoodle cookie is a nod to the cinnamon laden pastry.
While the exact origin is unclear, the snickerdoodles is believed to be invented in 891 by Cornelia Campbell Bedford. The New York cooking teacher and newspaper writer had been working on a recipe for the Cleveland Baking Powder company when she came up with a sugar cookie covered in sugar and cinnamon.
Snickerdoodles are rolled in cinnamon/sugar before they are baked. Additionally, snickerdoodle dough contains cream of tartar which gives snickerdoodles their iconic slightly tangy flavor, thick chewiness and craggly surface.

WANT TO TRY THIS pumpkin cookie RECIPE?
PIN IT TO YOUR dessert or pumpkin recipe BOARD TO SAVE FOR LATER!
FIND ME ON PINTEREST FOR MORE GREAT RECIPES! I AM ALWAYS PINNING :)!
©Carlsbad Cravings by CarlsbadCravings.com


Pumpkin Snickerdoodle Cookies
Save This Recipe To Your Recipe Box
You can now create an account on our site and save your favorite recipes all in one place!
Ingredients
DRY INGREDIENTS
- 2 1/2 cups (300g) all-purpose flour (measure flour correctly or they will not spread, see notes)*
- 1 tablespoon cornstarch
- 1 teaspoon cream of tartar
- 1 teaspoon baking soda
- 1/4 teaspoon baking powder
- 1 ½ teaspoons ground cinnamon
- 1/2 tsp EACH ground nutmeg, ground ginger, salt
- 1/4 tsp EACH ground cloves, ground allspice
CREAMING INGREDIENTS
- 3/4 cup granulated sugar
- 2/3 cup packed light brown sugar
- 12 tablespoons unsalted butter, room temperature
- 1 large egg yolk
- 1/2 cup Libby's pumpkin puree (not pumpkin pie filling, see notes)
- 1 1/2 teaspoons vanilla extract
FOR ROLLING
- 1/4 cup granulated sugar
- 1 teaspoon ground cinnamon
Instructions
- In a mixing bowl, whisk together the Dry Ingredients until thoroughly combined; set aside.
- In the bowl of an electric stand mixer fitted with the paddle attachment, cream together the butter and sugars on medium speed until fluffy, about 2 minutes.
- On medium-low, mix in the egg yolk, followed by the pumpkin and vanilla extract.
- On low, slowly mix in the Dry Ingredients just until combined. Give the dough a final stir by hand to scrape up any dough at the bottom of the bowl.
- Cover the dough and chill for 3 hours or freeze for 45 minutes. You may chill the dough in the fridge for up to 3 days.
- Preheat the oven to 350 degrees F. Line two baking sheets with parchment paper or silicon nonstick baking mats. Whisk together the ¼ cup granulated sugar with 1 teaspoon cinnamon in a small bowl; set aside.
- Using a 2-tablespoon cooking scoop, scoop the dough and roll it into a ball, then roll in the cinnamon sugar mixture to thoroughly coat. At this point, I roll the ball into a tall oval (see video), so it's more tall than it is wide to create thicker cookies. Transfer the balls to the baking mat, spacing cookies 2-inches apart (6 per baking sheet). Refrigerate any dough you are not using at the time, colder dough=thicker cookies!
- Bake at 350 degrees F just until set and the tops are starting to crack (they should look slighlty underbaked; they will cook more once removed from oven). Baking times will vary depending on how cold your dough is, plan on anywhere from 10-13 minutes. Cool on the baking sheet for 5 minutes then transfer to a wire rack to cool completely. Tip: If they aren’t really spreading by minute 9, remove them from the oven and lightly bang the baking sheet on the counter 2-3x. This helps initiate that spread. Return to the oven to continue baking.
Video
Notes
Want To Make This Recipe?

Did You Make This Recipe?
Tag @CarlsbadCravings and Use #CarlsbadCravngs
Leave a Review, I Always Love Hearing From You!


Kayla says
I never leave comments on the recipes I use, but I had to with this one. These are the prettiest cookies I have ever made! They spread and cracked perfectly and taste great. I am making these to serve at a dinner I am cooking for our local fire department and I think they will be a hit. I saw numerous pumpkin snickerdoodle recipes on Pinterest but when I saw one from Carlsbad Cravings, I knew it was the right one to choose because I have made your chicken fajita soup many times and it is delicious so I was certain these cookies would be great too. Thanks for another delicious recipe!
Jen says
Hi Kayla! Thank you so much for leaving such a warm review of my cookie recipe! I’m so glad you loved them and that you’re sharing the love with our first responders! That is such a wonderful idea! I’m so glad that my Chicken Fajita recipe has become a tried and true recipe in your home! Happy baking!
Hm112004 says
Has anyone added chocolate chips or white chocolate chips? Thanks
Jen says
Hi Hillery! Chocolate chips are delicious with these cookies as are a number of other add-ins! Just add 1 cup to the dough! I hope you love them!
Dena says
Yummy, easy and delicious, the whole family loved them! I can’t wait to try the pumpkin cookies with cream cheese next
Jen says
Thank you Dena! I’m so happy that you and your family loved these cookies! I’m excited for you to try my other pumpkin cookies! They are also so delicious!
Cheryl L. says
Wow! These were so good. Perfect little fall treat
Jen says
Hi Cheryl! That’s so wonderful to hear how much you loved these cookies! Thank you!