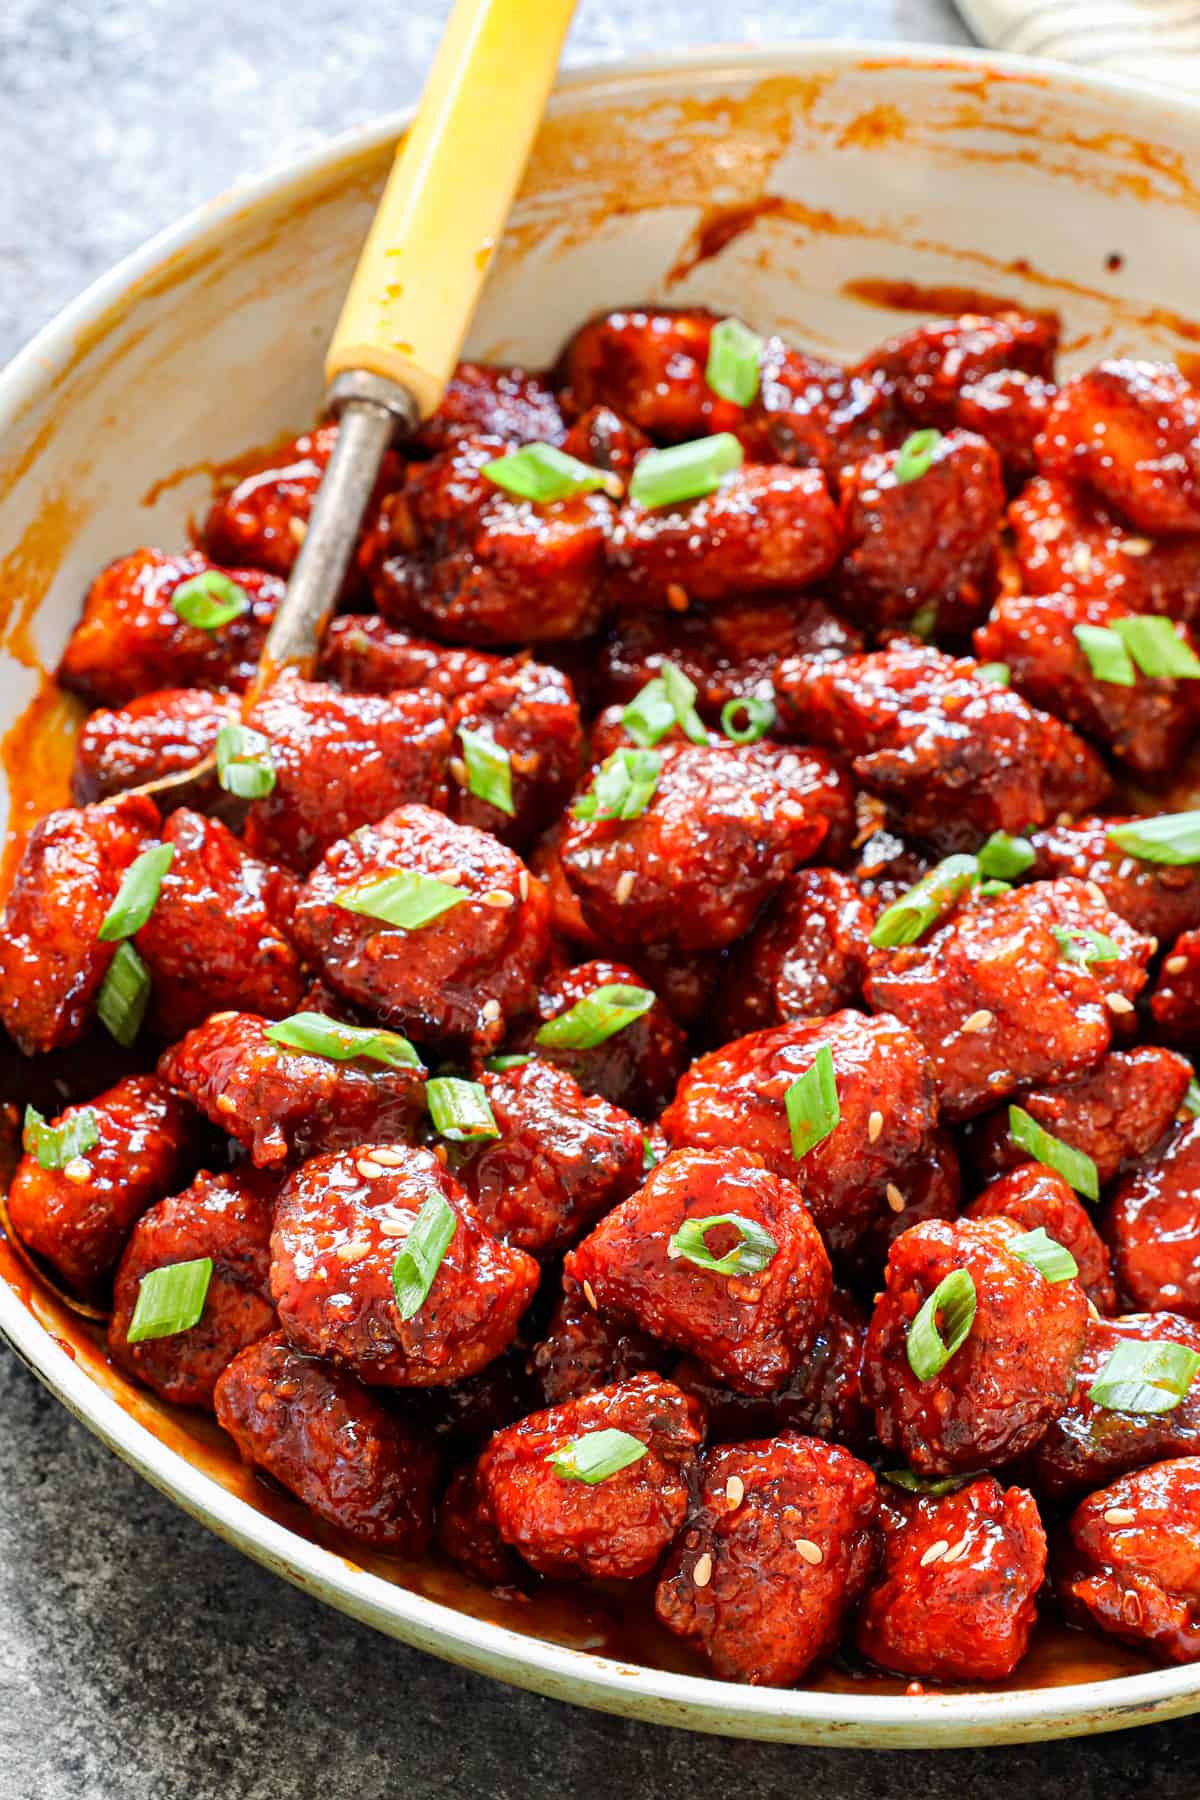
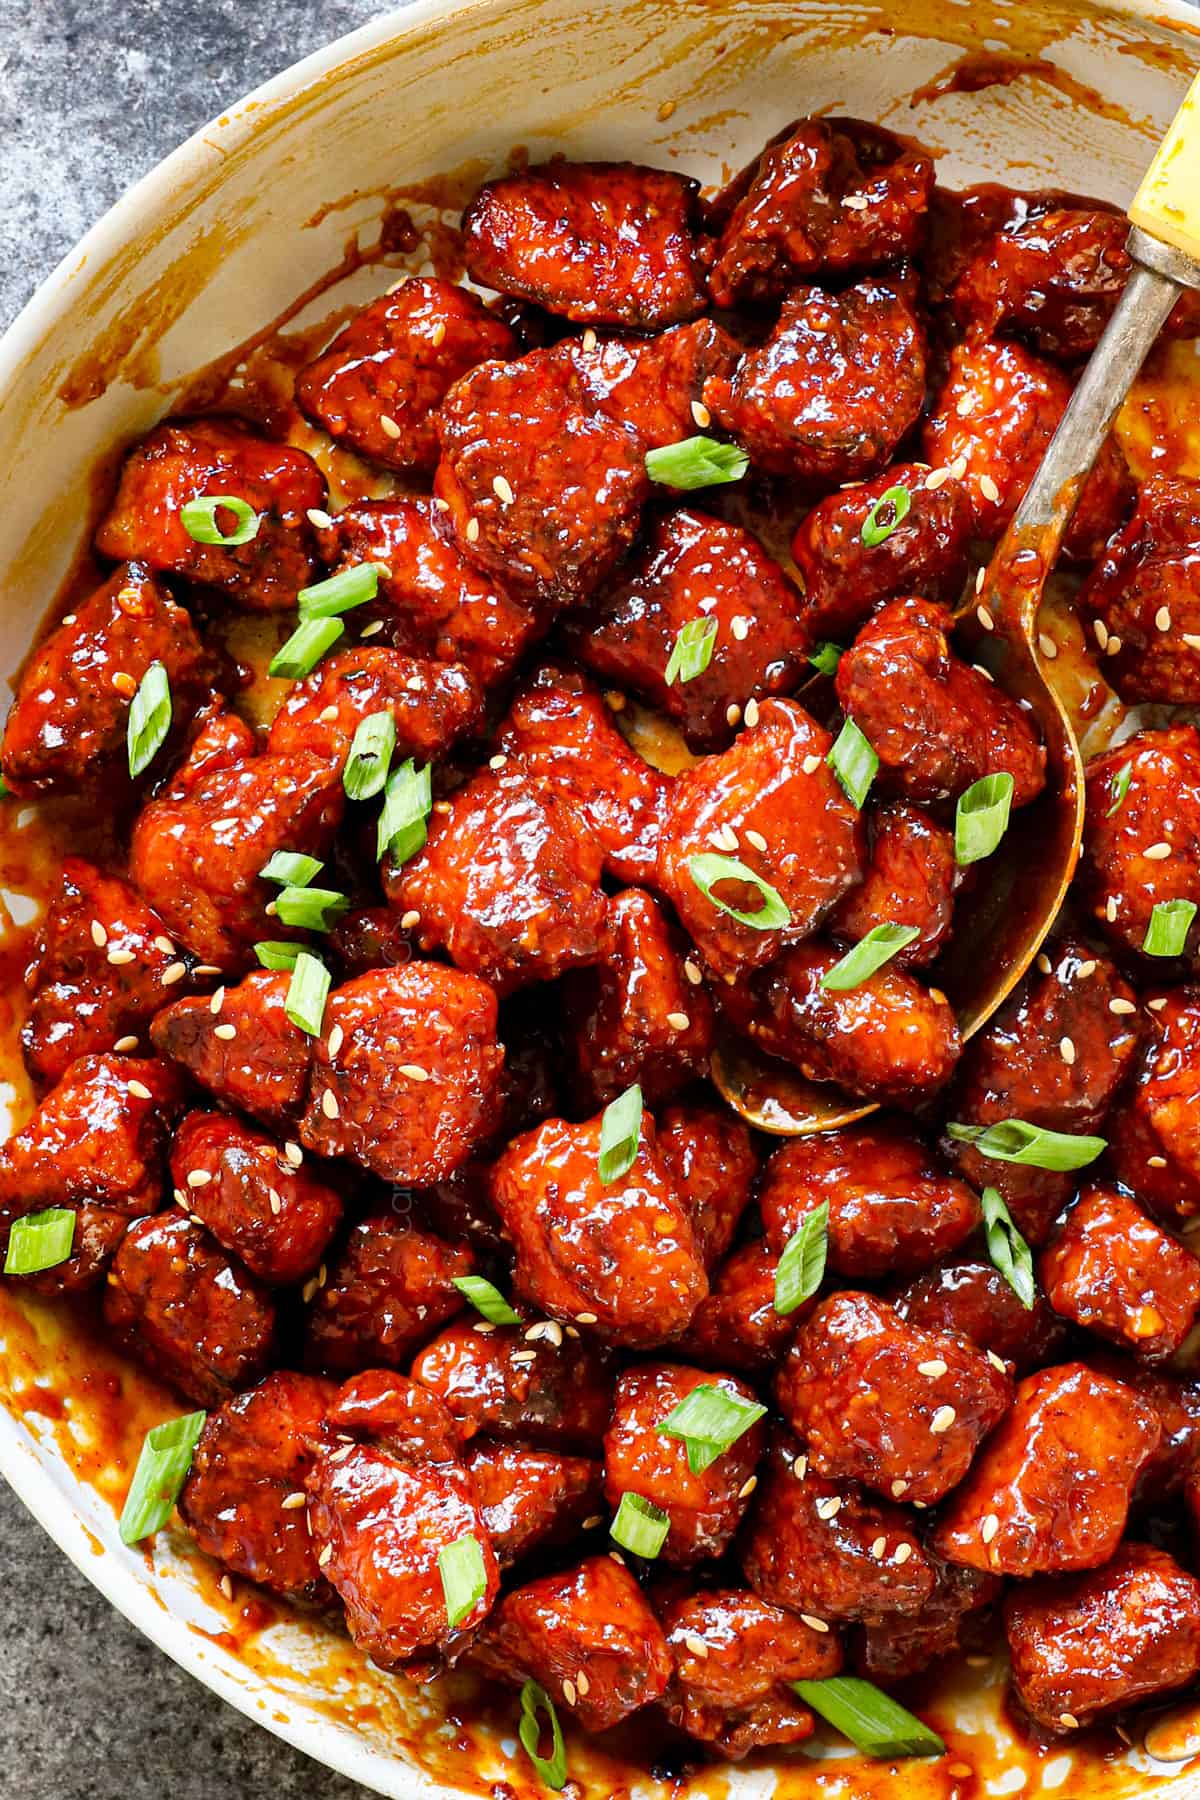
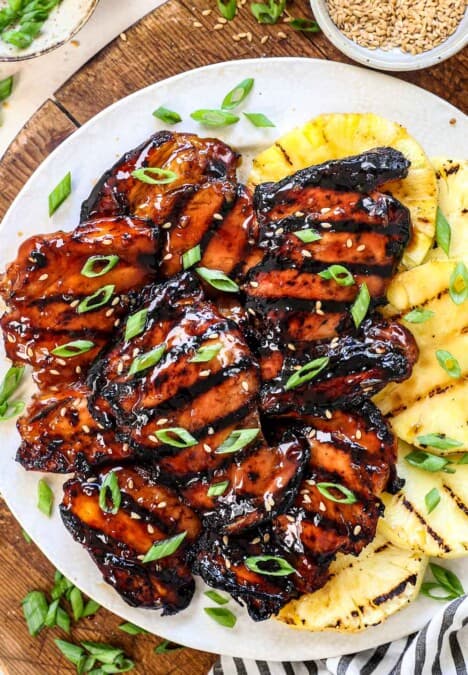
Korean Fried Chicken is crispy, juicy morsels coated in an outrageously delicious sticky, savory, sweet and spicy sauce that will have you licking the plate! Although the chicken is usually deep fried, this recipe is a healthier, more approachable version made with bite-size pieces of chicken pan fried in less oil, but still every bit as crispy. Learn how to make this Korean favorite in less than an hour with step-by-step photos and video tutorial.
Watch How to Make Korean Chicken


What is Korean Fried Chicken?
Also known as “the other KFC,” Korean Fried Chicken is a popular and distinct style of fried chicken originating from South Korea. It can be made with a whole chicken separated into pieces or smaller bites of chicken. The breading is typically made with potato starch for a thinner, outer coating, then double fried for an incredibly crispy crunch.
Yangnyeom chicken is a variety of Korean fried chicken coated in a bold, sweet, savory and spicy red sauce of gochujang, sugar, rice vinegar, garlic and ginger. The recipe I’m sharing with you today is a healthier, more approachable version of yangnyeom chicken, but every bit as delicious!

Why this is the Best Korean Fried Chicken

Korean Fried Chicken Recipe Ingredients
There are three parts to this Korean Fried Chicken recipe: 1) the marinade, 2) the breading, 3) the sauce. It looks like a lot of ingredients, but many of the ingredients are repeats, used multiple times. Let’s take a closer look at what you’ll need (full recipe with measurements in the printable recipe card at the bottom of the post):
CHICKEN Marinade
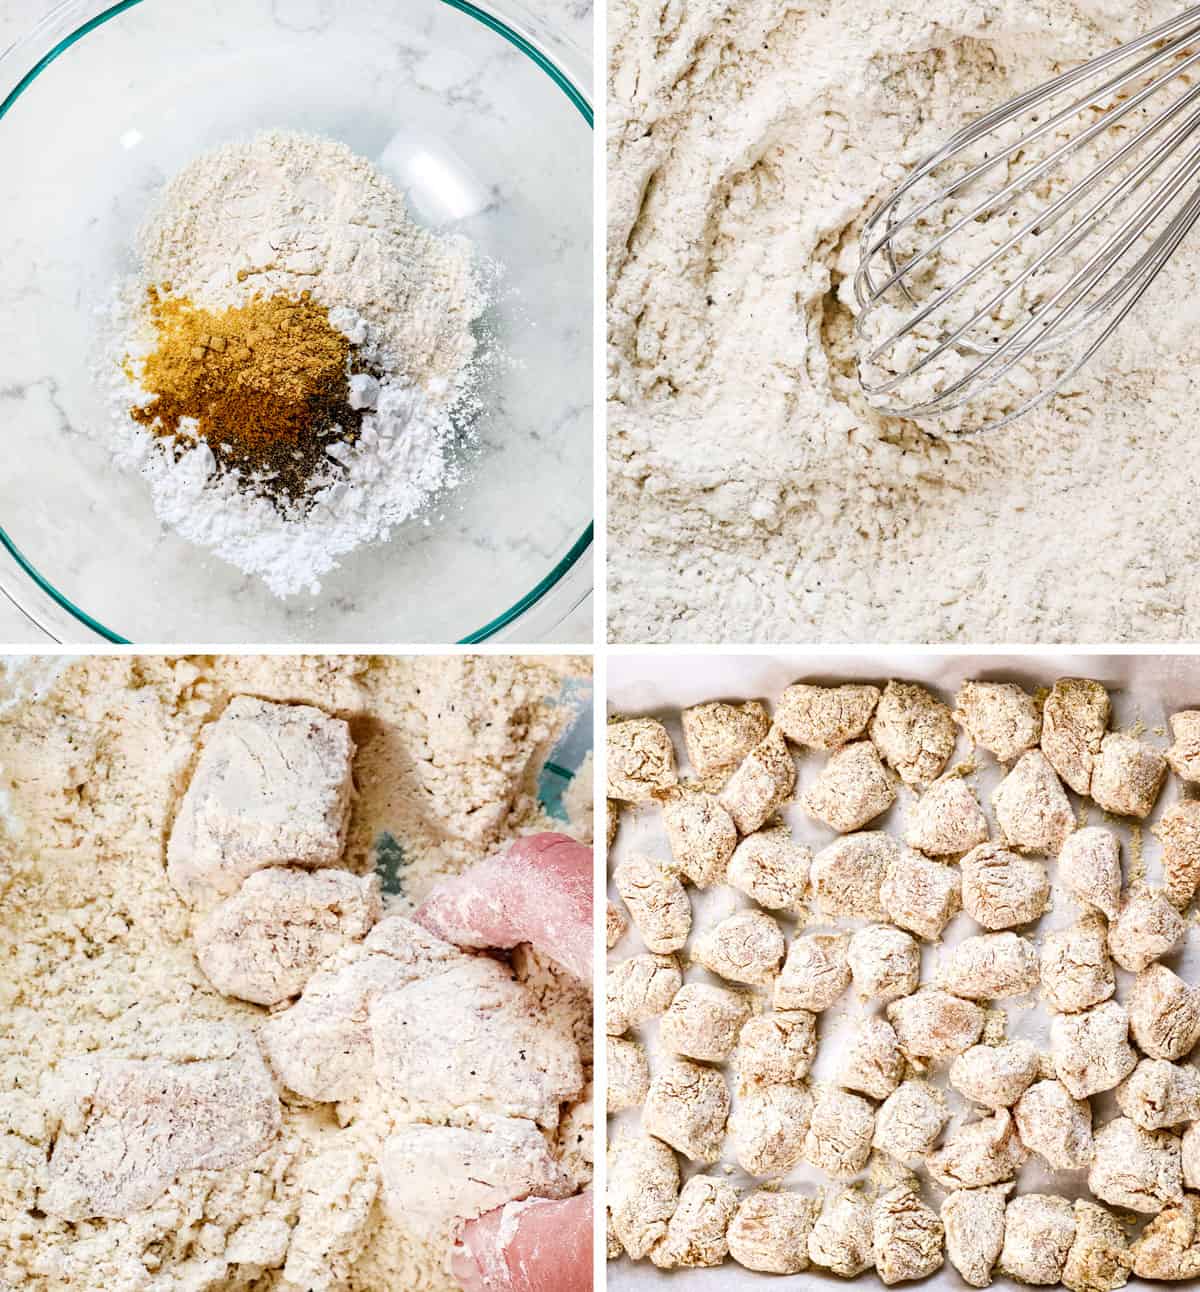
CHICKEN Breading
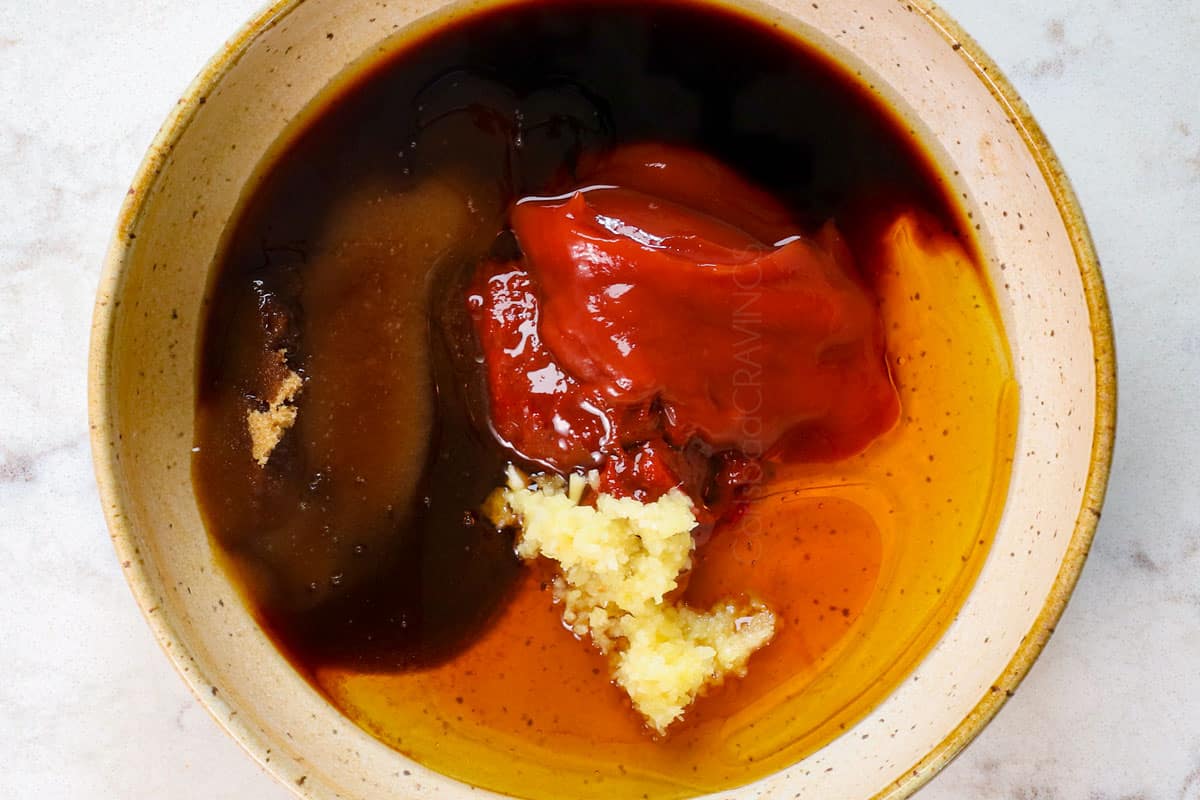
FOR THE Sauce:
What is Korean fried chicken batter made of?
Korean fried chicken batter typically consists of a mixture of flour, cornstarch, or potato starch, and baking powder which create its signature light and crispy texture. It’s often seasoned with garlic powder, onion powder, ginger powder, salt and pepper.

Korean Chicken variations

How to make Korean Fried Chicken
Let’s take a closer look at how to make Korean Fried Chicken (full recipe in the recipe card at the bottom of the post or watch the HOW TO VIDEO):


TIPS FOR making Korean Fried Chicken

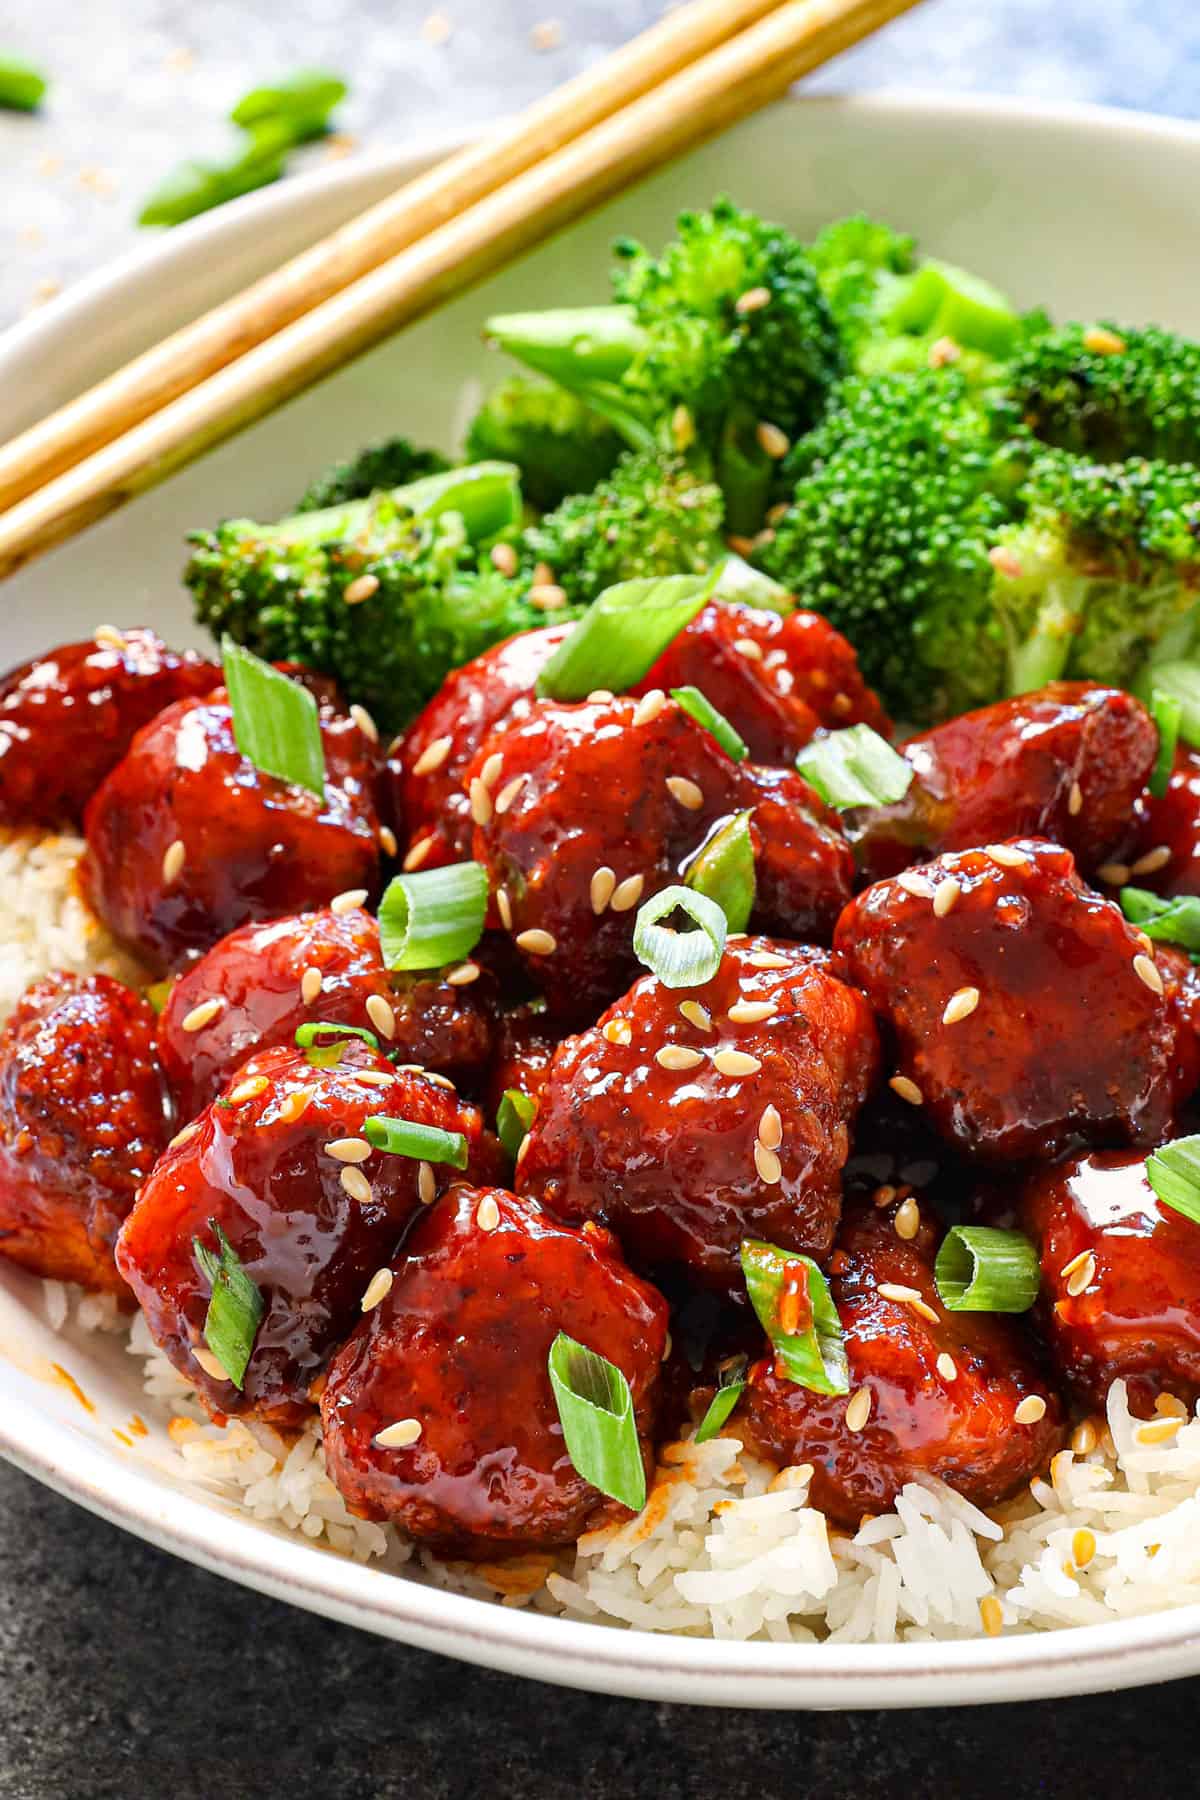
Serving Korean Fried Chicken
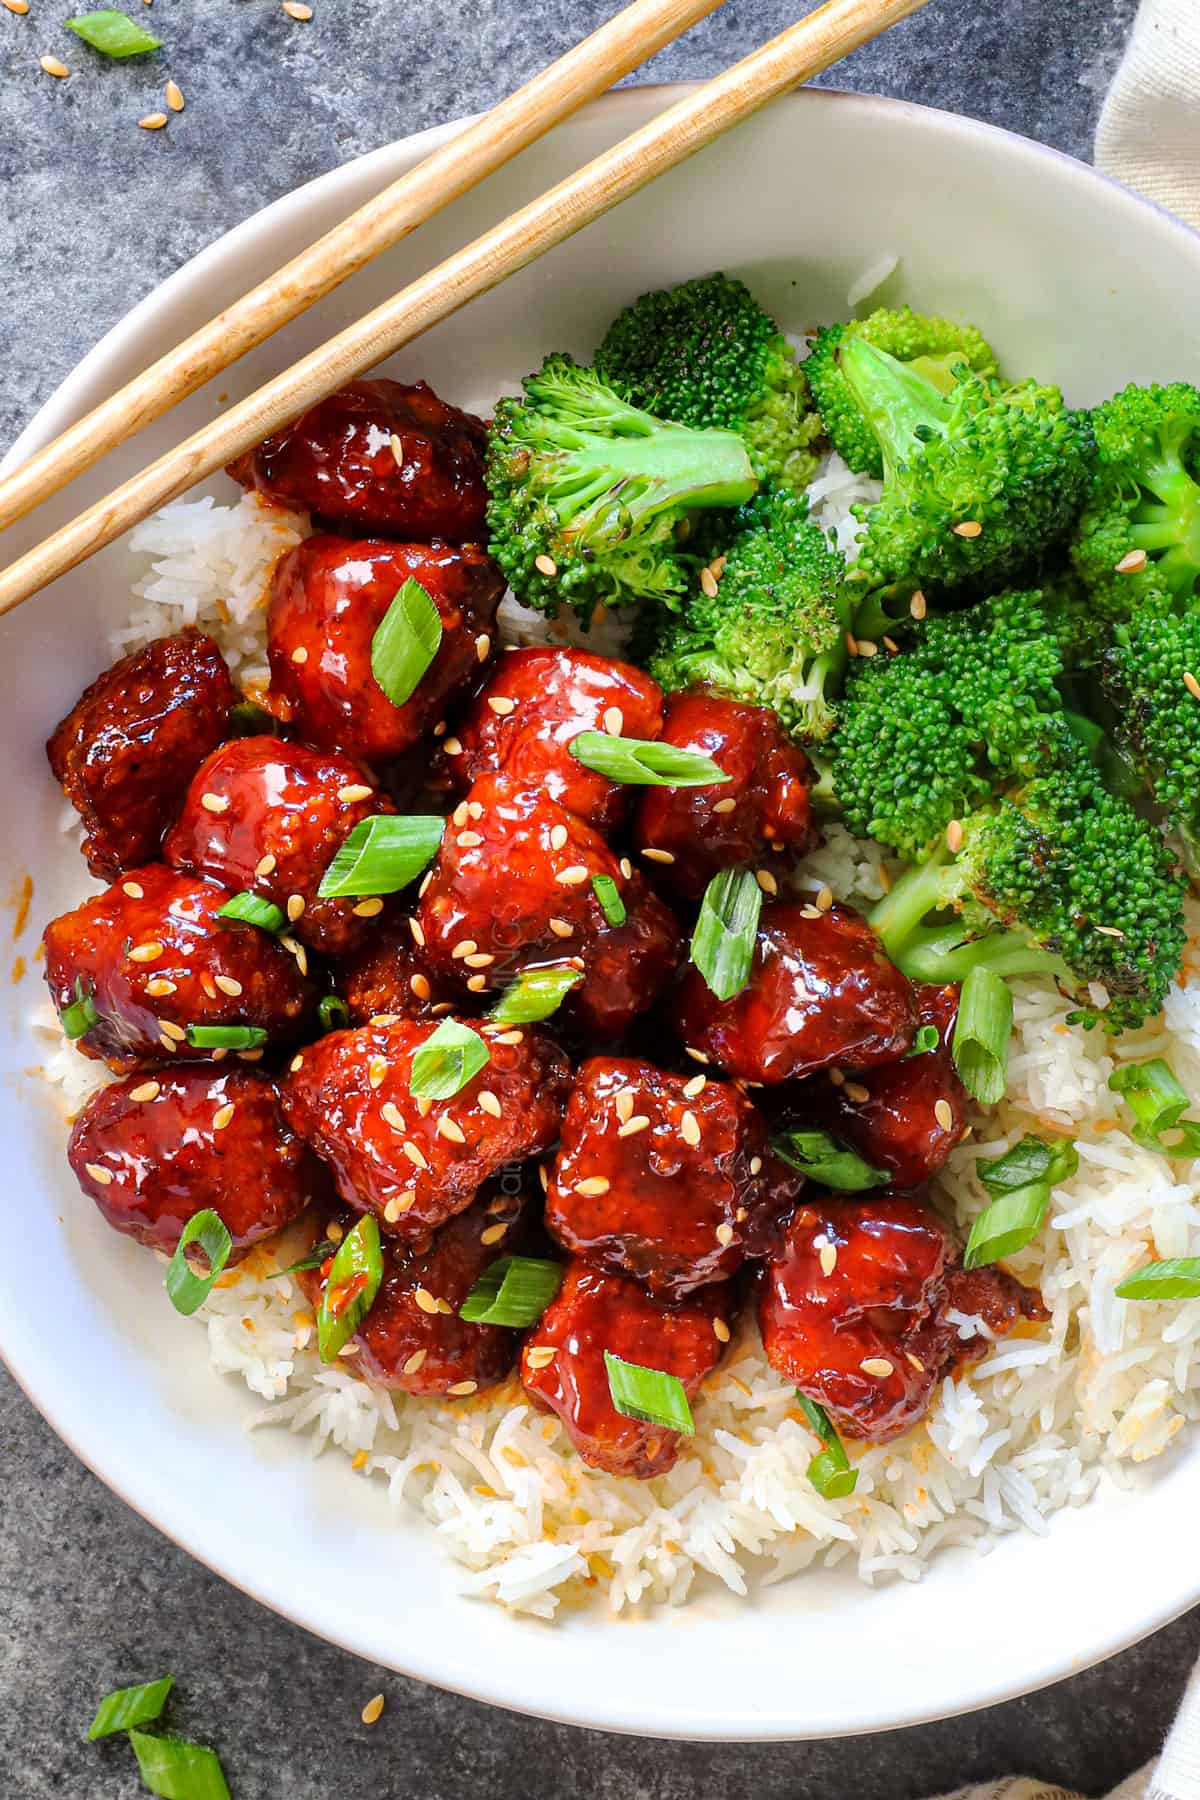
This Korean Fried Chicken is dripping with flavor so it pairs well with neutral sides such as:

MEal Prep Korean Fried Chicken
This Korean Fried Chicken can be prepped in stages:
The sauce: Whisk the sauce ingredients together but do not simmer. Store it in an airtight container in the refrigerator.
The chicken: Chop the chicken and store in an airtight container in the refrigerator for up to 24 hours. Prepare the marinade and store separately.
Breading: Whisk the breading ingredients together in a Ziploc freezer bag. Store the breading for weeks or proceed to dredge chicken then refrigerate:
Dredge chicken: Prepare chicken through dredging, then transfer it to a parchment paper lined baking sheet in a single layer. Cover the chicken tightly with plastic wrap and refrigerate. Let the chicken sit at room temperature for 20 minutes before cooking.


How to store Korean BBQ Fried Chicken
Store leftovers in an airtight container in the refrigerator for up to 5 days.
HOW TO freeze Korean Chicken REcipe
I recommend freezing the chicken and sauce separately for the best texture, otherwise, the chicken absorbs the sauce like a sponge:
1. Cook chicken according to directions then let cool to room temperature. Space chicken apart on a baking sheet then transfer to the freezer. Flash freeze for 1-2 hours or until the chicken is solid. This prevents the chicken from clumping together.
2. Add chicken to a freezer size bag, squeeze out excess air and label. Add the stir fry sauce to a separate freezer safe, airtight container.
3. Freeze the chicken and sauce separately for up to 3 months.
4. When ready to use, thaw chicken and sauce in the refrigerator overnight. Bring the sauce to a simmer in a skillet, then add the chicken.

How to Reheat Korean Fried Chicken
How to reheat on the stove: Leftovers are best reheated over medium heat on the stove, even if they are small portions.
Reheating in microwave: Take care not to overcook the chicken or it can become rubbery in the microwave. Microwave for one minute then at 20 second intervals until warmed through.
Korean Style Fried Chicken FAQs
Unlike traditional American fried chicken, Korean fried chicken is coated in a flavorful sauce after frying. This sauce adds a sweet, savory, fiery kick to the crispy chicken, creating a unique and delicious flavor combination that’s finger lickin’ good!
Korean fried chicken may not be crispy for several reasons:
1. Moisture on the Chicken: Ensure the chicken is thoroughly dried before coating it with the flour mixture.
2. Oil Temperature: Frying at the wrong oil temperature can lead to soggy chicken. Maintain a consistent oil temperature of around 350-375°F (175-190°C).
3. Crowding: Overcrowding the pan while cooking can cause the chicken pieces to steam rather than fry, resulting in less crispiness. Fry in smaller batches.
4. Not Draining Excess Oil: After frying, allow the chicken to drain on paper towels to remove excess oil and maintain crispiness.
Korean fried chicken is known for its exceptional taste due to several key factors. Firstly, the chicken is traditionally double-fried, creating an incredibly crispy and light exterior while keeping the meat tender and juicy. Secondly, it’s often coated in a flavorful sauce that strikes a balance between sweet, savory, and spicy. The combination of textures and the bold flavor profile of the sauce set Korean fried chicken apart from other fried chicken variations, making it an irresistible and addictive treat.
Korean fried chicken is different from traditional fried chicken due to its double-frying technique, which yields an exceptionally crispy exterior while maintaining a tender interior. Additionally, it’s often coated in a flavorful and spicy sauce, creating a unique sweet, savory, and spicy flavor profile that sets it apart from traditional fried chicken.
In South Korea, the term “chicken” (치킨) typically refers to fried or sometimes roasted chicken. “Yangnyeom” (양념) translates to “seasoned” in Korean. Therefore, “yangnyeom chicken” (양념치킨) essentially means “seasoned fried chicken” in Korean. If the chicken is not seasoned, it’s referred to as “dakgogi-twigim” (닭고기 튀김), which can be translated as “chicken meat fritter,” or simply as “fried chicken” (프라이드치킨). Beyond Korea, “yangnyeom chicken” is commonly known as “Korean fried chicken.”

Looking for more Korean Recipes?
Bibimbap
Korean Chicken
Korean Chicken Wings
Korean Noodles
Korean Beef Bowls
Korean Steak Tacos
Korean BBQ Burgers
WANT TO TRY THIS Korean Fried Chicken RECIPE?
PIN IT to your recipe BOARD TO SAVE FOR LATER!
FIND ME ON PINTEREST FOR MORE GREAT RECIPES! I AM ALWAYS PINNING :)!
©Carlsbad Cravings by CarlsbadCravings.com


Best Korean Fried Chicken
Save This Recipe To Your Recipe Box
You can now create an account on our site and save your favorite recipes all in one place!
Ingredients
QUICK CHICKEN MARINADE
- 2 pounds boneless, skinless chicken breasts, cut into 1-inch pieces
- 1 egg
- 1/2 cup buttermilk (OR ½ TBS vinegar mixed with ½ cup milk)
- 1 tablespoon reduced sodium soy sauce
- 1 tablespoon rice wine
- 1 teaspoon baking soda
CHICKEN BREADING
- 1/2 cup flour
- 1/2 cup potato starch or cornstarch
- 1 teaspoon curry powder
- 1/2 tsp EACH ground ginger, garlic powder, onion powder, salt, pepper, baking powder
Sauce
- 1/4 cup brown sugar
- 1/4 cup honey
- 3 tablespoons ketchup
- 3 tablespoons reduced sodium soy sauce
- 3 tablespoons gochujang paste
- 2 tablespoons rice vinegar
- 1 tablespoon toasted sesame oil
- 4 garlic cloves, minced
- 1 tsp ginger powder (or 1 TBS fresh)
- 1 teaspoon Asian chili sauce (more or less to taste)
Garnish
- green onions
- toasted sesame seeds
Instructions
- Marinate Chicken: Whisk the marinade ingredients together in a large bowl then stir in the chicken. Marinate at room temperature for 20-30 minutes. Meanwhile, make the sauce and the breading mixture.
- Make sauce: Whisk the sauce ingredients together in a medium bowl; set aside.
- Bread Chicken: In a separate large bowl, whisk the breading ingredients together. Working in batches, remove chicken from marinade with a slotted spoon, dab off excess marinade with paper towels and add to breading. Using a clean hand, toss the chicken until well coated. Remove chicken to a parchment paper lined baking sheet. Repeat with all of the chicken.
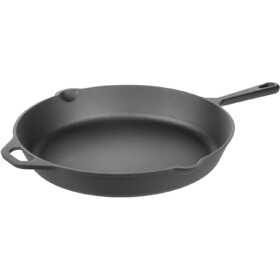
- Pan fry: Add enough vegetable oil to a large skillet so it reaches 1/4-inch up the sides and heat to 375°F over medium-high heat. (You can use less oil if you use a NONSTICK skillet, but it won't quite as crispy.) Working in batches, shake off excess breading from chicken add to hot pan in a single layer and cook for about 4-6 minutes, or until cooked through, turning halfway through. Remove using a spider strainer or slotted spoon to a paper towel lined plate.
- Simmer sauce: Wipe out pan. Add the sauce to the pan and bring to a simmer for a couple minutes to warm through. Taste and adjust as desired. Add chicken back to pan and stir until evenly coated.
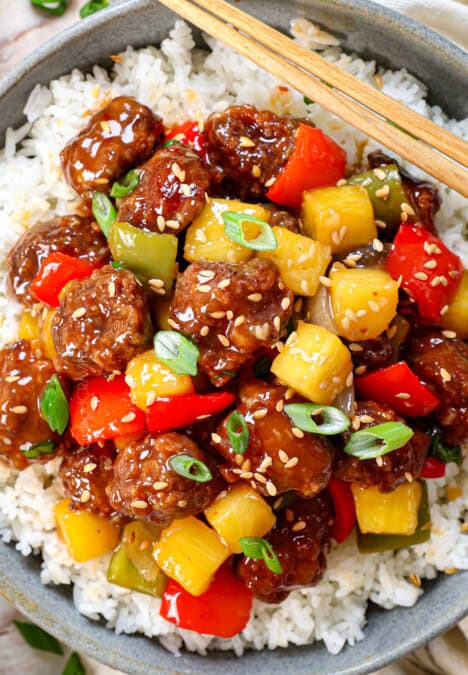
- Serve: Garnish with green onions and sesame seeds if desired and serve with rice.
Video
Notes
- To store and reheat: Store leftovers in an airtight container in the refrigerator for up to 5 days. Leftovers are best reheated over medium heat on the stove, even if they are small portions as microwaving can make the chicken rubbery.
MEAL PREP
- The sauce: Whisk the sauce ingredients together but do not simmer. Store it in an airtight container in the refrigerator.
- The chicken: Chop the chicken and store in an airtight container in the refrigerator for up to 24 hours. Prepare the marinade and store separately.
- Breading: Whisk the breading ingredients together in a Ziploc freezer bag. Store the breading for weeks or proceed to dredge chicken then refrigerate:
- Dredge chicken: Prepare chicken through dredging, then transfer it to a parchment paper lined baking sheet in a single layer. Cover the chicken tightly with plastic wrap and refrigerate. Let the chicken sit at room temperature for 20 minutes before cooking.
Want To Make This Recipe?

Did You Make This Recipe?
Tag @CarlsbadCravings and Use #CarlsbadCravngs
Leave a Review, I Always Love Hearing From You!


Debra says
Is it possible to omit the curry? I can’t handle the taste and don’t have a stomach for it. The rest of the spices look good; it’s just the curry i’m questioning, thanks!
Jen says
Absolutely!
Lisa says
Just made this for dinner… WOW! Flavor bomb, exactly as written. Juicy, tons of flavor & pretty easy. I have never had to order pizza after making one of your recipes! Thanks for another killer dinner!
Jen says
That is amazing you made it already! I’m thrilled you loved it so much! Thanks for making so many of my recipes!
Allison says
This looks so delicious, I can’t wait to make it! Do you have any recommendations for substitutes for the Asian chili sauce? I can’t find it anywhere and the link to Amazon goes to a product that is unavailable. I believe there’s still a shortage of that type of chili sauce/chili pepper which is why it’s unavailable. Thanks in advance!
Jen says
Hi Allison! I am not sure why the link isn’t working, but here is a different one! https://www.amazon.com/Sky-Valley-Paste-Sambal-Organic/dp/B07PT68RL5/ref=sr_1_1_sspa?crid=1W73LTWH5SX5U&keywords=Sambal+Oelek&qid=1697055695&sprefix=sambal+oelek%2Caps%2C273&sr=8-1-spons&sp_csd=d2lkZ2V0TmFtZT1zcF9hdGY&psc=1 Hope this helps!
Carolyn says
I made this last night, it was wonderful! The chicken was tender on the inside and crunchy on the outside. The sauce was a lovely warm blend of flavors that went together so well.I’ve never used gochujang before, so that was fun. I served it with jasmine rice and snow peas. I made it exactly as written. I love your recipes, and this one in particular.
Jen says
Thanks so much Carolyn! I am so glad that it was a fun and yummy experience!!
Derek says
This recipe is the most amazing and delicious chicken recipe I have ever made and everyone loved it. It’s so damn good I’m making it again today! Thanks this is really a great one! #CARLSBADCRAVNGS
Jen says
Thank you Derek! I’m so glad it has been such a winner!
Joanne says
Tried this for family and every one loved it, I will reduce gochujang next time due to some family issues with spice. Thank you for this lovely recipe.
Jen says
Hi Joanne! How fantastic that everyone loved this recipe and that you will make it again! Thanks so much!
Carol says
Hi I only have bicarbonate of soda, not baking soda or baking powder. Could I use this instead and if so what quantities please?
Jen says
Yes Carol, use the exact same quantity, enjoy!