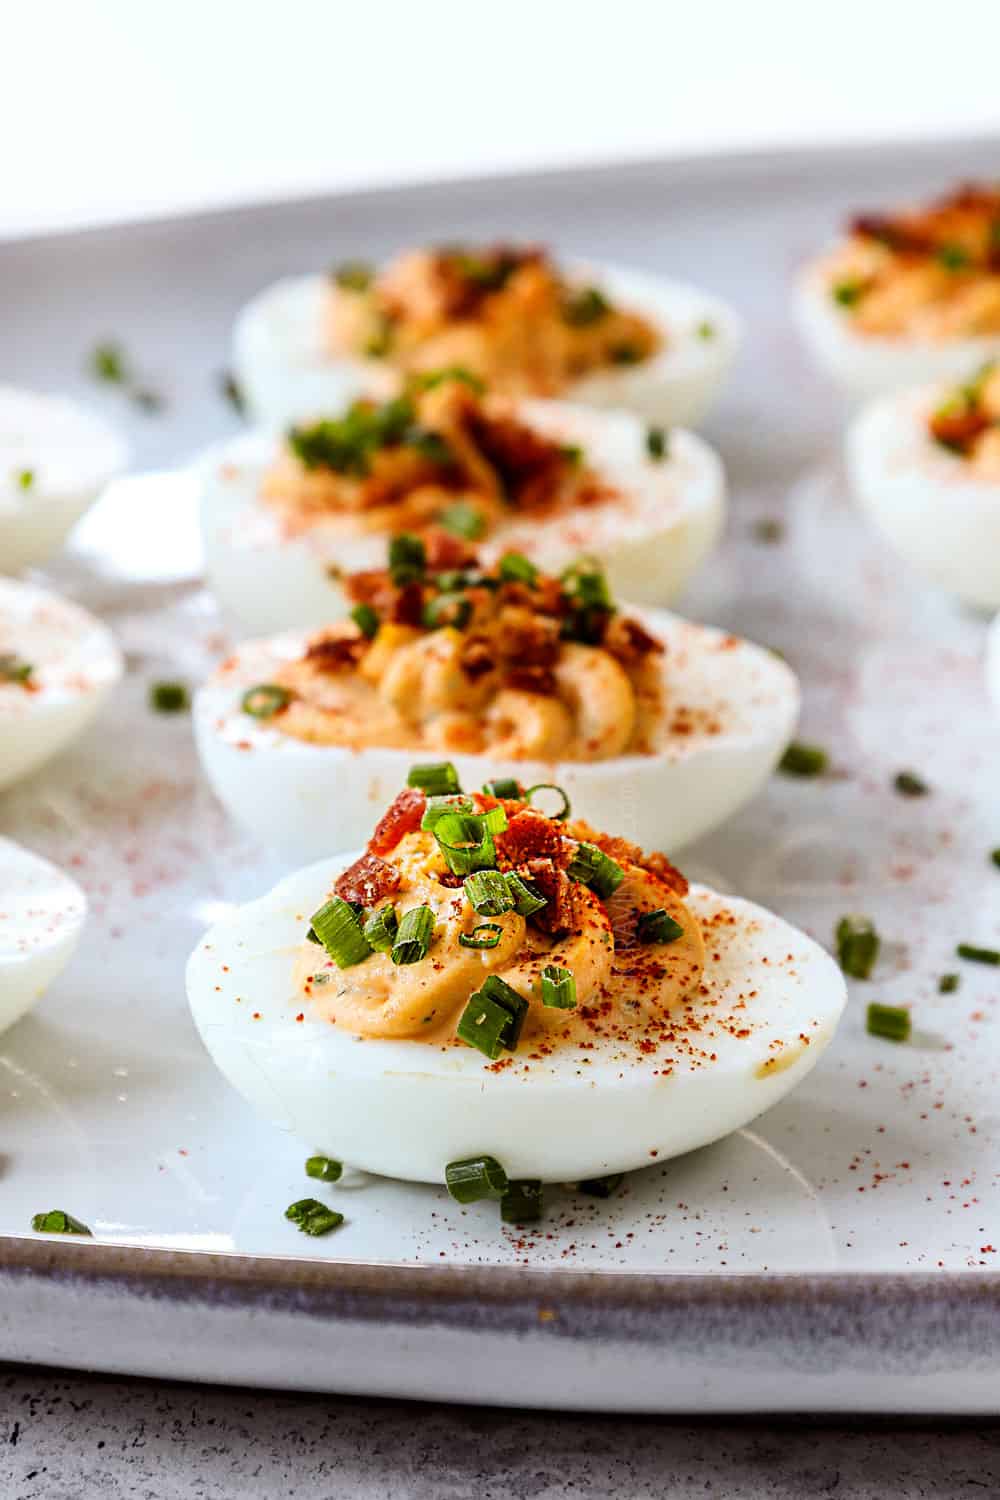
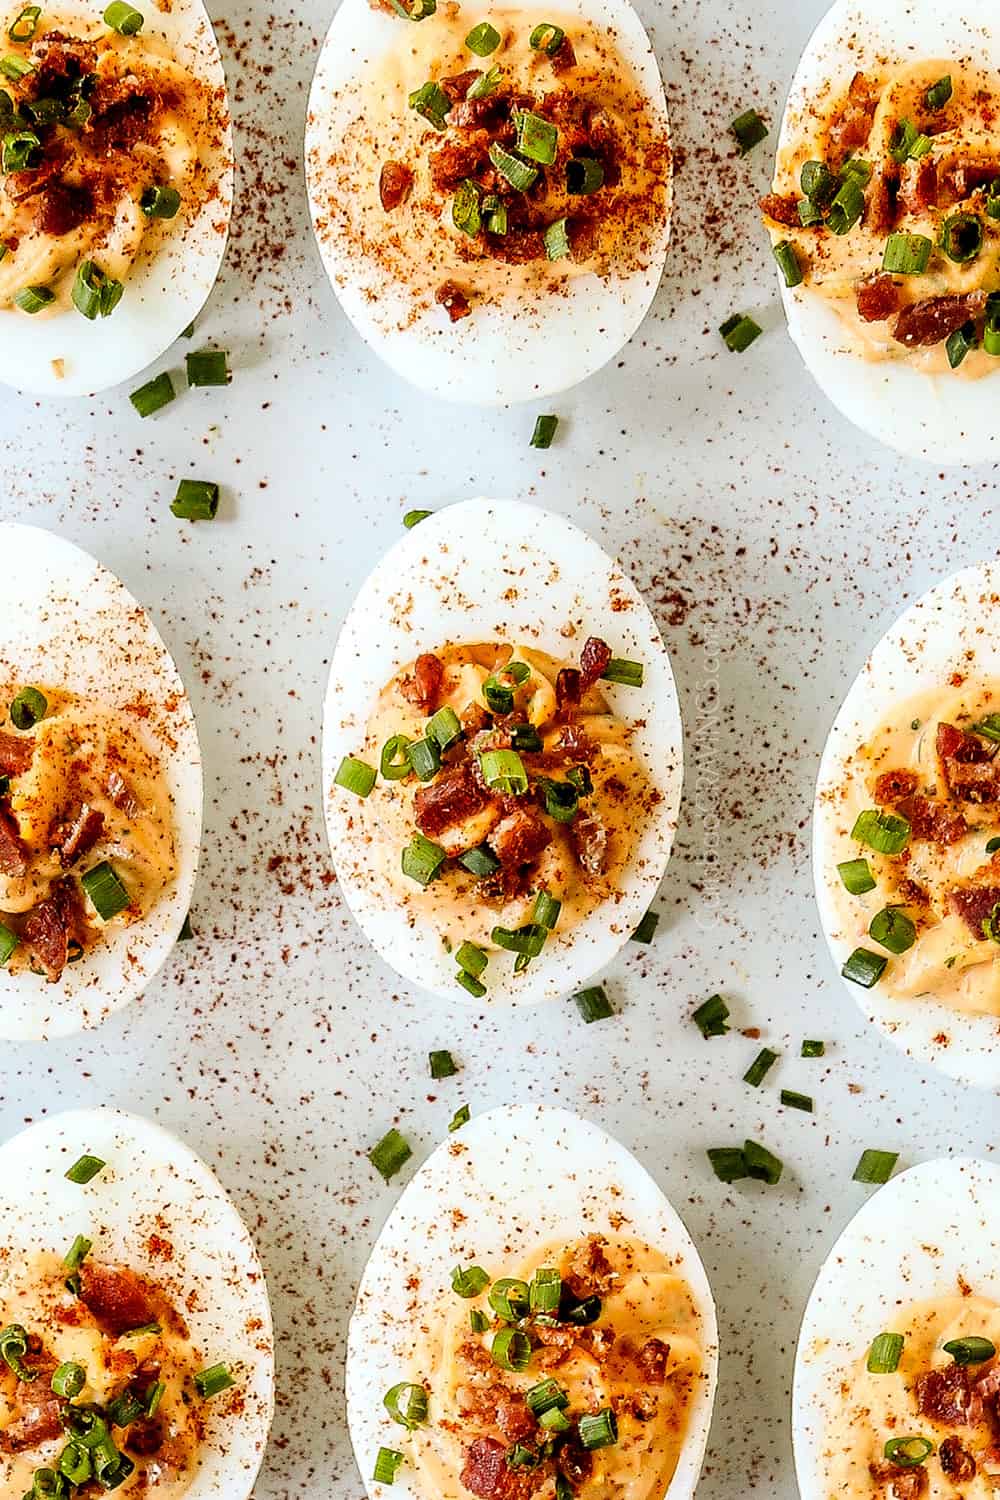
Learn how to make deviled eggs with this elevated classic recipe with a few modern twists, plus tons of recipe variations and topping ideas! With expert techniques, you get silky-smooth yolks, a perfectly seasoned filling, and eggs that peel effortlessly—delivering flawless, crowd-pleasing results every time!
Watch How to Make Deviled Eggs

PIN THIS RECIPE TO SAVE FOR LATER

What makes this the Best Deviled Eggs Recipe
I’m the first to admit that I am not a hard-boiled egg fan- I don’t even like them in my potato salad! So, I was wary the first time I tried deviled eggs, and absolutely shocked when I liked them, nay, loved them!
To convert all the other skeptics out there, I was determined to make this the best deviled egg recipe. So, I examined classic devilled egg ingredients and elevated them while still maintaining the classic flavor – just better. Here’s how:
•First, I started with the mayo. The best appetizer dips use a combo of mayonnaise and sour cream — and I found that the best deviled eggs do, too. Mayonnaise provides creamy binding power, while a touch of sour cream adds tangy lightness, elevating the filling.
•Next, the tang. I swapped traditional vinegar for fresh lemon juice—it brightens the flavor while keeping the filling fresh and vibrant.
•Then, the mustard. Classic Dijon gets a zesty boost from horseradish, adding subtle heat that wakes up all the other flavors.
•Seasonings make the difference. Paprika, garlic powder, and a pinch of cayenne combine beautifully with Cajun seasoning, plus fresh parsley, dill, and chives, creating a deviled egg that’s bold, complex, and utterly irresistible.
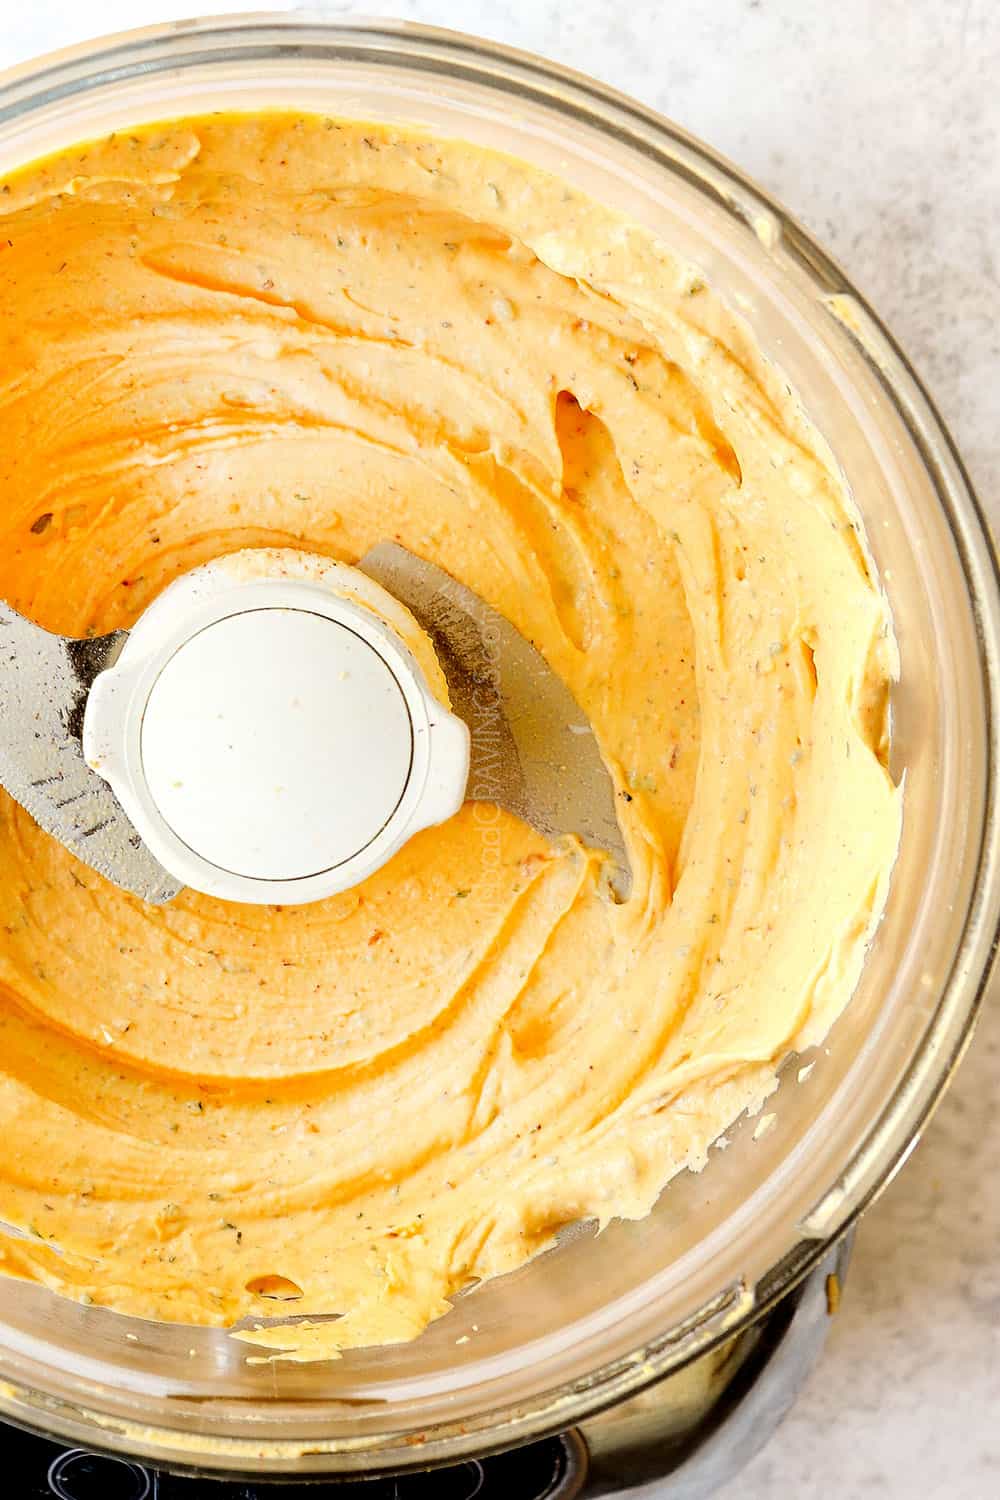
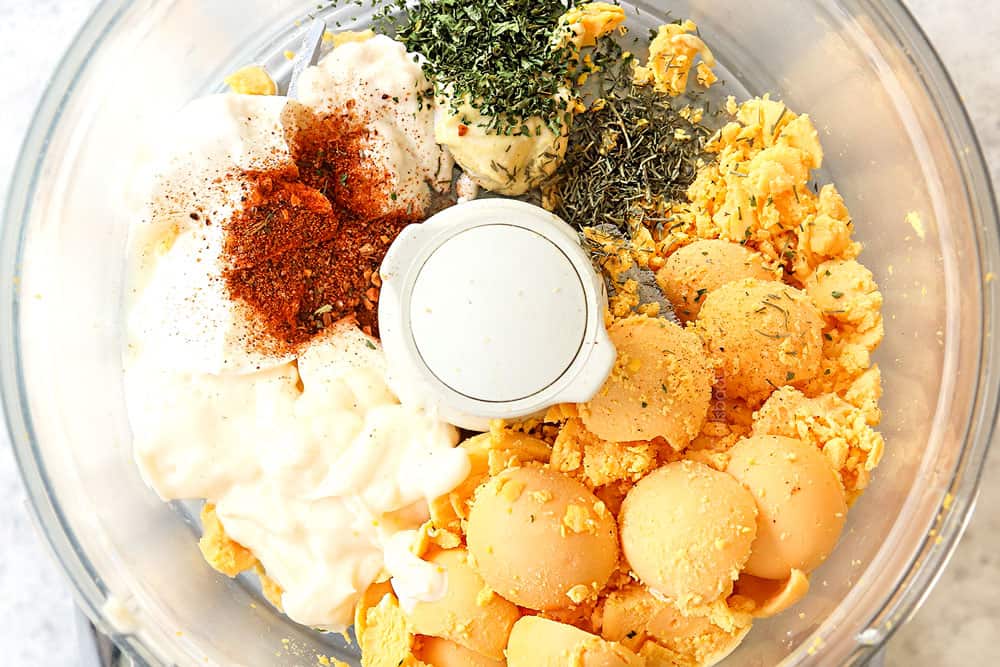
•Finally, the secret silky step: a drizzle of olive oil in the food processor creates the smoothest, easiest-to-pipe filling ever. This creates the silkiest filling you’ve ever tasted, plus it’s easier than mashing!

What is a Deviled Egg?
For those new to deviled eggs (aka devilled eggs, stuffed eggs, dressed eggs, or Russian eggs), here’s the scoop! This classic appetizer dates back to ancient Rome, where boiled, seasoned eggs were enjoyed as a first course.
Today, deviled eggs are hard-boiled eggs halved, with yolks removed and mixed with mayo, mustard, and vinegar—though fillings can be endless: Greek yogurt, sour cream, horseradish, pickle juice, or relish all work beautifully.
The creamy filling is piped back into the yolk cavity and often finished with a sprinkle of paprika. The result? Cold, tangy, perfectly creamy eggs that are a show-stopping appetizer any time of year, though they’re especially beloved at Easter.
Why Are They Called Deviled Eggs?
Despite the name, deviled eggs aren’t sinister—they’re devilishly delicious! The term “devil” dates back to the 1700s, when it was used to describe heavily seasoned foods like deviled ham or spicy Italian fra diavolo. Traditional deviled eggs get their “devil” from mustard, vinegar, and a hint of cayenne or Tabasco. In this recipe, we turn up the heat with Cajun seasoning and horseradish for truly devilish flavor.

Deviled Eggs Recipe Ingredients
This best deviled egg recipe elevates classic deviled eggs with a couple of flavorful swaps. To make this easy deviled egg recipe, you will need:

How to make hard boiled eggs for this Deviled Egg Recipe
You have three options to cook eggs up perfectly every time. Please note that cooking time will vary by method, depending on the size of your eggs, the size of your pot, how cold your eggs are to begin with, your altitude, and the temperature/vigor of the simmering water.
HARD BoilED eggs on the stove
Use a saucepan that snuggly fits the eggs in a single layer, so there isn’t much room for them to bounce around and crack. I always like to add an extra egg so I can check it for doneness.
1. Gently place the eggs in a single layer in the empty pot and add cold water until it reaches 1″ above the eggs.
2. Bring water to boil. Once it’s boiling all the way to the top, not just at the edges, cover and turn off the heat. Keep the pot on the hot burner.
3. Let stand covered for 14-17 minutes.
4. As soon as the eggs are cooked, transfer them with a slotted spoon to a bowl of ice water.
STEAMED EGGS ON THE STOVE
Fill a saucepan with enough water to reach the bottom of the steamer basket (about 1 inch).
1. Heat water to a boil until it is at full boil and producing steam.
2. Turn off the heat and gently place 12 eggs at the bottom of the steamer basket or the bottom of the pan.
3. Turn the heat back on again to medium-high, and cover the pot.
4. Cook for 14-17 minutes for cooked-through hard-boiled.
5. As soon as the eggs are cooked, transfer them with a slotted spoon to a bowl of ice water.
Instant Pot H3
1. Place a steamer basket in the bottom of your pressure cooker. Add ½ to 1 inches of water (1 to 2 cups) to the pressure cooker (check your pressure cooker manual for minimal liquid amounts). The water level should be just below the steamer basket.
2. Add cold eggs straight from the fridge, but be careful of wedging eggs too firmly against one another or stacking eggs on top of each other since these can cause eggs to crack.
3. Close the lid on the pressure cooker and make sure the steam valve is set to the “sealed” position. Set the pressure to high and set the timer for 4 minutes for electric pressure cookers (3 minutes for stovetop). The pressure cooker will take 5 to 10 minutes to come to full pressure and then being cooking. Cooking time begins once the cooker has come to pressure.
4. After cooking is done, let the pressure cooker sit for 5 minutes with the lid on and the steam vent “sealed” to allow steam to begin releasing naturally. (If you’re using a stovetop pressure cooker, remove it from heat.)
5. After 5 minutes of natural release, flip the steam valve to “venting” and quick-release any remaining pressure.
6. Immediately transfer the cooked eggs to a bowl of ice water.
How To Peel Boiled Eggs Easily
1. Transfer the cooked eggs to an ice bath immediately after cooking. This stops the eggs from cooking, causing the eggs to contract and pull away from the shell, which will make them easier to peel.
2. Let the eggs sit in the ice bath for at least 5 minutes before you start peeling.
3. Keep them in the ice bath while you’re peeling the other eggs.
MORE TIPS
• If possible, use eggs that are at least 7 days old
• Add a teaspoon of baking soda to the boiling water
• Add a tablespoon of vinegar to the boiling water
How to make the Best Deviled Eggs
Once you have hard-boiled eggs, the rest of the deviled eggs recipe comes together in minutes! Here’s how to make them:
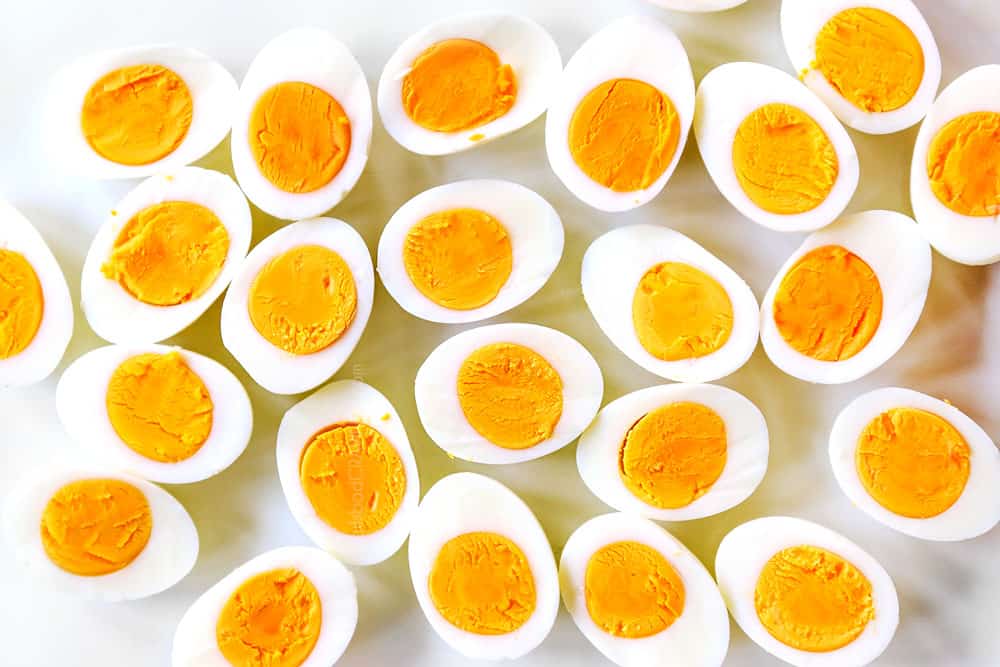
- CUT. Slice the hard-boiled eggs in half lengthwise. Scoop out the egg yolks and transfer them to a food processor or mixing bowl if you don’t have a processor. Set the whites aside.
- MIX. If using a mixing bowl, mash the egg yolks completely until they form a fine powder, then add the remaining ingredients and mix until smooth. If using a food processor, add all of the ingredients to the egg yolks (no need to process first), then process until smooth. If the mixture seems too thick, add a drizzle of olive oil.
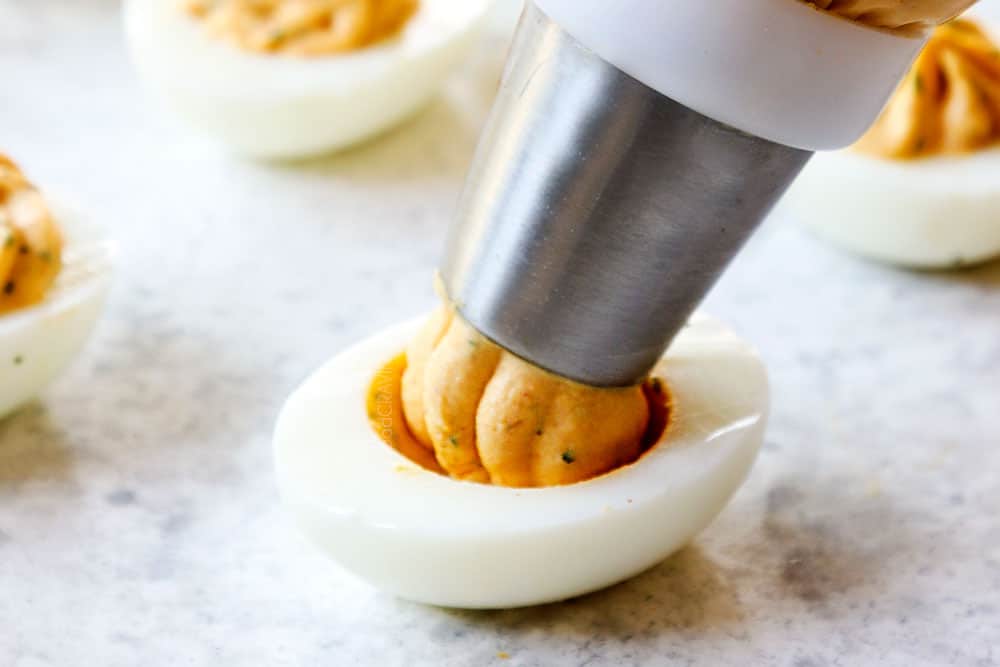
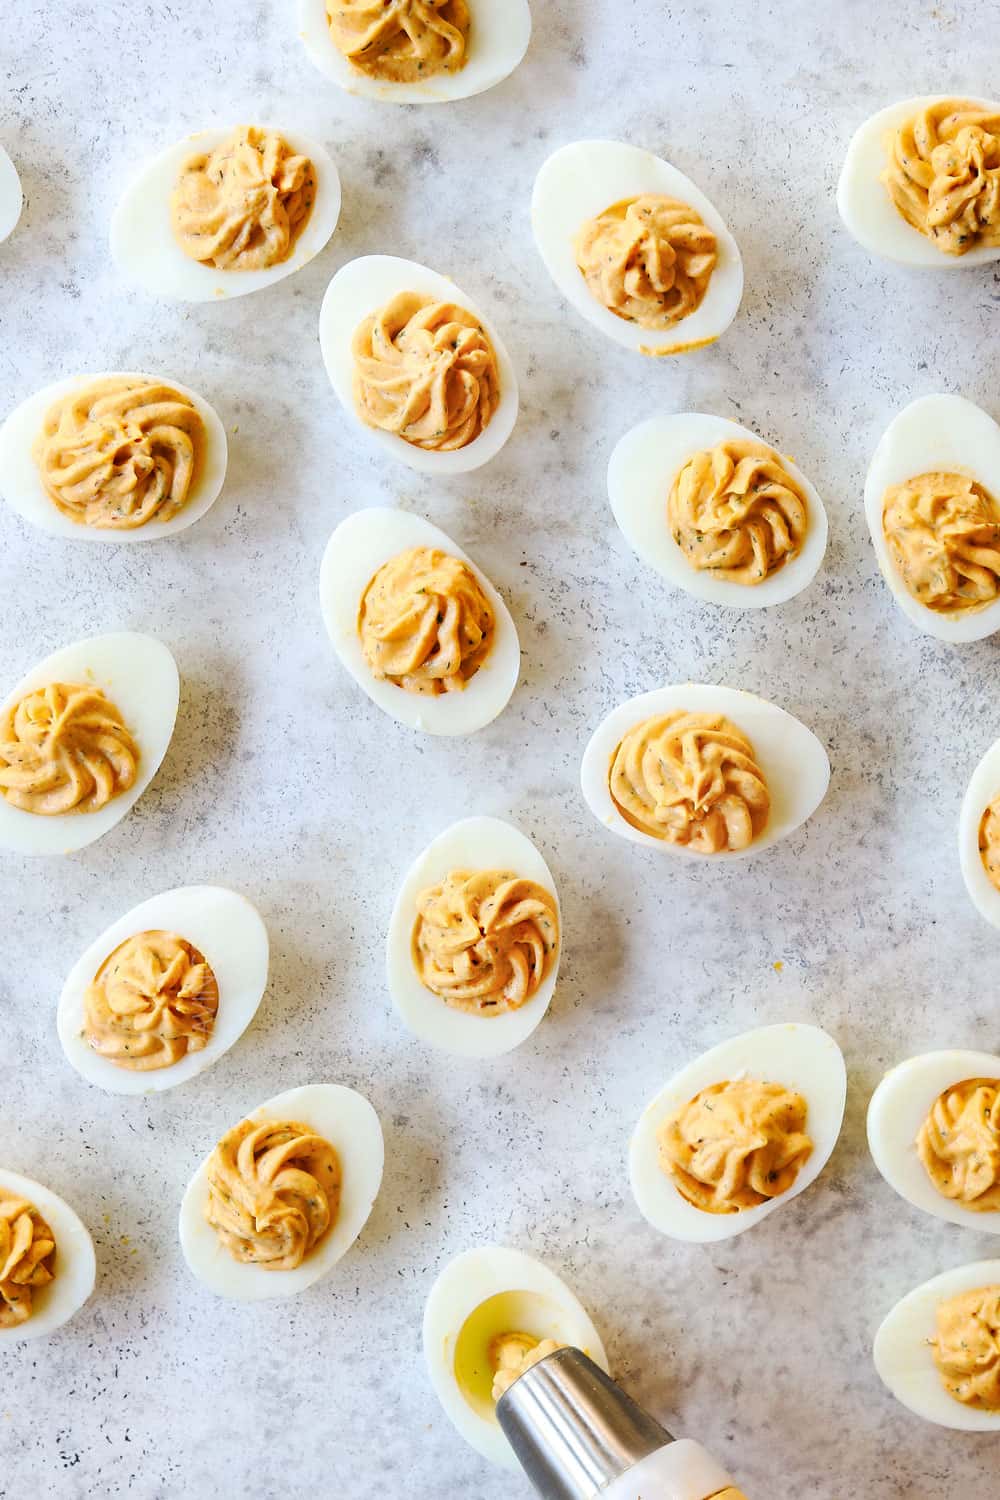
- FILL. Use a piping bag fitted with a large tip, or a plastic bag with the corner snipped off, to fill the egg white cavity with the yolk mixture.
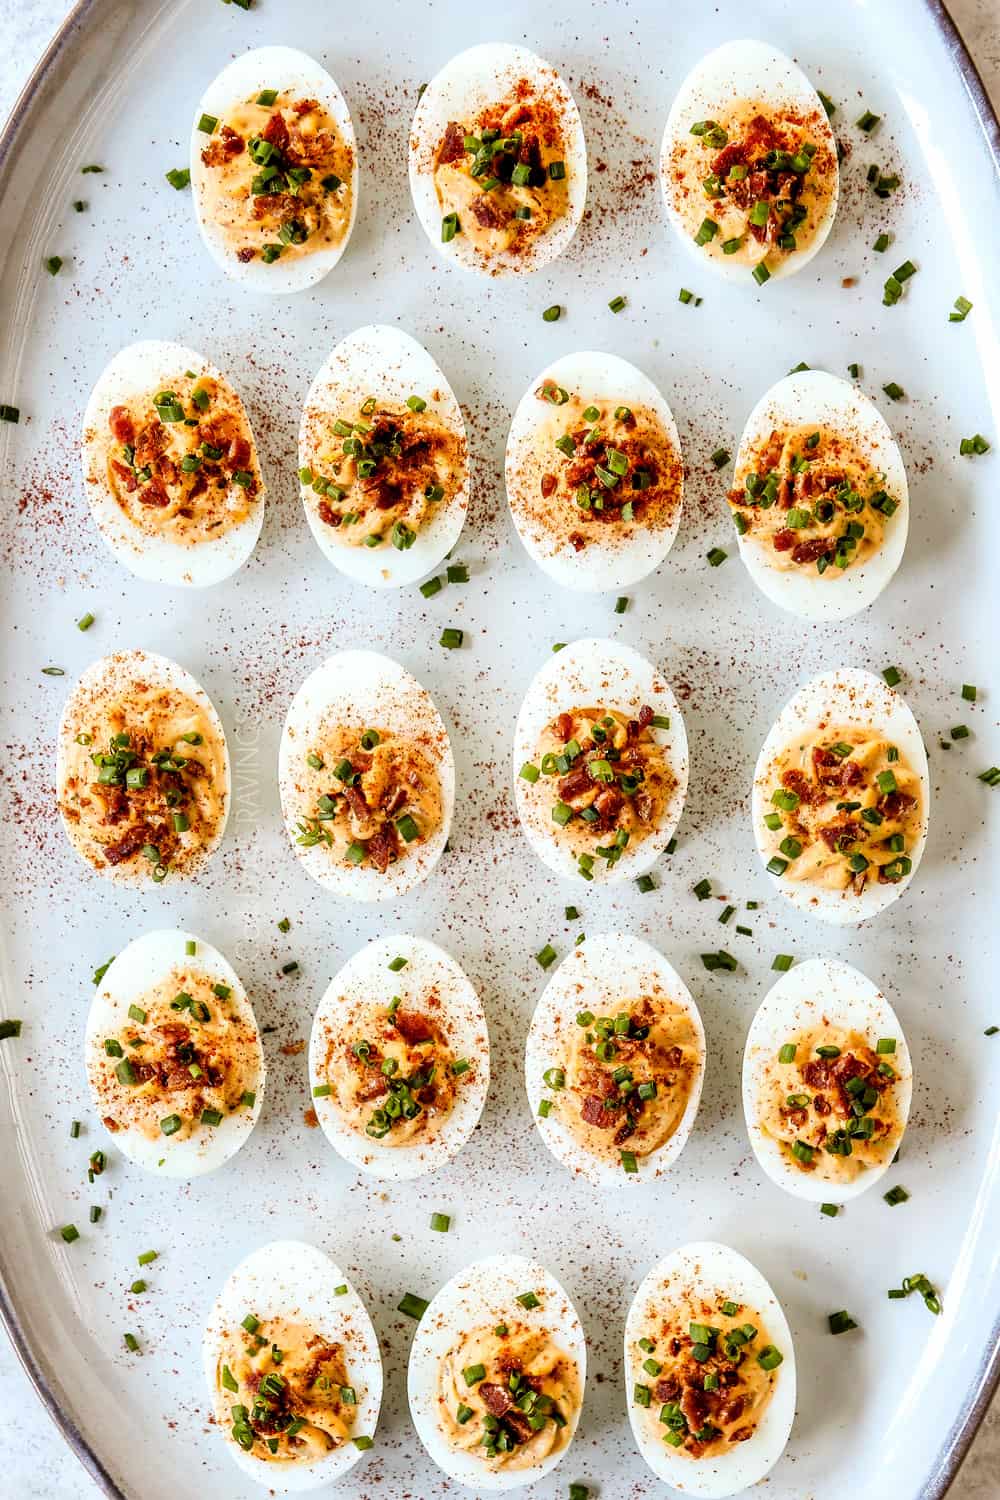
TOP. Sprinkle each deviled egg with crumbled bacon, chives, and optional paprika or Cajun seasoning. Serve immediately.

How to pipe on egg mixture?
Piping the egg filling into the yolk cavity makes it clean, easy and beautiful! You can use a large piping tip, such as the star, for a pretty presentation, or you can snip the corner from a large freezer bag for a smooth, whirled topping.

Tips for the Best Deviled Eggs

DEVILED EGG RECIPE VARIATIONS:
There are countless ways to customize your easy deviled eggs from the filling to the toppings, so don’t be afraid to get creative and jazz up this recipe to make your own!
Filling Additions and Substitutions:
Substitutions:
Add-Ins:

Deviled Egg Topping Ideas – Ways to Dress Up Your Eggs!
There is a reason deviled eggs are also called “dressed eggs” – you can dress them up with practically anything! The toppings can COMPLETELY change the flavor profile and add delightful texture. Here are just a few egg topper ideas:
Greens:
Pickled Fun:

HOW TO CREATE A DEVILED EGG BAR
The best part about fun and flirty toppings is to let everyone pick their favs! Assemble the deviled eggs with the filling, line up the toppings, then let everyone pick and choose how to dress their eggs – now everyone can enjoy their own unique bites!
Deviled Egg Flavor Combinations
Now that you’re armed with filling variations and topping ideas, it’s time to come up with your very own deviled egg flavor combinations! The possibilities are virtually endless, but below are some ideas to get your creative juices flowing.
Note, you’ll want to keep the egg filling the same – the mayo, sour cream, Dijon, and lemon juice, unless noted. Omit the Cajun seasoning and season with salt and pepper to taste, etc. in all of the following recipes:
WITH SEAFOOD
WITH CHICKEN, Bacon, OR HAm
vegetarian
Flavorful twists

How to store a Deviled Egg
Deviled eggs are best eaten 30 minutes after being chilled, but they can still be stored in an airtight container in the refrigerator for up to 3 days. Enjoy them in deviled-egg form, or mash up leftovers to make an egg salad sandwich!
Deviled Eggs Recipe FAQs
Deviled eggs are typically served as an appetizer or side, so I would plan for about 2-3 per person. Of course, I could easily do more than that, so this guesstimate is assuming guests are being polite 😉.
Absolutely! Halve all of the ingredients. You will need to reduce the cooking time for the hard-boiled eggs by a couple of minutes.
Absolutely! Deviled eggs are a great make-ahead recipe, making them a fabulous, stress-free holiday appetizer.
Make the hard-boiled eggs: To make ahead, you can hard-boil the eggs up to a week in advance, but don’t peel them. Let the eggs cool completely, then store them in a plastic bag until ready to use.
Make the filling: You can peel and slice the eggs, and make the filling up to two days before serving the deviled eggs. Store the filling separately from the egg whites in an airtight container in the refrigerator. You can even store the filling in a plastic bag, so all you have to do is snip a corner to pipe it into the egg whites when it’s go time. To store the egg whites, transfer them to a serving platter and wrap the egg whites tightly with plastic wrap in the serving dish and store in the refrigerator.
Assemble: When ready to serve, pipe the egg yolk filling into the egg whites. You can store the assembled deviled eggs covered in the refrigerator for a few hours before serving, but the fresher, the better.

WANT TO TRY THIS Deviled Eggs RECIPE?
PIN IT to your recipe BOARD TO SAVE FOR LATER!
FIND ME ON PINTEREST FOR MORE GREAT RECIPES! I AM ALWAYS PINNING :)!
©Carlsbad Cravings by CarlsbadCravings.com
Tools Used in This Recipe
See Favorite Tools


Best Deviled Eggs Recipe
Save This Recipe To Your Recipe Box
You can now create an account on our site and save your favorite recipes all in one place!
Ingredients
- 12 hard-boiled eggs (see notes)
Filling
- 3 tablespoons mayonnaise
- 3 tablespoons sour cream
- 1 tablespoon lemon juice
- 2 teaspoons Dijon mustard
- 1 teaspoon prepared horseradish
- 2 teaspoons Cajun seasoning
- 1 teaspoon dried parsley (or 1 TBS FRESH)
- 1/2 teaspoon dried dill weed (or 1 ½ tsps FRESH)
- 1/4 teaspoon salt, more or less to taste
Toppings
- Cooked and crumbled bacon (highly recommend!)
- Cajun seasoning or paprika (optional)
- Chopped fresh chives
Instructions
- Slice the hard-boiled eggs in half lengthwise. Scoop out the egg yolks and transfer them to a food processor or mixing bowl if you don’t have a processor; set the egg whites aside.
- If using a mixing bowl, mash the egg yolks completely until they form a fine powder, then add the remaining ingredients and mix until smooth. If using a food processor, add all of the ingredients to the egg yolks (no need to process first), then process until smooth. If the mixture seems too thick, add a drizzle of olive oil. Taste and adjust seasonings as desired. If refrigerating at this point, keep in mind that the flavors will mellow.
- Use a piping bag fitted with a large tip, or a plastic bag with the corner snipped off, to fill the egg white cavity with the yolk mixture. Chill for 30 minutes, time permitting.
- Sprinkle each deviled egg with crumbled bacon, chives and optional paprika or Cajun seasoning. Serve immediately.
Video
Notes
HARD Boiled eggs
You want to try and use a saucepan that snuggly fits the eggs in a single layer so there isn’t much room for them to bounce around and crack. I always like to add an extra egg so I can check it for doneness.- Gently place the eggs in single layer in the empty pot and add cold water until it reaches 1″ above the eggs.
- Bring water to boil. Once it’s boiling all over the top, not just the edges, cover, and turn off the heat. Keep the pot on the hot burner.
- Let stand covered for 14-17 minutes.
- As soon as the eggs are cooked, transfer them with a slotted spoon to a bowl of ice water.
STEAMED EGGS ON THE STOVE
- Fill a saucepan with as much water as needed to reach the bottom of the steamer basket (about 1 inch or so).
- Heat water to boiling until it is at full boil and producing steam.
- Turn off the heat and gently place 12 the eggs at the bottom of the steamer basket or the bottom of the pan.
- Turn the heat back on again to medium high, and cover the pot.
- Cook for 14-17 minutes for cooked-through hard boiled.
- As soon as the eggs are cooked, transfer them with a slotted spoon to a bowl of ice water.
STEAMED EGGS IN THE INSTANT POT
- Place a steamer basket in the bottom of your pressure cooker. Add ½ to 1 inches of water (1 to 2 cups) to the pressure cooker (check your pressure cooker manual for minimal liquid amounts). The water level should be just below the steamer basket.
- Add cold eggs straight from the fridge, but be careful of wedging eggs too firmly against one another or stacking eggs on top of each other since these can cause eggs to crack.
- Close the lid on the pressure cooker and make sure the steam valve is set to the “sealed” position. Set the pressure to high and set the timer for 4 minutes for electric pressure cookers (3 minutes for stovetop). The pressure cooker will take 5 to 10 minutes to come to full pressure and then being cooking. Cooking time begins once the cooker has come to pressure.
- After cooking is done, let the pressure cooker sit for 5 minutes with the lid on and the steam vent “sealed” to allow steam to begin releasing naturally. (If you’re using a stovetop pressure cooker, remove it from heat.)
- After 5 minutes of natural release, flip the steam valve to “venting” and quick-release any remaining pressure.
- Immediately transfer the cooked eggs to a bowl of ice water.
How to Store
Deviled eggs are best eaten 30 minutes after being chilled but they can still be stored in in an airtight container in the refrigerator for up to 3 days. Enjoy them in deviled egg form or mash up leftovers to make an egg salad sandwich!Make Ahead
Deviled eggs are a great make-ahead recipe which means they are a fabulous stress-free holiday appetizer.- Make the hard-boiled eggs: To make ahead, you can hard boil the eggs up to a week in advance but don’t peel them. Let the eggs cool completely then store in a plastic bag until ready to use.
- Make the filling: You can peel the eggs, slice the eggs and make the filling up to two days before serving the deviled eggs. Store the filling separately from the egg whites in an airtight container in the refrigerator. You can even store the filling in a plastic bag so all you have to do is snip the corner to pipe the filling into the egg whites when it’s go time. To store the egg whites, transfer them to a serving platter and wrap the egg whites on the serving dish tightly with plastic wrap and store in the refrigerator.
- Assemble: When ready to serve, pipe the egg yolk filling into the egg whites. You can store the assembled deviled eggs covered in the refrigerator for a few hours before serving, but the fresher, the better.
Possible Recipe Variations
- Swap horseradish: I love the addition of horseradish, but if you’re not a fan, omit it and add some sass with cayenne pepper or hot sauce.
- Swap Cajun seasoning: I love that Cajun seasoning is a mixture of everything delicious, but if you don’t have it on hand, add some paprika, garlic powder and cayenne pepper to taste. Alternatively, you could go a different route entirely and season the egg filling with Italian seasonings, curry powder, jerk seasonings ranch seasoning or Old Bay seasoning.
- Swap mayonnaise for avocado: To make avocado deviled eggs, just substitute the equivalent in avocado. Make sure it’s ripe enough so it will mix up smooth.
- Swap lemon juice: I prefer lemon juice to vinegar, but you may sub 1 ½ teaspoons white vinegar or pickle juice then add more to taste if desired.
- Add pickles: In addition to swapping the lemon juice for some pickle juice, you can also add some relish – a Southern classic!
- Add olives: Stir in chopped olives directly into the filling.
- Add crunch: I love the crunch of bacon as a topping but you can also add crunch to the filling with finely chopped celery or bell peppers.
- Add protein: Add bacon, ham, crab meat, salmon or shrimp to the filling or reserve for a garnish on top.
- Add fresh herbs: Add fresh chives, dill, parsley, tarragon or your favorite herbs to the filling for extra fresh flavor.
- Add pesto: Instead of herbs, go for a couple tablespoons of basil pesto mixed into the filling. If using, reduce the sour cream and mayo.
- Add onions: Add chives, green onions or red onions to the filling.
- Add heat: The Cajun seasoning and horseradish add flavor but don’t make the deviled eggs overly spicy. To really bring the heat, add some cayenne pepper, Tabasco, Sriracha, harissa, chipotle peppers or fresh or pickled jalapeños.
- Add some cheese: You can mix soft crumbled cheese such as feta or goat cheese directly into the filling. Finely shredded sharp cheddar or Gouda would also be delish.
- Topping Ideas: Bite size small shrimp seasoned with Old Bay Seasoning or Cajun seasoning, smoked salmon, salmon roe, lump crab meat, bacon jam, radish slices, microgreens, pickles, pepperoncini, olives, tapenade, capers, candied jalapenos, crispy fried onions, fried pickles, fried jalapenos, crumbled feta, goat cheese, blue cheese, etc.
Recipe Flavor Combinations
Please see the post for TONS of recipe flavor combinations such as Bacon Ranch Cheddar Deviled Eggs, Smoked Salmon Deviled Eggs, Shrimp Cocktail Deviled Eggs, Buffalo Deviled Eggs, Greek Inspired Deviled Eggs, etc.Want To Make This Recipe?

Did You Make This Recipe?
Tag @CarlsbadCravings and Use #CarlsbadCravngs
Leave a Review, I Always Love Hearing From You!


April W says
Thanks for the various methods for cooking the eggs. We tend to use the 1” above method when we are in a hurry. When we are not, cooking in the sous vide has made hard boiled eggs super easy to peel!
Thanks for the recipe! I’ll have to try to sneak it in, I have a very picky deviled egg crowd 😉
Jen says
Great tip about the sous vide eggs – I’ll have to add that! I would be honored if your deviled egg connoisseurs enjoyed this recipe – keep me posted!
Karen says
Thank you for this delicious recipe! First a little confession: I’ve never made deviled eggs. Mom never made these when I was growing up but 2 friends often brought these to potlucks so I was a little intimidated how pretty they were. Could I do it? But not any longer! Because your instructions were clear and concise (as usual), I made these yesterday and served them to my family. Smiles all around. Only challenge is accommodating everybody’s ‘pallet’ preferences. Hubby and I would have preferred more picante but I always have to accommodate those who can’t tolerate spicy. Now that I have confidence in making these pretty, I like your suggestion of a deviled egg bar and start experimenting with your suggested fillings and toppings. Again, thanks for the great recipe Jenn!
Jen says
You’re so welcome Karen, I’m so pleased your first experience with deviled eggs was a hit! To make you and your husbands deviled eggs spicier, you can sprinkle yours with cayenne pepper, add a drizzle of hot sauce or some jalapenos – yum!
Alyse says
Great recipe! I will be making on Easter!
Jen says
Thanks Alyse, Happy Easter!