Red Velvet Cheesecake is 100% make ahead friendly and guaranteed to become a new holiday favorite!
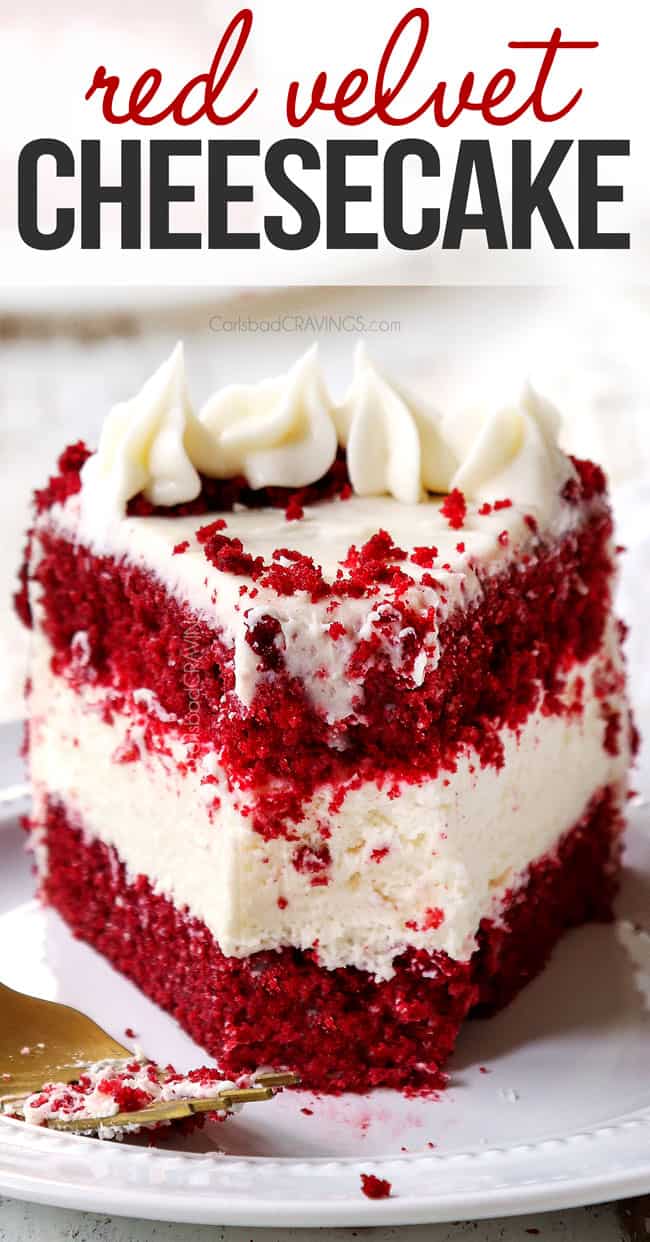
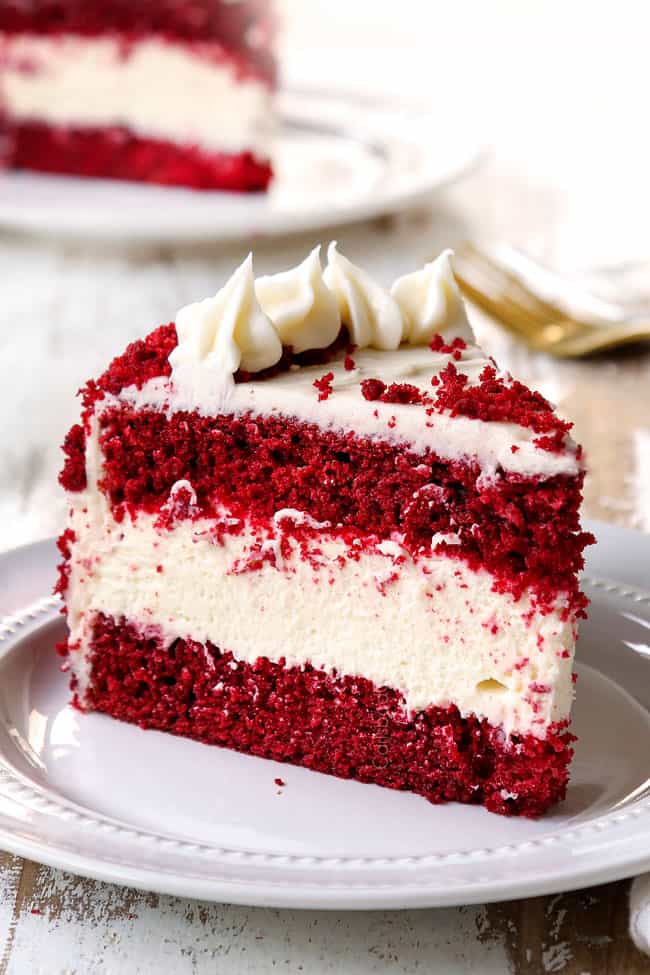
This red velvet cheesecake combines two beloved classic desserts: red velvet cake and cheesecake to create the ultimate gorgeous, decadently delicious, show stopping dessert. This red velvet cheesecake may look impressive, but is easy to make with tender red velvet cake rounds and a luscious no-bake cheesecake filling spiked with white chocolate all slathered in a light cream cheese frosting. This red velvet cheesecake is also make-ahead friendly for a stress-free dessert everyone will be raving about. I’ve included detailed instructions, tips and tricks so this red velvet cheesecake will be the hit of your holidays!
I love making cheesecakes for special occasions because they are make ahead friendly and always gorgeous. Some must make cheesecakes include Pecan Pie Cheesecake, Eggnog Cheesecake, German Chocolate Cheesecake, Chocolate Raspberry Cheesecake, Pumpkin Cheesecake, Blueberry Cheesecake, Strawberry Cheesecake and of course this Red Velvet Cheesecake!
pin this recipe to save for later
Red Velvet Cheesecake Recipe
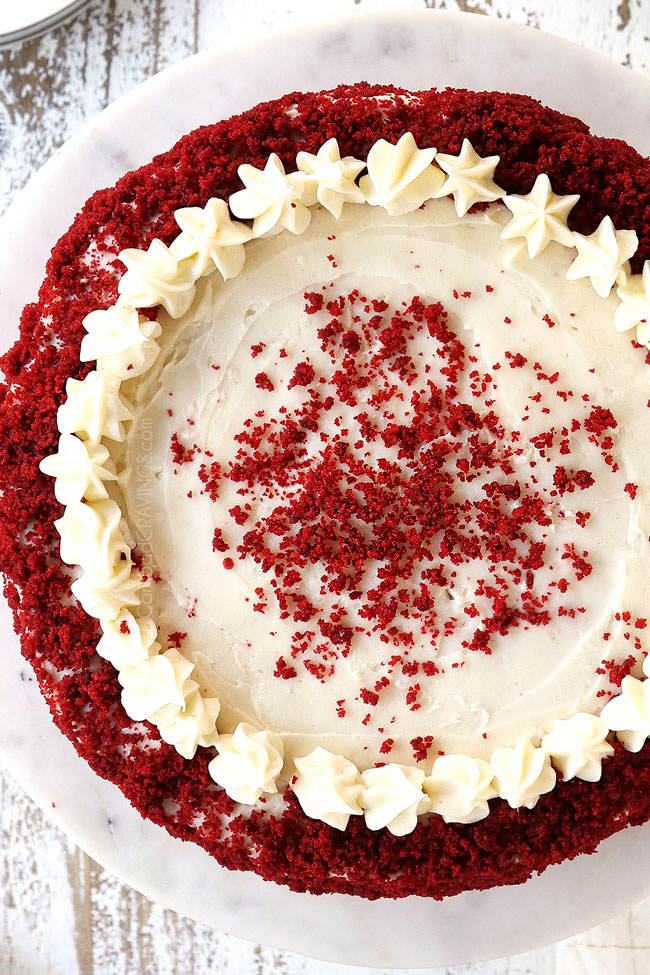
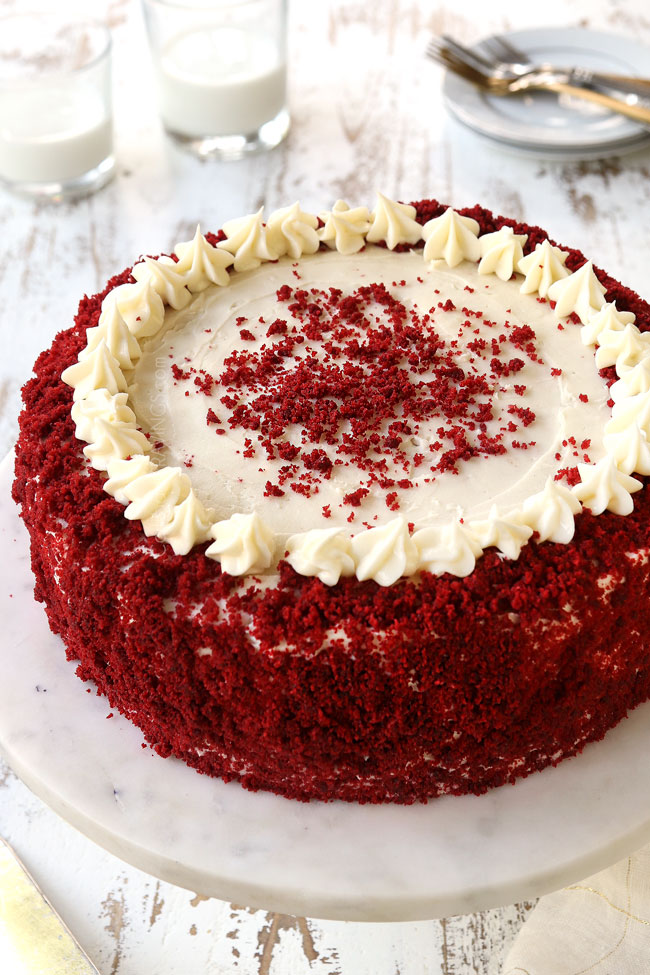
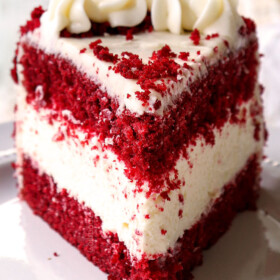
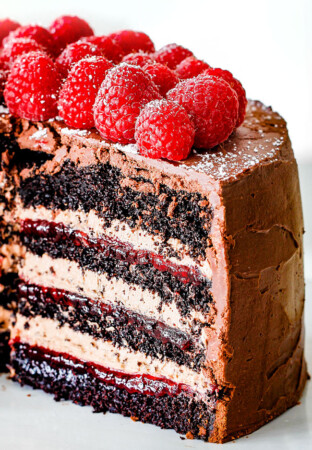
This red velvet cheesecake tastes even dreamier than it looks, both Patrick and I were obsessed! Red velvet cheesecake is the perfect choice for the holidays because not only does it taste incredible but it looks festive without even trying. I decorated the outside with red velvet cake crumbs but you can also use crushed candy canes or sprinkles!
When I first saw this red velvet cheesecake recipe in America’s Test Kitchen – Great American Cakes Magazine I thought the photo was stunning but I was a bit skeptical about how all the ingredients would come together – would the cheesecake meld with the cake? Would it be too heavy? Too many layers? I can attest that this red velvet cheesecake just works:
- The flavors are a dream: red velvet and cream cheese are a match made in heaven but often the cream cheese frosting can be overwhelming heavy. In this red velvet cheesecake recipe, the cheesecake provides the requisite cream cheese flavor in a silkier, dreamier, surprisingly light way. Enveloping the entire cake is a light buttercream frosting blended with a small amount of cream cheese to marry all of the flavors together.
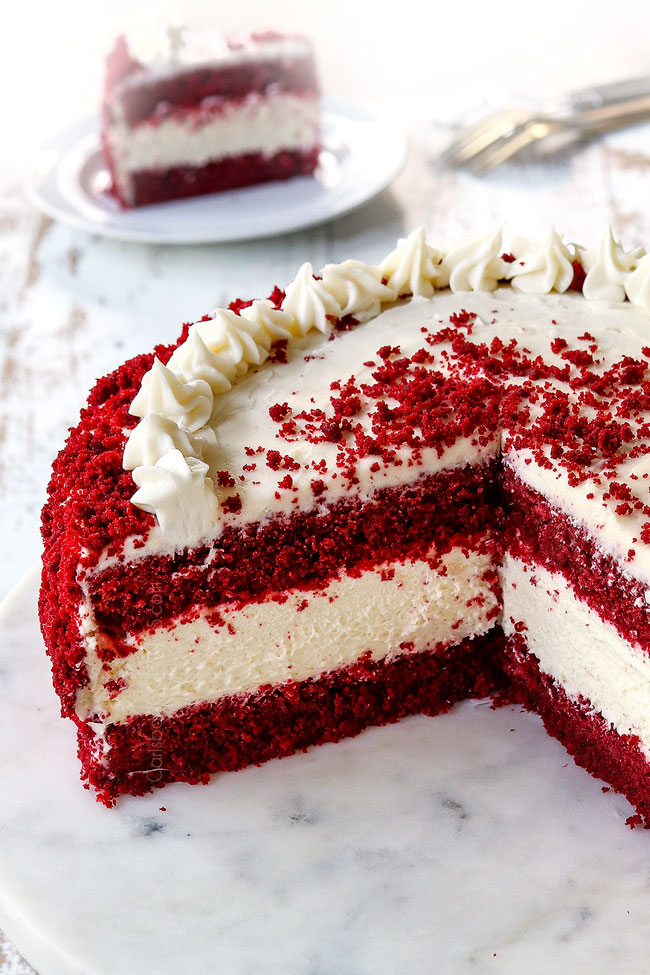
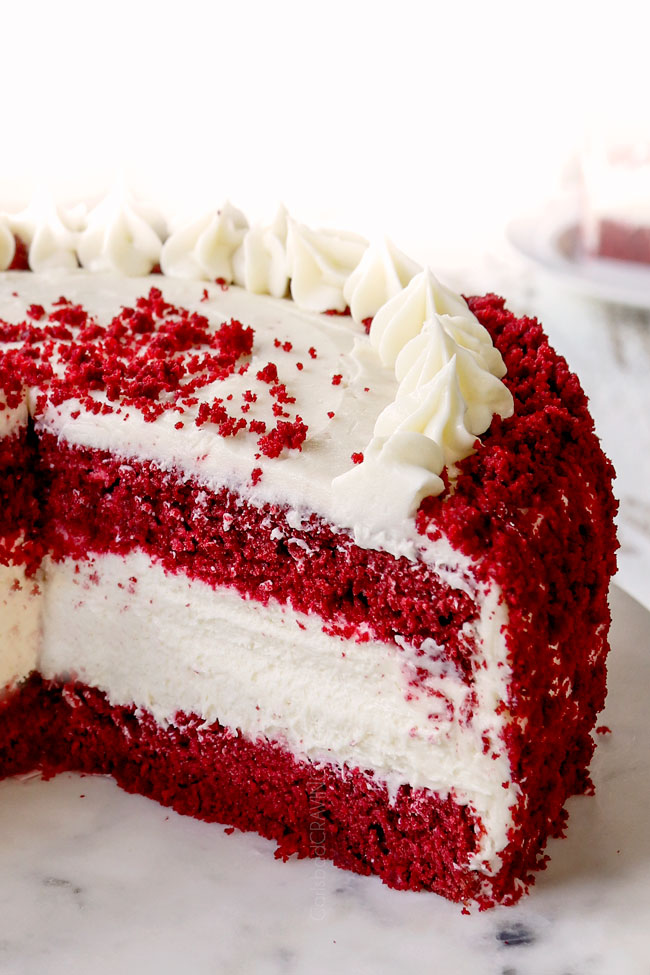
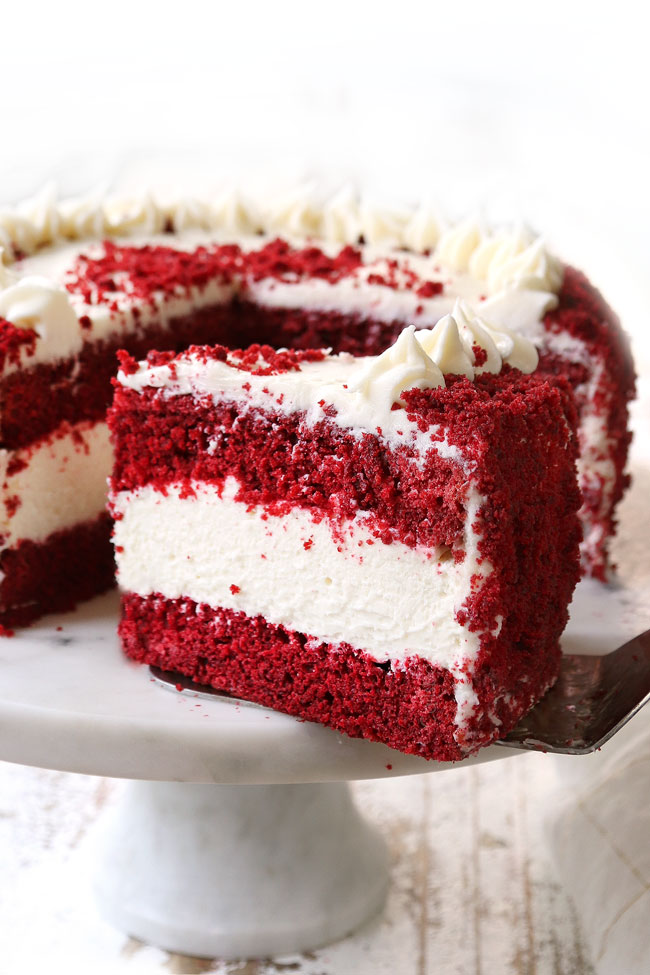
- It’s rich yet light: the red velvet cakes are soft and tender and “velvety” while the no-bake cheesecake center is luxuriously creamy yet airy due to the whipped heavy cream. You’ll be surprised how easily one slice slips down!
This red velvet cheesecake recipe is easy to make but it not quick to make due to the multiple components and the cooling and chilling required. That being said, much of the time is hands off and it is so worth of every second.
To make the red velvet cheesecake, two red velvet cake rounds are baked and cooled. One cake is placed in the bottom of a springform pan to provide stability when assembling the cake. If you don’t have a springform pan, don’t worry, I’ve provided alternatives as well.
The cake is topped with a no-bake cheesecake stabilized by gelatin, lightened by whipped cream and laced with white chocolate. The cheesecake layer is topped with the second red velvet cake and then refrigerated and allowed to set before unmolding and frosting. The resulting red velvet cheesecake is decadently delicious, festive and so good it will become an annual Christmas tradition!
WHAT IS RED VELVET?
If you have ever wondered where “red velvet” comes from, it originated way before food coloring. Before food coloring, red velvet cakes were more scarlet. In fact, the color was created solely by a chemical reaction between the vinegar, cocoa and buttermilk. Once the formulation of cocoa powder changed, this red effect no longer occurred and food coloring was added to once again create the red hue.
Today, red velvet refers to vanilla and cocoa flavored baked goods that are dyed red. They traditionally contain the original ingredients of vinegar and buttermilk which keep the baked good fluffy and light and create the smooth texture of the fine crumb described as “velvet.”
Red velvet cheesecake ingredients
There are three main components to this red velvet cheesecake recipe – the cake, the cheesecake and the frosting. Subsequently, there is a long list of ingredients but they are mostly pantry friendly and many of the ingredients are repeats. You will need:
FOR THE CAKE
- Cocoa powder: use unsweetened cocoa powder. Note, this is baking cocoa found in the baking aisle and not a chocolate drink mix.
- All-purpose flour: is the best for this red velvet cheesecake recipe. Skip the cake flour, bread flour and wheat flour. I have not made this recipe with gluten free flour, so I can’t speak to whether it will work here. If you try it, please let me know!
- Baking soda: works with the buttermilk to leaven the cake. Take care the baking soda is fresh, (throw out after 6-12 months) so it works!
- Buttermilk: reacts with the baking soda and vinegar to create the “velvet” crumb. You can also substitute with sour milk which I do all the time by adding 1 ½ tablespoon lemon juice or white vinegar to a 1 cup (or larger) measuring cup), adding milk until it reaches 1 cup, giving it a stir, and letting it rest for 10 minutes.
- Eggs: provide structure and moisture. Use room temperature eggs because they whip to a higher volume which promotes a more tender cake.
- Vinegar: use distilled white vinegar. Other vinegars will introduced unwanted flavor.
- Vanilla: use pure vanilla extract for best results.
- Red food coloring: is a must for red velvet! You can’t achieve the red color without it.
- Salt: enhances the flavors and cuts through the sweetness. You want to use good old table salt.
- Butter: use unsalted butter so we can control the salt.
- Sugar: granulated sugar please.
FOR THE CHEESCAKE
- Cream cheese: I used full fat cream cheese but it will also work with less fat, but remember less fat = less flavor and creaminess. Please do NOT use nonfat cream cheese.
- Heavy cream: labeled “heavy whipping cream” at the grocery store. You must use heavy cream – no other substitutions will work. Take care that your heavy cream is very cold, remove it from the refrigerator just when ready to use.
- White chocolate: 6 ounces add a little something special to the cheesecake. White baking chocolate bars melt better but you may also use white chocolate chips but give them a head start by finely chopping. A great time saving trick is to chop them in your food processor.
- Unflavored gelatin: is a common baking ingredient and can be found next to the packages of Jell-O and pudding at your grocery store. It is what adds structure to the cheesecake without adding eggs.
- Sugar: granulated sugar will do the trick.
- Lemon juice: cuts through the sweetness. Bottled or fresh is fine.
- Vanilla extract: use quality extract for best results.
FOR THE FROSTING
- Butter: use unsalted butter or omit the salt in the frosting. The butter should be softened at room temperature otherwise your frosting will be runny.
- Powdered sugar: also known as confectioner’s sugar sweetens the frosting and adds structure.
- Cream cheese: use full fat cream cheese for best results. The cream cheese should be softened to room temperature at room temperature.
- Vanilla extract: pure vanilla extract for the best flavor.
HOW TO MAKE red velvet cheesecake
This red velvet cheesecake is made in four stages: 1) the red velvet cake, 2) the cheesecake filling, 3) chilling the cheesecake, 4) frosting the cheesecake. Each stage is simple, so please don’t be overwhelmed! Below are detailed instructions with step by step photos. You will find full ingredient measurements in the recipe card at the bottom of the post:
FOR THE CAKES
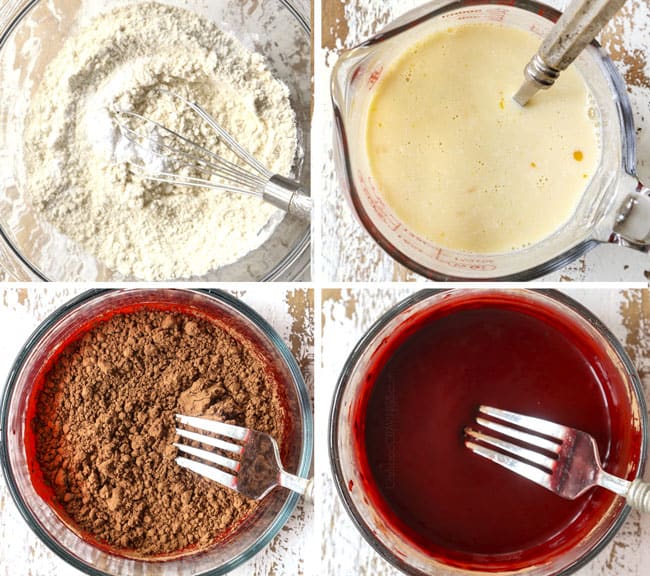
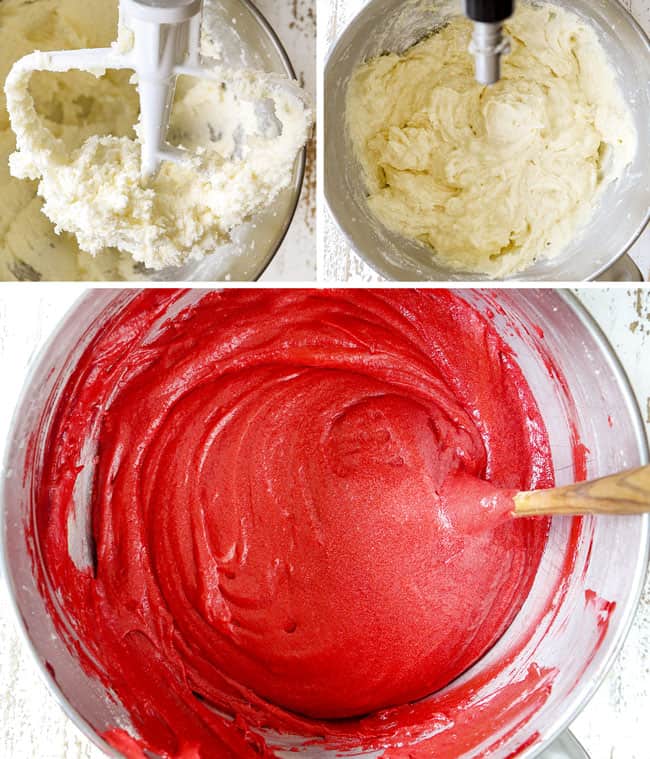
- Prep the cake ingredients. Whisk the flour, baking soda, and salt together in a bowl. Whisk the buttermilk, eggs, vinegar and vanilla together in a 2-cup liquid measuring cup. Mix the cocoa with food coloring in small bowl until a smooth paste forms.
- Cream the butter then add the dry ingredients. Using a stand mixer fitted with the paddle attachment, beat the butter and sugar on medium-high speed until pale and fluffy, 3-4 minutes. Reduce the speed to low and add flour mixture in thirds alternating with buttermilk mixture, scraping down the bowl as needed. Add cocoa mixture, increase speed to medium, and beat until completely incorporated, about 30 seconds. Give batter a final stir by hand.
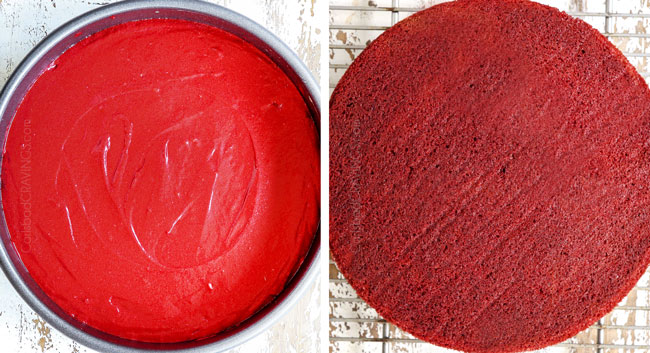
- Bake cakes. Divide batter evenly between prepared pans and smooth tops with rubber spatula. Bake until toothpick inserted in the center comes out clean, about 25 minutes, rotating pans halfway through baking. Let cakes cool in pans on wire rack for 10 minutes. Remove cakes from pans, discarding parchment, and let cool completely on rack, about 2 hours.
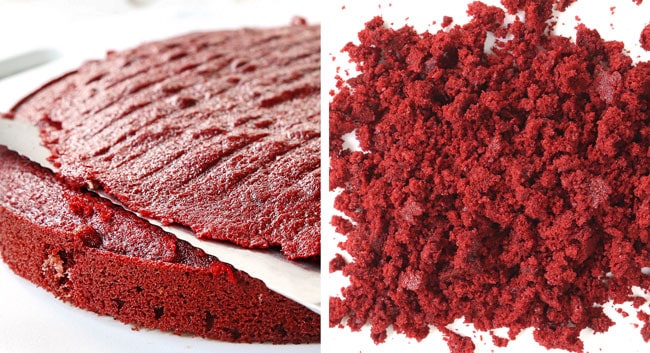
- Level cakes. Using a serrated knife, level each cake. Use your fingers to crumble the tops into small crumbs; set crumbs aside in an airtight container to garnish the cake.
FOR THE CHEESECAKE
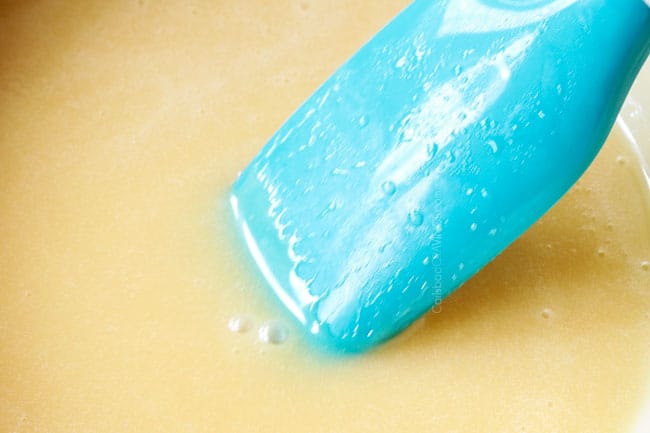
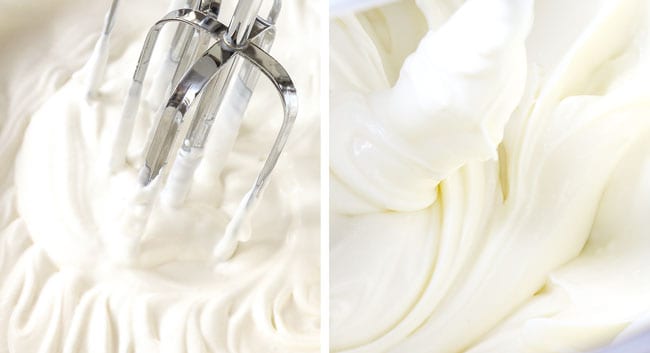
- Melt white chocolate with gelatin. Sprinkle gelatin over ½ cup cream in small saucepan and let sit 5 minutes. Cook mixture over low heat until edges are just bubbling. Add white chocolate and cook, stirring constant, until just melted and smooth. Let cool slightly, about 15 minutes.
- Beat cream cheese and heavy cream. Using a clean, dry mixer bowl and whisk attachment, whip remaining 1 cup cream on medium-high speed until stiff peaks form; transfer to a bowl and set aside. Return now empty bowl to mixer, fit mixer with paddle, and beat cream cheese and sugar on medium-high speed until light and fluffy.
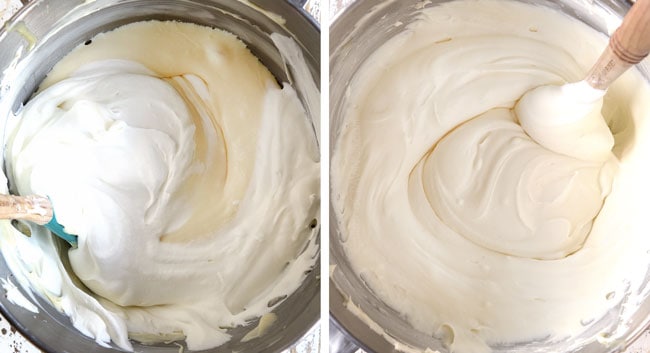
- Combine white chocolate, cream cheese and heavy cream. Reduce speed to medium-low and add white chocolate mixture to the cream cheese and mix until just combined, scraping down bowl as needed. Using rubber spatula, gently fold in whipped cream.
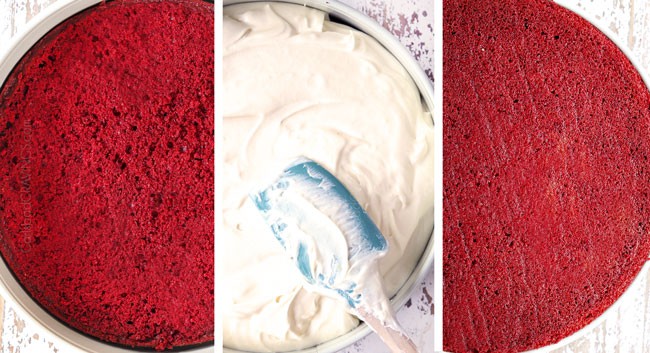
- Top red velvet cake with cheesecake. Set 1 cake round in a parchment paper lined springform pan; set aside second cake round. Spread cheesecake filling over cake round in pan and smooth top. Place second cake round, cut side down, on top. Cover with plastic wrap and refrigerate until set, about 6 hours.
FOR THE FROSTING
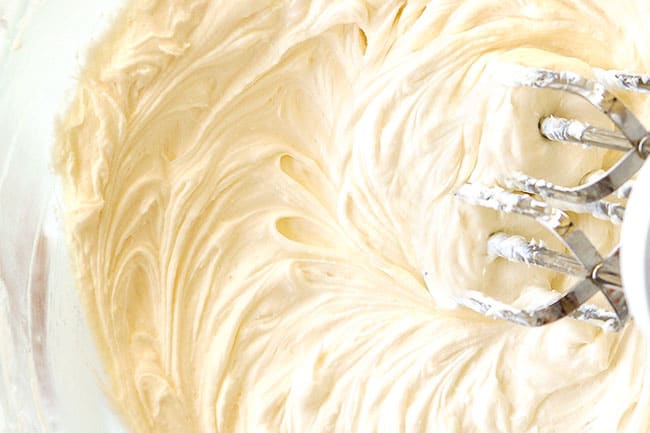
- Cream butter and sugar. Using stand mixer fitted with paddle, beat butter and sugar on medium-high speed until fluffy, about 2 minutes.
- Add cream cheese. Add cream cheese 1 piece at a time, and continue to beat until incorporated. Beat in vanilla and salt.
- Crumb layer. Transfer cake to plate or pedestal. Separate out ½ cup frosting (or more as needed) and create a thin crumb layer by frosting the top and the sides of the cake. Freeze cake for 30 minutes.
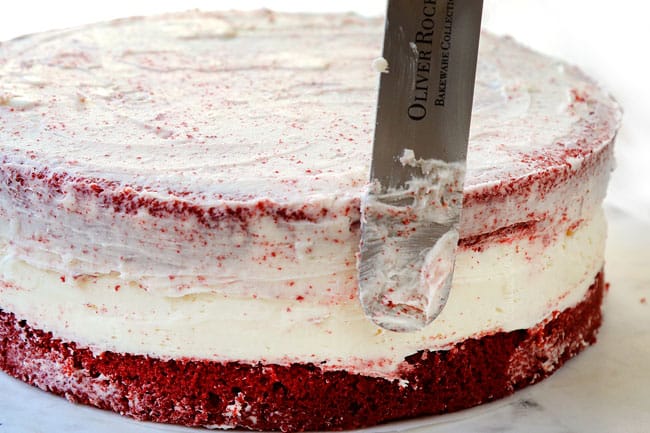
- Frost cake. Spread frosting evenly over top and sides of cake. Gently press reserved cake crumbs onto sides of cake.
TIPS FOR red velvet cheesecake
This red velvet cheesecake recipe is pretty straightforward, but here are some baking tips to ensure the perfect cheesecake every time:
CAKE:
- Use correct pan size. It is important that you use 9-inch round cake pans and not 8-inch cake pans because we are going to assemble the cake in a 9-inch springform pan. 9-inch diameter also creates a more pleasing ratio of cheesecake to cake.
- What if I don’t have a spring form pan? You can still make this red velvet cheesecake even if you don’t have a springform pan by building your own cake collar with parchment paper. Transfer the baked, cooled bottom cake round to a pedestal or serving plate and tightly encircle the cake round with parchment paper that is at least 3 inches tall. You may want to double wrap the cake so it’s more sturdy then secure the parchment paper to itself with tape.
- Use cooking spray with flour. It is so quick and easy to use and saves you the hassle and mess of buttering and flouring your pans. You should be able to find it at your local grocery store in the baking aisle.
- Don’t pack flour: Whenever you measure flour, don’t scoop it into the flour bag/container or else the flour will compress and packed flour yields denser, drier cakes. Rather, scoop flour into measuring cup and then level.
- DIY Buttermilk: I never keep buttermilk on hand but it is crucial in this recipe for the melt-in-your mouth tender crumb and for the lactic acid to react with the baking soda to leaven the cake. Fortunately, I find DIY buttermilk is just as effective. To make your own buttermilk for this recipe, measure 1 ½ tablespoons lemon juice or white vinegar into a measuring glass or one cup measuring cup. Add enough milk to equal one cup. Give it a stir and let sit 5-10 minutes. The milk will curdle so you know it’s ready.
- Use room temperature eggs. Room temperature eggs bind together more easily and whisk to a higher volume. This promotes more even distribution into the batter resulting in a light, fluffy cake (because eggs trap air). Cold eggs result in a denser cake. Room temperature eggs also create a runnier batter which is easier to spread/not overwork so the cake has more lift and rises more evenly.
- How to quickly bring eggs to room temperature. Fill a bowl with warm water (not hot) and add eggs and let sit 10-20 minutes.
- Don’t overmix the batter. Once you add the buttermilk/egg mixture in thirds, stop mixing the batter as soon as you see most of the streaks of flour disappear. Overmixing cake batter causes the gluten in the flour to form elastic gluten strands which result in a dense, chewy texture.
- Bake immediately. Don’t forget to preheat your oven before you start making the cake batter. Once the baking soda is added to the wet ingredients, a chemical reaction begins. You need to take advantage of this reaction quickly before it passes otherwise your cake won’t rise as intended or be as tender.
- Don’t over-bake the cake. Start checking your cake at 25 minutes and only add time if needed because an overbaked cake is a drier cake.
- Generously level cooled cakes. The cakes will rise in the middle which is perfect for our purposes of using the leftover crumbs. Make sure the cakes are completely cool before you level them. Level the cakes so they are completely flat so they will seamlessly sandwich the cheesecake.
CHEESECAKE
- Use soft cream cheese for cheesecake. The cream cheese should be soft enough that it can easily beat into a creamy consistency. If it is not soft enough, then it will yield lumpy cheesecake and will leave white specks. It is okay to microwave cream cheese for the cheesecake but not recommended for the frosting.
- Beat cream cheese until fluffy. The most important part of making your red velvet cheesecake filling is to beat the cream cheese until light and fully with your paddle attachment – about 3 minutes. Three minutes can seem like a long time, so set your timer and don’t stop early! Beating the cream cheese creates lusciously smooth and creamy cheesecake.
- Whip to stiff peaks. Whip the cream cheese until stiff peaks form to help provide structure to the no-bake cheesecake filling. “Stiff peaks” simply means the whipped cream will stand straight up when the beaters are removed and not curl at the tips.
- Don’t over-beat whipped cream. That being said, stop mixing as soon as stiff peaks form because over-whipped cream becomes grainy. If you’ve accidently reached the grainy stage, you can try and salvage the whipped creamy by adding a few tablespoons of fresh cream and gently mixing it in by hand using a wire whisk. If the whipped cream is separated, then unfortunately it can’t be fixed.
FROSTING
- For the frosting, do NOT over-microwave cream cheese or butter to soften. For the perfect frosting consistency, let the cream cheese and butter soften at room temperature to room temperature. If you must use the microwave, take care to under do it or your frosting will be runny. It is best to plan ahead and never microwave the butter or cream cheese.
- Refrigerate frosting. If your frosting is too runny, then pop it in the freezer for 10 minutes whip again, or place in the refrigerator for 30 minutes.
HOW TO SOFTEN CREAM CHEESE FOR CHEESECAKE
Cream cheese is a key ingredient in this red velvet cheesecakes so it’s important that it is softened correctly in order to produce lump free cheesecake. To soften cream cheese, you have three options:
- Water bath: This is my preferred method to soften cream cheese because it softens it evenly throughout without the risk of scorching it. To create a water bath, fill a medium bowl with hot water. Place the sealed, packaged cream cheese in the bowl for 10 minutes to soften. If it isn’t soft enough after 10 minutes, then dump out the hot water, refill and repeat.
- Counter + Microwave: This is my second preferred method as it is super quick and easy and allows the cream cheese to come to room temperature evenly. Cube cream cheese and transfer it to a microwave safe plate. Microwave for a few 30 seconds intervals then allow cream cheese to sit at room temperature for 30 minutes. This gives it a head start to soften at room temperature.
- Soften at room temperature: The FDA states cream cheese can sit at room temperature for 2 hours. Cubing it into small cubes first will help it soften more quickly and evenly.
- Microwave: This method is if you need cream cheese NOW but it is a little riskier because the cream cheese can overcook/scorch – so proceed with care and caution. Cube cream cheese and transfer to a microwave safe plate. Microwave for 15-20 seconds, stir and microwave another 15 seconds. Repeat until cream cheese is softened.
Can I make red velvet CHEESECAKE ahead of time?
Yes! Red velvet cheesecake is the perfect make ahead dessert. I recommend chilling your cheesecake for at least 24 hours before serving because I think it tastes better/more flavorful the second day. You can also prep ahead in stages:
- Cakes: prepare cakes according to recipe directions. Once the cakes have cooled, wrap them tightly in plastic wrap and store in the refrigerator for up to 3 days, or freeze for up to 2 months.
- Frosting: Can be made up to two days in advance, covered and stored in an airtight container the refrigerator. It will harden slightly in the refrigerator so let it sit at room temperature to soften before whipping again and proceeding to frost your cheesecake.
HOW TO STORE red velvet CHEESECAKE
Wrap the red velvet cheesecake with plastic wrap or use a cake carrier/storage container if you have one. Refrigerate for up to 5 days.
CAN I FREEZE red velvet CHEESECAKE?
Yes! This red velvet cheesecake freezes very well. You can freeze the cake layers before assembling or freeze the entire cheesecake:
TO FREEZE THE CAKE LAYERS:
- Tightly double wrap each cake layer separately in plastic wrap.
- Freeze cake for up to 2 months.
- Allow the cakes to thaw overnight in the refrigerator then unwrap and come to room temperature on the counter before assembling.
TO FREEZE THE cheesecake:
- Place chilled cheesecake on a baking sheet and place, uncovered, in the freezer. Freeze until firm.
- Remove from the freezer and wrap cheesecake in plastic wrap followed by heavy duty aluminum foil.
- Freeze for up to 1 month for optimal flavor, 2 months is the max.
- To thaw, remove cheesecake from freezer to the refrigerator. Let thaw overnight.
- You can also freeze individual slices using the same method and packaging them separately.
Want to try this Red Velvet Cheesecake RECIPE?
Pin it to your Dessert or holiday Board to SAVE for later!
Find me on Pinterest for more great recipes! I am always pinning :)!
©Carlsbad Cravings by CarlsbadCravings.com

Red Velvet Cheesecake
Save This Recipe To Your Recipe Box
You can now create an account on our site and save your favorite recipes all in one place!
Ingredients
RED VELVET CAKE
- 2 1/4 cups all-purpose flour
- 1 1/2 teaspoons baking soda
- Pinch of salt
- 1 cup buttermilk
- 2 large eggs at room temperature
- 1 tablespoon distilled white vinegar
- 1 teaspoon vanilla extract
- 2 tablespoons unsweetened cocoa powder
- 2 tablespoons red food coloring
- 12 tablespoons unsalted butter softened
- 1 1/2 cups granulated sugar
CHEESECAKE FILLING
- 1 1/2 teaspoons unflavored gelatin
- 1 1/2 cups heavy cream
- 6 ounces white chocolate chopped
- 1 pound (16 oz.) Cream Cheese softened
- 1/2 cups granulated sugar
- 1 tablespoons lemon juice
FROSTING
- 8 tablespoons unsalted butter softened
- 2 cups Powdered sugar
- 8 ounces Cream Cheese cut into to 4 pieces, softened
- 3/4 teaspoon vanilla extract
- Pinch of salt
Instructions
For the cake
- Preheat oven to 350 degrees F. Line two 9-inch round cake pans with parchment paper. Spray with nonstick cooking spray WITH FLOUR or grease and flour pans.
- Whisk flour, baking soda, and salt together in a bowl. Whisk buttermilk, eggs, vinegar and vanilla together in a 2-cup liquid measuring cup. Mix cocoa with food coloring in small bowl until a smooth paste forms.
- Using stand mixer fitted with the paddle attachment, beat butter and sugar on medium-high speed until pale and fluffy, 3-4 minutes. Reduce speed to low and add flour mixture in thirds alternating with buttermilk mixture, scraping down the bowl as needed. Add cocoa mixture, increase speed to medium, and beat just until incorporated, about 30 seconds (don't overmix). Give batter a final stir by hand.
- Divide batter evenly between prepared pans and smooth tops with rubber spatula. Bake until toothpick inserted in the center comes out clean, about 25 minutes, rotating pans halfway through baking. Let cakes cool in pans on wire rack for 10 minutes. Remove cakes from pans, discarding parchment, and let cool completely on rack, about 2 hours.
- Using a serrated knife, level the top of each cake. Use your fingers to crumble the tops into small crumbs; set crumbs aside in an airtight container to garnish the cake. Set 1 cake round in a parchment paper lined springform pan cut side up; set aside second cake round.
For the filling
- Sprinkle gelatin over ½ cup cream in a small saucepan and let sit 5 minutes. Cook mixture over low heat until edges are just bubbling. Add white chocolate and cook, stirring constant, until just melted and smooth. Let cool slightly, about 15 minutes.
- Using a clean, dry mixer bowl and whisk attachment, whip remaining 1 cup heavy cream on medium-high speed until stiff peaks form; transfer to a bowl and set aside.
- Return the now empty bowl to mixer and fit with the paddle attachment. Beat cream cheese and sugar on medium-high speed for 3 minutes, scraping down the sides of the bowl occasionally.
- Reduce speed to medium-low and add lemon juice and white chocolate mixture and mix until just combined, scraping down bowl as needed. Using rubber spatula, gently fold in whipped cream.
- Spread cheesecake filling over cake round in springform pan and smooth the top. Place reserved cake round, cut side down, on top. Cover with plastic wrap and refrigerate until set, about 6 hours.
For the frosting
- You can make the frosting anytime while the cheesecake is chilling, cover and refrigerate, then let it sit at room temperate for 15 minutes or so to soften before frosting OR make the frosting just before serving.
- Using stand mixer fitted with paddle, beat butter and sugar on medium-high speed until fluffy, about 2 minutes. Add cream cheese 1 piece at a time, and continue to beat until incorporated. Beat in vanilla and salt.
- Run a thin knife between the red velvet cheesecake and the side of the springform pan; remove pan. Transfer cheesecake to a serving plate or pedestal.
- Separate out ½ cup frosting (or more as needed) and create a thin crumb layer by frosting the top and the sides of the cake. Freeze cake for 30 minutes.
- Spread frosting evenly over top and sides of cake. Gently press reserved cake crumbs onto sides of cake.
Notes
Baking tips (see post for full list of tips)
- DIY buttermilk: you can also substitute with sour milk which I do all the time by adding 1 ½ tablespoon lemon juice or white vinegar to a 1 cup (or larger) measuring cup), adding milk until it reaches 1 cup, giving it a stir, and letting it rest for 10 minutes.
- Unflavored gelatin: is a common baking ingredient and can be found next to the packages of Jell-O and pudding at your grocery store. It is what adds structure to the cheesecake without adding eggs.
- Use correct pan size: it is important that you use 9-inch round cake pans and not 8-inch cake pans because we are going to assemble the cake in a 9-inch springform pan. 9-inch diameter also creates a more pleasing ratio of cheesecake to cake.
- What if I don't have a spring form pan? You can still make this red velvet cheesecake even if you don't have a springform pan by building your own cake collar with parchment paper. Transfer the baked, cooled bottom cake round to a pedestal or serving plate and tightly encircle the cake round with parchment paper that is at least 3 inches tall. You may want to double wrap the cake so it's sturdier then secure the parchment paper to itself with tape.
- Generously level cooled cakes: the cakes will rise in the middle which is perfect for our purposes of using the leftover crumbs. Make sure the cakes are completely cool before you level them. Level the cakes so they are completely flat so they will seamlessly sandwich the cheesecake.
- Use soft cream cheese for cheesecake: the cream cheese should be soft enough that it can easily beat into a creamy consistency. If it is not soft enough, then it will yield lumpy cheesecake and will leave white specks. It is okay to microwave cream cheese for the cheesecake but not recommended for the frosting.
Make ahead
Red velvet cheesecake is the perfect make ahead dessert. I recommend chilling your cheesecake for at least 24 hours before serving because I think it tastes better/more flavorful the second day. You can also prep ahead in stages:- Cakes: prepare cakes according to recipe directions. Once the cakes have cooled, wrap them tightly in plastic wrap and store in the refrigerator for up to 3 days, or freeze for up to 2 months.
- Frosting: Can be made up to two days in advance, covered and stored in an airtight container the refrigerator. It will harden slightly in the refrigerator so let it sit at room temperature to soften before whipping again and proceeding to frost your cheesecake.
HOW TO STORE
Wrap the red velvet cheesecake with plastic wrap or use a cake carrier/storage container if you have one. Refrigerate for up to 5 days.How to FREEZE
You can freeze the cake layers before assembling or freeze the entire red velvet cheesecake:TO FREEZE THE CAKE LAYERS:
- Tightly double wrap each cake layer separately in plastic wrap.
- Freeze cake for up to 2 months.
- Allow the cakes to thaw overnight in the refrigerator then unwrap and come to room temperature on the counter before assembling.
TO FREEZE THE cheesecake:
- Place chilled cheesecake on a baking sheet and place, uncovered, in the freezer. Freeze until firm.
- Remove from the freezer and wrap cheesecake in plastic wrap followed by heavy duty aluminum foil.
- Freeze for up to 1 month for optimal flavor, 2 months is the max.
- To thaw, remove cheesecake from freezer to the refrigerator. Let thaw overnight.
- You can also freeze individual slices using the same method and packaging them separately.
Want To Make This Recipe?

Did You Make This Recipe?
Tag @CarlsbadCravings and Use #CarlsbadCravngs
Leave a Review, I Always Love Hearing From You!
Recipe barely adapted from America’s Test Kitchen – Great American Cakes Magazine


Mary Ann Deubel says
Hi…Would gluten free flour work in this recipe? Would I have to make any adaptations for it? Thanks for your help!
Jen says
Hi Mary Ann, I have not tested this recipe with gluten free flour but if you stick with quality GF flour like Bob Red Mill’s 1 to 1 baking flour I think it should still work great. Good luck!
Tammy says
Made this cake for my Moms birthday. Came out exactly as pictured. Thank you for sharing this recipe with us all.
Jen says
You’re so welcome Tammy! Happy birthday to your Mom!
Richard C Larsen says
Can I omit the red food coloring and cocoa powder to make a white vevet cake
Jen says
I think that would be fine and not alter the texture too much. If you are looking for a fantastic white cake recipe, I recommend this one: https://carlsbadcravings.com/white-chocolate-raspberry-cake/
Yokheved Yisrael says
Can I use eggs instead of the gelatin for the cheesecake recipe?
Jen says
Unfortunately that won’t work because the cheesecake is no-bake.
natina says
Looks so delicious! Gotta try the Red Velvet Cheesecake recipe for sure.
Jen says
Thanks Natina, I hope you love it as much as us!
Richard C Larsen says
Can you do three layers if cake and two cheesecake centers for one cake
Jen says
You can do as many layers as you want! For three cake layers make 1 and 1/2 of the cake recipe, and double the cheesecake recipe. Enjoy!
Laney says
Would love to try this! What kind of food coloring do you use for this recipe? Liquid or gel? Do you have a preferred brand? Thank you!
Jen says
Hi Laney, I use liquid food coloring! I hope you love the cheesecake!
Brittney says
Instead of the food coloring could I use red velvet emulsion ?
Jen says
I haven’t used it before so I’m sorry I can’t be sure – sorry!