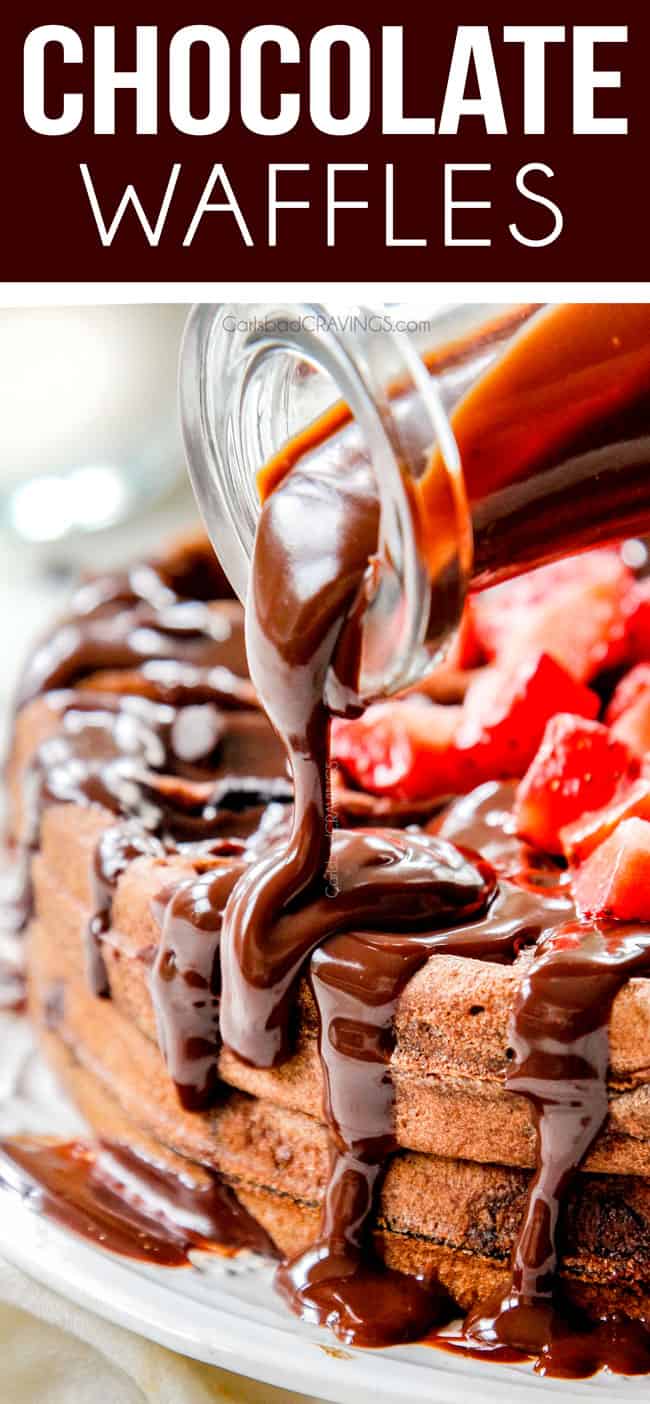
Easy Chocolate Waffles for the chocolate lover!
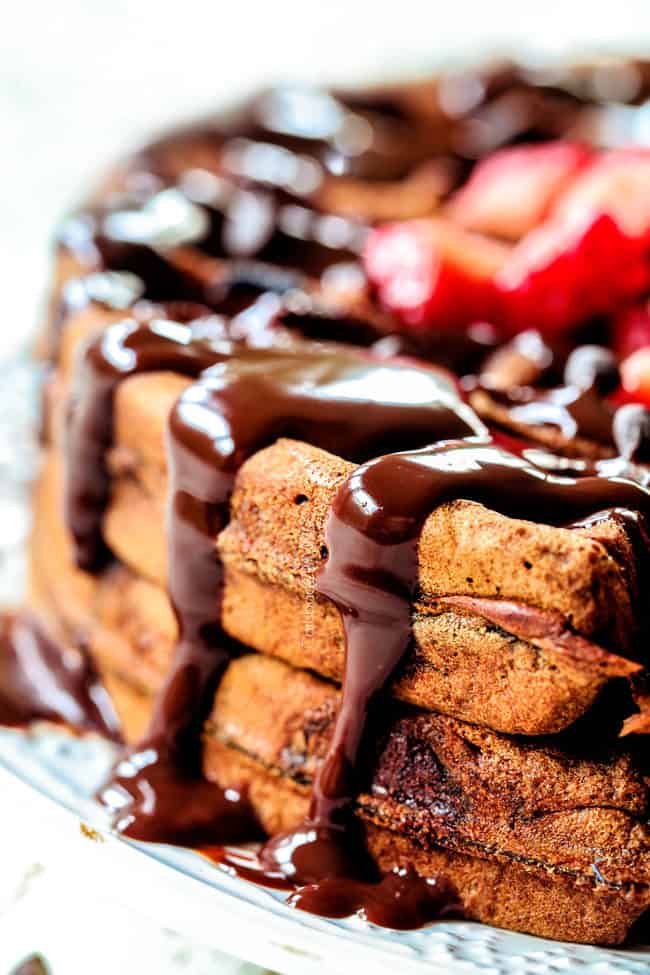
Rich, buttery, double Chocolate Waffles are ideal for special occasion breakfasts or brunch (hello Valentine’s Day), or for a fun dessert! They are lightly crispy on the outside, tender on the inside and decadently delicious all over. These Chocolate Waffles are fabulous just with maple syrup or serve them with chocolate sauce, strawberries, whipped cream and even ice cream! They are super easy to make, reheat well in the toaster or oven and freeze well for a quick and delicious breakfast or snacks- because you are going to want to snack on them all the time!
Chocolate waffles recipe video
PIN THIS RECIPE TO SAVE FOR LATER
Chocolate Waffles Recipe
These luxurious Chocolate Waffles join my “breakfast for dessert” recipes such as my Crème Brulee French Toast, Banana Cream Cheese Coffee Cake and Carrot Cake Crepes – because if you’re going to take time to make breakfast, make it epic.
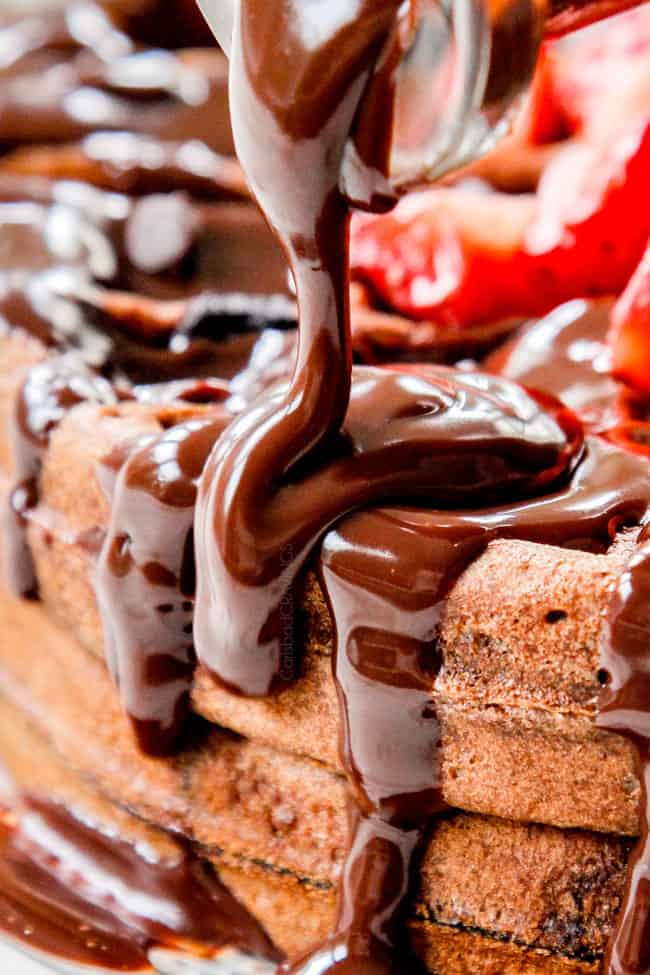
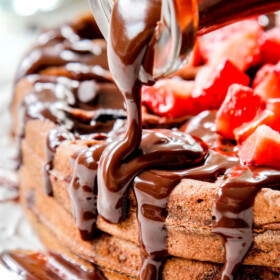
And these Chocolate Waffles are epicically delicious. They transport you to indulgent chocolate paradise made with cocoa powder, chocolate chips and doused in silky Chocolate Ganache syrup.
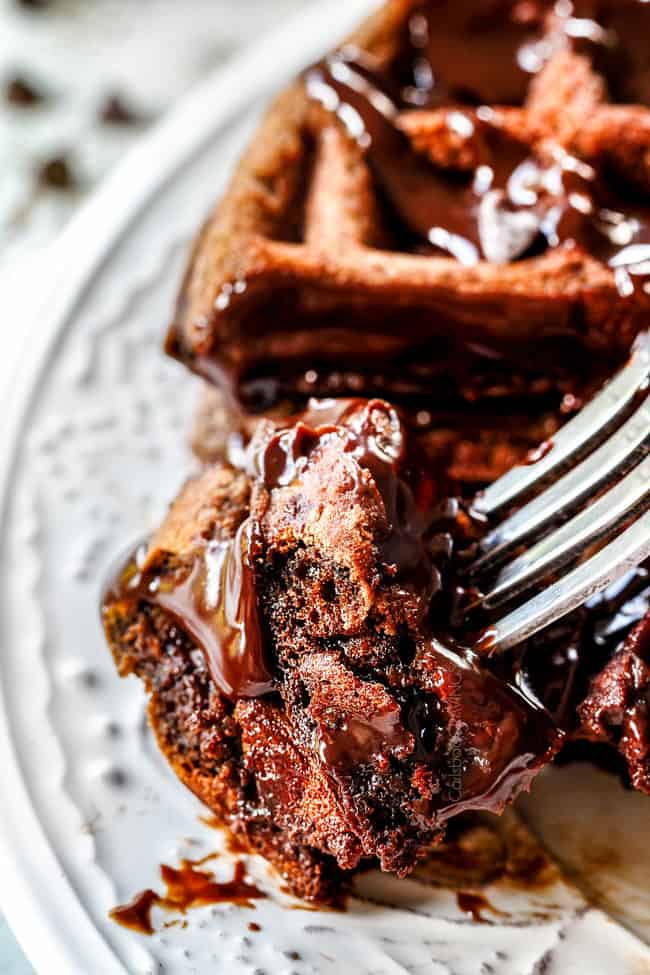
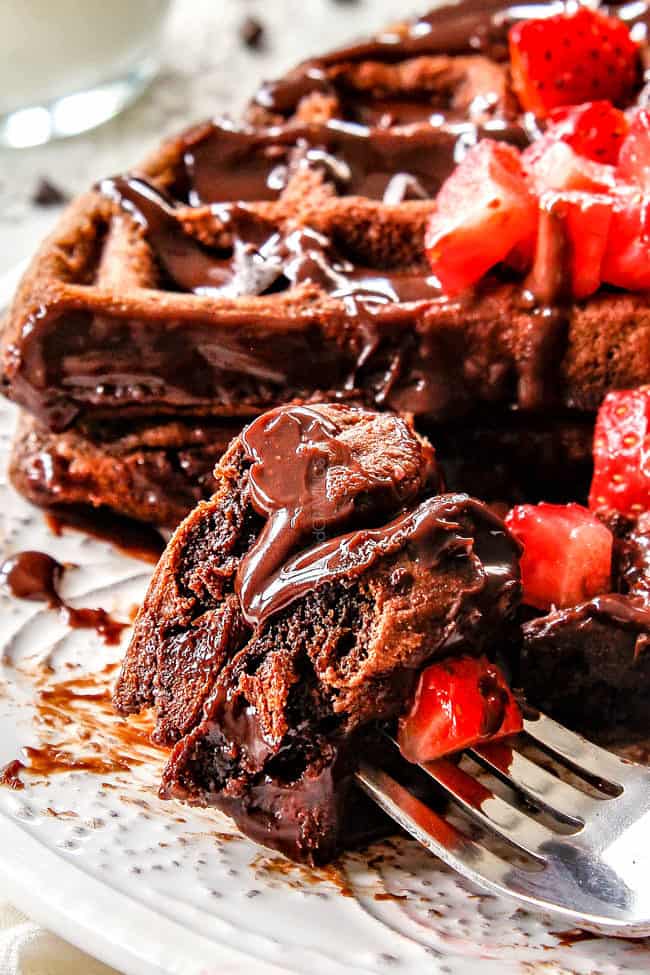
They are like a rich, brownie in lighter, crispier waffle form, which means brownies for breakfast, which means its going to be an epically fabulous day.
These Chocolate Waffles are super simple to make. They are similar to many waffle recipes which take minutes to whip up just with the addition of cocoa powder and chocolate chips. I also don’t whip the egg whites separately for a richer texture – and bonus, easier recipe!
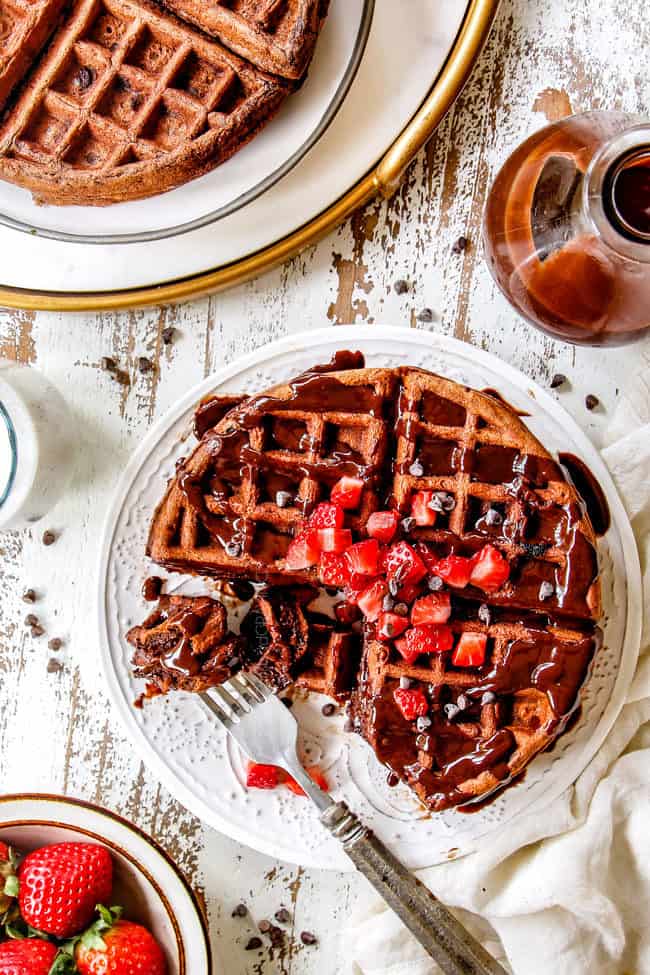
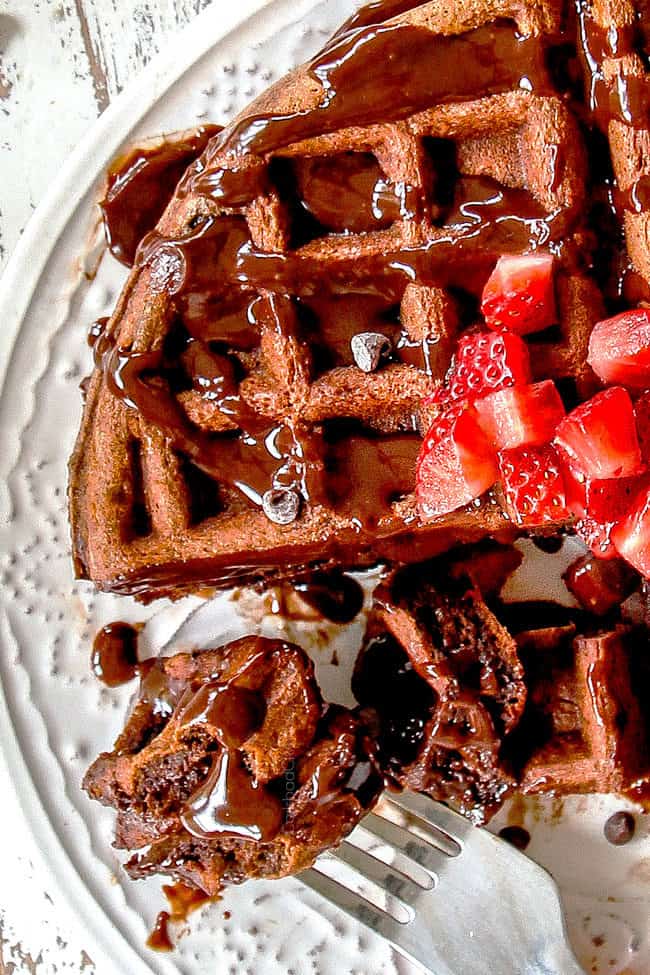
While you can go all chocolate with these waffles, they are incredibly versatile. You can serve them up with just a dusting of powdered sugar, fresh strawberries and a dollop of whipped cream or you can go full dessert mode with a healthy scoop of ice cream, chocolate ganache and a cherry on top. No matter how or when you serve them, these Chocolate Waffles are destined to become a family favorite!
Chocolate Waffle Ingredients
These easy Chocolate Waffles are made with traditional waffle ingredients of milk, eggs, flour, baking powder, baking soda, etc. with the addition of cornstarch, vanilla Greek yogurt, cocoa powder, and chocolate chips.
Butter: I love REAL butter in my Chocolate Waffles – you can taste the difference and the texture. For best results, please don’t use a substitute.
Greek Vanilla Yogurt: I’ve replaced one cup of milk with Greek vanilla yogurt for added flavor, richness and moisture. You may substitute with plain Greek yogurt or sour cream if you are in a bind.
Cornstarch: this might sound odd, but one of the best tips I’ve read is to replace some of the flour in your waffle recipe with cornstarch – and it works! Cornstarch prevents the waffles from getting soggy from cooking steam and delivers a crispy outside and tender fluffy inside. I made a batch of Chocolate Waffles with all flour and they were a little too soft but with the addition of cornstarch, they were perfect!
Cocoa Powder: I think ½ cup is the right amount of chocolate flavor but you can use more or less depending on what you are trying to achieve. Take care to use unsweetened cocoa powder that is found in the baking aisle and NOT chocolate milk mix. It might sound obvious but it does happen 😉. If you love dark chocolate, then you can use the extra dark cocoa powder a mixture of the two.
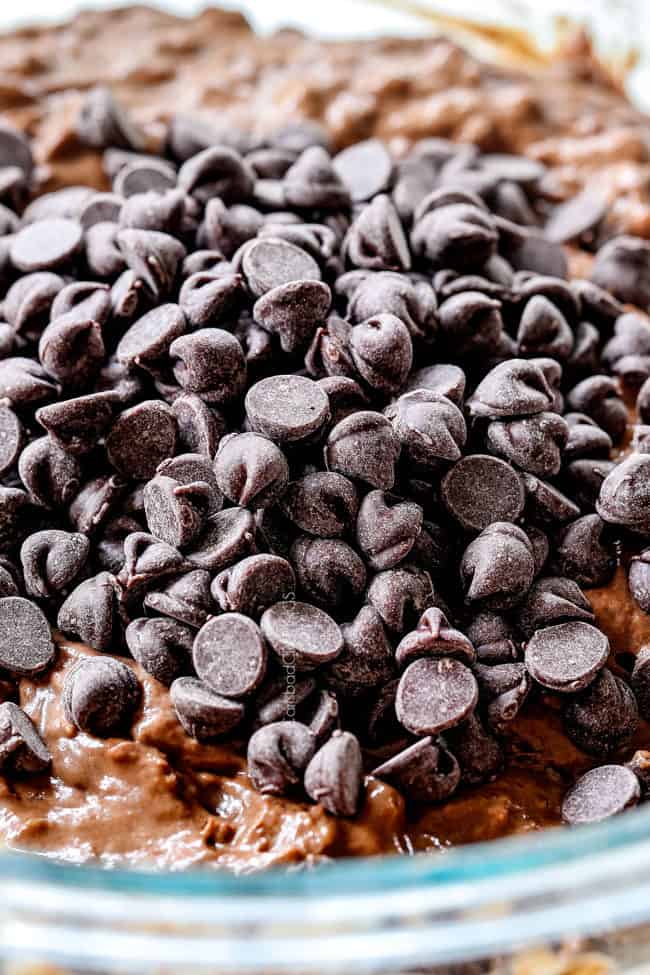
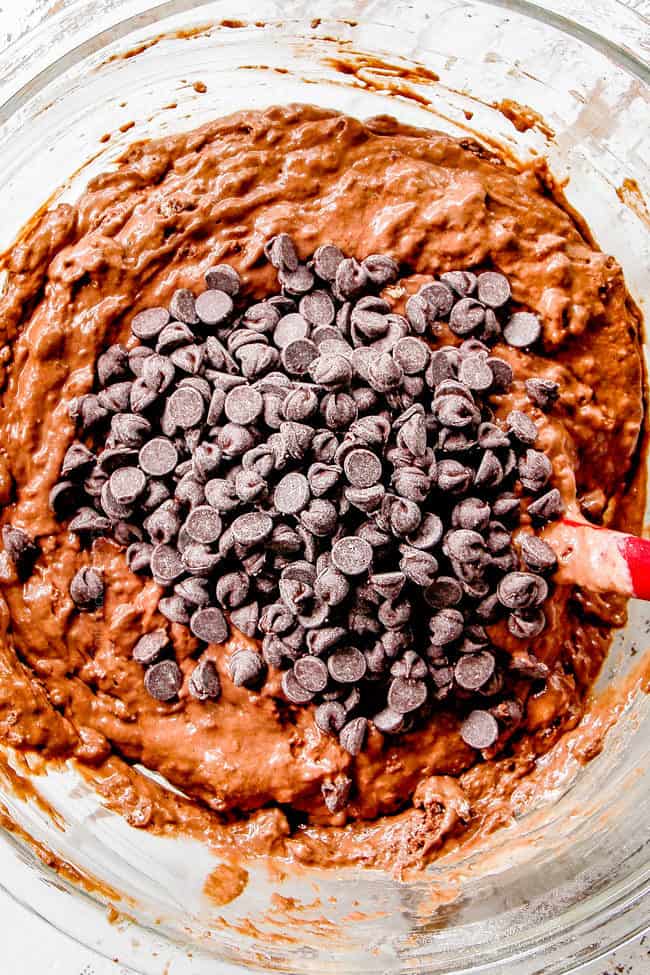
Chocolate Chips: I use chocolate chips for convenience but you can also use chopped up chocolate chunks. I think this added chocolate is necessary for their add chocolate flavor.
Add Ins: In addition to chocolate chips, you can also add nuts, coconut or other chips like peanut butter chips, butterscotch chips, etc.
Flavorings: Chocolate Waffles are a blank canvas for flavorings. I like to keep it simple with vanilla extract and cinnamon but you can add additional cinnamon, nutmeg, allspice, ginger, etc.
Chocolate Waffle Toppings
The possibilities are endless when it comes to smothering your Chocolate Waffles. You can go as simple as powdered sugar or maple syrup or as decadent as my Chocolate Ganache. Its like silky chocolate syrup enveloping a warm, rich brownie which I highly recommend.
Here are all my topping ideas, what’s your favorite?:
- chocolate ganache/syrup
- powdered sugar
- maple syrup
- strawberry syrup
- raspberry syrup
- caramel sauce
- fresh fruit such as strawberries, raspberries and bananas
- Nutella
- white chocolate shavings
- whipped cream
- ice cream
- cherries
- nuts
You can even transform these Chocolate Waffles into waffle ice cream sandwiches by stuffing them with your favorite ice cream. I’m all about chocolate on chocolate, so I’m going with Rocky Road.
Tips for the Best Chocolate Waffles
These Chocolate Waffles are super simple to make but here are a few tips and tricks for the Best Chocolate Waffles every time:
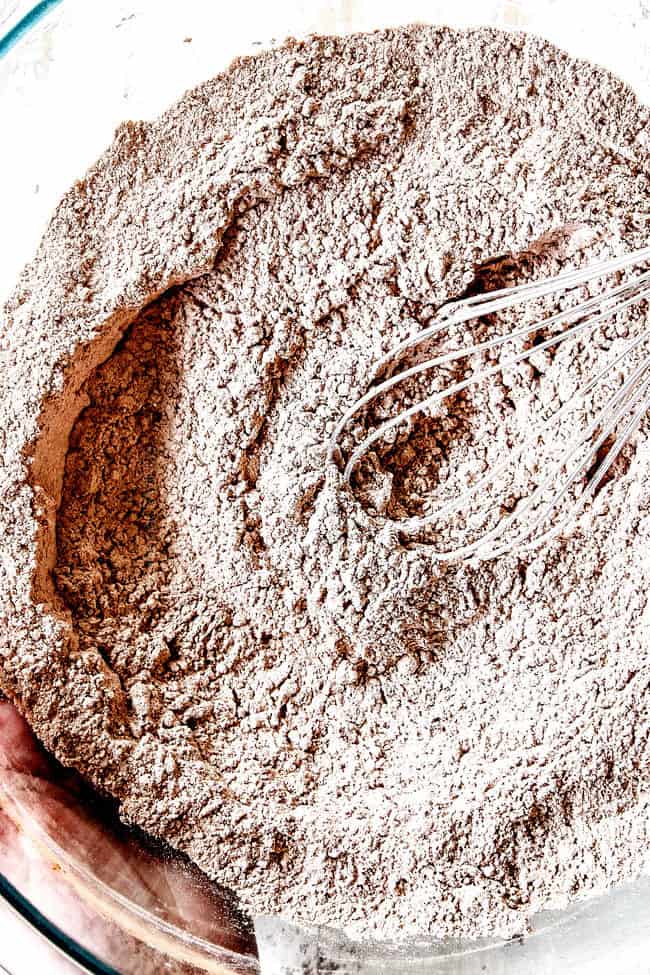
Sift Dry Ingredients
If you use your dry ingredients a lot and they are not clumping together then you can simply whisk all the dry ingredients together without sifting.
If any of your dry ingredients are not fluffy, however, you will want to either sift that dry ingredient directly into the dry ingredients bowl OR sift all the dry ingredients together after whisking them together. I find I need to sift my cocoa powder, otherwise, I am left with small, hard granules.
To sift dry ingredients: Add them to a sifter and shake back and forth over a bowl until you are only left with dry clumps in the sifter. If there are a lot of clumps remaining, I use the back of a measuring cup to push these clumps through the sifter forcing them into the perfect size.
Use Room Temperature Ingredients
We want room temperature eggs, milk and yogurt for two reasons:
First, have you ever whisked cold milk into melted butter? It quickly coagulates, leaving you with clumps of solid butter that refuse to mix nicely into the batter. Room temperature ingredients eliminate this problem.
Second, room temperature ingredients blend together much easier so thy are hard to overmix, especially when combined with the dry ingredients, making for more tender, less dense waffles.
To quickly bring eggs to room temperature: fill a bowl with warm water (not hot) and add eggs and let sit 10-20 minutes.
Don’t Overmix
Mixing the Chocolate Waffle batter develops the gluten, the less gluten development, the more tender the waffles. Over-mixing will produce chewier, denser, less fluffy waffles. To mix your waffle batter, always use a spatula and FOLD the wet ingredients into the dry ingredients. Mix just until there aren’t any pockets of flour, keeping in mind you are going to stir a few more times once you add the chocolate chips as well.
Let Batter rest
After you mix your Chocolate Waffle batter, let it rest for 5 minutes before making your waffles. This resting time will produce lighter waffles.
Use a hot waffle iron
Just like we want a skillet sizzling hot before we add chicken or steak, we want our waffle iron sizzling hot before we add our Chocolate Waffle batter. A hot waffle iron will produce crispier outsides with tender insides because the batter will begin to cook on the outside as soon as it hits the griddle. When a waffle iron isn’t hot enough, you will get soggy, even squishy waffles.
To make sure your waffle iron is hot: warm it CLOSED for at least five minutes. To check if its ready, flick a drop of water on the griddle, it should sizzle and evaporate right away – if not, warm on.
Don’t Peak
Don’t lift your waffle iron lid too soon or your waffles will stick to the top and rip. Most waffle irons will have a light or beeper to let you know when they’re done, but if not, don’t open your waffle iron until the steam has stopped coming out the sides. The batter for these Chocolate Waffles is richer, so I found I had to cook my waffles longer than my waffle iron beeper.
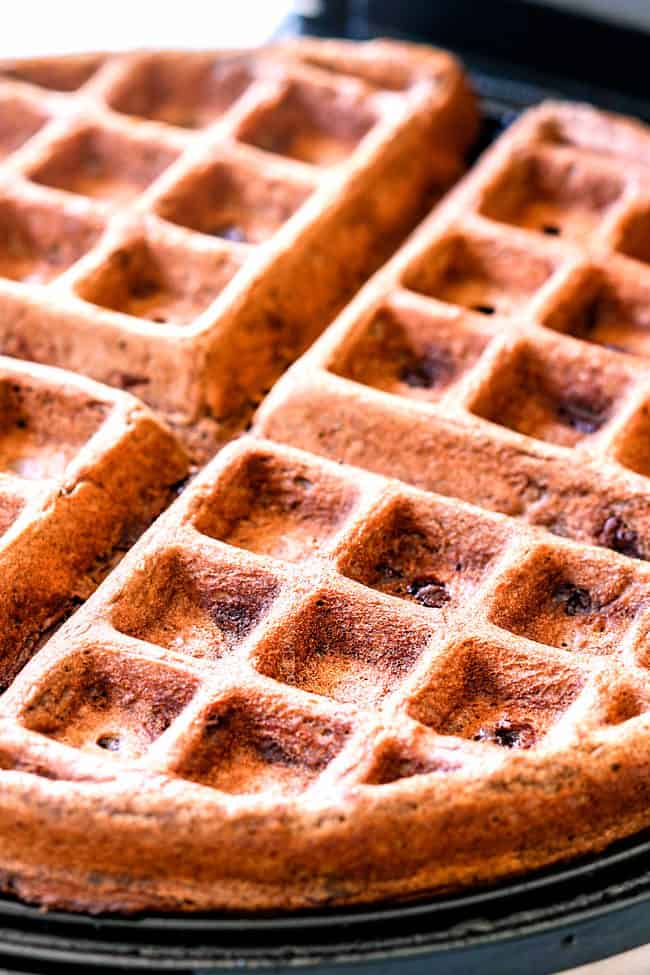
Pick your Texture
If you like softer waffles, cook for less time, if you like crispier waffles, cook until your waffles reach desired crispiness. You can even customize individuals waffles to their personal preference.
Don’t Stack Waffles
As your waffles come out of the waffle iron, don’t stack them, or they will become soggy and limp. Instead, line the waffles in a single layer on a cooling rack or in the oven (see below).
How do I Keep Waffles Warm?
You can keep waffles warm until they are all made by preheating your oven to 200 degrees F. Place waffles directly on the oven baking rack or place on a baking/cooling rack placed inside a baking pan. The cooling rack elevates the waffles and allows air to circulate on all sides so they don’t become soggy.
How do you make waffles crispy?
To make crispy Chocolate Waffles, cook them for longer in your waffle iron. If you still want them crispier, then bake them afterwards.
To bake waffles, place them in a single layer on a baking rack set on a baking sheet. Make sure they aren’t touching so they can crisp up evenly without trapping any steam. Bake at 250 degrees F for 5-10 minutes, or until they reach desired texture.
Can I make Waffles Ahead of Time?
I don’t recommend making waffle batter ahead of time or the waffles won’t rise as well but you can make Chocolate Waffles head of time to reheat or freeze.
If you are purposely making waffles to freeze, then cook them just until cooked through and on the softer side – less crispy then you’d normally make, this way, they won’t be overdone when cooked “twice.”
I highly doubt you’ll have leftover Chocolate Waffles after a couple days of the chocolaty morsels calling from the refrigerator, but if you do, or if you want an easy snack, breakfast or dessert, they freeze exceptionally well.
Can Waffles Be Reheated?
Absolutely! You can reheat them in the microwave but they will be on the softer side. For crisper waffles, toast them or bake them. To reheat in the oven:
- Preheat oven to 350 degrees.
- Line waffles in a single layer on a baking sheet.
- Bake for 5 minutes or until warmed through.
How do I freeze Waffles?
To freeze waffles:
- Let waffles cool completely.
- Place waffles on a baking sheet in a single layer.
- Place in the freezer and freeze until solid, about one hour.
- Once frozen, add waffles to a freezer bag or airtight container, with a parchment paper in between each waffle. Alternatively, you can place individual serving sizes into separate plastic bags. Squeeze out any excess air.
- Freeze waffles for up to 3 months.
- When ready to use, pull out the desired number of waffles and let them defrost for 10 minutes on the counter. Alternatively, you can let them defrost in the refrigerator overnight.
- Either toast, microwave (won’t be crispy) or bake your waffles. To bake waffles, place on baking sheet and bake at 300 degrees F for about 5 minutes or until warmed through.
Looking for more Chocolate Recipes?
- Chocolate Zucchini Muffins
- Chocolate Eclair Cake
- Chocolate Fondue
- Chocolate Peanut Clusters
- Chocolate Raspberry Cake
Want to try this Chocolate Waffle Recipe?
Pin it to your BREAKFAST, DESSERT OR CHOCOLATE Board to SAVE for later!
Find me on Pinterest for more great recipes! I am always pinning :)!
©Carlsbad Cravings by CarlsbadCravings.com
Tools Used in This Recipe
See Favorite Tools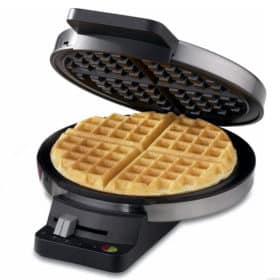

Chocolate Waffles
Save This Recipe To Your Recipe Box
You can now create an account on our site and save your favorite recipes all in one place!
Ingredients
Dry Ingredients
- 1 1/4 cups flour
- 1/2 cup cornstarch
- 1/2 cup unsweetened cocoa powder
- 1/4 cup packed brown sugar
- 1 tablespoon baking powder
- 1 teaspoon baking soda
- 1/2 teaspoon salt
- 1/2 teaspoon cinnamon optional
Wet Ingredients
- 4 tablespoons unsalted butter
- 2 eggs at room temperature
- 1 cup vanilla Greek yogurt (nonfat is fine) at room temperature
- 1 cup milk at room temperature
- 1 teaspoon pure vanilla extract
Add Later
- 1 cup semi-sweet chocolate chips
Serving Suggestions
- 1 recipe Chocolate Sauce/Ganache highly recommended
- 1 recipe Strawberry Syrup
- 1 recipe Easy Creamy Caramel Sauce
- Powdered sugar
- maple syrup
- fresh fruits: strawberries, raspberries, bananas
- chopped nuts
- whipped cream
- Ice cream
Instructions
- Make Chocolate Ganache (syrup) according to directions. Set aside.
- Grease and preheat waffle iron according to manufacturer's directions.
- Whisk Dry Ingredients together in a large bowl (you may need to sift if your cocoa powder doesn’t fully incorporate).
- In a separate bowl, melt butter and let cool a few minutes then whisk in the remaining Wet Ingredients.
- Make a well in the middle of the Dry ingredients. Add wet ingredients and fold just until combined with a spatula. Fold in chocolate chips. Allow batter to rest for 5 minutes.
- Ladle batter onto the center of the waffle iron and spread a little with a spatula (**I use 1 cup but amount may vary depending on iron size and shape**). Close the iron and cook to desired texture (shorter time for softer, longer for crispier).
Video
Notes
Chocolate Waffle Tips
Sift dry ingredients: If any of your dry ingredients are clumping, you will want to either sift that dry ingredient directly into the Dry Ingredients bowl OR sift all the Dry Ingredients together after whisking them together. I find I need to sift my cocoa powder, otherwise, I am left with small, hard granules. To sift dry ingredients: Add them to a sifter and shake back and forth over a bowl until you are only left with dry clumps in the sifter. If there are a lot of clumps remaining, I use the back of a measuring cup to push these clumps through the sifter forcing them into the perfect size. To quickly bring eggs to room temperature: fill a bowl with warm water (not hot) and add eggs and let sit 10-20 minutes. Use a hot waffle iron: A hot waffle iron will produce crispier outsides with tender insides because the batter will begin to cook on the outside as soon as it hits the griddle. When a waffle iron isn’t hot enough, you will get soggy, even squishy waffles. To make sure your waffle iron is hot, warm it CLOSED for at least five minutes. To check if its ready, flick a drop of water on the griddle, it should sizzle and evaporate right away – if not, warm on. Don’t peak : Don’t lift your waffle iron lid too soon or your waffles will stick to the top and rip. Most waffle irons will have a light or beeper to let you know when they’re done, but if not, don’t open your waffle iron until the steam has stopped coming out the sides. The batter for these Chocolate Waffles is richer, so I found I had to cook my waffles longer than my waffle iron beeper. Don’t stack waffles: As your waffles come out of the waffle iron, don’t stack them, or they will become soggy and limp. Instead, line the waffles in a single layer on a cooling rack or in the oven (see below). To keep waffles warm: You can keep waffles warm until they are all made by preheating your oven to 200 degrees F. Place waffles directly on the oven baking rack or place on a baking/cooling rack placed inside a baking pan. The cooling rack elevates the waffles and allows air to circulate on all sides so they don’t become soggy.How to Make Crispy Waffles
To make crispy Chocolate Waffles, cook them for longer in your waffle iron. If you still want them crispier, then bake them afterwards. To bake waffles, place them in a single layer on a baking rack set on a baking sheet. Make sure they aren’t touching so they can crisp up evenly without trapping any steam. Bake at 250 degrees F for 5-10 minutes, or until they reach desired texture.How to Reheat Waffles
You can reheat waffles in the microwave but they will be on the softer side. For crisper waffles, toast them or bake them. To reheat in the oven:- Preheat oven to 350 degrees.
- Line waffles in a single layer on a baking sheet.
- Bake for 5 minutes or until warm through.
How To freeze waffles:
- Let waffles cool completely.
- Place waffles on a baking sheet in a single layer.
- Place in the freezer and freeze until solid, about one hour.
- Once frozen, add waffles to a freezer bag or airtight container, with a parchment paper in between each waffle. Alternatively, you can place individual serving sizes into separate plastic bags. Squeeze out any excess air.
- Freeze waffles for up to 3 months.
- When ready to use, pull out the desired number of waffles and let them defrost for 10 minutes on the counter. Alternatively, you can let them defrost in the refrigerator overnight.
- Either toast, microwave (won’t be crispy) or bake your waffles. To bake waffles, place on baking sheet and bake at 300 degrees F for about 5 minutes or until warmed through.
Want To Make This Recipe?

Did You Make This Recipe?
Tag @CarlsbadCravings and Use #CarlsbadCravngs
Leave a Review, I Always Love Hearing From You!
©Carlsbad Cravings Original


Deanna says
I cannot wait to make these this weekend- I know my boys will gobble them right up! As always, thanks for all the tips and tricks. I am guilty of not using a screaming hot waffle iron. I also look forward to the crispy oven hack. Thanks Jen!
Jen says
YAY! I’m excited for you and your family to try them! I’m so pleased you found all the tips and tricks helpful – now you’ll have the best Chocolate Waffles ever!
Ritu Dewan says
Hello. You have a beautiful blog. Just made these for breakfast. I added 3/4 cup flour and subbed with oat flour. Crispy and truly yummy. ❤️
Jen says
I’m so please you made them already and loved them! Thanks Ritu!
Melissa Ferris says
If you can’t have corn, what can you replace the cornstarch with in your chocolate pancakes? Half a cup is a lot. I’m able to switch out some ingredients for others since I don’t eat corn and soy in your recipes. I’ve enjoyed lots of your recipes over the years.
Jen says
Hi Melissa, thanks for your kind words! You can replace the cornstarch with flour, they just might not be quite as crispy. Enjoy!
Elle says
One word: INCREDIBLE! My husband made these for me for Valentine’s Day breakfast (including the ganache!). He is not a very experienced cook or baker, but he had no problem following either recipe. He followed all of the instructions exact (thank you for all of your extra tips in the blog post!!) and we added strawberries and bananas for the topping. The waffles are the best homemade waffles we have ever eaten and the ganache really took it to a new level. We saved this recipe to make every Valentine’s Day. Thank you so much for sharing this, from both of us!!
Jen says
I LOVE that your husband made these Chocolate Waffles and the Ganache for you for Valentines Day – what a sweetheart! I’m so pleased he found my extra tips and tricks helpful – that makes me so happy! I am honored they are thee best homemade waffles you have ever eaten- wahoo! Thank you so much for taking the time to comment and make my day Elle!
Ashley says
I made these for the fam for a special Valentines breakfast. We topped with chocolate ganache, strawberry syrup and whipped cream. So rich and so delicious! When the kids asked for dessert later we said we already had dessert for breakfast thanks for a delicious and fun dessert, I mean breakfast!
Jen says
You are such a fun mom, I’m sure family loved this Valentine’s Day treat! And chocolate ganache AND strawberry syrup sounds like heaven with these waffles!
Cyndi says
Does this recipe double well? Can you omit the chocolate chipits? Thank you.
Jen says
Yes and yes! Enjoy!
Cyndi says
Thank you so much for your prompt response – this is the recipe I will be using! It’s for a special Father’s Day dessert tomorrow for my husband. A few years pre pandemic we had chocolate waffles at a sweet little bistro when we were travelling and I bought a double Belgian waffle maker just to try to duplicate that delicious treat! And now I’m finally getting around to it. A full cup of cornstarch seems like a lot even for doubling but I will follow your recipe to a “T” (except for the cinnamon – I love it but not when combined with chocolate). I’m even making your ganache! Thank you again :).
Jen says
Thanks Cyndi, I hope they come close to your favorite bistro waffles!
Cyndi says
Thank you, Jen! They were actually even better! Crispy on the outside, soft and chewy inside, just what we were hoping for. I doubled the recipe without any issues and froze the leftovers – which not surprisingly disappeared quickly from the freezer. I also made your ganache! It was easy and the best I’ve ever made or had. I topped them with the ganache (hey – you can get outright artistic drizzling that over yummy things!), ice cream (chocolate and vanilla), real whipped cream, more ganache and like you suggested, a cherry on top! It was the first time I used my waffle maker and it was a joy to use because the waffles came out perfect. Your easy and delicious chocolate waffles recipe will be my go-to, as will the chocolate ganache, which I plan to use on multiple desserts now. Thank you! ABSOLUTELY FIVE STARS
Jen says
First off, sorry for the delayed response I’ve been on vacation and just catching up 😉 but thank you so much for taking the time to leave an awesome review! I’m thrilled these chocolate waffles were such a hit and will be on repeat, along with the ganache. You are so right – chocolate ganache makes everything better!
Sue Olsen says
Hi Jen, I made these waffles today for my son. They were a HUGE hit! Thank you for all your great cooking tips to make everything better!
Jen says
You are so welcome, Sue, I am glad you are finding my tips helpful! I’m thrilled the chocolate waffles were such a hit!