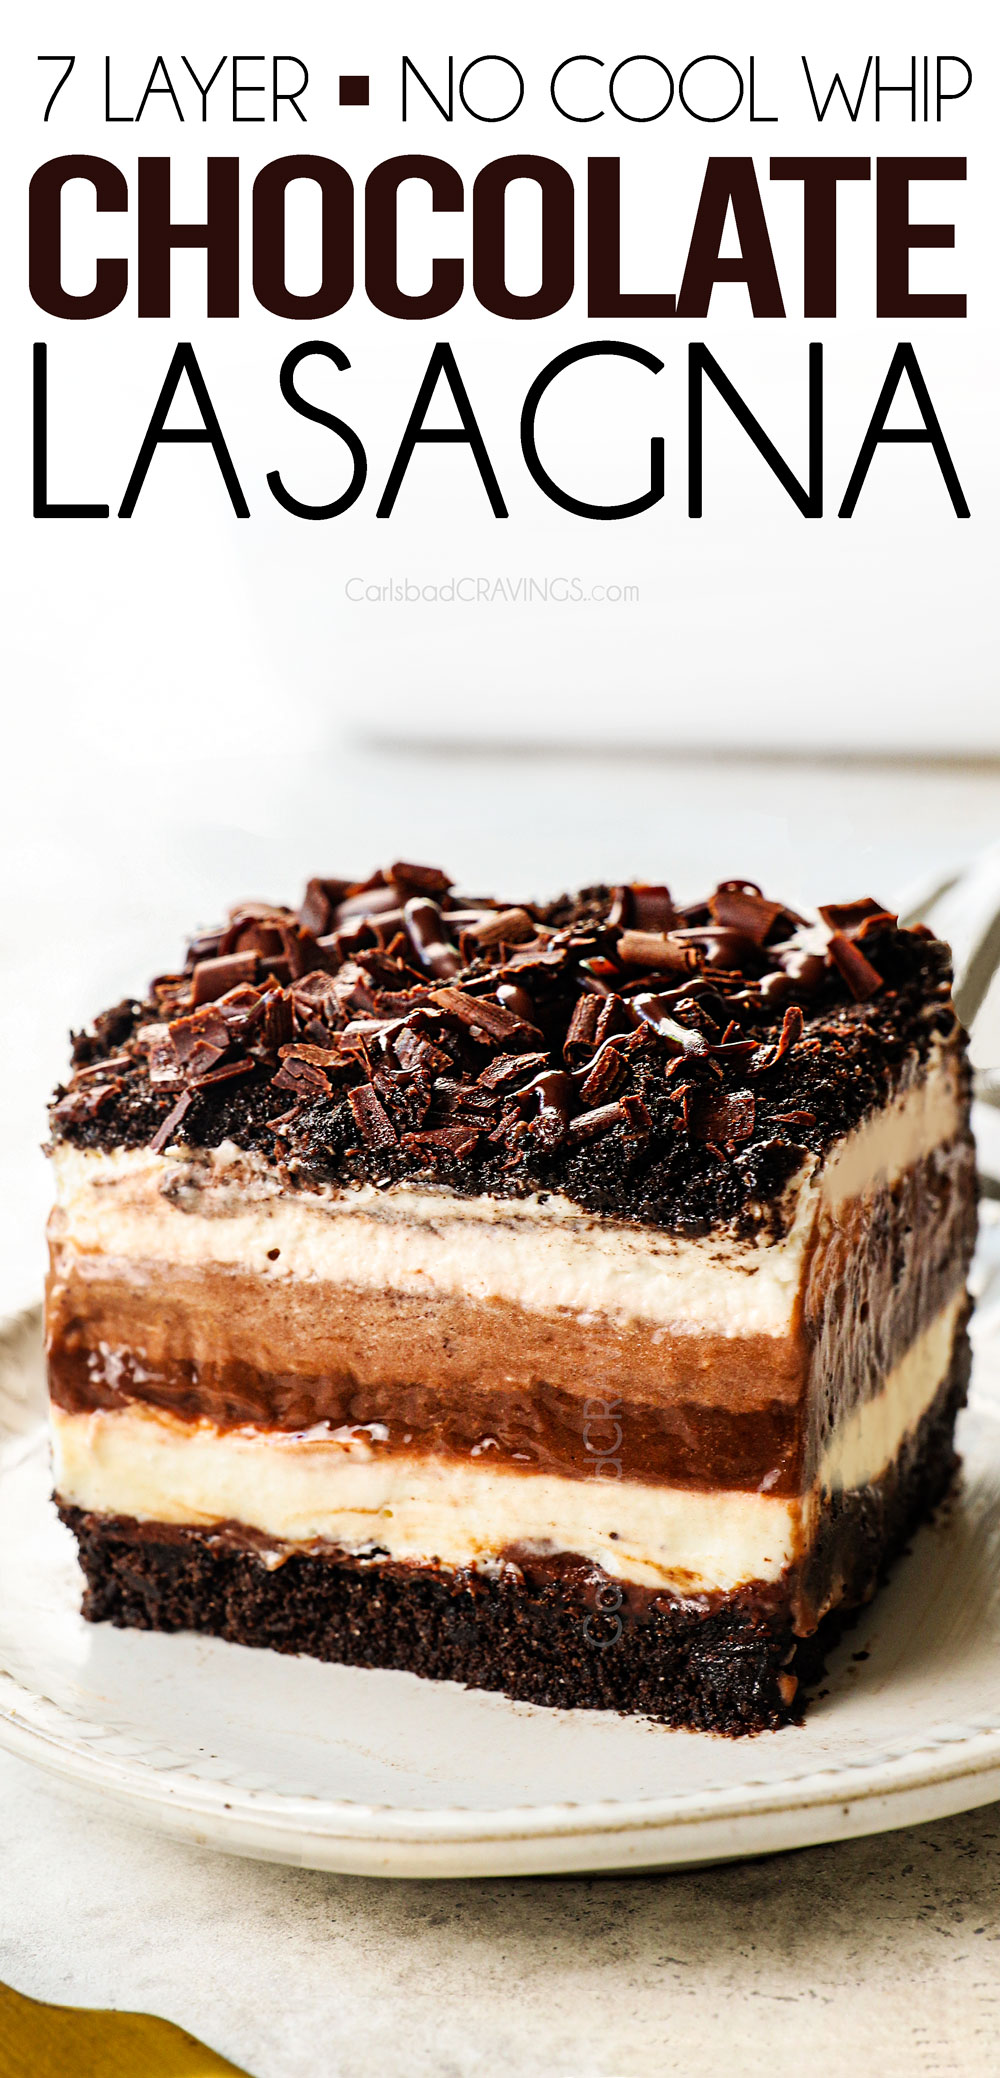
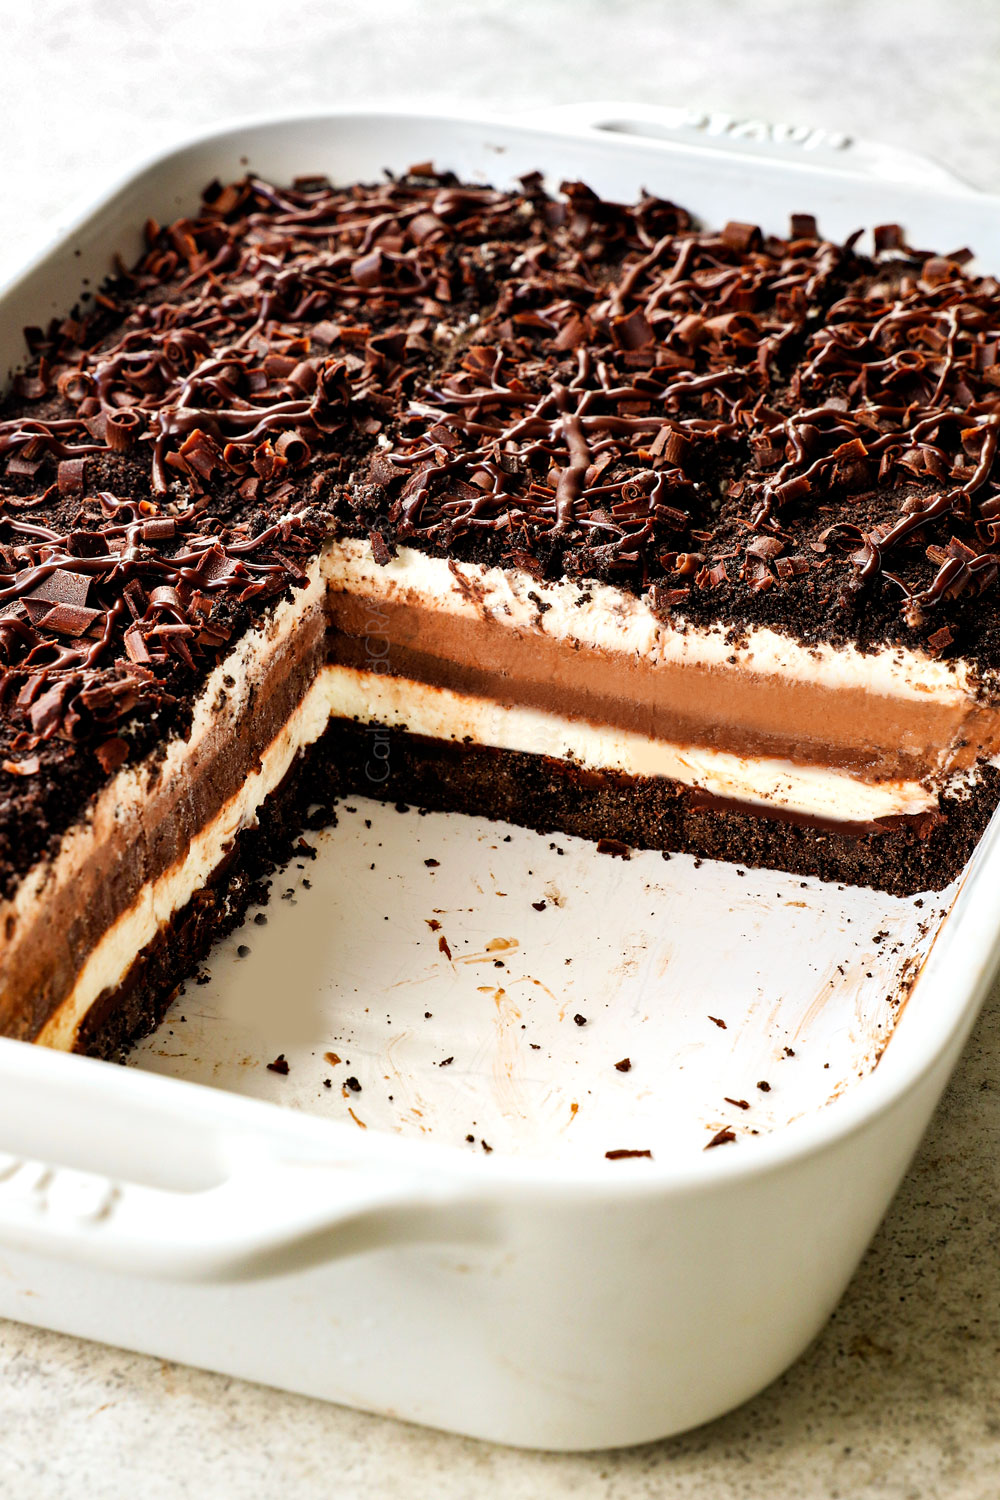
No Bake Chocolate Lasagna boasting seven layers of creamy, fluffy, chocolaty decadence is the dessert of your dreams and will be the hit of every occasion. Plus, it’s made with homemade whipped topping – no Cool Whip here!
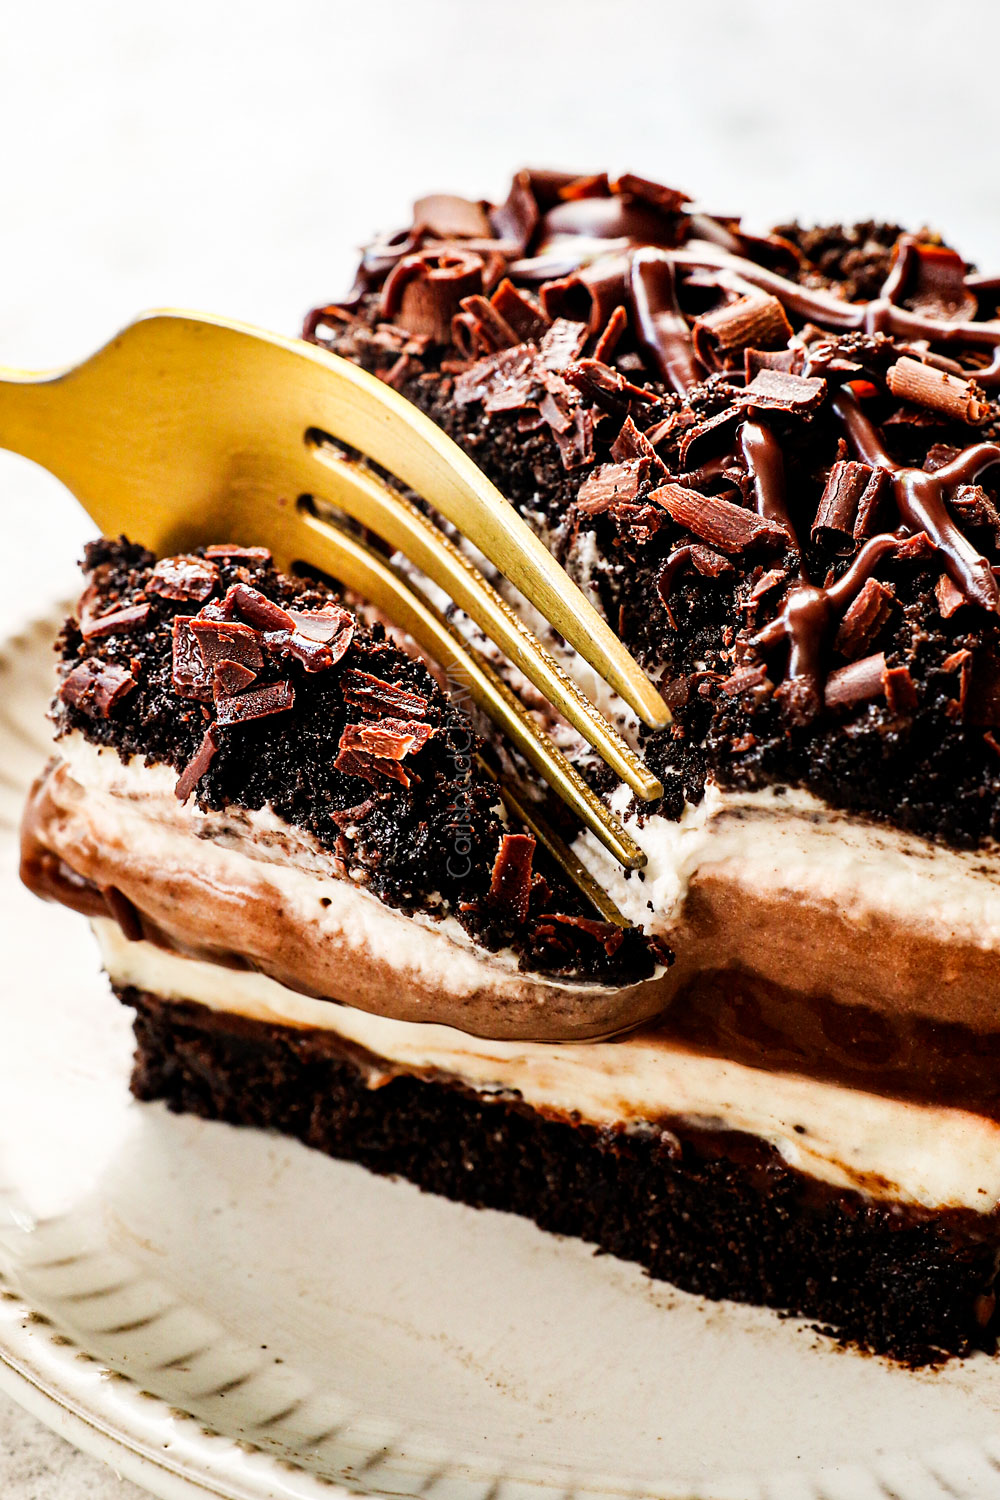
Once you sink your teeth into this Chocolate Lasagna recipe, you’ll never be able to live without it! It’s not only gorgeous with its pristine rainbow of layers, but splendidly cool, crazy creamy, outrageously chocolaty, rich yet light at the same time and will have all your guests talking – and clamoring for the recipe. This no-bake Chocolate Lasagna is nestled in an Oreo crust, mounded with layers of fudgy chocolate ganache, creamy cheesecake, silky chocolate pudding chocolate cream, fluffy whipped topping (without any Cool Whip!), and more crushed Oreos to create a dessert that screams to you as it chills in the refrigerator, beckoning for its sensational layers to glide down your throat. This dessert is easy to make, make-ahead friendly and freezer friendly for a stress-free dessert homerun. The hardest part will be waiting for that first bite – and then not eating half the pan.
Chocolate desserts are their own fabulous brand of scrumptious. If you’re a chocolate lover, don’t miss these tried-and-true chocolate recipes: Mini Chocolate Peanut Butter Pies, Chocolate Butterfinger Pie, Chocolate Éclair Cake, Chocolate Raspberry Cake, Chocolate Mousse Cake and German Chocolate Cheesecake.
PIN THIS RECIPE TO SAVE FOR LATER
HOW TO MAKE Chocolate Lasagna VIDEo

What is Chocolate Lasagna?
Chocolate Lasagna is a layered, no-bake dessert made popular by Olive Garden’s Chocolate Lasagna. Instead of lasagna noodles, this dessert features impressive layers of chocolate and cream in various forms. It’s easy to make thanks to a few ready-made ingredients in combination with homemade whipped topping to create a stunning, silky, creamy, chocolaty, light, fluffy, divinely delicious dessert.

Why this chocolate lasagna recipe works
It’s a showstopper. This Chocolate Lasagna is one of my favorite desserts of all time and is guaranteed to be a hit with kids and adults alike. Serve it up at potlucks, pool parties, bridal showers, birthdays, for a friend who just had a baby or surgery, and holidays like Easter, Mother’s Day, Father’s Day and 4th of July.
The best part about this Chocolate Lasagna is ALL THE LAYERS – the more, the better! This recipe boasts two extra layers than traditional recipes – a delectable, rich fudgy ganache layer and light, chocolate cream layer made with pudding and whipped topping. They are easy to whip up and elevate this recipe to the best ever!
No baking required! No turning on the oven or stove, just let your handheld mixer do all the work.
It’s 100% make ahead friendly. Prepare the dessert ahead of time and serve it STRESS FREE!
It doesn’t use Cool Whip. Did you know Cool Whip doesn’t even contain any dairy?! Instead of using the chemical laden topping, this recipe uses homemade whipped topping made with heavy creamy, sugar and stabilized by gelatin so it doesn’t weep or melt.
It’s perfectly portable. Because this Chocolate Lasagna is layered into one pan, it’s the perfect portable dessert for all your gatherings! It’s refreshing, cool and creamy, but still decadently rich.

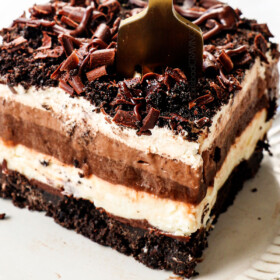
what are the layers in chocolate lasagna?
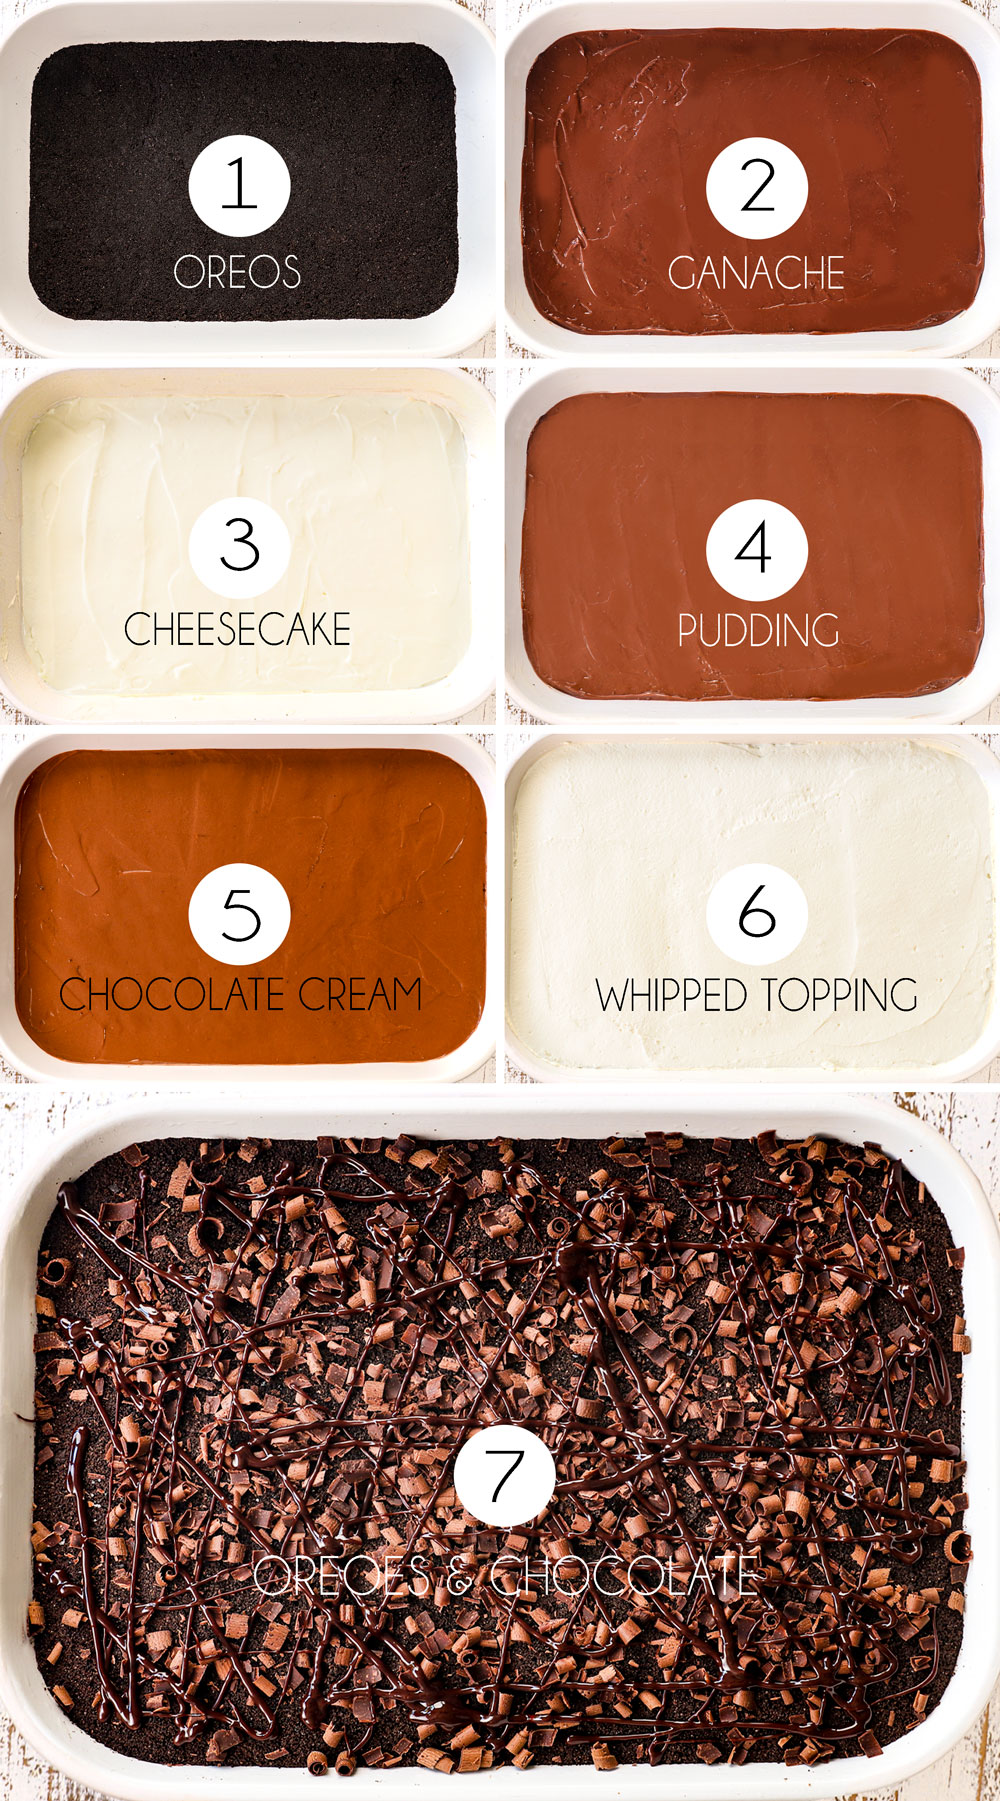
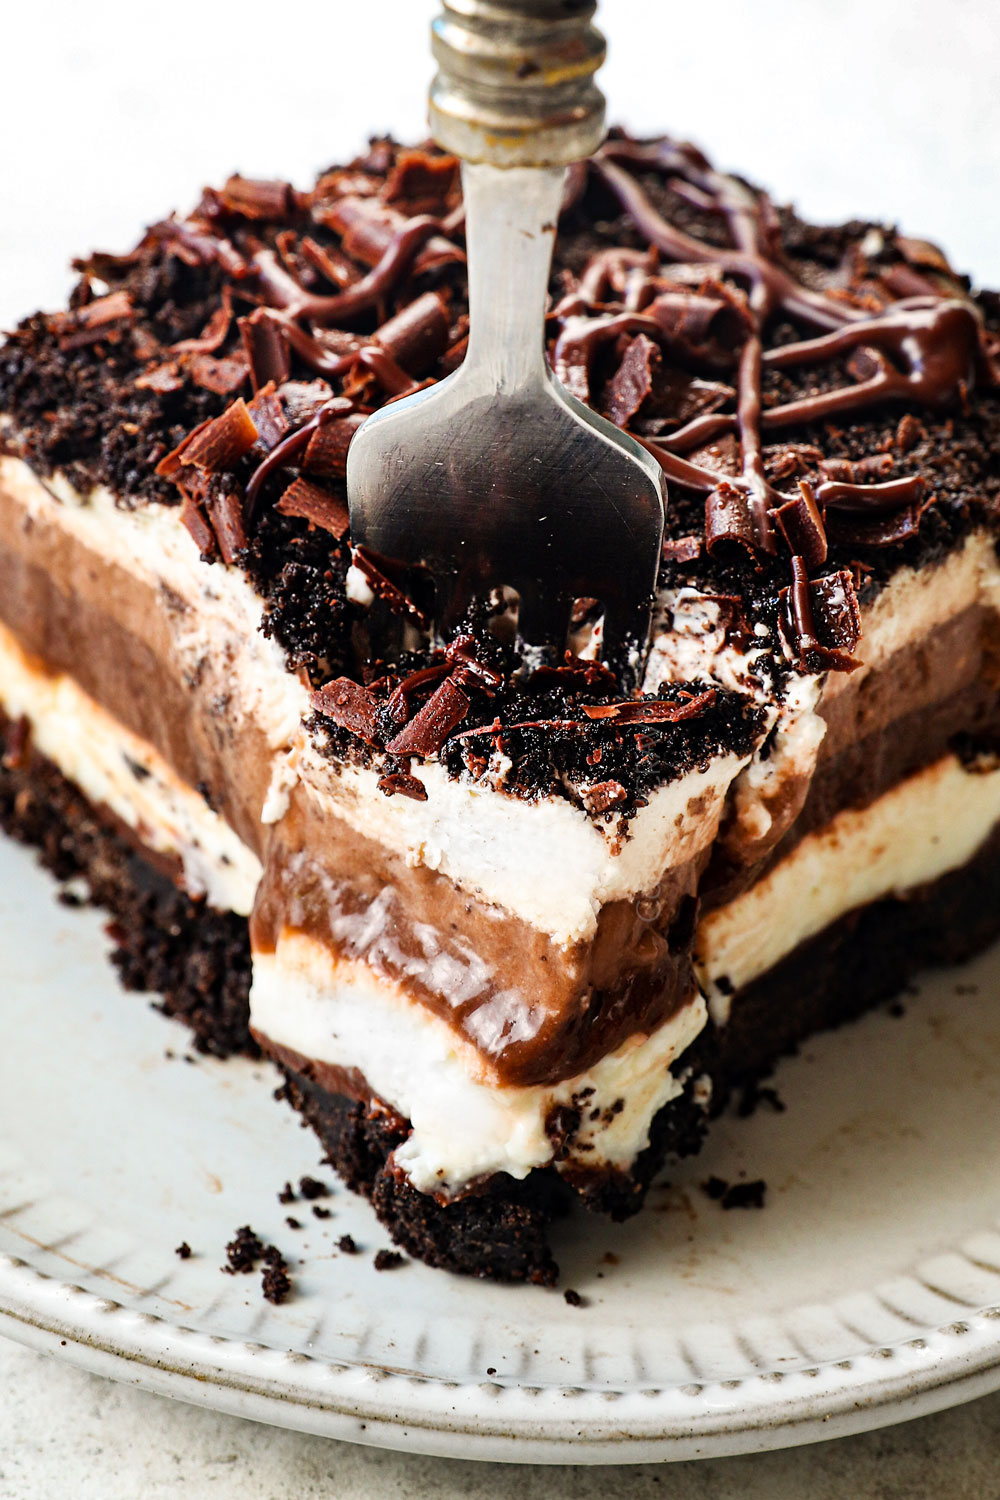
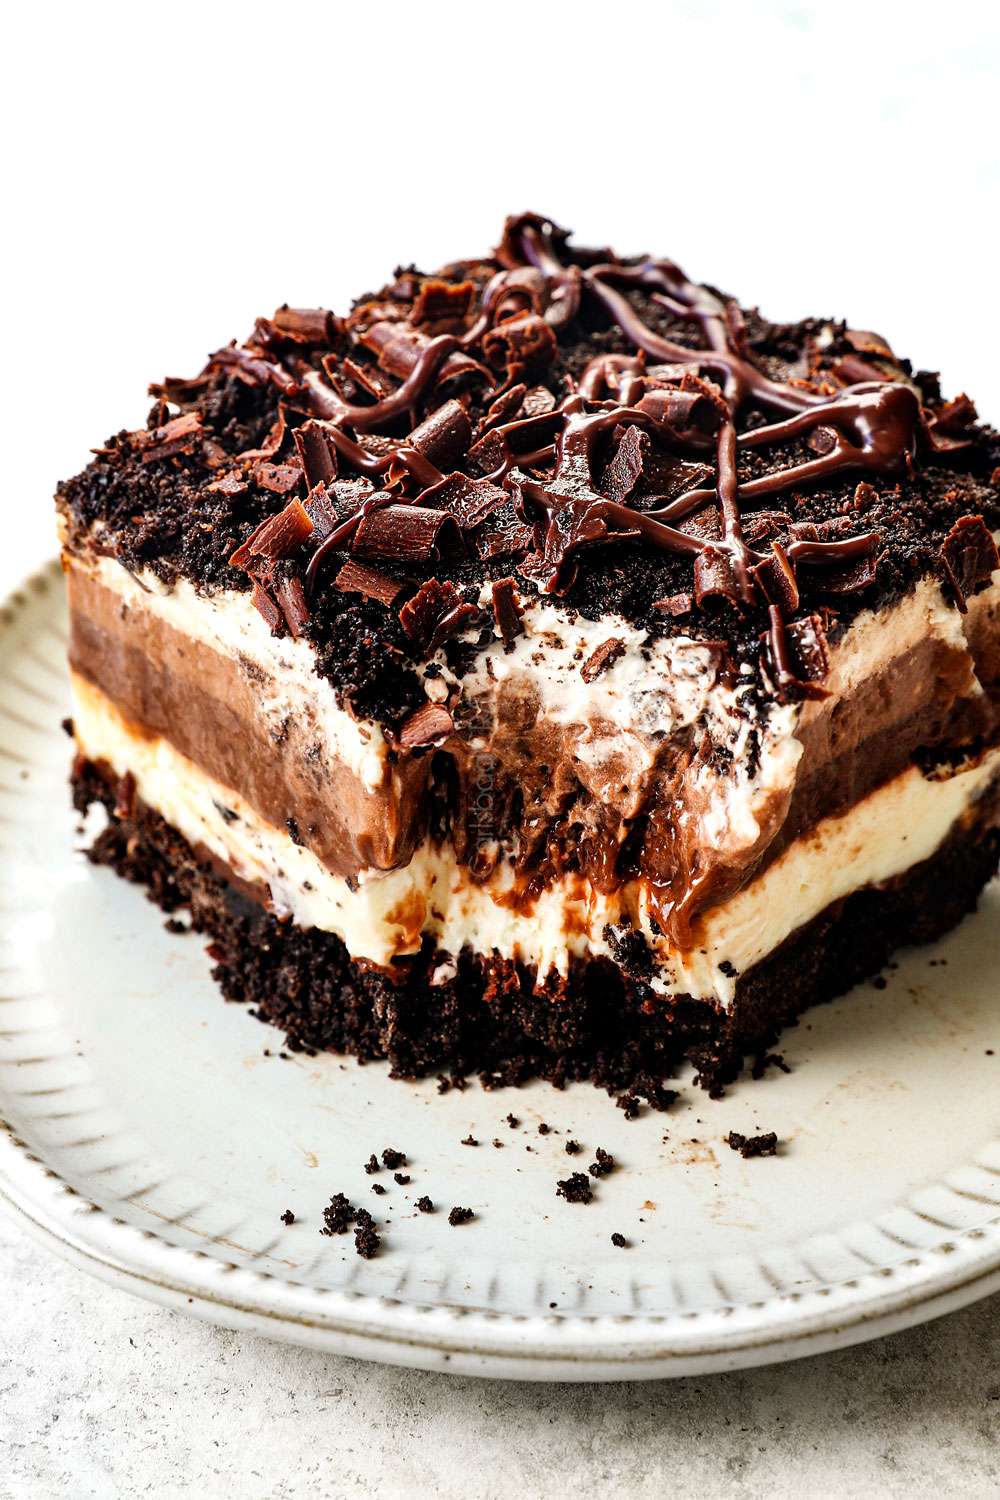
This Chocolate Lasagna recipe consists of seven layers that combine to make one of the most intoxicating desserts of all time. Here’s the layers breakdown:
Layer 1: Oreo crust
Layer 2: Chocolate ganache
Layer 3: Cheesecake (cream cheese + whipped topping)
Layer 4: Chocolate pudding
Layer 5: Chocolate cream (chocolate pudding + whipped topping)
Layer 6: Whipped topping
Layer 7: Crushed Oreos with chocolate shavings and chocolate drizzle

chocolate lasagnA without cool whip
This Chocolate Lasagna recipe is the only one I’ve seen without Cool Whip! Cool Whip is used to lighten the texture of the cream cheese and pudding but it is packed with chemicals and has the tendency to taste plasticky.
Instead, this recipe is made 1000X more fabulous by making homemade whipped topping, also known as stabilized whip cream – and it’s so easy! Most importantly, you can taste the difference.
Homemade whipped topping is simply heavy cream that has been whipped with gelatin in order to give it structure. It’s made by dissolving unflavored gelatin in water then whipping it into the heavy cream until stiff peaks form – that’s it!
Chocolate Lasagna Recipe Ingredients
We are going to get the most out of the ingredients by using many of them in more than one layer. For example, the homemade whipped topping is used with the cheesecake layer, the pudding layer and as a standalone layer. Here’s what you’ll need:
CAN I MAKE THIS RECIPE GLUTEN FREE?
Yes! Oreos now come gluten free! The rest of the recipe ingredients are gluten free.
HOW TO MAKE Chocolate Lasagna
This Chocolate Lasagna recipe is rich, decadent, dizzyingly delicious, and best of all, anyone can make it! The only drawback is the dessert must be chilled between each layer so they can properly set before adding the next one – but it is SO WORTH THE WAIT! Here’s the breakdown (full recipe with measurements in the recipe card at the bottom of the post:
Layer 1 – Oreo Crust
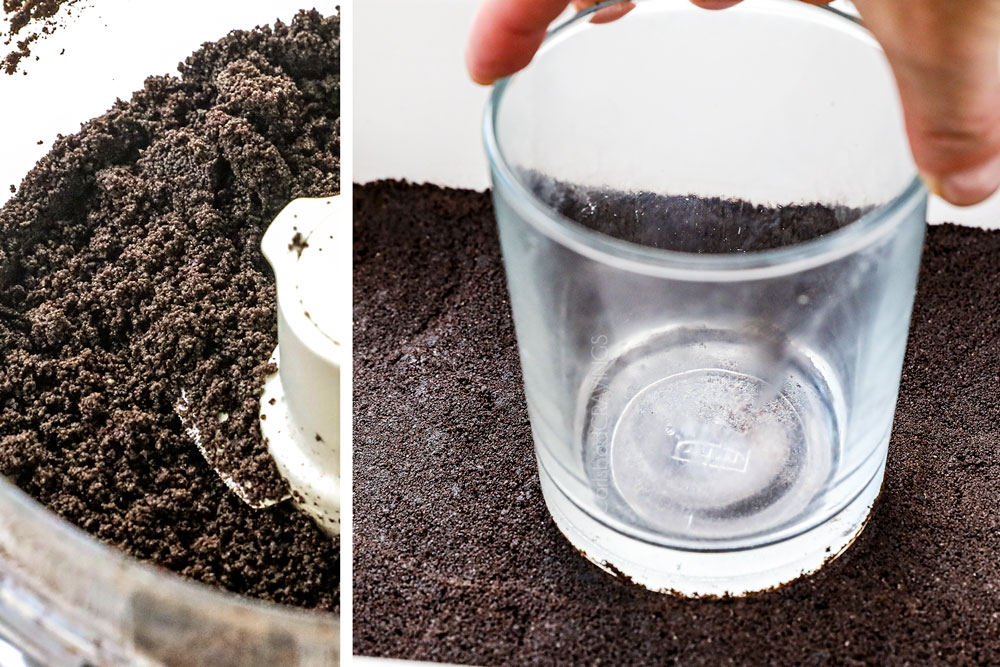
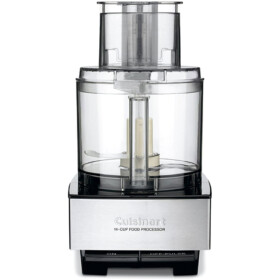
- Add the whole Oreos with filling to a food processor and process until finely ground (or crush in a bag with a rolling pin). Set aside 1 cup for the topping. Add the butter and process (or stir) until evenly combined.
- Pour into a 9×13 pan and pat into an even layer using the bottom of a glass so it’s nice and compact. Place in the freezer while you make the next layer.
Layer 2 – Ganache
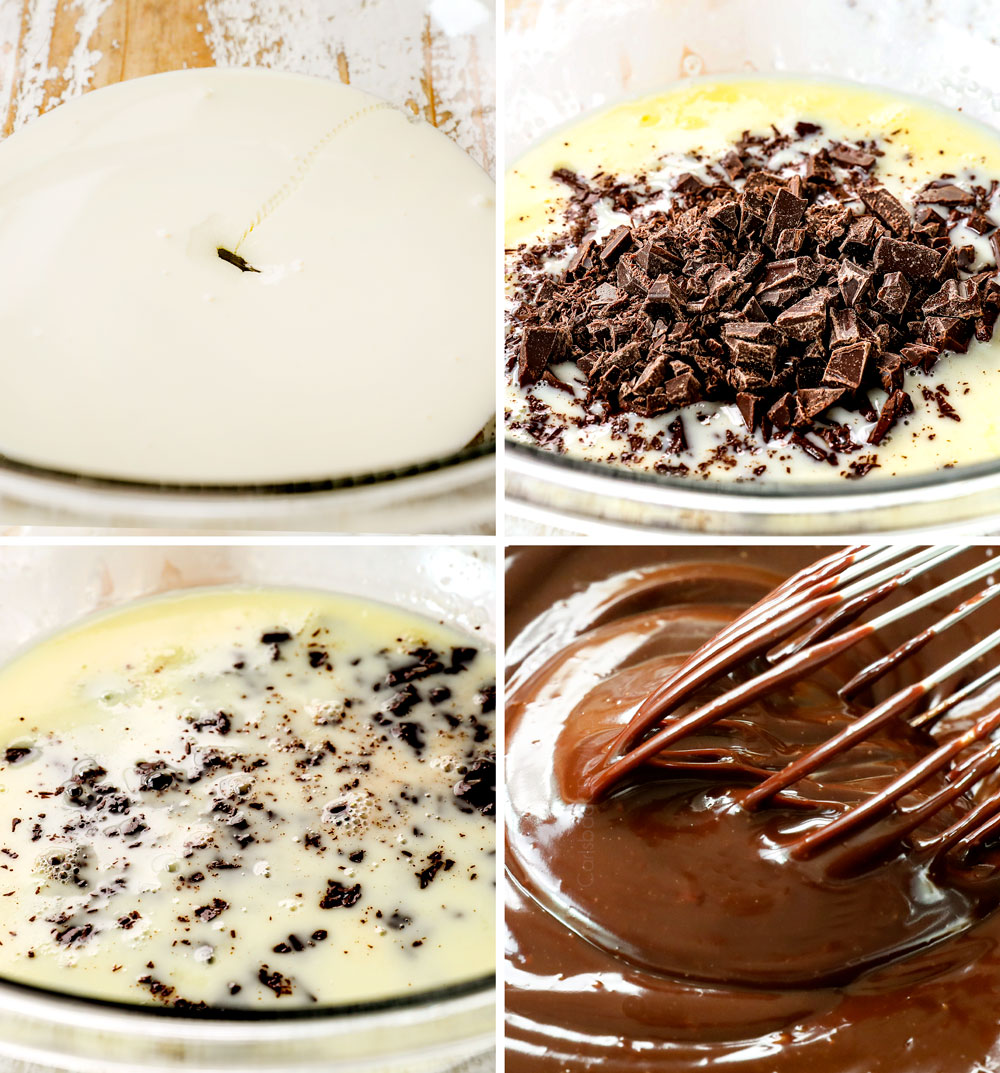
- Add the heavy cream and corn syrup to a microwave safe bowl. Heat until the cream is simmering, about 90 seconds.
- Add the chopped chocolate and let the mixture stand for 5 minutes, then whisk vigorously until chocolate is melted and smooth. See my chocolate ganache page if you need extra help with it. Let the ganache cool slightly so it’s lukewarm but still pourable before adding to the crust.
- Transfer about 3 tablespoons (eyeball it) to a microwave safe bowl to use later as the drizzle. Pour the remaining ganache over the crust and spread into a smooth layer. Place the pan in the freezer while you make the next layer.
Layer 3: Cheesecake
- Homemade Whipped Topping: Stir the water and gelatin together in a small bowl; let sit 5 minutes. Microwave for 20 seconds or until just simmering, then give it a stir and set aside.
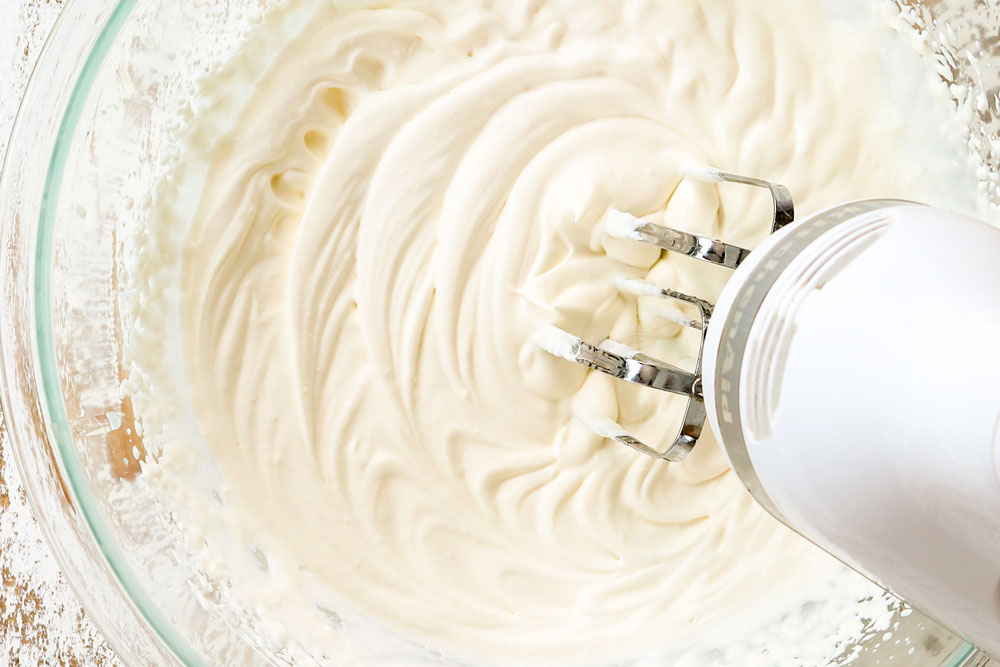
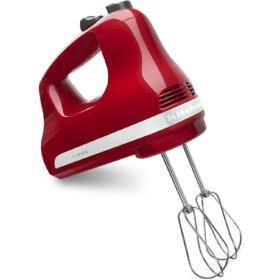
- Add heavy cream, some powdered sugar, and vanilla extract to a large mixing bowl. Whip using an electric hand mixer just until soft peaks form (the peaks flop over when the beaters are lifted.) Turn the mixer to low and slowly pour in the gelatin mixture. Mix until combined then increase speed to medium and continue mixing until stiff peaks form (peaks stand straight up when the beaters are lifted).
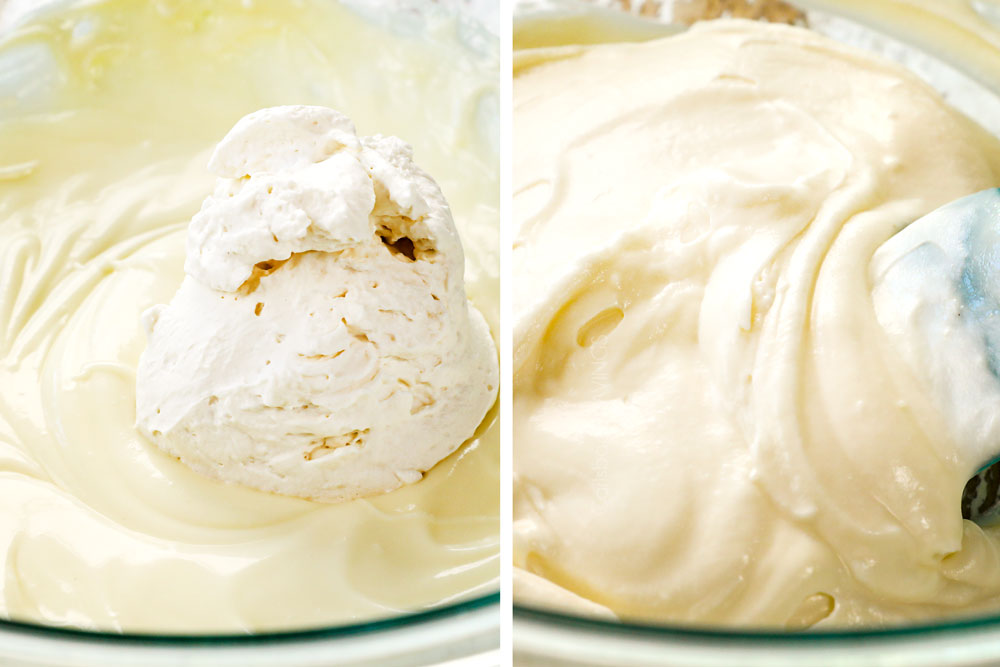
- Cream cheese: In a separate large bowl, beat the cream cheese, some powdered sugar and 2 tablespoons milk until smooth and creamy.
- Fold 1 ½ cups of the whipped topping into the cream cheese until smooth. You’ll use the rest of the whipped topping in a few minutes.
- Spread the cream cheese mixture over the ganache. Place in the freezer while you make the next layer.
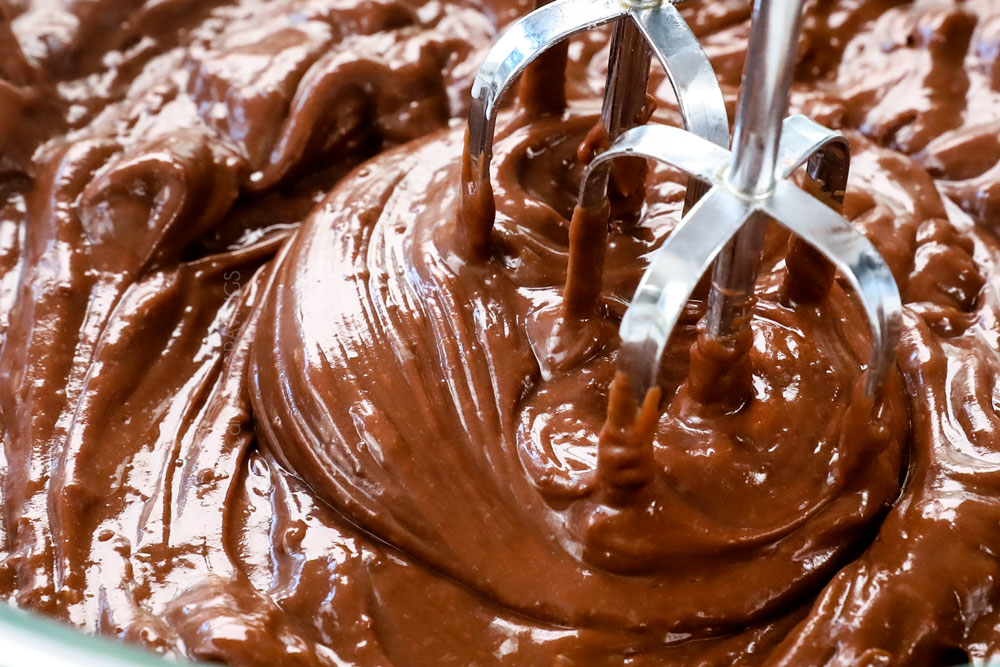
Layer 4 – Chocolate Pudding
- Beat pudding mixes and milk with a handheld whisk for 2 minutes or until smooth and very thick. .
- Spoon 2 cups of the pudding over the cheesecake layer and smooth into an even layer. Place the pan in the freezer while you make the next layer.
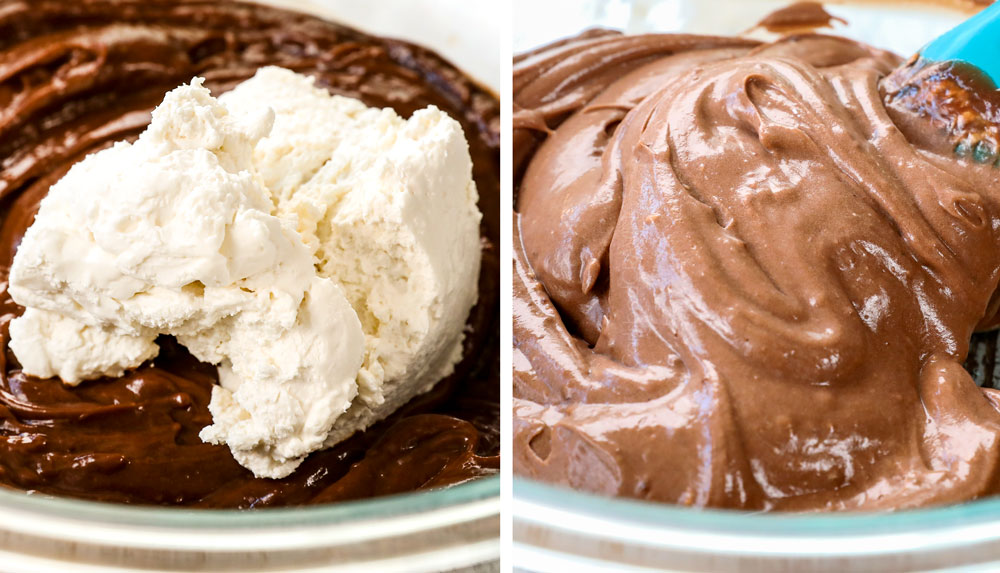
Layer 5: Chocolate Cream
- To the remaining pudding, stir in one cup of the remaining whipped topping. Spread over pudding. Place in the freezer for 5-10 minutes to set.
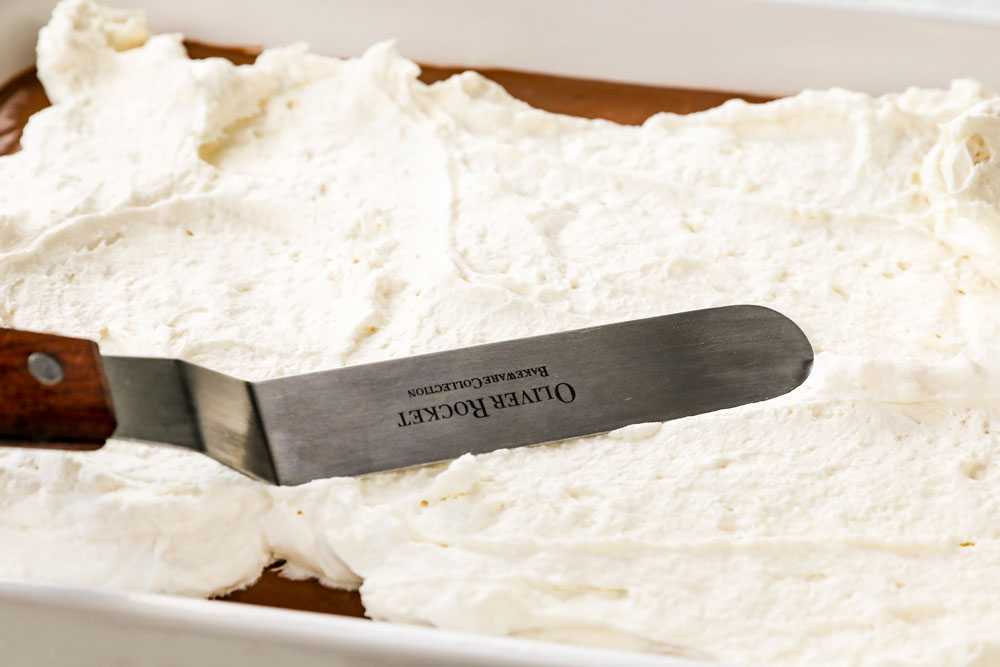
Layer 6: Whipped Topping
- Spread the remaining whipped topping over the top.
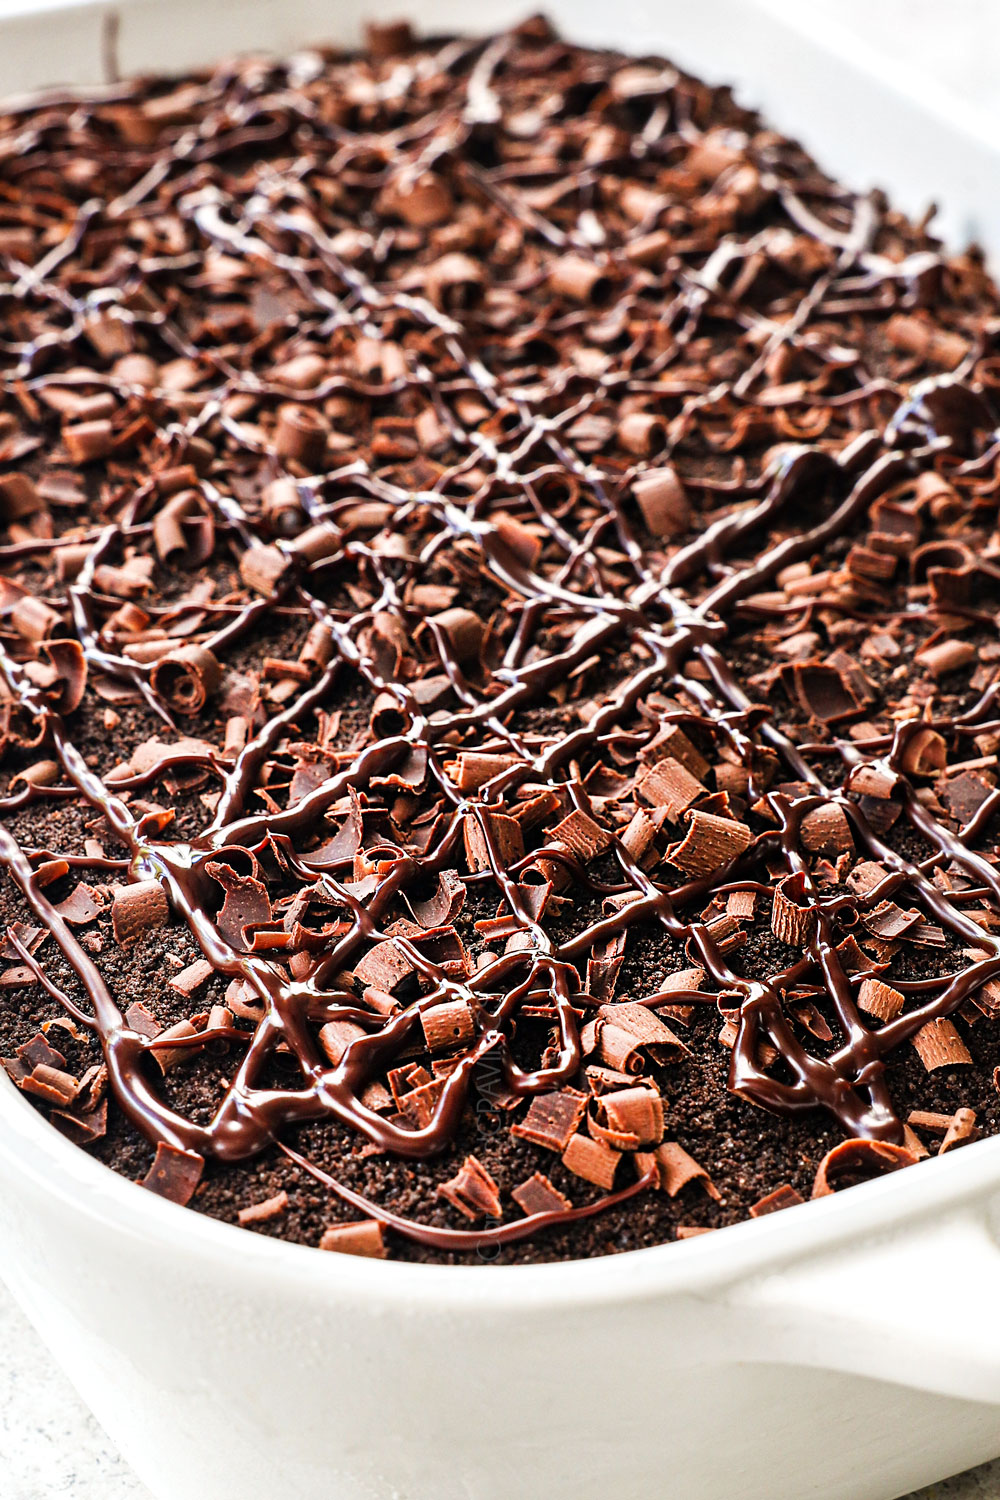
Layer 7: Crushed Oreos and Chocolate
- Evenly sprinkle with remaining crumbled Oreos and lightly press into the whipped topping.
- Evenly sprinkle with optional chocolate shavings. (Shave with carrot peeler), or use your favorite chopped candy (like Butterfinger).
- Microwave the reserved chocolate ganache for 10 seconds or so until pourable. Let it cool for a few minutes, add to a plastic bag, snip the corner, and drizzle all over the top.
Step 8: Chill
- Cover the Chocolate Lasagna with plastic wrap and refrigerate for at least 4 hours in the fridge or freeze for 1-2 hours before slicing.

- Use the whole Oreo. Don’t toss the cream filling! You’ll want to crush the whole cookie so the crust will stick together.
- Use a food processor. You want the finest Oreo crumbs possible so they compact together and don’t fall apart. I recommend using your food processor to achieve this fine texture in seconds.
- Stick with Jell-O brand pudding. Reduced-fat brands or “healthier” brands of pudding have a tendency to bleed into the next layer, so stick with Jell-O brand for the cleanest layers.
- The pudding consistency should be thick. Don’t be tempted to add additional milk to the pudding. It needs to be thick so it will hold its shape.
- Use quality chocolate for the ganache. Use baking chocolate bars because they melt beautifully due to the higher percentage of cocoa butter. If you have to use chocolate chips, use a quality brand with a higher percentage of cocoa butter like Guittard or Ghirardelli. Many other chocolate brands contain less cocoa butter and will not melt as seamlessly and can leave you with stubborn chocolate pieces that won’t melt.
- Don’t skip the corn syrup. The corn syrup keeps the ganache shiny, smooth and pliable even after being refrigerated.
- Use homemade whipped topping: You cannot use plain homemade whipped cream without the gelatin or the dessert will deflate and melt. The other option is to use Cool Whip.
- Fix stiff whipped topping. If the whipped topping is extra stiff and not spreadable, it’s easy to fix by folding in additional heavy cream a couple tablespoons at a time until it’s spreadable.
- Freeze the lasagna between every layer. I highly recommend popping the dessert into the freezer after each step for about 10 minutes. The longer you can freeze the dessert between the steps, the more distinct your layers will be. To that end, this dessert is best if you can make it while you’re doing something else around the house, so you don’t get frustrated about the waiting time.
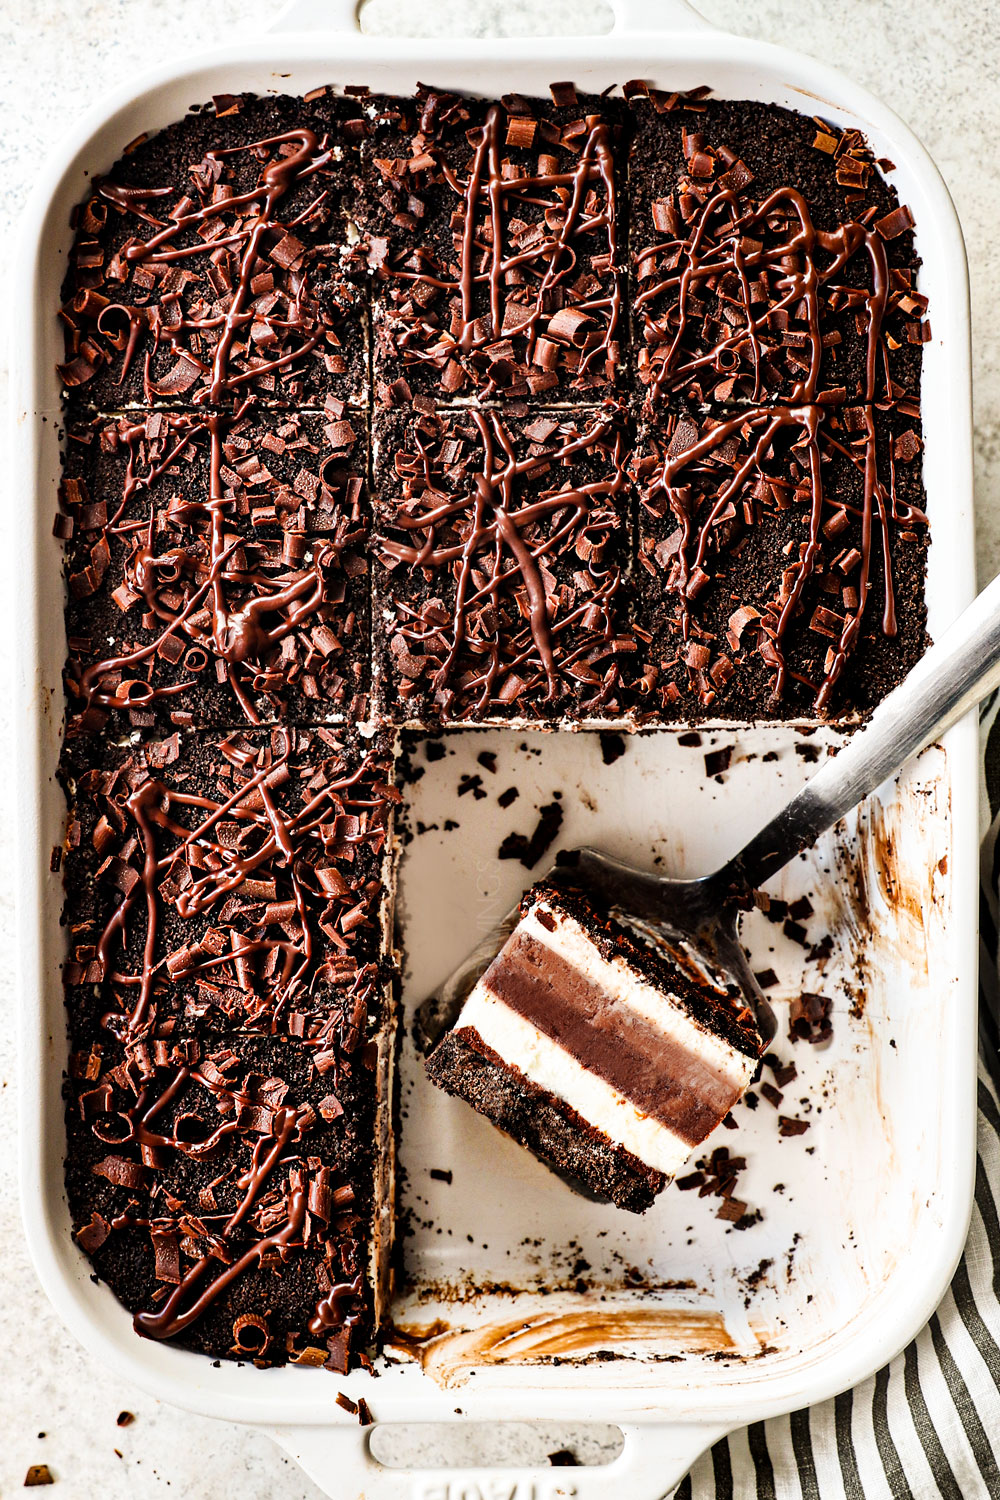
- To cut clean slices: Fill a large glass with hot water. Dip the knife in the hot water before each cut, then wipe clean with a paper towel after each cut, then repeat. You can also run the knife under hot water in between cuts.
- For easiest slicing and cleanest cuts: I recommend freezing the Chocolate Lasagna for at least 2 hours (up to 24), slicing, then transferring to the refrigerator to thaw. If you don’t have time to thaw the lasagna, then freeze for 30-60 minutes, slice and serve.
- Chill until ready to serve: Refrigerate the Chocolate Lasagna until it’s time to serve otherwise it will start to soften and will be impossible to slice cleanly. If that happens – just scoop it out!
- Freeze if chilling isn’t possible. If you are bringing the dessert to a gathering and it’s not possible to keep refrigerated, then freeze and slice before transporting. It will thaw by the time it’s ready to serve.
ADDITIONAL TOPPING IDEAS
Looking for a fun way to mix up this Chocolate Lasagna? Try swapping out the topping! Instead of chocolate shavings, or in addition to, try:
–Crushed candy bars: Butterfingers, Reese’s Peanut Butter Cups, Heath Bars, Twix, etc.
–Toffee bits
–Mini chocolate chips
–Marshmallows
–Nuts
–Mini M&Ms
–Andes Mints at Christmas time
–Candy canes at Christmas time
–Drizzle of caramel

- Use different flavored Oreos: Toffee Crunch, Chocolate Hazelnut, Mint, Birthday Cake, Chocolate Peanut Butter, Carrot Cake, Chocolate Marshmallow, Caramel Coconut, Lemon, etc. Just make sure the Oreos are not Double Stuf.
- Make it gluten-free: Use a gluten-free Oreo substitute and check that your pudding is gluten-free. When using cookies other than Oreos, increase the butter to 8 tablespoons in the crust because the cookies are missing the Oreo filling.
- Use Cool Whip: I prefer making homemade whipped topping, but you can replace it with a store-bought whipped topping, such as Cool Whip.
- Skip the ganache: The chocolate ganache is optional and may be omitted if desired.
- Change flavors completely! Substitute the chocolate pudding for coconut, banana, butterscotch, lemon, etc. along with your choice of cookie. For example, you could use lemon pudding with Chocolate Coconut Oreos. When using cookies other than Oreos (like Graham Crackers), increase the butter to 8 tablespoons because the cookies are missing the Oreo filling.
- Nuts: Add nuts into the pudding or as a garnish. If you like pistachios, chocolate and pistachio are a winning combination. Crushed peanuts and pecans, macadamia nuts, hazelnuts are also delicious.
- Fruit: Consider garnishing the top with fruit or adding a layer of fruit – I love raspberries and chocolate together! Strawberries, cherries, bananas and coconut could also be used.
- Fun Serving options: Instead of making the Chocolate Lasagna in a 9×13 baking dish, layer it in a couple trifle dishes or individual dishes or mason jars for a shower, birthday or event serving.
- Serve partially frozen: Pop the dish in the freezer and serve partially frozen and it will be more like an ice cream cake.

Can I make this recipe in advance?
Absolutely! The entire dessert can be assembled up to three days in advance and refrigerated or frozen. It actually tastes best when it’s allowed to chill in the fridge overnight.

How to Store Chocolate Lasagna
Store the Chocolate Lasagna in the fridge for up to three days. Cover the top with plastic wrap to keep the dessert fresh. The dessert is safe and tasty for up to a week, but the layers will begin to soften and may weep a bit; still so delicious, just maybe not company best.
Can Chocolate Lasagna Be Frozen?
Yes! This no bake chocolate dessert freezes very well. Cover the pan with a double layer of plastic wrap and foil. Freeze for up to two months then thaw in the refrigerator overnight before serving. You can slice the dessert when it is still partially frozen for the cleanest slices then let the dessert continue to thaw in the refrigerator.
Chocolate Lasagna FAQS
You’ll need 33 Oreo cookies, or a 1-pound family pack. That’s about 3 cups of Oreo crumbs.
No, you’ll need to use regular Oreos to make the crust.
If you prefer to use Cool Whip, then replace the gelatin and heavy cream mixture with one 12-oz thawed container of whipped topping. Use it wherever the homemade whipped topping is used.
Sure thing! Homemade chocolate pudding would be delicious in this Chocolate Lasagna recipe.
No, you must use full-fat, regular heavy cream to make the homemade whipped topping.
Yes! You MUST let it chill for at least 4 hours before slicing and serving. This gives the layers time to firm up. If you’re short on time, try freezing the pan for an hour instead.
Be sure to grease the bottom of the pan generously before adding the Oreo crust.
First, stick with Jell-O brand pudding. Reduced-fat brands or “healthier” brands of pudding have a tendency to bleed into the next layer. Second, freeze the dessert for 10 minutes between each layer. Finally, chill the dessert sufficiently before slicing. Ideally, pop it in the freezer for a few hours, slice, then transfer to the refrigerator.
Absolutely! Just like traditional lasagna, this recipe tastes even better the next day as the layers have time to chill and set up.
It will last up to three days in the fridge. After that, layers will soften/deflate a bit and may start to weep.

WANT TO TRY THIS Chocolate Lasagna RECIPE?
PIN IT TO YOUR Chocolate, Dessert or No Bake Dessert Recipe BOARD TO SAVE FOR LATER!
FIND ME ON PINTEREST FOR MORE GREAT RECIPES! I AM ALWAYS PINNING :)!
©Carlsbad Cravings by CarlsbadCravings.com

Chocolate Lasagna
Save This Recipe To Your Recipe Box
You can now create an account on our site and save your favorite recipes all in one place!
Ingredients
Oreo Crust
- 1 family size/1 pound pkg. Oreo cookies (regular cookies with filling)
- 6 tablespoons butter, melted (salted or unsalted)
Ganache
- 1/2 cup heavy cream
- 2 1/2 tablespoons corn syrup
- 6 ounces semi-sweet baking chocolate, chopped
Whipped Topping
- 1/4 cup water
- 1 tablespoon unflavored gelatin
- 1/2 cup powdered sugar
- 3 1/4 cups heavy cream
- 2 teaspoons vanilla extract
Cheesecake
- 8 ounces cream cheese, room temperature
- 1 cup powdered sugar
- 2 tablespoons milk
Chocolate Pudding
- 2 3.9 oz. pkgs. INSTANT chocolate pudding (unprepared)
- 3 cups milk
Garnish
- 1 cup reserved Oreos crumbs (in directions)
- 4 ounces semi-sweet chocolate (optional to make chocolate curls)
Instructions
Layer 1 – Oreo Crust
- Add the whole Oreos to a food processor and process until finely ground (or crush in a bag with a rolling pin). Set aside 1 cup for the topping. To the remaining Oreos, add the butter and process (or stir) until evenly combined.
- Pour into a lightly greased 9×13 pan and pat into an even layer using the bottom of a glass. Place in the freezer while you make the next layer.
Layer 2 – Ganache
- Add the heavy cream and corn syrup to a medium microwave safe bowl. Microwave until just boiling, about 90 seconds.
- Add the chopped chocolate and press down so it’s submerged in the hot cream. Let stand for 5 minutes, then whisk vigorously until the chocolate is melted and smooth. Transfer about 3 tablespoons to a microwave safe bowl to use later as the drizzle.
- Let the remaining ganache cool for a few minutes, until thickened but still pourable and spreadable. Pour over the crust and spread into a smooth layer. Place in the freezer while you make the next layer.
Layer 3 – Cheesecake
- Whipped Topping: Stir the water and gelatin together in a small bowl; let sit 5 minutes. Microwave for 20 seconds, give it a stir then set aside.
- Add ½ cup powdered sugar, 3 ¼ heavy cream, and 2 teaspoons vanilla extract to a large mixing bowl. Whip using an electric handheld mixer just until soft peaks form (the peaks flop over when the beaters are lifted.) Turn the mixer to low and slowly pour in the gelatin mixture. Mix until combined then increase speed to medium and continue mixing until stiff peaks form (peaks stand straight up when the beaters are lifted). Set aside.
- Cream cheese: In a separate large bowl, beat the cream cheese, 1 cup powdered sugar and 2 tablespoons milk until smooth and creamy.
- Fold 1 ½ cups of the whipped topping into the cream cheese until smooth.
- Spread the cream cheese mixture over the ganache. Place in the freezer for 5-10 minutes while you make the next layer.
Layer 4 – Chocolate Pudding
- Beat pudding mixes and milk with a handheld mixer for 2 minutes (it will be thick).
- Spoon 2 cups over cheesecake layer and smooth. Place in the freezer for 5-10 minutes while you make the next layer.
Layer 5 – Chocolate Cream
- To the remaining pudding, fold in one cup of the remaining whipped topping. Spread over pudding. Place in the freezer for 5-10 minutes to set.
Layer 6 – Whipped Topping
- Spread the remaining whipped topping over the Chocolate Cream in an even layer. If the whipped topping has become extra stiff and not spreadable, it’s easy to fix by folding in additional heavy cream a couple tablespoons at a time until it’s spreadable.
Layer 7 – Oreos and Chocolate
- Immediately sprinkle the reserved Oreo crumbs over the whipped topping and lightly press into the topping.
- Evenly sprinkle with optional chocolate shavings (shave with carrot peeler), or your favorite chopped candy (like Butterfinger).
Chill
- Cover with plastic wrap and refrigerate for at least 4 hours or freeze for 1 hour before slicing. For the cleanest cuts, I recommend freezing for a few hours, slicing, then transferring to the refrigerator until ready to serve.
Video
Notes
Expert Tips and Tricks
- Unflavored gelatin: This is a common baking ingredient and can be found next to the packages of Jell-O and pudding at your grocery store. You cannot make homemade whipped topping without it or the dessert will deflate and weep. The other option is store-bought such as Cool Whip.
- Use the whole Oreo. Don’t toss the cream filling! You’ll want to crush the whole cookie so the crust will stick together.
- Gluten free: Oreos now come gluten free! The rest of the recipe ingredients are gluten free.
- Freeze the lasagna between every layer. I highly recommend popping the dessert into the freezer after each step for about 10 minutes. The longer you can freeze the dessert between the steps, the more distinct your layers will be. To that end, this dessert is best if you can make it while you’re doing something else around the house, so you don’t get frustrated about the waiting time.
- To cut clean slices: Fill a large glass with hot water. Dip the knife in the hot water before each cut, then wipe clean with a paper towel after each cut, then repeat. You can also run the knife under hot water in between cuts.
- For easiest slicing and cleanest cuts: I recommend freezing the Chocolate Lasagna for at least 2 hours (up to 24), slicing, then transferring to the refrigerator to thaw. If you don’t have time to thaw the lasagna, then freeze for 30-60 minutes, slice and serve.
- Chill until ready to serve: Refrigerate the Chocolate Lasagna until it’s time to serve otherwise it will start to soften and will be impossible to slice cleanly. If that happens – just scoop it out!
- Freeze if chilling isn’t possible. If you are bringing the dessert to a gathering and it’s not possible to keep refrigerated, then freeze and slice before transporting. It will thaw by the time it’s ready to serve.
- Recipe Variations: See the post for lots of tasty ideas such as using different flavored Oreos, puddings, etc.
How to store
- To store: Store covered in the fridge for up to three days. The dessert is safe and tasty for up to a week, but the layers will begin to soften and may weep a bit; still so delicious, just maybe not company best.
- To freeze: Cover the pan with a double layer of plastic wrap and foil. Freeze for up to two months then thaw in the refrigerator overnight before serving. I recommend slicing the dessert when it is still partially frozen for the cleanest slices then letting the dessert continue to thaw in the refrigerator.
Want To Make This Recipe?

Did You Make This Recipe?
Tag @CarlsbadCravings and Use #CarlsbadCravngs
Leave a Review, I Always Love Hearing From You!


Carly says
Everything was going great until I got to the chocolate pudding layer. Who messes up instant chocolate pudding? Apparently I do. When I mixed the two instant pudding mixes together with three cups of milk for two minutes it never thickened. I guess I’m going to go back to the store for more pudding and finish making the dessert later. I seriously don’t understand what went wrong. haha.
Jen says
Sad! I’m wondering if you accidently used the “Cook and Serve” pudding instead of instant?
Roxanne Chakbazof says
I had the same issue with instant pudding BUT it set up properly after refrigerating and this was the most delicious thing ever. Another one knocked out of the park Jen!
Jen says
Thank you so much, Roxanne, I am so glad it ended up working for you!
Raimee says
I made this for a progressive dinner and it was a HUGE hit. It took twice as long to make as I figured, but next time I could cut that time in half. Can’t wait to make it again!!
Jen says
Yay! I’m so glad it was a winner!